How to Remove a Turntable Platter: A Step-by-Step Guide for Vinyl Enthusiasts

Hey there, fellow vinyl lovers! Today, we’re diving into a topic that might seem a bit daunting at first: how to remove a turntable platter.

Trust me, I’ve been there – staring at my prized turntable, sweating bullets at the thought of messing something up.

But fear not! I’m here to share all the tricks I’ve learned over the years, so you can tackle this task with confidence.

Let’s kick things off with a little fun fact: did you know that the first turntable, invented by Emile Berliner in 1887, didn’t even have a removable platter? We’ve come a long way since then!

Now, removing the platter is a crucial skill for any serious vinyl enthusiast. Whether you’re doing some deep cleaning, replacing parts, or just satisfying your curiosity, knowing how to safely remove and replace your turntable’s platter is essential.

So, grab a cup of coffee (or your beverage of choice), and let’s get our hands dirty – figuratively speaking, of course. We want those platters clean, after all!

How To Remove A Turntable Platter

Close-up view of a person gently lifting a turntable platter from the center spindle, with the slipmat set aside. The setup is neat and modern, placed on a sturdy surface with vinyl records stored nearby. Soft lighting emphasizes the careful process involved in removing the platter.

As a vinyl enthusiast who’s tinkered with countless turntables, I can tell you that removing a turntable platter isn’t rocket science, but it does require some care. Generally, you’ll start by removing the slipmat, then locate the center spindle.

Many platters can be lifted straight up, while others might have a locking mechanism or require a gentle rocking motion to release. The key is to be patient and never force it – if you meet resistance, stop and consult your turntable’s manual.

We’ll dive deeper into the specifics below, but remember, each turntable model can be a bit different, so always approach with caution!

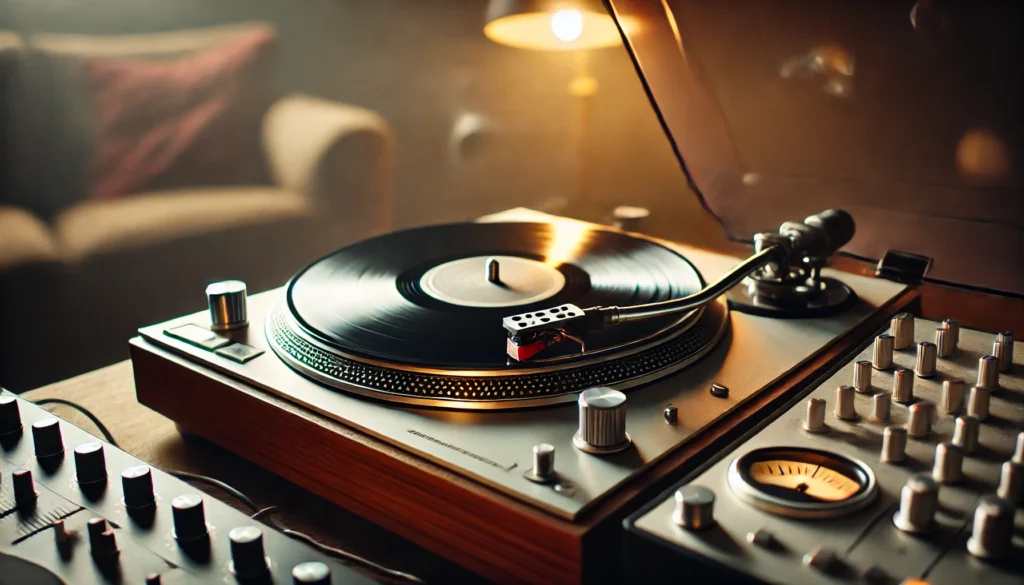
Understanding Your Turntable’s Platter

Close-up view of various turntable platters, including aluminum, acrylic, and glass, displayed neatly in an organized setting. Each platter showcases its unique material and design, placed on a clean surface with a modern turntable in the background. Vinyl records are stored nearby, and soft ambient lighting enhances the precision and detail of the setup.

Alright, let’s start with the basics – what the heck is a turntable platter anyway? Well, it’s that big circular thing your records sit on. Simple, right?

But oh boy, there’s more to it than meets the eye!

The platter is like the heart of your turntable. It’s responsible for spinning your precious vinyl at a consistent speed, which is crucial for getting that perfect sound we all crave.

I remember when I first got into vinyl, I thought all platters were the same. Man, was I wrong!

There are different types, materials, and designs, each with its own quirks and benefits. You’ve got your basic aluminum platters, which are light and get the job done.

Then there are the heavyweight champs – the acrylic and glass platters. These bad boys add some serious mass, which can help dampen vibrations.

I once upgraded to an acrylic platter and let me tell you, the difference in sound was like night and day!

But here’s the thing – removing the platter isn’t just about satisfying your curiosity (though that’s a perfectly valid reason in my book). It’s a crucial step in maintaining your turntable.

You might need to remove it to clean underneath, replace the belt on a belt-drive turntable, or even upgrade to a fancy new platter. Just remember, your platter and the bearing it sits on are precision-engineered parts.

Treat ’em with respect! I learned this the hard way when I once carelessly yanked off a platter and ended up misaligning the whole darn thing.

Spent hours getting it back to perfect – not fun, let me tell you!

So, whether you’re rocking a vintage Technics or a modern Pro-Ject, understanding your platter is the first step to turntable mastery. And trust me, once you get comfortable with this, you’ll feel like a real vinyl guru.

Just don’t let it go to your head – we’ve all got more to learn in this awesome world of analog audio!

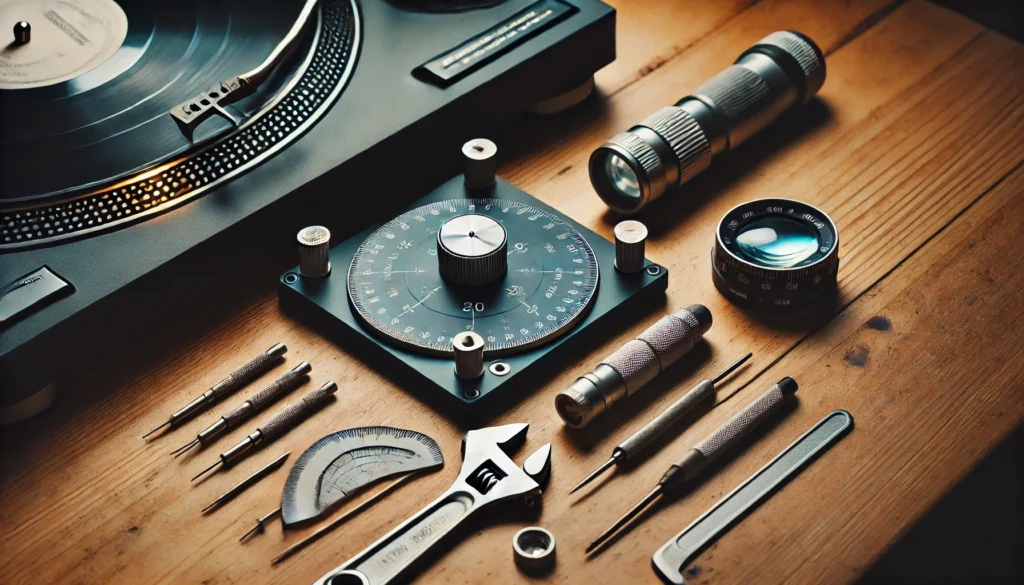
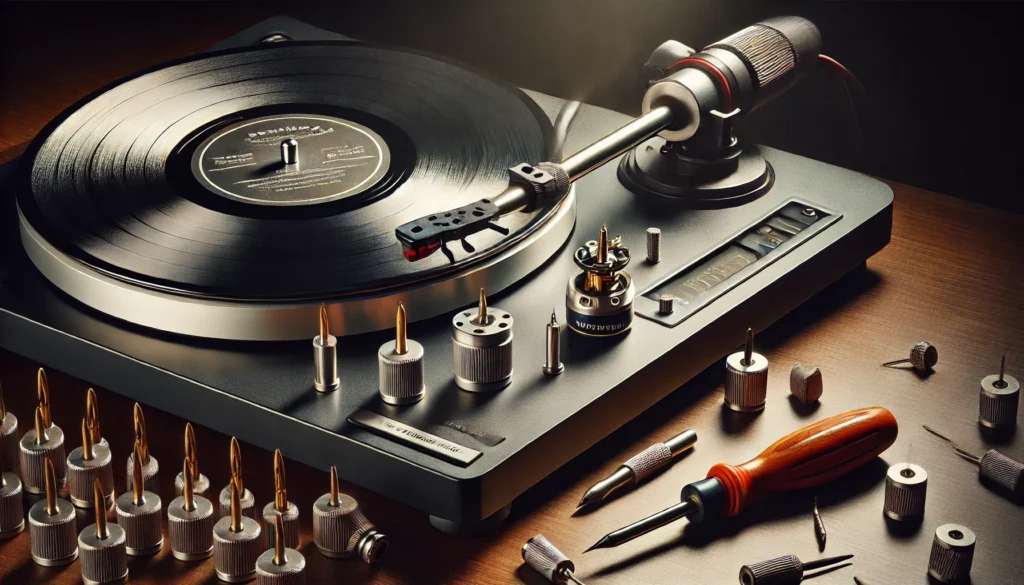
Tools You’ll Need for Platter Removal

A person carefully removing a turntable platter, following a step-by-step procedure. The workspace is prepared with a soft cloth, and the slipmat has been set aside. The platter is being lifted gently with tweezers nearby, while the belt and turntable are handled with care in a cozy, organized setup.

Alright, folks, let’s talk tools! Now, before you go raiding your toolbox like a kid in a candy store, let me tell you – when it comes to removing a turntable platter, less is often more.

But having the right tools can make all the difference between a smooth operation and a hair-pulling frustration fest. Trust me, I’ve been there!

First things first, you’ll need a clean, soft cloth. This isn’t just for wiping your brow when you start sweating bullets (kidding… sort of).

It’s actually for handling the platter once you’ve removed it. You don’t want your greasy mitts all over that precision surface, do you?

I once made that mistake and spent the next hour meticulously cleaning fingerprints off my platter. Not. Fun.

Next up, you might need a screwdriver. Now, don’t go grabbing that rusty old thing from the back of your junk drawer.

We’re talking precision here, people! A small flathead or Phillips head screwdriver (depending on your turntable) can be crucial for removing any screws holding the platter in place.

I remember the time I tried using a butter knife instead… let’s just say my turntable (and my pride) never quite recovered.

For some turntables, especially those finicky belt-drive models, you might need a pair of plastic tweezers. These are great for safely removing the drive belt without stretching or damaging it.

Metal tweezers? Forget about it!

That’s a one-way ticket to Snapped Belt City, population: you. Now, here’s a pro tip: get yourself a small flashlight.

You’d be surprised how handy this can be when you’re peering into the dark recesses of your turntable, trying to figure out what’s what. I can’t tell you how many times I’ve wished for a third hand to hold a light while I’m working.

Oh, and don’t forget about safety! A pair of lint-free gloves can be a game-changer.

They’ll protect both your hands and your equipment. I learned this the hard way after a particularly nasty encounter with some old, gummy lubricant.

Took days to get that stuff off my hands!

Lastly, and this might sound obvious, but make sure you have your turntable’s manual handy. Every model is different, and the manual can be a lifesaver when you’re trying to figure out the quirks of your particular setup.

Can’t find your manual? No worries!

Most manufacturers have them available online these days. Remember, folks, the right tools make the job easier and safer.

But hey, if you’re feeling overwhelmed, don’t sweat it! We’ve all been there.

Just take a deep breath, put on your favorite record (before you remove the platter, of course), and dive in. You’ve got this!

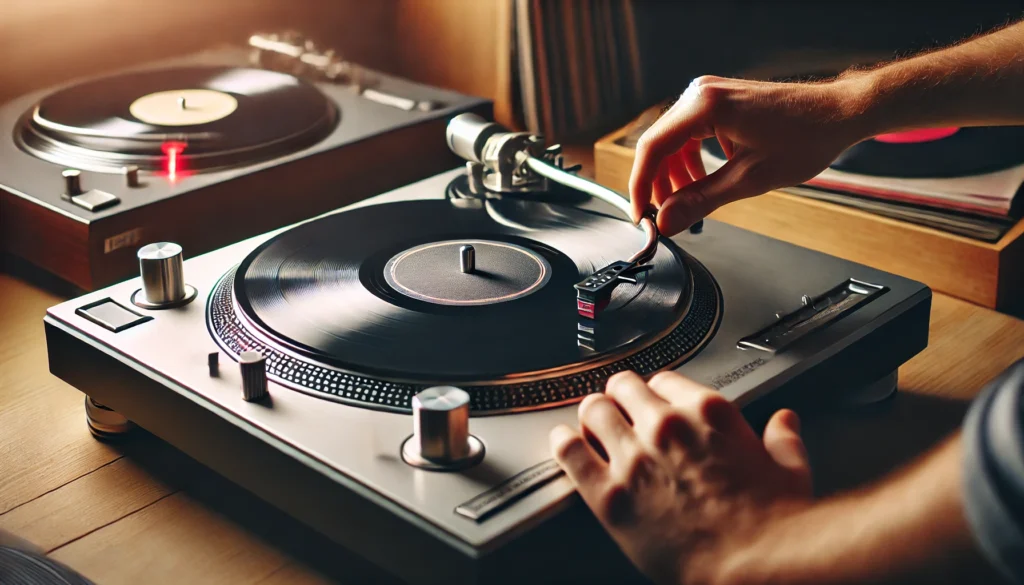
Step-by-Step Guide to Removing a Turntable Platter

A person carefully troubleshooting a stuck turntable platter, applying gentle pressure while rotating the platter in a cozy, organized room. Vinyl records are nearby, and soft lighting highlights the calm and methodical approach to handling the situation. The scene emphasizes patience and care in safely removing a stubborn platter.

Alright, vinyl junkies, it’s time for the main event! We’re gonna walk through removing that platter step by step.

Don’t worry, I’ll hold your hand through this (figuratively, of course – I learned the hard way that literal hand-holding and delicate audio equipment don’t mix well).

First things first, let’s prep our workspace. Clear off a flat, stable surface – your platter’s gonna need somewhere to rest once we get it off.

Lay down a soft cloth to protect it. Trust me, you don’t want to be the person who successfully removes their platter only to scratch it on a stray thumbtack.

Not that I’m speaking from experience or anything…

Now, power down your turntable and unplug it. I know, I know, you’re excited to get started, but safety first!

I once forgot this step and let’s just say, static electricity and I are no longer on speaking terms.

Okay, deep breath. We’re going in!

Start by removing the slipmat if you have one. Easy peasy, right?

But wait! Before you go yanking on that platter, take a good look at it.

Some turntables have a simple setup where the platter lifts straight off, while others might have locking mechanisms or screws holding it in place.

If you’ve got a belt-drive turntable, you’ll probably need to remove the belt first. This is where those plastic tweezers come in handy.

Gently lift the outer edge of the platter and carefully remove the belt. Whatever you do, don’t use your fingernails!

I learned that lesson the hard way – took weeks for my nail to grow back.

For direct-drive turntables, you’re usually dealing with a straight lift-off situation. But here’s the kicker – some high-end models have a locking mechanism.

If you try to yank it off without disengaging the lock, well… let’s just say you’ll be in for a world of hurt (and possibly a hefty repair bill).

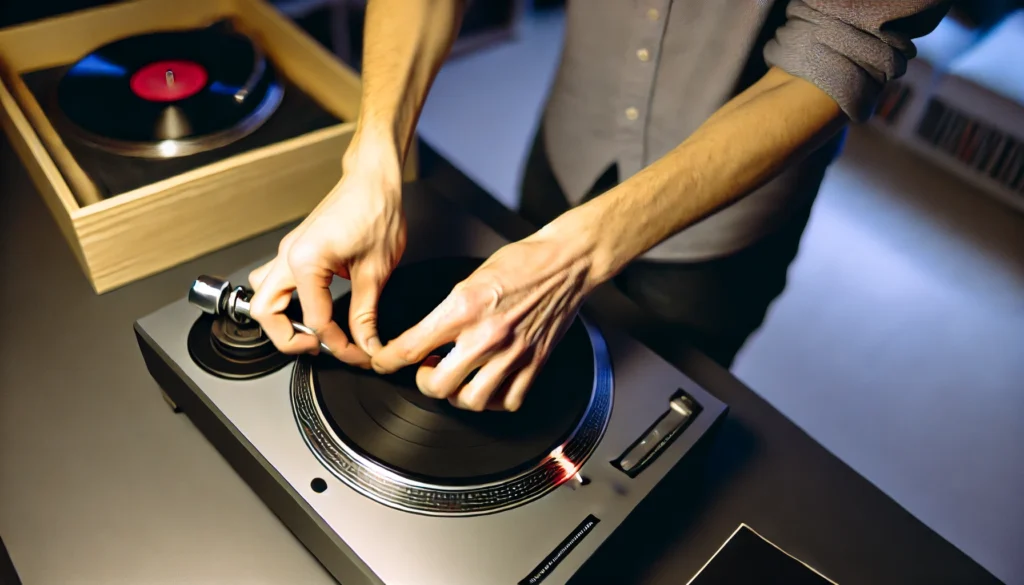
Once you’ve dealt with any locking mechanisms or belts, it’s time for the moment of truth. Grip the platter firmly (but not too firmly – we’re not trying to strangle it) and lift straight up.

If it doesn’t budge, don’t force it! That’s a one-way ticket to Brokesville.

Instead, try a gentle rocking motion. Sometimes platters can get a bit stuck, especially if they haven’t been removed in a while.

As the platter comes free, be prepared for its weight. Some of these bad boys are heavier than they look!

I once nearly dropped my first high-end platter – talk about a heart-stopping moment!

And voila! You’ve done it!

Your platter is free, and you’re officially a turntable tinkerer. Take a moment to bask in your awesomeness.

But don’t get too cocky – we still need to put it back on later!

Remember, every turntable is a bit different, so if you run into any snags, don’t be afraid to consult that manual. And hey, if all else fails, there’s no shame in calling in a pro.

Better safe than sorry when it comes to your precious vinyl setup!

Common Challenges and How to Overcome Them

A person gently cleaning a turntable platter with a soft, lint-free cloth, using distilled water on a soft surface. An anti-static brush is nearby, while the modern turntable and neatly stored vinyl records create a cozy, organized setup. Soft lighting highlights the importance of proper maintenance for optimal sound quality.

Alright, audio adventurers, let’s talk about the elephant in the room – or should I say, the stubborn platter on the turntable. Sometimes, removing a platter isn’t as smooth as butter on a hot pancake.

But don’t worry, I’ve been there, done that, and I’m here to share my battle scars… I mean, wisdom!

First up, the dreaded stuck platter. Oh boy, I remember the first time I encountered one of these.

I pulled, I pushed, I may have even tried sweet-talking it (spoiler alert: platters don’t respond to flattery). If you find yourself in this situation, resist the urge to channel your inner Hercules.

Brute force is a one-way ticket to Regretsville, population: you and your broken turntable.

Instead, try this little trick I learned: apply a gentle, even pressure while slowly rotating the platter. Sometimes, this can help break the seal that’s keeping it stuck.

If that doesn’t work, a little heat can be your friend. No, I don’t mean take a blowtorch to it!

(Please, for the love of vinyl, don’t do that.) Try playing a record for about 15 minutes.

The heat from operation can sometimes expand the metal just enough to loosen things up.

Now, let’s talk about those delicate vintage turntables. These babies require a special touch.

I once approached a 1960s Garrard like it was a modern deck and… well, let’s just say I gained a newfound appreciation for the phrase “they don’t make ’em like they used to.” With older turntables, patience is your best friend.

Go slow, be gentle, and if something doesn’t feel right, stop and reassess.

Another common hiccup is dealing with strange noises or resistance when trying to remove the platter. If you hear grinding, scraping, or any noise that makes you wince, stop immediately!

This could be a sign of debris caught in the bearing, or worse, a damaged bearing. I learned this lesson the hard way and ended up with a repair bill that made my wallet cry.

One more thing – be prepared for surprises. I once removed a platter and found a small colony of dust bunnies living underneath.

Another time, I discovered a long-lost guitar pick that had somehow found its way into the turntable (still not sure how that happened). The point is, expect the unexpected!

Remember, if you’re ever in doubt, there’s no shame in stepping back and seeking help. Whether it’s consulting online forums, calling the manufacturer, or taking it to a pro, sometimes discretion is the better part of valor.

Your turntable (and your sanity) will thank you.

And hey, if all else fails and you find yourself stuck (pun intended), take a break, put on your favorite record (on another turntable, of course), and come back to it later. Sometimes, a fresh perspective is all you need to overcome these platter predicaments.

You’ve got this, vinyl warrior!

Cleaning and Maintaining Your Platter

Alright, vinyl virtuosos, we’ve made it to the final frontier – the art of platter pampering! Now that you’ve successfully removed your platter (high five!), it’s time to show it some love.

Trust me, a clean, well-maintained platter is the secret sauce to audio nirvana.

First things first, let’s talk about why this is important. Your platter is like the foundation of a house – if it’s not level and smooth, everything built on top of it is gonna be wonky.

I learned this the hard way when I ignored a seemingly innocent bit of gunk on my platter. The result?

More pops and crackles than a bowl of Rice Krispies. Not exactly the audiophile experience I was going for!

So, how do we keep our platters pristine? Well, start with a gentle cleaning.

And when I say gentle, I mean it! No harsh chemicals or abrasive materials here.

I once made the mistake of using an old t-shirt to clean my platter. Let’s just say, my “AC/DC” logo is now permanently etched into the surface.

Not my finest moment.

Instead, use a soft, lint-free cloth slightly dampened with distilled water. If you’re dealing with stubborn grime, a tiny drop of mild dish soap can help, but be sure to rinse thoroughly.

Work in gentle circular motions, paying extra attention to any visible marks or smudges.

Now, here’s a pro tip: don’t forget about the underside of the platter! This often-neglected area can accumulate dust and debris, which can affect your turntable’s performance.

I once found an entire ecosystem of dust bunnies living under there. It was like a tiny, fuzzy civilization!

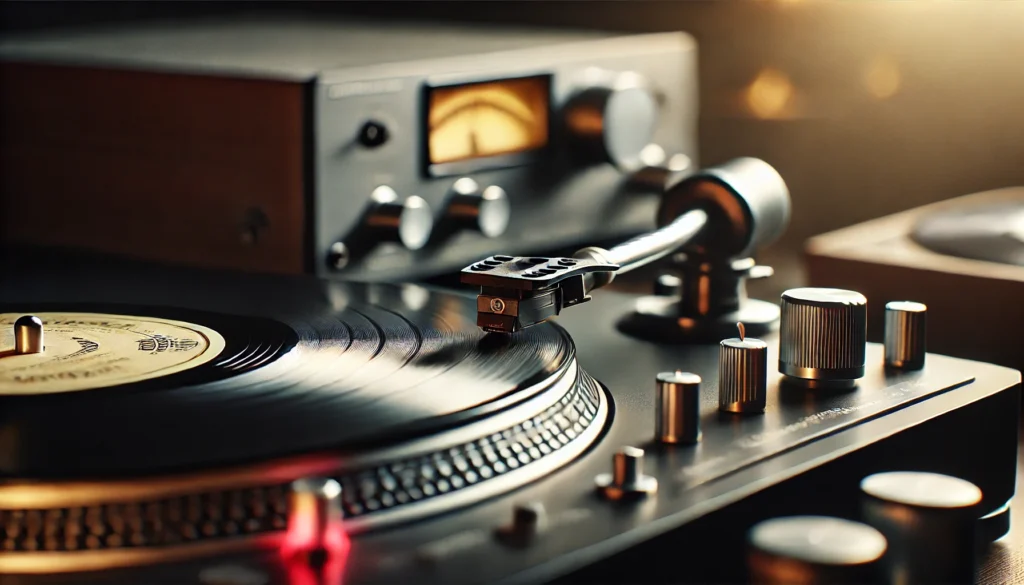
Once you’ve got your platter squeaky clean, it’s time to talk about the beating heart of the operation – the bearing. This is the part that allows your platter to spin smoothly.

A well-lubricated bearing is crucial for optimal performance. But beware!

More is not always better when it comes to bearing oil. I learned this the hard way when I over-lubricated mine and ended up with oil all over my favorite record.

Talk about a slippery situation! A tiny drop of the right oil (usually specified in your turntable’s manual) is all you need.

Apply it carefully to the spindle, and you’re golden.

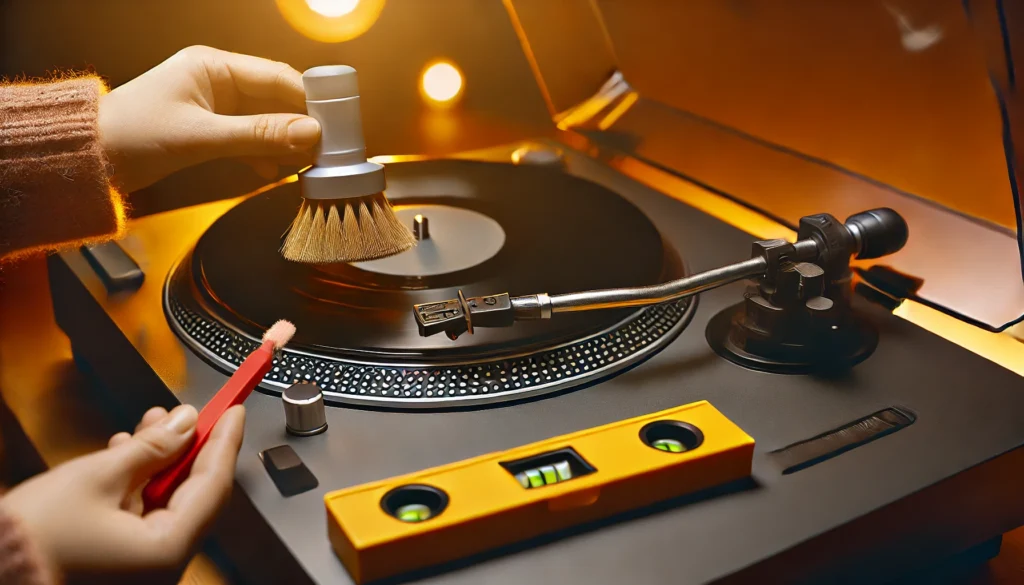
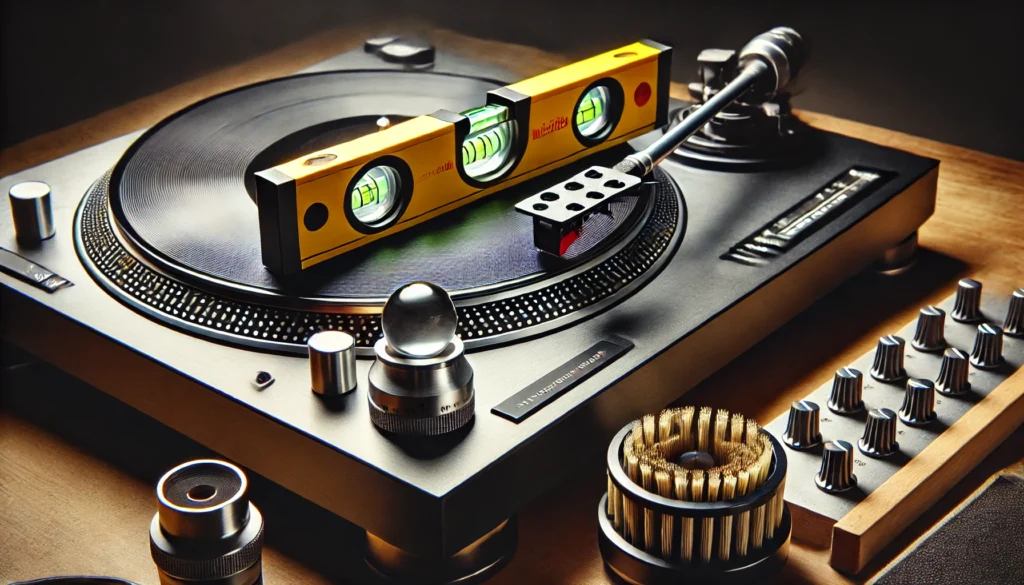
Now, let’s talk about a often overlooked aspect of platter maintenance – leveling. An uneven platter can cause all sorts of issues, from inconsistent playback speed to increased wear on your records.

I once spent weeks trying to figure out why my records sounded “off,” only to realize my platter was slightly tilted. Face, meet palm!

To check if your platter is level, you can use a bubble level or even a leveling app on your smartphone. Place it on the platter and rotate it to different positions.

If you notice any significant deviations, you might need to adjust the feet of your turntable or even the surface it’s sitting on.

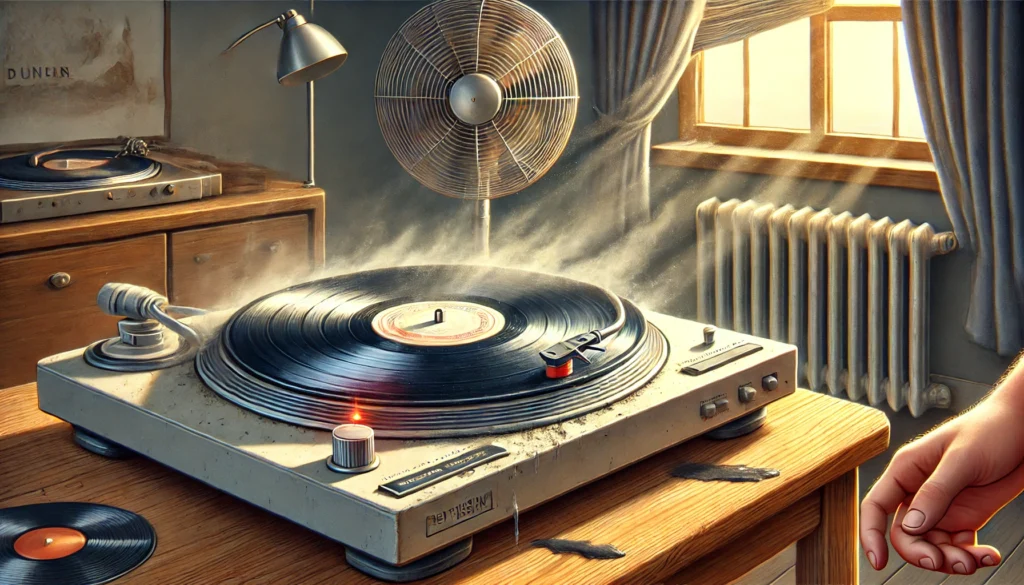
Oh, and here’s a tidbit that might blow your mind – temperature matters! Extreme temperatures can affect the shape of your platter, especially if it’s made of materials like acrylic.

I once left my turntable near a heater and came back to find my platter had warped ever so slightly. Lesson learned: keep your setup away from heat sources and direct sunlight.

Let’s not forget about static, the silent killer of good sound. A static-y platter can attract dust like a magnet, and we all know dust is the enemy of clean playback.

Investing in an anti-static brush or gun can work wonders. I remember the first time I used an anti-static gun – it was like magic!

Suddenly, dust wasn’t clinging to my records like a clingy ex.

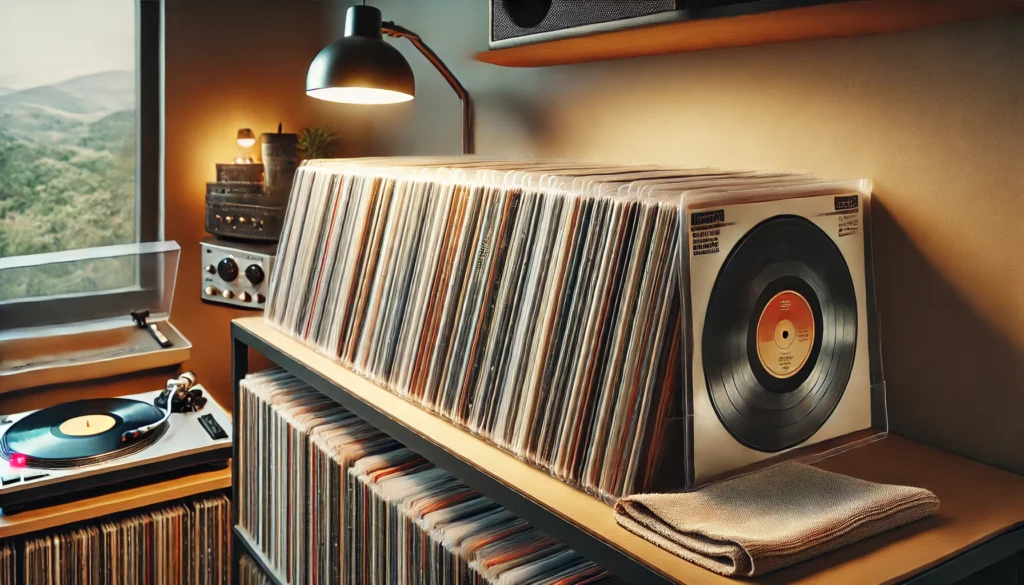
Lastly, consider the material of your platter mat. Whether you’re team felt, rubber, or cork, make sure to give it a good cleaning regularly too.

These mats can trap a surprising amount of dust and debris. I once found a small forest of cat hair living in my felt mat (note to self: keep the turntable cover closed when not in use).

Remember, folks, a little bit of regular maintenance goes a long way. It might seem like a chore at first, but trust me, your ears will thank you.

And hey, there’s something oddly satisfying about giving your beloved turntable some TLC. It’s like a bonding experience between you and your music!

So there you have it – the ins and outs of platter cleaning and maintenance. With these tips, your platter will be spinning smoother than a Barry White love song.

Now, go forth and enjoy that crystal-clear analog sound!

Conclusion

Whew! We’ve come a long way, haven’t we? From understanding what a platter is to becoming bona fide platter removal experts, we’ve covered it all.

And let me tell you, if you’ve made it this far, you’re well on your way to becoming a true vinyl virtuoso!

Remember when we started, and the idea of removing a turntable platter seemed as daunting as defusing a bomb? (Okay, maybe that’s a bit dramatic, but you get the point!) Now look at you – armed with knowledge, ready to tackle any platter that dares cross your path.

It’s like we’ve been on a journey together, you and I, through the highs and lows of turntable maintenance.

But here’s the thing – and I can’t stress this enough – every turntable is unique. What works for my vintage Technics might not be the ticket for your shiny new Pro-Ject.

So don’t be afraid to customize these tips to fit your specific setup. Experiment, but always err on the side of caution.

Trust me, I’ve learned the hard way that sometimes, less really is more when it comes to tinkering with audio equipment.

Now, I know we’ve covered a lot of ground here, but don’t let it overwhelm you. Rome wasn’t built in a day, and neither is turntable expertise.

Take it one step at a time, and before you know it, you’ll be removing platters in your sleep! (Though I wouldn’t recommend actually doing that – sleepwalking and delicate audio equipment don’t mix, trust me on this one.)

Oh, and let’s not forget about safety. Always prioritize the well-being of both yourself and your precious equipment.

If something doesn’t feel right, or if you’re unsure, there’s no shame in seeking help from a professional. Better safe than sorry, especially when it comes to your beloved vinyl setup.

As we wrap up this vinyl voyage, I want to encourage you to share your own experiences and tips. Every vinyl enthusiast has their own tricks of the trade, and the community thrives on sharing knowledge.

So don’t be shy – drop a comment below and let us know about your platter removal adventures!

And hey, if you found this guide helpful, why not spread the love? Share it with your fellow vinyl junkies.

After all, good music (and good advice) is meant to be shared.

So, my fellow audiophiles, it’s time to put this newfound knowledge to the test. Go forth and remove those platters, clean those bearings, and bask in the glory of a well-maintained turntable.

Your records (and your ears) will thank you.

Until next time, keep those grooves clean and your music flowing. Happy spinning, everyone!

How to Balance a Turntable Arm: A Vinyl Lover’s Guide

Did you know that an unbalanced turntable arm can ruin your precious vinyl records?

I sure didn’t when I first got into collecting vinyl, and boy, did I learn that lesson the hard way!

But don’t worry, I’m here to share my hard-earned knowledge with you so you can avoid making the same mistakes I did.

Properly balancing your turntable arm is crucial for getting the best sound quality out of your records and, more importantly, protecting them from unnecessary wear and tear.

In this guide, I’ll walk you through everything you need to know about balancing your turntable arm, from understanding why it’s important to detailed instructions on how to do it right.

How to Balance Turntable Arm

Close-up of a turntable arm being balanced, showing the counterweight adjustment, anti-skate set to zero, and a tracking force gauge nearby for fine-tuning.

Balancing a turntable arm involves adjusting the counterweight and anti-skate to ensure the stylus applies the correct amount of pressure on the record groove.

You’ll start by setting the anti-skate to zero, then adjust the counterweight until the arm floats horizontally.

After that, you’ll fine-tune the tracking force using a gauge, and finally, set the anti-skate to match the tracking force.

This process optimizes sound quality and minimizes record wear.

We’ll explore this topic more deeply below, but that’s the gist of it!

Understanding Turntable Arm Balance

Detailed view of a turntable arm hovering above a vinyl record with visible counterweight and anti-skate adjustments, highlighting the importance of arm balance for sound quality and record protection.

Okay, let’s get into the nitty-gritty of turntable arm balance. When I first started out, I thought it was just some audiophile mumbo-jumbo, but trust me, it’s super important!

Turntable arm balance refers to the way your tonearm is set up to apply the right amount of pressure on your records.

It’s all about finding that sweet spot where the stylus (that’s the needle, for us non-techies) can track the grooves accurately without putting too much or too little pressure on the vinyl.

Why is this so important, you ask? Well, let me tell you about the time I ruined my favorite record because I didn’t know any better.

I had the arm set way too heavy, and after just a few plays, I noticed the sound quality had gone downhill faster than a roller coaster. Turns out, I’d actually worn down the grooves!

Talk about a heartbreaking (and expensive) lesson. On the flip side, if your arm is too light, you’ll get all sorts of funky sounds – skipping, distortion, you name it.

It’s like trying to ice skate with roller blades on – it just doesn’t work! Now, there’s a common misconception that heavier is better because it keeps the needle in the groove.

I used to think that too! But nope, that’s not how it works.

The goal is to find the perfect balance (pun intended) where the stylus can pick up all the tiny details in the groove without causing any damage. Another thing I’ve learned is that different cartridges (that’s the doohickey that holds the stylus) have different optimal tracking forces.

So, if you upgrade your cartridge, you’ll need to rebalance your arm. I found that out the hard way when I splurged on a fancy new cartridge and couldn’t figure out why it sounded worse than my old one!

Bottom line: getting your turntable arm balance right is crucial for protecting your vinyl and getting the best sound quality. It might seem a bit daunting at first, but don’t worry – I’ll walk you through it step by step.

Trust me, your ears (and your records) will thank you!

Tools Needed for Balancing a Turntable Arm

Detailed setup of essential tools for balancing a turntable arm, including a tracking force gauge, screwdriver, spirit level, and lint-free cloth in a cozy vinyl listening space.

Alright, let’s talk tools! When I first decided to balance my turntable arm, I thought I could just eyeball it.

Spoiler alert: that didn’t work out so well. So, let me save you some trouble and walk you through what you’ll actually need.

First up, the essentials. You’ll need a steady hand and patience (trust me, you’ll need both!).

A tracking force gauge is also crucial – this little gadget is a game-changer. You’ll also want to have a small screwdriver (usually a flathead) and a clean, lint-free cloth on hand.

Now, some optional tools can make your life easier. A spirit level helps ensure your turntable is perfectly flat.

A cartridge alignment protractor is great for getting that perfect angle. And a magnifying glass can be helpful because some of these adjustments are tiny!

When I first started, I tried to cheap out and skip the tracking force gauge. Big mistake!

I ended up guessing the weight and, well, let’s just say my records weren’t too happy about that. So, do yourself a favor and invest in a good gauge.

They’re not too expensive, and they’ll save you a lot of headaches (and potentially damaged records) in the long run. As for where to find these tools, most good audio equipment stores will have them.

I actually found my tracking force gauge online – there are tons of options out there. Just make sure to read reviews and get one that’s accurate.

Oh, and here’s a pro tip I learned the hard way: make sure your hands are clean and dry before you start fiddling with your turntable. I once got a bit of pizza grease on my stylus (don’t ask), and let me tell you, that was not a fun cleanup job!

Remember, taking care of your turntable is an investment in your music enjoyment. These tools might seem like a bit of an expense upfront, but they’ll pay off in the long run with better sound quality and longer-lasting records.

Trust me, future you will be grateful!

Step-by-Step Guide to Balancing Your Turntable Arm

Step-by-step visual of balancing a turntable arm, showing the counterweight adjustment, anti-skate set to zero, and tracking force gauge on the platter in a cozy vinyl listening room.

Alright, folks, it’s time to roll up our sleeves and get down to business! I’m going to walk you through balancing your turntable arm.

Don’t worry if it seems a bit intimidating at first – I was nervous too when I first tried it. But trust me, once you get the hang of it, you’ll be doing it like a pro!

First things first, you need to prepare your turntable. Make sure it’s on a level surface.

I once tried to balance mine on a wobbly table – big mistake! Use a spirit level if you have one, or just eyeball it if you don’t.

Also, make sure your turntable is unplugged. Safety first, people!

Next, you’ll want to set the anti-skate to zero. Look for the anti-skate control – it’s usually a small dial or slider near the tonearm base.

Set this to zero for now. We’ll come back to it later, I promise!

Now comes the fun part – adjusting the counterweight. This is where the magic happens!

The counterweight is that chunky thing at the back of the tonearm. Start by rotating it until the tonearm floats horizontally, perfectly balanced.

It might take a few tries, but be patient! I remember spending a good 20 minutes on this step the first time, cursing under my breath the whole time.

But man, was it satisfying when I finally got it right! Once your arm is floating horizontally, you need to zero the tonearm.

Carefully rotate the numbered dial on the counterweight (not the entire weight) until it reads zero. This step is crucial – it’s like calibrating a scale before you weigh something.

Now it’s time to set the tracking force. Gently rotate the entire counterweight (including the dial) clockwise until the desired tracking force is reached.

Your cartridge manual should tell you the recommended tracking force. If you don’t have the manual, a good starting point is usually between 1.5 to 2 grams.

This is where that nifty little tracking force gauge comes in handy. Place it on the platter and carefully lower the tonearm onto it.

The gauge should confirm that you’ve set the correct tracking force. If it’s off, adjust the counterweight slightly and check again.

It might take a few tries to get it perfect. Remember that anti-skate control we zeroed out earlier?

Now it’s time to set it. Generally, you want to set it to the same value as your tracking force.

But here’s a little secret I learned: sometimes setting it slightly lower (like 0.5g less) can give you better sound. Play around with it and trust your ears!

Finally, do a final visual check. Once everything’s set, the tonearm should be parallel to the record surface when it’s lowered.

If it’s not, you might need to adjust the tonearm height (if your turntable allows for that). Now, I know this might sound like a lot, but trust me, it gets easier with practice.

The first time I did this, it took me over an hour and I was sweating bullets the whole time. Now?

I can do it in about 10 minutes, easy peasy! One last tip: be gentle!

These are delicate instruments we’re dealing with. I once got a bit too enthusiastic and nearly snapped my stylus clean off.

Talk about a heart-stopping moment! Remember, the goal here is to find that sweet spot where your records sound amazing and your stylus isn’t wearing them down.

It might take a bit of trial and error, but once you get it right, oh boy, you’ll hear the difference! And don’t be afraid to fine-tune things as you go along.

Sometimes a tiny adjustment can make a world of difference in sound quality. Happy balancing, vinyl lovers!

Your ears (and your records) will thank you for taking the time to get this right.

Maintaining Your Turntable Arm Balance

Cozy vinyl listening setup with a turntable, carbon fiber brush, and spirit level, emphasizing proper maintenance, balanced tonearm, and dust-free operation for optimal sound quality.

Now that you’ve got your turntable arm perfectly balanced, you might think you’re done for good. But hold up!

Maintaining that balance is just as important as setting it up in the first place. Don’t worry, though – it’s not as daunting as it sounds.

First things first, how often should you check your balance? Well, I learned the hard way that it’s not a set-it-and-forget-it kind of deal.

I recommend giving it a quick check every month or so, and definitely anytime you move your turntable or bump it accidentally. I once had a party where someone decided to use my turntable as a drink coaster (the horror!), and you bet I was rebalancing that arm the next day.

Now, what can affect your balance over time? More than you might think!

Temperature changes can mess with the viscosity of the arm’s bearings. Dust buildup can add tiny amounts of weight to your stylus.

Even the natural settling of your turntable’s feet can throw things off kilter. It’s like your turntable is a living, breathing thing – it needs regular check-ups!

Here are some tips I’ve picked up for keeping your turntable in top condition. Keep it clean – dust is the enemy of good sound.

I use a carbon fiber brush before and after each listening session. It’s become almost meditative for me – a little ritual before I dive into my vinyl journey.

When you’re not using your turntable, use a stylus cover. It’ll keep dust off and prevent accidental damage.

I learned this one after my cat decided my stylus looked like a fun toy. Let’s just say that was an expensive replacement.

Every few months, check your leveling. Use a spirit level to make sure your turntable is still perfectly flat.

You’d be surprised how much floors can shift, especially in older houses. Listen critically – your ears are your best tools.

If something starts to sound off, don’t ignore it. It might be time for a rebalance.

Keep your turntable away from vibrations. I used to have mine right next to my speakers.

Big mistake! The vibrations were subtly affecting the balance.

Now I keep it on a separate, sturdy surface. Regularly check your tracking force using your gauge every month or so to make sure it hasn’t drifted.

And be mindful of temperature – try to keep your turntable in a room with relatively stable temperature. Extreme changes can affect the balance.

Remember, taking care of your turntable is an act of love. It’s not just about maintaining equipment – it’s about preserving the quality of your music and the lifespan of your precious vinyl collection.

I know it might seem like a lot of work, but trust me, it becomes second nature after a while. And the payoff?

Crystal clear sound, happy records, and the satisfaction of knowing you’re treating your music with the respect it deserves. So go forth, balance those arms, and enjoy the warm, rich sound of perfectly played vinyl.

Your ears (and your records) will thank you!

Conclusion

Whew! We’ve covered a lot of ground, haven’t we?

From understanding why turntable arm balance is crucial, to the process of achieving that perfect balance, and even how to maintain it. It’s been quite a journey!

Let’s recap why all this matters: a properly balanced turntable arm ensures the best possible sound quality from your vinyl records while also protecting them from unnecessary wear and tear. It’s like finding that perfect dance partner – when everything’s in balance, the music just flows!

Now, I know we’ve gone through a lot of technical stuff, but don’t let that intimidate you. Remember, every vinyl enthusiast started somewhere, and with a bit of practice, you’ll be balancing tonearms like a pro in no time.

It’s all about patience, attention to detail, and a willingness to learn. One thing I’ve learned in my vinyl journey is that there’s always room for customization.

While I’ve given you the general guidelines, don’t be afraid to experiment a little. Maybe you’ll find that a slightly lighter tracking force works better for your favorite jazz records, or that a touch more anti-skate gives your classical albums that extra clarity.

Trust your ears and have fun with it! And hey, if you’re feeling overwhelmed, that’s okay too.

The vinyl community is full of helpful folks who are always willing to share their knowledge. Don’t hesitate to reach out to fellow enthusiasts or your local record store for advice.

We’re all in this together, united by our love for those beautiful black discs. Lastly, I want to encourage you to share your own experiences and tips.

Have you found a clever way to check your balance? Did you make a mistake that taught you a valuable lesson?

Share it in the comments! Your insights could be just what another vinyl lover needs to hear.

Remember, at the end of the day, this is all about enjoying your music to the fullest. A well-balanced turntable arm is your ticket to audio bliss, allowing you to immerse yourself in the warm, rich sound that only vinyl can provide.

So go on, give your turntable some love, drop that needle, and let the music play. Here’s to perfectly balanced tonearms and many hours of happy listening!

How Long Do Turntable Styluses Last? A Vinyl Lover’s Guide

Hey there, vinyl enthusiasts! Ever found yourself grooving to your favorite record, only to suddenly notice something’s off with the sound?

Well, let me tell you, I’ve been there, and it’s probably time to take a closer look at your turntable’s stylus. You know, that tiny little needle that’s responsible for bringing your vinyl collection to life?

Yeah, that one! It’s crazy how such a small component can make or break your listening experience.

But here’s the million-dollar question: how long do these little guys actually last?

Buckle up, because we’re about to dive deep into the world of turntable styluses, their lifespan, and everything you need to know to keep your vinyl sounding crisp and clear. Trust me, by the end of this, you’ll be a stylus expert – or at least sound like one at your next record swap meet!

How long Do Turntable Stylus Last?

Close-up of a well-maintained turntable stylus playing a vinyl record, symbolizing a lifespan of 500 to 1,000 hours, with a cleaning brush nearby.

In my experience, turntable styluses typically last between 500 to 1,000 hours of playing time. However, this can vary widely depending on factors like stylus quality, usage frequency, and maintenance.

High-end styluses might last up to 1,500 hours or more, while budget options could need replacing after just 200-300 hours. I’ve found that with proper care, you can often push your stylus to the upper end of its lifespan.

But don’t worry if these numbers seem a bit abstract – we’ll dive into the nitty-gritty details below, exploring everything from signs of wear to tips for extending your stylus life. So stick around, because we’re about to drop the needle on some seriously useful info!

Understanding Turntable Styluses

Close-up of different types of turntable styluses (spherical, elliptical, micro-line, and Shibata) placed next to a vinyl record, with labels identifying each type.

Alright, let’s get down to the nitty-gritty of turntable styluses. You know, I remember the first time I held a stylus in my hand – I was terrified I’d break the darn thing!

But once you understand what these little marvels are all about, you’ll be handling them like a pro in no time.

So, what exactly is a turntable stylus? Well, it’s basically the business end of your turntable’s cartridge.

It’s that tiny, usually diamond-tipped piece that actually makes contact with your vinyl records. Think of it as the middleman between your beloved records and your ears.

Its job? To trace those microscopic grooves in your records and translate them into sweet, sweet music.

Now, here’s where it gets interesting – not all styluses are created equal. There are different types, each with their own pros and cons.

The most common ones you’ll come across are spherical and elliptical styluses. Spherical ones are like the Honda Civics of the stylus world – reliable, easy to maintain, but not exactly audiophile territory.

Elliptical styluses, on the other hand, are more like your sporty models. They can track the groove walls more precisely, giving you better sound quality, especially in those high frequencies.

But wait, there’s more! You’ve got your fancy-pants micro-line and Shibata styluses too.

These bad boys are like the Ferraris of the stylus world – high-performance, but they’ll cost ya. They’re designed to make even more contact with the record groove, potentially giving you even better sound and causing less wear on your precious vinyl.

Now, I gotta tell ya, the importance of stylus quality can’t be overstated. I learned this the hard way when I cheaped out on a replacement stylus for my first turntable.

Let’s just say my records didn’t thank me for that decision! A good quality stylus not only sounds better but also treats your records with more respect.

It’s like the difference between dancing with a graceful partner and someone who keeps stepping on your toes!

So, there you have it – Stylus 101. Whether you’re rockin’ a basic spherical or livin’ large with a micro-line, understanding your stylus is the first step to vinyl nirvana.

Just remember, no matter how tempting it might be, don’t try to DJ by scratching with your grandpa’s vintage turntable. Trust me on this one!

Factors Affecting Stylus Lifespan

Close-up of a stylus playing a clean vinyl record, with annotations highlighting 'Quality,' 'Frequency of Use,' 'Record Condition,' and 'Maintenance' as factors affecting lifespan.

Alright, folks, let’s talk about what makes or breaks your stylus – literally! You see, the lifespan of these tiny music maestros can vary wildly, and it all comes down to a few key factors.

Buckle up, ’cause we’re about to go on a wild ride through the world of stylus longevity!

First up, we’ve got quality. Now, I’m not saying you need to sell a kidney to afford a top-notch stylus, but let me tell you, investing in a good one can save you a lot of headaches down the road.

I remember when I first started collecting vinyl, I thought I was being clever by buying the cheapest stylus I could find. Boy, was that a mistake!

It wore out faster than my patience during a bad first date. High-quality styluses are made with better materials and more precise manufacturing processes, which means they can take more of a beating before giving up the ghost.

Next on our hit list is frequency of use. This one’s pretty straightforward – the more you use your turntable, the faster your stylus is gonna wear out.

It’s like your favorite pair of sneakers; the more miles you put on ’em, the quicker they’re gonna need replacing. But hey, if you’re spinning records every day, I say more power to ya!

Just keep in mind that your stylus might need a little more TLC.

Now, here’s where things get a little dirty – literally. The condition of your records plays a huge role in how long your stylus will last.

Think about it: if your vinyl is cleaner than a whistle, your stylus is gonna have an easy time gliding through those grooves. But if your records are dustier than your great-aunt’s attic, well, that grit and grime is gonna wear down your stylus faster than you can say “discography.”

Last but definitely not least, we’ve got maintenance and cleaning. I’ll admit, I used to be terrible at this.

I’d just plop the needle down and let it rip, never giving a second thought to cleaning it. Big mistake!

Regularly cleaning your stylus (gently, mind you – we’re not scrubbing pots and pans here) can significantly extend its life. It’s like flossing – a little bit of regular maintenance goes a long way.

So there you have it, folks – the four horsemen of the stylus apocalypse: quality, usage, record condition, and maintenance. Keep these in mind, and you’ll be well on your way to stylus nirvana.

And remember, a happy stylus means happy listening!

Signs It’s Time to Replace Your Stylus

Close-up of a vinyl turntable stylus with a bent tip, showing signs of wear and tear, highlighting 'Sound Degradation,' 'Bent Stylus Tip,' and 'Tracking Issues' as indicators it's time for replacement.

Alright, vinyl junkies, gather ’round! It’s time we had a heart-to-heart about the signs that your beloved stylus might be ready for retirement.

Trust me, I’ve been through this more times than I care to admit, and let me tell you, it can be a real heartbreaker if you don’t catch it early!

First up, let’s talk about the most obvious sign: degradation in sound quality. You know that crisp, clear sound you love?

Well, if it starts sounding more like a muddy puddle than a crystal-clear stream, your stylus might be waving the white flag. I remember the first time I noticed this – I was jamming to my favorite Bowie album, and suddenly it sounded like he was singing underwater.

Not cool, David, not cool at all!

But here’s the kicker – sometimes the change is so gradual, you might not even notice it! That’s why it’s a good idea to really listen to your records every now and then.

Put on a familiar album and pay attention. If it sounds like it’s lost its sparkle, it might be time to start shopping for a new stylus.

Now, let’s get visual, shall we? Take a good look at your stylus – and I mean a really good look.

You might need a magnifying glass for this one. If you see any obvious wear and tear, like a bent or chipped tip, it’s definitely time to say goodbye.

I once had a stylus that looked like it had been through a war zone – turns out, I’d accidentally bumped the tonearm one too many times. Oops!

Here’s another red flag to watch out for: tracking issues. If your stylus starts skipping more than a kid playing hopscotch, or if it’s not staying in the groove like it used to, that’s a big ol’ warning sign.

I had this happen once during a party – talk about a mood killer! One minute we’re all grooving to some funky beats, the next it sounds like we’re listening to a remix by DJ Skippy McSkipface.

Now, I know what you’re thinking – “But how often should I really be replacing this thing?” Well, my friend, that’s the million-dollar question.

Most manufacturers recommend replacing your stylus every 500 to 1,000 hours of playtime. But let’s be real, who’s keeping track?

I certainly don’t have a playback stopwatch!

A good rule of thumb is to consider replacement after about a year of regular use, or sooner if you’re a heavy listener. But remember, these are just guidelines.

Your mileage may vary, as they say in the car business.

So there you have it, folks – the tell-tale signs that your stylus might be ready for the great turntable in the sky. Keep your ears open, your eyes peeled, and your records spinning.

And remember, when in doubt, it’s better to replace your stylus a bit early than to risk damaging your precious vinyl collection. Trust me, your records (and your ears) will thank you!

How to Extend the Life of Your Stylus

A turntable stylus being carefully cleaned with a soft brush, alongside a tracking force gauge and cue lever, emphasizing proper care to extend stylus life.

Alright, vinyl aficionados, gather ’round! It’s time to talk about keeping your stylus in tip-top shape.

Think of your stylus as a delicate little creature – treat it right, and it’ll reward you with years of beautiful music. Treat it wrong, and well… let’s just say I’ve learned that lesson the hard way.

First things first: cleaning. Now, I know what you’re thinking – “Cleaning? Boring!”

But trust me, this is crucial. I used to be a “set it and forget it” kind of guy until I realized my stylus was collecting more fuzz than my belly button.

Gross, right? A clean stylus is a happy stylus, folks.

Use a soft brush (they make special ones for this) and gently brush from back to front. No scrubbing like you’re trying to get a stain out of your favorite shirt!

I once got a bit too enthusiastic and bent my stylus. Let’s just say that was an expensive lesson in gentleness.

Next up: tracking force. This is the amount of weight your stylus puts on the record.

Too much, and you’re basically using your records as a cutting board. Too little, and your needle will be bouncing around like it’s at a trampoline park.

Neither is good for your stylus or your vinyl. Get yourself a tracking force gauge (they’re not expensive) and make sure you’re in the sweet spot.

Your cartridge manual will tell you the right range. I remember when I first adjusted my tracking force correctly – it was like hearing my records for the first time all over again!

Now, let’s talk handling. Your stylus is not a pointing device, folks!

I cringe when I see people using their stylus to show where a track starts. That’s a big no-no!

Always use the cue lever to lower and raise the tonearm. It’s there for a reason, and it’s not just to make your turntable look fancy.

Trust me, your stylus will thank you for the gentle treatment.

Storage is another biggie. When you’re not using your turntable, put that dust cover down!

I learned this the hard way when I left my turntable uncovered for a week while on vacation. Came back to find enough dust on my stylus to build a small, very linty snowman.

Not cool. Also, if your turntable came with a stylus guard, use it!

It’s like a tiny helmet for your stylus.

Lastly, and this might sound obvious, but be careful! No dancing around your turntable like you’re at a rave.

I may or may not have knocked my tonearm while attempting some, uh, enthusiastic dance moves. Let’s just say my stylus didn’t appreciate my sick beats.

Remember, folks, a little TLC goes a long way. Treat your stylus right, and it’ll keep your vinyl spinning smoothly for years to come.

And who knows? Maybe your great-grandkids will be jamming to your perfectly preserved record collection someday.

Now that’s what I call leaving a legacy!

Choosing the Right Replacement Stylus

Turntable setup with various replacement styluses on display, highlighting compatibility checks, upgrade options, and budget considerations in choosing the right stylus.

Alright, vinyl lovers, the time has come. Your trusty stylus has given up the ghost, and now you’re faced with the daunting task of finding a replacement.

Don’t worry, I’ve been there, and I’m here to guide you through this audio jungle!

First things first: compatibility. This is crucial, folks.

You can’t just slap any old stylus onto your cartridge and expect audio nirvana. It’s like trying to fit a square peg in a round hole – frustrating and ultimately pointless.

I learned this the hard way when I bought a stylus on a whim at a flea market. Let’s just say it was about as compatible with my cartridge as oil is with water.

Check your cartridge model and make sure the stylus you’re eyeing is a perfect match. Trust me, your ears (and wallet) will thank you.

Now, here’s where it gets interesting: do you go for a like-for-like replacement, or do you take this opportunity to upgrade?

It’s like being at a crossroads, except instead of selling your soul to the devil for guitar skills, you’re choosing between good sound and potentially mind-blowing sound. If you’re happy with how your setup sounded before, a like-for-like replacement is a safe bet.

But if you’re feeling adventurous, upgrading your stylus can be like giving your whole system a shot of audio espresso!

But hold your horses! Before you start dreaming of that top-of-the-line stylus, let’s talk budget.

I know, I know, it’s not the most exciting topic, but it’s important. Styluses can range from “bargain bin” cheap to “sell a kidney” expensive.

While it’s tempting to go for the gold, remember that a mid-range stylus from a reputable brand can often give you fantastic sound without breaking the bank. It’s all about finding that sweet spot between quality and affordability.

And here’s a pro tip: don’t forget to consider where you’re buying from. I’ve had great experiences with specialty audio shops – the folks there usually know their stuff and can give you solid advice.

Online can be great too, but make sure you’re buying from a reputable seller. I once bought a “bargain” stylus online that turned out to be about as genuine as a three-dollar bill.

Lesson learned!

Lastly, don’t be afraid to ask for help or advice. Whether it’s from your local record store guru, an online forum, or that audiophile friend we all seem to have, a little guidance can go a long way.

After all, choosing a stylus is part science, part art, and a whole lot of personal preference.

So there you have it, folks – your guide to navigating the wild world of replacement styluses. Remember, the right stylus can breathe new life into your vinyl collection.

It’s like giving your records a spa day – they’ll come out refreshed, rejuvenated, and ready to rock your world all over again. Happy hunting, and may the audio gods be ever in your favor!

Conclusion

Whew! We’ve been on quite a journey, haven’t we?

From understanding what makes these tiny needle-shaped heroes tick, to knowing when it’s time to retire them, and even how to choose their successors – we’ve covered it all. Who knew such a small component could have such a big impact on our vinyl listening experience?

Remember, folks, taking care of your stylus is like taking care of your teeth (but hopefully more fun). Regular maintenance, careful handling, and knowing when it’s time for a change can make all the difference.

Your stylus is the bridge between those groovy grooves and your eager ears – treat it right, and it’ll reward you with years of amazing sound.

So, the next time you drop that needle, take a moment to appreciate the intricate dance happening at the tip of your stylus. It’s pretty amazing when you think about it – this tiny piece of technology is bringing your favorite artists to life right in your living room.

Now, I want to hear from you! What’s your experience with stylus life?

Got any maintenance tips or replacement stories to share? Drop a comment below and let’s keep this vinyl conversation spinning.

After all, sharing is caring in the world of audio enthusiasts.

And remember, whether you’re a vinyl newbie or a seasoned collector, there’s always more to learn and discover in this wonderful world of analog sound. So keep those records spinning, your stylus clean, and your ears open.

Here’s to many more hours of crystal-clear , warm, and oh-so-satisfying vinyl goodness. Rock on, audiophiles!

And there you have it – your complete guide to turntable stylus longevity, care, and replacement. Whether you’re a casual listener or a die-hard vinyl enthusiast, I hope this information helps you get the most out of your stylus and, by extension, your entire vinyl listening experience.

Remember, each stylus is unique, just like each record in your collection. What works for one person might not work for another, so don’t be afraid to experiment a little.

Trust your ears, treat your equipment with care, and most importantly, enjoy the music. After all, that’s what this hobby is all about, isn’t it?

So go on, put on your favorite record, sit back, and let that stylus work its magic. And the next time someone asks you, “How long do turntable styluses last?” you’ll have plenty to say.

Happy listening, folks, and may your stylus live long and prosper!

Will Suitcase Turntables Ruin Records? Understanding The Pros and Cons of Suitcase Turntables

Alright, let’s start by breaking down what exactly we’re dealing with here. Suitcase turntables are those adorable, all-in-one record players that look like they’ve time-traveled straight outta the 60s.

They’re basically a turntable, speakers, and amplifier all crammed into a portable package that resembles a vintage suitcase. Pretty nifty, right?

I remember when I first got my hands on one of these bad boys. I was so excited to have a turntable I could easily move from room to room or take to a friend’s place for impromptu vinyl listening parties.

The portability factor is definitely their biggest selling point – no need for a complicated setup or extra equipment.

Another major pro? They’re usually pretty wallet-friendly.

When I was just starting my vinyl journey, I couldn’t justify dropping a small fortune on a high-end setup. Suitcase turntables offer an affordable entry point for newbies or casual listeners who just wanna dip their toes into the analog waters.

But here’s where things get a bit dicey. The old saying “you get what you pay for” definitely applies here.

These portable players often cut corners when it comes to build quality and components. The tonearms can be on the flimsy side, and the cartridges are usually pretty basic.

And don’t even get me started on the built-in speakers – let’s just say they won’t be winning any audio quality awards anytime soon.

One of the biggest downsides I’ve noticed is the lack of customization options. With most suitcase turntables, what you see is what you get.

Wanna upgrade that cartridge or adjust the tracking force? Good luck! Many models don’t allow for easy tweaking or improvements.

Look, I’m not trying to totally bash suitcase turntables here. They definitely have their place in the vinyl ecosystem.

But if you’re serious about sound quality or preserving your records for the long haul, you might wanna think twice before making one of these your primary player.

Will Suitcase Turntables Ruin Records?

Suitcase turntables can potentially damage vinyl records over time due to their lower build quality and lack of essential features found in higher-end turntables.

The main issues include excessive tracking force, poor cartridge alignment, and vibration problems.

While they might not immediately ruin your records, frequent use of a suitcase turntable can lead to accelerated wear and decreased sound quality.

However, with proper care and some modifications, you can minimize the risk to your vinyl collection.

Don’t worry though, we’re about to take a deep dive into the world of suitcase turntables and their impact on your precious vinyl.

By the end of this article, you’ll be armed with all the knowledge you need to make informed decisions about your record-playing setup!

The Potential Risks to Your Vinyl Records

Close-up of a suitcase turntable playing a vinyl record, showing excessive tracking force and vibrations from built-in speakers, highlighting potential risks to vinyl records.

Now, let’s get into the nitty-gritty of why some folks are wagging their fingers at suitcase turntables. Trust me, I’ve learned some of these lessons the hard way!

First up: tracking force. This is the amount of pressure the stylus (that’s the needle, for you newbies) puts on your record.

Many suitcase turntables are notorious for having excessive tracking force. It’s like they’re trying to dig to China through your vinyl! 😅

This extra pressure can wear down your record grooves faster than you can say “limited edition pressing.”

I once left a prized record playing on repeat on my suitcase turntable while I took a long shower (don’t judge, we’ve all done it). When I came back, I swear I could hear a difference in sound quality.

It was subtle, but it freaked me out enough to do some research.

Another potential issue is cartridge alignment. In an ideal world, your stylus should be perfectly positioned to track the record grooves accurately.

But with many suitcase players, the cartridge alignment is off from the get-go, and there’s no way to adjust it. This can lead to distortion and uneven wear on your records over time.

Oh, and let’s not forget about vibrations! The all-in-one design of suitcase turntables means the speakers are right there in the same enclosure as the turntable itself.

This can create a feedback loop of vibrations that mess with the sound quality and potentially cause the stylus to skip or bounce around. Not great for your records or your listening experience.

Now, I’m not saying your records will burst into flames the second they touch a suitcase turntable. But over time, these issues can add up to decreased sound quality and accelerated wear on your vinyl.

It’s kinda like wearing shoes that don’t quite fit – you might not notice the damage right away, but eventually, you’ll start feeling the effects.

Factors That Influence Record Wear

Cozy room with a suitcase turntable playing a vinyl record, showing potential risks like excessive tracking force and vibrations from built-in speakers.

Alright, now that we’ve covered the potential risks, let’s break down some of the factors that can influence how much wear and tear your records experience. It’s not all doom and gloom, I promise!

First things first: the quality of the turntable components plays a huge role. The tonearm, cartridge, and stylus are like the holy trinity of record playback.

In many suitcase turntables, these parts are… well, let’s just say they’re not exactly top-of-the-line. A lightweight, poorly balanced tonearm can lead to tracking issues, while a low-quality cartridge or worn-out stylus can wreak havoc on your grooves.

I learned this lesson the hard way when I noticed some of my favorite albums starting to sound a bit “crunchy” after a few months of heavy rotation on my budget suitcase player. It was heartbreaking, but it pushed me to learn more about proper turntable setup and maintenance.

Speaking of setup – that’s another crucial factor. Even if you’ve got decent components, if they’re not properly aligned and balanced, you’re asking for trouble.

Unfortunately, most suitcase turntables don’t give you many options for adjusting these settings. It’s kinda like trying to parallel park a car with a steering wheel that doesn’t turn – frustrating and potentially damaging!

Now, let’s talk about how often you’re spinning those records. If you’re only pulling out the suitcase player for occasional listening sessions, the wear and tear will obviously be less than if you’re using it as your primary turntable.

It’s all about moderation, folks!

And don’t forget about good old-fashioned TLC. How you handle and store your records can make a big difference in their longevity.

I cringe when I think about how carelessly I used to toss my records around in my early collecting days. Treat ’em with respect, keep ’em clean, and they’ll reward you with years of great sound.

Remember, every time that needle hits the groove, there’s some level of wear happening. It’s just physics, baby!

But by understanding these factors, we can make informed decisions about how to best preserve our precious vinyl while still enjoying the music. It’s all about finding that sweet spot between protection and enjoyment!

How to Minimize Damage When Using a Suitcase Turntable

Cozy room with a suitcase turntable playing a vinyl record, showing adjustments to tracking force, a DIY slipmat, and a record cleaning brush to minimize damage.

Okay, so maybe you’ve already got a suitcase turntable, or you’re really digging the portability factor. Don’t worry, I’ve got some tips to help you minimize potential damage to your vinyl babies!

First up: if your suitcase player allows for it, try adjusting the tracking force. Some models have a little screw on the tonearm that lets you tweak this.

You’re aiming for that Goldilocks zone – not too heavy, not too light. I once spent an entire afternoon fiddling with this on my old player, using a kitchen scale as a makeshift tracking force gauge.

It wasn’t pretty, but it did the job!

If you’re feeling a bit more ambitious (and your wallet allows), consider upgrading the cartridge or stylus. This can make a world of difference in both sound quality and record wear.

Just make sure the new cartridge is compatible with your player – I learned that lesson the hard way when I excitedly bought a fancy new cartridge only to find out it wouldn’t fit my suitcase turntable. Talk about a facepalm moment! 🤦‍♂️

Now, let’s talk about cleaning. Keeping your records and stylus clean is crucial for minimizing wear.

Invest in a good record brush and use it before and after each play. And for the love of all that is holy, please clean that stylus regularly!

A buildup of dust and gunk can turn your needle into a tiny record-destroying monster.

Here’s a little hack I stumbled upon: try using a slipmat. These thin mats sit between your record and the platter, helping to reduce vibrations.

I’ve even seen some vinyl enthusiasts use old mousepads as DIY slipmats. Get creative!

Another tip: be mindful of where you place your suitcase turntable. Avoid putting it on uneven surfaces or near sources of vibration (like speakers or subwoofers).

I once made the mistake of setting up my player on a wobbly coffee table – let’s just say it didn’t end well for the record I was playing.

Lastly, consider using your suitcase turntable strategically. Maybe save it for more casual listening sessions or when you need portability, and invest in a higher-quality setup for your prized records and serious listening time.

Remember, while these tips can help, they’re not miracle workers. If you’re really concerned about preserving your vinyl collection, you might want to consider exploring some alternatives…

Alternatives to Suitcase Turntables for Better Vinyl Preservation

Cozy room featuring entry-level audiophile and vintage turntables connected to external speakers, highlighting better options for vinyl preservation.

Alright, let’s say you’ve decided that maybe a suitcase turntable isn’t the best long-term solution for your vinyl addiction (trust me, I’ve been there). What are your options?

Don’t worry, I’ve got some ideas that won’t require selling a kidney!

First up, let’s talk about entry-level audiophile turntables. Now, I know the word “audiophile” might sound scary (and expensive), but hear me out.

There are some really solid options out there that won’t break the bank. Brands like Audio-Technica, Pro-Ject, and U-Turn offer turntables that are a significant step up from suitcase players in terms of sound quality and record preservation.

I remember when I finally bit the bullet and upgraded to my first “real” turntable. It was like hearing my records for the first time all over again!

The improvement in sound quality was mind-blowing, and I felt so much better knowing my vinyl was being treated right.

Now, if you’re feeling adventurous (and maybe a little handy), consider exploring the world of vintage turntables. You can often find some real gems at thrift stores, flea markets, or online marketplaces.

With a little TLC and maybe some modern upgrades (like a new cartridge), these oldies can be absolute goodies.

I once scored a beautiful 70s Pioneer turntable for a steal at a garage sale. It needed some work, but after a good cleaning and a new stylus, it became my pride and joy.

There’s something special about bringing an old player back to life!

But what if you’re still craving that portability factor? Fear not!

There are some higher-quality portable options out there that strike a balance between convenience and sound quality. Look for models with adjustable counterweights, replaceable cartridges, and better build quality overall.

One thing to keep in mind: if you’re upgrading from a suitcase player, you might need to invest in some additional components like a phono preamp or powered speakers. It can seem a bit overwhelming at first (believe me, I’ve been there), but the improvement in sound quality and peace of mind for your records is totally worth it.

Remember, the goal here isn’t to shame anyone for using a suitcase turntable. We all start somewhere!

But if you’re finding yourself increasingly passionate about vinyl and want to ensure your collection stays in tip-top shape, exploring these alternatives can be a game-changer.

Conclusion

Whew! We’ve covered a lot of ground here, haven’t we?

From the potential risks of suitcase turntables to ways of minimizing damage and exploring alternatives, it’s been quite a journey. And let me tell you, it’s a journey I’ve lived through myself!

Here’s the bottom line: while suitcase turntables can be a fun and convenient entry point into the world of vinyl, they do come with some risks to your records. The combination of lower-quality components, lack of adjustability, and potential for excessive wear means they’re not ideal for serious collectors or anyone looking to preserve their vinyl for the long haul.

But hey, don’t panic if you’ve been using one! The damage isn’t instantaneous, and with some care and attention, you can minimize the risks.

Whether you decide to stick with your suitcase player (with some tweaks) or upgrade to a more robust setup, the most important thing is that you’re enjoying your music.

Remember, vinyl isn’t just about pristine sound quality – it’s about the experience, the ritual, and the connection to the music. Whatever setup you choose, make sure it brings you joy and allows you to fully appreciate your records.

I’d love to hear about your experiences with suitcase turntables or any other vinyl-related adventures you’ve had. Drop a comment below and let’s keep the conversation going!

And hey, if you’ve got any killer tips for preserving records that I didn’t mention, share ’em with the class!

Now, if you’ll excuse me, I’ve got some records to spin. Happy listening, folks!

Do I Need an Amplifier for My Turntable?

Ah, the sweet sound of vinyl! It’s crazy how these black discs have made such a comeback.

Did you know that vinyl record sales hit a 30-year high in 2021, with over 41 million units sold? It’s like we’ve gone back in time, but with better technology.

The resurgence of vinyl has brought with it a whole new generation of music lovers discovering the joys (and quirks) of analog sound. But if you’re new to the vinyl game, you might be wondering about all the gear you need to get your tunes spinning.

One question that often pops up is whether you need an amplifier for your turntable. Well, buckle up, because we’re about to dive into the world of analog audio and figure this out together!

Do I Need an Amplifier for My Turntable?

A cozy room setup with a modern turntable, amplifier, and bookshelf speakers, emphasizing the role of the amplifier in enhancing the vinyl experience.

In most cases, yes, you need an amplifier for your turntable. The signal from a turntable’s cartridge is typically too weak to directly drive speakers.

An amplifier boosts this signal to a level that can power your speakers and fill your room with those sweet vinyl vibes. However, there are some exceptions and alternatives that we’ll explore more deeply below.

The key is understanding your specific turntable and the rest of your audio setup. Now, I remember when I first got into vinyl.

I was so excited to play my first record that I just plugged everything in without thinking. Let me tell you, the sound that came out was so quiet, I thought I’d broken something!

That’s when I learned the hard way about the importance of proper amplification. But don’t worry, I’m here to save you from making the same rookie mistakes I did!

Understanding Turntable Output Signals

Close-up of a turntable setup with RCA cables connected to a phono preamp and amplifier, illustrating the difference between phono and line signals.

Okay, so let’s get into the nitty-gritty of turntable signals. Trust me, it’s not as complicated as it sounds!

There are two main types of output signals you’ll encounter with turntables: phono-level and line-level. Phono-level signals are super weak – we’re talking millivolts here.

That’s why they need a special kind of amplification called a phono preamp. On the other hand, line-level signals are stronger and can be fed directly into a regular amplifier or powered speakers.

I remember the first time I heard about RIAA equalization. I was like, “What the heck does a music industry association have to do with my turntable?”

Turns out, it’s all about making sure those tiny grooves in your records can actually hold all the music info without the needle jumping out! The phono preamp applies this equalization to flatten out the sound.

Let me break it down a bit more. When records are made, the bass frequencies are reduced, and the treble frequencies are boosted.

This is done because bass takes up more physical space in the groove, and if it wasn’t reduced, the grooves would be too wide, and you couldn’t fit much music on a record. The treble is boosted to overcome noise that can occur during playback.

So, when you play a record, you need to reverse this process. That’s where RIAA equalization comes in.

It boosts the bass and reduces the treble to give you the sound as it was originally intended. Pretty cool, right?

Some turntables come with a built-in phono preamp, which is pretty handy. My first decent turntable had one, and it was a lifesaver!

But if yours doesn’t, don’t freak out. You’ve got options, my friend.

Types of Turntables and Their Amplification Needs

Side-by-side comparison of two turntables, one with a built-in preamp connected to powered speakers, and the other with an external preamp and amplifier setup.

Let’s break this down nice and simple. First, we’ve got turntables with built-in preamps.

These bad boys are ready to rock right out of the box. You can plug them directly into powered speakers or a regular amplifier.

It’s like the easy mode of turntable setups! Then there are turntables without built-in preamps.

These are the ones that’ll make you scratch your head if you don’t know what you’re doing. They need either an external phono preamp or an amplifier with a phono input.

It’s a bit more work, but some vinyl enthusiasts swear by the flexibility it offers. I’ve owned both types, and let me tell you, there are pros and cons to each.

The built-in preamp is super convenient, but sometimes you might want to upgrade your preamp for better sound quality. It’s all about finding what works for you and your ears!

Now, let’s talk about some specific examples. Entry-level turntables like the Audio-Technica AT-LP60X come with a built-in preamp.

These are great for beginners because you can just plug and play. On the other hand, higher-end turntables like the Pro-Ject Debut Carbon EVO don’t have a built-in preamp.

These are aimed at audiophiles who want to choose their own preamp to fine-tune their sound. Some turntables, like the Fluance RT81, give you the best of both worlds.

They have a built-in preamp, but also a switch to bypass it if you want to use an external one. Talk about flexibility!

The Role of Amplifiers in a Turntable Setup

Close-up of a high-quality amplifier connected to a turntable setup with glowing volume knobs and speakers, highlighting its role in boosting the audio signal.

Alright, so what’s the big deal with amplifiers anyway? Well, they’re like the unsung heroes of your audio setup.

They take that weak little signal from your turntable (or phono preamp) and beef it up so your speakers can actually do something with it. But it’s not just about making things louder.

A good amplifier can really make your music shine. It’s like the difference between looking at a painting with sunglasses on and seeing it in perfect lighting.

The details, the dynamics, the warmth of the sound – a quality amplifier brings all of that out. I’ll never forget the first time I upgraded from my cheap all-in-one system to a proper amplifier.

It was like hearing my records for the first time all over again! Suddenly, I could pick out individual instruments, and the bass… oh man, the bass was something else!

Let’s get a bit technical for a moment. Amplifiers have several important specifications that affect their performance.

There’s power output, measured in watts per channel. This determines how loud your system can go and how well it can handle dynamic peaks in the music.

Then there’s total harmonic distortion (THD), which measures how much the amplifier changes the signal. Lower is generally better here.

Signal-to-noise ratio (SNR) is another important spec – it tells you how much of what you’re hearing is music versus background noise. But here’s the thing – while these specs are important, they don’t tell the whole story.

Two amplifiers with identical specs on paper can sound quite different in practice. That’s why it’s always best to trust your ears if you can.

Factors to Consider When Deciding on an Amplifier

Modern home audio setup with multiple amplifiers, showcasing various options from entry-level to high-end, including tube, solid-state, and hybrid amplifiers.

Now, before you go running off to buy the fanciest amplifier you can find, let’s talk about what you need to consider. First up is budget.

Look, we’d all love to have top-of-the-line gear, but sometimes our wallets have other ideas. The good news is, you can get some pretty decent sound without breaking the bank.

Just don’t go too cheap – you might end up spending more in the long run replacing crappy equipment. For example, something like the Yamaha A-S301 is a great entry-level integrated amplifier that won’t break the bank.

If you’re on a super tight budget, you might look at something like the Fosi Audio BT20A. It’s not going to win any awards, but it’ll get the job done.

Next, think about space. I learned this one the hard way.

I once bought this monster of an amplifier, only to realize it wouldn’t fit on my tiny shelf. Measure twice, buy once, folks!

If space is at a premium, you might want to look at mini amplifiers like the NAD D 3020 V2. It’s got a small footprint but packs a punch.

Then there’s sound quality preferences. This is where things get personal.

Some people love the warm, fuzzy sound of tube amplifiers. Others prefer the clarity of solid-state amps.

It’s like choosing between smooth jazz and rock ‘n’ roll – there’s no right answer, just what sounds good to you. If you’re after that classic tube sound, something like the Willsenton R8 might be up your alley.

For solid-state fans, brands like Marantz and Cambridge Audio are worth checking out. And if you want to dip your toes into both worlds, there are hybrid amplifiers like the PrimaLuna EVO 100 that combine tubes and solid-state technology.

Lastly, consider future upgrades. Think about where you want your system to go in the future.

Maybe you want to add more sources or upgrade to better speakers down the line. A flexible amplifier can grow with your system.

Look for ones with multiple inputs, and maybe even features like Bluetooth or a DAC (Digital-to-Analog Converter) if you think you might want to add digital sources later. Remember, it’s okay to start small and work your way up.

Rome wasn’t built in a day, and neither is the perfect vinyl setup!

Alternative Solutions: Powered Speakers and Receivers

Cozy office setup with a modern turntable connected to powered speakers on one side and a vintage receiver on the other, showcasing alternative amplifier solutions.

Now, if all this talk about separate amplifiers is making your head spin, don’t worry! There are some simpler solutions out there.

Powered speakers are like the Swiss Army knives of audio gear. They’ve got built-in amplifiers, so you can plug your turntable (with a phono preamp) directly into them.

Bam! Instant vinyl setup. I’ve got a pair in my office, and they’re perfect for casual listening.

Some popular options in the powered speaker world include the Audioengine A5+ and the Kanto YU6. These both have built-in phono preamps, so you can plug your turntable directly into them.

The Klipsch R-51PM is another great option that even has a USB input if you want to connect your computer. Then there are receivers, which are like the multi-tool version of amplifiers.

They’ve usually got a phono input, a regular amplifier, and often a radio tuner all in one box. If you’re looking to set up a whole home audio system, a receiver can be a great way to go.

I remember helping my buddy set up his first vinyl rig with a vintage receiver we found at a thrift store. It was a bit of a gamble, but man, when we fired it up and heard that warm, vintage sound… pure magic!

Modern receivers like the Sony STR-DH190 or the Onkyo TX-8220 are great options if you want something new. They’ve got phono inputs, plenty of power, and often Bluetooth connectivity for when you want to stream from your phone.

But don’t discount vintage gear! Brands like Marantz, Pioneer, and Sansui made some killer receivers back in the day.

Just be prepared for a bit of maintenance – these old units often need a bit of TLC to get them running their best.

How to Choose the Right Amplifier for Your Turntable

Detailed audio setup with a turntable connected to an illuminated amplifier and speakers, emphasizing key factors like power output, phono input, and sound signature.

Okay, so you’ve decided to go for a separate amplifier. Good choice!

Here’s what you need to keep in mind: First up is power output. This needs to match your speakers.

Too little power, and you’ll be straining to hear anything. Too much, and you might blow your speakers (trust me, that’s not a fun sound).

As a general rule, you want an amplifier that can provide about 1.5 to 2 times the RMS power rating of your speakers. Next, check the inputs.

Make sure it’s got the right connections for your turntable and any other gear you want to hook up. If your turntable doesn’t have a built-in preamp, you’ll need an amp with a phono input.

If it does, any line-level input will do. Don’t forget about features.

Some amps come with built-in phono stages, Bluetooth, or even USB inputs. Think about what you’ll actually use.

It’s easy to get caught up in the bells and whistles, but if you’re not going to use them, they’re just driving up the price. The sound signature is crucial.

Like I mentioned before, different amps have different sounds. If you can, try before you buy.

Go to a hi-fi shop and listen to a few different models. Bring some of your favorite records if you can – you want to hear how the amp handles music you know well.

And finally, don’t forget to check out reviews. See what other vinyl lovers are saying.

But remember, everyone’s ears are different! What sounds great to one person might not work for you.

I once spent weeks agonizing over which amplifier to buy. I read every review, watched every YouTube video, and drove my local hi-fi shop crazy with questions.

In the end, I went with my gut (and my ears) and couldn’t be happier!

Setting Up Your Turntable with an Amplifier

Modern living room setup with a turntable connected to an amplifier and speakers, showing key setup details like phono input, ground wire, and speaker connections.

Alright, you’ve got your gear. Now let’s get this party started!

Here’s a quick guide to setting everything up: First things first, place your turntable on a stable, level surface. Trust me, you don’t want it jiggling around!

Vibrations can cause the needle to skip or even damage your records. If you can, put it on a different surface from your speakers to avoid feedback.

Next, you’ll want to connect your turntable to the phono input on your amplifier (or to a separate phono preamp if you’re using one). Use good quality RCA cables for this – they don’t have to be super expensive, but the really cheap ones can introduce noise into your system.

After that, it’s time to connect your speakers to the amplifier. Make sure you’ve got the right channel (left/right) going to the right speaker.

It’s an easy mistake to make, but it can really mess with your stereo imaging if you get it wrong. Use good speaker wire here – again, it doesn’t have to be the most expensive, but avoid the super thin stuff.

Once everything’s connected, plug it all in and power it up. Take a deep breath – you’re almost there!

Finally, the moment you’ve been waiting for. Put on a record, gently lower that needle, and let the music wash over you.

There’s nothing quite like hearing a favorite album on vinyl through a well-set-up system. One mistake I see a lot of newbies make is forgetting to connect the ground wire from the turntable to the amplifier.

If you hear a nasty hum, that’s probably why. Don’t be like past me – connect that ground wire!

Another tip: start with your amplifier volume low and gradually increase it. This protects your speakers (and your ears) from any sudden loud noises.

Conclusion

Whew! We’ve covered a lot of ground, haven’t we? From understanding the basics of turntable signals to choosing the right amplifier, you’re now armed with the knowledge to make your vinyl sing!

Remember, there’s no one-size-fits-all solution when it comes to turntable setups. What works for me might not work for you, and that’s okay!

The joy of getting into vinyl is experimenting, tweaking, and finding that perfect sound that makes your toes tap and your heart soar. Don’t be afraid to start simple and upgrade over time.

My first setup was pretty basic, but as I learned more and figured out what I liked, I gradually improved it. That’s half the fun of this hobby!

And hey, don’t forget about the importance of speaker placement and room acoustics. Even the best amplifier in the world can’t overcome poor speaker positioning or a room with terrible acoustics.

But that’s a topic for another day! So go forth and amplify!

And hey, if you’ve got any cool tips or tricks for setting up a turntable system, why not share them in the comments? We’re all in this vinyl adventure together!

Now, if you’ll excuse me, I’ve got some records to spin. Happy listening, folks!

Is It Bad To Leave A Vinyl Record On The Turntable? Protect Your Precious Vinyl

Hey there, fellow vinyl enthusiasts! Let’s talk about something that’s been bugging me lately – the age-old question of whether it’s okay to leave our beloved records on the turntable.

I mean, we’ve all done it, right?

You finish spinning that perfect album, and you think, “I’ll just leave it there for next time.” But is that really a good idea?

I’ve been collecting vinyl for years now, and let me tell you, I’ve made my fair share of mistakes. There was this one time I left my prized first pressing of “Rumours” on the platter for weeks.

When I finally went to play it again, I was horrified to find it warped and covered in dust. That was a wake-up call, let me tell you!

So, I decided to dive deep into this topic, drawing from my own experiences and chatting with other vinyl aficionados.

In this article, we’re going to explore why leaving your records on the turntable might not be the best idea, and what you can do to keep your vinyl in tip-top shape.

Trust me, your future self (and your records) will thank you for taking the time to learn about proper vinyl care!

Is It Bad To Leave A Vinyl Record On The Turntable?

A vinyl record left on a turntable with visible dust accumulation, illustrating the risks of leaving records exposed. Shelves of neatly stored records are in the background.

You bet it is! As a long-time vinyl enthusiast and collector, I’ve learned this lesson the hard way. Leaving a record on the turntable is like leaving your favorite book open and face-down on a dusty shelf – it’s just asking for trouble.

While it might seem convenient to keep that LP ready for your next listening session, doing so can lead to warping, dust accumulation, and even damage from constant stylus pressure. Trust me, I’ve ruined more than one prized record by being lazy about proper storage.

In this article, we’ll dive deep into why it’s a bad idea to leave your vinyl on the platter and explore better ways to care for your precious collection. But first, let’s get into the nitty-gritty of why this seemingly innocent habit can spell disaster for your records.

The Risks of Leaving Vinyl Records on Turntables

A vinyl record left on a turntable gathering dust, with a slightly warped edge, exposed to sunlight and heat. A hovering elbow hints at the risk of accidental scratches.

Oh boy, where do I even begin? Leaving your vinyl records on the turntable is like inviting a whole host of problems to your listening party.

Let me break it down for you based on my years of experience (and mistakes):

Dust accumulation: You wouldn’t believe how quickly dust can settle on an exposed record! I once left my favorite Beatles album on the platter for a week, and when I came back, it looked like it had aged 20 years.

Dust particles can work their way into the grooves, causing that annoying crackling sound we all hate. And let me tell you, getting that dust out is no picnic!

Warping: This is the big one, folks. I learned about warping the hard way when I left a limited edition pressing on my turntable during a heatwave.

The heat from the room caused the vinyl to warp, and now it sounds like I’m listening to music underwater. Vinyl is sensitive to temperature changes, and leaving it exposed on the platter can lead to uneven heating and cooling, resulting in that dreaded warp.

Stylus pressure damage: Here’s something I didn’t realize until I ruined a perfectly good copy of “Dark Side of the Moon” – constant pressure from the stylus can actually damage the grooves over time. Even if your tonearm is perfectly balanced, leaving it in contact with the record for extended periods can cause wear in that specific spot.

It’s like when you sleep in the same position all night and wake up with a crick in your neck – except your record doesn’t recover as easily.

Accidental scratches: I’ll admit it – I’m clumsy. And leaving records out on the turntable is just asking for trouble for someone like me.

Whether it’s a stray elbow while dusting or an overeager cat (yes, that happened), exposed records are vulnerable to all sorts of accidental damage. I once knocked a can of soda onto a record I’d left out, and let’s just say cola and vinyl don’t mix well.

The bottom line is, leaving your records on the turntable is a risky business. It might seem convenient at the moment, but trust me, the potential damage isn’t worth it.

I’ve learned to always return my records to their sleeves after playing, no matter how tired I am or how sure I am that I’ll play it again tomorrow. Your future self (and your records) will thank you!

Proper Vinyl Record Storage Techniques

A neatly organized vinyl record collection stored upright with protective plastic outer sleeves and poly-lined inner sleeves. A dehumidifier and microfiber cloth are visible for humidity control and cleaning.

Alright, let’s talk about keeping those precious vinyl babies safe and sound! After years of trial and error (and a few tears shed over damaged records), I’ve got some tried-and-true techniques for you:

Vertical storage is your friend: I used to stack my records horizontally, thinking it was no big deal. Boy, was I wrong!

Stacking puts too much weight on the bottom records, leading to warping and groove damage. Now, I keep all my records standing upright, like books on a shelf.

It takes up more space, sure, but it’s worth it to keep my collection in top shape.

Clean sleeves are a must: This might sound obvious, but you’d be surprised how many people (including past me) neglect their sleeves. I make sure to use high-quality inner sleeves – those paper ones that come with the records are okay, but they can leave dust and paper residue on your vinyl.

I switched to poly-lined inner sleeves a few years back, and the difference is night and day. And don’t forget about the outer sleeves!

A good plastic outer sleeve protects against dust and minor spills.

Temperature and humidity control is crucial: I learned this lesson the hard way when I stored my records in a damp basement. The warping and mold were nightmarish!

Now, I keep my collection in a cool, dry place. Aim for a room temperature around 65-70°F (18-21°C) and humidity between 45-50%.

I invested in a small dehumidifier for my record room, and it’s been a game-changer.

Handling tips to live by: Okay, confession time – I used to grab records by the playing surface like I was palming a basketball. Cringe, I know!

Now, I handle them like they’re made of glass. Always hold records by the edges and the label area.

And for Pete’s sake, make sure your hands are clean! I keep a microfiber cloth nearby to wipe any fingerprints off the surface gently.

Regular cleaning is key: Even with proper storage, records can still accumulate dust over time. I’ve made it a habit to give each record a quick once-over with a carbon fiber brush before and after playing.

For deeper cleaning, I use a record cleaning solution and a microfiber cloth, but be careful – too much liquid can seep into the label or even the grooves.

Consider a record weight: This is a bit of an advanced tip, but using a record weight or clamp can help flatten slight warps and improve playback. Just be sure your turntable can handle the extra weight!

Remember, proper storage isn’t just about preserving your records – it’s about preserving the music and memories they hold. I’ve got albums that have been with me for decades, and they still sound fantastic because I’ve learned to take care of them properly.

Trust me, your future self will thank you for the effort you put into storage now!

Turntable Maintenance for Vinyl Longevity

A vinyl turntable undergoing maintenance with a soft brush cleaning the platter and tonearm, a stylus brush cleaning the stylus, and a bubble level used for calibration.

Let’s chat about keeping that turntable in tip-top shape! I’ve learned (sometimes the hard way) that a well-maintained turntable is just as important as properly stored records.

Here’s what I’ve picked up over the years:

Regular cleaning is non-negotiable: Dust is the enemy, folks! I make it a point to give my turntable a good once-over at least once a week.

I use a soft, anti-static brush to gently sweep away any dust from the platter, tonearm, and other surfaces. And don’t forget about the dust cover – keeping it clean helps prevent dust from settling on your records during playback.

Stylus care is crucial: Oh boy, did I learn this one the hard way! I once went way too long without cleaning my stylus, and the buildup of gunk was affecting my sound quality big time.

Now, I use a stylus brush (very gently!) after every few plays. For a deeper clean, I use a specialized stylus cleaning fluid about once a month.

Just remember – always brush from back to front, never side to side!

Calibration checks keep things humming: I used to think that once I set up my turntable, I was good to go forever. Wrong!

Over time, things can shift slightly out of whack. Now, I check my tonearm balance and tracking force every few months.

It’s a bit fiddly at first, but it makes a world of difference in sound quality and record wear.

Dust cover usage – a delicate balance: I used to always play records with the dust cover down, thinking I was protecting them. Turns out, this can actually cause issues with resonance and even increase static!

Now, I keep the cover up while playing (to reduce resonance) but always close it when I’m done to keep dust out.

Belt check for belt-drive turntables: If you’ve got a belt-drive turntable like I do, don’t forget to check the belt occasionally. They can stretch or wear out over time, affecting playback speed.

I replace mine every couple of years just to be safe.

Level playing field: I once noticed some weird playback issues and eventually realized my turntable wasn’t perfectly level! Now, I check the level every so often with a bubble level.

It’s a small thing, but it can make a big difference.

Keep it cool: I learned the hard way that electronics and heat don’t mix well. I make sure my turntable has plenty of ventilation and isn’t sitting in direct sunlight or near a heat source.

Cartridge alignment – the unsung hero: This is a bit advanced, but getting your cartridge properly aligned can significantly improve sound quality and reduce record wear. I use an alignment protractor every six months or so to make sure everything’s still in the sweet spot.

Remember, a little regular maintenance goes a long way in preserving both your turntable and your vinyl collection. I know it might seem like a lot, but once you get into the habit, it becomes second nature.

And trust me, when you drop the needle on a perfectly maintained system and hear that crystal-clear analog sound, you’ll know it’s all worth it!

Best Practices for Playing and Storing Vinyl Records

A neatly organized vinyl collection stored vertically on a shelf, with a carbon fiber brush cleaning a record. A record sleeve and a hygrometer are visible, emphasizing proper storage and care.

Alright, vinyl lovers, gather ’round! After years of fumbling my way through record collecting, I’ve finally nailed down some solid practices for playing and storing these precious platters.

Let me share my hard-earned wisdom with you:

Pre-play cleaning ritual: I always, always give my records a quick once-over with a carbon fiber brush before dropping the needle. It’s amazing how much dust can accumulate even in a clean sleeve!

This little habit has saved me from many a crackle and pop.

Post-play routine – don’t slack off!: I used to be guilty of leaving records out after playing, thinking I’d get back to them later. Big mistake!

Now, no matter how tired I am, I always return the record to its sleeve immediately after playing. Future me always appreciates it.

Storage rotation – keep ’em moving: I noticed that some of my less-played records were getting a bit… well, stuck in their ways. Now, I try to rotate my storage every few months.

It helps prevent warping from prolonged pressure in one spot.

Collection organization – find your groove: I used to have a chaotic “system” that only I understood. These days, I keep things alphabetical by artist, with a separate section for compilations and soundtracks.

Find what works for you, but trust me, some sort of system is a lifesaver when your collection grows!

Handle with care – every time: I cringe when I think about how I used to manhandle my records. Now, it’s edges and label area only, folks!

And clean hands are a must – I keep a microfiber cloth nearby for quick wipes.

Invest in quality inner sleeves: Those paper sleeves that come with records? They’re not doing you any favors. I switched to poly-lined inner sleeves a few years back, and it’s made a world of difference in keeping my records clean and static-free.

Outer sleeves for extra protection: I used to think outer sleeves were just for fancy collectors. Now, I use them for all my records.

They protect against dust, minor spills, and that annoying yellowing that can happen to album covers over time.

Temperature and humidity – be vigilant: I learned this one the hard way after storing some records in a damp basement. Now, I keep a hygrometer in my record room to monitor conditions.

Aim for around 65-70°F and 45-50% humidity.

Vertical storage is key: Stacking records horizontally is tempting when space is tight, but resist! Vertical storage prevents warping and keeps your records happy.

Regular deep cleaning sessions: Even with good habits, records can accumulate grime over time. I do a deeper clean with a proper record cleaning solution every few months, especially for my most-played albums.

Mind your tracking force: I used to think heavier tracking meant better sound. Wrong!

Too much force can damage your records over time. I check my tonearm’s tracking force regularly to keep it in the sweet spot.

Be mindful of static: Static electricity is the silent record killer. I use an anti-static gun before playing particularly troublesome records, and it’s like magic!

Know when to retire a record: This one’s tough, but sometimes you gotta know when to let go. If a record is severely damaged or worn, continuing to play it can damage your stylus.

I’ve had to retire a few beloved albums to “display only” status over the years.

Remember, these practices aren’t just about preserving the physical records – they’re about preserving the joy of listening to vinyl. There’s nothing quite like dropping the needle on a well-cared-for record and hearing it sound as good as the day you bought it.

Happy listening, folks!

Conclusion

Whew! We’ve covered a lot of ground, haven’t we? From the perils of leaving records on turntables to the nitty-gritty of proper storage and maintenance.

As we wrap up, I can’t help but reflect on my own journey with vinyl – the mistakes made, lessons learned, and the pure joy that comes from a well-cared-for record collection.

Remember, taking care of your vinyl isn’t just about preserving a physical object. It’s about preserving the music, the memories, and the unique experience that only vinyl can provide.

Each record in your collection is a little time capsule, holding not just music, but moments of your life.

I encourage you to take these tips and make them your own. Experiment with different cleaning methods, find a storage system that works for your space, and most importantly, keep enjoying your records!

The beauty of vinyl is in its tactile, involved nature – caring for your collection is part of the experience.

And hey, don’t be too hard on yourself if you make mistakes along the way. We all do!

I’ve certainly had my share of facepalm moments (like the time I tried to clean a record with dish soap… don’t ask). The important thing is to learn and keep improving your vinyl care game.

Lastly, I’d love to hear from you! What are your tried-and-true vinyl care tips?

Any horror stories or triumphs you’d like to share? Drop a comment below and let’s keep the conversation going.

After all, the vinyl community is all about sharing knowledge and experiences.

Now, if you’ll excuse me, I’ve got some records to listen to – properly stored and cared for, of course! Happy spinning, everyone!

Do I Need a Receiver for My Turntable? A Complete Guide

The resurgence of vinyl has brought with it a wave of nostalgia and a renewed appreciation for analog sound. But for many newcomers to the world of turntables, the complexity of audio setups can be overwhelming.

One question that often comes up is whether a receiver is necessary for a turntable setup. Let’s dive into this topic and clear up any confusion!

Do I Need a Receiver for My Turntable?

A modern turntable setup with powered speakers on a minimalist desk, showcasing a simple audio system without a receiver.

In most cases, you do need a receiver for your turntable, but there are exceptions. If you have a turntable with a built-in preamp, you can connect it directly to powered speakers without a receiver.

However, for traditional turntables without a built-in preamp, a receiver (or an alternative like a separate phono preamp) is necessary to boost and equalize the signal before sending it to speakers. The choice ultimately depends on your specific turntable model and desired audio setup.

Stick around as we explore this topic in more depth, covering everything you need to know about turntables, receivers, and the alternatives available!

Now, let’s break down the details to help you understand exactly what you need for your vinyl setup.

What is a Receiver and Its Role in a Turntable Setup?

A close-up of a traditional audio receiver connected to a turntable, showing various knobs and input ports, with warm nostalgic lighting.

Alright, let’s start with the basics. A receiver is like the command center of your audio system.

It’s that big box with all the knobs and buttons that you might’ve seen in your parents’ or grandparents’ living room. Trust me, I’ve spent countless hours fiddling with my dad’s old receiver, trying to get the perfect sound!

A receiver typically performs several main functions. First, it amplifies the audio signal from your turntable (or other sources) to power your speakers.

It also allows you to switch between different audio sources, like your turntable, CD player, or radio. Additionally, it provides tone controls for adjusting bass and treble, letting you fine-tune your sound.

But here’s the kicker – not all turntables need a receiver to work. It all depends on the type of turntable you have and the kind of setup you’re going for.

Let me tell you, I learned this the hard way when I bought my first turntable and couldn’t figure out why it wasn’t working with my computer speakers!

The primary reason many turntables need a receiver is because of something called RIAA equalization. When vinyl records are made, the bass frequencies are reduced, and the treble frequencies are boosted.

This is done to allow for longer playing times and to prevent the needle from jumping out of the groove. The receiver’s phono preamp applies the necessary equalization to restore the proper balance of frequencies.

Without this equalization, your music would sound thin and tinny.

Types of Turntables: Built-in Preamp vs. External Preamp

A side-by-side comparison of two turntable setups, one with a built-in preamp connected to powered speakers and the other using an external preamp and receiver.

Now, this is where things get a bit technical, but stick with me – I promise it’ll make sense!

There are two main types of turntables. First, we have turntables with a built-in preamp.

These bad boys are like the Swiss Army knives of the turntable world. They have a preamp built right in, which means they can connect directly to powered speakers or a regular amplifier.

No receiver needed! When I discovered these, it felt like a revelation.

Suddenly, my vinyl setup became so much simpler.

The built-in preamp does all the necessary amplification and RIAA equalization internally. This means you can plug these turntables directly into any line-level input (like the AUX or CD input) on a stereo system or powered speakers.

It’s a great option for beginners or those who want a more streamlined setup.

However, there’s a trade-off. Built-in preamps are generally not as high-quality as separate components.

If you’re an audiophile looking for the absolute best sound quality, you might find the built-in preamp limiting.

On the other hand, we have turntables without a built-in preamp. These are the more traditional types.

They output a very weak signal that needs to be boosted and equalized before it can be amplified. This is where a receiver with a phono input comes in handy.

Or, you can use a separate phono preamp. I remember the first time I connected one of these to a regular amplifier without a phono preamp – all I got was a faint, tinny sound.

Not exactly the rich vinyl experience I was hoping for!

These turntables offer more flexibility and potentially higher sound quality. You can choose a high-quality external preamp that matches your preferences and budget.

As you upgrade your system over time, you can swap out components without needing to replace the entire turntable.

Some turntables even offer the best of both worlds – they have a built-in preamp that can be bypassed if you want to use an external one. Talk about flexibility!

Alternatives to Traditional Receivers

A comparison of alternatives to traditional receivers for turntable setups, showcasing an integrated amplifier, powered speakers with phono input, and an all-in-one turntable system.

Okay, so what if you don’t want to shell out for a full-blown receiver? Don’t worry, I’ve got you covered.

There are a few alternatives that can get you spinning vinyl without breaking the bank.

First up, we have integrated amplifiers. These are like receivers without the radio tuner.

They’re great if you’re just focused on playing records and don’t need all the extra bells and whistles. An integrated amp combines a preamp and power amp in one unit.

Many modern integrated amps come with a phono stage built-in, making them perfect for turntable setups.

I remember when I upgraded from a receiver to an integrated amp – the improvement in sound quality was noticeable. The focused design often results in better performance for the price.

Another option is powered speakers. Some powered speakers have a phono input, which means you can connect your turntable directly to them.

It’s a compact solution that’s perfect for small spaces. I used this setup in my college dorm room, and let me tell you, it was a game-changer!

Powered speakers have built-in amplifiers, so you don’t need a separate amp. Some even have Bluetooth connectivity, allowing you to easily switch between vinyl and digital sources.

Just be aware that not all powered speakers have a phono input – make sure to check before you buy.

If you’re looking for more flexibility, consider using a phono preamp with active speakers. This setup allows you to use a small phono preamp to boost the turntable’s signal, then connect it to any powered speakers or audio system.

This approach allows you to mix and match components. You could start with a budget phono preamp and upgrade later without needing to replace your whole system.

Plus, it’s a great way to add turntable compatibility to an existing audio setup.

Lastly, we have all-in-one turntable systems. These systems include everything you need in one package – turntable, preamp, amplifier, and speakers.

They’re super convenient and great for beginners or those with limited space.

I got one of these for my mom, who wanted to listen to her old records but didn’t want to deal with a complicated setup. She loves it!

Just keep in mind that you’re trading some sound quality and upgrade potential for convenience.

Factors to Consider When Deciding on a Receiver

A receiver displayed on a modern shelf, with icons representing factors like budget, space, sound quality, and features such as Bluetooth and multi-room audio.

Alright, so you’re thinking about getting a receiver. Here are a few things to keep in mind.

First and foremost, consider your budget. Receivers can range from affordable to “holy cow, that costs more than my car!”

Figure out what you’re comfortable spending. Trust me, I’ve been tempted by those high-end models, but my wallet usually brings me back to reality!

Remember, you don’t always get what you pay for in audio. Sometimes, a mid-range receiver can sound just as good as a high-end one to most ears.

It’s all about finding the sweet spot between price and performance.

Next, think about space. Receivers can be bulky.

Make sure you have room for it in your setup. I once bought a receiver that was too big for my shelf, and let’s just say it didn’t end well for my toes!

Consider the ventilation needs too. Receivers can generate a lot of heat, so they need space to breathe.

If you’re tight on space, you might want to consider one of the alternative options we discussed earlier.

Sound quality is another crucial factor. If you’re an audiophile, you might want to invest in a higher-quality receiver.

But if you’re just starting out, a basic model will probably do just fine.

Pay attention to specifications like Total Harmonic Distortion (THD) and Signal-to-Noise Ratio (SNR). Lower THD and higher SNR generally mean better sound quality.

But don’t get too hung up on specs – trust your ears!

It’s also worth thinking about future expansion. Consider whether you might want to add more components to your system down the line.

A receiver with multiple inputs can give you more flexibility in the future.

For example, you might want to add a CD player, a streaming device, or even a second turntable later. Having extra inputs will save you the hassle of constantly unplugging and re-plugging devices.

Don’t forget about features. Modern receivers come with a variety of bells and whistles.

Do you need Bluetooth connectivity? How about multi-room audio?

4K video passthrough for a home theater setup?

I once bought a receiver with a ton of features I thought I’d use, only to realize I only ever used about 10% of them. Be honest with yourself about what you’ll actually use to avoid paying for features you don’t need.

Last but not least, consider compatibility. Make sure the receiver you choose is compatible with your other equipment.

Check the power output against your speakers’ requirements, and ensure it has the right types of inputs for all your devices.

I learned this lesson the hard way when I realized my new speakers were 4 ohms and my receiver could only handle 8 ohm speakers safely. Always double-check these details!

How to Connect a Turntable to a Receiver

A close-up of RCA cables being connected to a receiver's 'Phono' input with a grounding wire, showing a step-by-step process of connecting a turntable to a receiver.

Okay, let’s get down to the nitty-gritty of connecting your turntable to a receiver. First, you’ll want to look for the “Phono” input on your receiver.

It’s usually labeled pretty clearly.

Next, you’ll connect the RCA cables from your turntable to this input. The red plug goes to the red input, and the white (or black) plug goes to the white input.

If your turntable has a grounding wire (it looks like a thin, exposed wire), connect it to the grounding post on the receiver. This helps reduce humming.

Finally, select the “Phono” input on your receiver, and you’re good to go! I remember the first time I did this – I was so nervous about messing it up.

But once I got it right, and that first record started playing… man, it was magic!

If your turntable has a built-in preamp, or if you’re using a separate phono preamp, you’ll connect to a standard line-level input instead (like CD or AUX). In this case, make sure any built-in preamp is switched on, or that your external preamp is connected between the turntable and the receiver.

A quick tip: Always make sure your receiver is turned off when connecting or disconnecting components. This prevents any loud pops or potential damage to your speakers.

Troubleshooting Common Issues

An illustration of common turntable issues, including no sound, grounding wire buzzing, imbalanced channels, and skipping, along with visual troubleshooting solutions.

Even with the best setup, things can sometimes go wrong. Let’s talk about a few common issues and how to fix them.

First up is the dreaded “no sound” problem. If you’re not getting any audio, start by checking all your connections and make sure you’ve selected the right input on your receiver.

If you’re using a turntable with a built-in preamp, make sure it’s switched on. Also, check if your receiver’s mute function is activated.

Buzzing or humming is another common issue. This is often a grounding problem.

Make sure your grounding wire is connected properly. If the problem persists, try connecting the grounding wire to different metal parts of your receiver.

Sometimes, electrical interference from other devices can cause humming – try moving your turntable away from other electronics.

Channel imbalance, where one speaker is louder than the other, can be frustrating. Start by checking your connections and the balance control on your receiver.

It could also be an issue with your turntable’s cartridge alignment or the tonearm’s anti-skate setting.

If you’re experiencing skipping or distortion, this could be due to a worn needle, improper turntable setup, or even a warped record. Check your stylus for wear and make sure your turntable is on a level surface.

If it’s just one record causing issues, it might be time to clean it or replace it if it’s too damaged.

Lastly, speed issues can make your records sound too fast or too slow. If you’re experiencing this, your turntable’s speed might need adjusting.

Many turntables have fine speed adjustments hidden under the platter.

I’ve dealt with all of these at one point or another. The buzzing issue drove me crazy for weeks until I realized I had forgotten to connect the grounding wire.

Don’t be like me – check the simple things first!

Remember, vinyl playback involves a lot of precise mechanical processes. Regular maintenance of your turntable, including proper cleaning and occasional cartridge alignment checks, can prevent a lot of these issues.

Conclusion

So, do you need a receiver for your turntable? As we’ve seen, it really depends on your specific setup and needs.

If you have a turntable with a built-in preamp, you might be able to skip the receiver altogether. But if you’re working with a traditional turntable, a receiver (or one of the alternatives we discussed) can be a crucial part of your vinyl listening experience.

Remember, there’s no one-size-fits-all solution. The best setup is the one that works for you, your space, and your budget.

Don’t be afraid to experiment and ask for advice from other vinyl enthusiasts. And most importantly, enjoy the music!

Setting up a turntable system can seem daunting at first, but it’s also incredibly rewarding. There’s something special about the ritual of putting on a record, dropping the needle, and hearing those first crackles before the music starts.

It’s a physical, tangible connection to the music that you just don’t get with digital formats.

As you dive deeper into the world of vinyl, you’ll discover that it’s not just about the music – it’s about the experience. The large album artwork, the liner notes, the weight of the record in your hands – it all adds to the enjoyment.

And let’s not forget the thrill of crate-digging in record stores, hunting for that rare pressing or discovering a new favorite album.

Whether you’re rescuing your parents’ old records from the attic or building a collection from scratch, remember that the most important thing is to have fun with it. Don’t get too caught up in having the “perfect” setup – even a basic system can provide hours of listening pleasure.

Hey, why not share your own turntable setup in the comments? I’d love to hear about what’s working for you, or help troubleshoot if you’re having any issues.

After all, we vinyl lovers gotta stick together! And who knows?

Maybe your setup will inspire someone else to start their own vinyl journey. Happy listening, everyone!

How to Connect a Turntable to a Receiver Without Phono Input: A Step-by-Step Guide

Hey there, vinyl enthusiasts! Ready to dive into the world of connecting turntables to receivers without phono inputs?

Buckle up, because we’re about to embark on a groovy journey through the ins and outs of getting your record player hooked up to just about any modern audio setup.

Trust me, I’ve been there – staring at my shiny new turntable and a receiver that looks like it’s speaking a different language.

But fear not! I’ve got your back, and by the end of this guide, you’ll be spinning those records like a pro.

How To Connect Turntable To Receiver Without Phono Input

A vintage turntable connected to a modern receiver without a phono input, with thin sound waves symbolizing the weak signal. Vinyl records are stacked nearby in a cozy, ambient-lit setup.

Connecting a turntable to a receiver without a phono input isn’t as tricky as it sounds! I’ve been there, scratching my head over those mysterious connections.

Here’s the deal: you’ll need a phono preamp. It’s this nifty little device that boosts the turntable’s weak signal and applies the necessary equalization.

Just plug your turntable into the preamp, then connect the preamp to any standard input on your receiver (like AUX or CD). Voila! You’re ready to spin those records.

Don’t worry, we’ll dive into all the juicy details below, but that’s the gist of it. Now, let’s get into the nitty-gritty of making your vinyl sing through any modern receiver!

What is a Phono Input and Why It Matters

Modern vinyl turntable setup connected to a receiver without a phono input, showing troubleshooting with manuals and connection diagrams nearby. Vinyl records are stacked in a cozy, well-lit space.

Alright, let’s break this down. A phono input isn’t just some fancy-pants audiophile term – it’s actually pretty crucial when it comes to playing vinyl.

See, back in the day, every receiver worth its salt had a phono input. But times change, and so does technology.

So, what’s the big deal? Well, the signal that comes straight off a turntable is super weak.

Like, whisper-in-a-hurricane weak. A phono input is specially designed to boost that signal and apply something called RIAA equalization.

Without getting too nerdy, this equalization basically makes sure your records sound the way they’re supposed to.

I remember the first time I tried to plug my dad’s old turntable directly into a regular input on my fancy new receiver. Let’s just say it didn’t go well.

The sound was so quiet, I thought I’d broken something! That’s when I learned about the magic of phono inputs.

But here’s the rub – a lot of modern receivers don’t have phono inputs anymore. It’s like trying to find a payphone in 2024.

Sure, they exist, but good luck finding one when you need it!

This is where things get interesting. Just because your receiver doesn’t have a phono input doesn’t mean you’re out of luck.

There are workarounds, and I’m gonna show you how to use them. Trust me, by the time we’re done, you’ll be able to make any receiver play nice with your turntable, phono input or not!

The Problem: Connecting a Turntable to a Receiver Without Phono Input

Modern vinyl turntable setup connected to a receiver without a phono input, showing troubleshooting with manuals and connection diagrams nearby. Vinyl records are stacked in a cozy, well-lit space.

Okay, so you’ve got your shiny new turntable (or maybe a vintage gem), and you’re all set to dive into the warm, rich sound of vinyl. But wait! You look at the back of your receiver, and… no phono input.

Cue the sad trombone.

This is a problem I’ve faced more times than I care to admit. It’s like showing up to a potluck with a dish that requires an oven, only to find out there isn’t one.

Frustrating, right?

The issue here is pretty straightforward. Your turntable is putting out a signal that’s too weak and differently equalized for a standard input to handle properly.

It’s like trying to fill a swimming pool with a garden hose – technically possible, but not very effective.

This scenario is becoming more and more common these days. I mean, vinyl is making a comeback (heck, I’ve got more records now than I did in the ’80s!), but receiver manufacturers haven’t quite caught up.

They’re still living in the digital age, focusing on things like HDMI ports and Bluetooth connectivity.

I’ve seen this problem pop up in all sorts of situations. There was the time my nephew got his first turntable for Christmas, only to realize his parents’ sleek, modern sound system didn’t have a phono input.

Or when I decided to set up a record player in my office, only to remember that my compact desktop speaker system wasn’t exactly vinyl-friendly.

But don’t worry! This isn’t a deal-breaker. In fact, it’s an opportunity to get a little creative with your setup.

And let me tell you, there’s nothing quite like the satisfaction of getting your system up and running, especially when you’ve had to overcome a hurdle or two.

In the next sections, we’re going to look at a few different solutions to this problem. Whether you’re working with a budget setup or a high-end system, I’ve got you covered.

So, let’s roll up our sleeves and get that turntable connected!

Solution 1: Using a Phono Preamp

Close-up view of a phono preamp connected between a vinyl turntable and a receiver, with cables plugged into both. The setup is on a wooden surface with vinyl records nearby, in a cozy, well-lit space.

Alright, folks, let’s talk about the magic box that’s gonna solve our little phono input dilemma – the phono preamp. This little gizmo is about to become your new best friend in the world of vinyl playback.

So, what the heck is a phono preamp? Well, it’s basically a middleman between your turntable and your receiver.

It does the job that a phono input would do – amplifying that weak turntable signal and applying the RIAA equalization we talked about earlier. It’s like a translator that helps your turntable and receiver speak the same language.

Now, how do you use one of these bad boys? It’s pretty straightforward, even for a klutz like me. Here’s how it goes:

  1. Connect your turntable’s output cables to the input on the phono preamp.
  2. If your turntable has a ground wire (looks like a thin wire with a forked end), connect that to the ground terminal on the preamp.
  3. Connect the output of the phono preamp to any standard input on your receiver (AUX, CD, etc.).
  4. Plug in the preamp’s power supply.
  5. Turn everything on and start spinning those records!

Easy peasy, right? I remember the first time I set up a phono preamp.

I was so nervous I’d mess something up, but it turned out to be simpler than setting up my coffee maker!

Now, let’s talk about some phono preamps that won’t break the bank but will get the job done:

  1. Art DJ Pre II: This little guy is a workhorse. It’s affordable and does the job well.

I’ve recommended this to plenty of friends just starting out.

  1. Pro-Ject Phono Box DC: A step up in price, but it delivers clean, detailed sound. I use this one in my office setup.
  2. Schiit Mani: Don’t let the name fool you (though it’s fun to say). This American-made preamp punches way above its weight class.
  3. Cambridge Audio Duo: If you’re feeling fancy and have some extra cash, this one’s a beauty. It even has a headphone amp built in!

Remember, the key is to choose a preamp that fits your budget and needs. Don’t feel like you need to spend a fortune – even a basic preamp will be leagues better than no preamp at all.

I once made the mistake of buying a super expensive preamp for my entry-level turntable. Talk about overkill! It was like putting racing tires on a minivan.

Learn from my mistakes, folks – match your preamp to your setup.

With a phono preamp in place, you’ll be amazed at how good your vinyl can sound, even without a dedicated phono input on your receiver. It’s like unlocking a secret level in a video game – suddenly, everything sounds better!

Solution 2: Turntables with Built-in Preamps

A vinyl turntable with a built-in preamp connected directly to a receiver, with the 'PHONO/LINE' switch visible. The setup includes vinyl records nearby on a wooden surface, in a cozy, well-lit environment.

Alright, vinyl heads, let’s chat about another nifty solution to our phono input predicament – turntables with built-in preamps. These bad boys are like the Swiss Army knives of the turntable world.

They’ve got everything you need in one package!

So, what’s the deal with these all-in-one wonders? Well, they’re exactly what they sound like – turntables that have a phono preamp built right into them.

It’s like having a turntable and a preamp that decided to move in together and save on rent.

Now, let’s break down the pros and cons, because like my Aunt Mildred’s fruitcake, they’re not for everyone.

Advantages:

  1. Convenience: Just plug and play, baby! No need for extra boxes or cables.
  2. Space-saving: Great for tight setups. I once had a turntable with a built-in preamp in a tiny apartment, and it was a lifesaver.
  3. Cost-effective: Often cheaper than buying a separate turntable and preamp.

Disadvantages:

  1. Less flexibility: You’re stuck with the preamp you’ve got. No mixing and matching for that perfect sound.
  2. Potential quality compromise: Sometimes (not always) the built-in preamps aren’t as high-quality as separate units. It’s like those all-in-one TV dinners – convenient, but not always gourmet.
  3. Upgraditis: If you catch the audiophile bug (trust me, it’s contagious), you might find yourself wanting to upgrade your preamp down the line.

Now, how do you use these built-in preamp turntables? It’s easier than falling off a log! Here’s the lowdown:

  1. Look for a switch on your turntable labeled something like “PHONO/LINE” or “WITH PHONO/WITHOUT PHONO”.
  2. Flip that switch to the LINE position (or WITHOUT PHONO, depending on your model).
  3. Connect the turntable’s output cables directly to any standard input on your receiver (AUX, CD, etc.).
  4. Fire it up and let the good times roll!

I remember the first time I used a turntable with a built-in preamp. I spent an embarrassing amount of time looking for where to connect the non-existent external preamp before I realized I didn’t need one.

Don’t be like me – read the manual!

Now, let’s talk about some popular turntables with built-in preamps that won’t let you down:

  1. Audio-Technica AT-LP120XUSB: This is like the Swiss Army knife of turntables. Built-in preamp, USB output, the works.

I’ve recommended this to more friends than I can count.

  1. Sony PS-LX310BT: If you want to go wireless, this one’s got Bluetooth. I once used this at a party, and people couldn’t believe the sound was coming from a turntable!
  2. Pro-Ject Debut Carbon EVO: A bit pricier, but oh boy, does it deliver. The built-in preamp is no slouch either.
  3. Fluance RT81: A personal favorite. It’s got a warm, rich sound that’ll make you wonder why you ever bothered with digital.

Remember, the key is to find a turntable that fits your needs and budget. Don’t get suckered into buying features you’ll never use – it’s like buying a speedboat for your backyard kiddie pool.

Solution 3: Using a Stereo Preamp

A stereo preamp with a phono stage connected to a turntable and receiver, showing multiple inputs and connections. The setup includes vinyl records on a wooden surface in a cozy, ambient-lit space.

Alright, vinyl enthusiasts, we’re about to venture into slightly more advanced territory. Don’t worry, though – it’s not rocket science, just a bit of audio wizardry.

Let’s talk about using a stereo preamp to connect your turntable to a receiver without a phono input.

First off, what’s the difference between a phono preamp and a stereo preamp? Well, it’s kind of like the difference between a specialist doctor and a general practitioner.

A phono preamp is designed specifically for turntables, while a stereo preamp is a more general-purpose device that can work with various audio sources.

Here’s the kicker – some stereo preamps have a phono stage built in. It’s like finding out your Swiss Army knife also has a tiny espresso maker.

These are the ones we’re interested in.

So, how do you use a stereo preamp with a phono stage? Let’s break it down:

  1. Connect your turntable to the phono input on the stereo preamp.
  2. If your turntable has a ground wire, connect it to the preamp’s ground terminal.
  3. Connect the stereo preamp’s output to any standard input on your receiver.
  4. Power up the preamp and adjust the volume.
  5. Start spinning those records and bask in the audio goodness!

Now, when should you choose this option? Well, a stereo preamp with a phono stage can be a great choice if:

  1. You want flexibility to connect other audio sources.
  2. You’re looking to upgrade your overall audio setup, not just your turntable connection.
  3. You’ve got a bit more budget to play with and want higher-quality components.

I remember when I first used a stereo preamp with my turntable. I felt like a kid in a candy store with all the connections and settings.

Of course, I also managed to create a feedback loop that made a noise like an angry cyborg cat, but hey, live and learn, right?

Here are a few stereo preamps with phono stages that I’ve had good experiences with:

  1. Cambridge Audio AXA35: This little beauty has a great phono stage and plenty of inputs for other devices.
  2. Yamaha A-S301: A powerhouse that’ll handle your turntable and then some.
  3. NAD C 316BEE V2: Don’t let the alphabet soup name fool you – this is a solid performer.

Remember, using a stereo preamp is a bit more involved than the other solutions we’ve discussed. But if you’re looking to take your audio game to the next level, it can be a great option.

Just be prepared for a bit of trial and error. I once spent an entire afternoon tweaking settings on my stereo preamp, trying to get the perfect sound.

My wife thought I’d lost my marbles, but when she heard the result, even she had to admit it was worth it. (Though she still rolls her eyes when I start talking about audio equipment at parties.)

Troubleshooting Common Issues

A vinyl turntable setup with troubleshooting in progress, showing the ground wire connected to the preamp and cables being checked. Manuals and tools are visible in a cozy, well-lit workspace.

Alright, folks, let’s talk troubleshooting. Because let’s face it, sometimes things don’t go as smoothly as we’d like.

Don’t worry, though – I’ve made every mistake in the book, so you don’t have to!

First up, let’s tackle the dreaded ground loop hum. You know, that annoying buzz that sounds like a swarm of electronic bees decided to crash your listening party? Yeah, that one.

The most common cause of this is a grounding issue. Here’s how to fix it:

  1. Make sure your turntable’s ground wire is connected to the preamp or receiver’s ground terminal.
  2. If that doesn’t work, try connecting the ground wire to a different ground point.
  3. Still humming? Try a cheater plug (an adapter that removes the ground pin from your power cable). But be careful – this can be dangerous if not done properly.

I once had a persistent hum that drove me nuts for weeks. Turns out, I had my turntable set up too close to my router.

Who knew WiFi and vinyl didn’t mix?

Next up, let’s talk about low volume problems. If your music sounds like it’s coming from the bottom of a well, try these steps:

  1. Double-check that you’ve selected the correct input on your receiver.
  2. Make sure your preamp is turned on and the volume is up.
  3. If you’re using a turntable with a built-in preamp, check that the PHONO/LINE switch is set to LINE.

I once spent an embarrassing amount of time fiddling with cables and settings, only to realize I’d accidentally hit the mute button on my receiver. Face, meet palm.

Now, let’s address distortion issues. If your music sounds like it’s being played through a kazoo, try these fixes:

  1. Check your stylus (needle) for dust or damage. A quick clean can work wonders.
  2. Make sure your turntable is properly balanced and the tracking force is correct.
  3. If you’re using an external preamp, try adjusting its gain settings.

I learned about tracking force the hard way when I set up my first serious turntable. Let’s just say my records sounded like they were being played with a cactus until I got it right.

Remember, troubleshooting is all about patience and methodical testing. Don’t be afraid to reach out to manufacturer support or local audio shops if you’re stuck.

And whatever you do, resist the urge to throw your equipment out the window. Trust me, it doesn’t help (and it makes a terrible mess).

Optimizing Your Turntable Setup for Best Sound Quality

"A vinyl turntable setup optimized for sound quality, with the turntable level on a sturdy surface and isolated from speakers. A protractor and tracking force gauge are visible, alongside vinyl records and cleaning tools in a cozy, well-lit space.

Alright, audio aficionados, we’ve got our turntable connected and troubleshot. Now let’s talk about squeezing every last drop of audio goodness out of your setup.

Because let’s face it, if we’re going through all this trouble, we might as well make it sound amazing, right?

First things first – placement is key. Your turntable is like a diva; it needs the right stage to perform its best.

Here are some tips:

  1. Keep it level: Use a spirit level to make sure your turntable is perfectly flat. A tilted turntable is about as useful as a chocolate teapot.
  2. Isolation is your friend: Keep your turntable away from your speakers to avoid vibrations. I once had my turntable on the same shelf as my speaker, and it sounded like my records were being played underwater.
  3. Avoid direct sunlight: Unless you want your vinyl to do its best Salvador Dali impression, keep it out of the sun.

Next up, let’s talk about cartridge alignment and tracking force. These might sound like terms from a sci-fi novel, but they’re crucial for good sound.

Cartridge alignment: This is all about making sure your needle sits in the groove at the right angle. Use a protractor (you can print one online) to check the alignment.

It’s fiddly work, but worth it. The first time I aligned my cartridge properly, it was like someone had cleaned my ears out with Q-tips made of audio magic.

Tracking force: This is how heavily your stylus sits in the groove. Too light, and you’ll get distortion.

Too heavy, and you’ll wear out your records faster than a cat wears out a new scratching post. Follow your cartridge manufacturer’s recommendations, and invest in a tracking force gauge if you’re serious about your sound.

Now, let’s talk maintenance. A little TLC goes a long way in the world of vinyl:

  1. Clean your records: Invest in a good record cleaning solution and brush. Your records will thank you by not sounding like a bowl of Rice Krispies.
  2. Keep your stylus clean: A dirty stylus is like trying to listen to music through a sock. Use a stylus brush or cleaning gel regularly.
  3. Check your belt: If you have a belt-drive turntable, check the belt periodically for wear and tear. A stretched belt can make your music sound like it’s being played by a drunk DJ.

I learned the importance of maintenance the hard way when I pulled out my dad’s old records and tried to play them without cleaning. It sounded like someone was frying bacon in the background of every song.

Remember, optimizing your setup is an ongoing process. Don’t be afraid to experiment with different settings, and trust your ears.

After all, the goal is for the music to sound good to you, not to impress the audio snobs at the hi-fi store (though that can be fun too).

And hey, if all else fails, just crank up the volume and dance. Because at the end of the day, that’s what it’s all about, right?

Conclusion

Well, folks, we’ve come to the end of our vinyl voyage. We’ve navigated the treacherous waters of connecting turntables to receivers without phono inputs, troubleshot common issues, and even dipped our toes into the world of audio optimization.

It’s been quite a ride, hasn’t it?

Let’s recap our journey:

  1. We learned about phono inputs and why they matter.
  2. We explored three solutions to the no-phono-input problem:
  • Using a separate phono preamp
  • Opting for turntables with built-in preamps
  • Employing a stereo preamp with a phono stage
  1. We tackled common issues like ground loop hum, low volume, and distortion.
  2. And finally, we dove into optimizing our setup for the best possible sound quality.

Remember, there’s no one-size-fits-all solution in the world of audio. What works for one person might not work for another.

It’s all about finding what sounds best to your ears and fits your lifestyle.

I encourage you to experiment, to try different setups, and most importantly, to enjoy the process. There’s something magical about dropping the needle on a record and hearing that first crackle before the music starts.

It’s a ritual that connects us to the music in a way that clicking ‘play’ on a digital file just can’t match.

And hey, don’t be discouraged if things don’t sound perfect right away. Like I said, I’ve made every mistake in the book (and probably invented a few new ones).

Each hiccup is just an opportunity to learn something new about your setup.

So go forth and spin those records! Whether you’re rediscovering old favorites or exploring new sounds, there’s a whole world of music waiting for you.

And now, armed with the knowledge from this guide, you’re ready to tackle any connection conundrum that comes your way.

Remember, at the end of the day, it’s all about the music. So crank up the volume, settle into your favorite listening spot, and let the vinyl vibes wash over you.

Happy listening, everyone!

Oh, and one last thing – don’t forget to share your vinyl adventures in the comments below. Did you successfully connect your turntable? What’s your favorite record to test a new setup? Let’s keep the conversation going and build a community of vinyl enthusiasts.

After all, music is meant to be shared!

How to Align and Realign Your Turntable Cartridge: A Step-by-Step Guide

Hey there, vinyl enthusiasts! Ever put on your favorite record only to hear something just a bit… off?

Chances are, your turntable cartridge might be out of whack. Don’t worry, though – I’ve been there, and I’m here to help you get your tunes sounding crisp and clear again.

In this guide, I’ll walk you through the ins and outs of aligning and realigning your turntable cartridge.

Trust me, it’s not as daunting as it sounds, and the improvement in sound quality will blow your mind!

How To Align And Realign Your Turntable Cartridge

Close-up view of a turntable's cartridge being aligned using a protractor, with precision tools like a stylus force gauge and vinyl records nearby.

Aligning and realigning your turntable cartridge involves carefully adjusting its position on the tonearm to ensure optimal tracking of the record grooves. You’ll need a few tools, like an alignment protractor and a stylus force gauge.

Start by setting the cartridge in the headshell, then use the protractor to adjust the overhang and angle. Fine-tune the tracking force and azimuth for the best sound quality.

It’s a bit fiddly, but with patience, you’ll get it right! We’ll dive deeper into the process below, but that’s the gist of it.

Understanding Turntable Cartridge Alignment

Close-up view of a vinyl turntable's tonearm and cartridge riding in the grooves of a spinning record, with a slight tilt hinting at misalignment.

Alright, let’s get down to brass tacks. You know that little gizmo at the end of your turntable’s tonearm?

That’s your cartridge, and it’s the unsung hero of your vinyl setup. I remember when I first started collecting records – I had no clue how important this tiny component was!

The cartridge houses the stylus (aka the needle) that rides in your record’s grooves, translating those microscopic bumps and dips into sweet, sweet music. But here’s the kicker: if that cartridge isn’t aligned just right, it’s like trying to drive a car with misaligned wheels.

Sure, it’ll work, but it ain’t gonna be pretty.

Proper alignment is crucial for a few reasons. First off, it ensures that your stylus is hitting the groove at the correct angle.

This means you’re getting the most accurate sound reproduction possible. Secondly, it helps prevent excessive wear on both your records and your stylus.

Trust me, replacing a worn-out stylus or, worse, a damaged record, is no fun – been there, done that, got the t-shirt!

So, how do you know if your cartridge is misaligned? Well, there are a few telltale signs.

If you’re hearing distortion, especially in the high frequencies, that’s a red flag. Uneven wear on your stylus is another giveaway.

And if you’re noticing that your records are wearing out faster than they should, yep, you guessed it – misalignment could be the culprit.

I’ll never forget the time I realized my cartridge was out of whack. I was spinning my favorite jazz album, and suddenly, Miles Davis’s trumpet sounded more like a dying cat than the smooth, mellow tones I was used to.

That was my wake-up call, and it might be yours too!

Essential Tools for Cartridge Alignment

Essential tools for turntable cartridge alignment including an alignment protractor, stylus force gauge, small screwdriver, Allen wrenches, magnifying glass, and flashlight on a wooden surface.

Alright, before we dive into the nitty-gritty of alignment, let’s talk tools. You wouldn’t try to change a tire without a jack, right?

Same principle applies here. Having the right tools will make this process a whole lot easier, trust me.

First up, you’re gonna need an alignment protractor. This little piece of paper (or plastic, if you’re fancy) is your new best friend.

It’s got some funky-looking lines and curves on it, but don’t let that intimidate you. We’ll get into how to use it later.

Next on the list is a stylus force gauge. This gadget helps you set the correct tracking force for your cartridge.

Too much force, and you’ll wear out your records faster than you can say “vinyl revival.” Too little, and you’ll be dealing with skips and poor sound quality.

Been there, done that – not fun!

You’ll also need a small screwdriver and possibly some Allen wrenches. These are for making those tiny adjustments to your cartridge’s position.

Word to the wise: be gentle! I once got a bit overzealous with the screwdriver and… well, let’s just say I had to buy a new cartridge.

Last but not least, grab a magnifying glass or a loupe if you’ve got one. Aligning a cartridge involves some seriously small-scale work, and unless you’ve got superhuman eyesight, you’ll appreciate the extra help.

Oh, and here’s a pro tip: a flashlight can be super helpful too. I can’t tell you how many times I’ve been squinting in the shadows, trying to see if my stylus is lined up right.

A little extra light goes a long way!

Now, I know what you’re thinking – “Do I really need all this stuff?” And hey, I get it. When I first started out, I tried to wing it with just a screwdriver and my naked eye.

Let’s just say the results were… less than stellar. Trust me, investing in these tools will save you a lot of headaches (and potentially some damaged records) down the line.

Step-by-Step Guide to Aligning Your Cartridge

Close-up of a vinyl turntable during cartridge alignment, with the stylus being aligned to the null points on an alignment protractor. A stylus force gauge and a mirror are nearby for tracking force and azimuth adjustments.

Alright, folks, this is where the rubber meets the road – or in our case, where the stylus meets the groove. Let’s dive into the actual alignment process.

Don’t worry if it seems a bit daunting at first; we’ll take it nice and slow.

First things first, let’s prep your turntable. Make sure it’s on a level surface – I learned this the hard way when I tried aligning my cartridge on a wobbly coffee table.

Not my brightest moment! Remove the platter mat and any records.

We want a clean workspace here.

Now, grab that alignment protractor we talked about earlier. Place it on your turntable’s spindle.

This is where things get a bit tricky, so take a deep breath and channel your inner zen master.

You’re gonna want to adjust the overhang of your cartridge. This is the distance the stylus extends past the center of the tonearm pivot.

Sounds complicated, right? It kinda is, but here’s a trick I use: imagine you’re trying to get the stylus to touch two specific points on the protractor.

These are called null points, and they’re where the stylus’s angle is perfect for tracing the record groove.

Loosen the screws on your headshell (gently!) and slide the cartridge back and forth until the stylus lines up with both null points. It might take a few tries, but don’t get frustrated.

I remember spending a good hour on this step my first time – it’s all part of the process!

Once you’ve got the overhang sorted, it’s time to set the tracking force. This is where that stylus force gauge comes in handy.

Check your cartridge’s manual for the recommended tracking force – usually somewhere between 1.5 and 2.5 grams. Adjust your tonearm’s counterweight until you hit that sweet spot.

Last but not least, let’s tackle the azimuth. This is the angle of the stylus relative to the record surface.

Ideally, it should be perfectly perpendicular. A good way to check this is to lower the stylus onto a mirror (carefully!) and see if it’s straight.

If not, you might need to rotate the cartridge slightly in the headshell.

Phew! That was a lot, huh? But trust me, once you get the hang of it, you’ll be aligning cartridges like a pro.

Just remember – patience is key. Rome wasn’t built in a day, and perfect cartridge alignment doesn’t happen in five minutes!

Common Mistakes to Avoid During Alignment

A vinyl turntable setup showing common mistakes during cartridge alignment, including overtightened headshell screws and incorrect tonearm height leading to a wrong Vertical Tracking Angle (VTA). A screwdriver and misaligned cartridge are visible nearby.

Alright, now that we’ve covered the basics, let’s talk about some pitfalls to watch out for. I’ve made pretty much all of these mistakes at some point, so consider this my “do as I say, not as I did” section!

First up: overtightening the headshell screws. I know, I know – you want to make sure that cartridge is secure.

But trust me, cranking those screws down like you’re changing a tire is a recipe for disaster. You can actually warp the cartridge body or damage the internal components.

Just tighten them until they’re snug, then stop. Your cartridge (and your wallet) will thank you.

Another common mistake is ignoring the tonearm height. This affects what’s called the Vertical Tracking Angle (VTA), and it can have a big impact on sound quality.

I remember when I first upgraded my cartridge – I was so focused on the alignment that I completely forgot about adjusting the tonearm height. The result?

Let’s just say it wasn’t the sonic upgrade I was hoping for.

But perhaps the biggest mistake I see people make (and I’ve been guilty of this too) is rushing the process. Aligning a cartridge is a bit like meditation – it requires patience and a steady hand.

I once tried to do a quick alignment job before a party, and let’s just say my guests were not impressed with the sound quality. Take your time, double-check your work, and don’t be afraid to start over if something doesn’t seem right.

Oh, and here’s a bonus tip: don’t forget to re-check your alignment after you’ve finished. Sometimes, tightening those final screws can shift things ever so slightly.

A quick double-check can save you a lot of frustration down the line.

Maintaining Proper Alignment Over Time

A vinyl turntable setup showing careful handling, with the tonearm secured and the platter being removed, illustrating the process of maintaining cartridge alignment over time.

So, you’ve successfully aligned your cartridge. Congrats! But don’t think you can just set it and forget it.

Maintaining that perfect alignment is an ongoing process. Don’t worry, though – it’s not as bad as it sounds.

First off, make it a habit to do regular check-ups. I like to give my cartridge a once-over every month or so.

It doesn’t have to be a full realignment – just a quick visual inspection to make sure nothing’s shifted. Trust me, catching a misalignment early can save you from some serious sound quality issues down the line.

Speaking of which, handle your turntable with care! I learned this lesson the hard way when I decided to move my setup to a different room… by picking up the whole turntable while it was still assembled.

Bad idea. The jostling knocked my carefully aligned cartridge out of whack.

Now, I always remove the platter and secure the tonearm before moving my turntable.

But here’s the thing – even with the best care, your cartridge alignment might drift over time. It’s just a fact of life in the vinyl world.

So don’t beat yourself up if you find things a bit off-kilter after a while. It happens to the best of us!

Now, I know what some of you might be thinking: “Can’t I just take it to a pro?” And hey, sometimes that’s not a bad idea. If you’re really struggling or if you’ve got a high-end system, a professional alignment might be worth considering.

But for most of us, with a little patience and practice, we can keep our cartridges singing sweetly at home.

Conclusion

Whew! We’ve covered a lot of ground, haven’t we? From understanding why cartridge alignment matters to the nitty-gritty of actually doing it, we’ve been on quite a journey.

But hey, that’s part of the fun of being a vinyl enthusiast, right?

Remember, aligning your turntable cartridge isn’t just about getting better sound (although that’s a pretty awesome benefit). It’s about taking care of your records, extending the life of your equipment, and really diving deep into the hobby we all love.

Now, I’m not gonna lie – getting your cartridge alignment perfect can be a bit of a challenge. But don’t let that discourage you!

Every time you do it, you’ll get a little better, a little faster, and a little more confident. And trust me, the first time you drop the needle on a perfectly aligned system and hear the music come through clearer than ever before… well, it’s pretty darn satisfying.

So, what are you waiting for? Grab your protractor, put on your favorite record, and start tweaking!

And hey, if you’ve got any tips or tricks of your own for cartridge alignment, why not share them in the comments? We’re all in this vinyl-loving community together, after all.

Now, if you’ll excuse me, I’ve got a date with my turntable and a stack of records. Happy listening, everyone!

Why Is My Turntable So Quiet? 5 Common Causes and Simple Solutions

Picture this: you’ve just scored a pristine copy of your favorite album on vinyl, rushed home to spin it on your turntable, and… wait, why does it sound like it’s whispering? If you’re scratching your head wondering, “Why is my turntable so quiet?” you’re not alone.

I’ve been there, trust me! As a vinyl enthusiast and self-proclaimed audio tinkerer, I’ve encountered my fair share of volume woes. But fear not, fellow record lovers!

I’m here to share the knowledge I’ve gained through years of trial and error (and a few facepalm moments). In this article, we’ll dive into the most common reasons your turntable might be giving you the silent treatment and how to crank up the volume without breaking a sweat.

So, grab a cup of coffee, and let’s get your vinyl singing at the top of its lungs again!

Why Is My Turntable So Quiet?

A turntable with a vinyl record spinning, suggesting troubleshooting for low volume issues, with possible causes like a worn stylus, cartridge misalignment, or missing preamp.

Alright, let’s cut to the chase. Your turntable might be acting like a shy performer for a handful of reasons.

Maybe your stylus is worn out and needs a replacement – trust me, I’ve been guilty of using a needle way past its prime! Or it could be that your cartridge settings are off, kinda like trying to dance with your shoes on the wrong feet.

Another culprit? A weak or missing preamp. I once spent a whole weekend wondering why my new turntable was so quiet, only to realize I needed a preamp.

Facepalm moment right there! Sometimes, it’s just a matter of improper setup – like when I didn’t level my turntable and wondered why it sounded off.

And don’t get me started on amplifier and speaker issues – those can definitely put a damper on your vinyl party. But don’t worry, we’re gonna dive deeper into all these potential party poopers and how to kick ’em to the curb!

Understanding Turntable Components and Their Impact on Volume

A detailed view of turntable components including the cartridge, stylus reading a vinyl record, and a preamp in the background, highlighting their role in sound quality.

Let’s break it down, shall we? When I first got into vinyl, I thought a turntable was just a fancy record spinner.

Boy, was I wrong! There’s a whole orchestra of components working together to make that sweet analog sound.

First up, we’ve got the cartridge and stylus – the dynamic duo responsible for reading those tiny grooves in your records. Think of the cartridge as the interpreter and the stylus (or needle) as its eyes.

If either of these is off its game, your music’s gonna sound about as exciting as a deflated balloon.

Now, here’s where I made my rookie mistake: I didn’t realize how crucial proper alignment was. Imagine trying to read a book with your eyes crossed – that’s basically what a misaligned cartridge does to your records.

It’s all about precision, folks!

But wait, there’s more! Enter the preamp, the unsung hero of volume.

This little guy takes the whisper-quiet signal from your cartridge and amplifies it to a level your stereo can actually work with. I remember the day I discovered my old turntable had a built-in preamp, and I’d been running it through another external one.

Talk about overkill! But hey, live and learn, right?

Getting these components to play nice together is key to achieving that perfect volume. It’s like conducting an orchestra – when everything’s in harmony, oh boy, does it sound sweet!

But don’t worry if it seems overwhelming. We’re gonna break it all down, step by step.

Trust me, if I could figure it out after countless facepalm moments, you’ve got this in the bag!

Worn or Misaligned Stylus: The Silent Culprit

Close-up of a turntable's stylus being examined with a magnifying glass for wear or misalignment, with a two-point protractor tool nearby

Alright, let’s talk about the stylus – that tiny but mighty component that’s literally the point of contact between your records and the rest of your system. I’ll never forget the time I realized my stylus was worn out.

I was wondering why my favorite albums suddenly sounded like they were being played underwater!

So, how do you know if your stylus is the silent troublemaker? Well, aside from the obvious drop in volume, you might notice a loss of clarity in the high frequencies.

It’s like someone threw a blanket over your speakers. Another telltale sign is distortion, especially in louder passages.

If your music starts to sound like it’s coming through a bad phone connection, your stylus might be crying out for retirement.

But here’s the tricky part – sometimes it’s not wear and tear, but misalignment that’s causing the issue. I learned this the hard way when I installed a new cartridge and didn’t align it properly.

The result? It sounded like my records were being played by a tone-deaf robot. Not cool.

Checking your stylus is pretty straightforward. First, give it a good look with a magnifying glass.

If the tip looks flat or chipped, it’s time for a replacement. Trust me, your records will thank you!

As for alignment, there are a few tools you can use. Personally, I swear by the two-point protractor method.

It might seem finicky at first, but once you get the hang of it, it’s like unlocking a secret level in your audio game.

Replacing a stylus can be nerve-wracking – I still get sweaty palms every time I do it. But remember, a fresh stylus can breathe new life into your entire system.

It’s like getting a new pair of glasses; suddenly, everything’s clearer and more vibrant!

Just be careful when handling the stylus. I once dropped mine on the floor and spent the next hour crawling around like a detective, searching for it.

Not my proudest moment, but hey, we’ve all been there, right?

Cartridge Woes: Settings and Connections

A detailed view of a turntable's cartridge with color-coded wires connected to the headshell, highlighting tracking force and anti-skate adjustments.

Let’s dive into the world of cartridges, shall we? This little powerhouse is like the heart of your turntable, and just like your ticker, it needs the right pressure to function properly.

I’m talking about tracking force, folks!

I remember when I first got my hands on a high-end cartridge. I was so excited that I slapped it on without checking the recommended tracking force.

Big mistake! The sound was thin, and the volume was pathetic.

It was like trying to squeeze juice from a raisin – not much coming out!

Here’s the deal: too little tracking force, and your stylus won’t sit properly in the groove, resulting in low volume and potential skipping. Too much, and you risk damaging both your records and your stylus.

It’s a Goldilocks situation – you need to get it juuuust right.

And don’t even get me started on anti-skate! This setting counteracts the natural tendency of the tonearm to slide towards the center of the record.

Get it wrong, and your sound stage goes all wonky. Trust me, I’ve had albums where it sounded like the drummer was playing from inside a closet while the singer was shouting from across the street!

Now, let’s talk connections. You’d think plugging in a few wires would be straightforward, right?

Well, let me tell you about the time I spent hours troubleshooting low volume, only to realize one of my cartridge leads had come loose. Talk about a facepalm moment!

Check those tiny wires connecting your cartridge to the headshell. They’re color-coded for a reason, folks!

Red and green for right channel, white and blue for left. And make sure they’re snug – a loose connection can turn your high-fidelity setup into a lo-fi nightmare faster than you can say “vinyl revival.”

Oh, and here’s a pro tip I learned the hard way: if you’re switching cartridges, double-check the output level. I once went from a high-output moving magnet to a low-output moving coil without adjusting my preamp settings.

The result? It sounded like my records were being played from the bottom of a well!

Remember, getting these settings right is like tuning a guitar. It takes a bit of patience and a good ear, but once you nail it, the difference is like night and day.

Your records will thank you, and your ears will do a happy dance!

Preamp Problems: Boosting Your Signal

A turntable setup with an external preamp connected, showing cables and grounding wire attached, emphasizing the importance of boosting the turntable's signal

Alright, let’s talk about the unsung hero of the turntable world – the preamp. This little marvel is responsible for taking that teeny-tiny signal from your cartridge and beefing it up to a level your main amplifier can work with.

Without it, your vinyl would sound about as loud as a mouse whispering.

I’ll never forget the day I plugged my brand new turntable directly into my receiver’s AUX input, wondering why it sounded like my records were being played from the next room. Turns out, I needed a preamp!

It was like I’d been trying to fill a swimming pool with a garden hose, and someone finally turned on the fire hydrant.

Now, here’s where it gets tricky. Some turntables have a built-in preamp, some don’t.

And some receivers have a phono input (which is basically a built-in preamp), while others don’t. It’s like a game of audio chess, and you need to know your pieces!

I once spent an entire afternoon troubleshooting low volume, only to realize I was running my signal through two preamps. Talk about overkill!

It’s like wearing two pairs of glasses – you’re not seeing any better, you’re just giving yourself a headache.

If you’re using an external preamp, make sure it’s up to snuff. I learned the hard way that not all preamps are created equal.

I once bought a super cheap one online, thinking I was being clever. The result?

It sounded like my records were being played through a tin can telephone. Lesson learned: sometimes it’s worth investing a little more for quality sound.

And don’t forget about gain settings! Most preamps have adjustable gain, which is like a volume boost for your cartridge’s signal.

Set it too low, and you’ll be cranking your main volume to the max. Set it too high, and you risk distortion.

Finding that sweet spot is like Goldilocks tasting porridge – when it’s just right, you’ll know!

Oh, and here’s a pro tip: if you’re hearing a persistent hum through your speakers, check your preamp’s grounding. I once spent weeks battling an annoying buzz, only to realize I’d forgotten to connect the ground wire from my turntable to my preamp.

It was like magic – plug in that little wire, and suddenly, silence is golden!

Remember, a good preamp setup is the difference between your vinyl sounding like a whisper or a roar. Get it right, and you’ll be swimming in a sea of warm, full-bodied analog goodness.

Now that’s what I call audio nirvana!

5. Turntable Setup and Maintenance for Optimal Sound

A turntable setup with a bubble level placed on top for proper leveling, tonearm being balanced, and a carbon fiber brush ready for cleaning

Let’s get down to the nitty-gritty of turntable setup and maintenance. Trust me, this stuff matters more than you might think.

I learned that the hard way when I first set up my prized turntable on a wobbly IKEA table. Every time someone walked by, it sounded like my records were seasick!

First things first: leveling. Your turntable needs to be as level as a calm lake on a windless day.

I’m talking bubble-level perfect. I once thought I could eyeball it – big mistake!

My records were playing slower on one side than the other, like some weird audio version of the leaning tower of Pisa.

And don’t even get me started on balance. Your tonearm should be perfectly balanced before you set the tracking force.

I remember spending hours wondering why my brand new cartridge sounded off, only to realize my tonearm was slightly tilted. It was like trying to write with a pen that’s constantly falling over – frustrating and ineffective!

Now, let’s talk about the unsung heroes of the turntable world – belts and motors. If your belt is stretched out or your motor is struggling, your records might sound like they’re being played underwater.

I once had a belt that was so old and stretched, it was like watching a record play in slow motion. Not exactly the foot-tapping experience I was going for!

But here’s the real kicker – cleanliness. Dust is the mortal enemy of good sound.

I learned this the hard way when I left my turntable uncovered for a month while on vacation. Coming back to play a record was like listening through a layer of fuzzy sweaters.

Not cool, man.

Regular cleaning is key. I’m talking about dusting your turntable, cleaning your stylus, and yes, cleaning your records too.

I use a carbon fiber brush before and after every play. It’s like flossing for your vinyl – a little annoying, but so worth it in the long run.

Oh, and here’s a pro tip I wish someone had told me earlier: check your cartridge alignment every few months. Temperature changes can cause things to shift ever so slightly, and before you know it, your perfect setup is a little off-kilter.

Remember, a well-maintained turntable is a happy turntable. And a happy turntable means crystal clear, room-filling sound that’ll make your digital-loving friends wonder what they’ve been missing all these years.

It’s like the difference between instant coffee and a perfectly pulled espresso – once you’ve experienced the good stuff, there’s no going back!

Conclusion

Whew! We’ve been on quite the audio journey, haven’t we? From worn styli to preamp puzzles, we’ve covered the main reasons why your turntable might be giving you the silent treatment.

But here’s the thing – every setup is unique, just like every vinyl enthusiast’s taste in music.

Remember when I first started out? I was so frustrated with my quiet turntable that I nearly gave up on vinyl altogether.

But with a little patience, some trial and error, and a whole lot of learning, I finally got my system singing at the top of its lungs. And let me tell you, that first moment when everything clicked into place and the music filled the room?

Pure magic!

Now it’s your turn to experience that audio nirvana. Take what you’ve learned here and apply it to your own setup.

Maybe your stylus needs replacing, or perhaps your cartridge could use a realignment. Whatever the case, don’t be afraid to roll up your sleeves and dive in.

Trust me, the satisfaction of solving the problem yourself is almost as sweet as the music that’ll soon be filling your room!

Just remember, vinyl is as much about the journey as it is about the destination. Each adjustment, each upgrade, each cleaning session – they’re all part of the ritual that makes listening to records so special.

It’s not just about the sound; it’s about the connection you forge with your music.

As you work on improving your turntable’s volume, don’t forget to enjoy the process. Put on your favorite records, even if they’re a bit quiet at first.

Let the music inspire you as you tinker and tweak. And most importantly, trust your ears.

They’re your best tool in this analog adventure.

Oh, and here’s a final piece of advice from someone who’s been down this road: don’t be afraid to ask for help. Join online forums, visit your local record store, or chat with other vinyl enthusiasts.

The analog audio community is incredibly supportive and always eager to share knowledge. I can’t tell you how many times a random tip from a fellow vinyl lover has saved me hours of frustration!

So, what are you waiting for? Go give your turntable some love, and before you know it, you’ll be cranking up the volume and rediscovering your record collection all over again.

Who knows? You might even impress your friends with your newfound audio expertise at your next listening party!

Remember, a quiet turntable is just a challenge waiting to be overcome. With the right knowledge and a bit of patience, you’ll be well on your way to audio bliss.

Now go forth and let those grooves sing!