How to Clean a Turntable: A Step-by-Step Guide for Vinyl Enthusiasts

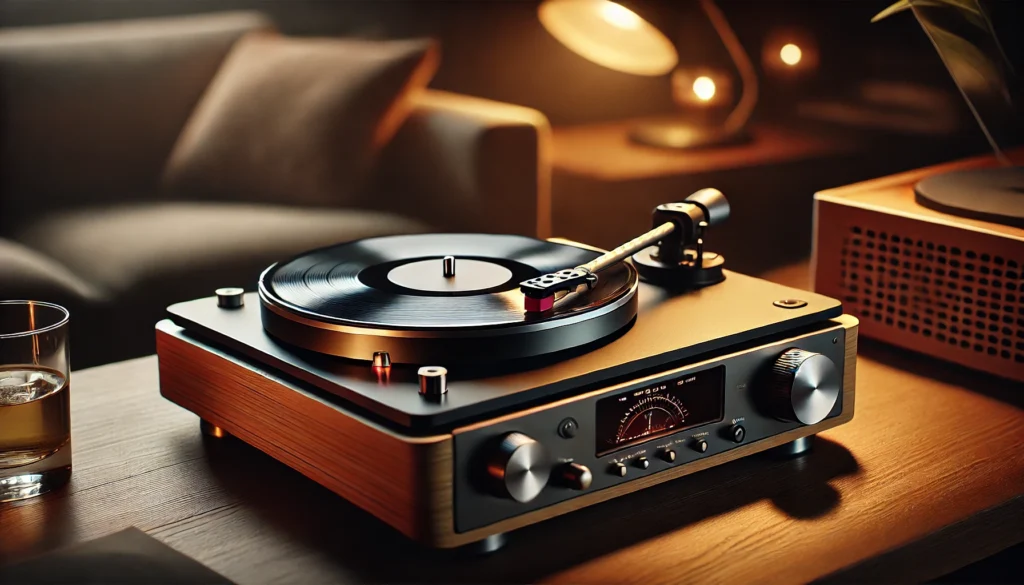
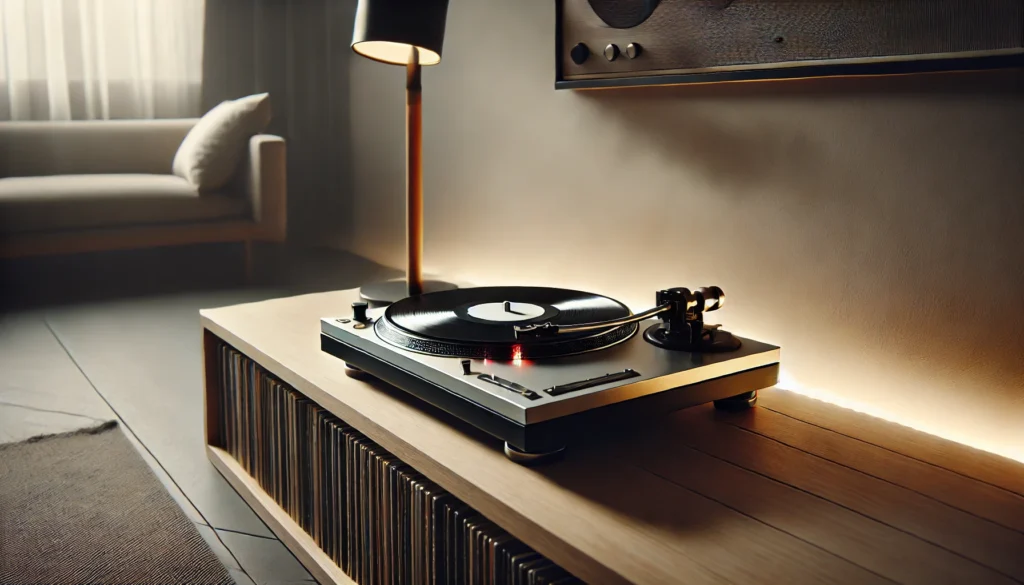
Hey there, fellow vinyl enthusiasts! You know, there’s something magical about dropping the needle on a pristine record and hearing that warm, rich sound fill the room.

But let me tell you, maintaining that audio bliss isn’t just about collecting great albums – it’s about keeping your turntable in tip-top shape. I learned this the hard way when I first started my vinyl journey, and boy, do I wish someone had given me a crash course in turntable cleaning back then!

I remember the day I realized how important a clean turntable really is. I’d just scored a rare pressing of my favorite album at a flea market, and I couldn’t wait to give it a spin.

But when I dropped the needle, instead of crystal-clear tunes, I heard more pops and crackles than a bowl of Rice Krispies! That’s when it hit me – I’d been neglecting my poor turntable, and it was time to clean up my act (pun totally intended).

In this guide, I’m gonna walk you through everything I’ve learned about how to clean a turntable. We’ll cover all the nooks and crannies, from the platter to the stylus, and I’ll even throw in some of my personal tips and tricks that I’ve picked up along the way.

Trust me, your ears (and your records) will thank you for it!

So, grab your anti-static brush and let’s dive into the world of turntable cleaning. It might not be the most glamorous part of being a vinyl junkie, but it’s definitely one of the most important.

And hey, who knows? You might even start to enjoy it as much as I do (okay, maybe that’s a stretch, but a guy can dream, right?).

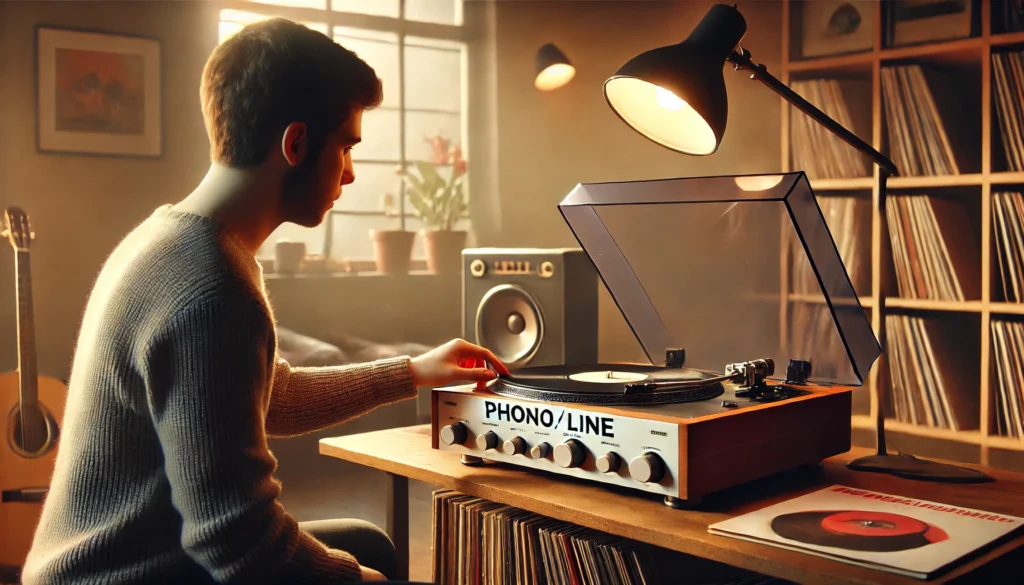
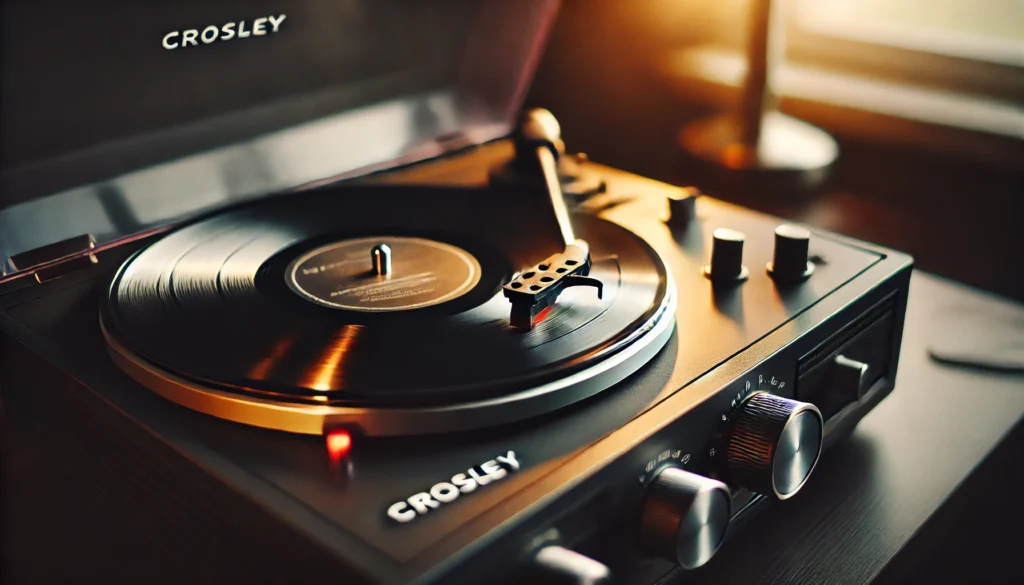
How To Clean A Turntable

A clean turntable with the dust cover removed, showing the platter, tonearm, and stylus being cleaned with an anti-static brush.

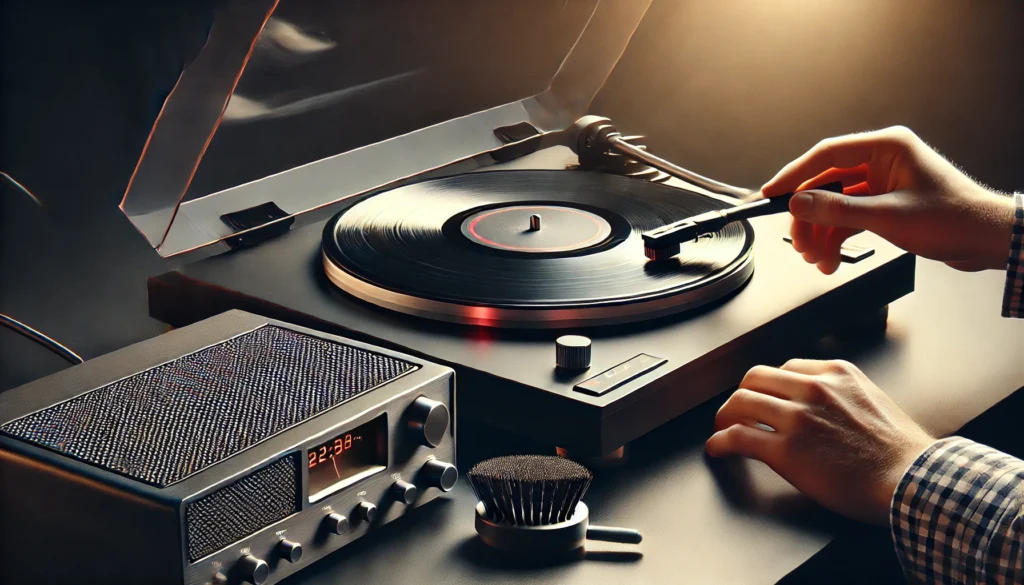
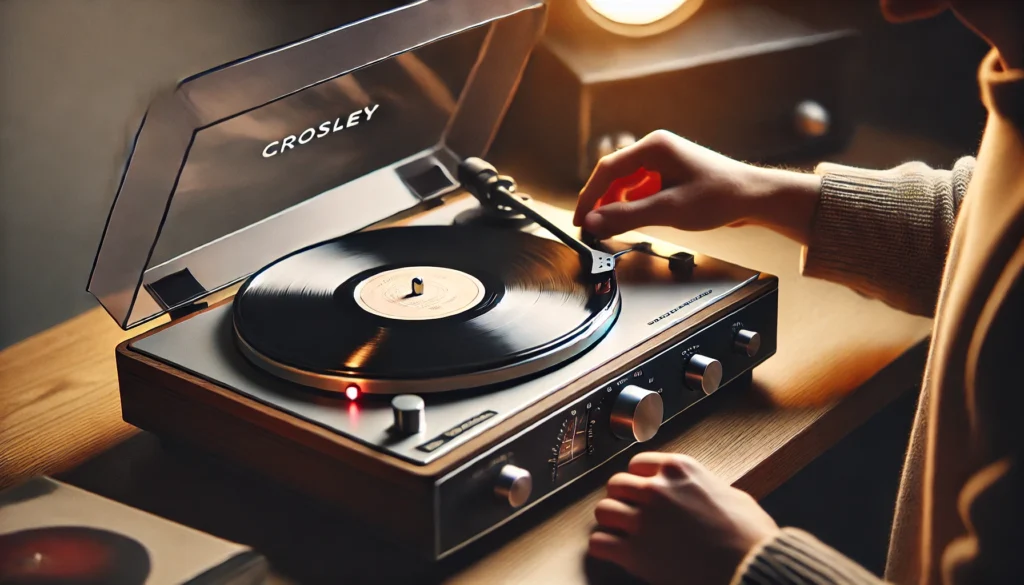
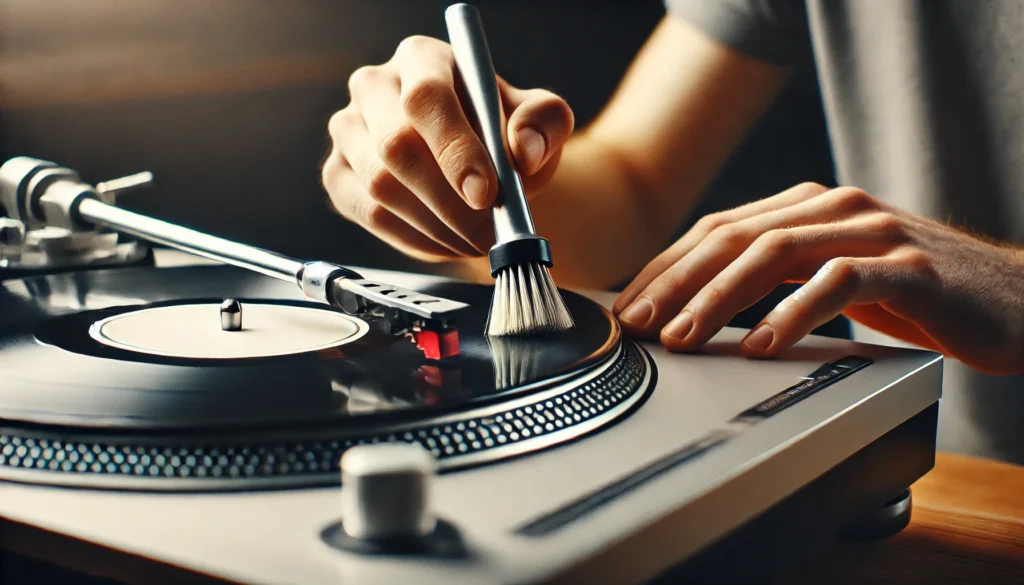
Cleaning a turntable involves several steps to ensure optimal performance and longevity of your equipment. First, unplug the turntable and remove the dust cover.

Use an anti-static brush to gently remove dust from the platter and tonearm. Clean the stylus (needle) with a specialized stylus cleaner, moving from back to front.

Wipe down the turntable’s body with a microfiber cloth. For deeper cleaning, remove the platter and clean it separately.

Don’t forget to clean your vinyl records too! We’ll explore these steps and more advanced techniques in detail below.

Understanding the Importance of a Clean Turntable

Close-up of a vinyl record and stylus with visible dust particles, highlighting the importance of keeping a turntable clean for optimal sound quality.

Alright, let’s get real for a second. When I first got into vinyl, I thought all I needed was a cool record collection and a decent turntable.

Boy, was I wrong! It turns out that keeping your turntable clean is just as crucial as picking the right records. Let me break it down for you.

First off, a clean turntable is all about sound quality. Think about it – your stylus is literally riding in tiny grooves on your record, picking up every little vibration.

Now, imagine if those grooves are full of dust, grime, or worse, little bits of crud from the last time you had a dance party with your favorite LP. Yuck! All that gunk interferes with the stylus’s ability to read the grooves accurately, and suddenly your pristine recording sounds like it’s being played underwater.

Trust me, I’ve been there, and it’s not pretty.

But it’s not just about sound quality. Keeping your turntable clean actually helps prolong the life of your records and equipment.

I learned this the hard way when I let my turntable get a bit… let’s say “lived in.” The built-up dirt on the stylus started acting like sandpaper on my records! I cringe thinking about the damage I did to some of my favorite albums.

And don’t even get me started on what a dirty turntable can do to your stylus and cartridge. These are delicate pieces of equipment, folks, and they deserve some TLC.

So, how often should you be cleaning your turntable? Well, it depends on how much of a neat freak you are (and how often you’re spinning those records).

As a general rule, I give my turntable a quick once-over before each listening session. It only takes a minute, and it’s become part of my ritual.

For a deeper clean, I set aside some time every couple of weeks. It’s like a spa day for my turntable!

Now, I know what you’re thinking – “Do I really need to clean it that often?” And hey, I get it. When I first started, I was pretty lazy about maintenance.

But let me tell you, the difference in sound quality and the peace of mind knowing you’re taking care of your equipment is totally worth it. Plus, once you get into the habit, it becomes second nature.

One last thing – don’t forget that a clean turntable isn’t just about the platter and stylus. You’ve got to think about the whole package – the tonearm, the cartridge, even the dust cover.

It’s all part of the ecosystem that keeps your vinyl sounding sweet. But don’t worry, we’ll get into all that juicy details later on.

So, there you have it – the lowdown on why keeping your turntable clean is so dang important. Trust me, your future self (and your records) will thank you for taking the time to do it right.

Now, let’s move on to the fun part – the cleaning supplies!

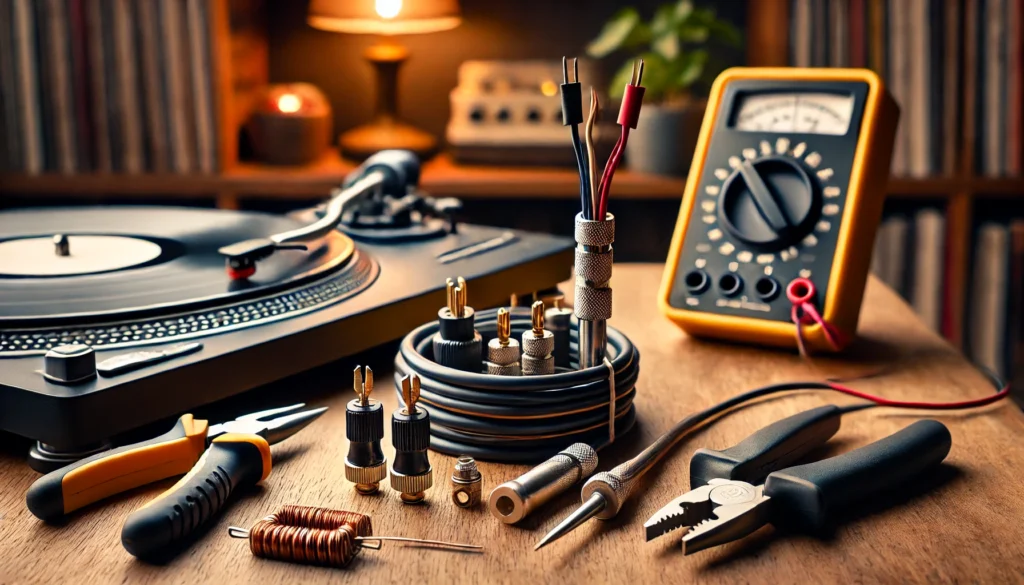
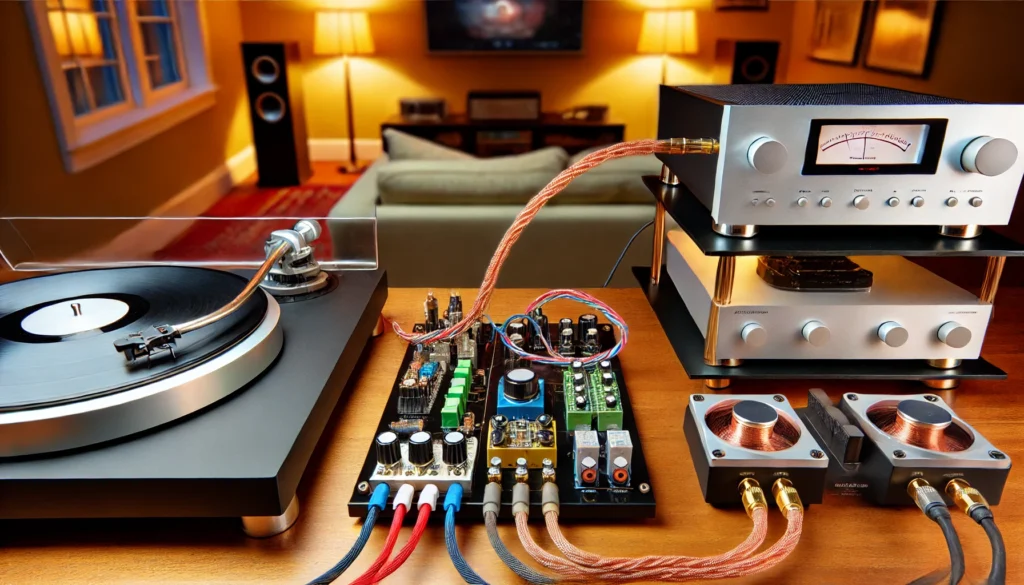
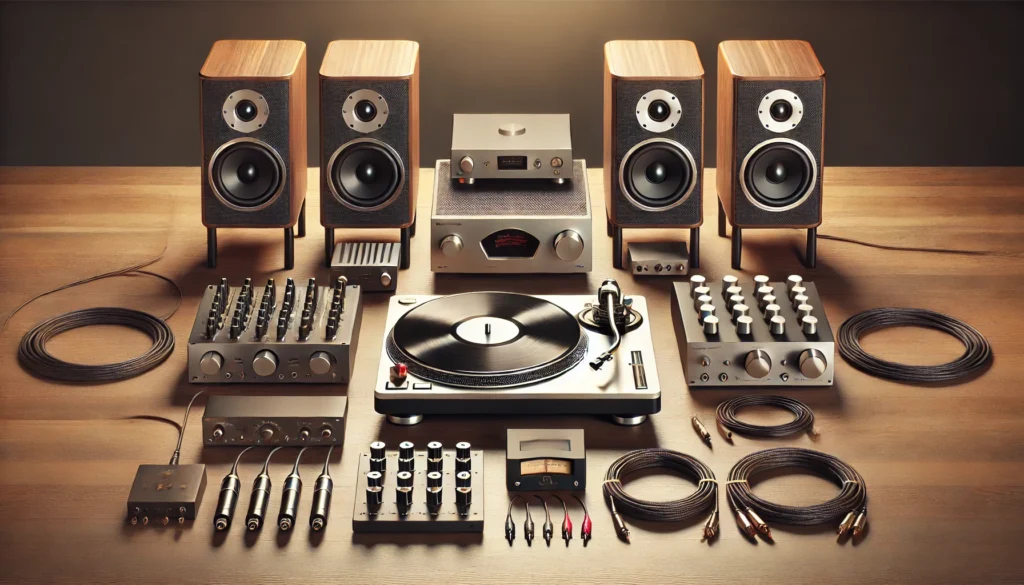
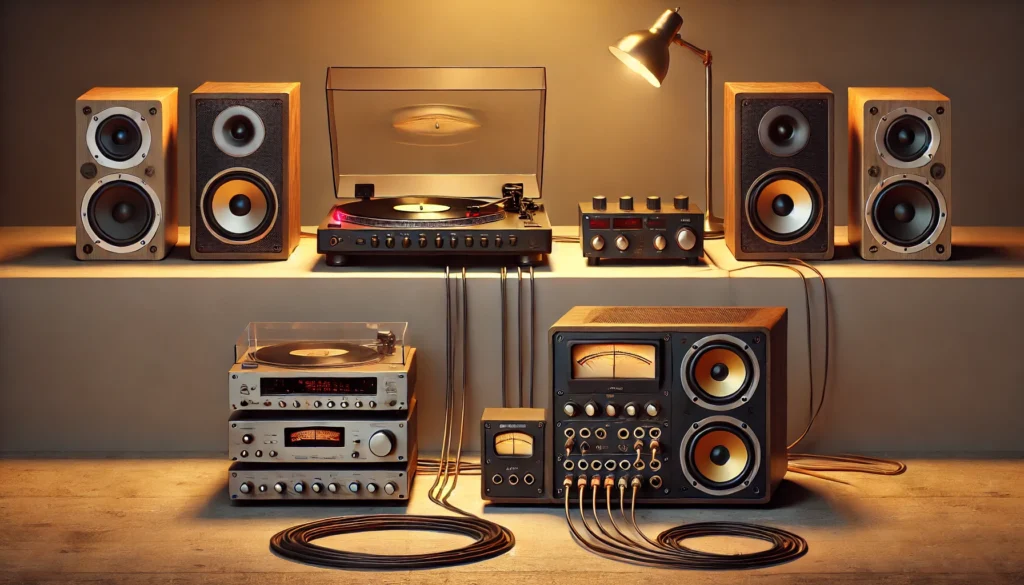
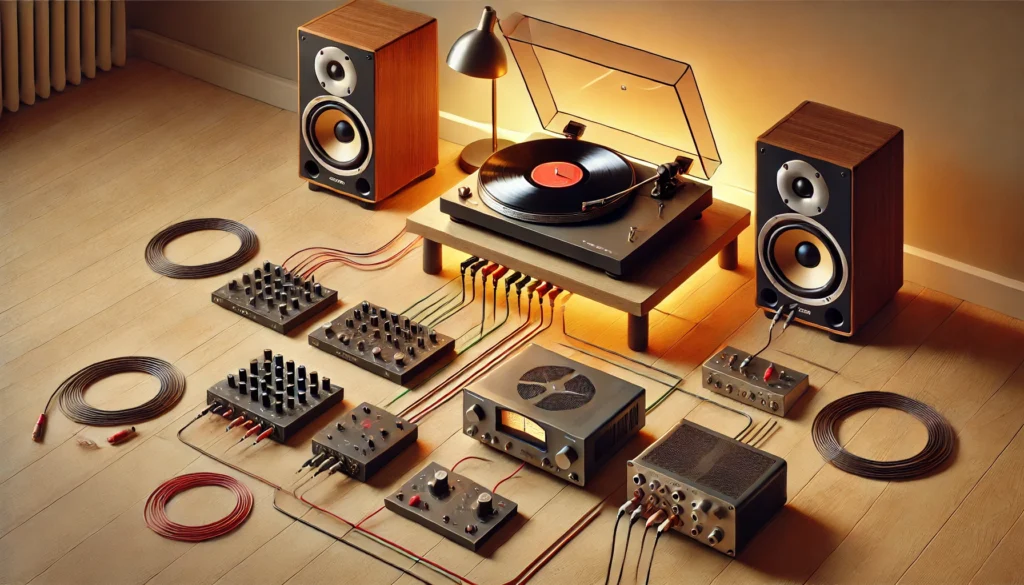
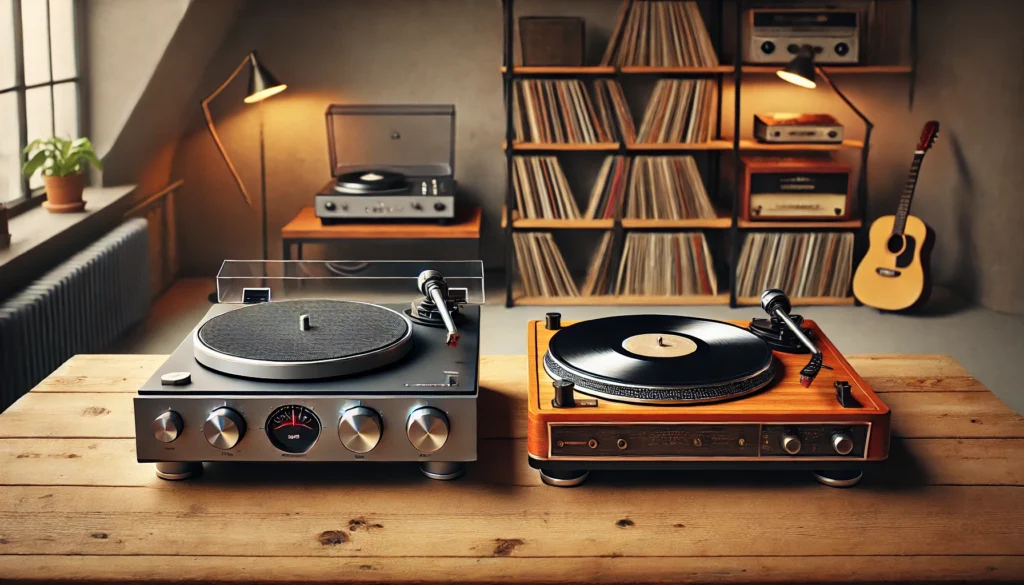
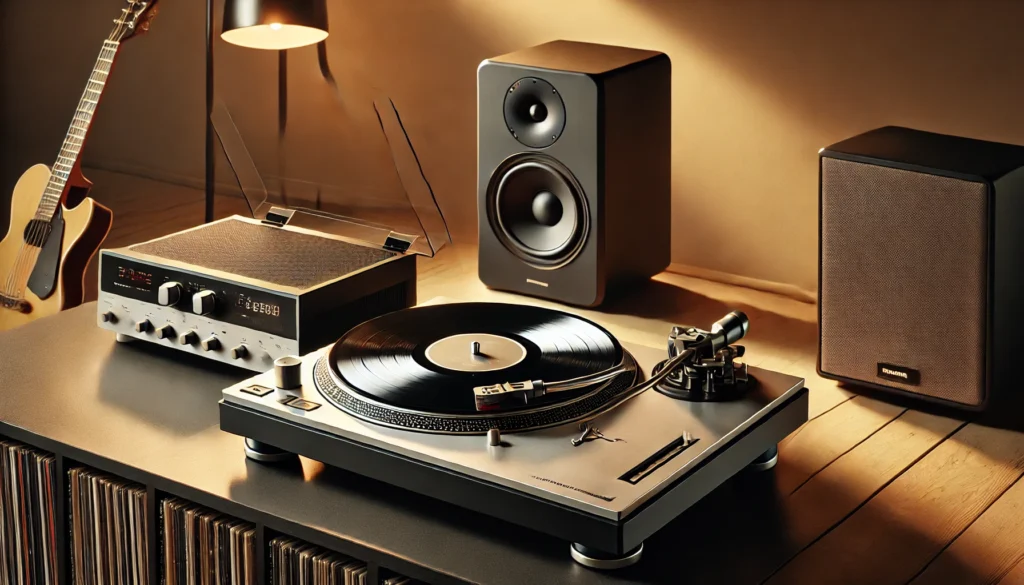
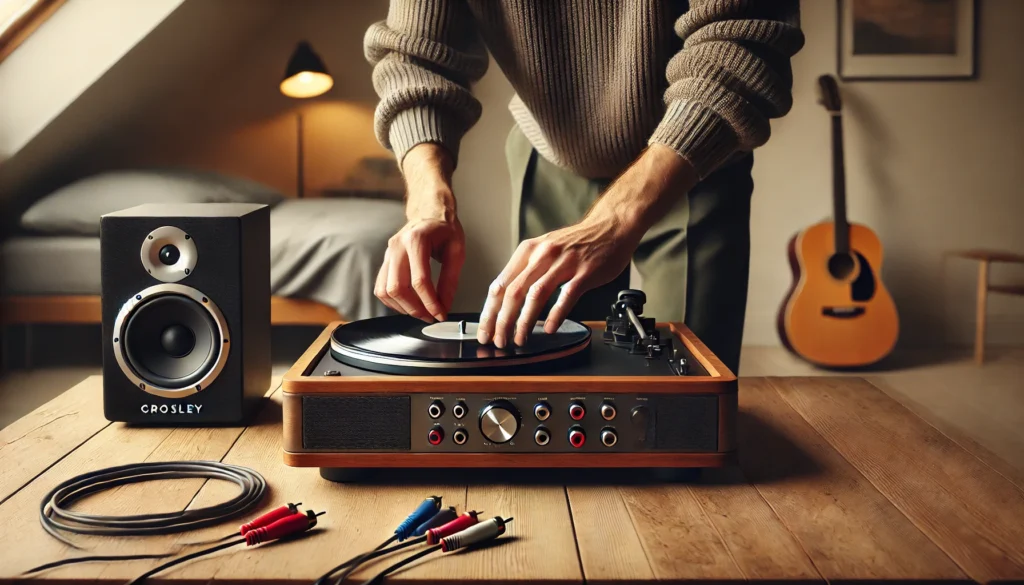
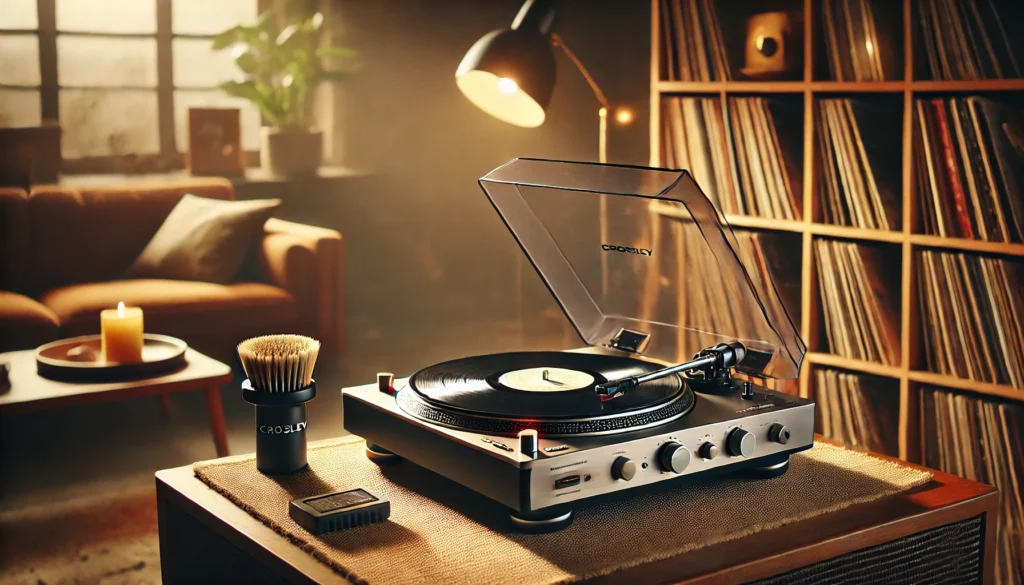
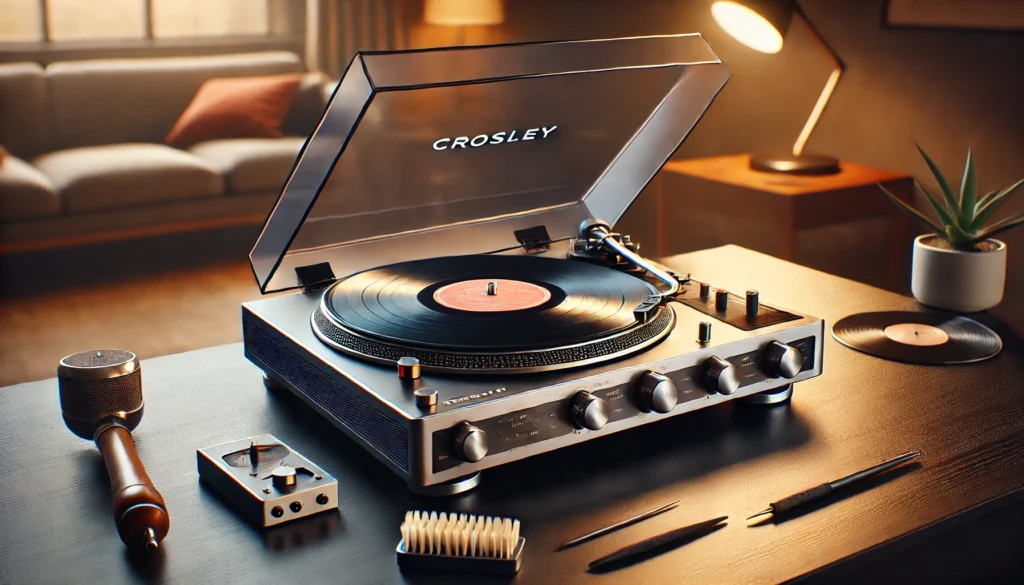
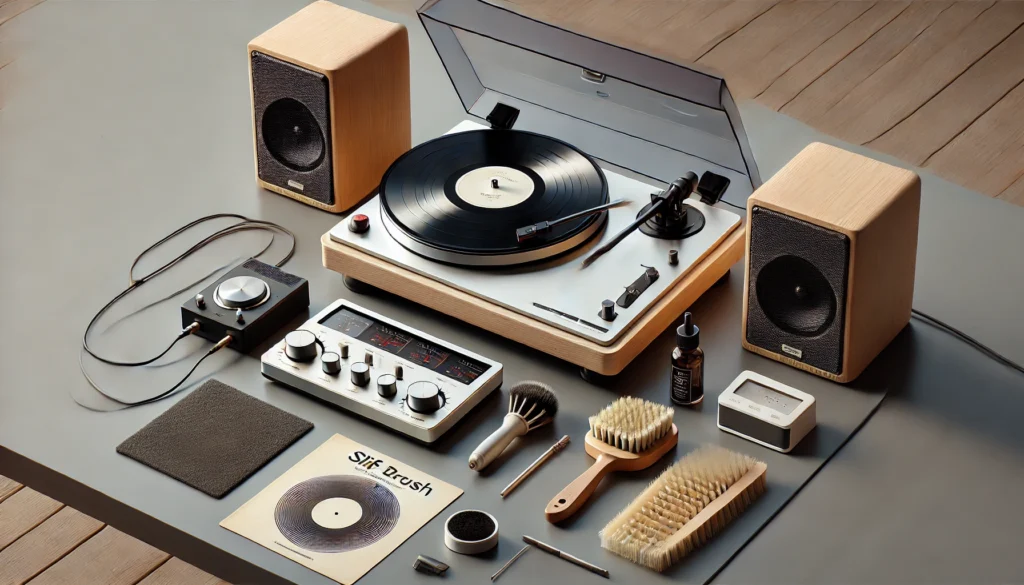
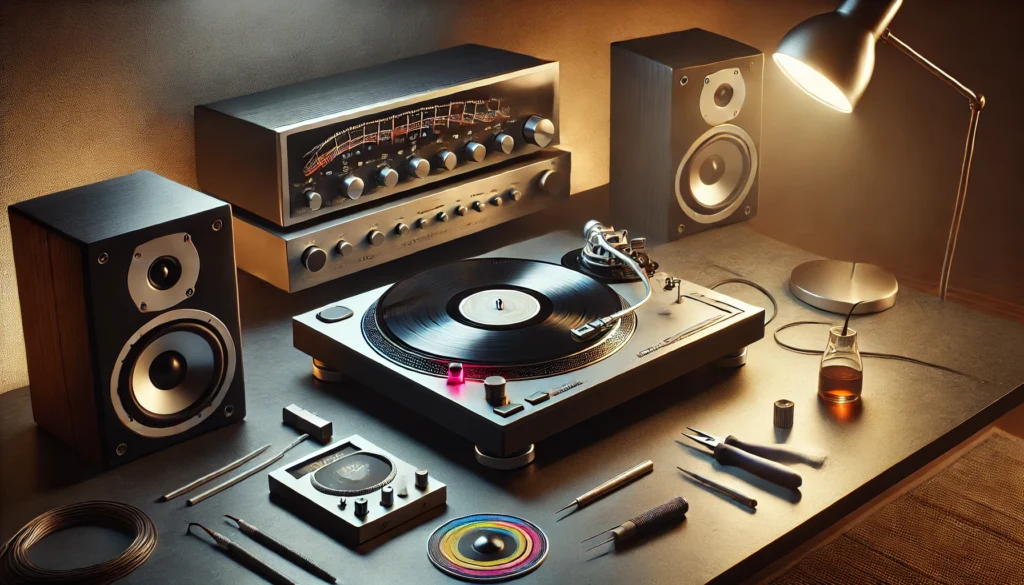
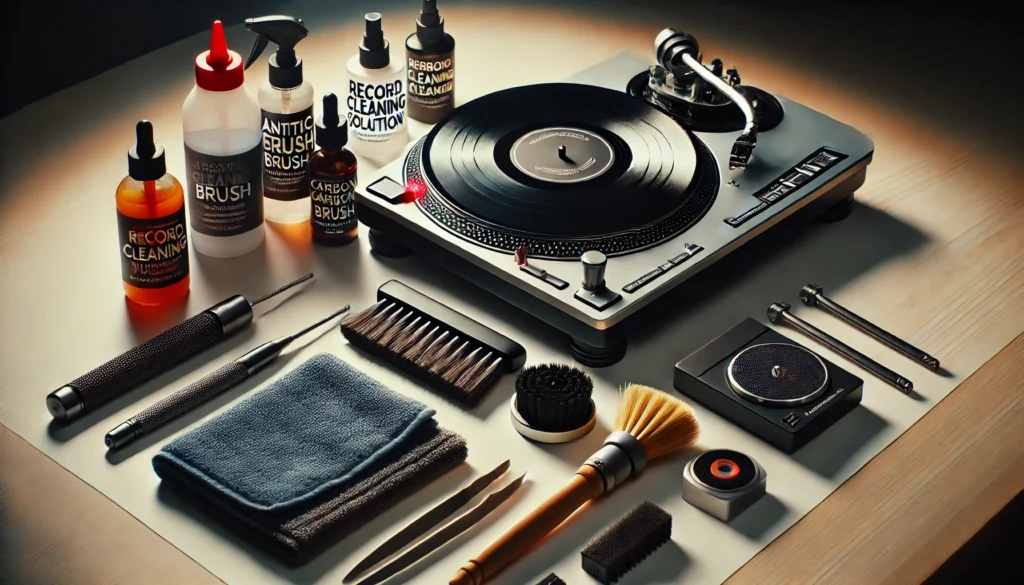
Essential Cleaning Supplies for Your Turntable

A neatly arranged setup of essential turntable cleaning supplies, including an anti-static brush, carbon fiber brush, microfiber cloths, record cleaning solution, and stylus cleaner next to a clean turntable.

Alright, vinyl lovers, it’s time to talk shop – cleaning shop, that is! When I first started out, I thought I could get by with just a old t-shirt and some Windex.

Oh boy, was I wrong! Learning about the right cleaning supplies was a game-changer for me, and I’m gonna save you the trouble of making the same mistakes I did.

Let’s dive into the essential arsenal for keeping your turntable in tip-top shape!

First up, we’ve got the anti-static brush. This little beauty is your first line of defense against the evil forces of dust and static.

I remember the first time I used one – it was like magic! All those little dust particles just disappeared. Pro tip: give your records a quick brush before and after each play.

It takes seconds and makes a world of difference.

Next on the list is the carbon fiber brush. Now, this might sound like something out of a sci-fi movie, but trust me, it’s a vinyl enthusiast’s best friend.

The super-fine carbon fibers can get into those tiny record grooves and lift out dust that you can’t even see. I use mine religiously, and it’s helped keep my records sounding crisp and clear.

Now, let’s talk liquids – specifically, record cleaning solution. This stuff is like a spa treatment for your vinyl.

But here’s the thing – not all cleaning solutions are created equal. I learned this the hard way when I used a homemade concoction that left a weird residue on my records.

Stick with a reputable brand, or if you’re feeling adventurous, there are some great DIY recipes out there (but that’s a whole other conversation).

Don’t forget about microfiber cloths! These babies are perfect for wiping down your turntable’s body and platter.

They’re soft enough not to scratch anything, but effective at picking up dust and grime. I’ve got a drawer full of ’em, and I’m not ashamed to admit it!

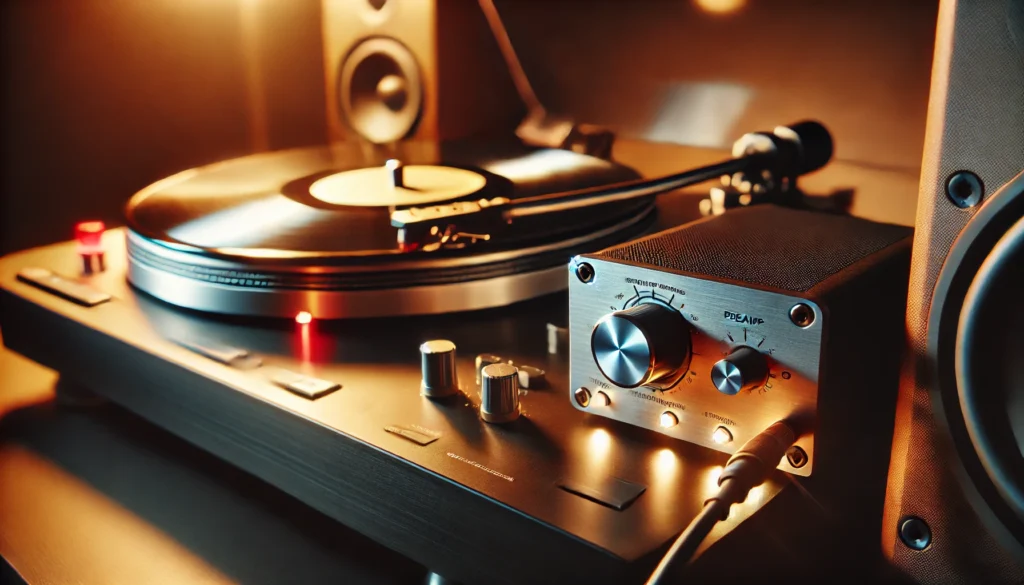
Last but definitely not least, we’ve got the stylus cleaner. This is the unsung hero of turntable maintenance.

Your stylus (that’s the needle, for you newbies out there) is where the rubber meets the road – or in this case, where the diamond meets the vinyl. Keeping it clean is crucial for good sound and for protecting your records.

There are a few different types out there, from gels to brushes, but whatever you choose, make sure it’s designed specifically for stylus cleaning.

Now, I know what you’re thinking – “Do I really need all this stuff?” And I get it, I was skeptical too at first.

But let me tell you, once you’ve got your cleaning kit set up, you’ll wonder how you ever lived without it. It’s like having a little spa for your turntable right at your fingertips!

One last piece of advice – invest in quality supplies. I tried to cheap out when I first started, and I ended up having to replace things more often (not to mention the subpar cleaning results).

Good quality supplies will last longer and do a better job, saving you money and hassle in the long run.

So there you have it, folks – your essential turntable cleaning supply list. With these tools in your arsenal, you’ll be well on your way to keeping your setup clean and your tunes sounding sweet.

Now, who’s ready to get their hands dirty? (Or should I say clean?)

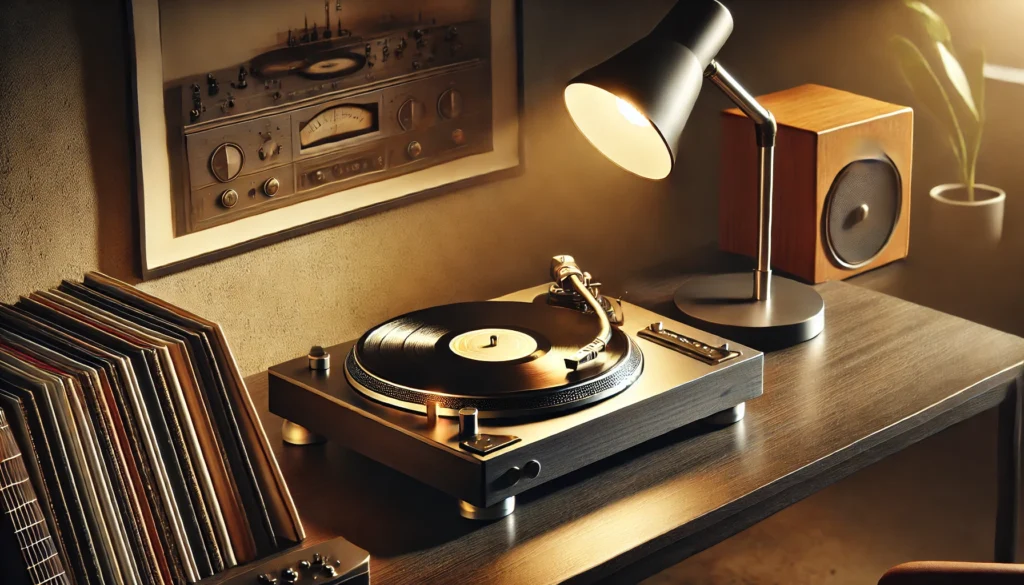
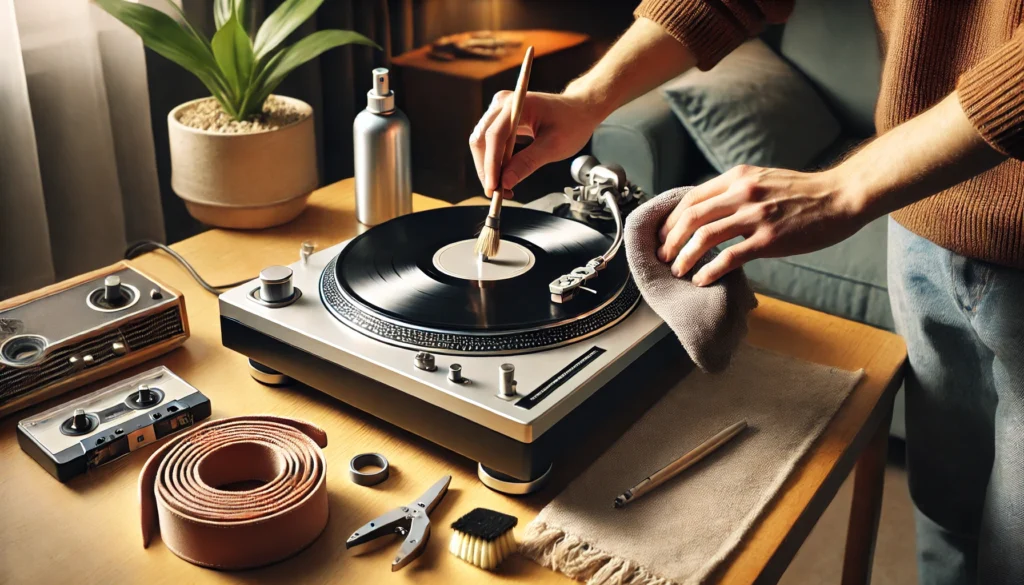
Cleaning the Turntable Platter and Mat

A clean turntable with the platter and mat removed, showing the process of cleaning with a microfiber cloth and a lint roller used to clean the felt mat.

Alright, vinyl aficionados, it’s time to roll up our sleeves and get down to the nitty-gritty – cleaning that turntable platter and mat! This is where the rubber meets the road in turntable maintenance, and let me tell you, it can be a bit intimidating at first.

I remember the first time I tried to remove my platter – I was sweating bullets, convinced I was going to break something!

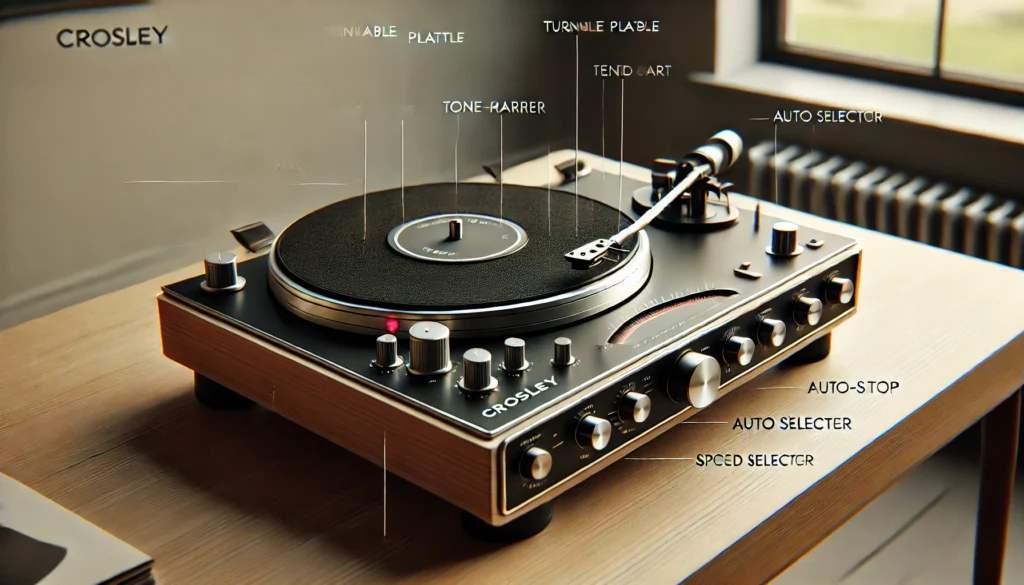
First things first, let’s talk about removing the platter. Now, every turntable is a little different, so it’s a good idea to consult your manual if you’re not sure.

But generally, it’s a pretty straightforward process. Most platters just lift right off, but some might have a small clip or screw holding them in place.

Just be gentle, and remember – if it feels like you’re forcing it, stop and double-check!

Once you’ve got the platter off, take a moment to marvel at all the dust and gunk that’s accumulated underneath. It’s like archeology, but grosser!

Now, depending on what your platter is made of (aluminum, acrylic, etc.), you’ll want to clean it differently. For most platters, a microfiber cloth slightly dampened with distilled water will do the trick.

Just be sure to dry it thoroughly before putting it back on.

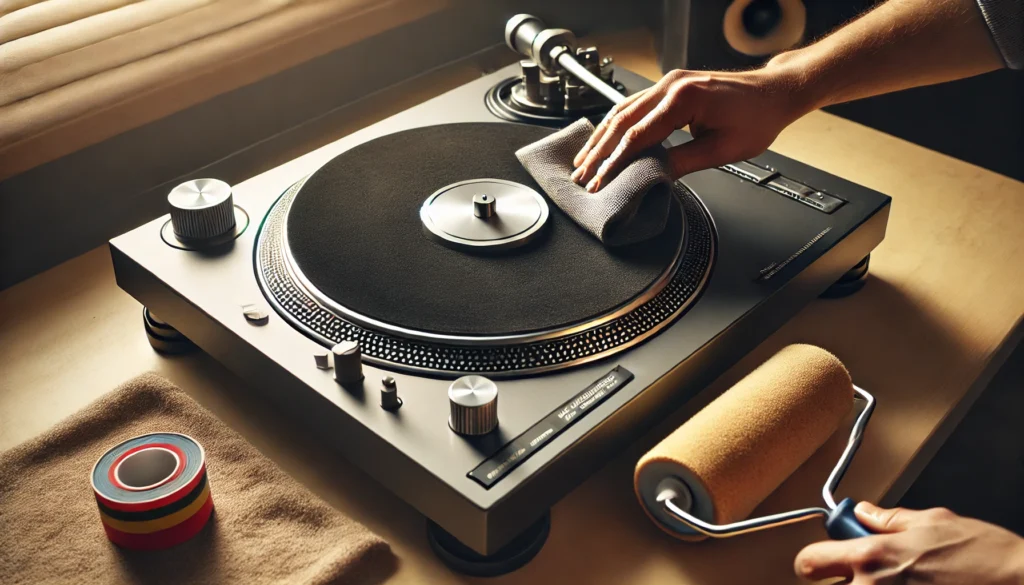
Now, let’s talk about that mat. If you’ve got a felt mat, you’re in for a treat (and by treat, I mean a bit of a challenge).

Felt mats are like magnets for dust and static. I learned this the hard way when I tried to clean mine by shaking it out – big mistake!

All I did was send dust flying everywhere. The best way to clean a felt mat is with a lint roller or tape.

Just roll or dab it gently over the surface, and you’ll be amazed at how much gunk comes off.

For rubber or cork mats, you’ve got it a bit easier. These can usually be wiped down with a damp cloth.

Just be sure to let them dry completely before putting them back on your turntable. Nobody likes a soggy mat!

Here’s a pro tip I picked up along the way: while you’ve got everything apart, take a moment to clean the spindle (that’s the little post in the center that the record sits on). A q-tip with a tiny bit of rubbing alcohol works wonders here.

Just be careful not to get any alcohol on the platter itself.

Now, when it comes to reassembling everything, take your time. Make sure everything is bone dry before you put it back together.

Align the platter carefully – you don’t want it to be off-center or wobbly. Once it’s back in place, give it a gentle spin.

If it rotates smoothly without any weird noises, you’re golden!

One last thing – don’t forget to level your turntable after you’ve put everything back together. Even slight shifts can affect the sound quality.

I use a little bubble level for this, but there are fancy digital levels out there if you want to get really precise.

I gotta say, there’s something really satisfying about seeing your platter and mat all clean and fresh. It’s like giving your turntable a spa day!

And trust me, your records will thank you for it. The difference in sound quality is like night and day.

So there you have it – the ins and outs of cleaning your turntable platter and mat. It might seem like a lot of work, but once you get into the habit, it becomes second nature.

And hey, it’s a small price to pay for keeping your vinyl sounding sweet, right? Now, who’s ready to tackle that stylus?

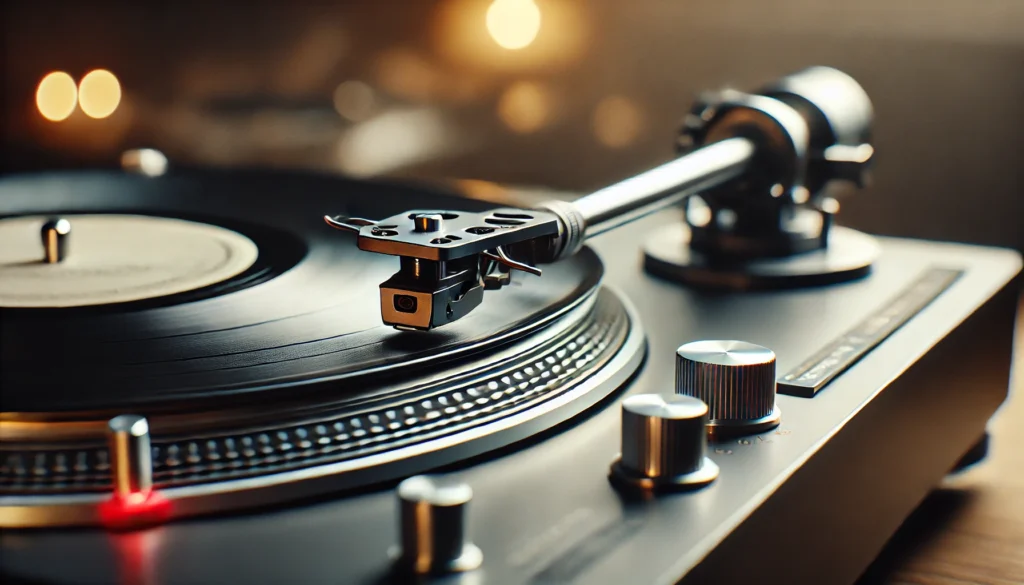
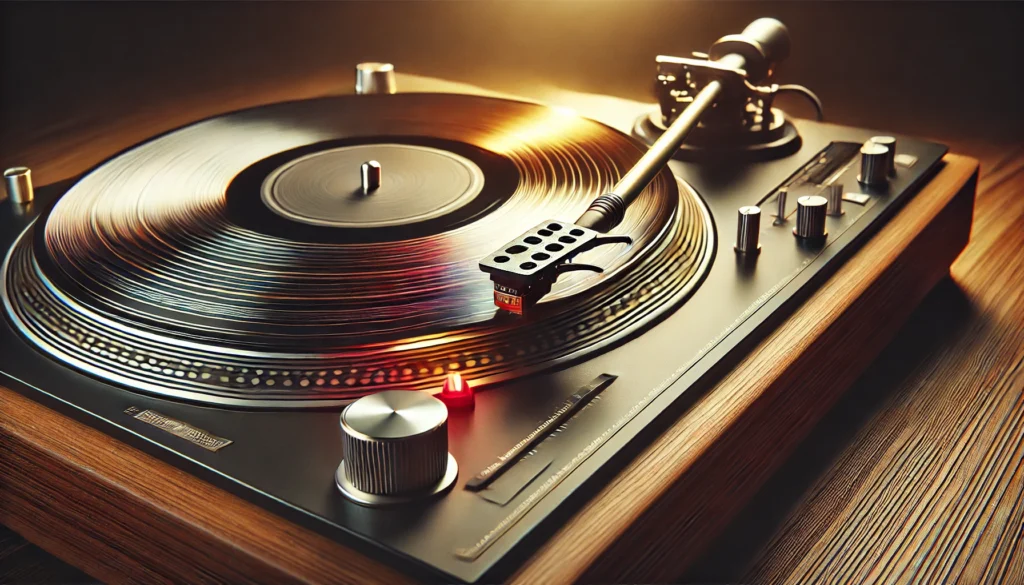
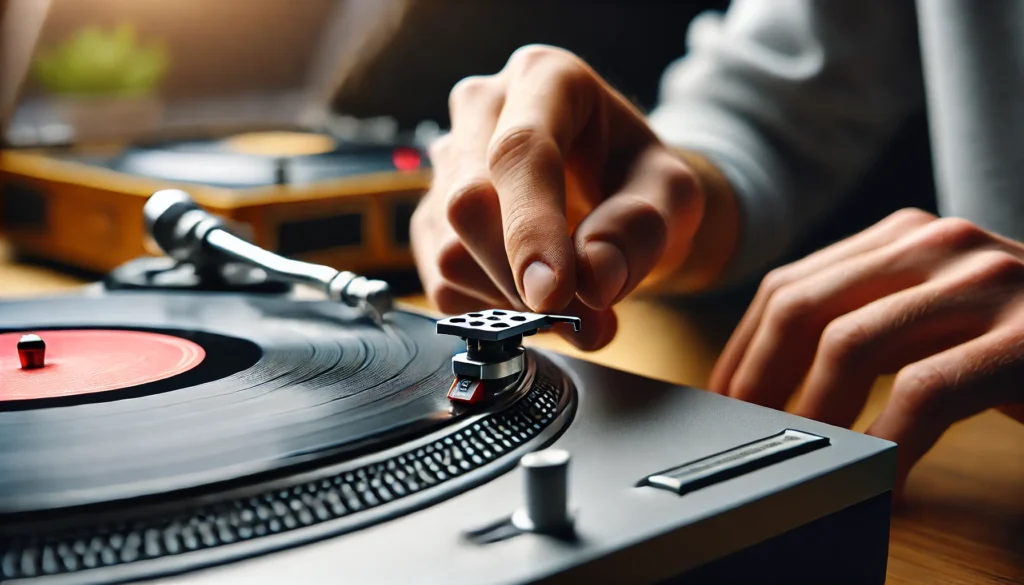
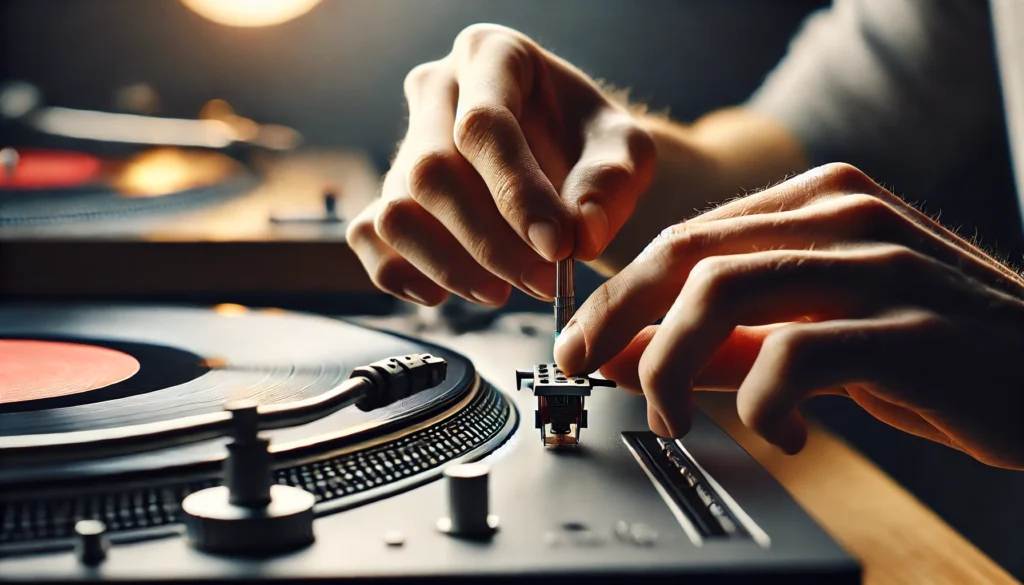
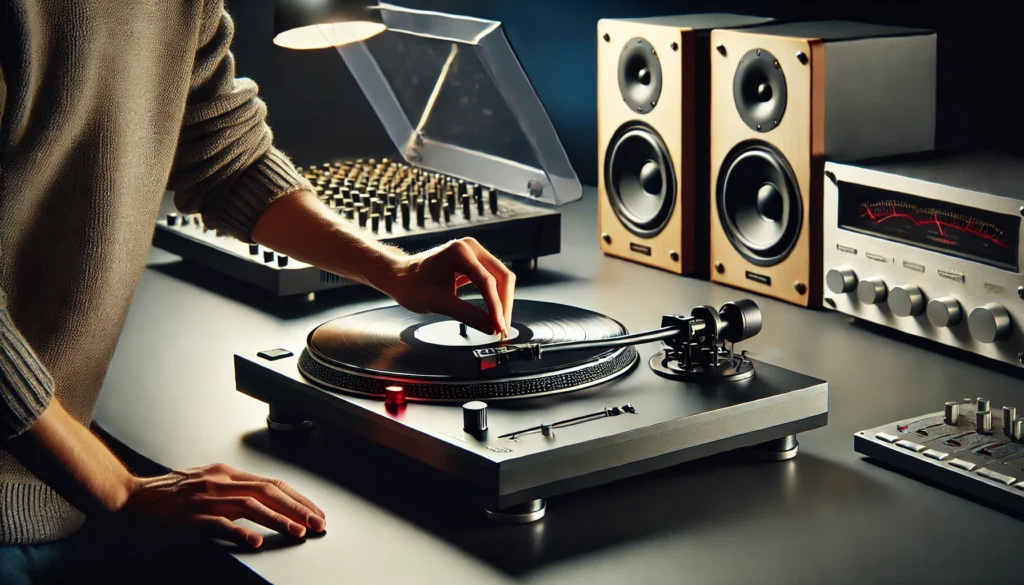
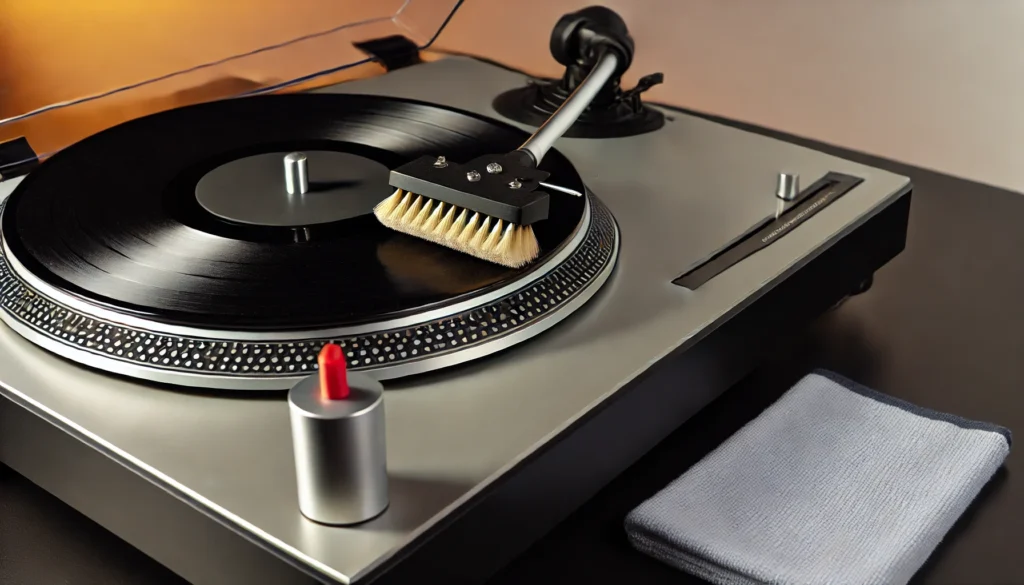
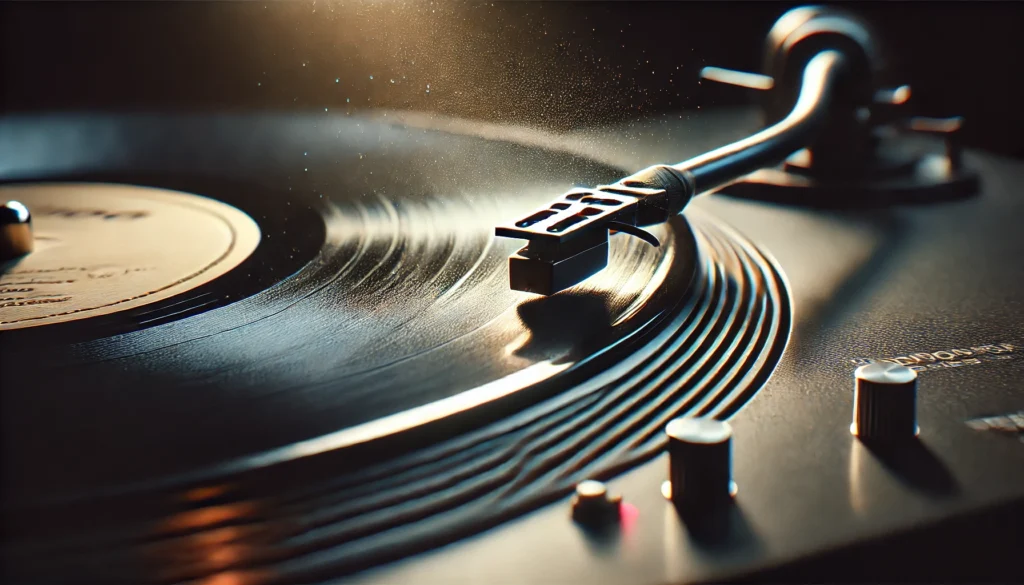
Proper Stylus (Needle) Cleaning Methods

Close-up of a delicate stylus being cleaned with a specialized stylus cleaning brush, showing careful attention to detail with a magnifying glass nearby

Alright, folks, it’s time to talk about one of the most crucial – and let’s face it, nerve-wracking – parts of turntable maintenance: cleaning the stylus, or as some of you might know it, the needle. This tiny piece of equipment is where the magic happens, and keeping it clean is absolutely essential for good sound quality and the longevity of your records.

Now, I’ll be honest with you – the first time I cleaned my stylus, I was sweating bullets. It’s such a delicate part, and the thought of damaging it was terrifying.

But let me tell you, once you get the hang of it, it’s not so bad. In fact, it’s become one of my favorite parts of turntable maintenance.

There’s something oddly satisfying about seeing that tiny diamond tip sparkle!

So, why is a clean stylus so important? Well, think about it – this little guy is running through the grooves of your records, picking up every minute vibration to create sound.

If it’s clogged up with dust, dirt, or (heaven forbid) bits of vinyl, it’s not going to be able to do its job properly. Not only will this affect your sound quality, but it can actually damage your records over time.

Trust me, I learned this the hard way when I neglected my stylus cleaning for too long and ended up with some nasty sounding records.

Now, let’s get into the nitty-gritty of how to clean this delicate piece of equipment. First things first – always, and I mean always, make sure your turntable is off and the tonearm is secured before you start cleaning.

I once forgot this step and… well, let’s just say it didn’t end well for my favorite record.

There are a few different methods for cleaning your stylus, but my go-to is using a specialized stylus cleaning brush. These brushes are designed to be super soft and gentle, so they won’t damage the delicate stylus tip.

The key is to brush from back to front – never side to side or front to back. Think of it like petting a very tiny, very expensive cat – always in one direction!

If you’re dealing with some stubborn gunk (it happens to the best of us), you might need to break out the big guns – stylus cleaning fluid. This stuff is like magic, but you’ve got to be careful with it.

A little goes a long way! I usually put a drop or two on the brush, never directly on the stylus.

Then, gently brush from back to front, just like before.

Now, here’s a pro tip I wish someone had told me earlier – invest in a good magnifying glass or loupe. Being able to actually see what you’re doing makes a world of difference.

Plus, it’s pretty cool to see your stylus up close. It’s like a tiny work of art!

So, how often should you be cleaning your stylus? Well, that depends on how often you’re using your turntable.

As a general rule, I give mine a quick brush before each listening session. For a deeper clean with fluid, I do that about once a week.

But hey, use your ears – if you start to notice a decline in sound quality, it might be time for a clean.

One last thing – pay attention to how your stylus looks over time. If you notice any bending, chipping, or excessive wear, it might be time for a replacement.

A worn-out stylus can do some serious damage to your records, so don’t try to squeeze too much life out of it.

There you have it! The ins and outs of stylus cleaning. I know it might seem like a lot of fuss for such a tiny part, but trust me, your ears (and your records) will thank you for it.

Now, who’s ready to move on to the next part of our turntable cleaning adventure?

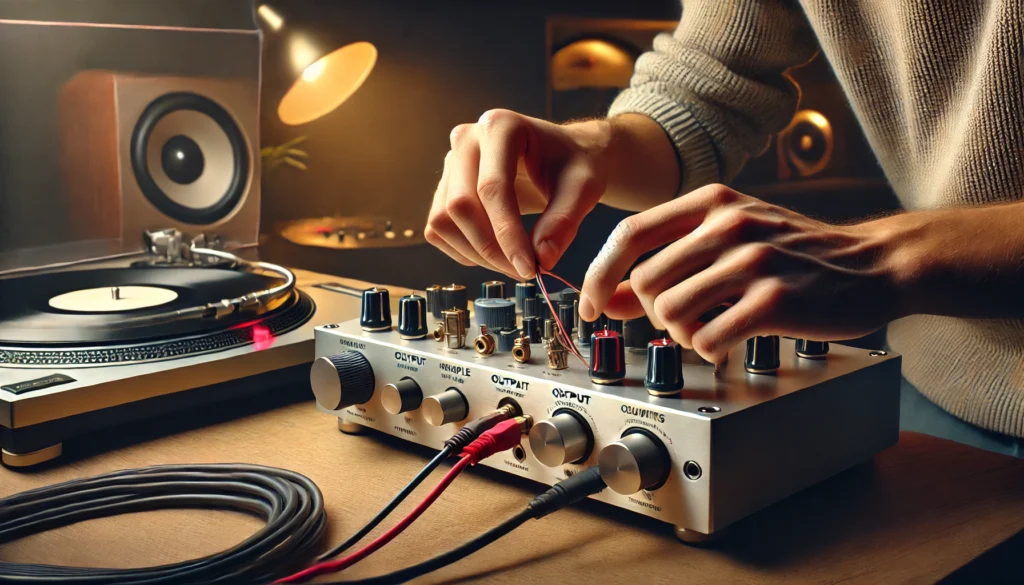
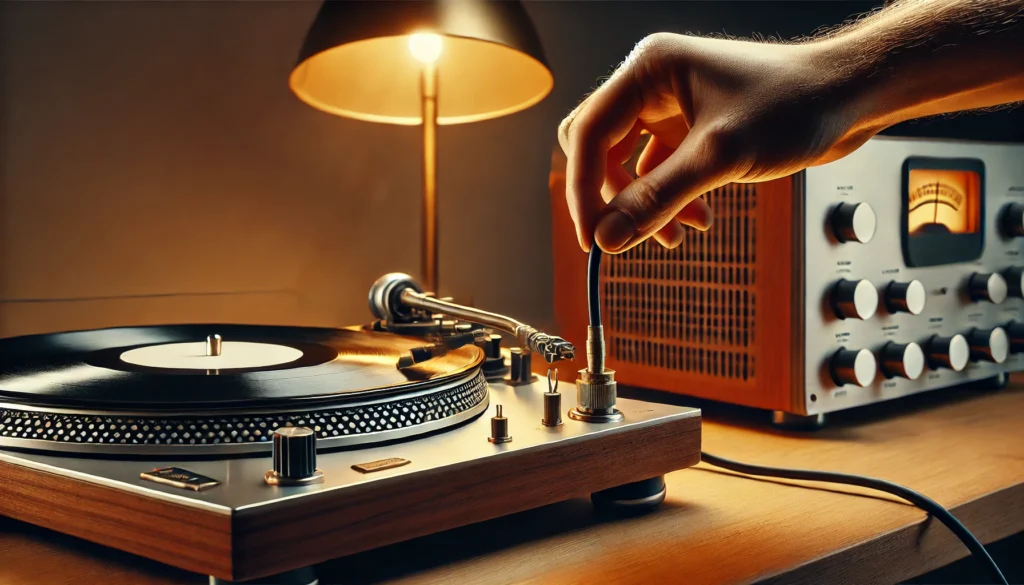
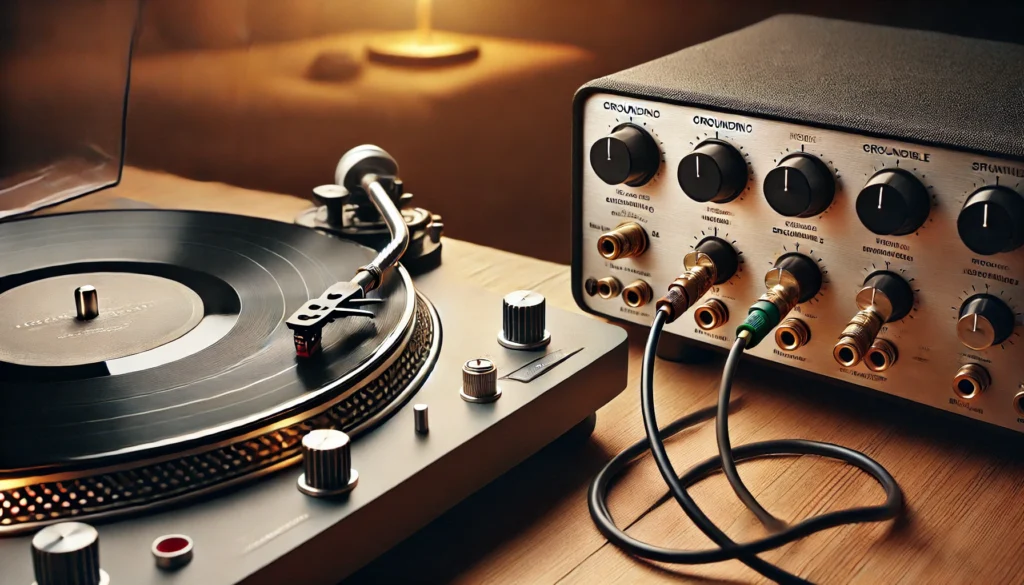
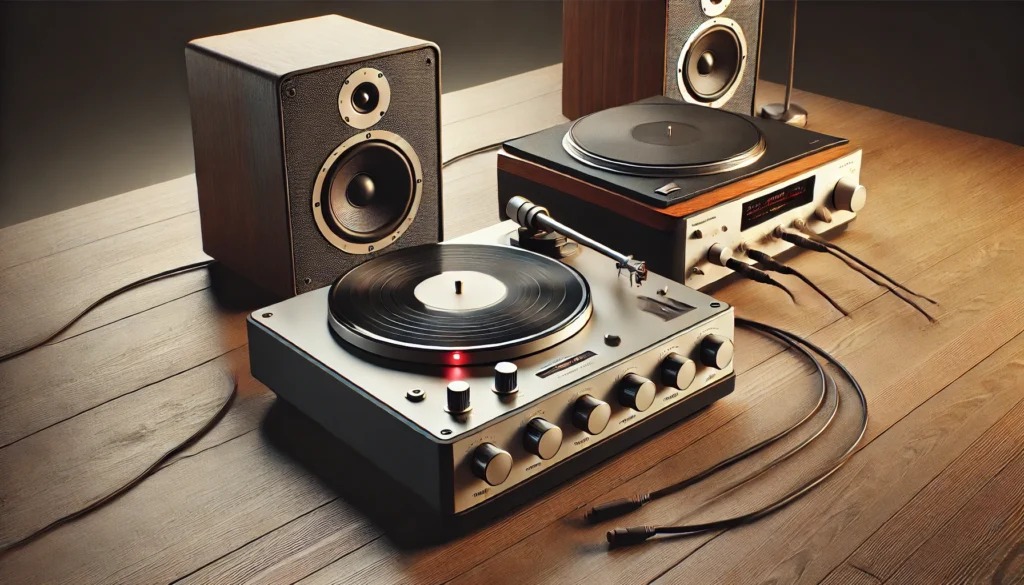
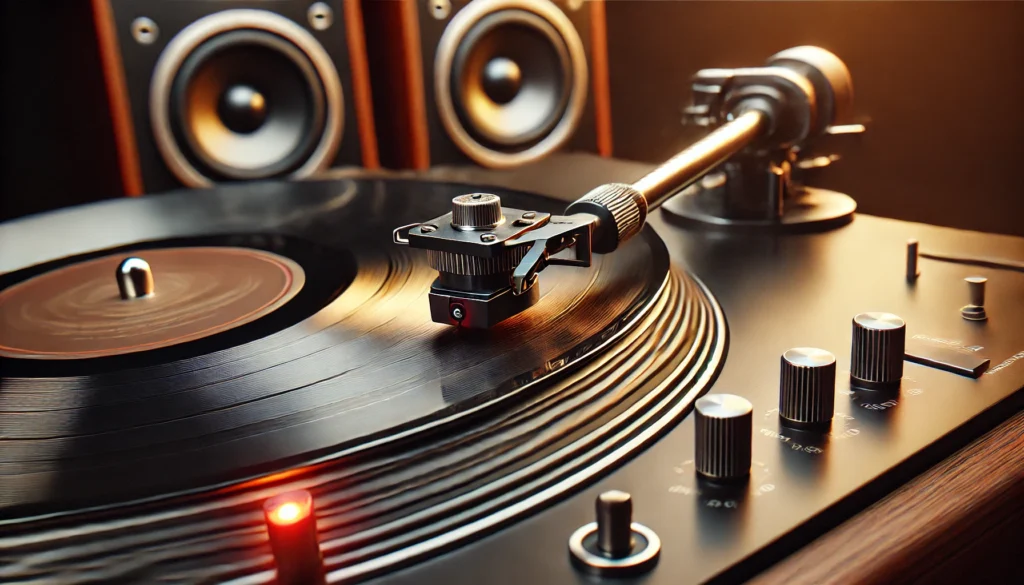
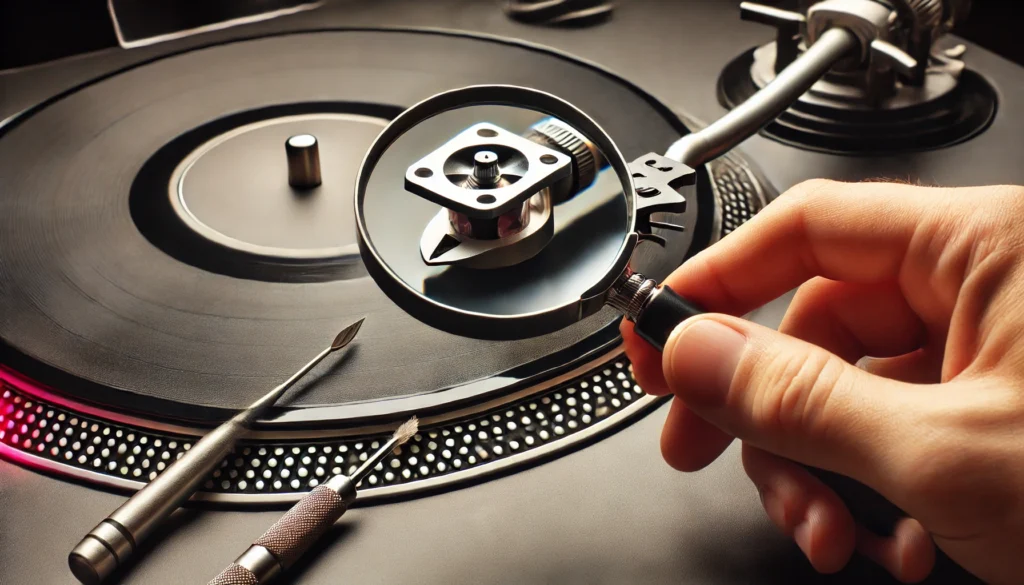
Maintaining the Tonearm and Cartridge

Close-up of a turntable's tonearm and cartridge being gently cleaned with a soft anti-static brush, showing the delicate wires and careful dust removal process.

Alright, vinyl lovers, let’s dive into a topic that often gets overlooked but is crucial for maintaining your turntable’s performance: the tonearm and cartridge. When I first started out, I was so focused on cleaning the platter and stylus that I completely neglected these parts.

Boy, was that a mistake!

Let’s start with the tonearm. This sleek piece of engineering is responsible for holding your cartridge and stylus in place as it glides across your records.

Keeping it clean and well-maintained is key to ensuring smooth operation and accurate tracking.

First things first, dust removal. I can’t tell you how many times I’ve looked at my tonearm and thought, “How the heck did it get so dusty?” It’s like the darn thing is a dust magnet!

The best way to tackle this is with a soft, anti-static brush. Gently brush away any visible dust, paying special attention to the bearings and pivot points.

Be careful around the wires connecting the cartridge – they’re delicate little buggers.

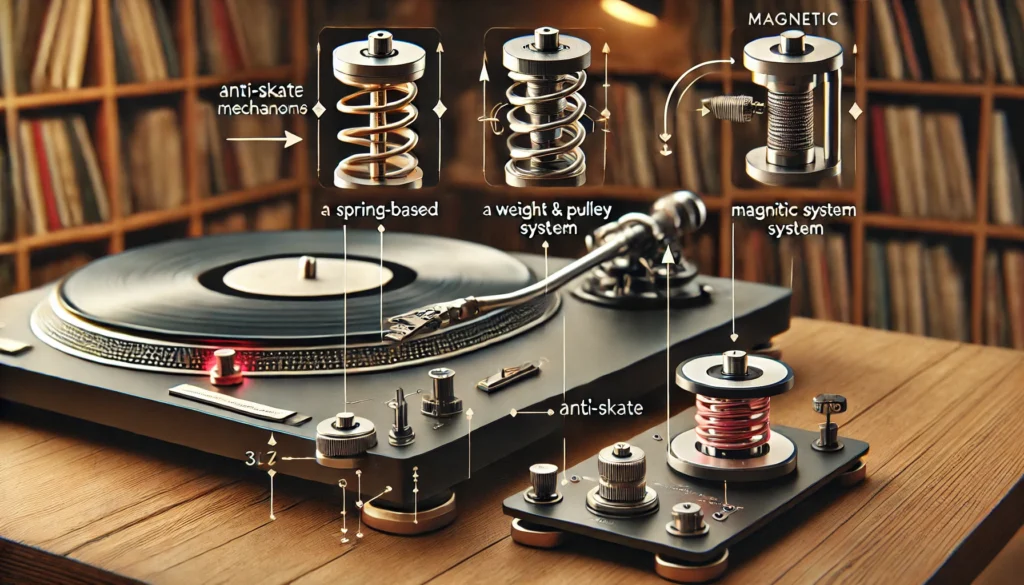
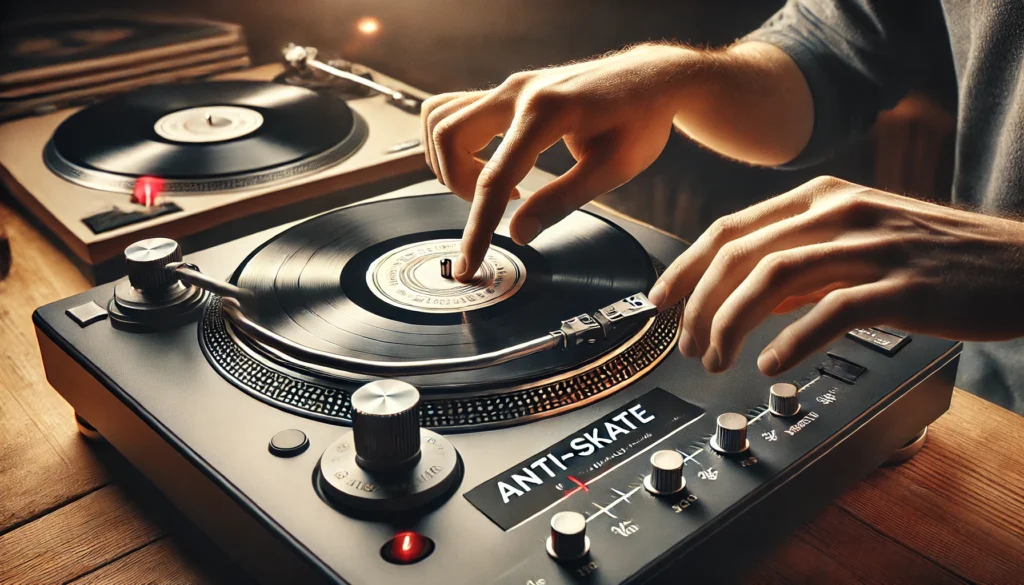
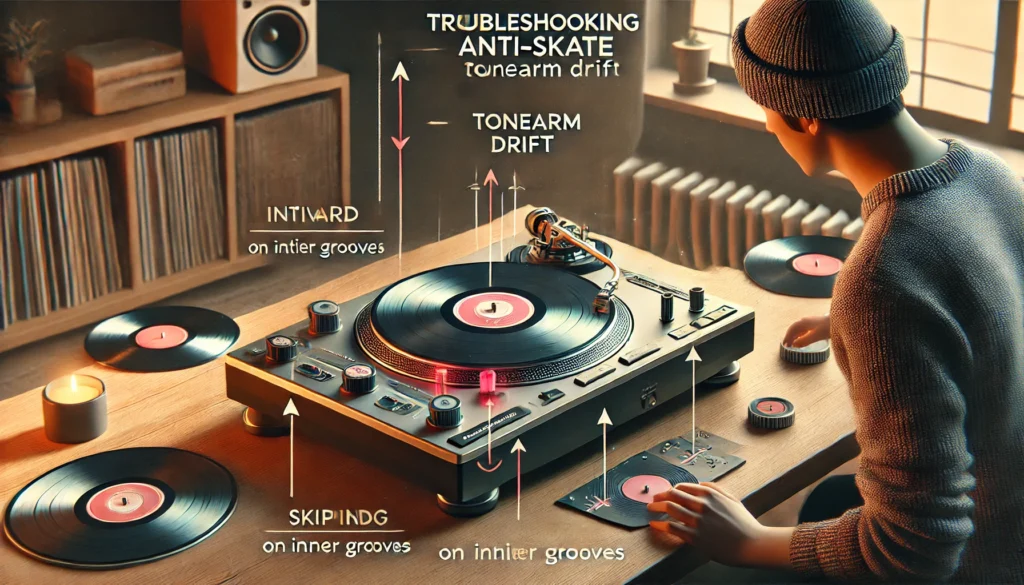
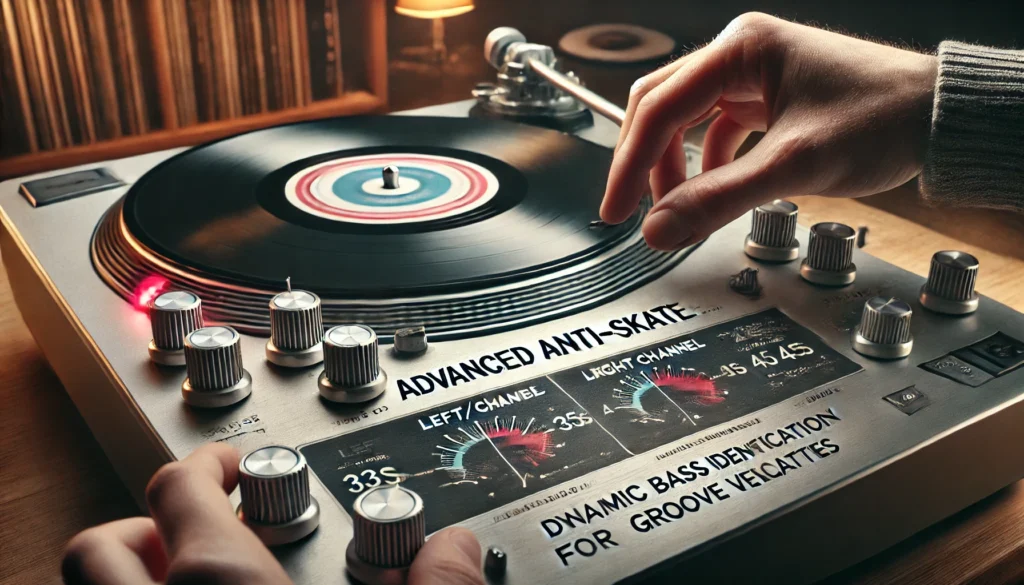
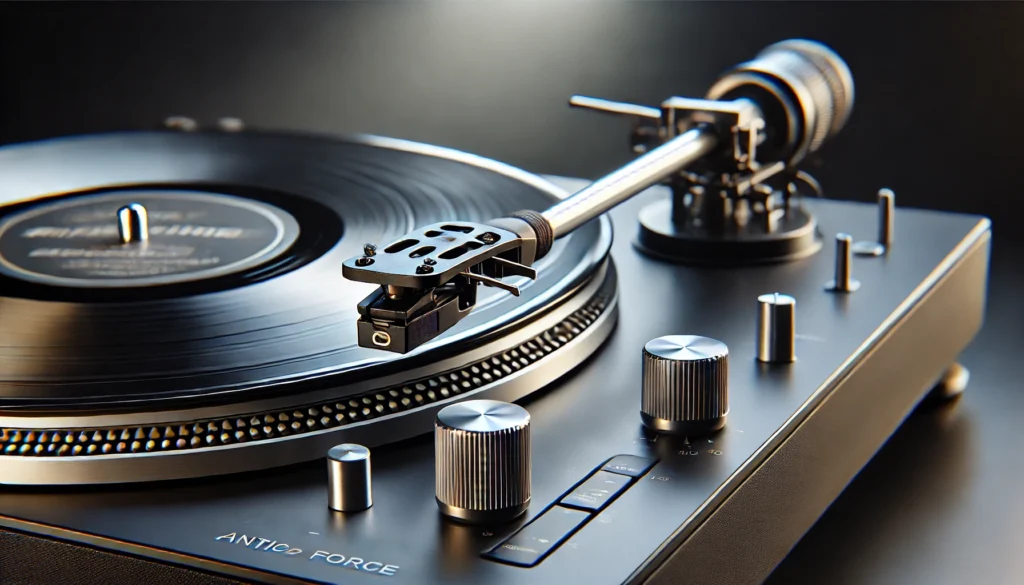
Now, here’s where things get a bit technical (and where I made a bunch of mistakes when I was starting out). Adjusting the tracking force and anti-skate settings is crucial for optimal performance. Tracking force is the downward pressure your stylus exerts on the record, while anti-skate counteracts the natural tendency of the tonearm to move inward.

I remember the first time I tried to adjust these settings – I was sweating bullets! But with a little practice (and a lot of patience), it becomes second nature.

Most turntables come with a gauge to help you set the correct tracking force. If yours didn’t, I highly recommend investing in one.

Trust me, it’s worth it.

For anti-skate, start by setting it to the same number as your tracking force. Then, put on a record and listen closely.

If you hear distortion in the right channel, increase the anti-skate. If it’s in the left channel, decrease it.

It’s a bit of a trial and error process, but once you get it right, the improvement in sound quality is mind-blowing!

Now, let’s talk about the cartridge. This little powerhouse is responsible for converting the physical movements of the stylus into an electrical signal.

Keeping it clean is pretty straightforward – a gentle brush with an anti-static brush should do the trick. Just be extremely careful around the stylus!

One thing I learned the hard way – pay attention to signs of wear on your cartridge. If you start noticing a drop in sound quality, increased surface noise, or difficulty keeping your tonearm balanced, it might be time for a replacement.

I once tried to squeeze a few extra months out of a worn-out cartridge, and let’s just say my records weren’t too happy about it.

Here’s a pro tip: keep track of your stylus hours. Most cartridges have a lifespan of about 1000 hours of play time.

I use a little notebook to jot down my listening sessions – it’s like a diary for my turntable!

Now, I know all this might sound a bit overwhelming, especially if you’re new to the world of vinyl. But trust me, once you get into the habit of regular maintenance, it becomes second nature.

And the payoff in terms of sound quality and the longevity of your equipment is totally worth it.

One last thing – don’t be afraid to consult your turntable’s manual or reach out to fellow vinyl enthusiasts for advice. We’ve all been there, and most of us are more than happy to share our hard-earned knowledge.

Heck, I once spent an entire afternoon at a record store, picking the owner’s brain about tonearm alignment!

So there you have it, folks – the nitty-gritty of maintaining your tonearm and cartridge. It might not be the most glamorous part of owning a turntable, but it’s definitely one of the most important.

Now, who’s ready to give their tonearm some TLC?

Deep Cleaning Your Vinyl Records

A vinyl record being deep cleaned with a cleaning solution and carbon fiber brush, with a microfiber cloth and record cleaning machine nearby

Alright, vinyl enthusiasts, it’s time to talk about a topic that’s near and dear to my heart: deep cleaning your precious records. Now, I know what some of you might be thinking – “Isn’t a quick brush before playing enough?” Well, let me tell you a little story that might change your mind.

Back when I first started collecting vinyl, I thought I was doing a great job keeping my records clean. A quick once-over with a carbon fiber brush before each spin, and I was good to go, right?

Wrong! It wasn’t until I borrowed a friend’s record cleaning machine that I realized what I’d been missing.

The difference in sound quality was like night and day. I could hear details in my favorite albums that I’d never noticed before.

It was like rediscovering my entire collection!

So, let’s dive into the world of deep cleaning your vinyl. There are two main approaches: wet cleaning and dry cleaning.

Both have their pros and cons, and I’ve tried just about every method under the sun.

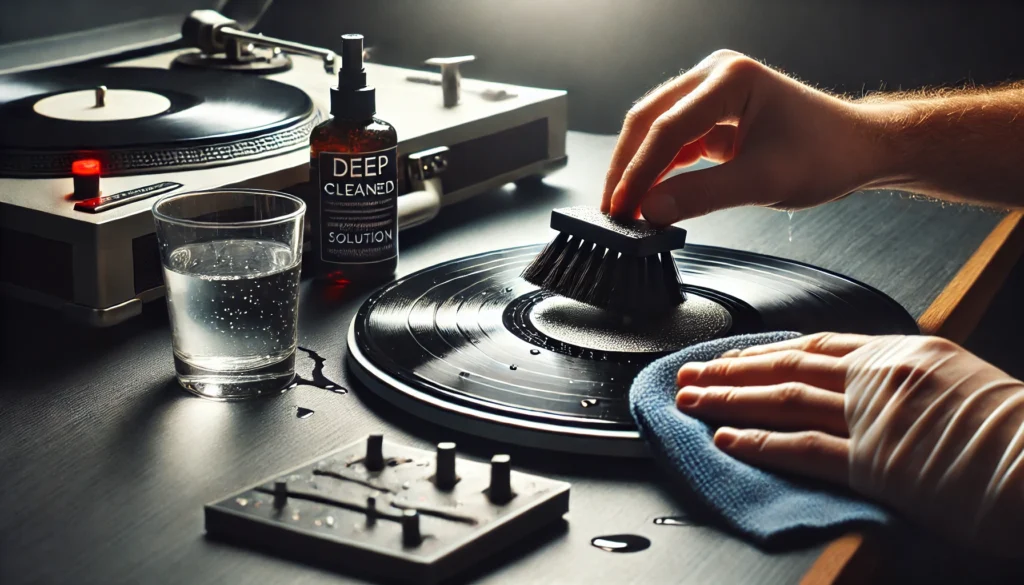
Let’s start with wet cleaning. This method involves using a cleaning solution to really get into those grooves and lift out all the gunk that’s been hiding in there.

Now, there are tons of commercial solutions out there, but I’ve had great success with a simple DIY mix of distilled water and a tiny drop of dish soap. Just be sure to use distilled water – tap water can leave mineral deposits on your records.

The process is pretty straightforward: apply the solution to your record (being careful to avoid the label), gently scrub with a carbon fiber brush or a specialized record cleaning brush, then rinse with distilled water and dry with a microfiber cloth. It can be a bit time-consuming, especially if you’re doing a whole stack of records, but the results are worth it.

Now, if you’re really serious about your vinyl (and let’s face it, if you’re reading this, you probably are), you might want to consider investing in a record cleaning machine. These bad boys use vacuum suction to remove the cleaning solution along with all the dirt and grime.

I remember the first time I used one – it was like watching magic happen!

On the other hand, we’ve got dry cleaning methods. These are great for maintenance cleaning between deep cleans.

The most common tool here is the trusty carbon fiber brush, which can remove surface dust and static. But for a more thorough dry clean, you might want to check out products like cleaning pads or rollers designed specifically for vinyl.

One thing I’ve learned the hard way – be careful with those all-in-one cleaning systems that claim to clean and protect your vinyl in one step. Some of them can leave a residue that actually attracts more dust in the long run.

Stick to simple, proven methods and you can’t go wrong.

Now, I know all this cleaning talk might sound like a lot of work. And I’ll be honest, it can be.

But here’s the thing – there’s something incredibly satisfying about the process. It’s like giving your records a spa day!

Plus, the improvement in sound quality is truly remarkable. You’ll hear details in your favorite albums that you never knew were there.

One last piece of advice – make deep cleaning your records a regular part of your vinyl routine. I try to give each of my records a thorough clean at least once a year, more often for the ones I play frequently.

It might seem like overkill, but trust me, your future self (and your turntable) will thank you for it.

So there you have it, folks – the ins and outs of deep cleaning your vinyl records. It’s a labor of love, but one that pays off in spades.

Now, who’s ready to roll up their sleeves and give their collection some TLC?

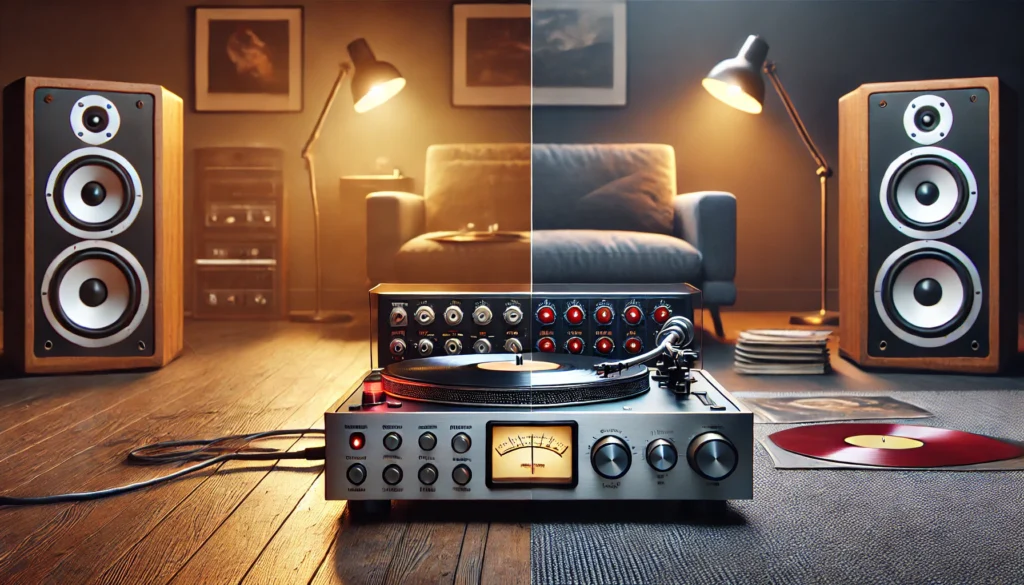
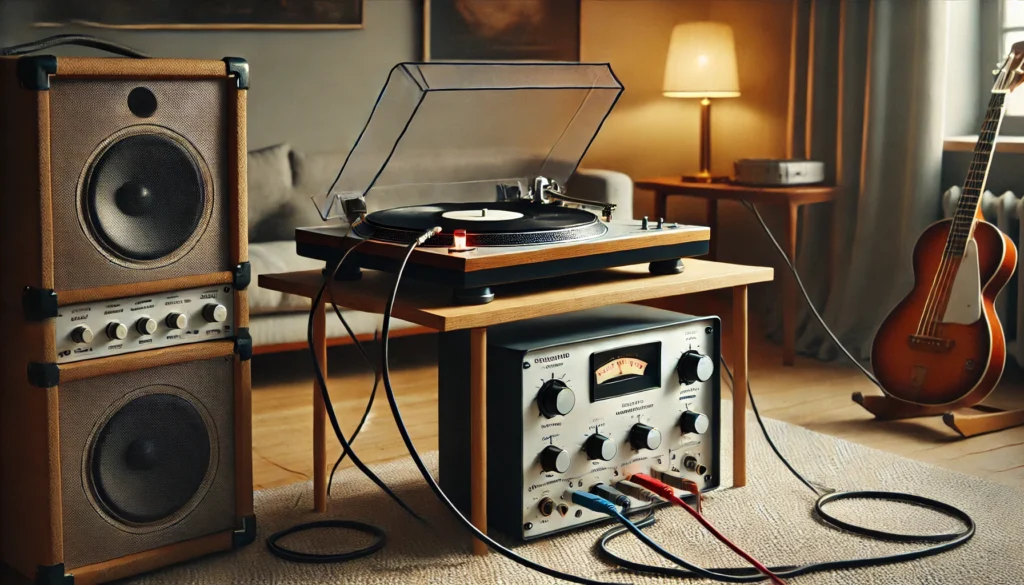
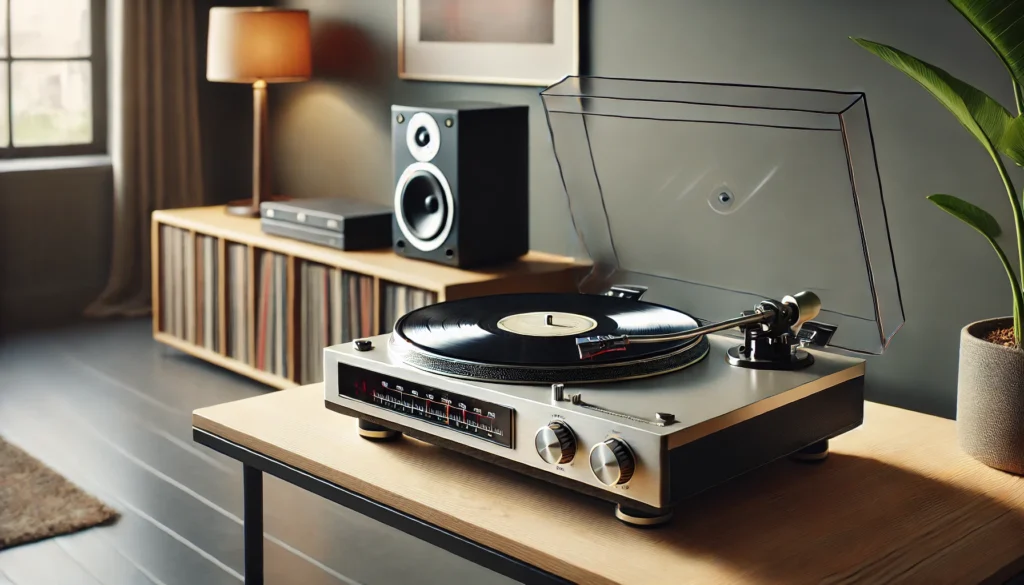
Preventive Measures for a Cleaner Turntable

A clean turntable with a closed dust cover, proper placement away from sunlight, and anti-static record sleeves nearby in a well-organized room.

Alright, vinyl lovers, we’ve covered a lot of ground when it comes to cleaning your turntable and records. But you know what they say – an ounce of prevention is worth a pound of cure.

So let’s talk about some preventive measures you can take to keep your turntable cleaner for longer. Trust me, future you will be grateful!

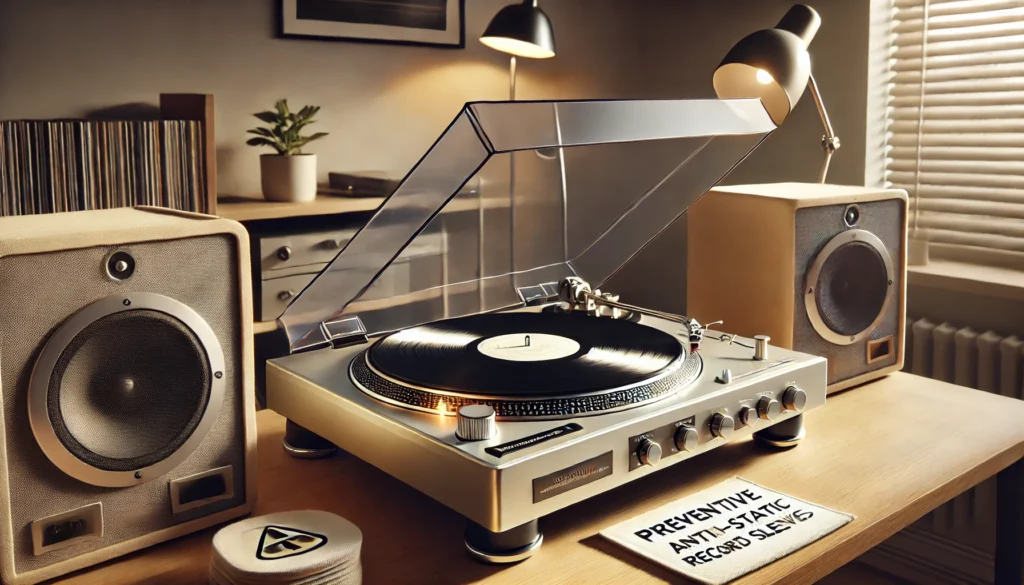
First up, let’s talk about the unsung hero of turntable maintenance: the dust cover. I’ll admit, when I first got into vinyl, I thought dust covers were just there to make turntables look prettier when they weren’t in use.

Boy, was I wrong! A good dust cover is your first line of defense against, well, dust.

It’s like a shield for your turntable, protecting it from all the nasty particles floating around in the air.

Now, here’s a mistake I made early on – I’d leave my dust cover open while playing records because I thought it looked cooler. Don’t be like me!

Unless you’re changing records, keep that cover closed. It’s especially important if you live in a dusty area or have pets.

I learned this the hard way when I found cat hair all over my platter one day. Not cool, kitty.

Not cool.

Speaking of storage, let’s talk about where you keep your turntable. Ideally, you want a spot that’s away from direct sunlight (which can warp your records), heat sources, and high traffic areas.

I once had my turntable set up near a window, and let me tell you, dusting became a daily chore. Now it’s in a nice, cozy corner where it’s protected from the elements and curious pets.

Here’s a pro tip: consider investing in a turntable isolation platform. These nifty devices help reduce vibrations from your surroundings, which not only improves sound quality but also helps keep dust from settling on your turntable.

I was skeptical at first, but after trying one, I was sold. It’s like giving your turntable its own little fortress of solitude!

Now, let’s talk about a regular maintenance schedule. I know, I know – it sounds boring.

But trust me, a little routine goes a long way. Here’s what works for me:

  • Daily: Quick dust with a carbon fiber brush before and after playing records.
  • Weekly: Wipe down the platter and tonearm with a microfiber cloth. Clean the stylus.
  • Monthly: Deep clean a batch of records. Check tracking force and anti-skate settings.
  • Yearly: Full turntable inspection and deep clean, including under the platter.

Of course, you can adjust this based on how often you use your turntable. The key is consistency.

It’s much easier to keep up with small, regular cleanings than to do a massive overhaul once in a blue moon.

Here’s something I wish I’d known earlier – pay attention to the air quality in your listening room. If you live in a particularly humid area, consider using a dehumidifier.

Excess moisture can lead to mold growth on your records (yuck!) and can even affect the performance of your turntable’s electronics.

On the flip side, if your air is too dry, static electricity becomes your enemy. I once lived in a really dry climate, and the static was so bad, I could practically see sparks flying off my records!

A humidifier can help with this, or you can try using anti-static sleeves for your records.

Lastly, don’t forget about your record sleeves. Inner sleeves can deteriorate over time, shedding fibers that end up on your records and stylus.

I make it a point to replace my inner sleeves every few years with high-quality, anti-static ones. It’s a small investment that pays off big time in the long run.

Remember, folks – taking care of your turntable isn’t just about cleaning up messes. It’s about creating an environment where those messes are less likely to happen in the first place.

It might seem like a lot of work, but once you get into the habit, it becomes second nature. And the payoff – in terms of sound quality and the longevity of your equipment – is totally worth it.

So there you have it – my top tips for keeping your turntable clean and happy. Now, who’s ready to set up their maintenance schedule?

Conclusion

Whew! We’ve covered a lot of ground, haven’t we? From the nitty-gritty of cleaning your stylus to the big-picture stuff like creating a maintenance schedule, we’ve explored every nook and cranny of turntable cleaning.

And you know what? I hope you’re as excited about it as I am!

I remember when I first started this vinyl journey, feeling overwhelmed by all the care and maintenance involved. But let me tell you, it’s all worth it.

There’s nothing quite like dropping the needle on a perfectly clean record, hearing those first notes come through crystal clear, and knowing that you’re taking the best possible care of your music.

Now, I’m not gonna lie – keeping your turntable clean is an ongoing process. It’s not something you can do once and forget about.

But that’s part of the beauty of vinyl, isn’t it? It’s a hands-on, engaging way to experience music.

Every time you clean your stylus or flip through your freshly cleaned records, you’re connecting with your music in a way that just doesn’t happen with digital formats.

Remember, the methods and schedules we’ve discussed are just guidelines. Feel free to adapt them to your own situation and preferences.

Maybe you live in a super dusty area and need to clean more often. Or maybe you only spin records on weekends and can get away with a less frequent schedule.

The key is to find what works for you and stick with it.

And hey, don’t be afraid to experiment! Try different cleaning solutions, test out various brushes, maybe even dive into the world of record cleaning machines.

The vinyl community is full of passionate people with great ideas – join in the conversation!

Lastly, I want to encourage you to share your own experiences and tips. What cleaning methods have worked best for you?

Have you discovered any clever hacks for keeping your turntable dust-free? Drop a comment and let us know!

We’re all in this together, working to keep our vinyl sounding sweet for years to come.

So, my fellow vinyl enthusiasts, armed with this knowledge, go forth and clean! Your turntable (and your ears) will thank you.

Now, if you’ll excuse me, I’ve got a date with my record cleaning brush. Happy listening, everyone!

What Is Anti-Skate On My Turntable & How Does It Work?

Did you know that a tiny adjustment on your turntable can make or break your vinyl listening experience?

Well, buckle up, because we’re about to dive into the world of anti-skate – a feature that might seem small but packs a big punch when it comes to getting the most out of your records.

As a vinyl enthusiast and self-proclaimed audiophile, I’ve spent countless hours tinkering with turntables.

Trust me, I’ve made every mistake in the book! But through all that trial and error, I’ve come to appreciate just how crucial anti-skate is in the grand scheme of turntable setup.

In this article, we’ll explore what anti-skate is, why it matters, and how to set it up like a pro.

Whether you’re a vinyl newbie or a seasoned collector, I promise you’ll walk away with some nuggets of wisdom that’ll take your listening game to the next level.

What Is Anti-Skate On My Turntable & How Does It Work?

 A detailed close-up view of a turntable's tonearm and anti-skate mechanism, with the tonearm positioned on a spinning vinyl record and the anti-skate dial visible, highlighting its role in balancing the stylus' movement.

Anti-skate on a turntable is a mechanism that counteracts the natural inward force on the tonearm as it tracks the record groove.

It works by applying an equal outward force, ensuring the stylus maintains consistent contact with both walls of the groove.

This balance is crucial for optimal sound quality and to prevent excessive wear on your records and stylus.

I remember the first time I heard about anti-skate – I was like, “What’s the big deal?” But let me tell you, once I got it dialed in correctly, it was like hearing my records for the first time all over again!

We’ll dive deeper into the nitty-gritty below, but for now, just know that this little feature can make a world of difference in your vinyl experience.

The Physics Behind Anti-Skate

Alright, let’s get a little nerdy for a second – but I promise it’ll be worth it! You know how when you’re ice skating, you naturally want to curve inward?

Well, your turntable’s tonearm feels the same way. As the record spins, there’s this pesky force called the “skating force” that tries to pull the tonearm towards the center of the record.

Now, why does this happen? It’s all about friction and angles, folks. The stylus, sitting in the groove, creates friction as it tracks the music.

But because the tonearm is at an angle to the record (unless you’ve got one of those fancy linear tracking turntables), this friction doesn’t just slow the arm down – it also pulls it inward.

I learned this the hard way when I first started collecting vinyl. I couldn’t figure out why my records sounded so wonky, especially towards the center.

It turns out, without proper anti-skate, the stylus was putting more pressure on one wall of the groove than the other. Not cool for sound quality or record longevity!

This is where anti-skate comes to the rescue. It’s like giving your tonearm a little outward nudge to balance things out.

When set correctly, it keeps the stylus centered in the groove, making sure it’s reading both channel walls equally. Trust me, your ears (and your records) will thank you!

Types of Anti-Skate Mechanisms

n illustration showing the physics behind anti-skate on a turntable, with arrows indicating the inward "skating force" pulling the tonearm towards the center and the counteracting outward anti-skate force. The stylus tracks the vinyl groove.

In my vinyl journey, I’ve come across a few different types of anti-skate systems. Let’s break ’em down:

Spring-based systems are pretty common and use a small spring to apply outward force on the tonearm. They’re usually adjustable with a little dial or slider. I’ve found these to be pretty reliable, but sometimes they can be a bit finicky to get just right.

Then there are weight and pulley systems. These use a weight hanging on a thread that’s attached to the tonearm via a little pulley.

As the arm moves inward, the weight provides a counterforce. I love how precise these can be, but I’ve definitely tangled that thread more times than I care to admit!

Some fancy-pants turntables use magnets to create the anti-skate force. It’s all very high-tech and usually provides super smooth operation. I drooled over one of these at a hi-fi show once, but my wallet wasn’t having it.

Each type has its pros and cons. Spring systems are simple but can wear out over time. Weight systems are precise but can be fiddly. Magnetic systems are smooth but often pricier.

Personally, I’ve had good experiences with all types – it’s more about getting the adjustment right than which system you’re using.

Why Is Anti-Skate Important?

A detailed image comparing different types of anti-skate mechanisms for turntables, including a spring-based system with a dial, a weight and pulley system, and a high-tech magnetic system, each showing how they apply outward force.

Let me tell you a story. Back when I was a vinyl newbie, I thought anti-skate was just some audiophile mumbo-jumbo.

Boy, was I wrong! I left it off completely, and after a few months, I noticed my records sounding distorted, especially on the inner grooves.

Even worse, when I looked closely at my stylus, it was visibly worn on one side. Ouch!

Anti-skate is crucial for several reasons. First off, it’s all about sound quality. When your stylus is centered in the groove, it picks up the sound from both channel walls equally.

This means better stereo separation and more accurate sound reproduction. It’s like the difference between listening through one-and-a-half earbuds versus two properly fitted ones.

It’s also about protecting your precious vinyl. Without anti-skate, your stylus puts more pressure on one groove wall.

Over time, this can actually wear down your records unevenly. And let me tell you, there’s nothing worse than damaging a rare vinyl find because of improper setup.

Your stylus benefits too. Just like it wears your records unevenly, improper anti-skate can wear down your stylus faster on one side. These little guys aren’t cheap, so you want them to last as long as possible.

Lastly, correct anti-skate helps your stylus stay in the groove, especially during louder or more dynamic passages. This means fewer skips and better playback of complex music.

Trust me, once you get your anti-skate dialed in, you’ll wonder how you ever listened without it properly set up!

How to Set Up Anti-Skate Correctly

A person adjusting the anti-skate on a modern turntable, using a blank test record and carefully watching the tonearm's movement. The cozy environment includes vinyl records nearby, emphasizing the precision of setting up anti-skate for balanced sound.

Alright, here’s where the rubber meets the road – or should I say, where the stylus meets the groove? Setting up anti-skate can seem daunting, but I promise it’s not rocket science.

Start with the basics: make sure your turntable is level and your cartridge is properly aligned. Anti-skate won’t work miracles if everything else is out of whack. Next, set your tracking force. This is usually done before anti-skate. Follow your cartridge manufacturer’s recommendations.

Find your anti-skate control. It might be a dial, a slider, or a hanging weight, depending on your turntable. Start at zero by setting the anti-skate to its lowest setting. Now, use a blank record or a test record. If you don’t have one, you can use the run-out groove of a regular record.

Gradually increase anti-skate. Watch the tonearm as it sits in the groove. If it starts to drift inward, you need more anti-skate. If it drifts outward, you’ve gone too far. Fine-tune by ear by playing some music and listening for distortion, especially in the right channel. Adjust until it sounds clean and balanced.

Don’t forget to double-check with different records. What works for one might not be perfect for all, so test with a few different albums.

Common mistakes? Oh boy, I’ve made them all! Don’t just set it to match the tracking force number – that’s a rough guide at best. And don’t forget to re-adjust if you change your stylus or cartridge.

Remember, patience is key. It took me a while to get the hang of it, but now I can dial it in pretty quickly. You’ll get there too!

Troubleshooting Anti-Skate Issues

A person troubleshooting anti-skate issues on their turntable, adjusting the anti-skate dial to fix tonearm drift or skipping on inner grooves. Visual cues show inward and outward drift, and the cozy room highlights the importance of fine-tuning for sound quality.

Even with the best setup, sometimes things can go wonky. Here are some common issues I’ve run into and how to fix them:

If you’re experiencing skipping on inner grooves, this could mean your anti-skate is set too low. Try increasing it slightly. Distortion in one channel? If it’s the right channel, your anti-skate might be too high. If it’s the left, it might be too low.

Watch out for tonearm drift. If it’s drifting inward, increase your anti-skate. If it’s drifting outward, decrease it. Inconsistent sound across the record? Your anti-skate might need fine-tuning, or there could be an issue with your tonearm bearings.

If you’re still having trouble, don’t be afraid to start from scratch. Reset everything to zero and work your way up again. And hey, if all else fails, don’t be ashamed to ask for help. I’ve learned some of my best tricks from the folks at my local hi-fi shop!

Advanced Anti-Skate Techniques

A person using a test record to adjust the anti-skate on a turntable, with indicators for both 33s and 45s speeds, fine-tuning the setup for dynamic, bass-heavy music. The cozy setting emphasizes precision in advanced anti-skate techniques.

Ready to take your anti-skate game to the next level? Here are some pro tips I’ve picked up over the years:

Consider using a test record. These have specific tracks designed to help you dial in your anti-skate perfectly. Look for one with left/right channel identification and tracking ability tests.

Think about your music choices too. If you listen to a lot of dynamic music with heavy bass, you might need a touch more anti-skate to keep the stylus tracking properly during those intense passages.

Did you know that the optimal anti-skate can vary slightly between 33s and 45s? It’s true! This is due to the difference in groove velocity. You might want to adjust accordingly when switching between speeds.

For those of you with older, well-loved records, you might need to back off the anti-skate a bit to prevent skipping. These worn grooves can behave differently, so a little tweaking can go a long way.

At the end of the day, trust your ears. If it sounds good and your records aren’t showing signs of wear, you’re probably in good shape. Remember, these are advanced techniques. Don’t stress if you’re not ready for this level yet. A good basic setup will get you 90% of the way there!

Conclusion

Whew! We’ve covered a lot of ground, haven’t we? From the basics of what anti-skate is to some pretty advanced techniques. But here’s the thing – all this tech talk is really just in service of one goal: getting the most enjoyment out of your vinyl collection.

Remember when I said that tiny adjustment could make or break your listening experience? Well, now you know why! Anti-skate might seem like a small detail, but it’s one of those things that separates the good setups from the great ones.

But here’s my final piece of advice: don’t get too caught up in the perfectionism trap. Yes, it’s important to get your anti-skate set correctly. But at the end of the day, the most important thing is that you’re enjoying your music. If you’ve followed the steps we’ve outlined and your records sound good to you, then kick back, drop the needle, and enjoy!

And hey, I’d love to hear about your experiences with anti-skate. Have you noticed a big difference after dialing it in? Any tricks you’ve discovered that I didn’t mention? Drop a comment below and let’s keep the conversation going. After all, the best part of this hobby is sharing our knowledge and experiences with fellow vinyl enthusiasts.

Now, if you’ll excuse me, I’ve got some records to spin. Happy listening, folks!

What Is a Preamp for a Turntable and Do I Need One?

Did you know that vinyl record sales have been steadily increasing for the past 15 years? In 2020 alone, vinyl outsold CDs for the first time since the 1980s!

And get this – in 2021, vinyl sales in the US hit $1 billion, a number not seen since 1986. It’s clear that the vinyl resurgence is here to stay, and if you’re diving into this world of warm, rich analog sound, you might be wondering about all the equipment involved.

One crucial component that often confuses newcomers is the turntable preamp. So, let’s dive in and demystify this essential piece of audio gear!

What Is a Preamp for a Turntable and Do I Need One?

A close-up of a turntable setup with a visible external preamp, focusing on the signal chain between the turntable, preamp, and speakers. The stylus is lowered onto a spinning vinyl record, and the preamp is connected with cables to an amplifier.

A turntable preamp, also known as a phono preamp or phono stage, is a device that amplifies the weak signal from your turntable’s cartridge to a level that your stereo system can use.

It also applies RIAA equalization to correct the frequency response of the vinyl recording. Without a preamp, you’d barely hear anything from your records, and what you did hear would sound all wrong!

Do you need one? Well, if you’re reading this, chances are you do! But don’t worry, we’ll explore this topic more deeply below and help you figure out if you need to add a preamp to your setup.

The Basics of Turntable Preamps

A split-screen scene showing two types of turntable preamps. One side depicts a modern turntable with an internal preamp connected to speakers, while the other side shows a turntable connected to an external preamp and an amplifier.

Alright, let’s break this down in simple terms. You know how when you’re whispering, it’s hard for people to hear you? Well, that’s kinda what’s happening with your turntable.

The signal coming from the needle (or stylus, if we’re being fancy) is super weak – like, whisper-level weak. The preamp’s job is to be that annoying friend who always repeats what you said, but way louder so everyone can hear.

But it’s not just about making things louder. Oh no, that would be too simple! See, when they make vinyl records, they have to tweak the sound a bit.

They boost the high frequencies and cut the low ones. Why? Well, if they didn’t, the grooves would be so wide that you’d only fit like 10 minutes of music on each side!

The preamp’s other job is to undo this tweak, so what you hear is what the artist intended.

Now, there are two types of preamps: internal and external. Some turntables, amplifiers, or receivers have preamps built right in.

That’s an internal preamp. An external preamp is a separate box that sits between your turntable and your amp. Both do the same job, but external ones often give you more control and sometimes better sound quality.

Let me tell you, when I first started getting into vinyl, I thought all this preamp stuff was just audiophile mumbo-jumbo.

Boy, was I wrong! The difference a good preamp makes is like night and day. It’s like going from watching a movie on your phone to seeing it in IMAX.

Suddenly, you’re hearing details in your favorite songs that you never knew were there!

Why You Might Need a Turntable Preamp

A person setting up a turntable for the first time, pressing their ear close to a speaker due to the low volume. Vinyl records are scattered around the cozy, well-lit room, emphasizing the need for a preamp to boost sound.

Let me tell you a little story. When I first got into vinyl, I was so excited to set up my new turntable. I plugged everything in, put on my favorite record, and… nothing. Well, almost nothing. I could hear the music, but it was so quiet I had to press my ear against the speaker! That’s when I learned about preamps the hard way.

See, the signal from a turntable is about 1000 times weaker than the signal from something like a CD player or your phone. Without a preamp, it’s like trying to fill a swimming pool with a garden hose – it’s just not gonna cut it.

But it’s not just about volume. Remember that RIAA equalization I mentioned earlier? Without that, your music would sound thin and screechy, with way too much treble and not enough bass. Trust me, nobody wants to listen to their favorite album sounding like it’s being played through a tin can telephone!

The RIAA equalization curve is actually pretty fascinating when you dig into it. It was standardized back in 1954 (yeah, way before my time!) to allow longer playing times on vinyl records and improve sound quality. The curve reduces the bass frequencies and boosts the high frequencies during recording. Then, the preamp applies the inverse of this curve during playback, restoring the original balance of frequencies. It’s like a secret code that only your preamp knows how to decode!

Signs You Don’t Have a Preamp (and Need One)

A person examining the back of their turntable and amplifier, looking for the 'PHONO/LINE' switch or a 'PHONO' input. The cozy room is softly lit, with vinyl records nearby, creating a warm, relaxed atmosphere.

Okay, so how do you know if you need a preamp? Well, there are a few telltale signs:

  1. Your turntable sounds super quiet, even with the volume cranked up.
  2. The sound is thin and tinny, lacking any real bass.
  3. You’ve plugged your turntable into an input labeled “AUX” or “LINE” instead of “PHONO.”
  4. Your records sound distorted or “off,” especially in the high frequencies.
  5. You can hear the music, but it lacks depth and detail.

If any of these sound familiar, you might be missing a preamp. But before you rush out to buy one, let’s do a quick check. Look at the back of your turntable. Do you see a little switch labeled “PHONO/LINE”? If you do, congrats!

You’ve got a built-in preamp. Just make sure it’s switched to “LINE” when you’re connecting to a regular input.

No switch? Check your amplifier or receiver. Is there an input labeled “PHONO”? If so, you’re in luck – that input has a preamp built in. Just make sure you use it!

If you’ve struck out on both counts, don’t worry. It just means you get to go shopping for a shiny new preamp!

I remember when I first realized I needed a preamp. I was trying to play a pristine copy of Pink Floyd’s “The Dark Side of the Moon” that I’d just scored at a flea market.

I was so excited to hear that iconic heartbeat at the beginning of “Speak to Me,” but all I got was a faint thump-thump that sounded more like a mouse tap-dancing than a heartbeat. That’s when I knew I had some shopping to do!

Choosing the Right Preamp for Your Turntable

 A person comparing different preamps for a turntable setup, with various models displayed on a table, ranging from budget to high-end tube preamps. The background includes a turntable and vinyl records in a cozy, well-lit room.

Alright, so you need a preamp. But which one? Man, when I first started looking, I felt like I was drowning in a sea of options.

There were $50 preamps and $5000 preamps, and they all claimed to be the best thing since sliced bread. It was overwhelming!

Here’s what I’ve learned: the right preamp for you depends on a few things:

  1. Your budget: You can get decent preamps starting around $50-$100. But if you’ve got a high-end turntable, you might want to invest more.
  2. Your cartridge type: There are two main types – Moving Magnet (MM) and Moving Coil (MC). Most entry-level turntables use MM cartridges, which work with most preamps. If you’ve got an MC cartridge, you’ll need a preamp that supports it.
  3. Your ears: At the end of the day, trust your ears. A more expensive preamp isn’t always better if you can’t hear the difference.
  4. Features: Some preamps come with extra features like adjustable gain, impedance settings, or even USB outputs for digitizing your vinyl. Think about what features might be useful for your setup.
  5. Your future plans: If you’re just dipping your toes into vinyl, a budget option might be fine. But if you’re planning to upgrade your turntable or cartridge in the future, it might be worth investing in a more versatile preamp now.

When I was starting out, I went with a budget-friendly option – the Art DJ Pre II. It did the job just fine and didn’t break the bank.

As I got more into vinyl, I upgraded to a Pro-Ject Tube Box S2. The difference was noticeable, but honestly, I was happy with both.

One thing I’ve learned is that preamps can have different “flavors” of sound. Solid-state preamps tend to be clean and neutral, while tube preamps can add a bit of warmth to the sound. It’s kind of like the difference between digital and film photography – neither is necessarily better, just different.

And here’s a pro tip: don’t be afraid to try before you buy if you can. Some hi-fi shops will let you test out different preamps with your own turntable.

It’s like test-driving a car – you wouldn’t buy one without taking it for a spin first, right?

Setting Up Your Turntable Preamp

A detailed scene showing the process of setting up a turntable preamp, with cables being connected to the preamp and ground wire, in a cozy room with soft lighting, vinyl records, and a modern turntable setup.

Setting up a preamp might sound daunting, but trust me, it’s not rocket science. Here’s a quick step-by-step:

  1. Connect your turntable’s output cables to the preamp’s input.
  2. Connect the preamp’s output to your amplifier or powered speakers.
  3. If your turntable has a ground wire, connect it to the preamp’s ground terminal.
  4. Plug in the preamp and turn everything on.

Sounds simple, right? Well, it usually is, but there are a couple of gotchas to watch out for. First, make sure you’re not doubling up on preamps. If your turntable has a built-in preamp, make sure it’s switched to “PHONO” when using an external preamp.

Also, pay attention to that ground wire. If you hear a hum, it’s probably because the ground wire isn’t connected properly.

I once spent hours troubleshooting a hum, only to realize I’d forgotten to connect the ground wire. Don’t be like me!

Here are a few more tips to get the best sound out of your preamp:

  1. Keep it away from other electronics: Preamps amplify very weak signals, so they can pick up interference easily. Try to keep your preamp away from things like cell phones, routers, or even power strips.
  2. Use good cables: You don’t need to spend a fortune, but using decent quality cables can make a difference. Look for well-shielded cables to minimize interference.
  3. Experiment with placement: Sometimes, moving your preamp just a few inches can make a difference in sound quality. Don’t be afraid to play around with it.
  4. Give it time to warm up: Some preamps, especially tube ones, sound better after they’ve been on for a while. Try turning on your preamp 15-30 minutes before you start listening.
  5. Check your cartridge alignment: This isn’t strictly about the preamp, but a poorly aligned cartridge can make even the best preamp sound bad. If you’re not sure how to do this, most local hi-fi shops can help.

The Impact of a Good Preamp on Your Vinyl Experience

A person sitting back, relaxed in a cozy living room, listening to vinyl records through a high-quality preamp. The turntable spins a record, and the room is filled with warm sound, creating a rich listening experience.

Now, you might be thinking, “Do I really need to fuss with all this preamp stuff? Can’t I just plug my turntable into my speakers and call it a day?”

Well, sure, you could. But let me tell you, once you hear your records through a good preamp, you’ll never want to go back.

A good preamp doesn’t just make your records louder – it brings them to life. Suddenly, you’re hearing details you never noticed before.

The bass becomes tighter and more defined. The highs sparkle without being harsh. The soundstage opens up, making you feel like the band is playing right there in your living room.

I remember the first time I really appreciated what a good preamp could do. I was listening to Miles Davis’s “Kind of Blue” – an album I thought I knew inside and out.

But with my new preamp, it was like hearing it for the first time. I could hear the breath in Miles’s trumpet, the subtle brush work on the drums, the woody resonance of the bass. It was like someone had wiped a layer of grime off a beautiful painting.

But it’s not just about the audiophile stuff. A good preamp makes listening to records more enjoyable, period. You don’t have to crank the volume to hear everything.

You don’t get listening fatigue as quickly. And most importantly, you get to hear your music the way the artists intended it to be heard.

Future-Proofing Your Vinyl Setup

A future-proof vinyl setup featuring a turntable with an advanced preamp offering adjustable settings like capacitance and resistance. The setup includes high-end speakers and a cozy, warmly lit room with vinyl records on shelves.

One last thing to consider when thinking about preamps is future-proofing your setup. Vinyl can be a bit of a rabbit hole (trust me, I know!), and once you start, you might find yourself wanting to upgrade other parts of your system.

A good preamp can grow with you. If you decide to upgrade your turntable or cartridge down the line, a versatile preamp can accommodate those changes. Some higher-end preamps even allow you to adjust settings like capacitance and resistance, letting you fine-tune the sound to your specific cartridge.

And if you’re into the whole analog-meets-digital thing, some preamps come with USB outputs. This lets you connect your turntable to your computer and digitize your vinyl collection. It’s a great way to preserve those rare records or make digital copies for on-the-go listening.

Conclusion

Whew! We’ve covered a lot of ground, haven’t we? From understanding what a preamp does to choosing the right one for your setup, you’re now armed with the knowledge to take your vinyl game to the next level.

Remember, a preamp is an essential part of any turntable setup. It’s not just about making things louder – it’s about bringing your records to life, letting you hear them as they were meant to be heard. Whether you go for a budget option or splurge on a high-end model, adding a preamp to your system can make a world of difference.

But here’s the thing – at the end of the day, the most important thing is enjoying your music. Don’t get so caught up in the technical details that you forget why you got into vinyl in the first place. It’s about the ritual of putting on a record, the warm sound, the connection to the music. A good preamp enhances that experience, but it’s not the be-all and end-all.

So, what are you waiting for? It’s time to assess your setup and see if you need to add a preamp to the mix. And hey, once you’ve got everything dialed in, why not drop a comment and let us know what preamp you chose and how it’s working out for you? Your experience could help out another vinyl newbie!

Now, if you’ll excuse me, I’ve got some records to listen to. Happy spinning, folks!

How to Ground a Turntable: A Step-by-Step Guide for Audiophiles

Psst! Hey there, fellow vinyl enthusiast! Ever put on your favorite record, only to be greeted by an annoying hum that just won’t quit?

Trust me, I’ve been there, and it’s enough to make you want to chuck your whole setup out the window. But hold up!

Before you do anything drastic, let me let you in on a little secret: that pesky hum might just be a grounding issue. And guess what? It’s totally fixable!

I remember the first time I encountered this problem. I’d just scored an amazing vintage turntable at a flea market, and I couldn’t wait to fire it up.

But when I did, instead of crystal-clear tunes, all I got was a buzz that could’ve rivaled a swarm of angry bees.

Talk about a bummer! But that frustrating experience led me down the rabbit hole of turntable grounding, and now I’m here to share all the juicy details with you.

In this guide, we’re gonna dive deep into the world of turntable grounding. I’ll break it down for you step by step, just like I wish someone had done for me back then.

We’ll cover everything from why grounding is so dang important to how to troubleshoot those stubborn issues that make you wanna pull your hair out.

So grab a cup of coffee (or maybe a glass of wine – I won’t judge), and let’s get ready to banish that hum for good!

How to Ground a Turntable

A close-up of a vinyl turntable being grounded, with a ground wire attached to the grounding screw on both the turntable and amplifier. The scene is set on a wooden surface with warm lighting, emphasizing the importance of proper grounding for eliminating hum and improving sound quality.

Grounding a turntable is a simple process that involves connecting a wire from your turntable to a grounding point on your amplifier or receiver.

First, locate the grounding screw or terminal on both your turntable and audio equipment.

Then, attach one end of the ground wire to the turntable’s ground point and the other end to your amp or receiver’s ground terminal.

Tighten both connections securely. This helps eliminate hum and improves overall sound quality.

We’ll explore this topic more deeply below, covering everything you need to know about proper turntable grounding.

Understanding Turntable Grounding

A vinyl turntable setup being properly grounded with a ground wire connected to an amplifier, preventing electrical interference. The softly lit room and minimalistic audio setup create a cozy atmosphere, highlighting the importance of grounding for clear, hum-free vinyl sound.

Alright, let’s get down to brass tacks and talk about what the heck grounding actually is. You know how sometimes you get a little zap when you touch a doorknob?

That’s kinda what we’re dealing with here, but on a much smaller scale. Grounding is basically giving all that excess electrical energy a safe place to go, instead of messing with your tunes.

Now, I gotta be real with you – when I first started messing around with turntables, I thought grounding was just some audiophile voodoo. Boy, was I wrong!

It turns out that proper grounding is like the unsung hero of your audio setup. It’s working behind the scenes to keep things sounding crisp and clean.

So why is grounding such a big deal for turntables specifically? Well, these babies are super sensitive to electrical interference.

I mean, think about it – you’ve got this tiny needle picking up microscopic vibrations from a piece of vinyl. It’s like trying to hear a whisper in a crowded room.

Any little bit of electrical noise can mess with that delicate signal. I learned this the hard way when I first set up my vintage turntable.

I plugged everything in, dropped the needle, and BAM – instant buzz city. It was like trying to listen to music through a swarm of bees.

Not exactly the warm, rich vinyl sound I was hoping for, ya know? But here’s the kicker – once I figured out how to ground that bad boy properly, it was like night and day.

Suddenly, all I could hear was the music, pure and clear. No more hum, no more buzz, just sweet, sweet analog goodness.

Now, I’m not gonna lie – there are a few common issues that can crop up if your grounding game isn’t on point. You might hear that annoying hum I mentioned earlier, or maybe a persistent buzz that makes you wanna tear your hair out.

In some cases, you might even pick up radio interference. (Yeah, I once had my turntable randomly start playing a local country station. Talk about a mood killer!)

But don’t sweat it! All these issues are totally fixable once you know what you’re doing.

And trust me, by the time we’re done here, you’ll be a grounding guru. So let’s roll up our sleeves and get into the nitty-gritty of how to make your turntable sound as clean as the day it was born!

Tools and Materials Needed

A close-up display of essential tools for grounding a turntable, including a ground wire with spade connectors, a small flathead screwdriver, wire strippers, and a multimeter. Optional extras like ferrite chokes and an audio-grade power strip are also arranged on a wooden surface, emphasizing the importance of proper tools for turntable setup.

Alright, folks, it’s time to talk shop! Before we dive into the nitty-gritty of grounding your turntable, we gotta make sure you’re packing the right tools for the job.

Trust me, there’s nothing worse than getting all amped up to fix your audio setup, only to realize you’re missing some crucial piece of equipment. Been there, done that, and let me tell you, it’s frustrating as heck!

So, let’s break down the essentials you’ll need to get this grounding party started:

  1. Ground wire: This is the MVP of our operation. You can usually find these bad boys with a spade connector on one end and a bare wire on the other.

If your turntable didn’t come with one, don’t panic! You can easily make your own with some 16 or 18 gauge wire.

  1. Screwdriver: A small flathead screwdriver is usually all you need to tighten those ground connections. But hey, if you wanna feel fancy, a precision screwdriver set can’t hurt.
  2. Wire strippers: If you’re making your own ground wire or need to strip the ends of an existing one, these babies are a lifesaver. Trust me, trying to strip wire with your teeth is NOT the move.

(Don’t ask how I know this…)

  1. Multimeter: Okay, this one’s optional, but it can be super helpful for troubleshooting. If you’re dealing with a persistent hum or want to check your connections, a basic multimeter can be your best friend.

Now, for those of you who really wanna take your setup to the next level, there are a few optional goodies you might wanna consider:

  1. Grounding block: This is like a central hub for all your grounding needs. It can be especially handy if you’ve got multiple components to ground.
  2. Ferrite chokes: These little clip-on devices can help reduce high-frequency interference. They’re like noise-canceling headphones for your cables!
  3. Audio-grade power strip: A high-quality power strip with isolated outlets can help prevent ground loops and provide cleaner power to your system.
  4. Anti-static mat: This can help reduce static buildup on your vinyl, which can contribute to noise and even attract dust to your records.

Look, I know it might seem like overkill to some of y’all, but trust me – having the right tools can make all the difference. I remember trying to MacGyver a ground connection with a paperclip and some electrical tape once.

Let’s just say it didn’t end well, and I may or may not have accidentally shocked myself in the process. (Pro tip: Don’t be like me. Use the proper tools!)

So, there you have it – your turntable grounding toolkit. Gather these goodies, and you’ll be all set to tackle any grounding challenge that comes your way.

And hey, even if you don’t need all the fancy extras right now, it’s always good to know what’s out there. You never know when you might wanna level up your audio game!

Step-by-Step Guide to Grounding Your Turntable

A vinyl turntable setup showing a close-up view of the grounding process, with a ground wire connected to both the turntable's grounding screw and the amplifier's grounding terminal. The scene is clean and well-lit, emphasizing the importance of secure connections for improved sound quality.

Alright, audio adventurers, it’s time to get our hands dirty! We’re gonna walk through grounding your turntable step by step.

Don’t worry if you’ve never done this before – I’ll guide you through it just like I wish someone had done for me when I was fumbling around with my first setup.

Step 1: Identify Your Grounding Points

First things first, we gotta locate where we’re gonna make our connections. On your turntable, look for a small screw or post labeled “GND” or “Ground”.

It’s usually on the back, near where the RCA cables come out. Can’t find it?

Don’t panic! Some turntables use the chassis itself as a ground point.

Now, on your amplifier or receiver, you’re looking for a similar setup. There’s usually a screw terminal labeled “GND” or sometimes a little picture of a triangle with a line under it.

(Fancy, right?)

Step 2: Connecting the Ground Wire

Okay, here’s where the magic happens. Take your ground wire (remember that MVP we talked about in the tools section?) and connect one end to the turntable’s ground point.

If it’s a screw, loosen it a bit, wrap the wire around it, and tighten it back up. If you’re dealing with a spade connector, just slip it over the post and tighten.

Now, stretch that wire over to your amp or receiver and do the same thing on that end. Make sure both connections are nice and snug.

We don’t want any loose connections here – that’s just asking for trouble!

Step 3: Testing the Connection

Alright, moment of truth! Plug everything in, turn on your system, and drop the needle on a record.

If all goes well, you should hear nothing but sweet, sweet music. No hum, no buzz, just pure analog goodness.

But wait, what if you’re still hearing some noise? Don’t throw in the towel just yet!

Sometimes it takes a little tweaking to get things just right. Try adjusting the tightness of your ground connections.

I’ve found that sometimes a connection that feels tight can still be a little loose electrically. Another trick I’ve learned: try reversing the direction of your ground wire.

I know it sounds weird, but sometimes this can make a difference, especially if you’re dealing with a ground loop. Oh, and here’s a pro tip: while you’re at it, make sure all your other connections are solid too.

Loose RCA cables can be sneaky culprits when it comes to unwanted noise. Now, I gotta be honest with you – the first time I tried grounding a turntable, I somehow managed to connect the ground wire to the wrong terminal on my amp.

Let’s just say the resulting noise was… impressive. But hey, we learn from our mistakes, right?

And now you can learn from mine! Remember, every system is a little different, so don’t get discouraged if it takes a bit of trial and error.

The key is to be patient and methodical. And trust me, once you get it right, the improvement in sound quality will be music to your ears.

(See what I did there?)

So there you have it – your step-by-step guide to grounding your turntable. Follow these steps, and you’ll be well on your way to audio nirvana.

And hey, even if you hit a snag, don’t sweat it. We’ve got troubleshooting tips coming up next.

You’ve got this!

Troubleshooting Common Grounding Issues

A troubleshooting scene featuring a vinyl turntable setup, with hands tightening a ground wire connection. Cables, ferrite chokes, a power strip, and a multimeter are nearby for adjusting and checking electrical connections. The background includes a cozy audio setup with warm lighting, emphasizing solutions for resolving hum or buzz.

Alright, vinyl virtuosos, let’s talk troubleshooting. Because let’s face it, sometimes things don’t go as smoothly as we’d like.

But don’t worry – I’ve been through the audio trenches, and I’m here to help you navigate the murky waters of grounding issues.

First up, let’s tackle that persistent hum or buzz. You know the one – it’s like a swarm of angry bees decided to crash your listening party.

If you’re still hearing this after grounding, don’t panic! Here are a few things to try:

  1. Double-check your connections: I know, I know, you already did this. But trust me, it’s worth another look.

Make sure everything is tight and secure.

  1. Try a different outlet: Sometimes the problem isn’t your equipment, but the power source. I once spent hours trying to fix a hum, only to realize it disappeared when I plugged into a different wall socket.

Face, meet palm.

  1. Lift the ground: This sounds counterintuitive, but sometimes you need to break the ground connection to fix a hum. Try a cheater plug or ground lift adapter.

(But be careful with this one – safety first!)

Now, let’s talk about the dreaded ground loop. This is when you’ve got multiple paths to ground, creating a circular current that shows up as noise in your system.

It’s like your audio setup is playing a game of electrical hot potato, and you’re the one getting burned.

To tackle a ground loop:

  1. Try the “one plug” trick: Plug all your components into the same power strip or outlet. This can often eliminate the loop.
  2. Use isolation transformers: These bad boys can break the loop by separating the grounds between components.
  3. Check for cable TV connections: Sometimes your cable or satellite box can introduce a ground loop. Try disconnecting it temporarily to see if that’s the culprit.

Lastly, let’s chat about interference from other electronics. This is when your turntable starts picking up radio signals or buzzing when your phone is nearby.

(Yeah, I once had my turntable start playing a local radio station. Talk about a mood killer!)

To combat interference:

  1. Reposition your equipment: Sometimes just moving your turntable away from other electronics can work wonders.
  2. Use shielded cables: If your cables aren’t already shielded, upgrading can make a big difference.
  3. Try ferrite chokes: These little clip-on devices can help reduce high-frequency interference.

Now, I gotta tell you about the time I thought I had a grounding issue, but it turned out my cat had been chewing on my RCA cables. Yeah, not my proudest moment as an audiophile.

But hey, we live and learn, right? The key to troubleshooting is patience and persistence.

Don’t be afraid to try different solutions, and remember – every system is unique. What works for one setup might not work for another.

But stick with it, and I promise you’ll get there. And if all else fails?

Well, there’s no shame in calling in the pros. Sometimes a fresh set of eyes (and ears) can make all the difference.

Just make sure to regale them with tales of your troubleshooting adventures. Who knows?

You might even teach them a thing or two!

Advanced Grounding Techniques for Audiophiles

A detailed audio setup featuring multiple components such as a turntable, preamp, CD player, and DAC, all connected with star grounding wires leading to a dedicated grounding block. The clean and organized wiring is complemented by visible copper bus bars and isolation transformers, highlighting advanced grounding techniques. The background showcases a cozy audiophile listening room with warm lighting.

Alright, audio aficionados, it’s time to take things up a notch! If you’ve mastered the basics of turntable grounding and you’re hungry for more, you’ve come to the right place.

These advanced techniques are for those of you who want to squeeze every last drop of performance out of your system. Fair warning: we’re about to get a little nerdy here, but trust me, it’s worth it!

Let’s start with multiple component grounding. If you’re like me, your audio setup probably looks like a mad scientist’s laboratory, with components stacked everywhere.

Each of these babies needs to be grounded properly to achieve audio nirvana. Here’s where the concept of star grounding comes in handy.

Picture a star with your preamp or integrated amp at the center. All your other components – turntable, CD player, DAC, you name it – connect their ground wires to this central point.

This helps prevent ground loops and keeps noise to a minimum. I remember when I first implemented star grounding in my system – it was like someone had lifted a veil I didn’t even know was there!

Now, let’s talk about dedicated grounding blocks. These are like the fancy cousins of the humble ground screw on your amp.

A good grounding block provides multiple connection points and can help isolate ground connections between components. Some audiophiles swear by copper bus bars for this purpose.

I once splurged on a high-end grounding block, and let me tell you, the improvement in clarity was no joke!

But here’s where things get really interesting – alternative grounding methods. Ever heard of using a dedicated earth ground?

This involves running a thick wire from your audio system to a grounding rod driven into the actual earth outside your house. Sounds crazy, right?

But I’ve tried it, and the reduction in noise floor was mind-blowing. Just be sure to check local building codes before you start digging up your yard!

Another trick up the audiophile sleeve is capacitor bypassing. This involves adding small capacitors across ground connections to shunt high-frequency noise to ground more effectively.

It’s a delicate balance, though – too much capacitance can actually degrade the sound. I learned this the hard way when I went overboard and ended up with muddy bass.

Oops!

Let’s not forget about isolation transformers. These bad boys can break ground loops by completely isolating the grounds between components.

They’re especially useful if you’re dealing with stubborn hum issues that just won’t quit. I once added an isolation transformer to my phono stage, and it was like someone had hit the mute button on the background noise.

Now, here’s a technique that might sound a bit out there – cryogenic treatment of cables and connectors. Some audiophiles swear by deep-freezing their cables to improve conductivity.

I’ll be honest, I was skeptical at first. But after trying it on a whim (and nearly giving myself frostbite in the process), I have to admit there was a noticeable improvement in detail retrieval.

One last advanced technique to consider is magnetic field optimization. This involves carefully arranging your components and cables to minimize electromagnetic interference between them.

It can be a bit like playing audio Tetris, but the payoff in reduced noise can be significant. Just be prepared for some funny looks from your family as you obsessively rearrange your audio rack for the umpteenth time!

Remember, with all these advanced techniques, the key is experimentation and careful listening. What works wonders in one system might not do much in another.

It’s all about finding the right combination for your unique setup. I’ll never forget the time I spent an entire weekend tweaking my grounding setup, only to realize that the biggest improvement came from simply cleaning the connections with some contact cleaner.

Sometimes it’s the simplest things that make the biggest difference!

At the end of the day, advanced grounding is as much an art as it is a science. It’s about developing a feel for your system and learning to trust your ears.

And hey, even if not every tweak results in an earth-shattering improvement, the journey itself is half the fun. After all, isn’t that what being an audiophile is all about?

So go forth and experiment! Try out these advanced techniques, keep an open mind, and most importantly, enjoy the music.

Because at the end of the day, that’s what it’s all about – getting the most out of your vinyl and losing yourself in the music. Happy grounding, audio adventurers!

Conclusion

Whew! What a journey we’ve been on, huh? From the basics of why grounding matters to the wild world of advanced audiophile techniques, we’ve covered a lot of ground (pun totally intended).

But here’s the thing – all this tech talk and troubleshooting is really about one thing: getting the most out of your music.

Remember when we started, and I told you about that frustrating hum that nearly made me chuck my turntable out the window? Well, looking back, I’m kinda glad I had that problem.

It kicked off this whole adventure into the world of audio grounding, and man, what a ride it’s been!

Now, I know we’ve thrown a lot of information at you. Some of it might seem a bit overwhelming, especially if you’re new to this whole vinyl game.

But here’s the secret – you don’t have to do it all at once. Start with the basics, get your turntable properly grounded, and go from there.

Trust me, even that first step can make a world of difference. As you get more comfortable, feel free to experiment with some of the more advanced techniques we talked about.

But always remember – there’s no one-size-fits-all solution in audio. What works for my setup might not work for yours, and that’s okay!

The fun is in the experimentation, in the little tweaks and adjustments that gradually shape your system into something uniquely yours. And hey, let’s not forget the most important thing – safety first!

Always be careful when working with electrical components, and if you’re ever unsure, don’t hesitate to consult a professional. Your ears (and your equipment) will thank you.

Now, I’d love to hear from you! Have you tried any of these grounding techniques?

Did they work for you? Or maybe you’ve got some secret audiophile trick up your sleeve that we haven’t covered.

Drop a comment below and let’s keep this conversation going. After all, half the fun of this hobby is sharing experiences and learning from each other.

Before I sign off, I just want to say – don’t let the pursuit of perfect sound keep you from enjoying your music. At the end of the day, this is all about enhancing your listening experience.

So once you’ve got your system dialed in, sit back, drop the needle on your favorite record, and just enjoy. Because that moment when the music starts, and everything else fades away?

That’s what it’s all about. So here’s to clean grounds, quiet backgrounds, and most importantly, great tunes.

Keep spinning those records, my friends, and may your sound always be as clear as a bell and as warm as a summer afternoon. Rock on!

Do Record Players Need Speakers? What to Know About Turntable Audio Setup

Vinyl’s making a comeback, baby! But let me tell you, diving into the world of record players can be as confusing as trying to untangle a pair of earbuds that’s been in your pocket all day. Trust me, I’ve been there!

One question that keeps popping up, especially for newbies, is whether record players need speakers. It’s a fair question – I mean, how are you supposed to hear those sweet, sweet tunes if there’s no sound coming out, right?

Well, buckle up, vinyl lovers, because we’re about to embark on a groovy journey through the world of turntable audio setups.

We’ll explore everything from all-in-one systems to fancy external speaker setups that’ll make your ears dance with joy.

Whether you’re a vinyl veteran or just dipping your toes into the wonderful world of records, this guide’s got you covered.

So, drop that needle, crank up the volume (but not too loud – we don’t want any noise complaints!), and let’s dive in!

Do Record Players Need Speakers? What to Know

A close-up comparison of a modern vinyl record player with built-in speakers next to a traditional turntable connected to large external bookshelf speakers. Both setups are displayed on a wooden surface with warm lighting, showcasing the difference between compact all-in-one systems and external speaker setups.

Most record players don’t have built-in speakers and require external speakers or an audio system to produce sound.

However, some all-in-one turntables come with integrated speakers. The quality and volume of built-in speakers are usually limited, so many vinyl enthusiasts prefer separate speakers for better sound quality.

We’ll dive deeper into the world of record players and speakers below, but that’s the quick answer for those of you in a hurry!

Types of Record Players and Their Speaker Setups

A visual comparison of three record player types: an all-in-one turntable with built-in speakers, a traditional turntable with external bookshelf speakers, and a USB turntable connected to a laptop for digital conversion. The scene is set on a minimalist wooden surface.

Alright, let’s dive into the world of record players and their speaker setups! I remember when I first got into vinyl, I was so confused about all the different types of turntables out there.

But don’t worry, I’ve made all the mistakes so you don’t have to!

First up, we’ve got all-in-one record players with built-in speakers. These babies are like the Swiss Army knives of the vinyl world.

They’re super convenient, especially if you’re just starting out or don’t have much space. I had one of these in college, and let me tell you, it was a lifesaver in my tiny dorm room!

But here’s the thing – while they’re great for beginners, the sound quality can be a bit… meh. It’s like listening to your favorite song through a tin can sometimes. But hey, we all gotta start somewhere, right?

Next, we’ve got traditional turntables without built-in speakers. These are the ones you’ll see in those fancy hi-fi setups that make you drool.

They don’t have speakers, but man, the sound quality can be out of this world! Of course, that means you’ll need to connect them to external speakers or an audio system.

I remember the first time I heard a proper turntable setup at my uncle’s place. It was like hearing music for the first time all over again! But fair warning – once you go down this rabbit hole, your wallet might start crying.

Lastly, we’ve got USB turntables. These are pretty cool because they let you convert your vinyl to digital files. It’s like a time machine for your music!

I use one of these to digitize some of my rarer records that I’m afraid to play too often.

So there you have it – the three main types of record players. Each has its pros and cons, and trust me, I’ve been through the ringer with all of them.

But that’s half the fun of getting into vinyl, right? The journey of figuring out what works best for you!

Components Needed for a Complete Turntable System

A detailed setup showing the key components of a complete turntable system, including a vinyl turntable, phono preamp, amplifier, external bookshelf speakers, and high-quality cables. The components are neatly arranged on a modern wooden surface, connected by visible cables.

Okay, folks, let’s talk about the components you need for a kickass turntable system. I’m gonna break it down for you, just like I wish someone had done for me when I was starting out.

First up, obviously, you need a turntable. That’s the thing that actually spins your records. Seems simple enough, right?

Well, I once bought a turntable at a garage sale, thinking I’d scored a great deal. Turns out, it was missing half the parts. Lesson learned: make sure your turntable is complete!

Next, you’re gonna need a phono preamp. This little gadget is super important because it boosts the signal from your turntable to a level that your amplifier can work with.

Some turntables have these built-in, but if yours doesn’t, you’ll need a separate one. I once tried to skip this step and… let’s just say it wasn’t pretty.

Then there’s the amplifier or receiver. This bad boy takes the signal from your phono preamp and makes it powerful enough to drive your speakers.

I remember the first time I hooked everything up correctly and cranked up the volume – my neighbors weren’t too happy, but man, it felt good!

Of course, you can’t forget the speakers. These are what actually produce the sound you hear. You’ve got a ton of options here, from small bookshelf speakers to massive floor-standers.

I started with some hand-me-down speakers from my dad, and let me tell you, even those old things sounded amazing compared to my previous setup.

Last but not least, you’ll need cables and connections to hook everything together. Don’t skimp on these! I learned the hard way that cheap cables can really mess with your sound quality.

It’s like trying to drink a milkshake through a coffee stirrer – it just doesn’t work well.

So there you have it – the basic components of a turntable system. It might seem like a lot, but trust me, once you get it all set up, you’ll be in vinyl heaven.

And hey, if you mess up along the way, don’t sweat it. We’ve all been there!

Pros and Cons of Built-in Speakers vs. External Speakers

A comparison of an all-in-one record player with built-in speakers and a traditional turntable connected to external bookshelf speakers. The compact all-in-one system is on one side, while the larger traditional setup with cables and separate speakers is on the other, emphasizing convenience versus sound quality.

Alright, let’s get into the nitty-gritty of built-in speakers versus external speakers. This is a debate that’s been raging in the vinyl community for years, and I’ve been on both sides of it!

Let’s start with the all-in-one systems that have built-in speakers. The big advantage here is convenience. Everything’s in one package – you just plug it in and you’re ready to rock. I remember when I got my first all-in-one player. I was so excited, I had it up and running in like 5 minutes flat!

These systems are also usually more affordable and take up less space. If you’re living in a shoebox apartment like I was in my 20s, this can be a real lifesaver. Plus, they’re super portable. I used to bring mine to parties all the time – instant cool points!

But here’s the rub – the sound quality on these built-in speakers often leaves a lot to be desired. It’s like trying to get a gourmet meal from a vending machine. Sure, it’ll do in a pinch, but it’s not gonna blow your mind.

Now, let’s talk about separate speakers. The biggest advantage here is sound quality. Oh man, the first time I heard my records through a proper set of external speakers, it was like I was hearing them for the first time all over again! The clarity, the depth, the soundstage – it was mind-blowing.

External speakers also give you way more flexibility. You can upgrade your speakers without changing your whole system, experiment with different placements, and really customize your sound. It’s like being the conductor of your own orchestra!

But of course, there are downsides. Separate speakers take up more space, they’re usually more expensive, and setting everything up can be a bit of a hassle. I remember spending an entire weekend trying to get my first proper system set up. There may have been some frustration and colorful language involved…

And let’s not forget about all the extra cables. If you’re not careful, your listening area can start to look like a spaghetti factory exploded in there.

In terms of sound quality comparisons, it’s usually no contest. External speakers almost always sound better. But that doesn’t mean built-in speakers don’t have their place. It all depends on your needs, your space, and your budget.

Speaking of budget, that’s definitely a consideration. You can spend anywhere from a hundred bucks to the price of a small car on a speaker setup. I’ve been down both roads, and let me tell you, sometimes less is more!

At the end of the day, it’s all about what works for you. Whether you’re rocking built-in speakers or a fancy external setup, the most important thing is that you’re enjoying your music. That’s what it’s all about, right?

How to Choose the Right Speakers for Your Record Player

A vinyl record player setup with both compact bookshelf speakers on a wooden shelf and larger floor-standing speakers in the background, highlighting the differences in size, power, and space usage. The turntable is connected to both speaker types, showcasing the decision between active and passive options.

Alright, folks, let’s talk about choosing speakers for your record player. This can be a real head-scratcher, but don’t worry – I’ve been through this process more times than I care to admit, and I’m here to help you avoid some of the mistakes I made.

First up, you’ve gotta decide between active and passive speakers. Active speakers have built-in amplifiers, while passive speakers need a separate amp. I started with passive speakers because that’s what my dad used, but let me tell you, when I switched to active speakers, it was like a whole new world opened up! No more fiddling with a separate amp, and the sound was perfectly matched to the speakers.

Next, you need to think about size and power. Now, I know it’s tempting to go for the biggest, baddest speakers you can find. Trust me, I’ve been there. But bigger isn’t always better. I once crammed a pair of massive floor-standers into my tiny apartment. They sounded great, but I could barely move around the room!

You need to consider the size of your space and how loud you actually need your music to be. For most people, a good pair of bookshelf speakers will do the trick. They’re compact, they sound great, and they won’t get you evicted from your apartment. Ask me how I know…

Compatibility is another big factor. Make sure your speakers will play nice with your turntable and other components. I once bought a pair of speakers only to find out they weren’t compatible with my amp. Talk about a facepalm moment!

And of course, we can’t forget about budget. Speakers can range from dirt cheap to “sell a kidney” expensive. My advice? Start with something in the middle range. You don’t need to break the bank to get good sound, but you also don’t want to go too cheap and end up with speakers that sound like they’re underwater.

I remember saving up for months to buy my first “real” pair of speakers. When I finally got them home and set them up, it was like hearing my records for the first time all over again. The clarity, the depth, the way I could hear every little detail – it was mind-blowing!

But here’s the thing – what sounds good to me might not sound good to you. Everyone’s ears are different. So if you can, try to listen to speakers before you buy them. Most hi-fi shops will let you demo speakers, and some online retailers have good return policies.

And don’t be afraid to experiment! Half the fun of this hobby is trying different setups and seeing what works best for you. I’ve gone through more speaker configurations than I can count, but each one taught me something new about what I like (and don’t like) in terms of sound.

Remember, at the end of the day, the best speakers are the ones that make your records sound good to you. Whether that’s a pair of vintage bookshelf speakers or the latest high-tech active monitors, as long as you’re enjoying your music, you’re doing it right!

Setting Up Your Record Player with External Speakers

A step-by-step setup of a vinyl record player connected to external speakers, with the turntable positioned on a stable surface, RCA cables connecting to a phono preamp, and the preamp connected to an amplifier. Neatly arranged wires lead to external bookshelf speakers in a cozy, well-lit space.

Okay, folks, let’s roll up our sleeves and talk about setting up your record player with external speakers. I know it can seem daunting at first – trust me, I’ve been there. The first time I tried to set up a full system, it looked like a tornado had hit my living room!

But don’t worry, I’m gonna break it down for you step by step, and share some of the hard-earned wisdom I’ve picked up along the way.

Step 1: Position your turntable. Find a stable, level surface away from any sources of vibration. I learned this the hard way when I put my turntable on the same shelf as my speakers – hello, feedback city!

Step 2: Connect your turntable to the phono preamp. If your turntable doesn’t have a built-in preamp, you’ll need to connect it to an external one. Just use a pair of RCA cables – red to red, white to white. Easy peasy!

Step 3: Connect the phono preamp to your amplifier. Again, use RCA cables. Connect the output of the preamp to an input on your amp – usually labeled ‘AUX’ or ‘LINE’.

Step 4: Connect your amplifier to your speakers. Use speaker wire for this. Make sure you connect the positive terminal (usually red) to positive, and negative (usually black) to negative. I once got this mixed up and couldn’t figure out why my music sounded so weird!

Step 5: Plug everything in and power it up. Double-check all your connections before you flip the switch!

Now, let’s talk troubleshooting. If you’re not getting any sound, check your connections and make sure everything’s powered on. If you hear a hum, your turntable might need to be grounded. There’s usually a little screw on the back for this.

If your sound is distorted, check your tracking force and anti-skate settings. And if one channel is quieter than the other, you might have a loose connection somewhere.

As for tips for optimal sound quality – experiment with speaker placement! I spent a whole weekend once moving my speakers inch by inch around the room until I found the sweet spot. Trust me, it makes a huge difference!

Also, make sure your turntable is properly leveled. A small bubble level can be a vinyl lover’s best friend. And don’t forget to keep your records and stylus clean – dust is the enemy of good sound!

One last tip – give your system time to warm up. I always let mine play for about 15 minutes before I sit down for some serious listening. It’s like letting a fine wine breathe, you know?

Remember, setting up a system is as much an art as it is a science. Don’t be afraid to experiment and trust your ears. After all, you’re the one who’s going to be listening to it!

Alternatives to Traditional Speakers for Record Players

A scene displaying alternatives to traditional speakers for a vinyl record player, including headphones for intimate listening, a Bluetooth adapter for wireless audio, and a home theater soundbar in the background. The record player is central, with these flexible audio setup options surrounding it.

Alright, vinyl enthusiasts, let’s shake things up a bit and talk about some alternatives to traditional speakers for your record player. Because sometimes, you gotta think outside the box!

First up, let’s chat about headphones. Now, I know what you’re thinking – “Headphones? For vinyl?” But hear me out! I remember the first time I plugged a good pair of cans into my turntable setup. It was like the music was being injected straight into my brain! The detail, the intimacy – it was a whole new way of experiencing my records.

Plus, headphones are great for those late-night listening sessions when you don’t want to wake up your roommates or neighbors. Trust me, I learned that lesson the hard way after one too many noise complaints!

Next on our list: Bluetooth adapters for wireless audio. I was skeptical about this at first. I mean, isn’t the whole point of vinyl to get away from digital tech? But let me tell you, the convenience factor is off the charts! I’ve got a setup now where I can stream my turntable to wireless speakers all over my house. It’s like living in the Jetsons, but with better music!

Just keep in mind that you might lose a tiny bit of audio quality with Bluetooth. But for casual listening or background music while you’re doing chores, it’s hard to beat.

Last but not least, let’s talk about soundbars and home theater systems. Now, this might sound a bit sacrilegious to the vinyl purists out there, but hear me out. I once hooked my turntable up to my home theater system on a whim, and holy moly! The sound was huge, immersive, and it felt like the band was playing right in my living room.

It’s not for everyone, and it might not give you that pin-point stereo imaging that hardcore audiophiles crave. But if you want to feel like you’re at a concert every time you drop the needle, it’s worth a shot!

One word of caution though – make sure your home theater system has an analog input. I once spent an entire afternoon trying to figure out why I couldn’t get sound, only to realize my system was digital-only. Face, meet palm!

The beauty of all these alternatives is that they let you enjoy your vinyl in different ways and different contexts. Maybe you use traditional speakers for your serious listening sessions, headphones for late-night spins, and Bluetooth for when you’re puttering around the house.

Remember, there’s no one “right” way to listen to your records. It’s all about what works for you and your lifestyle. So don’t be afraid to experiment! Who knows? You might just discover a whole new way to fall in love with your vinyl collection all over again.

Conclusion

Whew! We’ve been on quite a journey through the world of record players and speakers, haven’t we? From built-in speakers to external setups, from traditional to alternative options, we’ve covered a lot of ground.

Here’s the thing I want you to remember: choosing the right speaker setup for your record player is a personal journey. What works for me might not work for you, and that’s okay! The most important thing is that you’re enjoying your music.

If there’s one thing I’ve learned in my years of vinyl obsession, it’s that experimentation is key. Don’t be afraid to try different setups, different speakers, even different rooms in your house. Each change can bring out new aspects of your favorite records.

And hey, if you’re just starting out, don’t feel like you need to invest in a top-of-the-line system right away. Start with what you can afford, and upgrade as you go. Trust me, half the fun is in the journey of improving your setup over time!

Remember to consider things like your living space, your budget, and your listening habits when choosing your setup. And always, always trust your ears. At the end of the day, if it sounds good to you, that’s what matters most.

Oh, and don’t forget about safety and ethical considerations. Always follow manufacturer instructions when setting up your equipment, and be mindful of your neighbors when cranking up the volume!

Now, I’d love to hear from you! What’s your current setup like? Have you tried any of the alternatives we discussed? Or maybe you’ve got a unique solution that works for you? Drop a comment below and let’s keep this vinyl conversation going!

Remember, every record collection tells a story, and every listening setup is part of that story. So go forth, spin those records, and create your own audio adventure. Happy listening, vinyl lovers!

What Is Turntable: TurnTable vs Record Player

Hey there, vinyl enthusiasts and curious music lovers! Today, we’re diving into the world of turntables – those magical machines that bring our beloved records to life.

As someone who’s been tinkering with audio gear for years, I’m excited to share my knowledge and experiences with you. So, grab a cup of coffee, and let’s explore the ins and outs of turntables together!

What is a turntable?

A cozy, minimalist turntable setup on a sleek wooden table with a vinyl record spinning. The tonearm is lowered onto the record, and soft ambient lighting creates a warm atmosphere. Vinyl records are leaning against the table, adding to the warm, music-focused vibe of the space.

A turntable is a device designed to play vinyl records by spinning them on a circular platter and using a needle (stylus) to read the grooves, converting the physical information into an electrical audio signal.

It consists of key components like the platter, tonearm, cartridge, and motor, working together to reproduce the music stored on vinyl discs.

Turntables are prized by audiophiles for their ability to deliver warm, high-fidelity sound from analog recordings.

In the following sections, we’ll delve deeper into the fascinating world of turntables and their role in music playback.

Components of a Turntable

Close-up view of a modern turntable showcasing the platter, tonearm, and cartridge setup on a sleek wooden surface with warm ambient lighting in the background.

Alright, let’s break down the main parts of a turntable. Trust me, I’ve spent countless hours fiddling with these components, and I’ve learned a thing or two along the way!

First up, we’ve got the platter. This is the circular platform where you place your record.

It’s usually made of metal or acrylic, and it needs to be perfectly level for the best sound. I remember when I first started out, my platter was slightly warped, and boy, did that mess with the sound quality!

Next, there’s the tonearm. This is the long, slender arm that holds the cartridge and stylus.

It’s gotta be balanced just right – too heavy, and you’ll wear out your records faster than you can say “audiophile.” Too light, and you’ll miss out on those sweet, low frequencies.

Speaking of cartridges and styluses, these are the real MVPs of the turntable world. The cartridge holds the stylus (or needle), which reads the grooves in your vinyl.

I’ve gone through my fair share of cartridges, and let me tell you, upgrading from a basic model to a high-end one can make a world of difference!

The motor is what keeps everything spinning. It’s usually hidden away under the platter, but don’t underestimate its importance.

A good motor will keep your records spinning at a consistent speed, which is crucial for maintaining pitch accuracy.

Lastly, we’ve got the drive system. This is either a belt drive or a direct drive.

Belt drives use an elastic belt to spin the platter, while direct drives… well, they drive the platter directly. Each has its pros and cons, but that’s a whole other can of worms!

How a Turntable Works

A detailed image of a turntable in action, with the stylus moving along the grooves of a spinning vinyl record on a sleek wooden surface, softly lit to emphasize the intricate details.

Now that we know the parts, let’s talk about how these bad boys actually work. It’s pretty fascinating stuff, if you ask me!

So, you place your vinyl on the platter, and the motor starts spinning it at a specific speed (usually 33 1/3 or 45 RPM). As the record spins, the stylus rides along in the grooves.

These grooves aren’t just for show – they’re actually tiny, intricate patterns that represent the sound waves of the music.

As the stylus moves along these grooves, it vibrates. These vibrations are then converted into electrical signals by the cartridge.

It’s like magic, I tell ya! The first time I understood this process, it blew my mind.

But here’s the kicker – getting all of this to work properly is an art form in itself. You’ve gotta make sure everything is set up just right.

I can’t tell you how many hours I’ve spent adjusting tracking force, anti-skate, and alignment. It’s frustrating as hell sometimes, but when you get it right, oh boy, the sound is worth every second of effort!

And don’t even get me started on maintenance. Keeping your turntable in top shape is crucial.

I learned that the hard way when I neglected to clean my stylus for months. The buildup of dust and gunk nearly ruined one of my favorite records!

Types of Turntables

A detailed comparison image showing three types of turntables: belt-drive, direct-drive, and idler-wheel systems, displayed in a sleek, modern environment with labels highlighting the differences in their mechanisms.

Alright, let’s talk about the different flavors of turntables out there. Trust me, there’s more variety than you might think!

First up, we’ve got belt-drive turntables. These are the darlings of many audiophiles, myself included.

They use a rubber belt to connect the motor to the platter. The idea is that this belt helps isolate the platter from motor vibrations, resulting in cleaner sound.

I remember when I first upgraded to a belt-drive turntable – the reduction in background noise was like night and day!

Then there are direct-drive turntables. These bad boys have the motor directly connected to the platter.

They’re known for their consistent speed and durability, which is why they’re popular with DJs. I used to DJ a bit in college, and let me tell you, trying to scratch on a belt-drive is a recipe for disaster!

Lastly, we have idler-wheel turntables. These are less common nowadays, but they were big back in the day.

They use a rubber wheel to transfer motion from the motor to the platter. They can produce some great sound, but they’re prone to rumble if not maintained properly.

I’ve got an old idler-wheel turntable that I inherited from my dad, and while it sounds amazing when it’s working right, keeping it in shape is a real labor of love.

Difference Between Turntable and Record Player

A modern setup displaying both a turntable and a record player side by side for comparison in a cozy room with vinyl records and posters.

Now, here’s something that confuses a lot of folks – the difference between a turntable and a record player. Don’t worry, I was in the same boat when I first started out!

A turntable, as we’ve discussed, is essentially the platter, tonearm, and cartridge setup. It’s the core component that actually plays the record.

On the other hand, a record player is a more all-in-one solution. It includes the turntable itself, plus built-in speakers, a phono preamp, and sometimes even a radio or cassette player.

Record players are great for convenience. They’re usually more compact and you don’t need to worry about hooking up external components.

I started with a record player, and it was perfect for getting my feet wet in the vinyl world. But here’s the thing – they’re usually not as high-quality as a dedicated turntable setup.

Turntables, while they require more components (like a separate amplifier and speakers), offer more flexibility and often better sound quality. You can upgrade individual components as you see fit.

I’ve spent years slowly upgrading my setup, piece by piece, and the improvement in sound quality has been incredible.

So, which is better? Well, it really depends on what you’re after.

If you want a simple, all-in-one solution to casually enjoy some vinyl, a record player might be your best bet. But if you’re looking to dive deep into the world of high-fidelity audio and don’t mind a bit of complexity, a turntable is the way to go.

Choosing the Right Turntable

A side-by-side comparison setup featuring both a modern and vintage turntable with various audio components displayed.

Alright, so you’ve decided to take the plunge and get a turntable. Awesome! But now comes the tricky part – choosing the right one.

Don’t worry, I’ve been through this process more times than I care to admit, and I’ve got some tips for you.

First things first, consider your budget. Turntables can range from under $100 to well over $10,000.

When I started out, I made the mistake of going for the cheapest option I could find. Big mistake! It sounded terrible and actually damaged some of my records.

On the flip side, you don’t need to sell a kidney to get good sound. There are plenty of great options in the $300-$500 range that’ll serve you well.

Next, think about what kind of listening you’ll be doing. Are you a casual listener who just wants to spin some records on the weekend?

Or are you an audiophile who’s going to be critically listening to every note? This will help guide your decision on things like drive type, cartridge quality, and additional features.

Speaking of features, decide what’s important to you. Do you want a built-in phono preamp?

How about USB output for digitizing your vinyl? Automatic operation? These features can be convenient, but they often come at the cost of sound quality.

Now, here’s a contentious topic – new vs. vintage turntables. Both have their pros and cons.

New turntables often come with warranties and modern features, but vintage ones can offer incredible value for money if you know what to look for. I’ve got both in my collection, and I love them for different reasons.

Finally, don’t forget about upgradability. A good turntable should be able to grow with you as your tastes and budget evolve.

Look for models that allow you to easily upgrade the cartridge, platter, or even the tonearm down the line.

Remember, choosing a turntable is a personal decision. What works for me might not work for you.

Take your time, do your research, and most importantly, trust your ears!

Conclusion

Whew! We’ve covered a lot of ground today, haven’t we? From the basics of what a turntable is, to the nitty-gritty of how they work and how to choose the right one.

It’s a lot to take in, I know. But trust me, the world of turntables and vinyl is an incredibly rewarding one to explore.

Remember, at the end of the day, turntables are all about bringing music to life in a way that’s tangible and engaging. There’s something special about the ritual of pulling a record out of its sleeve, placing it on the platter, and dropping the needle.

It forces you to be present with the music in a way that streaming just can’t match.

Whether you’re a seasoned audiophile or just starting your vinyl journey, I hope this guide has been helpful. And hey, if you’ve got any experiences or tips of your own to share, I’d love to hear them!

Drop a comment below and let’s keep the conversation going. After all, the best part of this hobby is sharing our love for music and great sound with others.

Now, if you’ll excuse me, I’ve got some records that need spinning. Happy listening, folks!

The Magic Behind Vinyl: How Record Players Really Work

Holy smokes, can you believe that in this digital age, record players are making a comeback? It’s wild!

I remember the first time I dropped the needle on my dad’s old turntable – the warm crackle, the rich sound, it was like magic. But how the heck do these things actually work?

I mean, we’re talking about a needle reading tiny grooves and somehow turning that into Freddie Mercury belting out “Bohemian Rhapsody.” Mind-blowing, right?

Well, buckle up, because we’re about to dive into the nitty-gritty of how record players turn those vinyl discs into music that’ll make your soul sing!

How Record Players Work?

A detailed and close-up view of a vinyl record player in action, with a stylus resting in the grooves of a spinning record, connected to a modern cartridge, and speakers visible in the background.

Record players work by translating the physical grooves on a vinyl record into sound. As the record spins, a stylus (needle) follows these grooves, picking up vibrations.

These vibrations are converted into electrical signals by the cartridge, amplified by a preamp, and then sent to speakers which produce the sound we hear. The process involves precision engineering to accurately reproduce the recorded music from the vinyl’s microscopic patterns.

Now that we’ve got the basics down, let’s dig deeper into the fascinating world of turntables and really get our hands dirty with the details!

The Basics of Record Player Anatomy

A modern turntable setup showcasing the key components such as the platter, tonearm, cartridge, and stylus in action.

Alright, let’s break this bad boy down. A record player might look simple, but it’s got more parts than a Thanksgiving turkey!

First up, you’ve got the platter – that’s the big disc where your record sits. It’s like a vinyl’s dance floor, ya know?

And what makes it spin? The motor, of course!

Some fancy-pants turntables use what’s called a “direct drive” system, but I’m old school. I prefer the belt drive – it’s like the motor’s doing the cha-cha with the platter, and it helps reduce vibrations.

Now, the real star of the show is the tonearm. This skinny little arm might not look like much, but it’s doing some heavy lifting!

At the end of it, you’ve got the cartridge – think of it as the brains of the operation. And at the very tip?

That’s where the magic happens, my friends. The stylus, or needle as we used to call it, is the tiny little guy that reads the grooves in your record.

I remember the first time I had to replace a stylus. Talk about nerve-wracking!

It’s like performing surgery on a flea. But let me tell you, the difference in sound quality was like night and day.

It’s crazy how something so small can make such a big difference!

Last but not least, you’ve got the preamp and speakers. The preamp is like a translator, taking the tiny signals from the cartridge and beefing them up so your speakers can understand them.

And the speakers? Well, they’re the mouth of the whole operation, shouting out those sweet, sweet tunes for your ears to enjoy.

The Science of Sound Reproduction

A detailed close-up image of a stylus on a vinyl record player, resting on the grooves of a spinning vinyl record, illustrating the science of sound reproduction through analog vibrations.

Okay, now we’re getting into the really cool stuff. Have you ever looked closely at a vinyl record?

Those grooves aren’t just for show – they’re like a physical representation of sound waves. It’s mind-boggling when you think about it.

All that music, all those instruments, all captured in these microscopic wiggles!

So here’s how it works: as the record spins, the stylus rides along in these grooves like a tiny surfer catching sound waves. It’s picking up all these minute vibrations, which correspond to the different frequencies in the music.

High notes make the stylus wiggle faster, while bass notes create slower, wider movements.

But here’s where it gets really wild – the stylus is connected to a cantilever in the cartridge, which has some fancy-pants magnets or coils (depending on the type). As the stylus wiggles, it causes these magnets or coils to move, and BOOM!

You’ve just turned mechanical energy into electrical signals. It’s like magic, I tell ya!

I remember trying to explain this to my nephew once. I grabbed a paper cup and a toothpick and tried to make a mini record player.

Let’s just say it didn’t quite work out – we ended up with a mess and my sister yelling at me for getting toothpicks stuck in her carpet. But hey, science is all about trial and error, right?

Key Components in Action

A detailed view of a vinyl record player showcasing its key components in action, including the cartridge, stylus, and tonearm working together as the record spins.

Now that we’ve got the basics down, let’s talk about some of the key players in this vinyl orchestra. First up, the cartridge.

This little gizmo is like the conductor, making sure everything’s in harmony. There are two main types: moving magnet and moving coil.

I won’t bore you with the techie details, but basically, they each have their own way of converting those vibrations into electrical signals.

One thing that’s super important is the tracking force. That’s how much weight is pressing down on the stylus as it rides the groove.

Too much pressure, and you’ll wear out your records faster than I wear out my welcome at an all-you-can-eat buffet. Too little, and the sound gets all wonky.

Finding that sweet spot is crucial!

And don’t even get me started on anti-skate mechanisms. When I first heard about these, I thought it was some kind of fancy ice-skating move.

Turns out, it’s all about countering the force that wants to pull your tonearm towards the center of the record. Without it, your stylus would be skating all over the place – and not in a cool way.

I learned this the hard way when I forgot to set the anti-skate on my new turntable. I put on my favorite Beatles record and nearly had a heart attack when I heard this awful scraping sound.

Lesson learned – always read the manual, folks!

From Analog to Digital: Signal Processing

A close-up view of a modern vinyl record player connected to a phono preamp, showcasing the transition from analog to digital signal processing with sleek speakers.

Alright, we’re in the home stretch now! So we’ve got these tiny electrical signals from the cartridge, but they’re way too weak to drive your speakers.

That’s where the phono preamp comes in. This little box of wonders does two important jobs.

First, it boosts the signal so it’s strong enough for your amp or powered speakers. But here’s the really cool part – it also applies something called the RIAA equalization curve.

Now, I know what you’re thinking: “What the heck is that?” Well, when they make records, they mess with the frequencies a bit to fit more music in the grooves.

The preamp reverses this process, so what you hear is what the artists intended.

It’s like magic, I tell ya! The first time I plugged my turntable into a proper phono preamp, it was like someone had cleaned my ears out with a Q-tip dipped in awesome sauce.

Suddenly, I could hear details in my old records that I never knew existed!

Now, connecting all this analog goodness to modern audio systems can be a bit tricky. I remember trying to hook up my vintage turntable to my nephew’s fancy Bluetooth speakers.

Let’s just say it involved a lot of cursing, a tangle of wires that would make a spider jealous, and a very patient electronics store clerk who probably thought I was some kind of cave-dwelling hermit.

Maintaining Your Record Player for Optimal Performance

A modern vinyl record player setup being carefully maintained, with a person gently cleaning the stylus using a special stylus brush. The record player has a sleek black platter and a spinning vinyl record, with a carbon fiber brush nearby, emphasizing cleanliness and proper care. The scene is set in a minimalist and cozy environment with warm lighting, highlighting the importance of optimal record player maintenance.

Listen up, because this is important stuff! Keeping your record player in tip-top shape is crucial if you want to keep spinning those black circles of joy.

First things first – cleaning. And I’m not just talking about dusting off the top of your turntable (though you should do that too).

I’m talking about the nitty-gritty of cleaning your records and stylus.

For records, get yourself a good carbon fiber brush and use it before and after every play. Trust me, your records will thank you.

And for deeper cleaning? Well, let’s just say I’ve tried everything from special solutions to plain old dish soap.

Word to the wise: stick with the proper cleaning kits. I learned that lesson the hard way when I ruined my original pressing of “Dark Side of the Moon” with some questionable DIY cleaning method I found online.

Still kicking myself over that one!

Now, onto the stylus. This little guy is the unsung hero of your setup, and it needs some TLC.

I use a special stylus brush and cleaning solution, but be gentle! One wrong move and you could bend or break it.

I once sneezed while cleaning my stylus and nearly had a heart attack. Luckily, everything was fine, but I swear I aged ten years in that moment.

Calibration and alignment are also super important. Get yourself a good alignment protractor and take the time to set everything up properly.

It’s a bit fiddly, and you might feel like you need reading glasses and the patience of a saint, but trust me, it’s worth it. The difference in sound quality is like night and day!

Conclusion

Whew! We’ve come a long way, haven’t we?

From those tiny grooves to the sweet music filling your room, record players are truly marvels of engineering. It’s amazing how these devices, with their blend of simple mechanics and clever physics, can reproduce sound with such warmth and depth.

You know, every time I lower that tonearm onto a record, I still get a little thrill. There’s something magical about the whole process, isn’t there?

It’s not just about the sound quality (though that’s pretty awesome). It’s about the ritual, the connection to the music, and yeah, maybe a little bit of nostalgia too.

But here’s the thing – while I’ve given you the lowdown on how these babies work, every setup is unique. So don’t be afraid to experiment!

Try different cartridges, play with your speaker placement, or even build your own isolation platform (just maybe don’t use jello like I did in a moment of inspired madness).

And hey, let’s not forget about safety and ethics. Always handle your records and equipment with care.

And if you’re buying second-hand gear, make sure it’s all above board. We want to keep this vinyl revival going strong, right?

So, what are you waiting for? Dust off that old turntable, or treat yourself to a new one.

Dive into the world of vinyl and experience music the way it was meant to be heard. And hey, if you’ve got any cool tips or experiences with record players, why not share them in the comments?

I’d love to hear your vinyl adventures!

Now, if you’ll excuse me, I’ve got a date with my turntable and some classic rock. Time to drop the needle and let the good times roll!

How to Work a Crosley Turntable: A Beginner’s Guide

Okay, picture this: It’s a lazy Sunday afternoon, and you’ve just scored a sweet deal on a Crosley turntable at a garage sale.

You’re itching to spin some vinyl, but there’s one tiny problem – you have no clue how to work this thing!

Don’t worry, I’ve been there too. When I got my first Crosley, I was so excited that I nearly broke the tonearm trying to figure it out. Yikes!

But fear not, my fellow vinyl enthusiast. I’m here to share all the tips and tricks I’ve learned along the way.

Whether you’re a total newbie or just need a refresher, this guide will have you groovin’ to your favorite tunes in no time. So, let’s drop the needle on this tutorial and get your Crosley turntable up and running!

How to Work a Crosley Turntable

A Crosley turntable in action with a vinyl record spinning on its platter, set on a modern wooden surface.

To work a Crosley turntable, follow these steps:

1) Place the record on the platter.

2) Select the correct speed (33, 45, or 78 RPM) using the speed switch.

3) Lift the tonearm using the cueing lever.

4) Position the tonearm over the record’s edge.

5) Lower the tonearm gently onto the record using the cueing lever.

6) Adjust the volume on your turntable or connected speakers.

When finished, lift the tonearm and return it to its rest. Always handle records by their edges and clean the stylus regularly for optimal sound quality.

Now that we’ve covered the basics, let’s dive deeper into each step of operating your Crosley turntable and explore some pro tips to enhance your vinyl listening experience.

Setting Up Your Crosley Turntable

A cozy scene showing a Crosley turntable being carefully set up on a modern shelf. The turntable is positioned next to a mini-fridge, with cables ready to be connected to external speakers. The dust cover is open, emphasizing the need for stability and avoiding vibrations from nearby appliances during setup.

Alright, let’s kick things off with setting up your Crosley turntable. Trust me, I know the excitement of getting a new record player – it’s like Christmas morning for music lovers!

But before you start jamming, we’ve gotta make sure everything’s in its right place.

First things first, let’s unbox that bad boy. I remember when I got my Crosley Cruiser, I was so eager that I nearly tossed the styrofoam packing right out the window!

Don’t be like me – take your time and check that all the components are there and undamaged. You should have the turntable itself, a dust cover (if it’s not a suitcase model), and maybe some cables.

Now, where are you gonna put this beauty? I learned the hard way that placing it next to my mini-fridge was a big no-no – all those vibrations messed with the sound something fierce!

Find a spot that’s stable, level, and away from any sources of vibration. A solid shelf or table works great.

Oh, and make sure there’s enough clearance to lift the dust cover – I can’t tell you how many times I’ve bonked my head trying to change a record!

Okay, now for the fun part – hooking it up! If your Crosley has built-in speakers, you’re golden.

Just plug that power cord into the nearest outlet, and you’re halfway to vinyl heaven. But if you’re using external speakers (which I totally recommend for better sound), you’ll need to connect the RCA cables.

They’re those red and white plugs – just match the colors to the inputs on your speakers or receiver. Easy peasy!

One last tip – if your turntable has a ground wire (it looks like a thin cable with a forked end), make sure to connect it to the grounding post on your receiver. I once forgot this step and ended up with a hum louder than my neighbor’s lawnmower!

Trust me, proper grounding makes a world of difference.

And there you have it! Your Crosley turntable is set up and ready to rock.

But hold your horses – we’re not done yet. There’s still plenty more to learn about working this vinyl magic machine.

Stick around, and I’ll spill all the secrets I’ve picked up along the way!

Understanding the Components of Your Crosley Turntable

Close-up view of a Crosley turntable with labeled components, including the turntable platter, felt mat, tonearm, cartridge, stylus, speed selector, and auto-stop button. The turntable is on a sleek wooden surface, with soft lighting highlighting its parts.

Alright, folks, now that we’ve got your Crosley all set up, let’s break down the anatomy of this vinyl-spinning beast. Don’t worry if it looks like a spaceship control panel at first – I promise it’s not rocket science!

Let’s start with the star of the show: the turntable platter. This is the circular platform where your records sit.

Most Crosley models come with a felt mat that goes on top of the platter. I learned the hard way that this mat isn’t just for looks – it helps reduce vibrations and protects your precious vinyl.

One time, I played a record without the mat and ended up with more scratches than a cat lady’s furniture!

Next up, we’ve got the tonearm. This is that skinny arm thingy that swings over your record.

At the end of it, you’ll find the cartridge and stylus (aka the needle). This little duo is responsible for reading those grooves and turning them into sweet, sweet music.

Word to the wise: treat this part like it’s made of glass. I once knocked my tonearm while reaching for my coffee, and let’s just say my speakers made a noise that sounded like a dying whale!

Now, let’s talk about the speed selector. This little switch is usually marked with numbers like 33, 45, and sometimes 78.

These numbers refer to the RPM (rotations per minute) of different types of records. Most full-size albums play at 33 RPM, while singles usually spin at 45 RPM.

If you’re feeling adventurous and find some really old records, they might need that 78 RPM setting. Just make sure you’ve got the right speed, or your favorite song might sound like chipmunks on helium!

Last but not least, many Crosley turntables have an auto-stop function. This nifty feature automatically stops the platter from spinning when the record ends.

It’s a real lifesaver if you’re prone to falling asleep while listening to records (guilty as charged). But here’s a pro tip: some audiophiles swear that turning off the auto-stop can improve sound quality.

I tried it once and couldn’t tell the difference, but hey, maybe you’ve got golden ears!

Understanding these components is key to getting the most out of your Crosley turntable. It might seem like a lot to take in, but trust me, it’ll become second nature before you know it.

And once you’ve got it down, you’ll be impressing your friends with your vinyl wizardry in no time!

Operating Your Crosley Turntable

A cozy scene showing a Crosley turntable with a vinyl record playing, highlighting the tonearm gently placed on the record, capturing the essence of the vinyl listening experience.

Alright, my vinyl-loving friends, it’s time for the main event – actually playing a record on your Crosley turntable! I know you’re itching to get that needle droppin’, so let’s dive right in.

First up, let’s talk about placing the record on the platter. Seems simple enough, right?

Well, let me tell you about the time I tried to impress a date by smoothly sliding the record out of its sleeve and onto the turntable. Long story short, my fingers were all over the record, and the only thing that got impressed were my fingerprints on the vinyl!

Learn from my mistake – always handle records by the edges and the label. Treat ’em like they’re covered in wet paint!

Now, for the moment of truth – lowering the tonearm. This is where that cueing lever comes in handy.

It’s usually a little arm near the base of the tonearm. Lift it up, and the tonearm will rise.

Move the tonearm over to the edge of the record, then gently lower the lever. Voila!

The needle should gracefully descend onto your vinyl. I used to try lowering the tonearm by hand, but after a few heart-stopping scratches, I learned to trust the lever!

Once the needle hits the groove, you should start hearing music. If not, don’t panic!

Check your volume settings. I can’t tell you how many times I’ve had a mini heart attack thinking my turntable was broken, only to realize I’d muted my speakers.

Doh!

Speaking of settings, let’s talk about speed. Remember that speed selector we discussed earlier?

Make sure it matches your record – 33 RPM for most full-size albums, 45 RPM for singles. If your music sounds like Barry White on caffeine or the Chipmunks after a night out, you’ve probably got the wrong speed selected.

Don’t worry, we’ve all been there!

As the record plays, you might notice the tonearm slowly moving towards the center. That’s normal!

It’s following the spiral groove of the record. Just sit back, relax, and enjoy the warm, rich sound of vinyl.

And if your Crosley has that auto-stop function, it’ll take care of business when the record ends. If not, keep an ear out for that distinctive end-of-record static so you can lift the tonearm manually.

And there you have it! You’re officially spinning vinyl like a pro.

Remember, practice makes perfect. Before you know it, you’ll be changing records and adjusting settings like a seasoned DJ.

Now, if you’ll excuse me, I’ve got a date with my vinyl collection and a comfy chair. Happy listening!

Maintaining Your Crosley Turntable

A modern Crosley turntable setup in a cozy living room, with a vinyl record on the platter, a carbon fiber brush nearby, and soft ambient lighting. The dust cover is slightly lifted, and records are neatly stacked in the background

Alright, vinyl aficionados, let’s talk about keeping your Crosley turntable in tip-top shape. Trust me, a little TLC goes a long way in preserving both your turntable and your precious record collection.

I learned this the hard way when I neglected my first turntable and ended up with more dust than a desert storm!

First things first, let’s tackle cleaning. Your stylus (that’s the needle, for you newbies) is like the unsung hero of your turntable.

It’s doing all the hard work, reading those tiny grooves, so show it some love! I use a stylus brush to gently clean it from back to front.

Whatever you do, don’t use your fingers – I made that mistake once and ended up with a bent stylus and a very sad bank account.

Now, onto the records themselves. Oh boy, do I have a story about this!

I once found a crate of vintage records at a flea market and was so excited that I started playing them right away. Big mistake!

They were so dusty that my speakers sounded like they were coughing. Lesson learned: always clean your records before playing them.

I use a carbon fiber brush before each play, and for deeper cleaning, I invested in a record cleaning solution. Just be gentle – treat your vinyl like it’s made of butterfly wings!

Let’s talk about replacing the needle. If your music starts sounding like it’s coming through a sock, it might be time for a new stylus.

Don’t panic! It’s not as scary as it sounds.

Most Crosley needles just pull right out and push right back in. But word to the wise: make sure you get the right replacement.

I once bought a generic needle online and let’s just say my records sounded about as good as a cat screeching at 3 AM.

Lastly, let’s discuss storage. Your turntable and records need a good home.

Keep them away from heat, humidity, and direct sunlight. I learned this the hard way when I left a record on my windowsill – came back to find it warped into a nice vinyl bowl!

Not exactly the kind of bowl I wanted to eat my cereal out of.

For your records, store them vertically – stacking them horizontally is a one-way ticket to Warpville. And please, for the love of all things groovy, use those inner sleeves!

They’re not just fancy record lingerie – they protect against dust and scratches.

As for your turntable, keep that dust cover closed when you’re not using it. It’s not just there to look pretty (although my Crosley does look mighty fine).

It’s your first line of defense against dust, cat hair, and whatever else might be floating around your room.

Remember, folks, a well-maintained turntable is a happy turntable. And a happy turntable means years of awesome vinyl listening ahead of you.

Now, if you’ll excuse me, I’ve got a date with my record cleaning brush and a stack of dusty albums. Rock on!

Troubleshooting Common Crosley Turntable Issues

A modern Crosley turntable setup on a sleek, level surface with a vinyl record, illustrating proper positioning and common troubleshooting tips.

Okay, fellow vinyl enthusiasts, let’s talk troubleshooting. Even the best turntables can sometimes act up, and Crosleys are no exception.

But don’t worry – I’ve been through it all, and I’m here to help you navigate these rocky waters.

First up, let’s address the dreaded skip. You’re grooving to your favorite tune when suddenly – bam!

– the needle jumps and you’re in a different part of the song. Talk about a mood killer!

This happened to me during a romantic dinner once, and let’s just say it wasn’t exactly smooth sailing after that.

If you’re experiencing skips, first check if your turntable is on a level surface. I once had my Crosley on a wobbly table, and it skipped more than a kid playing hopscotch!

Also, make sure your record is clean – even tiny specks of dust can cause skips. If the problem persists, your stylus might be worn out or your tracking force might be off.

Don’t be afraid to consult your manual or reach out to Crosley support – they’re usually pretty helpful.

Next, let’s talk about speed issues. If your records sound like they’re on fast-forward or slow-mo, you might have a speed problem.

I remember playing a Beatles record for my dad, and he asked why John Lennon suddenly sounded like a chipmunk!

First, double-check that you’ve selected the right speed for your record. If that’s not the issue, your belt might be loose or worn out.

Some Crosley models let you adjust the belt yourself, but if you’re not comfortable doing that, it’s best to contact support.

Now, onto the auto-stop function. This feature is supposed to stop the platter when the record ends, but sometimes it can be a bit…overzealous.

I once had a turntable that thought every record was over after the first song!

If your auto-stop is triggering too early or not at all, there might be an issue with the mechanism. Some Crosley models let you adjust this, but again, consult your manual first.

If you’re not comfortable tinkering with it, reach out to Crosley. They’ve probably heard every auto-stop horror story in the book!

Lastly, let’s address sound quality issues. If your audio is distorted or just doesn’t sound right, there could be a few culprits.

Check your connections first – a loose cable can cause all sorts of audio weirdness. Also, make sure your stylus is clean and in good condition.

A dirty or worn-out stylus can make your records sound about as good as a cat walking across a piano.

Remember, troubleshooting is all part of the vinyl experience. Don’t get discouraged if you run into issues – we’ve all been there!

With a little patience and some trial and error, you’ll be back to enjoying your records in no time.

And hey, if all else fails, there’s always the nuclear option – turn it off and on again. You’d be surprised how often that works, even for turntables!

Now, if you’ll excuse me, I’ve got a date with my soldering iron and a temperamental auto-stop mechanism. Wish me luck!

Conclusion

Wow, what a journey we’ve been on! From unboxing your Crosley to troubleshooting those pesky issues, we’ve covered it all.

And you know what? I bet you’re feeling pretty darn confident about your turntable skills right now.

Give yourself a pat on the back – you’ve earned it!

Remember when we started, and that Crosley looked more complicated than a spaceship control panel? Now look at you, dropping needles and adjusting speeds like a pro!

It just goes to show that with a little patience and practice, anyone can become a vinyl virtuoso.

But here’s the thing – every setup is unique, just like every music lover. So don’t be afraid to experiment and find what works best for you.

Maybe you’ll discover that your Crosley sounds better with the dust cover off, or perhaps you’ll find the perfect cleaning routine that makes your records shine like new. The joy of vinyl is in the journey, not just the destination.

Now, I can’t stress this enough – always handle your records and equipment with care. I know it’s tempting to treat your turntable like it’s indestructible (trust me, I’ve been there), but a little TLC goes a long way.

Your future self will thank you when you’re still spinning the same records years down the line.

And hey, if you run into any issues that we didn’t cover here, don’t panic! The vinyl community is one of the most supportive out there.

Join some online forums, chat with fellow Crosley owners, or reach out to Crosley’s customer support. There’s always someone willing to lend a helping hand or share their own turntable tales.

Lastly, remember why we’re doing this in the first place – for the love of music! There’s something magical about the ritual of selecting a record, carefully placing it on the platter, and hearing those first crackles as the needle hits the groove.

It’s an experience that digital just can’t replicate, and your Crosley is your ticket to this wonderful world of analog sound.

So go on, put on your favorite album, sit back, and let the music wash over you. And as you’re tapping your foot to the beat, take a moment to appreciate how far you’ve come.

From newbie to vinyl virtuoso – not bad, my friend, not bad at all!

Now, if you’ll excuse me, I’ve got a date with my record collection and a comfy chair. Happy listening, and may your grooves always be dusty!

Oh, and before I go – why not share your own Crosley experiences in the comments? I’d love to hear about your favorite records, your troubleshooting triumphs, or even your epic turntable fails.

After all, we’re all in this vinyl adventure together!

How to Change a Needle on Your Turntable and Record Player: A Step-by-Step Guide

Did you know that a worn-out needle can make your favorite vinyl sound like it’s been dragged through a sandstorm? Yikes!

I learned that the hard way when I first got into collecting records. Trust me, there’s nothing worse than hearing your prized Led Zeppelin album sound like it’s being played underwater.

But don’t worry, my friend – changing a needle on your turntable or record player isn’t as daunting as it might seem. In fact, it’s a crucial skill for any vinyl enthusiast to master.

So, grab a cup of coffee (or whatever floats your boat), and let’s dive into the world of turntable maintenance. I promise by the end of this guide, you’ll be swapping needles like a pro and your records will thank you for it!

How to Change a Needle on a Turntable

A close-up view of a person carefully changing a turntable needle, with focus on the cartridge and vinyl in the background.

To change a needle on a turntable, follow these steps: 1) Gently remove the old needle by pulling it downward and forward from the cartridge. 2) Carefully insert the new needle into the cartridge, aligning the pins with the holes.

3) Push the new needle up and back until it clicks into place. 4) Reattach the headshell to the tonearm if you removed it.

5) Test the new needle by playing a record at low volume.

Now that we’ve got the quick answer out of the way, let’s dive deeper into the nitty-gritty of needle changing and explore all the juicy details that’ll make you a true vinyl virtuoso!

Understanding the Importance of a Good Needle

Close-up view of a high-quality turntable needle (stylus) playing a vinyl record, emphasizing the grooves of the record and the needle's tip in focus。

Alright, let’s get real for a second. When I first started spinning vinyl, I thought all needles were created equal.

Boy, was I wrong! It’s like thinking all coffee is the same – blasphemy, right?

A good needle, or stylus if you wanna get fancy, is the unsung hero of your entire setup. It’s the tiny little guy that’s actually touching your precious records and translating those grooves into sweet, sweet music.

Now, here’s the kicker – a worn-out or low-quality needle can seriously mess up your listening experience. I remember playing my dad’s old Beatles record with a needle that had seen better days, and let me tell you, it sounded like John, Paul, George, and Ringo were singing underwater while being attacked by angry seagulls.

Not cool.

But it’s not just about sound quality, folks. A bad needle can actually damage your vinyl.

Yeah, you heard that right. It’s like taking sandpaper to your records every time you play them.

I learned this the hard way when I ruined my first-edition copy of “Dark Side of the Moon”. Still hurts to think about it!

So, how do you know when it’s time to change your needle? Well, there are a few telltale signs.

First off, if you start hearing distortion, especially in the high frequencies, that’s a red flag. It’s like when your car starts making that weird noise – you know something’s up.

Another sign is if you see visible wear on the needle itself. If it looks flatter than a pancake, it’s time for a change.

Also, keep an ear out for any skipping or repeating. Sure, it might make for an interesting remix, but it’s not doing your records any favors.

And if you’re really not sure, there’s always the old-school method – use a magnifying glass to check the needle tip. If it looks more like a club than a point, it’s definitely time for an upgrade.

Remember, changing your needle isn’t just about maintaining sound quality – it’s about preserving your vinyl collection for years to come. Trust me, your future self (and your records) will thank you for it!

Gathering the Necessary Tools and Materials

A neatly arranged set of tools and materials for changing a turntable needle, including a replacement needle, small flathead screwdriver, needle-nose pliers, soft brush, can of compressed air, and a magnifying glass on a clean surface.

Alright, folks, it’s time to gear up! Changing a turntable needle isn’t exactly like gearing up for a space mission, but having the right tools can make all the difference.

Trust me, I’ve tried doing this with just my bare hands and a prayer – let’s just say it didn’t end well for my favorite Jazz record.

First things first, you’re gonna need a replacement needle. Sounds obvious, right?

But here’s where it gets tricky. Not all needles are created equal, and using the wrong one is like trying to fit a square peg in a round hole.

Been there, done that, got the T-shirt (and a very confused-looking turntable).

So, how do you find the right needle? Well, you’ve got a few options.

You can check your turntable’s manual (if you’re one of those rare organized souls who actually keeps manuals), or you can look up your turntable model online. If all else fails, you can always take a picture of your current cartridge and needle and show it to the folks at your local hi-fi shop.

They’re usually pretty helpful, even if they do sometimes look at you like you’re from another planet when you admit you’ve been using the same needle for a decade.

Now, onto the tools. You’re gonna need a small flathead screwdriver – emphasis on small.

The first time I tried this, I used a screwdriver that was way too big and nearly gave my poor turntable a heart attack. A pair of needle-nose pliers can also come in handy, especially if you’ve got butterfingers like me.

Oh, and don’t forget about cleaning supplies! A soft brush or a can of compressed air can help you clear out any dust or debris before you start.

Trust me, you don’t want to be sneezing all over your delicate equipment.

Lastly, and this might sound a bit weird, but grab a magnifying glass if you’ve got one. Those needles are tiny, and unless you’ve got superhuman vision, a magnifying glass can be a real lifesaver.

I once spent an hour squinting at my cartridge before I realized I could just use a magnifying glass. Facepalm moment for sure!

Remember, gathering the right tools is half the battle. With these items in your arsenal, you’ll be ready to tackle this needle-changing business like a pro.

Just don’t get too excited and try to change your needle in the dark like I did once. Spoiler alert: it doesn’t end well!

Identifying Your Cartridge and Needle Type

Close-up of a turntable cartridge and stylus, with a magnifying glass focused on the needle tip for detailed inspection.

Okay, buckle up, folks – we’re about to dive into the wild world of cartridges and needles. Don’t worry, it’s not as complicated as rocket science…

well, most of the time.

First things first, let’s talk about cartridges. These little guys are like the brains of your turntable operation.

They come in two main flavors: moving magnet (MM) and moving coil (MC). Now, don’t ask me why they’re called that – I’m pretty sure it’s just to confuse us mere mortals.

Moving magnet cartridges are like the friendly neighborhood Spider-Man of the turntable world – they’re common, reliable, and generally easier on the wallet. Moving coil cartridges, on the other hand, are more like Tony Stark – flashy, high-performance, but they’ll cost you a pretty penny.

Now, here’s where it gets fun (or frustrating, depending on your perspective). Figuring out what type of cartridge you have can sometimes feel like you’re trying to decode ancient hieroglyphics.

I remember the first time I tried to identify mine – I ended up convinced I had some sort of alien technology in my hands.

But fear not! There are a few ways to crack this code.

First, check your turntable’s manual (if you haven’t used it as a coaster, that is). It should tell you what type of cartridge came with your turntable.

If that’s a no-go, try looking for any markings or model numbers on the cartridge itself. Just be careful – these things are more delicate than my grandma’s china.

Once you’ve figured out your cartridge type, it’s time to tackle the needle, or stylus if you’re feeling fancy. These come in different shapes – conical, elliptical, and some fancy ones like Shibata or micro-line.

Don’t worry if these sound like Pokemon types to you – I felt the same way at first.

Conical styli are like the vanilla ice cream of the needle world – simple, reliable, gets the job done. Elliptical styli are a step up, offering better sound quality but they’re a bit pickier about alignment.

The fancier types? Well, they’re for the real audiophiles who can hear the difference between a cat’s meow recorded in a studio versus one recorded in a bathroom.

(Spoiler alert: I can’t.)

To figure out what type of stylus you have, you might need to channel your inner Sherlock Holmes. Look closely at the tip (this is where that magnifying glass comes in handy).

If it looks like a tiny ball bearing, it’s probably conical. If it’s more oblong, you’re likely looking at an elliptical stylus.

Remember, matching your new stylus to your cartridge is crucial. It’s like finding the right dance partner – if they don’t match, you’re gonna end up with some pretty funky moves (and not in a good way).

Don’t be afraid to ask for help if you’re stuck. I once spent an entire afternoon convinced I had a moving coil cartridge, only to find out it was just a particularly shiny moving magnet.

Live and learn, folks, live and learn!

Step-by-Step Guide to Changing Your Needle

Close-up of a person carefully replacing a turntable needle, focusing on the precise alignment of the needle with the cartridge.

Alright, it’s showtime! We’re finally ready to perform some turntable surgery.

Don’t worry, it’s not as scary as it sounds – no one’s life is on the line here. Well, except maybe the life of your records if you mess this up.

But hey, no pressure!

Step 1: Removing the old needle

First things first, we gotta get rid of the old needle. It’s like saying goodbye to an old friend, if that old friend was slowly ruining your favorite records.

Start by making sure your turntable is unplugged. I learned this the hard way when I accidentally started the platter while my face was right next to it.

Let’s just say I got a very close-up view of my reflection in the shiny metal.

Next, carefully remove the headshell from the tonearm. It usually twists off, but check your manual if you’re not sure.

If it doesn’t budge, don’t force it – we’re not trying to recreate a strongman competition here.

Now, look for a small clip or lever at the front of the cartridge. This is what’s holding your old needle in place.

Gently pull this forward and downward to release the needle. Remember, gentle is the key word here.

The first time I did this, I yanked it like I was starting a lawnmower. Spoiler alert: turntables don’t like to be treated like lawnmowers.

Step 2: Installing the new needle

Alright, out with the old, in with the new! Take your shiny new needle (try not to get distracted by how pretty it is) and line it up with the front of the cartridge.

There should be some small pins on the back of the needle that align with holes in the cartridge. It’s like a very tiny, very expensive game of pin the tail on the donkey.

Slowly push the new needle up and back into the cartridge until you hear a click. Don’t force it – if it’s not going in smoothly, double-check your alignment.

I once spent 10 minutes trying to jam a needle in upside down. Not my proudest moment.

Step 3: Testing the installation

Now for the moment of truth! Reattach the headshell to the tonearm and plug your turntable back in.

Put on a record you’re not too emotionally attached to (just in case) and gently lower the needle onto it.

If you hear music, congratulations! You’ve successfully performed turntable surgery.

If you hear something that sounds like a cat being strangled, don’t panic. Just double-check your installation and make sure everything’s aligned correctly.

Remember, it’s normal for a new needle to sound a bit different at first. It needs to be “broken in,” kind of like a new pair of shoes.

Give it a few hours of playtime and it should settle into its groove (pun absolutely intended).

And there you have it! You’ve changed your turntable needle like a boss.

Go ahead and treat yourself to your favorite album – you’ve earned it. Just try not to get too carried away with your newfound skills.

I once got so excited I changed my needle three times in one week. Turns out, that’s not necessary.

Who knew?

Maintenance Tips for Longer Needle Life

A detailed close-up of a vinyl turntable setup with a soft brush cleaning the needle.

Alright, vinyl enthusiasts, now that you’ve successfully changed your needle, let’s talk about keeping it in tip-top shape. After all, you don’t want to be changing these bad boys as often as you change your socks (although if you’re changing your socks as infrequently as some people change their needles, we might need to have a different conversation).

First up, cleaning. I know, I know, cleaning isn’t exactly the most thrilling topic, but trust me, it’s crucial.

You want to keep your needle cleaner than a whistle – although why whistles are the benchmark for cleanliness, I’ll never understand. Anyway, use a soft brush specifically designed for stylus cleaning.

And for the love of all that is holy, brush from back to front, not side to side. I learned this the hard way when I nearly snapped my needle off trying to clean it like I was scrubbing a dirty dish.

Now, let’s talk about how to handle your tonearm. Treat it like it’s made of spun sugar – that means no dropping it, no letting it bounce around, and definitely no using it as a tiny diving board for your action figures (don’t ask).

When you’re done listening, always use the tonearm lift to raise it gently. I once tried to lift it manually after a few too many glasses of wine, and let’s just say my records still haven’t forgiven me.

Storage is another biggie. When you’re not using your turntable, keep that dust cover down.

Dust is like the Voldemort of the vinyl world – it must not be named, and it certainly must not be allowed near your needle. If your turntable didn’t come with a dust cover, you can use a stylus guard.

Just don’t forget to remove it before you play a record, unless you want to hear what it sounds like when a needle tries to play plastic.

Speaking of playing, here’s a pro tip: don’t leave the needle sitting in the run-out groove at the end of a record. It’s like leaving your car running in the driveway – a waste of energy and potentially damaging.

I once fell asleep with a record playing and woke up to find my needle had been riding that run-out groove all night long. Talk about a walk of shame for my poor stylus.

Lastly, let’s talk about pressure, baby. No, not the kind you feel when you’re trying to impress your audiophile friends.

I’m talking about tracking force. This is the amount of pressure your needle puts on the record, and it’s pretty important.

Too much pressure and you’ll wear out your records faster than I wear out my welcome at all-you-can-eat buffets. Too little, and your needle will be skipping more than a kid in a playground.

Check your cartridge’s specifications for the right tracking force, and use a stylus pressure gauge to set it correctly.

Remember, a little TLC goes a long way in the world of turntables. Treat your needle right, and it’ll reward you with sweet, sweet music for years to come.

And who knows? Maybe one day you’ll be the wise old vinyl guru, dispensing needle wisdom to wide-eyed newbies.

Just try not to let it go to your head – nobody likes a needle know-it-all!

Conclusion

Well, folks, we’ve come to the end of our needle-changing journey. Who knew such a tiny component could lead to such a big adventure, right?

From understanding why a good needle matters, to the nail-biting process of actually swapping it out, we’ve covered it all. And let me tell you, mastering this skill is like unlocking a secret level in the game of vinyl enjoyment.

Remember, changing your turntable needle isn’t just about maintaining your equipment – it’s about respecting the music and the medium. It’s about ensuring that every note, every beat, every whispered lyric comes through exactly as the artist intended.

So go forth, my vinyl-loving friends, and change those needles with confidence. Your records will thank you, your ears will thank you, and hey, you might even impress that cute audiophile at the record store.

But before you rush off to become the needle-changing champion of your neighborhood, don’t forget the most important step: sit back, drop the needle on your favorite record, and enjoy the fruits of your labor. After all, that’s what this is all about – the pure, unadulterated joy of music.

Now, if you’ll excuse me, I’ve got a date with my turntable and a stack of records that are begging to meet my shiny new needle. Happy listening, folks!

How to Set Up and Use a Turntable: A Beginner’s Guide

Hey there, vinyl enthusiasts and curious newcomers! Ready to dive into the world of turntables? Well, you’re in for a treat!

I remember when I first got my hands on a turntable – it was like opening a treasure chest of musical possibilities.

But let me tell you, it wasn’t all smooth sailing at first. I made my fair share of rookie mistakes, but that’s all part of the journey, right?

Now, you might be wondering, “Why bother with all this old-school tech when we’ve got streaming at our fingertips?”

Well, let me tell you – there’s something magical about dropping that needle onto a vinyl record. The warm, rich sound that fills the room is unlike anything you’ll get from digital audio.

Plus, the whole ritual of selecting a record, carefully placing it on the platter, and watching it spin… it’s an experience, I tell ya!

But here’s the thing – to really get the most out of your vinyl experience, you’ve gotta set up your turntable right. Trust me, I learned this the hard way.

I once had my tonearm so out of whack that I thought my favorite Beatles record had turned into a skippy mess. Turns out, it was just my shoddy setup!

So, buckle up, ’cause I’m gonna walk you through everything you need to know about setting up and using a turntable. By the end of this guide, you’ll be spinning records like a pro!

How to Set Up and Use a Turntable

A detailed view of a turntable setup on a smooth wooden surface, with vinyl records neatly stacked beside it. The turntable is connected to an amplifier, and the tonearm is properly balanced, gently lowering the stylus onto a clean vinyl record on the platter. Warm lighting in the background adds a cozy and inviting atmosphere, highlighting the retro-modern aesthetic of the setup.

To set up and use a turntable, follow these steps:

1) Choose a level surface and place your turntable.

2) Connect the turntable to a phono preamp or amplifier.

3) Balance the tonearm and set the tracking force.

4) Adjust the anti-skate.

5) Clean your vinyl record.

6) Carefully place the record on the platter.

7) Use the cue lever to lower the stylus onto the record’s lead-in groove.

8) Enjoy your music!

Remember to handle records by their edges and clean the stylus regularly for optimal sound quality.

While this quick guide covers the basics, there’s a lot more to learn about getting the most out of your turntable setup. In the following sections, we’ll dive deeper into each step, explore common issues, and share some pro tips to enhance your vinyl listening experience.

Choosing the Right Turntable

A modern turntable setup displaying both a sleek direct-drive turntable and a belt-drive turntable, each with a vinyl record on the platter. The scene is set on a clean, wooden surface with soft lighting, emphasizing the key differences between the two designs.

Alright, let’s talk turkey about picking the perfect turntable. When I first started out, I was completely overwhelmed by all the options.

Belt-drive? Direct-drive? What the heck did all that mean? Well, I’m here to break it down for you in simple terms.

First up, you’ve got your belt-drive turntables. These bad boys use a belt to spin the platter (that’s the thing your record sits on).

They’re usually quieter and can give you better sound quality, especially for those mellow jazz sessions or acoustic tracks. But here’s the catch – they’re not great for DJ-ing or if you’re the impatient type who can’t wait for the platter to get up to speed.

On the flip side, you’ve got direct-drive turntables. These are the workhorses of the DJ world.

The motor’s directly connected to the platter, so you get instant start-up and more consistent speed. Plus, they’re built like tanks!

I remember when my clumsy cousin knocked over my direct-drive at a party – I nearly had a heart attack, but the thing just kept on spinning like nothing happened!

Now, when you’re shopping for a turntable, there are a few key features you’ll want to keep an eye out for:

  1. Adjustable counterweight: This little gizmo helps balance your tonearm and set the right tracking force. Trust me, you don’t want to skip this – unless you enjoy the sound of your needle gouging your precious vinyl!
  2. Anti-skate control: This nifty feature helps keep your stylus centered in the groove. Without it, you might find your needle skating across your records like it’s auditioning for the Olympics.
  3. Pitch control: If you’re feeling fancy, this lets you fine-tune the speed of your platter. It’s not essential, but it’s pretty cool if you want to get your records spinning at juuuust the right speed.
  4. Built-in preamp: If you’re just starting out, a turntable with a built-in preamp can save you some hassle (and cash). But if you’re looking to upgrade your sound down the line, you might want one without so you can add a separate preamp later.

Now, I know what you’re thinking – “How much is this gonna set me back?” Well, the good news is, you don’t have to sell a kidney to get into vinyl. There are some decent entry-level turntables out there for around $100-$200.

But if you’ve got some extra cash burning a hole in your pocket, you can find some really sweet setups in the $300-$500 range.

Just remember, the most expensive turntable isn’t always the best one for you. It’s all about finding the right balance between your budget and your needs.

Heck, I started with a hand-me-down turntable that looked like it had been through a war, and I still managed to fall in love with vinyl!

Essential Components for Your Turntable Setup

A modern turntable setup featuring essential components including a phono preamp, amplifier, powered speakers, and cleaning accessories for optimal vinyl performance.

Okay, so you’ve got your turntable picked out. Awesome! But hold your horses – we’re not done yet.

There are a few more pieces to this vinyl puzzle that you’re gonna need. Don’t worry, I’ve got your back.

Let’s break it down.

First up, you’re gonna need a phono preamp. Now, I know what you’re thinking – “A phono what-now?” I had the same reaction when I first heard about it.

Basically, a phono preamp boosts the signal from your turntable and applies something called RIAA equalization. Without getting too nerdy, it makes your records sound the way they’re supposed to.

Some turntables have this built-in, but if yours doesn’t, you’ll need to grab one separately.

Next, you’ll need something to actually hear your music. Shocking, I know!

You’ve got two main options here: powered speakers or an amplifier with passive speakers. If you’re just starting out, powered speakers can be a great, simple option.

But if you want more control over your sound (and trust me, you might catch the audiophile bug), an amp and passive speakers might be the way to go.

Now, let’s talk about the unsung hero of your setup – the cartridge and stylus. This dynamic duo is what actually reads the grooves in your records and turns them into sweet, sweet music.

The cartridge holds the stylus (also called the needle), and together they’re like the eyes and ears of your turntable. When I first started out, I thought all cartridges were created equal.

Boy, was I wrong! Upgrading my cartridge was like cleaning my ears for the first time – suddenly, I could hear details in my records that I never knew existed!

Lastly, don’t forget about the accessories. These might seem like small potatoes, but trust me, they can make a big difference.

Here are a few must-haves:

  1. Record cleaning brush: Keep those grooves dust-free for the best sound quality.
  2. Stylus brush: A clean stylus is a happy stylus!
  3. Slip mat: This goes between your record and the platter. It can help reduce static and improve sound.
  4. Level: Make sure your turntable is perfectly flat for optimal performance.

I remember when I first got my turntable, I was so excited that I skipped on some of these accessories. Big mistake!

My records were picking up more dust than a neglected attic, and my stylus was getting gunked up faster than you can say “vinyl revival.” Learn from my mistakes, folks!

Step-by-Step Turntable Setup Guide

A detailed scene of a modern turntable setup, focusing on a person carefully adjusting the tonearm's counterweight. In the background, speakers, an amplifier, and cables are neatly organized, showing a clean and precise audio setup.

Alright, now we’re getting to the good stuff! Setting up your turntable might seem like rocket science at first, but trust me, once you get the hang of it, it’s a piece of cake.

Let’s break it down step by step.

  1. Unboxing and initial inspection:
    First things first, let’s get that baby out of the box! Be gentle – turntables can be delicate.

Give everything a once-over to make sure nothing’s damaged or missing. I once got a turntable where the tonearm was bent like a boomerang – not ideal!

  1. Balancing the tonearm:
    This is where things get a bit tricky, but don’t sweat it! Start by setting the anti-skate to zero and removing any counterweights.

Now, adjust the counterweight until the tonearm floats horizontally. It should be as level as a calm lake on a windless day.

Once you’ve got that, you’re ready for the next step.

  1. Setting the tracking force:
    Remember that counterweight we just adjusted? Now we’re gonna use it to set the tracking force.

Your cartridge will have a recommended tracking force – usually between 1.5 to 2.5 grams. Set the counterweight dial to zero without moving the actual weight, then rotate the whole thing to the recommended force.

Voila! You’ve just set your tracking force like a pro.

  1. Adjusting the anti-skate:
    Anti-skate keeps your needle from getting pulled towards the center of the record. Generally, you want to set this to the same number as your tracking force.

Easy peasy!

  1. Connecting to your audio system:
    Time to hook everything up! Connect your turntable to your phono preamp (if it’s external), then to your amplifier or powered speakers.

Don’t forget the ground wire – it looks like a little tail coming out of your turntable. Attach this to the ground post on your preamp or amp to avoid any nasty humming sounds.

Now, I know this might all sound complicated, but trust me, it gets easier with practice. I remember the first time I tried to balance a tonearm – I was sweating bullets and my hands were shaking like I was diffusing a bomb!

But after a few tries, it became second nature.

Oh, and here’s a pro tip: invest in a tracking force gauge. It’s a little gadget that helps you set your tracking force more accurately.

When I first got one, I realized I’d been way off in my settings. Suddenly, my records sounded clearer than ever!

Just remember, take your time with this setup process. It’s not a race, and getting it right will make a world of difference in how your records sound.

And hey, if you mess up, no biggie! You can always start over.

That’s the beauty of this hobby – there’s always room to tinker and improve.

Using Your Turntable: Best Practices

A sleek modern turntable setup with a vinyl record spinning on the platter, accompanied by a stylish dust cover and wooden surface, creating a cozy and vintage ambiance.

Alright, you’ve got your turntable all set up and ready to rock. But hold up!

Before you start spinning those precious vinyl gems, let’s talk about some best practices. Trust me, I’ve learned some of these the hard way, and I’d hate for you to make the same mistakes!

First things first – handling your records. Always, and I mean ALWAYS, handle your records by the edges and the label.

Avoid touching the grooves like they’re hot lava. Your fingers are like little grease factories, and that oil can gunk up the grooves and affect the sound quality.

I once let a friend handle my prized original pressing of “Dark Side of the Moon” without explaining this… let’s just say we’re not friends anymore. (Just kidding, but I did make him buy me a new copy!)

Now, let’s talk about storage. Store your records vertically, like books on a shelf.

Stacking them horizontally might seem space-efficient, but it can warp your records faster than you can say “audiophile.” And please, for the love of all that is holy, keep them in their sleeves when not in use!

Cleaning your records is crucial. A carbon fiber brush is your best friend here.

Give your records a gentle brushing before and after each play to keep dust at bay. For deeper cleaning, you might want to invest in a record cleaning solution and microfiber cloth.

Just be gentle – you’re not scrubbing pots and pans here!

When it comes to actually playing your records, here’s where the magic happens. Start by giving your stylus a quick brush (front to back, never side to side) to remove any built-up gunk.

Then, use the cueing lever to gently lower the stylus onto the record. I know it’s tempting to just plop that needle down, but trust me, your records (and your stylus) will thank you for being gentle.

While the record’s playing, try to resist the urge to lift the dust cover. I know, I know, watching that record spin is hypnotic.

But every time you lift that cover, you’re letting dust settle on your precious vinyl. Plus, some turntables can pick up vibrations from the cover being open, which can affect the sound.

When it’s time to flip the record or change to a new one, always use the cueing lever to lift the tonearm. Then, stop the platter before removing the record.

I once got a little too eager and tried to snatch the record while it was still spinning – ended up with a scratch that sounded like a DJ having a seizure.

Oh, and here’s a quirky little tip I picked up along the way: if you’re having trouble with static electricity making your records stick to the slipmat, try placing a metal record weight on top of the spindle (not on the record itself) while it’s playing. It helps ground things and reduce static.

Weird, but it works!

Remember, using a turntable is all about the ritual. Take your time, be mindful, and really immerse yourself in the experience.

There’s something truly special about carefully selecting a record, gently placing it on the platter, and hearing those first crackles as the needle hits the groove. It’s like a little ceremony every time, and that’s what makes vinyl so magical.

Troubleshooting Common Issues

A modern turntable setup in a cozy room with a spinning vinyl record on a sleek, level surface. Troubleshooting tools, including a strobe disc and alignment tools, are placed nearby, along with neatly arranged cables and a grounding wire connected to the amplifier. Soft lighting enhances the well-maintained setup.

Alright, let’s face it – even with the best setup and care, sometimes things can go a little wonky with your turntable. But don’t panic!

Most common issues have pretty simple fixes. Let’s dive into some troubleshooting tips that’ll have you back to spinning tunes in no time.

  1. Skipping or distorted sound:
    Oh man, there’s nothing worse than settling in for a listening session and hearing your favorite track skip like a scratched CD. (Remember those?) First, check your tracking force.

If it’s too light, your stylus might be bouncing out of the groove. Too heavy, and you might be damaging your records.

Also, make sure your turntable is on a level surface. I once had a persistent skipping problem that drove me nuts, only to realize my turntable was slightly tilted because of a wobbly table leg!

  1. Excessive surface noise:
    If your records sound like they’re being played through a bowl of Rice Krispies, you’ve got a noise problem. First, give your records a good cleaning.

You’d be amazed at how much gunk can build up in those grooves! If that doesn’t help, check your stylus.

It might be dirty or worn out. I once spent weeks troubleshooting a noise issue, only to realize my stylus was balder than my Uncle Joe!

  1. Speed inconsistencies:
    Does your music sound like it’s been pitch-shifted by a deranged DJ? You might have a speed problem.

First, use a strobe disc to check if your turntable is actually spinning at the right speed. If it’s off, you might need to adjust the pitch control (if your turntable has one) or get the motor serviced.

I once had a turntable that played everything slightly too fast – made all my records sound like chipmunk versions!

  1. Cartridge alignment problems:
    If your music sounds distorted, especially towards the center of the record, your cartridge might be misaligned. This is a bit tricky to fix, but don’t worry – you’ve got this!

Use a cartridge alignment protractor (you can print one online) to check and adjust the alignment. It’s a bit fiddly, but man, the improvement in sound quality is worth it!

  1. Humming or buzzing:
    If you’re hearing a constant hum or buzz, it’s probably a grounding issue. Make sure that little grounding wire from your turntable is connected to your amp or preamp.

If it is and you’re still getting buzz, try a different outlet – sometimes electrical interference can cause this. I once spent an entire weekend trying to eliminate a mysterious hum, only to realize it was coming from my mini-fridge next to the turntable.

D’oh!

Remember, troubleshooting is all part of the vinyl experience. Don’t get discouraged if things aren’t perfect right away.

Half the fun is tinkering and gradually improving your setup. And hey, if all else fails, there’s no shame in taking your turntable to a pro for a check-up. Sometimes, you need a turntable doctor!

Maintaining Your Turntable for Longevity

A modern turntable being gently cleaned with a microfiber cloth in a cozy room, with the stylus being brushed using a small stylus brush. Maintenance tools, including a folded belt, soft brush, and compressed air, are nearby.

Alright, vinyl lovers, let’s talk about keeping your turntable in tip-top shape. Think of your turntable like a classic car – with proper care and maintenance, it can last for decades and even become a family heirloom.

(I’m still using my dad’s old Technics, and let me tell you, that thing’s older than most of my t-shirts!)

First up, let’s talk cleaning. Your turntable is like a dust magnet, and all that gunk can affect your sound quality.

Give it a gentle wipe-down with a microfiber cloth regularly. For those hard-to-reach spots, a soft brush or can of compressed air can work wonders.

Just be gentle – you’re not pressure washing your deck here!

Now, let’s talk about the heart of your turntable – the stylus. This little guy does all the heavy lifting, so treat it with respect!

Clean it gently with a stylus brush or a specialized cleaning solution. And here’s a pro tip: always brush from back to front, never side to side.

I learned that the hard way when I accidentally bent my stylus trying to clean it. Talk about a face-palm moment!

If you’ve got a belt-drive turntable, don’t forget about the belt! Over time, these can stretch out or even snap.

Check it periodically for signs of wear and replace it if needed. It’s a pretty easy DIY job, but if you’re not comfortable, no shame in asking for help.

I once tried to replace a belt after a few beers and ended up with something that looked more like a Möbius strip than a turntable belt!

For those of you with direct-drive turntables, you’ve got it a bit easier in the maintenance department. Just keep an eye (or ear) out for any unusual noises or speed inconsistencies that might indicate the motor needs attention.

Now, here’s something a lot of folks overlook – the environment. Your turntable doesn’t like extreme temperatures or humidity.

Try to keep it in a stable environment, away from direct sunlight or heat sources. I once made the mistake of putting my turntable near a window – come summer, the heat warped my favorite Beach Boys record into a vinyl taco!

Lastly, know when it’s time to call in the pros. If you’re hearing persistent issues that you can’t solve, or if it’s been a few years since your last service, it might be time for a check-up.

Think of it like taking your car for an oil change – a little preventative maintenance can save you from bigger problems down the road.

Remember, maintaining your turntable isn’t just about preserving sound quality – it’s about respecting the craftsmanship and history of this amazing technology. Plus, there’s something deeply satisfying about caring for your equipment.

It’s all part of the ritual that makes vinyl so special!

Conclusion

Whew! We’ve covered a lot of ground, haven’t we? From choosing the right turntable to troubleshooting those pesky issues, you’re now armed with the knowledge to dive headfirst into the wonderful world of vinyl.

But here’s the thing – this is just the beginning of your journey!

Remember, setting up and using a turntable isn’t just about following a set of instructions. It’s about developing a relationship with your music.

It’s about the ritual of carefully selecting a record, gently lowering the needle, and immersing yourself in the warm, rich sound that only vinyl can provide. It’s about rediscovering your favorite albums and hearing details you never noticed before.

Sure, there might be a learning curve. You might accidentally scratch a record (I still cringe thinking about the time I dropped the tonearm on my favorite Bowie album).

You might spend hours tweaking your setup to get it just right. But trust me, it’s all worth it when you drop the needle and hear that perfect sound.

And hey, don’t be afraid to experiment! Try different cartridges, play with speaker placement, or even dabble in vintage equipment.

The beauty of this hobby is that there’s always something new to learn and explore.

Most importantly, remember to enjoy the journey. Share your newfound passion with friends (vinyl listening parties are a blast!), support your local record stores, and maybe even start hunting for those rare pressings at flea markets and garage sales.

Who knows? You might just stumble upon a hidden gem!

So, what are you waiting for? Dust off those old records (or go buy some new ones – no judgment here!), fire up that turntable, and let the music play.

Welcome to the wonderful world of vinyl – I have a feeling you’re going to love it here!

Oh, and one last thing – if you’ve got any killer tips or awesome vinyl stories, drop ’em in the comments below. We’re all in this together, and sharing is caring in the vinyl community.

Now, if you’ll excuse me, I’ve got a date with my turntable and a fresh cup of coffee. Happy spinning, folks!