How to Remove Scratches from Turntable Dust Cover: A DIY Guide
Hey there, fellow vinyl enthusiasts! Today, we’re diving into a topic that’s probably bugged you as much as it has me – those pesky scratches on your turntable’s dust cover.
Man, I remember the first time I noticed a big ol’ scratch right in the middle of my brand new turntable’s dust cover.
Talk about a mood killer! But don’t worry, I’ve been through the trenches and come out the other side with some tricks up my sleeve.
Let’s face it, a scratched-up dust cover isn’t just an eyesore – it’s like trying to appreciate the Mona Lisa through a dirty window.
No bueno! But here’s the thing: you don’t need to be a rocket scientist or have deep pockets to fix this problem.
I’m gonna walk you through some tried-and-true methods that’ll have your dust cover looking crystal clear in no time.
Trust me, I’ve made every mistake in the book when it comes to this stuff. But hey, that’s how we learn, right?
So grab a drink, put on your favorite record (carefully!), and let’s get into the nitty-gritty of how to remove those annoying scratches from your turntable dust cover. It’s gonna be a fun ride!
How To Remove Scratches From Turntable Dust Cover?
To remove scratches from a turntable dust cover, follow these steps: 1) For light scratches, apply a small amount of plastic polish or non-gel toothpaste to a microfiber cloth and gently rub in circular motions. 2) For deeper scratches, use a plastic scratch repair kit, which typically includes fine-grit sandpaper and polishing compounds.
3) In severe cases, wet sanding with 2000-grit or higher sandpaper, followed by polishing, can be effective. Always clean the dust cover before and after treatment, and work in a well-ventilated area.
If these methods don’t work, consider professional restoration.
Now that we’ve covered the basics, let’s dive deeper into each method and explore some pro tips to get your dust cover looking brand new again.
Understanding Turntable Dust Cover Scratches
Alright, let’s talk scratches. Not all scratches are created equal, folks!
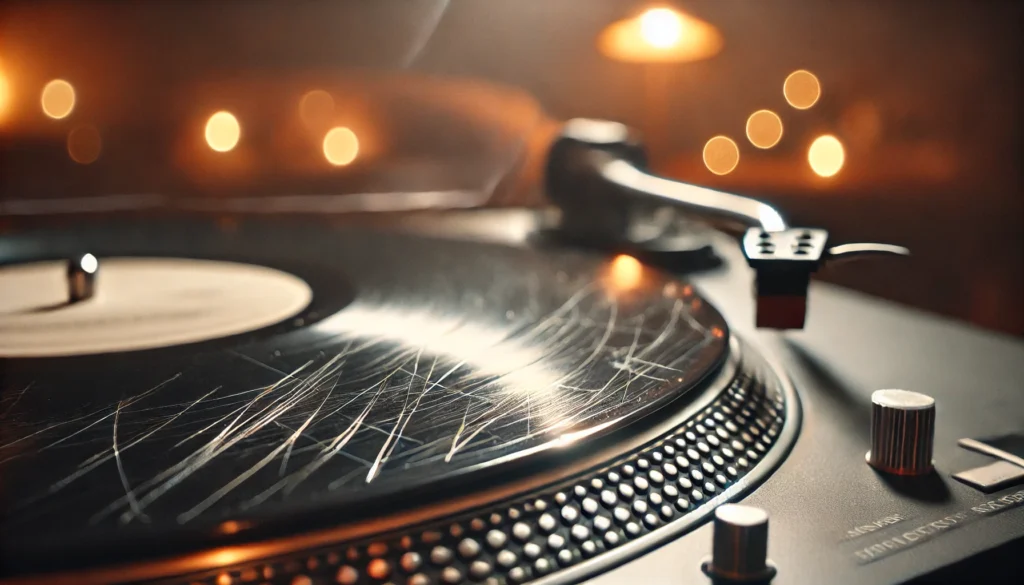
In my years of obsessing over my vinyl setup, I’ve seen ’em all. You’ve got your light surface scratches – those annoying little buggers that you can barely feel with your fingernail but catch the light just right to drive you nuts.
Then there are the deeper gouges that make you wince every time you look at ’em.
Here’s the deal: understanding what you’re dealing with is half the battle. Light scratches? No biggie.
We can handle those with some DIY magic. But those deep ones? They might need a bit more TLC, or in worst-case scenarios, professional help.
Don’t panic though! We’ll get to all that.
Now, you might be wondering, “Why should I even care about a few scratches?” Well, let me tell you a little story. I once ignored a bunch of small scratches on my dust cover, thinking they were no big deal.
Fast forward a few months, and those little scratches had turned into a hazy mess that was seriously messing with my vinyl viewing pleasure. Not to mention, it was collecting dust like nobody’s business!
So here’s the lowdown: keeping your dust cover clear isn’t just about looks (although, let’s be honest, a pristine setup is pretty sweet). It’s about protecting your precious vinyl from dust, debris, and accidental damage.
Plus, there’s something deeply satisfying about dropping that needle and seeing your record spin through a crystal-clear cover.
Before we dive into the fix-it part, take a good look at your dust cover. Run your fingers gently over the scratches.
Can you feel ’em? Are they catching your nail? This’ll give you a good idea of what we’re dealing with and help you pick the best method to tackle them.
Remember, every scratch tells a story – but let’s be real, some stories we’d rather erase! So, let’s roll up our sleeves and get ready to give those scratches the boot.
Trust me, your turntable (and your eyes) will thank you!
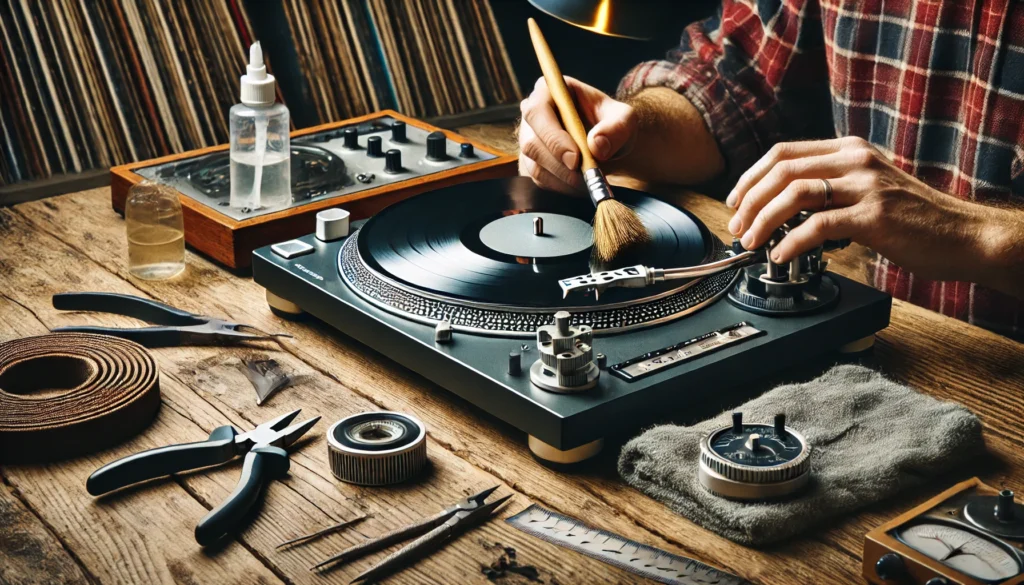
Gathering Supplies for Scratch Removal
Okay, team, it’s time to gear up! Before we dive into scratch-busting action, we need to make sure we’ve got all our ducks in a row.
And by ducks, I mean supplies. Trust me, there’s nothing worse than getting all pumped up to fix your dust cover only to realize you’re missing that one crucial item.
Been there, done that, and let me tell you, it’s frustrating as heck!
So, what do we need? Let’s break it down:
First up, the essentials:
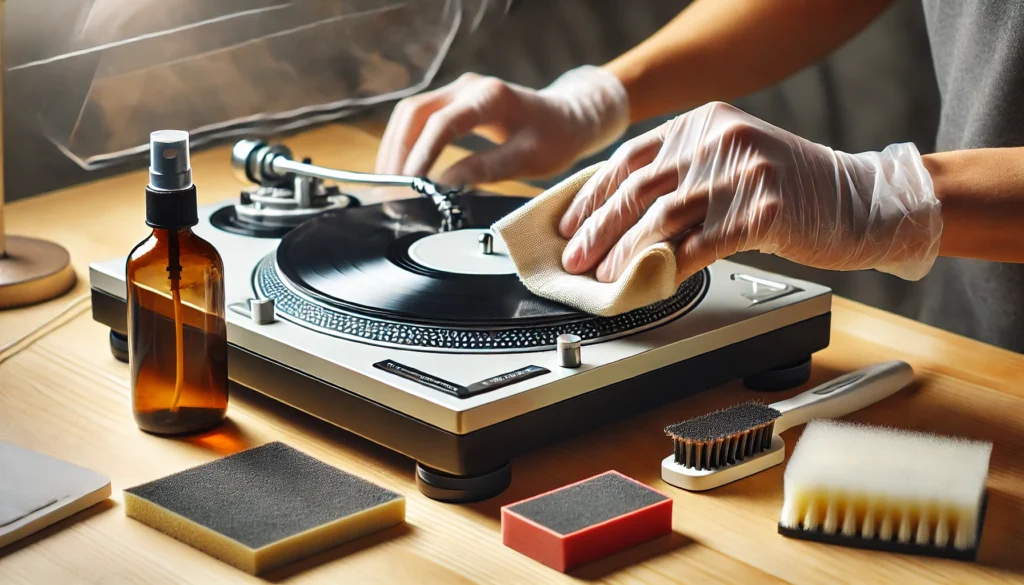
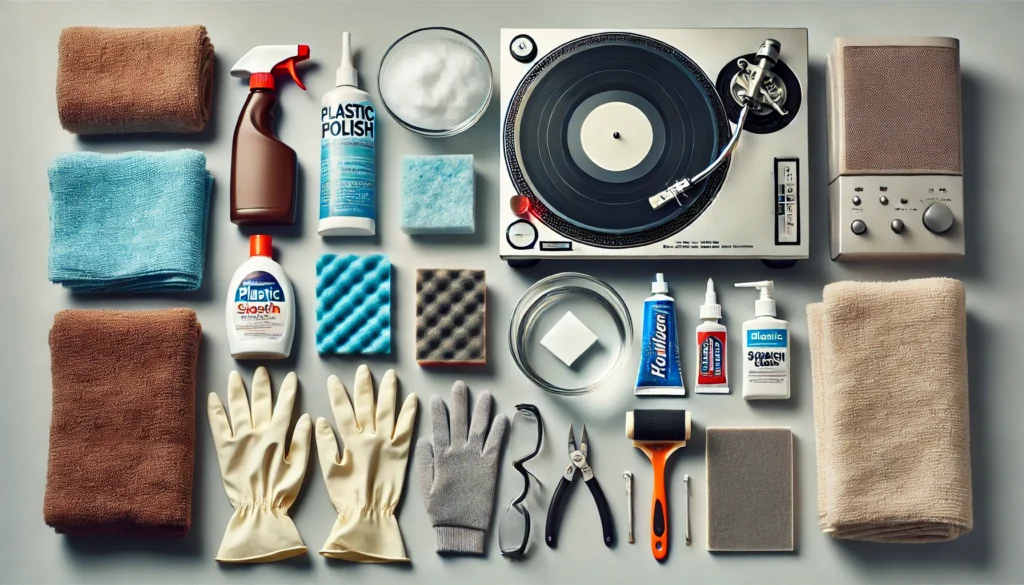
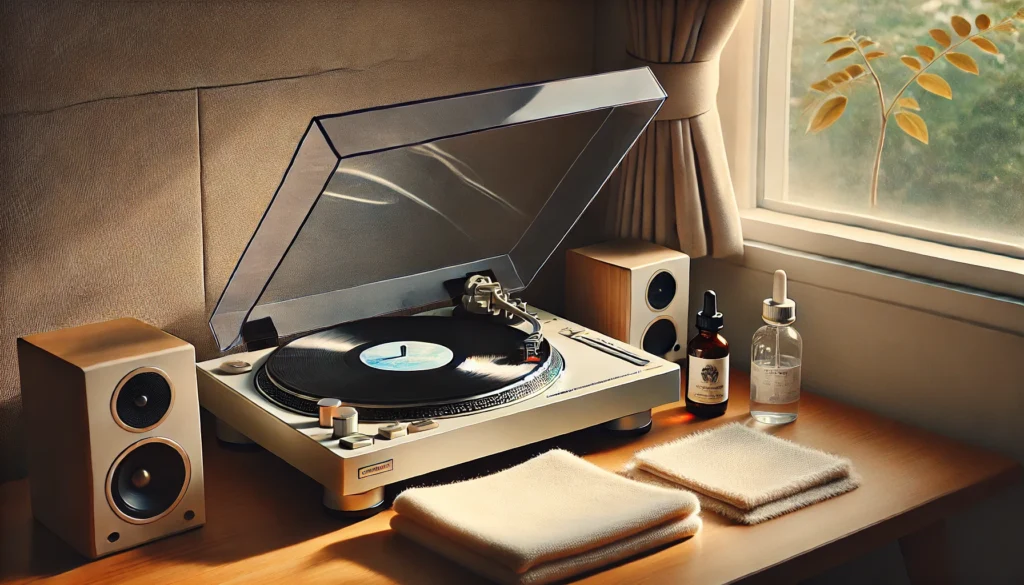
Microfiber cloths – and I mean the good ones, not those cheapo ones that leave lint everywhere.
Plastic polish – this stuff is like magic in a bottle for light scratches.
Toothpaste – yep, you read that right! The white, non-gel kind works wonders.
Warm water and mild dish soap – for cleaning before and after.
A clean, lint-free towel – for drying.
Now, if you’re feeling fancy (or dealing with some stubborn scratches), you might want to grab these optional but super helpful tools:
A plastic scratch repair kit – these often come with various grits of sandpaper and polishing compounds.
A buffer pad – trust me, your arms will thank you for this one.
Novus plastic polish set – this is the good stuff, folks!
Oh, and here’s something I learned the hard way – safety first! Grab yourself some:
Rubber gloves – to protect your hands from chemicals and prevent fingerprints on your freshly polished cover.
Safety glasses – because nobody wants polish in their eyes, am I right?
A well-ventilated area – seriously, some of these products can be pretty smelly.
Now, I know what you’re thinking – “Do I really need ALL this stuff?” Well, not necessarily. But here’s a little pro tip from yours truly: it’s better to have it and not need it than need it and not have it.
Plus, most of this stuff is pretty handy for other household fixes too.
One time, I thought I could get away with using an old t-shirt instead of a microfiber cloth. Big mistake!
Ended up with tiny scratches all over the cover. Talk about one step forward, two steps back!
So learn from my fails and get the right tools for the job.
Alright, got everything? Double-check that list!
Once you’re all set, we can move on to the fun part – actually fixing those pesky scratches. Get ready to see your dust cover transform before your very eyes!
Simple DIY Methods for Light Scratches
Alright, folks, it’s time to roll up our sleeves and get down to business! We’re talking light scratches here – you know, the ones that make you squint and tilt your head just right to see ’em.
But don’t be fooled, these little buggers can still mess with your vinyl viewing experience. Lucky for you, I’ve got some tried and true methods that’ll have your dust cover looking slick in no time.
First up, the toothpaste trick. I know, I know, it sounds crazy, but hear me out!
Grab some plain white toothpaste (none of that gel stuff) and a soft cloth. Put a small dab on the scratch and gently rub it in circular motions.
The mild abrasives in the toothpaste work to smooth out the scratch. Just don’t go overboard – too much pressure and you’ll end up with a bigger problem than you started with.
Trust me, I learned that the hard way!
Next, let’s talk plastic polish. This stuff is like liquid gold for your dust cover.
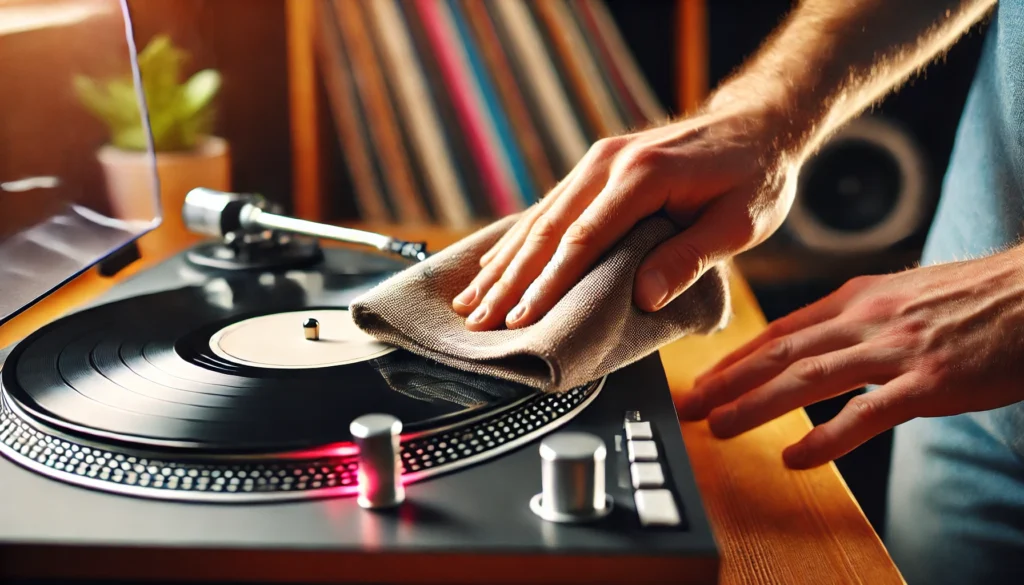
Apply a small amount to a clean microfiber cloth and work it into the scratch using light, circular motions. It might take a bit of elbow grease, but stick with it.
The first time I tried this, I got impatient and nearly gave up. But man, when I saw the results, I was kicking myself for not discovering this sooner!
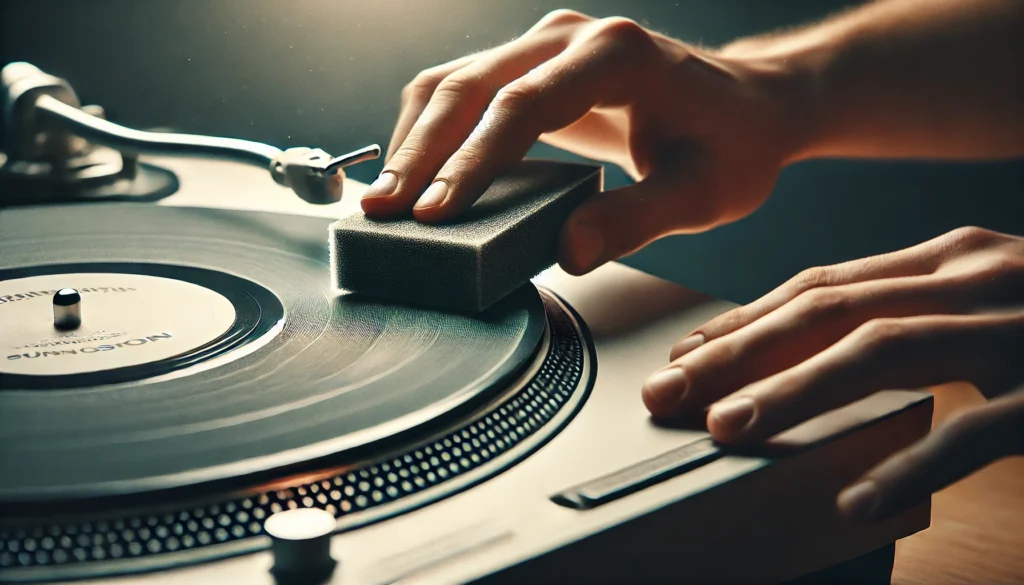
Now, here’s a little secret weapon: the magic eraser. Yep, that humble household cleaner can work wonders on light scratches.
Dampen it slightly and gently rub the scratched area. But be careful!
Too much pressure can actually create more scratches. I once got a bit overzealous and ended up with a slightly foggy spot.
Not my finest moment, let me tell you.
Here’s a pro tip: whatever method you choose, always test it on a small, inconspicuous area first. Better safe than sorry, right?
Remember, patience is key here. These methods aren’t instant fixes – it might take a few tries to see results.
But trust me, when you finally see that scratch disappear, it’s like Christmas morning for vinyl nerds!
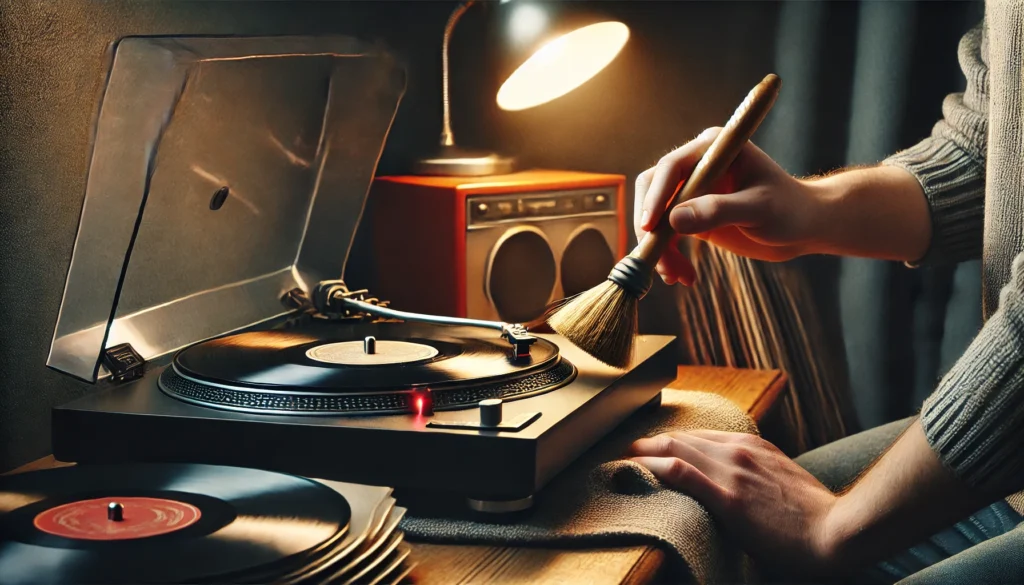
Oh, and one more thing – make sure you clean the dust cover thoroughly before and after. You don’t want any dirt or debris causing more scratches while you’re trying to fix the existing ones.
Been there, done that, and let me tell you, it’s not fun starting over from square one.
So there you have it, folks – your game plan for tackling those annoying light scratches. Give these methods a shot and watch your dust cover transform from scratched to spectacular.
Your vinyl collection will thank you!
Tackling Deep Scratches on Turntable Dust Covers
Alright, gang, now we’re getting into the big leagues. Those deep scratches that make you wince every time you look at your turntable?
Yeah, we’re coming for them. This is where things get a bit more intense, but don’t worry – I’ve got your back.
I’ve been through this battle myself, and let me tell you, it’s not for the faint of heart. But the results?
Oh man, they’re worth it.
First up, let’s talk wet sanding. Now, I know what you’re thinking – “Sanding my dust cover?
Are you crazy?” That’s exactly what I thought the first time someone suggested it to me. But trust me, when done right, it’s a game-changer.
Start with a super fine grit sandpaper (I’m talking 2000 grit or higher) and keep it wet at all times. Work in small, circular motions, and for the love of all things vinyl, go slow!
I rushed it once and ended up with a cover that looked like it had been through a sandstorm. Not my proudest moment.
Next up, scratch repair kits. These babies are designed specifically for plastic and can work wonders on deeper scratches.
They usually come with a series of polishing compounds and sandpapers. Follow the instructions to the letter – this isn’t the time to get creative.
I learned that the hard way when I tried to “improve” on the process and ended up with a mess that took twice as long to fix.
Now, here’s where it gets real. If you’ve got scratches that look more like canyons, it might be time to consider professional help.
I know, I know, it’s hard to hand over your precious turntable to someone else. But sometimes, you gotta know when to fold ’em.
There are specialists out there who can work magic on even the most battle-scarred dust covers.
Here’s a tip from someone who’s been in the trenches: take your time. Rushing through this process is a one-way ticket to Regretsville, population: you.
Put on your favorite album (on another system, of course), get in the zone, and treat it like a meditation. Your dust cover – and your sanity – will thank you.
Oh, and one more thing – if you’re dealing with really deep scratches, you might want to consider using a plastic filler before polishing. It’s like spackle for your dust cover.
Just be careful not to overdo it – too much filler and you’ll end up with a lumpy mess. Trust me, I’ve been there, and it’s not a good look.
Remember, folks, deep scratches are tough, but they’re not invincible. With a little patience, the right tools, and maybe a bit of colorful language (hey, we’re all adults here), you can bring that dust cover back from the brink.
And when you finally lower that cover over your turntable, scratch-free and gleaming? That feeling is pure vinyl nirvana.
Preventing Future Scratches on Your Dust Cover
Alright, vinyl lovers, we’ve battled the scratches and come out victorious. But here’s the million-dollar question: how do we keep those pesky scratches from coming back?
Well, buckle up, because I’m about to drop some knowledge that I wish someone had shared with me years ago. Trust me, these tips could save you a lot of headaches (and elbow grease) down the road.
First things first: cleaning. I know, I know, it sounds obvious, but you’d be surprised how many folks neglect this simple step.
Use a soft, lint-free cloth – microfiber is your best friend here. And for the love of all things groovy, avoid paper towels!
I made that mistake once and ended up with tiny scratches all over my newly polished cover. Talk about a facepalm moment.
When it comes to cleaning solutions, less is more. A little warm water and a drop of mild dish soap will do the trick for most dust and fingerprints.
Avoid harsh chemicals – they can do more harm than good. And always, always dry your cover thoroughly.
Leftover water droplets can leave spots or even cause warping over time.
Now, let’s talk handling. Treat your dust cover like it’s made of delicate butterfly wings.
I know that sounds dramatic, but seriously, gentle is the name of the game. When you’re opening or closing it, use both hands and lift from the sides, not the front edge.
I learned this the hard way when I accidentally slammed my cover shut and left a nice big scratch right in the center. Not my finest hour.
Here’s a pro tip: invest in a dust cover protector. Yeah, I know, it sounds like overkill – a cover for your cover?
But hear me out. These soft, fabric sleeves can be a game-changer, especially if you’re constantly moving your turntable around (guilty as charged).
They’re like a suit of armor for your dust cover, protecting it from scratches, dust, and even UV damage.
Speaking of storage, if you need to remove your dust cover for any reason, treat it like the precious gem it is. Store it flat, not on its side, and for heaven’s sake, don’t stack anything on top of it!
I once used my removed dust cover as a makeshift shelf for some records. Let’s just say it didn’t end well for anyone involved.
Oh, and here’s something I wish I’d known earlier: be mindful of your cleaning cloths. Make sure they’re clean before you use them on your dust cover.
A tiny piece of grit caught in the fabric can turn your gentle cleaning session into an impromptu scratch-creating party. Not fun.
Lastly, consider your turntable’s environment. Is it in direct sunlight?
Near a heat source? These can cause the plastic to warp or become brittle over time, making it more susceptible to scratches.
A little shade and some climate control can go a long way in preserving your dust cover’s pristine condition.
Look, I get it. Sometimes life happens, and despite our best efforts, scratches occur.
But by following these tips, you’ll be giving your dust cover the best chance at a long, scratch-free life. And trust me, future you will be thanking present you for taking these precautions.
Remember, folks, an ounce of prevention is worth a pound of cure. Or in our case, an ounce of care is worth a scratch-free dust cover.
Your vinyl deserves to be seen in all its glory, so let’s keep that view crystal clear!
Conclusion
Whew! We’ve been on quite the journey, haven’t we? From understanding those pesky scratches to battling them head-on, and finally learning how to keep ’em at bay.
If there’s one thing I hope you take away from all this, it’s that a little TLC goes a long way when it comes to your turntable’s dust cover.
Now, I know we’ve covered a lot of ground here, but remember – this isn’t a one-size-fits-all kind of deal. Your turntable, your dust cover, they’re unique!
So don’t be afraid to experiment a little (carefully!) to find what works best for you. Maybe you’ll discover a killer combo of techniques that works wonders on your particular setup.
And hey, let’s be real for a second. Even with all these tips and tricks, sometimes life happens.
You might get a scratch or two down the line. But now? Now you’re armed and ready to tackle whatever comes your way.
You’re practically a dust cover ninja!
Before I sign off, I gotta stress this – always prioritize safety when working with any cleaning products or tools. Your health is way more
How Long Does A Turntable Belt Last? A Vinyl Enthusiast’s Guide
Alright, vinyl junkies, gather ’round! We’re about to dive into a topic that’s gonna make or break your listening experience: turntable belts.
Yeah, I know, it’s not the sexiest part of your setup, but trust me, it’s a game-changer.
I’ll never forget the day I learned this lesson the hard way. Picture this: I’m hosting a listening party, all set to impress my audiophile buddies with my pristine copy of “Rumors” by Fleetwood Mac.
I drop the needle, and instead of Stevie Nicks’ velvety vocals, all we hear is a sad, warbling mess. Talk about a mood killer! Turns out, my turntable belt had given up the ghost without me even noticing.
So, how long does one of these bad boys actually last? Grab your favorite beverage, ’cause we’re about to get into the nitty-gritty of turntable belt lifespan.
By the time we’re done, you’ll be looking at your record player in a whole new light!
How Long Does A Turntable Belt Last?
On average, a turntable belt lasts between 3 to 5 years with regular use. However, high-quality belts made from materials like silicone can last up to 10 years, while cheaper rubber belts might need replacement after just 1-2 years.
Factors such as usage frequency, storage conditions, and overall turntable quality significantly influence a belt’s lifespan. Regular maintenance and proper care can extend its life, but it’s generally recommended to inspect your belt annually and replace it every 3-5 years to ensure optimal sound quality.
Now, that’s just scratching the surface. Stick around as we dive deeper into the nitty-gritty of turntable belt longevity, exploring everything from materials to maintenance tips that’ll keep your vinyl spinning smoothly for years to come.
Understanding Turntable Belts: Function and Materials
Let’s start with the basics, shall we? A turntable belt is like the unsung hero of your vinyl setup.
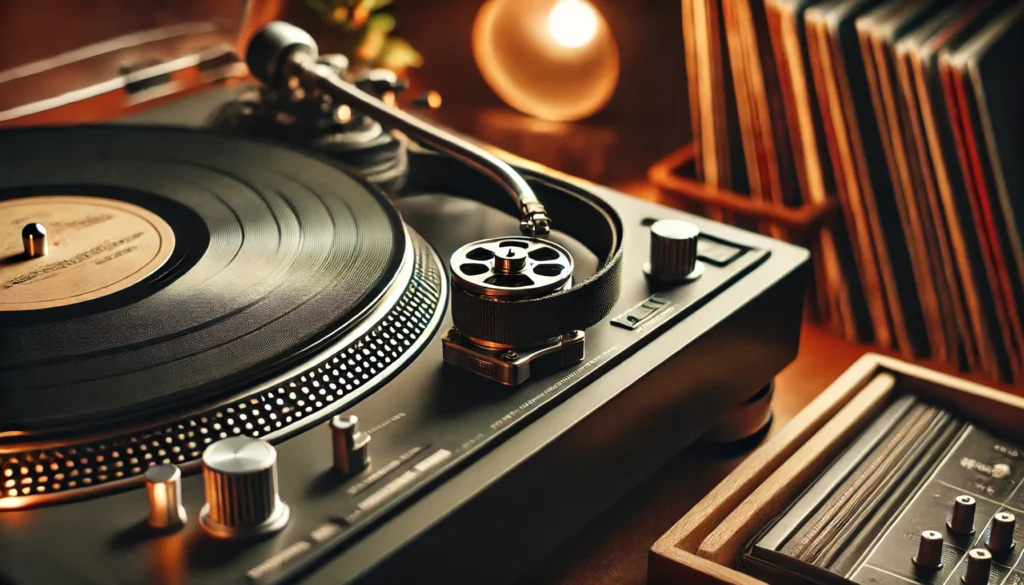
It’s this thin, circular band that connects the motor to the platter (that’s the big round thing your records sit on, for you newbies out there).
Its job? To transfer the motor’s rotation to the platter, keeping your vinyl spinning at just the right speed.
Now, these ain’t your grandma’s rubber bands. We’re talking specialized materials here, folks. Most commonly, you’ll find belts made from elastomers like rubber or neoprene.
Some fancy-pants models even use polyurethane or silicone. Each material has its pros and cons, but they all serve the same purpose: to keep your tunes spinning smoothly.
The quality of your belt can make or break your listening experience. A good belt will keep your platter spinning at a consistent speed, giving you that warm, rich sound we vinyl lovers crave.
A crappy one? Well, let’s just say it’ll have your records sounding like they’re being played underwater. Not cute.
Factors Affecting Turntable Belt Lifespan
Now, you might be thinking, “Come on, it’s just a rubber band. How complicated can it be?” Oh, sweet summer child. There’s a lot that goes into determining how long your belt will last.
First up, usage. If you’re like me and have your turntable spinning more often than not, your belt’s gonna wear out faster. It’s just a fact of life, like how my favorite jeans always seem to get holes in the knees first.
Then there’s the environment. Extreme temperatures and humidity are like kryptonite to turntable belts. I learned this the hard way when I left my turntable in a hot car once. Let’s just say the belt didn’t survive the experience.
Quality matters too, both of the belt and the turntable itself. A well-made belt on a properly aligned turntable will last way longer than a cheapo belt on a wonky setup. It’s like the difference between a good pair of running shoes and those $5 flip-flops from the drug store.
Lastly, how you treat your equipment makes a big difference. Proper storage and regular maintenance can add years to your belt’s life. It’s like taking care of a pet, except this one doesn’t leave hair all over your clothes.
Average Lifespan of a Turntable Belt
Alright, let’s get down to brass tacks. How long can you expect your turntable belt to last? Well, it’s not an exact science, but generally speaking, a decent quality belt should last you anywhere from 3 to 5 years with regular use.
But here’s the kicker – that’s just an average. I’ve had belts crap out on me after just a year, and I’ve got a buddy who swears his belt is going strong after a decade. It really depends on the factors we talked about earlier, plus a healthy dose of luck.
Different types of belts have different lifespans too. Those fancy silicone belts? They can last up to 10 years if you treat ’em right. On the flip side, I’ve seen some cheap rubber belts start stretching out after just a few months.
Will Turntable Belts Stretch Over Time?
Now, here’s a question that keeps many vinyl enthusiasts up at night: do turntable belts stretch over time? The short answer is: you betcha!
Just like that comfy old sweater you can’t bear to throw out, turntable belts naturally stretch as they age. It’s all about the material properties. Elastomers, which most belts are made from, have this annoying habit of losing their elasticity over time.
Heat, usage, and even gravity all contribute to this stretching process. Every time you fire up your turntable, that belt is getting a workout.
And just like how your muscles might get a bit saggy if you stop hitting the gym (not that I’m speaking from experience or anything), your belt starts to lose its tightness.
Now, a little bit of stretching isn’t the end of the world. But when it gets excessive, that’s when you start running into problems.
A stretched belt can cause all sorts of issues, from speed inconsistencies to that dreaded wow and flutter effect. It’s like listening to your records through a fan – not exactly the hi-fi experience we’re after.
How can you tell if your belt’s stretched out? Give it a little pinch. If it feels loose or saggy, or if you can easily twist it more than 90 degrees, it might be time for a replacement. Trust me, your ears will thank you.
Signs Your Turntable Belt Needs Replacement
Speaking of replacement, how do you know when it’s time to bid farewell to your old belt? Well, let me tell you, your turntable has ways of letting you know – and they ain’t subtle.
First off, keep your ears peeled for any changes in sound quality. If your once-crisp audio starts sounding like it’s being played through a bowl of jello, that’s a red flag. Pitch inconsistencies, speed fluctuations, or a general “warbly” sound are all signs your belt might be on its last legs.
Visually, a worn-out belt might look cracked, frayed, or stretched out. It’s like how the elastic goes in old underwear – not a pretty sight, and definitely not doing its job properly.
Performance issues are another big clue. If your platter’s taking longer to get up to speed, or if you notice the speed isn’t consistent, that’s your belt crying out for help.
And here’s a pro tip: if your turntable’s more than a few years old and you’ve never changed the belt, it’s probably time. Better safe than sorry, right?
Extending the Life of Your Turntable Belt
Now, I know what you’re thinking. “Great, another thing I gotta worry about maintaining.” But fear not! With a little TLC, you can keep your belt in tip-top shape for years to come.
First things first: keep it clean! Dust and debris can wreak havoc on your belt. A quick wipe down with a soft, lint-free cloth every now and then can work wonders. Just be gentle – we’re not scrubbing pots and pans here.
Storage is key too. Keep your turntable in a cool, dry place. Extreme temperatures and humidity are like kryptonite to turntable belts.
I learned this the hard way after leaving my setup in a damp basement for a few months. Let’s just say the smell of degrading rubber isn’t exactly pleasant.
When it comes to usage, moderation is key. I know it’s tempting to leave your turntable running 24/7 (believe me, I’ve been there), but giving it regular breaks can help prolong your belt’s life.
Lastly, make belt inspection part of your routine. Once a month or so, take a quick look at your belt. Check for any signs of wear and tear.
It’s like giving your car a once-over before a long trip – a little prevention goes a long way.
How to Replace a Turntable Belt
Alright, the time has come. Your trusty old belt has given up the ghost, and it’s time for a replacement. Don’t panic! Changing a turntable belt is easier than you might think. Here’s a quick rundown:
First, unplug your turntable. Safety first, kids!
Remove the platter. This usually just lifts right off, but check your manual if you’re unsure.
Take off the old belt. It should just slip off the motor pulley and the platter’s inner ring.
Clean the platter and pulley with a soft cloth. No harsh chemicals!
Carefully stretch the new belt around the platter’s inner ring.
Flip the platter over and reinstall it, making sure the belt catches on the motor pulley.
Rotate the platter a few times to make sure the belt’s seated properly.
And voila! You’re back in business.
Now, a word of caution: be gentle with that new belt. It’s not a rubber band, so don’t go stretching it out like crazy. And for the love of all that’s holy, make sure you get the right size belt for your turntable. A belt that’s too loose or too tight is about as useful as a screen door on a submarine.
If all this sounds too daunting, don’t be afraid to seek professional help. There’s no shame in letting an expert handle it. After all, we can’t all be turntable mechanics!
Conclusion
So there you have it, folks – everything you never knew you needed to know about turntable belts. From their humble beginnings to their inevitable stretchy end, these little rubber bands play a crucial role in bringing your vinyl to life.
Remember, a little preventive maintenance goes a long way. Keep your belt clean, store it properly, and show it some love every now and then. Your ears (and your records) will thank you.
And hey, next time you’re vibing to your favorite album, spare a thought for that hardworking belt spinning away under the hood. It might not be the star of the show, but without it, we’d all be listening to some very wonky tunes.
Now, I wanna hear from you! Got any belt horror stories? Tips for keeping your setup running smooth? Drop ’em in the comments below. After all, we’re all in this vinyl-loving journey together!
Stay groovy, and keep those platters spinning!
Should You Use a Record Weight? Boost Your Vinyl Sound Quality
Are you wondering if you should use a record weight to enhance your vinyl listening experience? Well, you’ve come to the right place!
As a vinyl enthusiast and audio gear junkie, I’ve spent countless hours experimenting with different setups to achieve the perfect sound. Let me share my insights on record weights and help you decide if they’re worth adding to your turntable setup.
Should you use a record weight? Yes, in most cases, using a record weight can significantly improve your vinyl listening experience.
Record weights help stabilize the vinyl on the platter, reducing vibrations and resonance, which leads to better sound quality, improved tracking, and more stable playback. They’re especially beneficial for slightly warped records or turntables with lighter platters.
However, it’s essential to ensure your turntable can handle the additional weight without causing damage to the motor or bearings.
Now, I know you’re probably itching to learn more about these nifty little accessories. Don’t worry, we’re gonna dive deep into the world of record weights and explore all the juicy details that’ll help you make an informed decision for your setup.
Trust me, by the end of this article, you’ll be a record weight pro!
Why Use A Weight Over A Turntable?
Alright, let’s talk about why you might want to use a weight over your turntable. Picture this: you’re all set for a cozy evening with your favorite vinyl, but as soon as the needle hits the groove, you hear that annoying warp or flutter.
Ugh, talk about a mood killer! That’s where a record weight comes in handy.
Using a weight over your turntable can work wonders for your listening experience. First off, it helps press the record flat against the platter, which is super helpful for those slightly warped records we all have (don’t pretend you don’t!).
This improved contact means better tracking and less distortion – music to any vinyl lover’s ears!
But that’s not all, folks! A weight also adds mass to the platter system, which helps dampen vibrations.
Think of it like adding shock absorbers to your car – suddenly, those bumps in the road (or in this case, imperfections in your vinyl) become way less noticeable. The result? Clearer sound, tighter bass, and an overall more stable playback.
Now, I know what you’re thinking – “But won’t that extra weight hurt my turntable?” It’s a valid concern, and we’ll dive into that later. For now, just know that for most modern turntables, the benefits of using a weight usually outweigh (pun intended!) any potential drawbacks.
But hey, don’t take my word for it – let’s explore this topic more deeply below and you can decide for yourself!
What is a Record Weight?
Oh boy, where do I start? Record weights are like the unsung heroes of the vinyl world.
I remember the first time I saw one, I thought, “What’s this fancy paperweight doing on a turntable?” Little did I know, these bad boys are so much more than just pretty accessories.
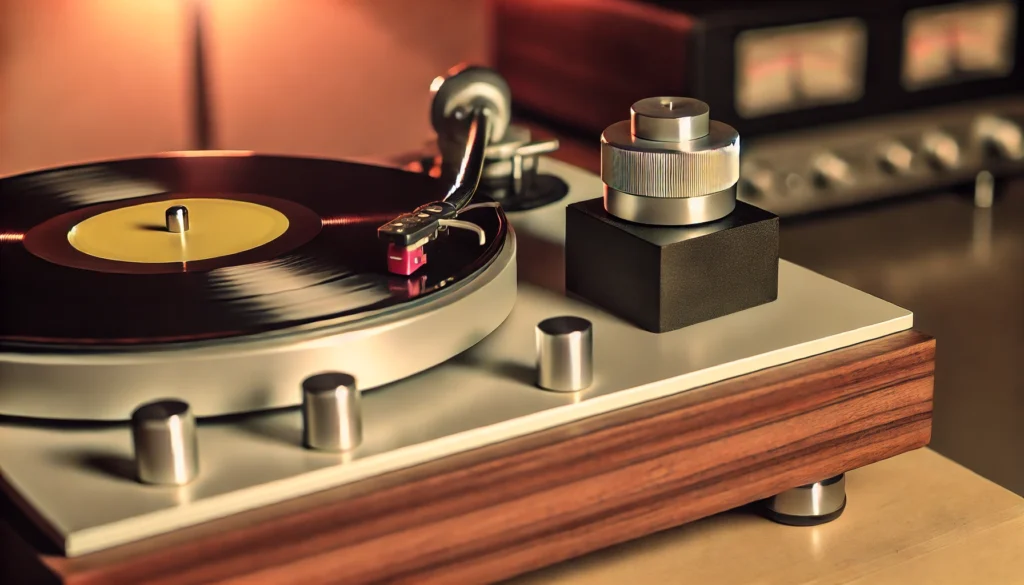
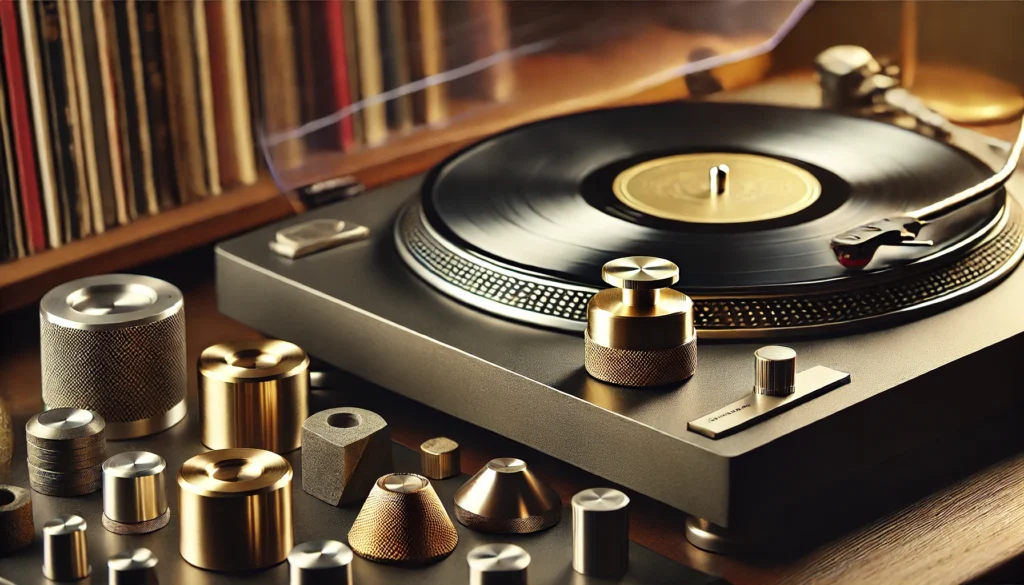
A record weight, also known as a record clamp or stabilizer, is basically a heavy disk that sits on top of your vinyl record while it’s playing. They come in all shapes and sizes, from sleek metal discs to elaborate contraptions that look like they belong in a sci-fi movie.
But don’t let their looks fool you – their purpose is dead serious.
The main job of a record weight is to stabilize your vinyl as it spins. It’s like giving your record a big, heavy hug while it’s doing its thing.
This extra weight helps press the record firmly against the platter, which can work wonders for your sound quality.
Now, there are a few different types of record weights out there. You’ve got your basic weights that just sit on top of the spindle, and then you’ve got clamps that actually screw down onto the spindle.
Some audiophiles swear by one type over the other, but in my experience, both can do the job well if used correctly.
So, how do these things actually work? Well, it’s all about physics, baby!
By adding mass to the record-platter system, a weight helps dampen vibrations and resonances. It’s like adding insulation to your walls – suddenly, all that outside noise (or in this case, unwanted vibrations) gets muffled.
But here’s where it gets really cool: a good record weight can actually help flatten out slightly warped records. I can’t tell you how many times I’ve rescued an old, beloved album from the “unplayable” pile with the help of a weight.
It’s like magic!
Should I use a record weight?
Yes, in most cases, you should use a record weight. Record weights can significantly improve your vinyl listening experience by stabilizing the record, reducing vibrations, and enhancing sound quality.
They’re particularly beneficial for slightly warped records or turntables with lighter platters. However, it’s crucial to ensure your turntable can handle the additional weight without causing damage to the motor or bearings.
While record weights offer many benefits, they’re not a one-size-fits-all solution. In the rest of this article, we’ll dive deeper into the world of record weights, exploring their pros and cons, and helping you make an informed decision for your unique setup.
Benefits of Using a Record Weight
Let me tell you, the first time I slapped a record weight on my turntable, it was like hearing my vinyl collection for the first time all over again. The benefits are real, folks, and they can be pretty darn impressive.
First up, let’s talk about sound quality. This is the biggie, the reason most of us get into this hobby in the first place.
A good record weight can seriously up your audio game. By pressing the record firmly against the platter, it improves the coupling between the two.
What does that mean in English? Basically, it helps your stylus track the groove more accurately.
The result? Clearer highs, tighter bass, and an overall more detailed sound.
It’s like cleaning your glasses – suddenly, everything comes into focus!
But wait, there’s more! (Sorry, couldn’t resist the infomercial vibe there.) One of the biggest benefits I’ve noticed is the reduction in vibration and resonance.
You know that annoying thing where your speakers cause your turntable to vibrate, which then causes more distortion, which then… well, you get the picture. A record weight helps break this feedback loop by damping those pesky vibrations.
It’s like telling your audio setup, “Hey, chill out, man!”
And let’s not forget about playback stability. This was a game-changer for me, especially with some of my older, slightly warped records.
A good weight can help iron out those minor imperfections, leading to more consistent playback. No more speed wobbles or pitch variations – just pure, sweet music.
I remember playing an old jazz record that always had this annoying flutter in one section. Slapped on a weight, and boom! Smooth as butter.
It was like rediscovering the album all over again.
Potential Drawbacks of Record Weights
Now, I know I’ve been singing the praises of record weights, but let’s keep it real for a minute. They’re not all sunshine and rainbows, and there are a few potential downsides you should be aware of.
Trust me, I learned some of these the hard way!
First up, let’s talk about wear and tear on your turntable. Adding extra weight to your platter means your turntable’s motor and bearings have to work harder.
It’s like asking your car to carry a heavy load – sure, it can do it, but it might not be great for long-term health. I once got a bit too enthusiastic with a particularly heavy weight and ended up with a burned-out motor.
Not my finest moment, let me tell you!
Then there’s the compatibility issue. Not all turntables are created equal, and some just don’t play nice with record weights.
I learned this lesson when I tried to use my fancy new weight on a friend’s vintage turntable. Let’s just say it didn’t end well, and I had some explaining (and apologizing) to do.
But here’s the kicker – and this one really got me – record weights can actually damage warped records if you’re not careful. I know, I know, earlier I said they can help with warps.
And they can! But if you’ve got a severely warped record and you slap a heavy weight on it, you’re basically forcing it flat against the platter.
This can stress the vinyl and potentially cause even more damage. I learned this the hard way with a prized first pressing that I was trying to “fix”.
Spoiler alert: it didn’t end well.
So yeah, while record weights can be awesome, they’re not a magic bullet. You’ve gotta use them wisely and be aware of their limitations.
But hey, that’s half the fun of this hobby, right? Learning from our mistakes and all that jazz.
How to Choose the Right Record Weight
Alright, so you’ve decided to take the plunge and get yourself a record weight. Awesome!
But now you’re staring at a sea of options, wondering which one to choose. Don’t worry, I’ve been there, and I’m here to help you navigate these tricky waters.
First things first, you gotta consider your turntable’s compatibility. This is crucial, folks.
You don’t want to end up like me, with a weight that’s too heavy for your poor turntable to handle. Check your turntable’s manual or manufacturer’s website for any weight limits or recommendations.
If in doubt, start with a lighter weight and work your way up.
Next up, let’s talk materials. You’ve got options ranging from aluminum to brass to fancy-pants carbon fiber.
Each material has its own properties that can affect sound. Personally, I’m a fan of brass weights.
They’re heavy enough to do the job without being too much for most turntables, and they’ve got a nice, warm sound to them. But hey, that’s just my preference – you might find you prefer the clarity of aluminum or the high-tech vibe of carbon fiber.
Size matters too, folks! You want a weight that covers a good portion of the label area without hanging over the edge of the record.
I once made the mistake of using a weight that was too small – it left a ring-shaped impression on my vinyl that I can still see to this day. Learn from my mistakes, people!
When it comes to installation and use, it’s pretty straightforward. Just place the weight gently on top of your record, centered around the spindle.
But here’s a pro tip: always lift the tonearm before removing the weight. I once got lazy and tried to slide the weight off while the record was still playing.
Let’s just say the resulting scratch taught me a valuable lesson!
Oh, and one more thing – don’t forget to re-adjust your vertical tracking angle (VTA) if you’re using a particularly heavy weight. It can change the angle of your tonearm, which can affect sound quality.
It’s a small detail, but hey, in this hobby, the small details are what make the difference between good sound and great sound.
Do I Need Two Turntable Weights?
Ah, the age-old question: “If one is good, are two better?” When it comes to turntable weights, it’s not quite that simple. Let me break it down for you based on my own trials and tribulations in the world of vinyl.
First off, let’s talk about what using two weights actually means. Some folks swear by using a weight on top of the record (like we’ve been discussing) and another underneath the platter.
The idea is to create a kind of vinyl sandwich, with your record nestled snugly between two stabilizing forces.
Now, I’ll be honest – when I first heard about this, I thought it was overkill. But being the curious (and slightly obsessive) audiophile that I am, I had to try it out.
And you know what? In some cases, it actually made a noticeable difference!
The pros of using two weights are pretty straightforward. You get even more stability and vibration damping.
It’s like giving your record a bear hug from both sides. This can lead to even better tracking, especially with warped records.
I remember playing an old, slightly dish-shaped record with this setup, and it was like the warp had magically disappeared!
But (and it’s a big but), there are some serious cons to consider. For one, you’re adding a lot of extra weight to your turntable system.
This can put a real strain on your motor and bearings. I learned this the hard way when I tried this on an old belt-drive turntable – let’s just say the poor thing wasn’t up to the task.
Then there’s the hassle factor. Adding and removing two weights every time you want to play a record can get old real fast.
Trust me, the novelty wears off pretty quickly when you’re trying to DJ a party and you’re fumbling with weights between every song.
So, do you need two turntable weights? In most cases, probably not.
One good quality weight will usually do the trick. But if you’re dealing with a particularly problematic record, or if you’ve got a high-end turntable that can handle the extra mass, it might be worth experimenting with.
My advice? Start with one weight and see how it goes.
If you’re still not satisfied, then maybe consider adding a second. But always, always check your turntable’s specs first.
The last thing you want is to damage your precious vinyl-spinning machine in pursuit of that perfect sound.
Alternatives to Record Weights
Okay, so maybe you’re not sold on the whole record weight thing. Or maybe your turntable just can’t handle the extra mass.
Don’t worry, my vinyl-loving friend, there are other ways to skin this cat (not that we’d ever want to skin a cat, mind you – it’s just an expression!).
Let’s start with record clamps. These bad boys work on a similar principle to weights, but instead of relying on mass, they use tension to hold the record in place.
They typically screw down onto your turntable’s spindle, pulling the record tight against the platter. I remember the first time I used a clamp – it was like night and day!
The improvement in sound quality was immediate and dramatic.
But clamps aren’t without their drawbacks. They can be a bit fiddly to use, especially if you’re changing records frequently.
And if you’re not careful, you can actually warp your records by over-tightening the clamp. Trust me, I learned that lesson the hard way with a prized first pressing.
Ouch!
Next up, let’s talk about turntable mats. These unassuming little discs can make a big difference in your sound.
They come in all sorts of materials – rubber, cork, leather, even fancy-pants carbon fiber. Each material has its own sonic signature.
Personally, I’m a fan of cork mats. They provide a nice balance of vibration damping and record coupling.
Plus, they look pretty cool!
I remember swapping out the stock felt mat on my first real turntable for a cork one. It was like lifting a veil from in front of my speakers.
Suddenly, everything sounded clearer and more detailed. And bonus – no more static cling!
Now, where was I? Oh yeah, other vinyl accessories!
Let me tell you about some of the other gadgets and gizmos I’ve tried in my quest for audio perfection.
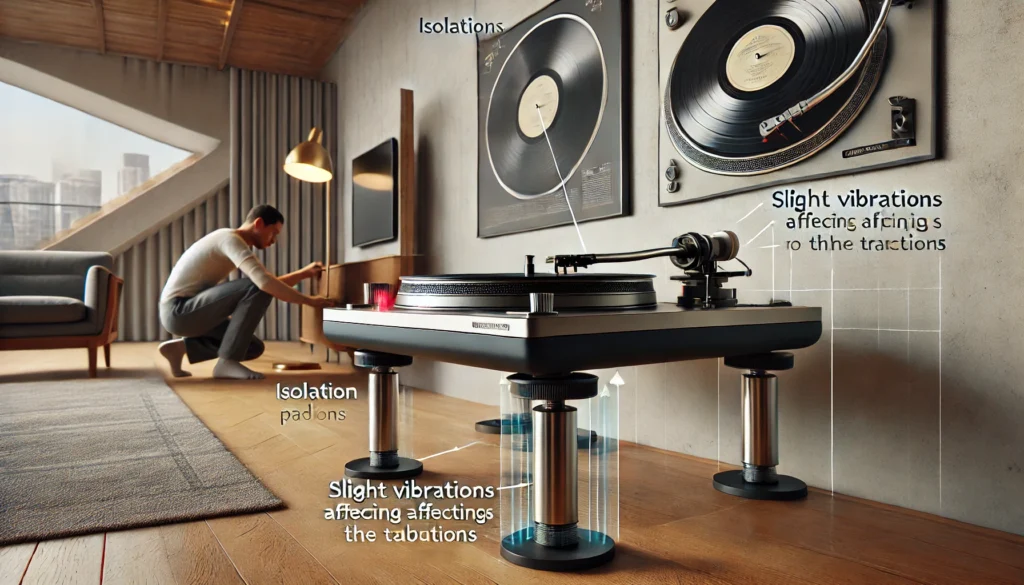
One thing that made a surprising difference in my setup was a good set of isolation feet for my turntable. These little rubber or spring-loaded beauties help decouple your turntable from whatever surface it’s sitting on.
I remember the first time I installed a set – suddenly, footsteps in the room weren’t causing the needle to jump anymore. It was like magic!
Another option worth considering is a record vacuum cleaner. Now, I know what you’re thinking – “What does cleaning have to do with sound quality?” Trust me, I had the same thought at first.
But let me tell you, a really deep clean can make a world of difference. The first time I used a vacuum cleaner on an old, dusty record, it was like hearing it for the first time.
All that gunk in the grooves was masking so much detail!
Oh, and let’s not forget about cartridge alignment tools. These might not directly replace a record weight, but they can seriously improve your sound quality.
I spent an afternoon once really dialing in my cartridge alignment, and it was like someone had upgraded my whole system. The soundstage opened up, the imaging improved – it was night and day!
Now, I’ve got to mention one more thing – a good quality phono preamp. If you’re using the built-in preamp in your turntable or receiver, you might be surprised at what an upgrade can do.
I remember saving up for months to buy a decent external preamp. When I finally got it home and hooked it up, I was blown away.
It was like someone had lifted a blanket off my speakers!
At the end of the day, there’s no one-size-fits-all solution. What works magic for one setup might fall flat for another.
The key is to experiment, trust your ears, and most importantly, enjoy the music. After all, isn’t that what this hobby is all about?
Conclusion
Whew! We’ve been on quite a journey, haven’t we?
From diving deep into the world of record weights to exploring all sorts of alternatives, we’ve covered a lot of ground. So, let’s recap the main points and wrap this up with a nice bow, shall we?
Record weights can be a fantastic addition to your vinyl setup, potentially improving sound quality, reducing vibrations, and stabilizing playback. They’re especially helpful for slightly warped records or turntables with lighter platters.
However, they’re not without their drawbacks, including potential wear on your turntable and compatibility issues.
When choosing a record weight, remember to consider your turntable’s specifications, the weight’s material and size, and proper installation techniques. And hey, while two weights might seem like a good idea, for most setups, one high-quality weight will do the trick just fine.
But don’t forget, record weights aren’t the only game in town! Clamps, mats, isolation feet, cleaning tools, and even a good phono preamp can all contribute to better sound quality.
The key is to experiment and find what works best for your unique setup and listening preferences.
Remember, at the end of the day, this hobby is all about enjoying the music. Whether you decide to use a record weight, try out some alternatives, or stick with your current setup, the most important thing is that it brings you joy when you drop that needle.
So go ahead, give some of these options a try. Who knows?
You might just discover a whole new dimension to your favorite albums. And isn’t that discovery what makes this vinyl journey so exciting?
Now, I’d love to hear from you! What’s your experience with record weights or other vinyl accessories?
Any tips or tricks you’ve discovered along the way? Drop a comment below and let’s keep this conversation going.
After all, sharing knowledge is how we all grow in this wonderful world of vinyl. Happy listening, folks!
Why Use a Light Over a Turntable: Illuminating Your Vinyl Experience
You know, it’s funny how sometimes the simplest things can make the biggest difference. I remember when I first got into vinyl, I was so focused on getting the perfect turntable and speakers that I completely overlooked one crucial element: lighting.
Yep, you heard that right – lighting! Who would’ve thought that a humble light could be the secret sauce to elevating your entire vinyl listening experience?
Let me tell you, once I discovered the magic of proper turntable lighting, it was like hearing my records for the first time all over again. And trust me, I’ve made plenty of rookie mistakes in my vinyl journey, but neglecting good lighting was probably one of my biggest facepalm moments.
So, grab a cup of coffee (or whatever floats your boat), and let’s dive into why you should seriously consider using a light over your turntable.
Why Use a Light Over a Turntable?
Using a light over a turntable is essential for several practical and aesthetic reasons. It improves visibility for accurate needle placement, helps in spotting dust and debris on records, enhances the overall visual appeal of your setup, and reduces eye strain during long listening sessions.
A well-placed light also aids in technical tasks like cartridge alignment and speed adjustments, ultimately leading to better sound quality and prolonged life of your vinyl collection. While we’ve covered the basics here, there’s a whole world of benefits to explore when it comes to turntable lighting – so let’s dive deeper into each aspect below!
The Visual Appeal: Enhancing Your Turntable Aesthetics
Okay, let’s be real for a sec – half the fun of having a turntable is showing it off, right? I mean, these things are beautiful pieces of engineering, and they deserve to be seen!
When I first set up my listening corner, it looked pretty sweet… during the day. But come nighttime, it was like my prized possession just disappeared into the shadows.
Talk about a bummer!
That’s where a good light comes in. It’s like giving your turntable its own personal spotlight.
And let me tell you, there’s something magical about watching that record spin under a warm, gentle glow. It’s not just about practicality – it’s about creating an atmosphere, y’know?
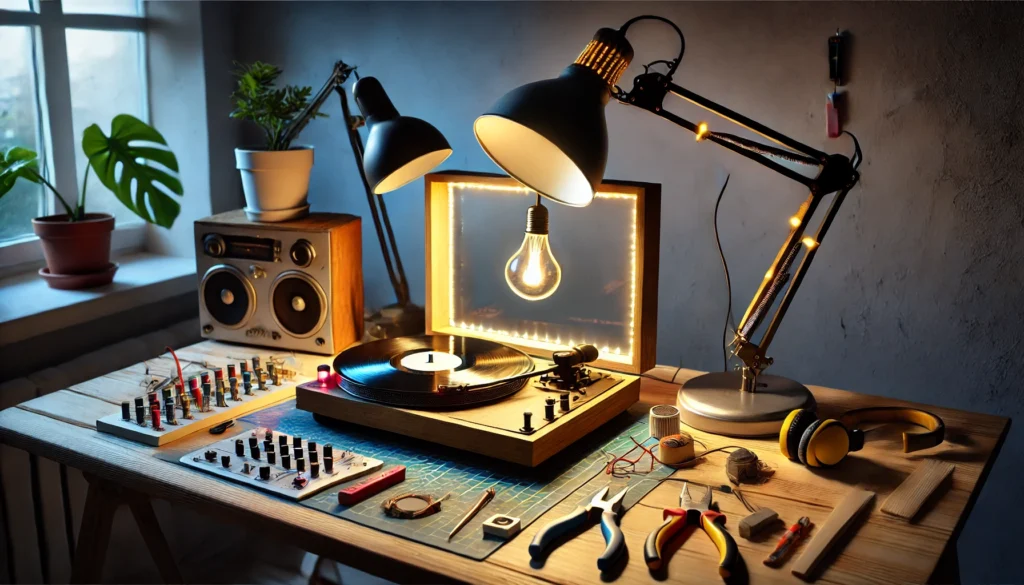
I’ve experimented with all sorts of lighting options over the years. LED strips can give a cool, modern vibe, while a classic desk lamp adds a touch of sophistication.
Heck, I even tried some color-changing bulbs for a while – let’s just say that phase didn’t last long. My wife wasn’t too thrilled about our living room turning into a disco every time I wanted to listen to some jazz!
The key is finding that sweet spot between functionality and aesthetics. You want enough light to see what you’re doing, but not so much that it feels like you’re performing surgery on your records.
It’s all about setting the mood, baby!
Practical Benefits: Improved Record Handling and Maintenance
Now, let’s get down to the nitty-gritty. Good lighting isn’t just about looking cool – it’s got some serious practical benefits too.
Remember that time I accidentally dropped the needle right on the label of my favorite record? Yeah, not my proudest moment.
But with proper lighting, those kinds of fumbles become a thing of the past.
First off, cueing up your records becomes so much easier. No more squinting and hoping for the best as you lower that needle.
With a good light, you can see exactly where you’re placing it. It’s like going from playing pin the tail on the donkey to… well, just putting the tail on the donkey.
Way less stressful!
But here’s where it gets really interesting – maintenance. I used to think my records were pretty clean until I shone a bright light on them.
Holy moly, the dust and debris I saw! It was like discovering a whole new microscopic world living on my vinyl.
Now, I can spot even the tiniest specks and make sure my records are truly clean before each play.
And don’t even get me started on how much easier it is to spot scratches or groove wear. It’s like having x-ray vision for your records.
Trust me, your vinyl will thank you for the extra TLC.
Reducing Eye Strain: A Comfort Consideration
Alright, confession time. There was a period when I was so into my new turntable that I’d spend hours just sitting there, flipping through records, and listening to music.
Sounds great, right? Well, it was… until I started getting these killer headaches and my eyes felt like they were gonna pop out of my skull.
Turns out, squinting at album covers and turntable controls in dim lighting isn’t exactly a recipe for comfort. Who knew?
(Probably everyone but me, but hey, we live and learn!)
Adding proper lighting was a game-changer. Suddenly, I could enjoy those marathon listening sessions without feeling like I’d been staring at a computer screen for 12 hours straight.
It’s amazing how much of a difference it makes when you can actually see what you’re doing without straining your eyes.
And let’s be honest, the older we get, the more we appreciate good lighting. I’m not saying we’re old or anything, but… okay, maybe I am.
But that’s okay! We’ve earned the right to listen to our music in comfort, dammit!
Setting the Mood: Lighting and the Listening Experience
Now, here’s where things get a little… woo-woo. But stick with me, because I swear there’s something to this.
The right lighting doesn’t just help you see better – it can actually enhance your whole listening experience.
Think about it. When you go to a concert, they don’t just flick on the fluorescent overheads and call it a day, do they?
Nah, they use lighting to set the mood, to make you feel the music. And you can do the same thing in your own listening space.
I’ve found that different types of lighting can complement different genres of music. A warm, soft glow for some late-night jazz?
Perfect. A cooler, brighter light for some energetic rock?
Now we’re talking! It’s like creating your own little concert experience right in your living room.
And let me tell you, there’s something almost meditative about watching a record spin under just the right light while the music fills the room. It’s a full sensory experience, man.
Visual, auditory, maybe even spiritual if you’re into that sort of thing.
Just be careful not to get too carried away. I once tried to recreate a full-on laser light show for a Pink Floyd listening session.
Let’s just say my cat wasn’t a fan, and I’m still finding little scorch marks on the ceiling.
Technical Advantages: Precision in Turntable Operation
Okay, now let’s get our geek on for a minute. If you’re anything like me, you probably spend way too much time fiddling with your turntable setup.
But hey, that’s half the fun, right?
Good lighting is absolutely crucial when you’re doing any kind of technical work on your turntable. I learned this the hard way when I was trying to align my cartridge in what I thought was “adequate” lighting.
Spoiler alert: it wasn’t. I ended up with a setup that was so off, it sounded like my records were being played underwater.
Not exactly the high-fidelity experience I was going for!
With proper lighting, you can see every tiny detail. Cartridge alignment becomes a breeze (well, relatively speaking – it’s still a pain in the butt, but at least you can see what you’re doing).
Adjusting the tracking force? No problem.
Even something as simple as checking your belt condition is so much easier when you can actually see the darn thing.
And don’t even get me started on speed adjustments. Being able to clearly see the strobe dots or whatever speed checking method you’re using makes a world of difference.
No more wondering if your 33 1/3 is actually more like 33 1/2 – you’ll be able to dial it in perfectly.
DIY Solutions: Creating Your Perfect Turntable Lighting
Now, I know what you’re thinking. “This all sounds great, but I don’t want to drop a fortune on fancy lighting.”
Well, my friend, that’s where the fun really begins. Creating your own turntable lighting setup can be a great DIY project, and it doesn’t have to break the bank.
I’ve tried all sorts of budget-friendly options over the years. One of my first attempts was just a simple desk lamp I picked up at a thrift store.
It wasn’t pretty, but it did the job! From there, I graduated to some LED strips I found on sale.
A little trickier to set up, but man, did it look cool.
For the more adventurous (or maybe just more desperate), you can get really creative. I once saw a guy who had rigged up an old bicycle light to shine on his turntable.
Was it elegant? Nope.
Did it work? You bet!
My personal favorite DIY solution was when I built a custom light box to go over my turntable. It took a weekend, some scrap wood, and a few choice words when I accidentally glued my fingers together, but the end result was pretty sweet.
Plus, it gave me major bragging rights with my audiophile buddies.
Just remember, whatever DIY solution you go for, make sure it’s safe and doesn’t interfere with your turntable’s operation. The last thing you want is a lighting rig that causes more problems than it solves.
Trust me, I learned that lesson the hard way when my “ingenious” hanging light idea nearly turned into a vinyl-destroying disaster!
Conclusion
So there you have it, folks – the lowdown on why using a light over your turntable is way more than just a fancy add-on. From enhancing your vinyl’s visual appeal to improving your record maintenance game, proper lighting is a game-changer.
Remember when I said I felt like I was hearing my records for the first time after adding good lighting? Well, I wasn’t exaggerating.
It’s not just about seeing better – it’s about experiencing your music in a whole new way. The visual element adds so much to the listening experience, it’s like unlocking a new dimension of your favorite tunes.
But hey, don’t just take my word for it. I encourage you to experiment with different lighting setups and see what works best for you.
Maybe you’ll prefer a bright, clear light for precise cueing, or perhaps a softer glow for those late-night listening sessions. The beauty of it is, there’s no one-size-fits-all solution.
It’s all about finding what enhances your personal vinyl journey.
And let’s not forget the practical side. Proper lighting can help you take better care of your precious vinyl collection.
Trust me, your future self will thank you when your records still sound crisp and clear years down the line.
So go ahead, shed some light on your turntable setup. Your eyes, your records, and your ears will all appreciate it.
And who knows? You might just find yourself falling in love with your vinyl collection all over again.
Now, if you’ll excuse me, I’ve got a date with my turntable, a new lamp, and some classic rock. Happy listening, everyone!
P.S. Don’t forget to share your own turntable lighting tips and tricks in the comments. I’m always on the lookout for new ideas – just maybe leave out the laser light shows.
My cat’s still giving me the side-eye for that one!
What Turntable Did Portishead Use? Unveiling the Iconic Sound of Trip-Hop
You know that feeling when a song hits you right in the gut? That’s what happened to me the first time I heard Portishead’s “Glory Box.”
The scratchy, haunting melody seemed to come from another dimension, and I just had to know: what kind of sorcery were they working with?! Let me tell ya, it wasn’t magic – it was pure turntable mastery.
Portishead, those wizards of trip-hop, didn’t just stumble into their iconic sound. Nope, they crafted it meticulously, and at the heart of it all was a very special piece of equipment.
Now, I’ve been a bit obsessed with audio gear since I was a teenager (much to my parents’ dismay – sorry about all those blown speakers, Mom!). But even I was blown away when I discovered the tool behind Portishead’s groundbreaking sound.
It’s not just about the equipment, though – it’s how they used it that really sets them apart. So, buckle up, music nerds and casual listeners alike!
We’re about to dive into the world of Portishead’s legendary turntable. Trust me, by the end of this, you’ll be looking at your record player in a whole new light.
Let’s drop the needle on this vinyl journey, shall we?
What Turntable Did Portishead Use?
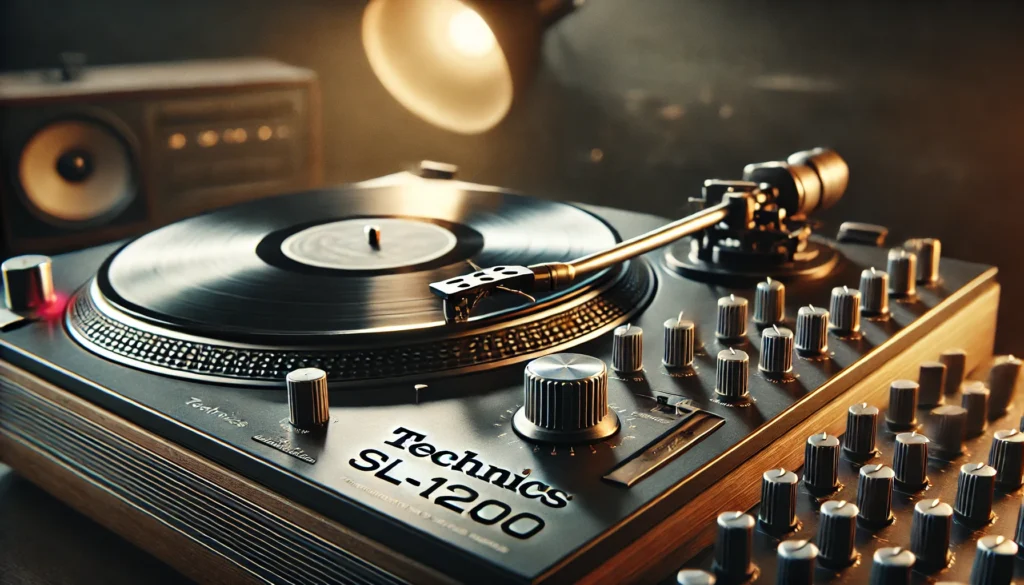
Portishead primarily used the Technics SL-1200 turntable, a legendary piece of equipment that became integral to their unique sound. This direct-drive turntable, known for its precision and durability, allowed the band, particularly DJ Geoff Barrow, to manipulate vinyl records with exceptional control.
The SL-1200’s robust motor, high-torque, and pitch adjustment capabilities made it perfect for the intricate scratching, sampling, and tempo manipulation that characterize Portishead’s music.
While this turntable was the cornerstone of their setup, it was Portishead’s innovative techniques and integration with other analog gear that truly brought their groundbreaking trip-hop sound to life.
In the following sections, we’ll delve deeper into how Portishead utilized the Technics SL-1200 to revolutionize music production and define a genre.
The Heart of Portishead’s Sound: The Technics SL-1200
Alright, let’s cut to the chase – the turntable that gave Portishead their signature sound was none other than the legendary Technics SL-1200. Man, when I first got my hands on one of these bad boys, it was like Christmas morning!
The Technics SL-1200 isn’t just any old record player, folks. This thing is the Rolls-Royce of turntables, the crème de la crème of vinyl spinning.
It’s been the go-to choice for DJs and music producers since it first hit the scene in the 1970s. And let me tell you, there’s a good reason for that!
Now, I remember when I first tried to use a belt-drive turntable for scratching. What a disaster!
But the SL-1200? It’s like it was made for the job. The direct-drive motor gives you incredibly precise control, perfect for those delicate scratches and cuts that Portishead is known for.
But here’s the kicker – it’s built like a tank! I once accidentally knocked mine off the table (don’t ask), and the darn thing still worked perfectly.
That’s the kind of reliability that made it perfect for Portishead’s experimental style. They could push it to its limits without worrying about it giving up on them mid-session.
And let’s not forget about that pitch control slider. Oh man, the things Portishead did with that!
It allowed them to fine-tune the speed of the record, creating those eerie, off-kilter samples that became their trademark. Trust me, trying to replicate that on a lesser turntable is like trying to paint the Mona Lisa with crayons!
Portishead’s Unique Approach to Turntablism
Now, having a Ferrari doesn’t automatically make you a race car driver, right? Same goes for turntables.
It’s not just about the equipment – it’s how you use it. And boy, did Geoff Barrow know how to use it!
Geoff’s approach to the SL-1200 was like nothing I’d ever seen before. Most DJs I knew were all about fast scratches and quick cuts.
But Geoff? He treated that turntable like it was an instrument in its own right. I remember trying to replicate his technique once.
Let’s just say my neighbors weren’t too happy with me that week! Geoff would often use the turntable to create long, drawn-out drones by playing a single note or sound and manipulating it with the pitch control.
It’s harder than it sounds, trust me! Take a track like “Mysterons” from their debut album “Dummy”.
That haunting, oscillating sound that opens the track? That’s all turntable magic, baby! Geoff would find these obscure samples, slow them down to a crawl, and layer them to create textures that were totally unique.
And don’t even get me started on “Strangers” from their second album. The way they integrated scratching into the fabric of the song was mind-blowing.
It wasn’t just a cool effect – it was an integral part of the composition. I spent weeks trying to figure out how they did it!
The Legacy of Portishead’s Turntable Choice
You know how they say imitation is the sincerest form of flattery? Well, after Portishead burst onto the scene, suddenly everyone and their grandma wanted an SL-1200.
It became the must-have piece of kit for anyone dabbling in trip-hop or experimental electronic music. I remember saving up for months to buy my first SL-1200.
When I finally got it home, I felt like I was part of some secret club. Like I finally had the key to unlocking those mesmerizing Portishead sounds.
But here’s the thing – it wasn’t just Portishead. The SL-1200 became synonymous with the entire trip-hop genre.
Artists like Massive Attack, Tricky, and UNKLE all embraced this turntable, each putting their own spin on its capabilities. And get this – even in today’s digital age, where you can do pretty much anything with a laptop, there are still artists out there swearing by the SL-1200.
I was chatting with a young producer the other day who told me he’d just bought one. “Nothing else gives you that warmth,” he said.
Couldn’t agree more, kid!
Beyond the Turntable: Portishead’s Full Setup
Now, as much as I’d like to tell you that all you need is an SL-1200 to sound like Portishead, that’d be a big fat lie. Sorry to burst your bubble!
The turntable was just one piece of a much larger puzzle. Portishead’s studio was like a mad scientist’s lab of audio gear.
They had all sorts of vintage synthesizers, drum machines, and effects units. I once got a peek at a similar setup and nearly drooled all over myself!
One key piece of kit was their mixing desk. They used an old Soundcraft analog mixer that added its own flavor to their sound.
Trying to recreate Portishead’s warmth and depth with a modern digital setup? Good luck with that!
They also made heavy use of tape machines. Yeah, you heard that right – actual tape!
In an era when everyone was going digital, Portishead stuck to their guns and kept it analog. It’s part of what gives their music that gritty, lived-in feel.
But here’s the genius part – they found a way to make all these elements work together seamlessly. The turntable wasn’t just a standalone thing; it was integrated into this whole ecosystem of sound.
It’s like they were conducting an orchestra of old-school audio gear!
The Evolution of Portishead’s Sound and Equipment
Now, you might be thinking, “Surely they’ve moved on from all this old gear by now?” Well, yes and no.
Portishead has definitely evolved over the years, but they’ve never lost touch with their roots. I remember when “Third” came out in 2008.
Man, what a curveball that was! It was like they’d taken their old sound and put it through a wood chipper.
But you know what? If you listened closely, you could still hear the DNA of those early recordings.
From what I’ve gathered, they still use a lot of analog gear, including turntables. But they’ve also embraced some modern tech.
It’s like they’ve found this sweet spot between old and new, and it’s freaking awesome! I saw them live a few years back, and let me tell you, they still had that SL-1200 up there on stage.
It was like seeing an old friend! But they were using it alongside some pretty high-tech digital gear.
The blend was mind-blowing. These days, Portishead isn’t as active as they used to be.
But when they do pop up, you can bet they’re still pushing boundaries. They’re like that cool aunt or uncle who’s always got some new trick up their sleeve, you know?
Conclusion
Whew! What a trip down memory lane, right? From the iconic Technics SL-1200 to their full analog setup, Portishead’s gear choices were as groundbreaking as their music.
It just goes to show that sometimes, the tools you use can be just as important as how you use them. But here’s the thing – don’t get too caught up in the gear envy!
Remember, Portishead’s magic wasn’t just in their equipment. It was their creativity, their willingness to experiment, and their unique vision that really made the difference.
So whether you’re spinning records on a high-end turntable or making beats on your laptop, the most important thing is to keep pushing boundaries. Who knows?
Maybe you’ll be the next artist to revolutionize music with your own unique sound! Now, I’m dying to hear from you guys.
Have you ever tried using a turntable in your own music? Or maybe you’ve got some killer Portishead-inspired tracks you want to share?
Drop a comment below and let’s keep this conversation going! And hey, if you’re feeling inspired, why not dust off that old record player and see what kind of magic you can make?
Remember, in the words of Portishead themselves, “All mine, the glory, all mine, everything.” So go out there and make some noise!
Who knows? Maybe we’ll be writing articles about your groundbreaking sound someday!
Is It Required to Have a Personal Turntable DJ?
Picture this: a dimly lit room, the pulsating beat of music filling the air, and at the center of it all, a DJ skillfully manipulating vinyl records on turntables.
For decades, this scene defined the essence of DJing. But in today’s digital age, is a personal turntable DJ still a necessity, or has technology rendered this traditional art form obsolete?
The truth is, the world of DJing has undergone a dramatic transformation, with digital controllers and software challenging the dominance of vinyl and turntables.
However, the choice between traditional and modern approaches isn’t always clear-cut. Each method has its unique strengths and applications, catering to different events, audiences, and artistic visions.
Let’s dive into the evolving landscape of DJing, exploring the pros and cons of turntable DJs versus digital alternatives, and uncover when and why you might still want to opt for the classic vinyl experience.
Is It Required to Have a Personal Turntable DJ?
In most cases, it is not strictly required to have a personal turntable DJ. The necessity depends on various factors such as the type of event, budget, desired atmosphere, and personal preferences.
While turntable DJs can add unique value through live mixing and authentic vinyl sound, there are many alternatives available today, including digital DJing options and pre-mixed playlists.
For casual events or personal use, a turntable DJ is often not necessary. However, for certain scenarios like large events, weddings, nightclubs, or venues catering to vinyl enthusiasts, a skilled turntable DJ can significantly enhance the experience.
In the following sections, we’ll delve deeper into the pros and cons of turntable DJs versus digital alternatives, helping you make an informed decision for your specific needs.
The Evolving Landscape Of DJing
The world of DJing has undergone a remarkable transformation in recent years, reshaping the way we think about music performance and event entertainment.
The traditional image of a DJ meticulously curating vinyl records and skillfully manipulating turntables has given way to a more diverse and technologically advanced landscape.
This shift is not merely a change in equipment or technique; it represents a fundamental evolution in the art and profession of DJing.
At the heart of this transformation lies the rapid advancement of digital technology. The digitization of music has had a profound impact on how DJs source, organize, and perform their music.
Where once a DJ’s library consisted of crates filled with vinyl records, today’s DJ can carry an entire music collection on a small hard drive or even access vast online libraries through streaming services.
This shift has not only changed the physical aspect of DJing but has also expanded the possibilities for music selection and mixing.
The rise of digital music formats has been accompanied by the development of innovative DJ equipment designed to bridge the gap between traditional techniques and modern technology.
These advancements have made it easier than ever for aspiring DJs to enter the field, lowering the barriers to entry that once existed due to the cost and complexity of traditional setups.
At the same time, established professionals have found new ways to expand their capabilities, incorporating digital tools alongside traditional techniques to create unique and engaging performances.
As a result of these changes, the necessity for a dedicated turntable DJ has diminished in many contexts.
Events that once required the specialized skills of a vinyl-only DJ can now be serviced by performers using a variety of equipment and techniques.
This shift has led to a democratization of DJing, with more people than ever able to try their hand at mixing music and performing for audiences.
However, this evolution doesn’t mean that traditional turntable skills have become obsolete. Instead, the DJ world has expanded to encompass a wide range of styles and approaches, from purely digital setups to hybrid systems that combine elements of both old and new technologies. This diversity has enriched the DJ scene, offering performers and audiences alike a broader palette of musical experiences to choose from.
The changing landscape of DJing has also been influenced by shifts in music consumption habits. As listeners have become accustomed to the immediate gratification of digital streaming services, their expectations for live music experiences have evolved as well.
Modern audiences often expect DJs to be able to accommodate requests quickly, seamlessly blend between genres, and incorporate visual elements into their performances – all tasks that are facilitated by digital technology.
Despite these changes, the fundamental role of the DJ remains the same: to create an engaging musical journey for their audience. Whether using turntables, controllers, or a combination of both, successful DJs must still possess a deep knowledge of music, an ability to read and respond to the crowd, and the technical skills to mix tracks seamlessly.
The tools may have changed, but the art of DJing continues to thrive in this new, more diverse landscape.
DJ Controllers: The Modern Alternative To Turntables
The introduction of DJ controllers has been one of the most significant developments in the evolution of DJing. These compact, versatile devices have revolutionized the way DJs approach their craft, offering a powerful alternative to traditional turntable setups. DJ controllers represent a convergence of digital technology and traditional DJing techniques, providing performers with unprecedented levels of control and creativity.
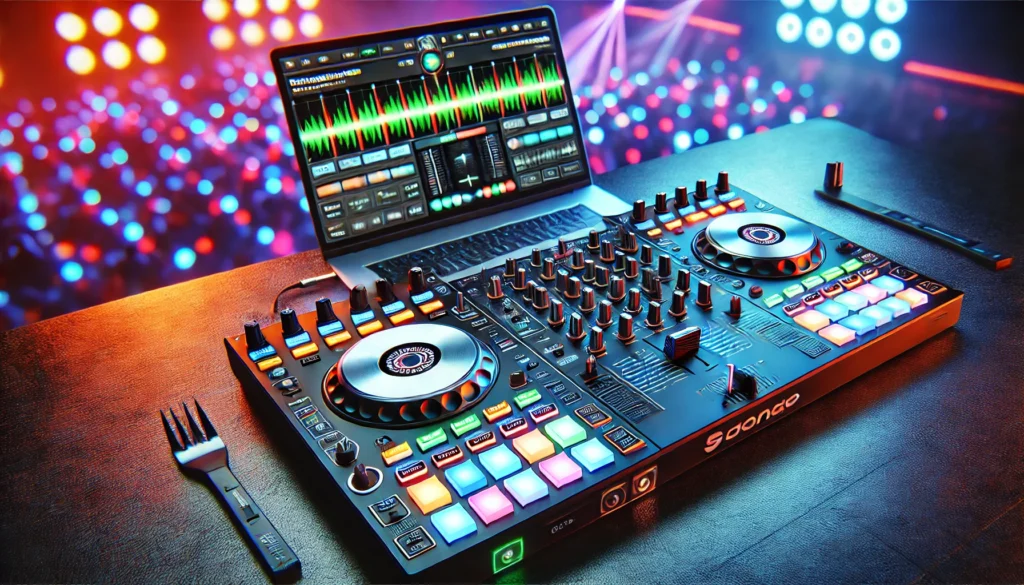
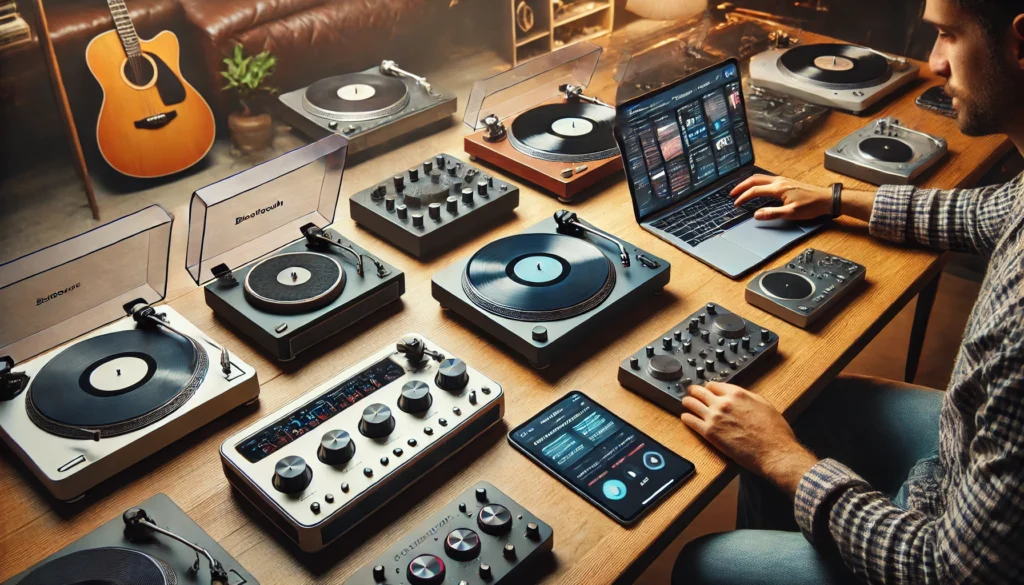
At their core, DJ controllers are all-in-one units that integrate various DJing functions into a single device. They typically connect to a computer running specialized DJ software, creating a seamless interface between the digital music files and the physical controls.
This integration allows DJs to manipulate and mix digital tracks with a level of precision and flexibility that was previously difficult to achieve with analog equipment.
Most DJ controllers are designed to mimic the layout and functionality of traditional DJ setups. They often feature jog wheels that replicate the feel and response of vinyl turntables, allowing DJs to scratch, cue, and adjust tracks in a familiar way.
Alongside these jog wheels, controllers boast an array of buttons, knobs, and faders that provide quick access to a wide range of mixing and effects options. This familiar layout helps DJs transition from traditional setups to digital systems, preserving many of the tactile elements that are central to the art of DJing.
The software component of a DJ controller setup is equally important. Modern DJ software offers a wealth of features that expand the creative possibilities for performers.
These programs allow DJs to set multiple cue points within tracks, create and trigger loops on the fly, and apply a vast array of digital effects. Many software packages also include advanced features like beat detection and key matching, which can help DJs create smoother mixes and more harmonious track transitions.
One of the most revolutionary aspects of DJ controllers is their ability to interface with vast digital music libraries. DJs can now carry their entire collection on a single laptop or even access tracks directly from online streaming platforms.
This capability has transformed the way DJs prepare for and perform their sets. Instead of being limited to the physical records they can carry, DJs now have instant access to virtually any track they might need.
This flexibility allows for more spontaneous and responsive performances, as DJs can quickly adapt their sets based on crowd reactions or unexpected requests.
The compact nature of DJ controllers has also had a significant impact on the profession. Traditional turntable setups, with their separate turntables, mixer, and often additional effects units, could be bulky and challenging to transport. In contrast, most DJ controllers are designed with portability in mind.
Many can fit into a backpack along with a laptop, making it much easier for DJs to travel between gigs or perform in venues with limited space. This portability has opened up new opportunities for mobile DJs and has made it easier for performers to take on a wider variety of gigs.
Despite their many advantages, it’s important to note that DJ controllers are not without their critics.
Some purists argue that the ease of use and digital assistance provided by controllers can lead to a homogenization of DJ performances, with less emphasis placed on the technical skills and music knowledge that were once essential.
However, proponents of controllers counter that these tools simply allow DJs to focus more on creativity and crowd interaction, rather than the physical mechanics of mixing.
As DJ controllers have evolved, they’ve become increasingly sophisticated, with high-end models offering features that rival or surpass those of professional club installations.
Some controllers now include built-in screens that display waveforms and track information, reducing the need for DJs to look at their computer screens.
Others offer advanced audio interfaces with multiple inputs and outputs, allowing for complex routing and the integration of external instruments or effects units.
The rise of DJ controllers has also led to changes in the way DJs approach their craft. With the ability to prepare and save playlists, set cue points, and create loops in advance, many DJs now spend significant time preparing their sets before a performance.
This pre-planning can lead to more polished and intricate mixes, but it also raises questions about the balance between preparation and spontaneity in DJ performances.
The Persistence Of Turntable DJing
Despite the widespread adoption of digital technologies and DJ controllers, turntable DJing continues to hold a significant place in DJ culture.
This persistence is not merely a matter of nostalgia or resistance to change; rather, it reflects a deep appreciation for the unique qualities and challenges that turntable DJing presents.
The art of manipulating vinyl records on turntables remains an important part of DJ heritage and continues to influence contemporary mixing techniques.
One of the primary reasons for the enduring appeal of turntable DJing is its connection to the roots of DJ culture.
The technique of mixing records on turntables dates back to the early days of hip-hop and disco in the 1970s, when pioneering DJs like Kool Herc, Grandmaster Flash, and Afrika Bambaataa first began experimenting with extending breaks and blending tracks.
This rich history imbues turntable DJing with a sense of authenticity and cultural significance that many DJs and music enthusiasts deeply value.
The physical nature of vinyl mixing is another factor that contributes to its ongoing popularity. Turntable DJing requires a high degree of manual dexterity and timing. DJs must physically cue up records, adjust pitch controls to beatmatch tracks, and use techniques like nudging and dragging to keep beats aligned.
This hands-on approach creates a direct, tactile connection between the DJ and the music, which many performers find deeply satisfying.
The visual spectacle of a DJ skillfully manipulating records can also add an extra dimension to the performance, engaging the audience in a way that more subtle digital techniques might not.
Many DJs and listeners argue that vinyl records provide a unique sound quality that digital formats struggle to replicate.
The analog nature of vinyl can impart a warmth and depth to the music that some find more appealing than the clarity of digital audio.
Additionally, the imperfections inherent in vinyl playback – such as the subtle crackle of surface noise or the slight wow and flutter of a rotating platter – can add character to a mix, creating a more organic and “live” feel.
The limitations of vinyl mixing can also be seen as a creative advantage. With a finite number of records to work with and without the ability to rely on software for beat matching or effects, turntable DJs must be intimately familiar with their music and highly skilled in their mixing techniques.
These constraints can lead to more thoughtful track selection and creative mixing solutions, pushing DJs to develop a deep understanding of their music and hone their technical skills.
Turntable DJing also continues to be the standard in certain music genres and scenes. In hip-hop, for example, turntablism – the use of turntables as musical instruments – remains an essential element of the culture.
Scratch DJs continue to push the boundaries of what’s possible with vinyl manipulation, creating intricate rhythms and textures that are difficult to replicate with digital tools.
Similarly, in some electronic music scenes, particularly those with a strong connection to dance music history, vinyl DJing is still highly valued and sometimes even expected.
The resurgence of vinyl as a consumer format in recent years has also contributed to the ongoing relevance of turntable DJing.
As more music becomes available on vinyl, including new releases and reissues of classic albums, DJs have access to a growing pool of high-quality records to incorporate into their sets.
This trend has helped to keep vinyl mixing viable and relevant in contemporary DJ culture.
Many established DJs who came up in the pre-digital era continue to prefer turntables, either exclusively or as part of hybrid setups.
These veterans often cite the importance of preserving traditional DJ skills and the unique character that vinyl brings to a performance.
Their influence helps to maintain the prestige and relevance of turntable skills within the DJ community.
It’s worth noting that the persistence of turntable DJing doesn’t necessarily mean a rejection of digital technologies.
Many DJs who primarily use turntables also incorporate digital tools into their setups, such as DVS (Digital Vinyl Systems) that allow them to play digital files using special timecode vinyl.
This hybrid approach allows DJs to maintain the feel and technique of vinyl mixing while benefiting from the convenience and expanded library options of digital formats.
The ongoing popularity of turntable DJing has also led to continued innovation in turntable technology.
Manufacturers continue to produce high-quality turntables designed specifically for DJ use, with features like high-torque motors, pitch control, and reverse play capabilities.
Some modern turntables even incorporate digital features, blurring the line between analog and digital DJing.
When Turntable DJs Might Still Be Preferable
While DJ controllers and digital setups have become increasingly prevalent, there are still many scenarios where a traditional turntable DJ might be the preferred or even required choice.
These situations often arise from a combination of factors including the specific nature of the event, the preferences of the audience, and the desire to create a particular atmosphere or experience.
One of the most common contexts where turntable DJs remain in high demand is within certain music genres and scenes that have strong historical ties to vinyl culture. Hip-hop, for instance, has deep roots in turntablism, with techniques like scratching and beat juggling being integral to the genre’s development
In hip-hop events, battles, and competitions, the ability to manipulate vinyl records skillfully is often seen as a mark of authenticity and skill.
Audiences and fellow artists in these scenes may expect or prefer to see a DJ working with actual vinyl, viewing it as a more genuine representation of the culture.
Similarly, in certain electronic music subgenres, particularly those with strong connections to dance music history like house, techno, and disco, there’s often a preference for vinyl DJs.
This preference stems from both the historical significance of vinyl in these genres and the belief that vinyl provides a warmer, more authentic sound.
In underground club scenes and at events catering to audiophiles or music purists, a turntable DJ might be specifically sought out to maintain this sense of authenticity and connection to the roots of the music.
Specialized music events focused on vinyl culture are another area where turntable DJs are not just preferred but often required.
Record fairs, vinyl-only club nights, and events celebrating specific eras of music (like 70s disco or 90s rave) often feature DJs playing exclusively on turntables.
These events cater to vinyl enthusiasts and collectors who appreciate the physicality and nostalgia associated with record playing.
The visual aspect of turntable DJing can make it preferable in settings where the DJ’s performance is meant to be a focal point of the event.
The spectacle of a skilled DJ physically manipulating records, cueing up tracks, and performing tricks like scratching can be much more visually engaging than a DJ working primarily with a laptop or controller.
This visual appeal makes turntable DJs popular choices for events where the audience is likely to be watching the DJ closely, such as at showcase events, in certain club layouts, or at parties where the DJ booth is prominently positioned.
In venues with a specific aesthetic or theme, particularly those going for a retro or vintage atmosphere, a turntable DJ can contribute significantly to the overall ambiance.
The presence of vinyl records and turntables can serve as both functional equipment and decor, adding to the visual theme of the space.
This makes turntable DJs popular choices for events at vintage-styled bars, retro-themed parties, or venues that want to evoke a particular era through their music presentation.
Some high-end clubs and music venues maintain turntable setups as a point of pride and to cater to DJs who prefer or specialize in vinyl mixing.
These venues often attract audiences who appreciate the skill and authenticity associated with turntable DJing. In such settings, the presence of a turntable DJ can be seen as a mark of quality and commitment to the art form of DJing.
Private events and weddings can also be contexts where turntable DJs are specifically requested. Some clients may have a personal connection to vinyl records or a preference for the aesthetic and sound of turntable DJing.
In these cases, the choice of a turntable DJ can add a unique and personalized touch to the event.
Educational settings present another scenario where turntable DJs might be preferable. DJ schools and music production courses often include vinyl mixing as part of their curriculum, recognizing the importance of understanding the roots of DJing and the fundamental skills involved in beatmatching and mixing without digital assistance.
In these contexts, instructors who are skilled in turntable techniques are essential.
It’s worth noting that in many of these scenarios, the preference for a turntable DJ doesn’t necessarily preclude the use of all digital technology.
Many DJs who are proficient with turntables also incorporate digital tools into their setups, such as mixers with effects processors or laptops running additional software.
The key is that the primary mode of track selection and mixing is done using physical records and turntables.
The choice to use a turntable DJ can also be influenced by the specific skills and reputation of individual DJs.
Some DJs have built their careers and reputations around their vinyl mixing skills, and event organizers may seek them out specifically for this expertise.
In these cases, the preference is less about the equipment itself and more about the unique style and skills of the particular DJ.
The Best Of Both Worlds: Hybrid Setups
As the DJ industry continues to evolve, many performers are finding that the most effective approach is to combine elements of both traditional turntable setups and modern digital systems.
These hybrid setups allow DJs to leverage the strengths of each technology, creating versatile and powerful performance rigs that can adapt to a wide range of situations and musical styles.
One common form of hybrid setup involves using turntables in conjunction with a digital vinyl system (DVS). This configuration allows DJs to use special timecode vinyl records that send signals to a computer running DJ software.
The software then plays digital audio files in response to the movement of the record. This setup preserves the tactile feel and technique of vinyl mixing while giving DJs access to vast digital music libraries. It’s an ideal solution for DJs
who want to maintain their turntable skills while benefiting from the convenience and expanded options of digital music formats.
Another popular hybrid approach involves using a traditional turntable setup alongside a DJ controller or CDJs (professional-grade CD players designed for DJing). This configuration allows DJs to seamlessly mix between vinyl records and digital tracks, offering the best of both worlds.
They can play rare or classic tracks on vinyl, taking advantage of the unique sound quality and authenticity of the format, while also having quick access to a broader range of music through their digital system.
Some DJs opt for a setup that includes one turntable and one digital deck. This arrangement allows for creative mixing between analog and digital sources, providing flexibility in music selection while maintaining the option to play physical records.
It’s a compact solution that can be particularly useful for mobile DJs who need to be prepared for various gig scenarios.
The mixer plays a crucial role in many hybrid setups. Modern DJ mixers often include built-in audio interfaces and can seamlessly integrate both analog and digital inputs.
Some high-end mixers even include onboard effects processors and the ability to connect directly to laptops running DJ software, further blurring the line between analog and digital DJing.
For DJs who primarily use digital systems but want to incorporate some elements of vinyl manipulation, there are controller options that closely mimic the feel and response of turntables.
These high-end controllers often feature motorized platters that provide the resistance and tactile feedback of vinyl, allowing DJs to scratch and manipulate digital files in a way that closely resembles working with physical records.
The software used in hybrid setups has also evolved to accommodate this blending of analog and digital techniques. Many DJ software packages now offer advanced vinyl emulation modes, allowing DJs to apply classic vinyl techniques to digital files.
These programs can even simulate the subtle imperfections of vinyl playback, adding warmth and character to digital tracks.
One of the key advantages of hybrid setups is their adaptability. DJs can tailor their rig to suit different types of gigs, venues, or musical styles. For instance, a DJ might use a fully digital setup for a mobile gig where portability is key, but switch to a hybrid or all-vinyl setup for a club residency or specialist event.
Hybrid setups also allow DJs to take advantage of the unique strengths of each format. Vinyl records can provide a warm, rich sound that many find preferable for certain types of music, particularly in genres with strong ties to vinyl culture.
Digital systems, on the other hand, offer precise control over track playback, the ability to quickly search vast music libraries, and access to advanced features like looping, effects, and instant track analysis.
The use of hybrid setups has led to new creative possibilities in DJing. For example, a DJ might use the steady, quantized beat of a digital track as a foundation, while layering over it with more organic, groove-based vinyl tracks.
Or they might use digital technology to extend and manipulate vinyl sources in ways that wouldn’t be possible with a purely analog setup.
For many DJs, a hybrid setup represents a bridge between the past and future of their craft. It allows them to honor the history and techniques of traditional DJing while embracing the innovations and possibilities offered by new technology.
This approach can be particularly appealing to DJs who came up in the vinyl era but want to stay current with modern trends and techniques.
The flexibility of hybrid setups also makes them valuable in educational settings. DJ schools and music production courses can use these rigs to teach both traditional and modern techniques, giving students a well-rounded skill set that prepares them for a variety of performance scenarios.
However, it’s worth noting that hybrid setups can be more complex and potentially more prone to technical issues than either purely analog or purely digital systems.
DJs using hybrid rigs need to be proficient in troubleshooting both analog and digital equipment and must be prepared to deal with potential compatibility issues between different components of their setup.
The cost can also be a consideration, as building a comprehensive hybrid setup often involves investing in both high-quality analog equipment and advanced digital systems.
However, many DJs find that this investment pays off in terms of versatility and the ability to adapt to different performance situations.
As technology continues to advance, we’re likely to see even more innovative hybrid solutions emerging. Manufacturers are constantly working on new ways to bridge the gap between analog and digital DJing, creating products that offer the best aspects of both worlds.
The Future Of DJing: Balancing Tradition And Technology
As we look towards the future of DJing, it’s clear that the industry will continue to evolve at a rapid pace, driven by technological innovations and changing musical landscapes. However, this evolution is unlikely to be a simple linear progression from analog to digital.
Instead, the future of DJing will likely be characterized by a nuanced balance between honoring traditional techniques and embracing cutting-edge technologies.
One of the most significant trends shaping the future of DJing is the increasing integration of artificial intelligence and machine learning technologies.
AI-powered DJ software is becoming more sophisticated, capable of analyzing crowd reactions and adjusting music selection in real-time.
These systems are getting better at mimicking the decision-making processes of human DJs, from beatmatching and harmonic mixing to reading the energy of a crowd and selecting appropriate tracks.
However, rather than replacing human DJs, these AI tools are more likely to become powerful assistants, augmenting the capabilities of skilled performers.
We may see DJs using AI to handle some of the more technical aspects of mixing, allowing them to focus more on track selection, crowd interaction, and the overall flow of their sets.
This could lead to more dynamic and responsive performances, with DJs able to quickly adapt to changing crowd dynamics.
Virtual and augmented reality technologies are also poised to make significant impacts on the world of DJing. VR DJ software allows users to mix music in immersive virtual environments, opening up new possibilities for remote performances and unique visual experiences.
Augmented reality, on the other hand, could transform the way DJs interact with their equipment, overlaying digital controls and information onto physical DJ gear.
The rise of cloud-based DJ platforms and streaming services specifically designed for DJs is another trend that’s likely to shape the future of the industry.
Services like Beatport LINK and SoundCloud GO+ allow DJs to access vast libraries of music directly from their DJ software, reducing the need for large personal music collections.
As these services continue to evolve, we may see a shift towards subscription-based models for DJ music access, similar to how consumers now stream music for personal listening.
Despite these technological advancements, there’s likely to be a continued appreciation for the skills and techniques associated with traditional DJing.
Many in the industry believe that the constraints and challenges of vinyl mixing foster creativity and musicality in ways that purely digital systems may not.
As a result, we’re likely to see ongoing efforts to preserve and celebrate these skills, perhaps through specialized events, competitions, or educational programs.
The equipment used by DJs is likely to continue evolving, with manufacturers finding new ways to blend analog and digital technologies.
We may see more hybrid devices that offer the tactile feel of vinyl manipulation while providing the flexibility of digital systems.
Touchscreen interfaces, gesture control, and even brain-computer interfaces could all play a role in shaping the DJ equipment of the future.
Sustainability is becoming an increasingly important consideration in the DJ industry. There’s growing interest in eco-friendly DJ equipment and practices, including the use of renewable energy sources for powering gear and the development of more energy-efficient hardware.
This trend is likely to continue, with manufacturers and DJs alike seeking ways to reduce the environmental impact of their activities.
The role of the DJ itself may continue to expand and evolve. Many DJs are already branching out into production, live performance, and other areas of the music industry.
In the future, we may see the lines between DJ, producer, and live electronic musician blur even further, with performers seamlessly switching between these roles during a single set.
The global nature of electronic music culture, combined with advancements in streaming technology, is likely to lead to more opportunities for remote and collaborative performances. We may see an increase in multi-location DJ sets, with performers in different parts of the world mixing together in real-time.
As music consumption habits continue to evolve, DJs may need to adapt to changing expectations from audiences. The instant gratification provided by streaming services and the algorithmic curation of personal playlists could influence how audiences engage with DJ performances.
DJs may need to find new ways to surprise and engage listeners who are used to having complete control over their music listening experience.
Education in DJing is also likely to evolve. While there will always be value in learning the fundamental skills of mixing and music selection, future DJ education may place increased emphasis on areas like music theory, production techniques, and even business and marketing skills.
Online learning platforms and VR-based training could make high-quality DJ education more accessible to aspiring performers around the world.
Despite all these changes, the fundamental role of the DJ as a curator and manipulator of music is likely to remain constant.
The specific tools and techniques may evolve, but the core skills of reading a crowd, understanding music deeply, and creating cohesive, engaging musical journeys will continue to be central to the art of DJing.
Conclusion
In conclusion, the question “Is it required to have a personal turntable DJ?” doesn’t have a simple yes or no answer.
The necessity of a turntable DJ depends on various factors, including the type of event, audience preferences, and desired atmosphere.
While DJ controllers and digital setups have revolutionized the industry, offering convenience and versatility, there’s still a place for traditional turntable DJing in certain contexts.
The future of DJing likely lies in a balance between honoring the art’s rich history and embracing technological innovations.
Whether you choose a turntable DJ, a controller setup, or a hybrid approach, the goal remains the same: to create an engaging and memorable musical experience for your audience.
As the industry continues to evolve, the most successful DJs will be those who can adapt to new technologies while maintaining the fundamental skills that have always defined great DJing.
How to Connect a Bose Soundbar to Wi-Fi
Struggling with getting your new Bose soundbar to connect to your home Wi-Fi network? Don’t sweat it
With the right guidance, you can have that speaker streaming wireless audio in no time.
Getting a Bose soundbar hooked up to Wi-Fi is a straightforward process using the Bose
Connect mobile app as long as your speaker has built-in Wi-Fi capability.
We’ll outline the complete procedure step-by-step.
Let’s dive right in to the specifics of networking your soundbar…
How to Connect a Bose Soundbar to Wi-Fi
The key to getting your Bose soundbar connected to your Wi-Fi network is using the Bose Connect mobile app.
This app allows you to configure the wireless settings on compatible Bose speakers and complete the networking process in just a few steps.
To start, you’ll want to download Bose Connect on your smartphone or tablet, create a Bose account if you don’t have one, and make sure your soundbar is powered on.
Connect your mobile device directly to the speaker via Bluetooth or an aux cable.
Open the Bose Connect app, select your soundbar model, and choose the option to join a wireless network.
Follow the onscreen prompts to select your Wi-Fi name and enter the correct password. The app then sends these settings to your soundbar to connect it.
The networking process may take a few minutes but the Bose Connect app guides you through each part of getting your speaker online.
As long as your soundbar supports Wi-Fi connectivity, connecting it wirelessly is quick and seamless using the mobile app.
We dive deeper into each specific step below.
But in a nutshell, the Bose Connect app handles getting your compatible soundbar hooked up to your home Wi-Fi.
Check Soundbar Compatibility
Before attempting to connect your Bose soundbar to Wi-Fi, you’ll want to verify that your specific soundbar model has built-in Wi-Fi capability.
This allows the soundbar to connect directly to your wireless network in order to stream music and access online services.
Most newer Bose soundbar models have Wi-Fi connectivity, but some older units may lack this feature.
You can check the specifications for your soundbar either on the Bose website or in your soundbar manual to confirm wireless compatibility.
If your sound bar does not list Wi-Fi as one of its connection options, it likely cannot connect directly to your home network.
In that case, you would need to connect a separate streaming device like a Roku or Amazon Fire TV Stick to your soundbar via HDMI.
Then that streaming device would connect to Wi-Fi and allow you to access music streaming services, but the soundbar itself would not join the wireless network.
So verifying Wi-Fi capability is an important first step before trying to get your Bose soundbar online.
As long as your user manual or the product details online indicate Wi-Fi is supported, you can move forward connecting it wirelessly.
Download Bose Connect App
Bose provides a mobile app called Bose Connect that allows you to set up and manage Wi-Fi connections on compatible sound bar models.
This app is available for download on both iOS and Android devices and serves as your primary tool for getting your soundbar onto your wireless network.
When you launch the Bose Connect app for the first time, you’ll need to create a free Bose account if you don’t already have one.
This allows the app to keep track of your registered Bose products and tailor the experience specifically to the devices you own.
Once you log into the app with your Bose account, you’ll be prompted to start adding products.
Make sure to download Bose Connect on the smartphone or tablet you plan to use for setting up the Wi-Fi connection initially.
While you can use multiple mobile devices with your Bose account, getting the network configured is easiest when done directly from your soundbar to start.
The mobile device essentially facilitates the connection between the soundbar itself and your Wi-Fi router.
So just one smartphone or tablet will be necessary during the setup process.
Connect Soundbar to Power Source
Before using the Bose Connect app to join a wireless network, you first need to connect your soundbar to a power source and turn on the device.
This ensures that all of the soundbar’s connection and streaming capabilities are operational during the Wi-Fi setup.
Plug your Bose soundbar directly into a wall outlet or power strip using the included power cable.
Make sure that the outlet is working and that your soundbar powers on properly once connected.
You should see indicator lights illuminate on the front of the soundbar to denote that it is getting electrical power.
Other connected Bose components like a wireless subwoofer or surround speakers may also automatically power on when you turn on the main soundbar itself.
Just confirm that all linked audio components are active so that the Bose Connect app can find every part of your Bose system during installation.
The soundbar needs to remain powered on throughout the networking process in the app as well.
Connect Mobile Device to Soundbar
In order for your mobile device to facilitate connecting the Bose soundbar to Wi-Fi, it will need to establish its own temporary link directly to the speaker itself.
You can do this wirelessly via Bluetooth or with a physical auxiliary audio cable.
Bluetooth is generally more convenient as long as your smartphone or tablet has Bluetooth connectivity.
Just select the option to add a new Bose product within the app and it will provide onscreen instructions to put your soundbar into Bluetooth pairing mode.
The steps to activate this setting may vary slightly by specific soundbar model, but typically involve pressing and holding a connection or Bluetooth button on the speaker or remote control.
This will allow your mobile device to find the soundbar and connect them directly during the Wi-Fi setup.
Alternatively, if your mobile device lacks Bluetooth support, use the included auxiliary cable and connect it between the headphone jack on your smartphone/tablet and the auxiliary input on the Bose soundbar.
Either connection method provides the temporary audio link necessary for the Bose Connect app to find and install Wi-Fi on the compatible speaker system.
Open Bose Connect App and Select Soundbar
With your mobile device now wirelessly tethered or wired directly to your Bose sound platform via Bluetooth or auxiliary cable, you can proceed with the Wi-Fi setup within the Bose Connect application.
Open the app on your smartphone or tablet and select the option to add or set up a new product. The app will automatically being searching for compatible Bose devices that are powered on and connected to your mobile device.
The name of your specific Bose soundbar model should appear in a list of available devices to choose from.
Keep in mind you may see other Bose products like headphones or Bluetooth speakers show up here as well.
Make sure to identify your soundbar model name and choose that one specifically.
The app only allows you to connect one device at a time to Wi-Fi.
After confirming the correct soundbar is selected within the Bose Connect app, it will prompt you to press the Wi-Fi connection button on the soundbar itself or ask if you want to connect it to a wireless network.
Both of these actions initiate the steps needed to get your speaker online.
Follow Onscreen Instructions
Once your specific Bose soundbar model is selected and you confirm connecting it to Wi-Fi, the Bose Connect app will provide clear onscreen instructions for getting your speaker onto your
home wireless network.
The app will have you confirm which Wi-Fi network you want your soundbar to join from a list it finds in your area.
Simply choose the correct network name for your router connection at home.
Also enter the Wi-Fi password associated with your wireless network when prompted by the app.
Precision is important here, so double check that the password is typed correctly in Bose
Connect before proceeding.
Once the network name and password are verified, the app may indicate it is sending Wi-Fi settings to your Bose soundbar and that the process could take a few minutes.
Follow any other cues provided on your mobile device as the speaker attempts to join the network.
The app generally guides you each step of the way until the soundbar finally connects.
Don’t close Bose Connect or deactivate the Bluetooth/auxiliary connection before the Wi-Fi configuration completes.
You may need to retry certain steps along the way or reboot your speaker and router if issues arise.
But ideally the onscreen instructions lead to a successful network connection on the first try without any hiccups.
Just realize the process could take a few attempts depending on your Wi-Fi signal strength and overall network configuration at home.
Connect Soundbar to Wi-Fi Network
If all goes smoothly following the step-by-step directions within the Bose Connect app, your compatible soundbar should now join the designated home Wi-Fi network.
You may also notice indicator lights on the front of the soundbar itself to denote an active Wi-Fi connection after finishing setup.
This means the device can now directly access streaming music services, internet radio stations, software updates, and everything else your wireless network provides.
Feel free to reconnect Bluetooth headphones or mobile devices directly to your Bose sound platform again now that Wi-Fi configuration is done.
The important aspect is that whenever the speaker itself powers on, it will automatically join your pre-programmed Wi-Fi network without any manual intervention necessary.
Revisit the Bose Connect app at any time to manage your connected Bose systems, adjust settings, and stream content wirelessly from mobile devices even when not home.
But that initial networking process only needs to be completed once typically.
Enjoy Streaming Music Wirelessly
Now situated securely on your home Wi-Fi connection, internet-enabled Bose soundbars grant wireless access to practically limitless music, entertainment, and customization features.
Stream songs or playlists directly from your smartphone, tablet, or computer over the network to your speaker without ever leaving the couch.
Or tap into streaming music services like Spotify, Apple Music, Pandora, Deezer, and Amazon Music, all which typically come pre-installed on connected Bose speakers.
Once online, you can also enable voice assistants like Amazon Alexa or Google Assistant to play music via voice commands as well as check weather, control smart home devices, and more using the same sound system.
Your Wi-Fi-equipped Bose soundbar essentially serves as the central hub for an entire home audio experience.
Get whole-home audio by pairing compatible wireless rear speakers and even upgrade to real surround sound with additions like Bass Modules and rear surrounds.
You can manage audio for a TV, turntable, computer, or anything else over Wi-Fi while also using the Bose Connect app to adjust settings from mobile devices no matter your location.
So enjoy full wireless streaming freedom courtesy of your high-tech, Wi-Fi-compatible Bose soundbar now joined to your home network.
Conclusion
Connecting your Bose soundbar to Wi-Fi opens up a whole new world of wireless music and entertainment options.
Following the step-by-step process within the Bose Connect app allows nearly any compatible soundbar to join your home network securely.
So tap into unlimited music streaming and customization features for an immersive listening experience throughout your living space.
How Do Vertical Turntables Work? A Spin on Traditional Record Players
Imagine a record player that defies gravity, spinning your vinyl vertically like a mesmerizing musical wall clock. That’s exactly what vertical turntables do, and they’ve been turning heads (and records) in the audio world lately.
As a long-time audio enthusiast and vinyl collector, I’ve seen my fair share of audio gear, but vertical turntables still manage to stop me in my tracks. In this article, we’ll dive into the fascinating world of these upright record players, exploring how they work and whether they’re worth adding to your audio setup.
How Do Vertical Turntables Work?
Vertical turntables work by mounting the platter and tonearm assembly perpendicular to the ground, allowing records to spin vertically. The basic components remain similar to traditional turntables, including a motor, platter, tonearm, and cartridge.
However, the orientation is rotated 90 degrees, with specially designed mechanisms to maintain proper tracking force and stylus alignment despite gravity’s pull. The record is typically held in place by a center spindle and sometimes additional clamps or supports to prevent slippage.
While the concept might sound simple, a lot of engineering goes into making sure these vertical players can reproduce sound accurately. Trust me, it’s not as easy as just tipping a regular turntable on its side!
We’ll explore the nitty-gritty details more deeply below, but that’s the gist of how these gravity-defying audio marvels work.
The Mechanics Behind Vertical Turntables
Alright, let’s get into the nuts and bolts of these vertical vinyl spinners. I remember the first time I saw one at a hi-fi show – I was scratching my head trying to figure out how it didn’t just drop the needle and ruin the record!
The key components of a vertical turntable are pretty much the same as their horizontal cousins. You’ve got your platter where the record sits, but it’s mounted vertically.
Then there’s the motor that spins the platter, just like in a regular turntable. The tonearm is where things get tricky – it needs to be carefully balanced to apply the right amount of force horizontally instead of vertically.
And of course, you’ve got your cartridge and stylus that read the grooves in your record, but they’re working against gravity in this setup.
The real magic happens in how these parts are engineered to work together vertically. The tonearm, for instance, often uses a counterweight system that’s more complex than what you’d find in a traditional turntable.
This ensures that the stylus applies the correct pressure to the record grooves despite being sideways.
I once tried to DIY a vertical turntable setup (don’t ask – it didn’t end well for my records), and let me tell you, getting that tracking force right is no joke. Professional vertical turntables use precision engineering to make sure the stylus doesn’t dig too deep into the grooves or skip across them.
Another cool thing about vertical turntables is how they handle the center spindle. Some models have a special clamp or stabilizer that holds the record securely in place.
Others rely on a slightly angled platter that uses gravity to keep the record from sliding off. It’s pretty ingenious when you think about it!
The motor in a vertical turntable also needs some special consideration. In horizontal turntables, the weight of the record and platter helps maintain consistent rotation speed.
But in a vertical setup, that weight is distributed differently. To compensate, vertical turntables often use more powerful motors or advanced speed control systems to ensure your records spin at the perfect 33 1/3 or 45 RPM.
And let’s not forget about the base or mounting system. Vertical turntables need a sturdy foundation to prevent wobbling or vibrations.
Some models come with their own stands, while others are designed to be wall-mounted. Either way, proper isolation is crucial for getting the best sound quality.
Advantages of Vertical Turntables
Now, you might be wondering, “Why bother with all this vertical business?” Well, let me tell you, these upright players have some pretty nifty advantages.
First off, there’s the space-saving design. This is probably the biggest selling point.
I live in a tiny apartment, and wall space is much easier to come by than shelf space. Vertical turntables can be mounted on the wall or stood up on a narrow surface, making them perfect for small living spaces.
When I first got mine, I was amazed at how much room it freed up on my audio rack. Suddenly, I had space for more vinyl!
Then there’s the unique aesthetic appeal. Let’s face it, these things look cool as heck.
I’ve had friends come over and gawk at my vertical setup like it’s a piece of modern art. It’s a great conversation starter and can really add a wow factor to your room decor.
I’ve even seen some folks use their vertical turntables as the centerpiece of their living room design. Talk about functional art!
Some folks swear that vertical playback leads to less dust accumulation on the record surface. This one’s a bit controversial, and I’m not entirely convinced, but I have noticed that it’s easier to see and clean dust off a vertical record.
Plus, there’s something satisfying about giving your record a quick brush before sliding it into place on the vertical platter.
And here’s a benefit I didn’t expect – easier record changes. This might sound silly, but I love how easy it is to swap records on a vertical player.
No more awkward reaching around the dust cover – just pop the old one off and slide the new one on! It’s made me more likely to explore different albums in my collection instead of letting the same record play over and over.
One time, I brought my vertical turntable to a friend’s house party, and it was a hit. People were fascinated by watching the record spin vertically, and it definitely added a unique vibe to the evening.
Just be careful if you’ve had a few drinks – trying to put a record on upright can be a bit of a challenge when you’re seeing double!
There’s also something to be said for the novelty factor. In a world where digital streaming is king, having a vertical turntable is a way to celebrate the physicality of vinyl in a whole new way.
It turns the act of playing a record into a visual experience as much as an auditory one.
Challenges and Considerations
Now, I don’t want to sound like I’m all sunshine and roses about vertical turntables. They do come with their fair share of challenges and considerations.
The biggest issue is gravity’s effect on the stylus and tracking force. Fighting against gravity can potentially lead to increased wear on both your records and the stylus.
High-quality vertical turntables are designed to minimize this, but it’s still a factor to consider. I’ve found that I need to replace my stylus a bit more frequently with my vertical setup compared to my old horizontal player.
Some audiophiles argue that the vertical orientation can affect the cartridge’s ability to track the grooves accurately, potentially leading to subtle changes in sound quality. Personally, I haven’t noticed a huge difference, but your mileage may vary.
I will say that it took me a while to get my vertical turntable dialed in just right, and at first, I did notice some tracking issues, especially on more complex recordings.
Another thing to keep in mind is that not all vertical turntables can handle every record size or weight. I learned this the hard way when I tried to play a heavyweight 180g pressing on my first vertical setup.
Let’s just say it didn’t end well for the turntable or my wallet. Now I’m much more careful about checking the specs of my player against the records I want to play.
Vertical turntables can also be more susceptible to vibrations, especially if wall-mounted. I once had mine set up near a busy street, and I swear I could hear the bass from passing cars in my music!
It took some experimenting with isolation pads and strategic placement to get it just right. If you’re in an apartment or have wooden floors, you might need to put in some extra effort to isolate your vertical turntable properly.
Lastly, while vertical turntables are gaining popularity, there are still fewer options available compared to traditional models. This can make it harder to find one that perfectly fits your needs and budget.
When I was shopping for mine, I found that the price range was pretty wide, with fewer mid-range options than I would have liked.
It’s worth noting that many of these challenges can be mitigated with proper setup and high-quality equipment. But they’re definitely something to keep in mind if you’re considering making the switch to vertical.
Don’t let these challenges scare you off, though – in my experience, the unique benefits of vertical turntables can make the extra effort worthwhile.
Are Vertical Turntables Any Good?
Alright, let’s get down to brass tacks – are these gravity-defying record players actually any good? Well, like most things in the audio world, the answer is: it depends.
In terms of sound quality, a well-designed vertical turntable can perform just as well as its horizontal counterpart. I’ve listened to some vertical setups that absolutely blew me away with their clarity and detail.
However, I’ve also encountered some that left a lot to be desired.
The key factors that determine the quality of a vertical turntable are the engineering and build quality, the cartridge and stylus quality, and proper setup and calibration. A poorly designed vertical turntable will struggle with tracking and could potentially damage your records.
Just like with regular turntables, the cartridge and stylus make a huge difference in sound quality. And proper setup is even more critical for vertical turntables – I once spent an entire weekend tweaking and adjusting my vertical setup to get it just right.
When it comes to user experience, vertical turntables can be a mixed bag. On one hand, they’re often easier to access and can make record changing a breeze.
On the other hand, some people find the vertical orientation less intuitive, especially if they’re used to traditional turntables. I remember the first few times I used mine, I felt a bit like I was learning to play records all over again!
Durability and longevity are areas where vertical turntables might lag behind their horizontal cousins. The added stress on components due to the vertical orientation can potentially lead to more wear and tear over time.
However, high-end models are built to last and can be just as durable as traditional turntables. I’ve had my current vertical setup for about three years now, and it’s still going strong with regular maintenance.
In my experience, vertical turntables can be fantastic if you choose a quality model and set it up correctly. Are they inherently better than horizontal turntables?
Not necessarily. But they can certainly hold their own in terms of performance while offering unique advantages in terms of aesthetics and space-saving.
I’ve found that my vertical turntable has actually rekindled my love for vinyl. There’s something about the ritual of selecting a record, sliding it into place vertically, and watching it spin that makes the whole experience feel fresh and exciting again.
It’s not just about the sound – it’s about the entire experience of enjoying music.
Choosing the Right Vertical Turntable
If you’re thinking about taking the plunge into the world of vertical turntables, there are a few key features to look out for. You’ll want to find a model with a robust stabilization system – look for good record clamps or stabilizers to keep your vinyl secure.
Adjustable tracking force is crucial for getting the best sound and protecting your records. Of course, a quality tonearm and cartridge are vital for good sound reproduction.
If you’re planning to wall-mount your turntable, pay extra attention to vibration isolation. And don’t forget to check the size and weight capacity – make sure it can handle all the types of records you want to play.
I’d also recommend looking for a model with a dust cover or some kind of protection system. Vertical records can be dust magnets!
Some popular brands that make decent vertical turntables include Gramovox, Miniot, and Auna. Prices can range from a few hundred bucks for entry-level models to several thousand for high-end audiophile versions.
In my experience, the sweet spot is usually in the mid-range – that’s where you start to see really good build quality and sound without breaking the bank.
When I was shopping for my vertical turntable, I made the mistake of going for the cheapest option I could find. Big mistake!
It sounded terrible and I was constantly worried it was going to drop my precious vinyl. I ended up saving up for a mid-range model, and the difference was night and day.
The sound quality improved dramatically, and I felt much more confident about the safety of my records.
Remember, a turntable is an investment in your music enjoyment. It’s worth spending a bit more to get something that will do justice to your record collection and stand the test of time.
That being said, don’t feel like you need to mortgage your house for a top-of-the-line model. There are plenty of great options in the middle range that can give you fantastic sound and reliability.
Conclusion
Whew! We’ve taken quite a spin through the world of vertical turntables, haven’t we? From their clever mechanics to their unique challenges and considerations, these upright vinyl players are certainly a fascinating twist on traditional audio gear.
So, are vertical turntables worth it? Well, like many things in the world of audio, it really comes down to your personal preferences and needs.
If you’re short on space, love unique design, and are willing to put in the effort to set up and maintain your turntable properly, a vertical model could be a great choice. On the other hand, if you’re a die-hard audiophile who demands the absolute best in sound quality or if you have a large collection of heavy or oddly sized records, you might want to stick with a traditional horizontal turntable.
For me, my vertical turntable has become a beloved part of my audio setup. It’s a conversation starter, a space-saver, and most importantly, it brings my music to life in a way that never fails to put a smile on my face.
Yes, it took some getting used to, and yes, I had to put in some extra effort to get it set up just right. But the unique experience it provides has been well worth it.
Just remember, whether your turntable spins horizontally or vertically, the most important thing is the joy it brings you when you drop that needle and let the music play. At the end of the day, that’s what it’s all about – connecting with your music and enjoying the warm, rich sound that only vinyl can provide.
I’d love to hear about your experiences with vertical turntables! Have you tried one?
Love them? Hate them? Got any tips or tricks to share?
Drop a comment below and let’s keep the conversation spinning!
How Does A Bluetooth Record Player Work? Unveiling the Magic of Modern Vinyl
Imagine the warm, rich sound of vinyl combined with the convenience of wireless streaming – that’s the magic of Bluetooth record players!
As a lifelong vinyl junkie and tech enthusiast, I’ve been fascinated by how these gadgets blend the best of both worlds. Stick with me, and I’ll walk you through the ins and outs of these modern marvels that are breathing new life into our beloved vinyl collections.
How Does A Bluetooth Record Player Work?
As a vinyl enthusiast and tech geek, I’ve spent countless hours tinkering with Bluetooth record players.
Here’s the lowdown: A Bluetooth record player works by combining traditional turntable technology with a Bluetooth transmitter. It plays your vinyl records as usual, but instead of connecting to speakers with wires, it sends the audio signal wirelessly to Bluetooth-enabled speakers or headphones.
This clever combo lets you enjoy the classic vinyl experience with modern convenience. Stick around, and I’ll dive deeper into the fascinating world of Bluetooth record players!
The Components of a Bluetooth Record Player
Let me break down the key parts of a Bluetooth record player for you.
Trust me, I’ve taken apart more of these than I care to admit (much to my wife’s chagrin)!
First up, you’ve got your basic turntable mechanism. This is the heart of the operation – a platter that spins your records at just the right speed.
I remember the first time I saw one of these in action as a kid. It was like magic!
Next, there’s the cartridge and stylus. These little guys are the unsung heroes of vinyl playback.
The stylus (that’s the needle to us regular folks) rides those tiny grooves in your record like a microscopic surfer, picking up all those sweet, sweet vibrations.
Now, here’s where things start to get techy – the preamp. This bad boy takes those tiny electrical signals from the cartridge and beefs ’em up so they’re strong enough to be heard.
Without it, your tunes would be quieter than a mouse in church!
The star of the show in a Bluetooth record player is, you guessed it, the Bluetooth transmitter. This nifty piece of tech takes that amplified signal and broadcasts it wirelessly to your speakers or headphones.
It’s like a tiny radio station just for your vinyl!
Finally, you’ve got your control panel. This is where you work your magic – start and stop the platter, adjust the speed, and most importantly, pair with your Bluetooth devices.
I’ve fumbled with more of these than I care to admit, especially after a glass of wine or two!
The Vinyl Playback Process
Alright, let’s get into the nitty-gritty of how these babies actually play your records.
It’s a process that never fails to amaze me, even after all these years.
So, you drop your favorite LP onto the platter, and the magic begins. The record starts spinning – 33 1/3 RPM for most albums, but some oldies might need 45 or even 78 RPM.
(Pro tip: make sure you’ve got the speed right, or you’ll end up with some funky-sounding tunes!)
As the record spins, that stylus I mentioned earlier starts tracking the grooves. It’s like a tiny explorer, following the path laid out in the vinyl.
Every bump and dip in those grooves represents the sound waves of your music. Pretty cool, huh?
Now, here’s where it gets really interesting. Those mechanical vibrations from the stylus get converted into electrical signals by the cartridge.
It’s like translating the language of the grooves into something your audio system can understand.
But wait, there’s more! Those electrical signals are pretty weak at this point. That’s where our friend the preamp comes in.
It boosts those signals, making them strong enough to be heard. Without this step, you’d be straining to hear anything at all!
Finally, we get to the Bluetooth part. Once the signal is nice and strong, the Bluetooth transmitter takes over.
It packages up that audio signal and sends it out into the ether, ready to be picked up by your wireless speakers or headphones.
And voila! Just like that, you’re listening to the warm, rich sound of vinyl, without a wire in sight.
It still blows my mind every time I think about it!
Bluetooth Technology in Record Players
Now, let’s talk about the real game-changer here – Bluetooth technology.
This is what sets these record players apart from your grandpa’s old turntable (no offense, Gramps).
Bluetooth record players typically use Bluetooth 4.0 or newer protocols. These newer versions are a real step up from the early days of Bluetooth.
They offer better sound quality and more stable connections. Trust me, I remember the days of constant dropouts and static – not fun!
The pairing process is usually pretty straightforward. You put your speakers or headphones in pairing mode, hit the pairing button on your record player, and boom – you’re connected!
Of course, there’s always that one stubborn device that refuses to pair. I swear, I’ve nearly thrown a few out the window in frustration!
When it comes to range, most Bluetooth record players can transmit up to about 33 feet (10 meters) without obstacles. But let’s be real, who’s listening to their records from that far away?
I like to be close enough to smell the vinyl (weird, I know, but don’t knock it till you’ve tried it).
One cool thing about these players is that many of them offer multiple connectivity options. So if you’re feeling old school, you can still hook up your wired speakers.
It’s like having the best of both worlds!
Advantages of Bluetooth Record Players
Let me tell you, Bluetooth record players have some serious perks.
I’ve been using one for a few years now, and I’m still discovering new things to love about it.
First off, the wireless convenience is a game-changer. No more tripping over speaker wires or trying to figure out which cable goes where.
I can’t tell you how many times I’ve nearly face-planted trying to change a record on my old setup!
Another big plus is compatibility with modern audio systems. Got a fancy new Bluetooth soundbar?
No problem! Want to listen on your wireless headphones? Easy peasy!
It’s like your vinyl collection suddenly learned to play nice with all your other tech.
Space-saving is another huge advantage. Without all those wires, you can set up your turntable pretty much anywhere.
I’ve got mine on a floating shelf, and it looks slick as hell.
And let’s not forget about portability. Some Bluetooth record players are designed to be taken on the go.
Vinyl picnic in the park, anyone? Just be careful – I learned the hard way that sand and record players don’t mix!
Potential Drawbacks and Solutions
Now, I’ll be straight with you – Bluetooth record players aren’t all sunshine and rainbows.
They’ve got their quirks, but don’t worry, I’ve got some tips to help you out.
First up, let’s talk audio quality. Some audiophiles argue that Bluetooth compression can affect sound quality.
And yeah, if you’re really picky, you might notice a difference. But for most of us casual listeners, the convenience far outweighs any minor loss in quality.
Plus, with newer Bluetooth codecs like aptX, the difference is getting smaller all the time.
Latency can be an issue with some setups. You might notice a slight delay between the needle dropping and the sound coming out of your speakers.
It’s usually not a big deal, but if it bugs you, look for players and speakers that support low-latency Bluetooth codecs.
For portable models, battery life can be a concern. Nothing worse than your tunes cutting out mid-song!
I always make sure to keep mine charged, and I carry a power bank just in case. Better safe than sorry, right?
If you run into pairing problems (and trust me, we all do), try the old “turn it off and on again” trick.
Works like a charm most of the time. And if all else fails, don’t be afraid to consult the manual.
I know, I know, reading instructions feels like admitting defeat, but sometimes it’s necessary!
Choosing the Right Bluetooth Record Player
Alright, so you’re sold on the idea of a Bluetooth record player.
But how do you choose the right one? Don’t worry, I’ve been through this rodeo a few times, and I’ve got some tips for you.
First off, look for key features like Bluetooth version (newer is generally better), motor type (belt-drive for less noise, direct-drive for more accurate speeds), and additional connectivity options.
Trust me, you’ll appreciate having the flexibility to connect to different devices.
When it comes to brands, there are some solid options out there. Audio-Technica, Sony, and Pro-Ject all make great Bluetooth turntables.
But don’t just take my word for it – do your research and read user reviews. Real-world experiences can tell you a lot more than a spec sheet.
Price-wise, you’re looking at anywhere from $100 for a basic model to over $1000 for high-end audiophile gear. My advice?
Start in the middle range if you’re serious about sound quality but don’t want to break the bank. You can always upgrade later if you catch the vinyl bug bad (and trust me, it’s contagious).
One last tip: pay attention to the cartridge quality. A good cartridge can make a world of difference in sound quality.
I learned this the hard way after suffering through months of subpar sound before finally upgrading my cartridge. What a difference!
Conclusion
Whew! We’ve covered a lot of ground, haven’t we?
From the inner workings of these modern marvels to the pros and cons of wireless vinyl playback, we’ve taken a deep dive into the world of Bluetooth record players.
As we wrap up, I can’t help but get excited about the future of this technology. We’re seeing more and more innovative features hitting the market, like turntables with built-in streaming capabilities and even smart home integration.
Imagine telling your virtual assistant to drop the needle on your favorite album – the future is now, folks!
But at the end of the day, what really matters is the music. Whether you’re a die-hard vinyl enthusiast or just dipping your toes into the world of analog audio, Bluetooth record players offer a unique blend of classic sound and modern convenience.
So go ahead, dust off those old records, fire up your Bluetooth speakers, and lose yourself in the warm, rich tones of vinyl.
And hey, if you’ve got any cool experiences with Bluetooth record players, drop a comment below. I’d love to hear your stories!
Remember, in the world of audio, there’s always something new to discover.
So keep exploring, keep listening, and most importantly, keep the music playing. Rock on, vinyl lovers!
Turntable Repair Guide: How To Fix a Broken Record Player
In an age where digital streaming dominates the music landscape, there’s something magical about the warm, rich sound of vinyl records.
But what happens when your beloved turntable starts acting up?
Don’t worry, I’ve got you covered! As a long-time vinyl enthusiast and self-taught turntable tinkerer, I’ve faced my fair share of record player woes.
In this guide, I’ll walk you through the ins and outs of turntable repair, sharing some hard-earned wisdom along the way.
Turntable Repair Guide: How To Fix a Broken Record Player
Alright, let’s cut to the chase. If you’re reading this, chances are your record player is giving you grief, and you’re itching to get it spinning again.
The good news is that many turntable issues can be fixed with a bit of patience and some elbow grease. From my experience, the key to successful turntable repair lies in proper diagnosis, having the right tools, and a willingness to learn.
In a nutshell, fixing a broken record player involves identifying the problem, gathering the necessary tools, and then following step-by-step repair techniques. Sometimes it’s as simple as a good cleaning, while other times you might need to replace a belt or realign the cartridge.
Don’t worry if that sounds Greek to you right now – we’ll dive deeper into all of this below. But first, let me assure you: with the right guidance, you can bring most turntables back to life!
Now, let’s roll up our sleeves and explore the wonderful world of turntable repair in more detail. Trust me, by the end of this guide, you’ll be well-equipped to tackle most common record player issues!
Identifying the Problem
Man, I remember the first time my trusty Technics SL-1200 started acting up. I was in the middle of a killer jazz session when suddenly, the music sounded like it was underwater.
Talk about a mood killer! But before I could fix it, I had to figure out what was wrong.
When it comes to turntable troubles, you’ve got to play detective. Is there no sound at all, or is it just weak?
Maybe the audio is distorted or skipping? Or perhaps the speed is all over the place?
Each symptom points to a different underlying issue.
Here are some common problems you might encounter:
No power or weak sound: This could be anything from a loose connection to a faulty amplifier.
Skipping or distorted audio: Often, this is related to the stylus (needle) or cartridge alignment.
Speed inconsistencies: Usually a sign of belt or motor issues.
Tonearm problems: This might involve the tonearm bearings or anti-skate mechanism.
Proper diagnosis is crucial – you don’t want to be replacing belts when the real problem is a dirty stylus! Trust me, I’ve made that mistake before, and it’s a waste of time and money.
Essential Tools for Turntable Repair
Before we dive into the nitty-gritty of repairs, let’s talk tools. You don’t need a fully stocked electronics lab, but a few key items will make your life a whole lot easier.
Here’s what I keep in my turntable repair kit:
Screwdrivers (both flathead and Phillips)
Needle-nose pliers
Cleaning solutions (isopropyl alcohol works wonders)
Soft, lint-free cloths
A magnifying glass (trust me, those tiny parts can be a pain to see!)
A multimeter for electrical troubleshooting
Turntable-specific tools like a cartridge alignment protractor and a stylus pressure gauge
Oh, and don’t forget about safety! Always unplug your turntable before poking around inside.
I learned that lesson the hard way – let’s just say it involved a small spark and some singed eyebrows. Not my finest moment!
Troubleshooting Common Turntable Issues
Alright, now we’re getting to the good stuff! Let’s break down some common issues and how to tackle them.
No Power or Weak Sound
This one’s a real bummer. You’re all set for a vinyl session, and…
nothing. Check the obvious stuff first – is it plugged in?
Is the amp on? I can’t tell you how many times I’ve had a mini heart attack, only to realize I forgot to flip the power switch!
If that’s not it, check your connections. Loose RCA cables are often the culprit.
If you’re still getting zilch, it might be time to bust out that multimeter and check for continuity in the power supply.
Skipping or Distorted Audio
Ugh, there’s nothing worse than your favorite track skipping like a broken record (pun intended). First things first, check your stylus.
Is it gunked up with dust and debris? A gentle cleaning might do the trick.
If that doesn’t help, your cartridge might be misaligned. This is where that alignment protractor comes in handy.
It takes some patience, but proper cartridge alignment can work wonders for your sound quality.
Speed Inconsistencies
Ever feel like your records are drunk? Speed issues can turn your music into a warped mess.
For belt-drive turntables, a stretched or slipping belt is often the culprit. Replacing the belt is usually a quick and easy fix.
For direct-drive turntables, speed problems might indicate motor issues. This can be trickier to fix, but don’t lose hope!
Sometimes, a good cleaning and lubrication of the motor bearings can get things back on track.
Tonearm Problems
A wonky tonearm can cause all sorts of issues. If your tonearm isn’t moving smoothly, the bearings might need cleaning or lubrication.
And don’t forget about the anti-skate – if it’s not set correctly, your needle might be taking a joyride across your precious vinyl!
Step-by-Step Repair Techniques
Now that we’ve covered the basics, let’s get our hands dirty with some specific repair techniques.
Cleaning and Maintenance
I can’t stress this enough – regular cleaning is your turntable’s best friend! Use a carbon fiber brush to gently clean your records before each play.
For deeper cleaning, a good record cleaning solution can work wonders.
Don’t forget about the stylus! A stylus brush and some cleaning solution can remove built-up gunk and improve your sound quality dramatically.
Belt Replacement
Replacing a turntable belt is like changing a guitar string – it seems daunting at first, but it’s actually pretty simple. First, remove the platter (that’s the big disc your record sits on).
You should see the old belt underneath. Carefully remove it, then loop the new belt around the motor pulley and the inner rim of the platter.
Voila! You’re back in business.
Cartridge Alignment and Replacement
This one’s a bit trickier, but don’t let that scare you off. Start by removing the headshell (the bit at the end of the tonearm that holds the cartridge).
Carefully disconnect the tiny wires – I like to use tweezers for this.
To align the new cartridge, use your alignment protractor. It takes some fiddling, but once you get it right, the improvement in sound quality is mind-blowing!
Motor Repair or Replacement
Okay, I’ll be honest – motor issues can be a real pain. If you’re dealing with a seized motor, sometimes a good cleaning and lubrication can bring it back to life.
But if that doesn’t work, you might be looking at a replacement job.
This is one area where I’d recommend seeking professional help if you’re not confident in your skills. There’s no shame in knowing your limits – better that than accidentally turning your turntable into a very expensive paperweight!
When to Seek Professional Help
Speaking of professional help, let’s talk about when it’s time to wave the white flag. If you’re dealing with complex electrical issues, or if your turntable is a high-end or vintage model, it might be best to leave it to the experts.
When I was starting out, I once tried to “fix” a rare vintage Garrard turntable. Long story short, I ended up with a pile of parts and a very expensive lesson learned.
Sometimes, it’s worth paying for professional repairs to avoid costly mistakes.
Look for repair shops that specialize in turntables. Check reviews and ask fellow vinyl enthusiasts for recommendations.
A good technician can work wonders on even the most stubborn turntable issues.
Preventing Future Turntable Problems
An ounce of prevention is worth a pound of cure, right? Here are some tips to keep your turntable humming along smoothly:
Keep it clean! Regular dusting and cleaning can prevent a host of issues.
Store your turntable properly. Keep it away from heat sources and direct sunlight.
Use a dust cover when not in use.
Replace your stylus regularly – a worn stylus can damage your records.
Be gentle! Turntables are precision instruments, so handle them with care.
Conclusion
Whew! We’ve covered a lot of ground, haven’t we? From diagnosing common issues to rolling up our sleeves for some hands-on repairs, we’ve explored the ins and outs of turntable maintenance and repair.
Remember, every repair is a learning experience. Don’t get discouraged if things don’t go perfectly the first time – I’ve certainly had my share of facepalm moments!
The key is to approach each problem methodically, armed with knowledge and the right tools.
By keeping your turntable in top shape, you’re not just maintaining a piece of equipment – you’re preserving a unique way of experiencing music. There’s something special about dropping the needle on a vinyl record, hearing that initial crackle, and being transported by the warm, rich sound.
So go forth and tinker, my fellow vinyl enthusiasts! And hey, if you’ve got any turntable repair stories or tips of your own, drop them in the comments below.
After all, the vinyl community is all about sharing the love of music – and the occasional repair horror story!
Now, if you’ll excuse me, I’ve got a date with my recently repaired turntable and a stack of jazz records. Happy listening, folks!