How Many Acoustic Panels Do You Need? Room-by-Room Guide [2026]
How many acoustic panels do I need? It’s the right question — but the honest answer is probably fewer than you think, only if you place them where they’ll actually do something.
Most people either overbuy (40 panels when 12 would do) or underbuy (4 panels scattered randomly when you needed 16 in the right spots). Both mistakes waste money because nobody explains the actual formula up front.
One calculation works for 90% of rooms. Once you know the coverage formula, the guesswork disappears and you stop overspending on treatment that doesn’t move the needle.
You’ll get the exact formula first, then room-by-room breakdowns to help you buy the right number on the first order.
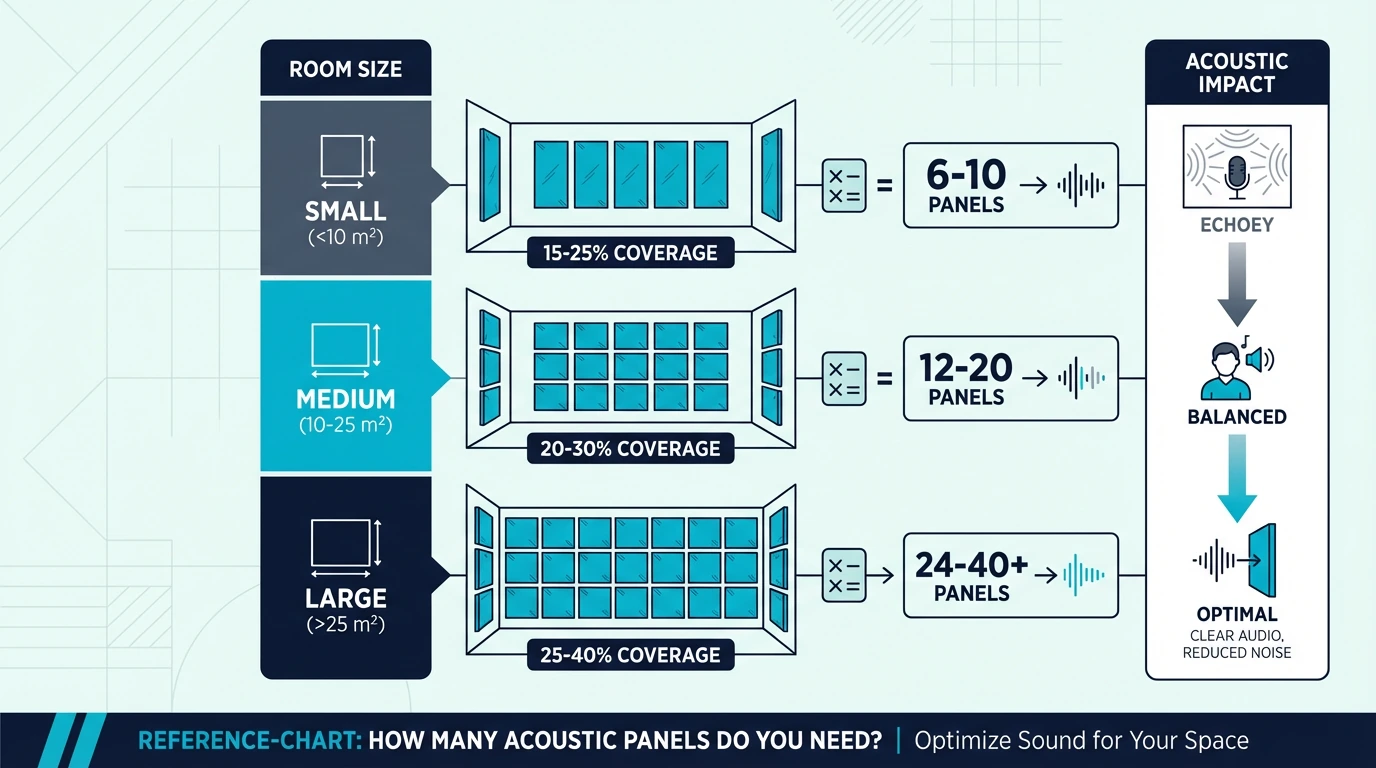
Most rooms need 20-30% wall coverage for noticeable improvement. Calculate your wall surface area, multiply by your target percentage, and divide by panel size.
A typical 10×12 room needs 8-12 standard panels for a night-and-day difference in echo and clarity.
How Many Acoustic Panels Do You Actually Need?
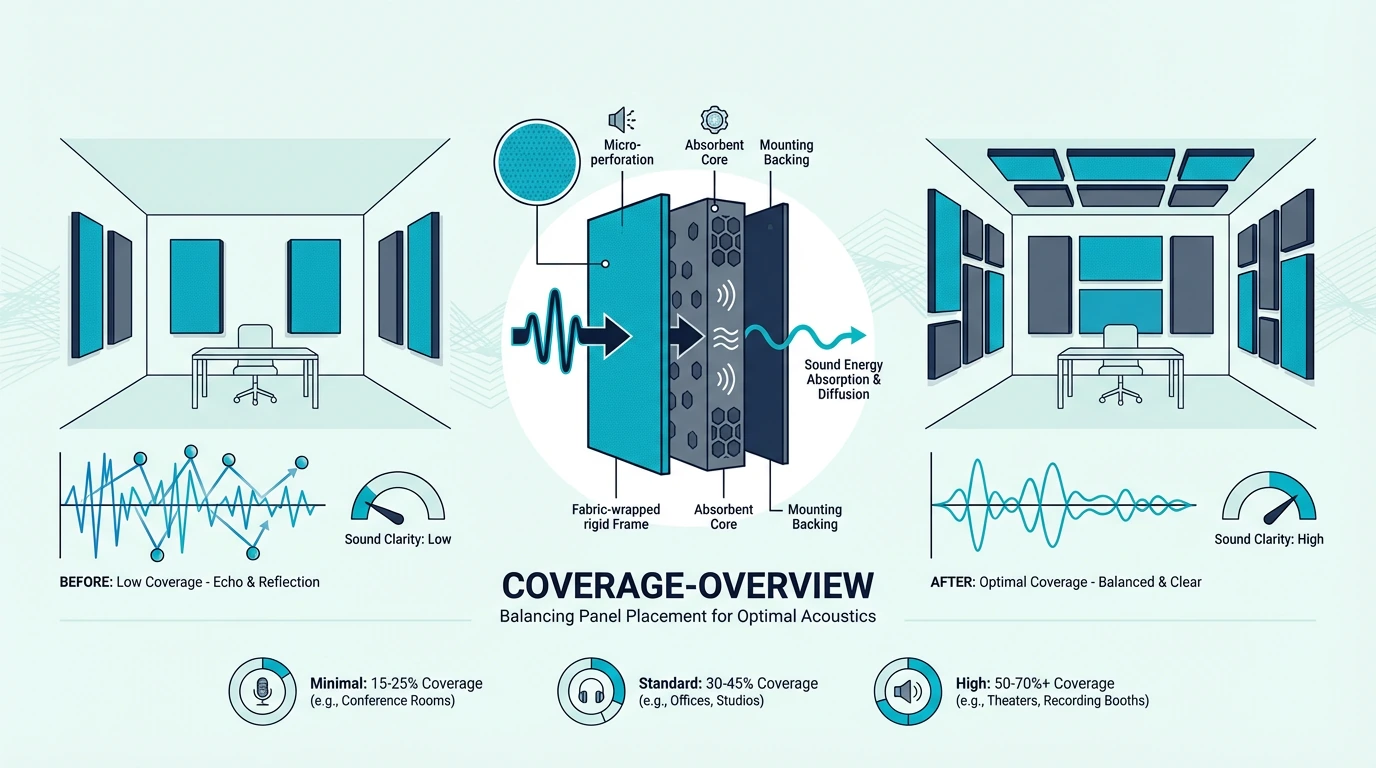
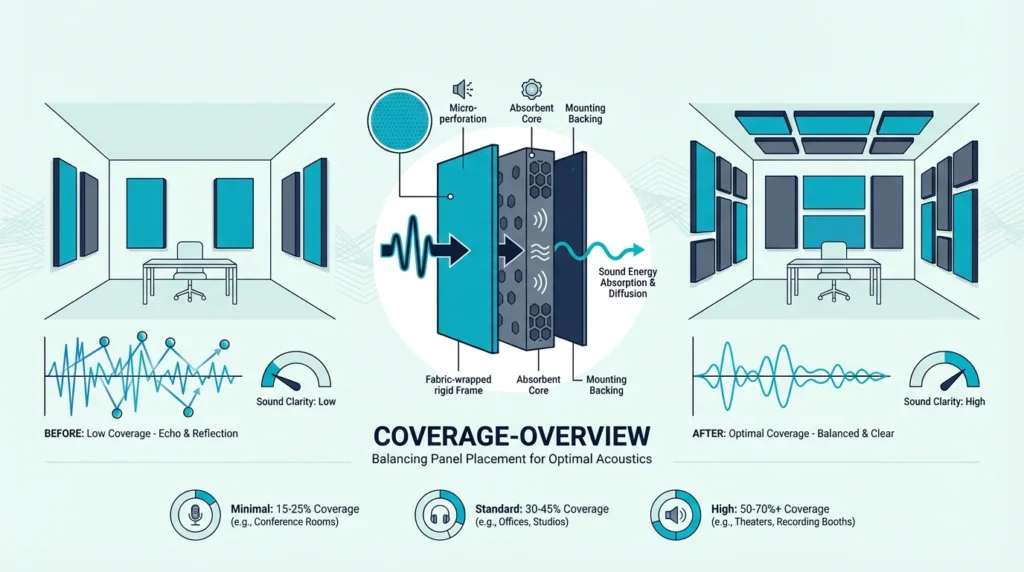
Reality check: you probably need fewer panels than you think, but you need them in the right places. The magic number for most rooms falls between 20-40% wall coverage — and that range exists because different goals require different treatment levels.
The lower end (20-25%) handles echo reduction and basic room improvement. Push toward 30-40% and you’re treating for mixing accuracy — two things determine where you land: the baseline coverage rule and your room’s specific quirks.
What’s the Basic Coverage Rule?
Think of wall coverage like paint — you’re not trying to coat every surface, just enough to change the room’s character. Twenty percent coverage is where acoustic treatment starts making an audible difference.
Below that threshold, you’re decorating rather than treating. Buying 30 panels when you need 12 wastes money and can actually make your room sound worse — over-treated rooms feel uncomfortably dead, like recording inside a sleeping bag.
The goal is controlled acoustics, not silence. You can always add panels later, but you can’t un-buy the ones gathering dust in your closet because you over-treated.
What Factors Affect Panel Quantity?
That 20% starting point assumes 8-foot ceilings and standard finishes — but ceiling height alone changes everything. Those gorgeous 12-foot ceilings add 50% more wall surface area that needs treatment.
Hard surfaces multiply your panel needs too. Glass walls, concrete floors, tile, and hardwood all bounce sound aggressively — a room with floor-to-ceiling windows might need 30-35% coverage where a carpeted space with curtains only needs 20%.
Your purpose matters as well. Podcast recording is forgiving since you’re treating a small zone around one microphone, but mixing music demands accuracy across your entire listening position.
How Do You Calculate Acoustic Panel Coverage?
Those factors set the range — but the actual math turns abstract percentages into real numbers you can act on. The formula handles it with nothing harder than multiplication and division.
You need three numbers: total wall surface area, target coverage percentage, and panel size. Measuring your room takes less than five minutes, and the formula handles the rest.
What’s the Simple Coverage Formula?
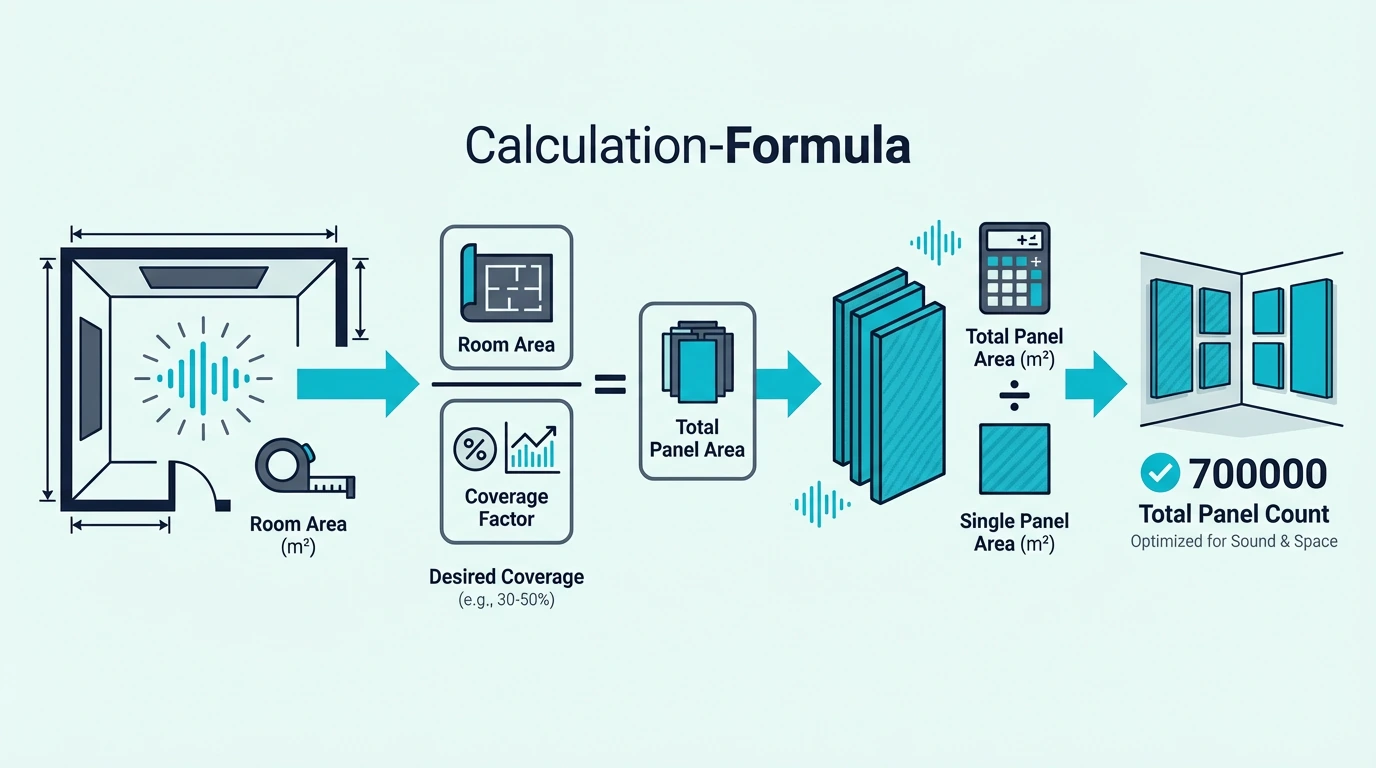
That formula is the industry standard for estimating acoustic treatment, and it looks like this:
Wall Surface Area (sq ft) × Coverage % ÷ Panel Size (sq ft) = Number of PanelsA real example makes it concrete. A 12×12 room with 8-foot ceilings has four walls totaling 384 square feet of surface area.
At 25% coverage you need about 96 square feet of panels. Standard 2×4 foot panels are 8 square feet each, so 96 ÷ 8 = 12 panels.
That’s your starting point, not a commandment. The formula flexes with your goals — drop to 20% for lighter treatment, push to 35% for serious studio control.
Quick Panel Calculator
Get a fast estimate for your room
How Do You Measure Your Room?
The formula needs real measurements — grab a tape measure and multiply each wall’s length by your ceiling height. Add all four walls together for total wall surface area.
For that 10×12 room with 8-foot ceilings: (10×8) + (12×8) + (10×8) + (12×8) = 352 square feet. Don’t subtract windows or doors — their reflective surfaces need treatment nearby anyway, so the slight overestimate actually helps.
Got an L-shaped room or weird angles? Measure each section separately and add them up — the formula is guidance, not gospel, and being within 10-15% still delivers excellent results.
Get Studio Tips Weekly
Join 5,000+ creators getting acoustic treatment advice every week.
No spam. Unsubscribe anytime.How Many Panels for Different Room Sizes?
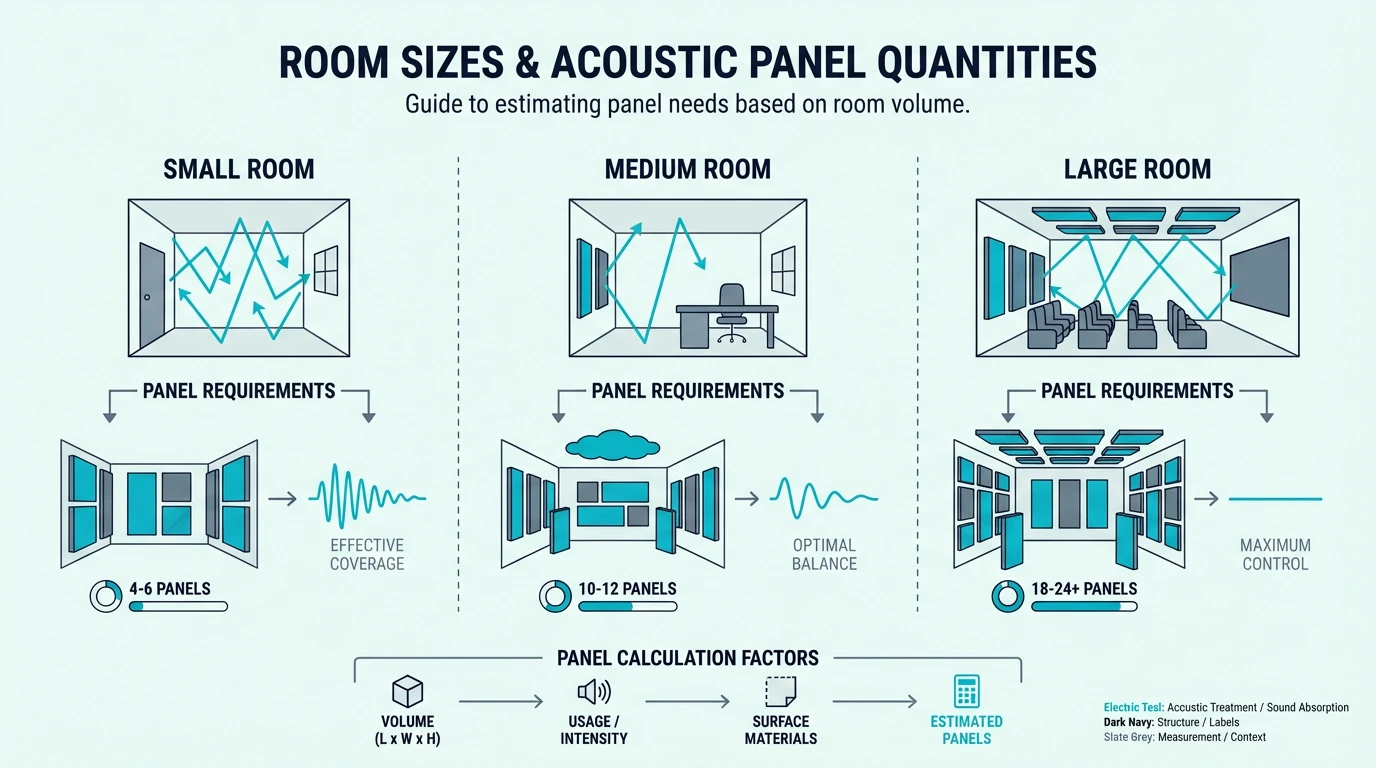
The formula translates directly into practical numbers. Pre-calculated counts at 25% coverage — the sweet spot for most home applications — show what each room size actually needs.
These assume 8-foot ceilings and standard 2×4 foot panels. For higher ceilings, scale up proportionally using the coverage formula.
How Many Panels for a 10×10 Room?
Starting at the smallest typical footprint, a 10×10 room has 320 square feet of wall space. At 25% coverage, you need about 80 square feet of panels — that’s 10 standard 2×4 panels.
Start with 6-8 at first reflection points and evaluate. Even in this compact room, you’ll notice improvement after the first few panels go up.
Strategic panel positioning at reflection points matters more than raw panel count. Six panels at first reflections will outperform twelve scattered randomly.
How Many Panels for a 12×12 Room?
Stepping up from that 10×10 footprint to 12×12 gives you 384 square feet of walls — the most common size for home studios. At 25% coverage, that translates to 12 panels.
Place 6 at first reflection points on side walls, 4 behind your desk or monitors, and 2 on the back wall. This distribution addresses the acoustic problems that actually matter for recording and mixing.
The studio panel guide ranks the panels that perform best in rooms this size.
How Many Panels for Larger Rooms?
Those 12-panel counts might suggest bigger rooms scale proportionally — they don’t. The additional air volume provides natural absorption that smaller rooms lack, so coverage percentages actually drop.
A 15×20 room has 560 square feet of walls. At just 20% coverage, you need about 112 square feet — roughly 14 panels.
A 20×20 room pushes to 640 square feet, requiring 16 panels minimum at 20% coverage.
Focus on first reflection points first in large spaces, then expand outward based on how the room responds. The coverage formula becomes your planning tool — use it to budget before you buy.
How Many Panels for Different Room Types?
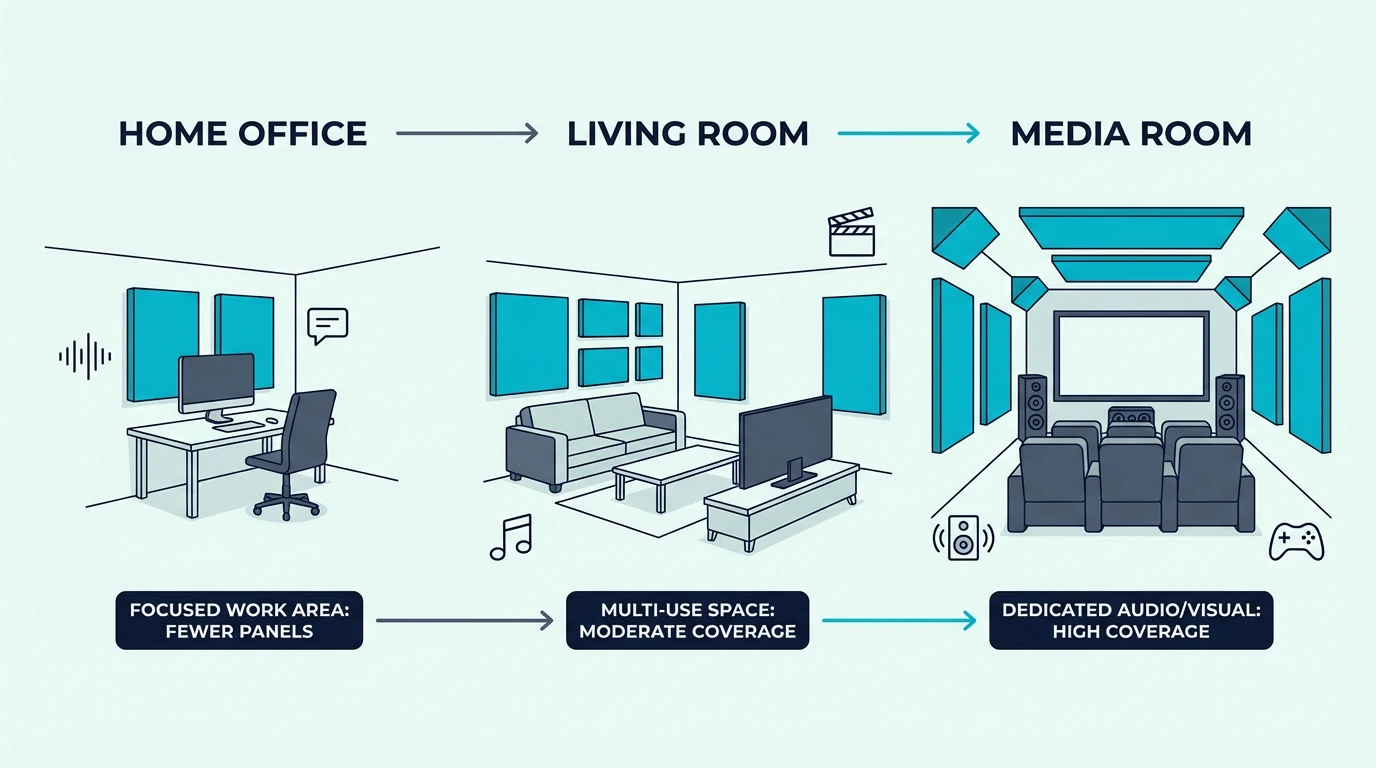
The numbers above work as baselines, but your room’s purpose shifts those targets meaningfully. A bedroom needs different treatment than a mixing studio, even when dimensions match exactly.
Studios need accuracy, theaters need even coverage, offices need echo control, and bedrooms need barely anything — the targets shift with how you actually use the space.
How Many for a Home Studio?
Home studios demand the highest coverage — typically 30-40% — because you need to hear your mixes accurately. There’s no point spending hours on a track if your room is lying to you about how it sounds.
A typical 10×12 studio needs 12-16 panels minimum. Prioritize first reflection points, then behind your monitors, and ideally ceiling treatment if budget allows.
The best acoustic panels for studios prioritize NRC ratings above 0.8. Lower-rated panels mean you need more of them, which affects your budget calculations.
UMIACOUSTICS 4 PCS Acoustic Panels with Hanging Bracket is a stronger benchmark when you want the formula to translate into real treatment, not just more pieces on the wall.

UMIACOUSTICS 4 PCS Acoustic Panels with Hanging Bracket
How Many for a Home Theater?
Where studios optimize for one listening position, home theaters flip that requirement — you want even coverage across all seating positions, not just a sweet spot for one listener.
Plan for 25-35% coverage depending on room size. A dedicated 15×20 theater room typically needs 14-20 panels spread strategically across every wall surface.
Side wall panels control the reflections that muddy dialogue — if you’ve ever strained to understand actors, insufficient side treatment is often the culprit. The home theater panel guide has the placement map for surround-sound setups.
How Many for an Office?
After those higher-coverage studio and theater targets, offices need the least treatment of any room type. You’re optimizing for echo reduction and video call quality, not critical listening accuracy.
Plan for 15-25% coverage. A typical 10×10 home office needs just 6-8 panels to completely transform the space for Zoom calls and focus work.
Focus on the wall behind your monitor and the wall you face during calls. These two surfaces handle the echoes that make you sound like you’re broadcasting from a bathroom.
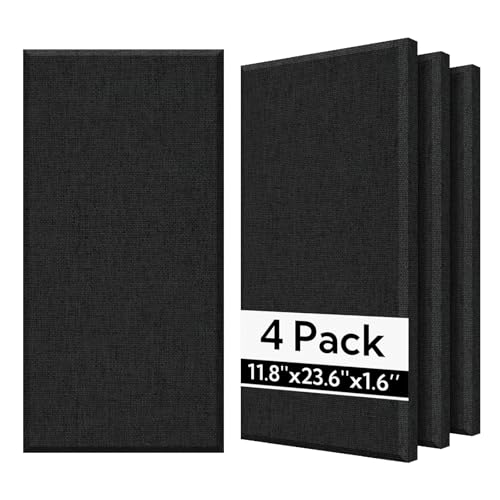
If your office math lands in the 6-8 panel range, a full-size option like ATS Acoustics Sound Absorbing Acoustic Panel 24 × 48 × 2 gets you there faster and with less clutter around the desk.
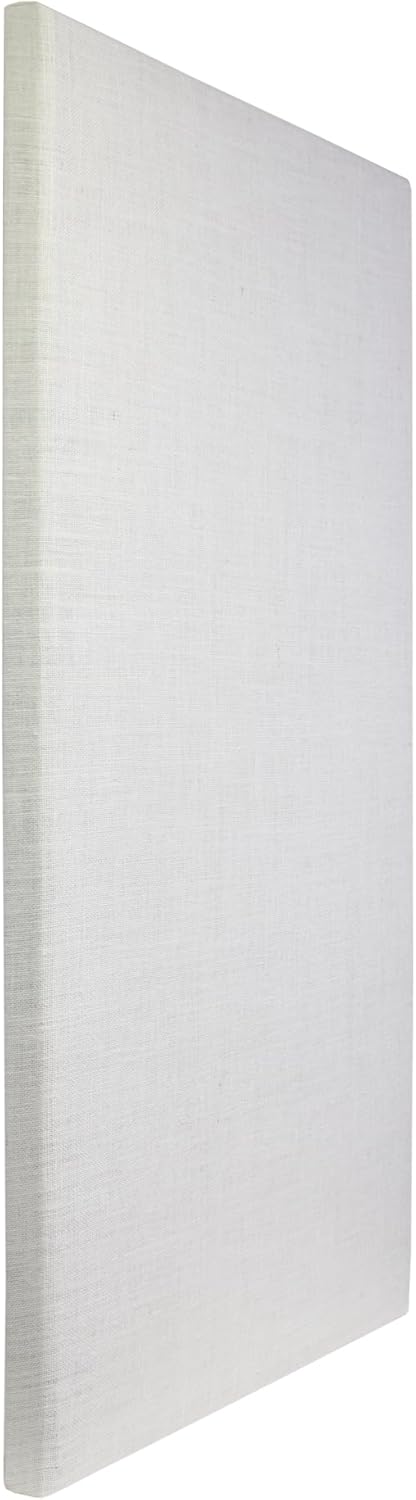
ATS Acoustics Sound Absorbing Acoustic Panel 24 × 48 × 2
How Many for a Bedroom?
Bedrooms need even less than offices — 15-20% coverage handles most acoustic complaints. That translates to 4-6 panels in a typical 10×12 bedroom.
Comfort matters more than precision here. Reduced echo makes the space feel more intimate and sleep-friendly, but heavy treatment would make the room feel claustrophobic — definitely not what you want in a space meant for relaxation.
What’s Light vs Heavy Acoustic Treatment?
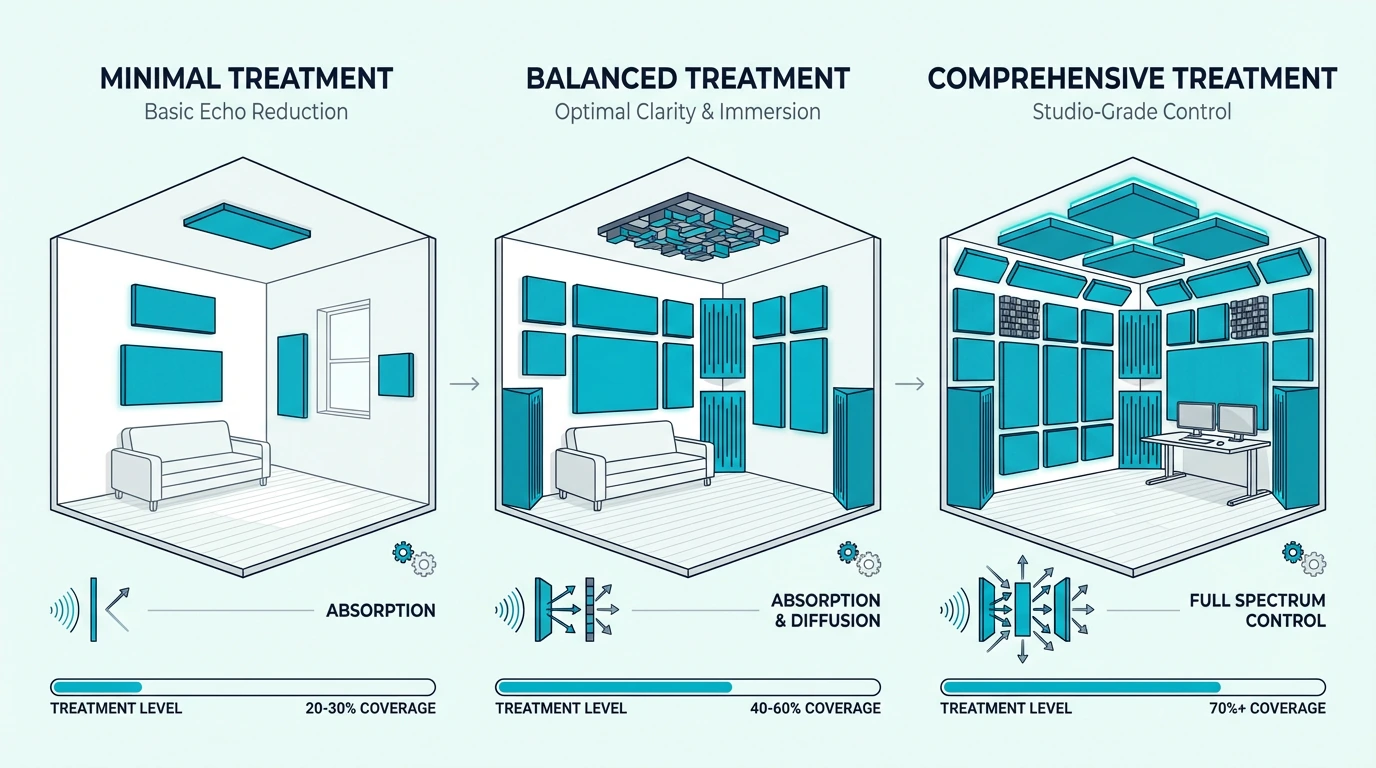
The terms “light treatment” and “heavy treatment” get thrown around without clear definitions. They map directly to the coverage percentages above — same concept, different vocabulary.
These definitions help you budget accurately and avoid the uncomfortable over-treated room that nobody warns you about until it’s too late.
What Is Light Treatment (20-30%)?
Light treatment tackles obvious problems without changing your room’s character. You’ll notice reduced echo, clearer speech, and better recording quality — but the room still sounds alive and natural.
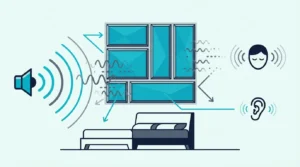
One distinction worth making here: this is acoustic treatment, not soundproofing — panels control reflections inside your room, not noise passing through walls.
This level works perfectly for home offices, bedrooms, and casual listening spaces. It’s the minimum threshold where acoustic treatment becomes audible, and honestly, it’s where most people should start.
Cost stays manageable here — typically a few hundred dollars for a small room using panels rated NRC 0.8 or higher.
What Is Moderate Treatment (30-50%)?
Step past that 30% threshold and things get serious. Your room becomes noticeably controlled, and the audio accuracy gap between light and moderate treatment is immediately obvious.
This is the sweet spot for home studios and dedicated listening rooms. You’re investing real money — two to three times what light treatment costs — but you hear the difference the moment you sit down to mix.
Most audio professionals land somewhere in this range. Full studio treatment exceeds it, but home-based creators rarely need to go further.
What Is Heavy Treatment (50%+)?
Beyond 50% coverage, you’re into territory that even moderate-treatment users find excessive. The room becomes very controlled — some would say uncomfortably so for everyday use.
Most home users find heavy treatment fatiguing. The lack of natural reflections makes spaces feel dead, and conversations become weirdly intimate in ways that are hard to describe until you’ve experienced it.
Only invest this much if you’re running a commercial studio or have very specific acoustic requirements that justify the expense.
How Many Panels Does Each Room Size Need?
This chart distills the numbers into one actionable reference. Bookmark it for when you start shopping.
| Room Size | Wall Area | Light (20%) | Moderate (30%) | Heavy (40%) |
|---|---|---|---|---|
| 8×10 | 288 sq ft | 7 panels | 11 panels | 14 panels |
| 10×10 | 320 sq ft | 8 panels | 12 panels | 16 panels |
| 10×12 | 352 sq ft | 9 panels | 13 panels | 18 panels |
| 12×12 | 384 sq ft | 10 panels | 14 panels | 19 panels |
| 12×15 | 432 sq ft | 11 panels | 16 panels | 22 panels |
| 15×15 | 480 sq ft | 12 panels | 18 panels | 24 panels |
| 15×20 | 560 sq ft | 14 panels | 21 panels | 28 panels |
| 20×20 | 640 sq ft | 16 panels | 24 panels | 32 panels |
These assume 8-foot ceilings and 2×4 foot panels. Adjust proportionally for different ceiling heights or panel dimensions using the coverage formula.
What Should You Do After Calculating?
You’ve got your number — now comes the part that actually determines your results. Choosing quality panels and placing them strategically matters as much as hitting the right quantity.
The placement guide maps out first reflection points — the spots where panels make the biggest difference per dollar spent.
When you’re ready to buy, panels with NRC ratings of 0.8 or higher deliver the best value per panel — lower ratings mean buying more to hit the same coverage.
Olanglab Fiberglass Acoustic Wall Panels 4 Pack is a better mid-range fit when your calculation says you need to build coverage in repeatable four-panel steps.
Olanglab Fiberglass Acoustic Wall Panels 4 Pack
For installation methods, Z-clips work best for permanent mounting while command strips handle lighter panels without wall damage. Either method keeps panels flush to the wall, which matters for both aesthetics and consistent absorption across the panel surface.
If you’re working with a tighter budget or want larger coverage per panel, sizing up makes a difference. Fewer big panels means fewer mounting points and a cleaner wall layout — especially in rooms where you’re only targeting first reflection points.
Panel thickness also factors into your buying decision. Two-inch panels handle mid and high frequencies well enough for most rooms, but 4-inch panels extend absorption down to around 125Hz — worth considering if your space has noticeable bass buildup or if you’re treating a home theater where low-end control matters.
Acoustic Panels 4 Pack Room Kit Large 46 × 23 makes more sense when your room plan calls for fewer, larger panels rather than a wall full of small tiles.
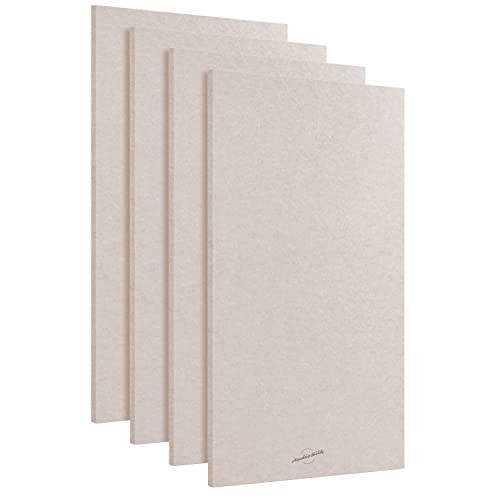
Acoustic Panels 4 Pack Room Kit Large 46 × 23
The acoustic panels hub has the full breakdown — placement, mounting, and panel comparisons — if you want to go deeper before buying.
Frequently Asked Questions
Can You Have Too Many Acoustic Panels?
Yes — and this mistake is harder to fix than having too few. Over-treatment makes rooms feel uncomfortably dead, voices sound muffled, and the space becomes fatiguing to spend time in.
Aim for the minimum coverage that solves your actual problem. Staying within the 20-40% range prevents over-treatment while still delivering real acoustic improvement.
Should You Start with Fewer or More Panels?
Start with fewer and add as needed. Six panels at first reflection points handles most issues in most rooms, and buying in stages saves money.
Adding panels one or two at a time also lets you hear each addition’s impact before spending more. You’ll develop better instincts for what your specific room needs rather than following generic recommendations blindly.
Can You Add Panels Later?
Absolutely — and that’s the biggest advantage of the panel-by-panel approach. Acoustic treatment is easily expandable, and many manufacturers sell panels individually.
The installation process stays the same whether you’re adding one panel or ten. Plan your initial layout with expansion in mind so future additions look intentional rather than haphazard.
Do Thicker Panels Mean Fewer Panels Needed?
Thicker panels absorb lower frequencies better, but they don’t reduce the quantity needed for wall coverage. You still need the same square footage of treatment regardless of thickness — the formula doesn’t change.
Two-inch panels handle frequencies down to about 250Hz effectively, while 4-inch panels extend to around 125Hz. For bass-heavy music or home theaters, thicker panels provide better low-frequency control — but the panel count stays consistent.
If you’re curious about the science here, the panel density guide breaks that trade-off down by core material and thickness.