Can You Cover Acoustic Panels With Fabric? Yes — Here’s How [2026]
Can you cover acoustic panels with fabric? Absolutely — but only if you choose the right material.
Cover it with the wrong fabric and you’ve built an expensive wall decoration that won’t absorb a single sound wave.
The mistake most people make is assuming the fabric covering is fixed or proprietary, because that assumption sends them to expensive replacements when a simple 30-minute re-wrap would fix the problem entirely.
Below you’ll find which fabrics work acoustically, which ones you’ll want to avoid, and how to wrap a panel in under 30 minutes without wrinkling the front face.
First, the one selection rule that determines whether your project works at all.
Can you cover acoustic panels with fabric? Yes — most acoustic panels are already fabric-wrapped, and you can re-cover them with any acoustically transparent material. The key is choosing fabric that lets sound pass through. Test by holding it to your mouth and blowing — if air flows freely, the fabric works. Avoid thick, tightly-woven materials that block airflow and reduce acoustic performance.
Why Cover Acoustic Panels With New Fabric?

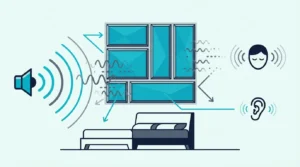
Most commercial acoustic panels already use fabric coverings over fiberglass or mineral wool cores. That fabric isn’t decorative — it’s functional.
It holds the absorbent material in place while allowing sound waves to pass through. You can swap it for something that matches your room’s aesthetic — as long as you choose the right material.
Matching Room Aesthetics
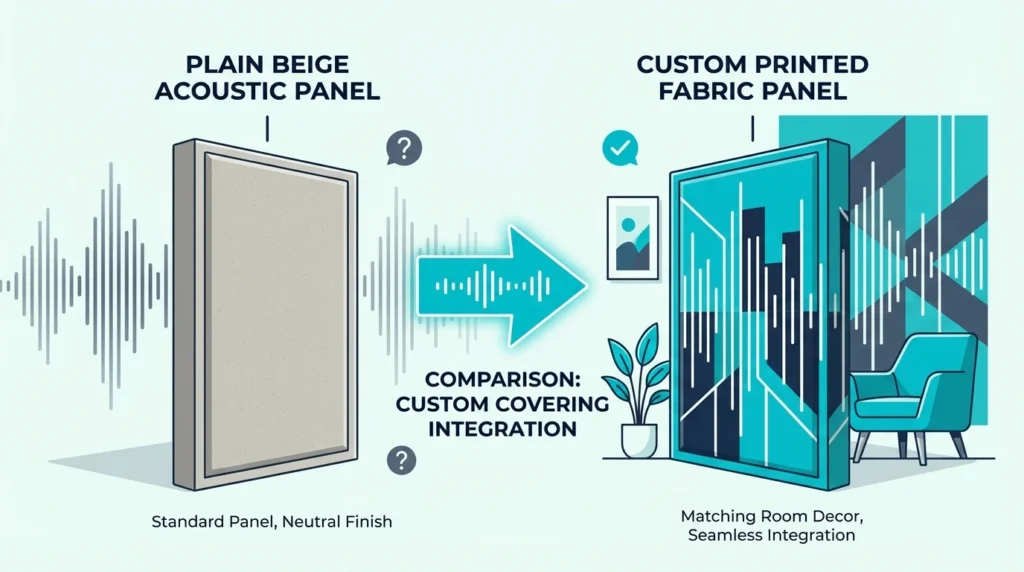
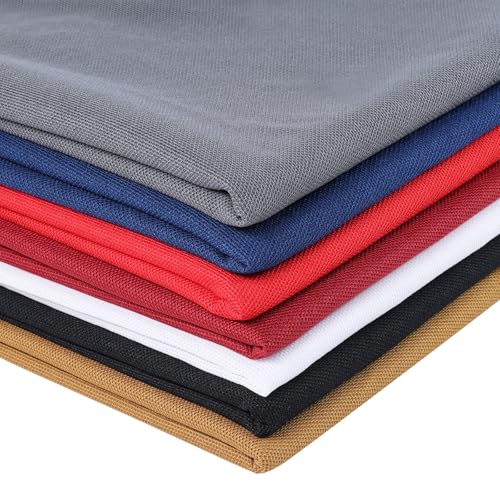
Standard acoustic panels come in limited colors — usually black, gray, or beige. These neutral tones work fine in recording studios but clash with living spaces, home offices, and bedrooms.
Re-covering lets you match your exact wall color or introduce patterns that complement your furniture. A panel wrapped in the same fabric as your curtains becomes part of the room design instead of an obvious acoustic treatment.
Refreshing Worn or Stained Panels
Fabric deteriorates over time. Dust accumulates, sunlight fades colors, and accidents happen.
A coffee splash or pet scratch doesn’t mean you need to replace the entire panel. The acoustic core — the fiberglass or mineral wool inside — doesn’t wear out.
Only the fabric covering shows age. Re-wrapping costs a fraction of replacement and takes about 30 minutes per panel.
Creating Custom Art Pieces
Printed acoustic panels cost far more than standard colors. By covering panels yourself, you can use any fabric with any design — family photos printed on canvas, band posters, abstract patterns, or custom artwork.
Rooms that need treatment but can’t sacrifice aesthetics — a living room, a home office, a bedroom — get the most out of thinking through acoustic panel placement when each panel doubles as a design decision.
What Fabric Works for Acoustic Panels?
Not every material you find at the craft store works acoustically. The wrong covering will act like a brick wall against high frequencies, instantly reducing your expensive panel’s effectiveness by 50% or more.
Fortunately, a single physical test catches every unsuitable material in under five seconds before you ever open your wallet.
The Blow Test (Essential)
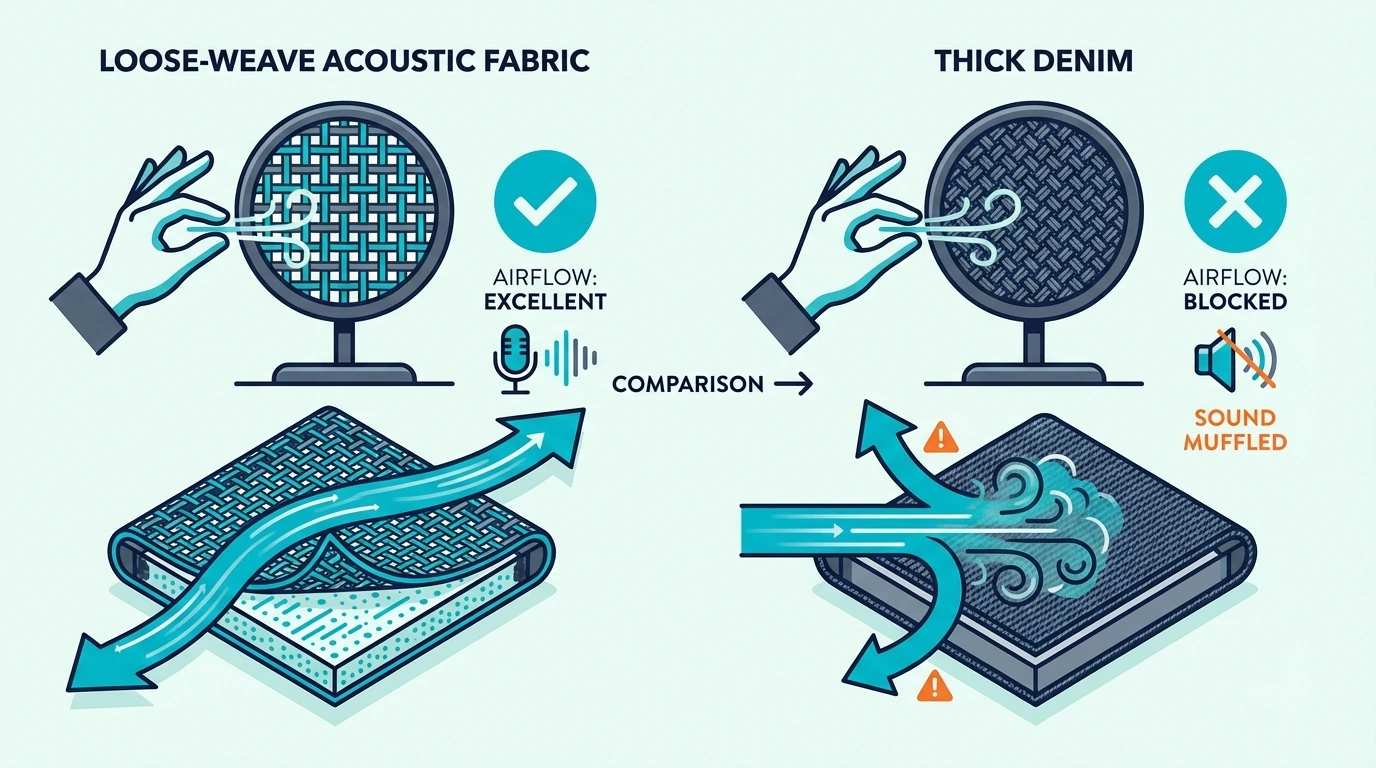
You don’t need lab equipment to verify acoustic transparency; you just need your lungs. By holding a fabric sample tightly against your mouth and blowing forcefully through it, you can instantly gauge its density.
If you feel strong airflow on the other side of your hand and virtually zero resistance pushing back against your mouth, the fabric is acoustically transparent. Because sound waves are simply pressure variations traveling through the air, materials that let air pass freely will inherently let sound waves pass freely. If the fabric pushes back like you are blowing into a thick pillow, it will act as a reflective acoustic barrier and ruin your panel.
Acoustically Transparent Options
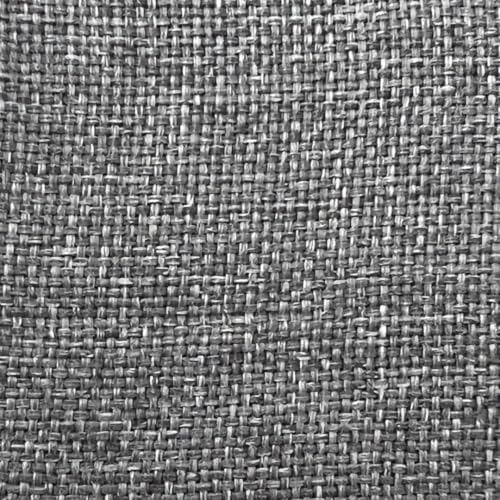
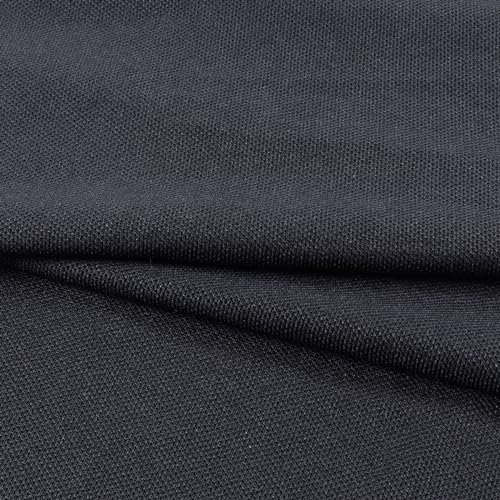
Once you know the testing metric, several standard fabric types consistently pass with flying colors. Natural burlap offers a rustic, highly textured look with very open weaves that breathe perfectly.
Basic muslin provides a smooth, tight surface that remains nearly invisible acoustically. The absolute safest choice is dedicated speaker grill cloth—the exact same material used to cover studio monitors and guitar cabinets. Products like SoundAssured Acoustical Fabric are engineered specifically to pass the blow test every single time, removing any guesswork from the equation.
SoundAssured Acoustical Fabric
Guilford of Maine’s FR701 remains the undisputed industry standard for commercial acoustic panels because it balances perfect transparency with strict fire ratings. The acoustic panel fabric guide compares these premium options against budget alternatives in exhaustive detail.
Fabrics to Avoid
If you run the blow test on standard painting canvas, it fails universally. The brutally tight weave that makes canvas so durable for stretching also makes it highly reflective to acoustic energy, meaning your panel might look like high-end art, but it won’t absorb a single flutter echo.
The exact same physics apply to leather, faux leather, and heavy vinyl. These materials are completely non-permeable and will physically transform a broadband acoustic absorber into a low-mid reflector—the exact opposite of your acoustic goal. Denim, heavy velvet, and thick upholstery fabrics typically fail the test for the same reason, as their dense backing layers seal off the airflow completely.
Get Studio Tips Weekly
Join 5,000+ creators getting acoustic treatment advice every week.
No spam. Unsubscribe anytime.How to Cover Acoustic Panels Step by Step
While re-wrapping sounds intimidating, it is basic upholstery work that requires zero specialized carpentry skills. The actual stapling process goes extremely fast; the secret to a flawless finish relies entirely on gathering the right tools before you tear the old fabric off.
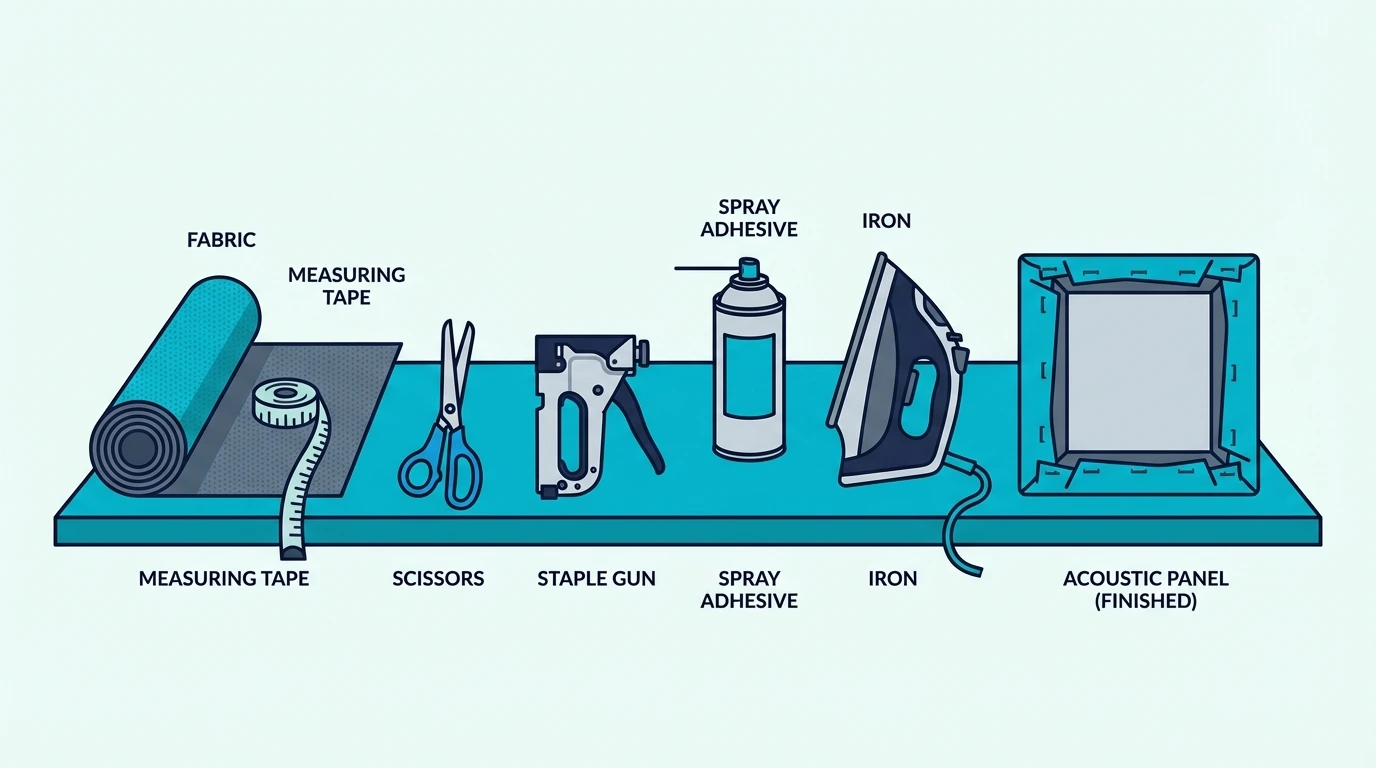
Materials You’ll Need
The backbone of the project is a standard heavy-duty staple gun loaded with 1/4-inch or 3/8-inch staples, depending entirely on the depth and hardness of your panel’s wooden frame.
You must cut your replacement fabric roughly 4 to 6 inches larger than the physical panel dimensions on every single side. This excess material guarantees you have enough grip to pull the fabric taut around the back of the frame, creating clean, professional-looking edges. You also absolutely must iron the fabric completely flat before touching the staple gun—any wrinkles trapped under the stretched material will become permanent visual defects that you cannot fix without ripping out fifty staples and starting over.
Removing Old Fabric
The teardown phase requires patience. Lay the old panel face-down on a perfectly clean floor or table. Because most commercial fabric is secured with heavy industrial staples driven deep into the back perimeter, you will need a flathead screwdriver or dedicated staple remover to pry them out individually.
If the panel uses spray adhesive instead of staples, you must peel the fabric away very slowly to avoid tearing chunks of the acoustic core out with the glue. Once the frame is exposed, rigorously inspect the internal fiberglass or mineral wool; if the core material is heavily compressed, water-damaged, or structurally crumbling, the panel is dead and not worth the effort of re-covering.
Wrapping the New Fabric
With your freshly ironed fabric lying face-down on the table, center the bare acoustic panel on top of it, ensuring the “face” of the fiberglass pushes into the back of the fabric.
The wrapping technique mimics stretching a canvas. You pull one long edge tightly over the wooden frame and drive a row of staples every 2 to 3 inches. You then move directly to the opposite long edge, pulling the fabric firmly across the face of the panel to establish an even tension before stapling it down. Once the long edges are locked, you repeat the exact same tensioning process on the short edges, finishing the corners with tight, 45-degree folds exactly like wrapping a birthday present.
The goal is achieving a smooth, wrinkle-free face without applying so much tension that the wooden frame physically warps under the stress. For massive 4-foot panels, using a seamless, wide-format roll like the 96” x 54” Speaker Grill Cloth prevents you from having to stitch pieces together across the front face.
96” x 54” Speaker Grill Cloth
The DIY acoustic panels guide breaks down this corner-folding and stretching process with visual examples, while the hanging guide covers the best hardware for getting the newly wrapped panels back on the wall safely.
Does Covering Affect Acoustic Performance?
You can start with a perfectly engineered 4-inch Owens Corning 703 core built into a solid pine frame. But if you stretch the wrong fabric over the top of it, the physics immediately collapse.
The performance gap between a highly permeable grill cloth and a non-permeable canvas is massive enough to cut a panel’s acoustic effectiveness directly in half—a failure that remains completely invisible until you sit down in the room and wonder why the harsh flutter echo is still ruining your recordings.
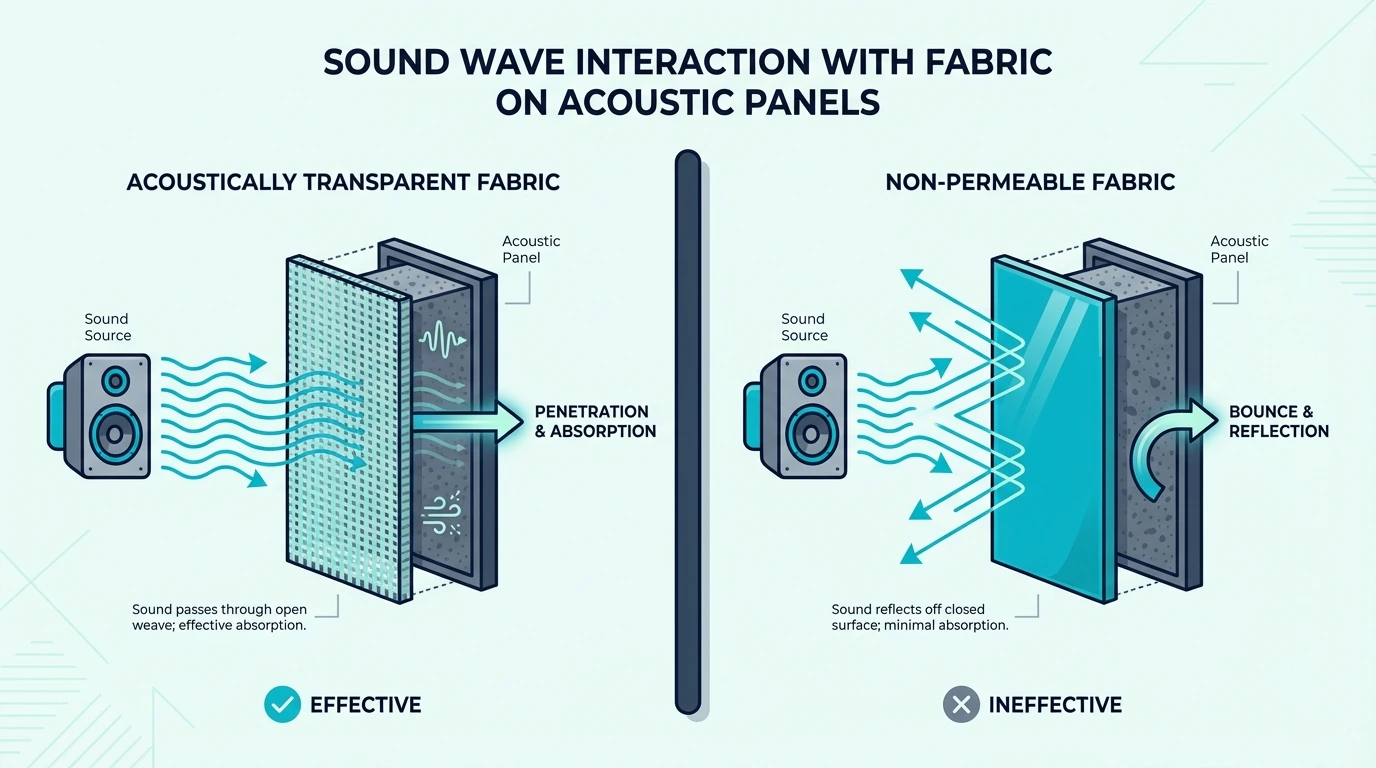
Transparent Fabric = No Performance Loss
When a fabric effortlessly passes the physical blow test, it becomes acoustically invisible to the sound waves traveling through the room. The dense fiberglass or mineral wool core does 100% of the actual physical absorption work.
Because the fabric doesn’t interfere, the panel’s original laboratory test ratings remain completely intact. Manufacturers could theoretically sell exposed yellow fiberglass blocks without any cover at all, but the fabric exists to contain the irritating glass fibers and make the product visually acceptable in a home environment. Covering a panel rated at NRC 0.95 with breathable speaker cloth ensures it will still operate at exactly NRC 0.95 when mounted on your wall. The insulation guide helps confirm your specific core material is actually worth the effort of re-covering.
Non-Permeable Fabric = Measurable Loss
Conversely, stretching a tight-weave canvas or a coated faux-leather over that same 0.95 NRC core creates a devastating acoustic bottleneck. Instead of transmitting the sound energy into the fiberglass, the rigid surface of the fabric acts like a mirror, reflecting the critical mid and high frequencies directly back into the room.
The NRC rating plummets from 0.95 down to 0.50 or worse, effectively destroying half the panel’s value. The frustrating aspect of this mistake is that a panel wrapped in canvas looks absolutely identical to a panel wrapped in Guilford of Maine acoustic cloth, meaning the catastrophic performance drop is completely hidden from the eye.
Testing Your Covered Panel
You never want to discover that massive performance drop after spending three hours wrapping and mounting a dozen panels. You must perform a crude but highly effective listening test on the very first panel you finish.
Prop the newly wrapped panel against a wall, stand roughly three feet away from it, and clap your hands sharply and loudly. Then take one step to the side and clap again at the bare, untreated drywall. The clap fired at the acoustic panel should instantly swallow the harsh, ringing “tail” of the echo, sounding completely dead and muffled compared to the sharp metallic slap off the drywall.
If the clap against the covered panel rings out exactly like the bare wall, your chosen fabric is actively blocking the sound waves and ruining the build. Before committing your entire budget to a bulk fabric order, buying a single yard of proven material like 1-yard speaker grill cloth lets you run this exact clap test without risking the whole project.
1-yard speaker grill cloth
Can You Use Printed Fabric on Acoustic Panels?
Printed fabric opens real creative possibilities — the catch is that the print process itself can close off the pores you need open.
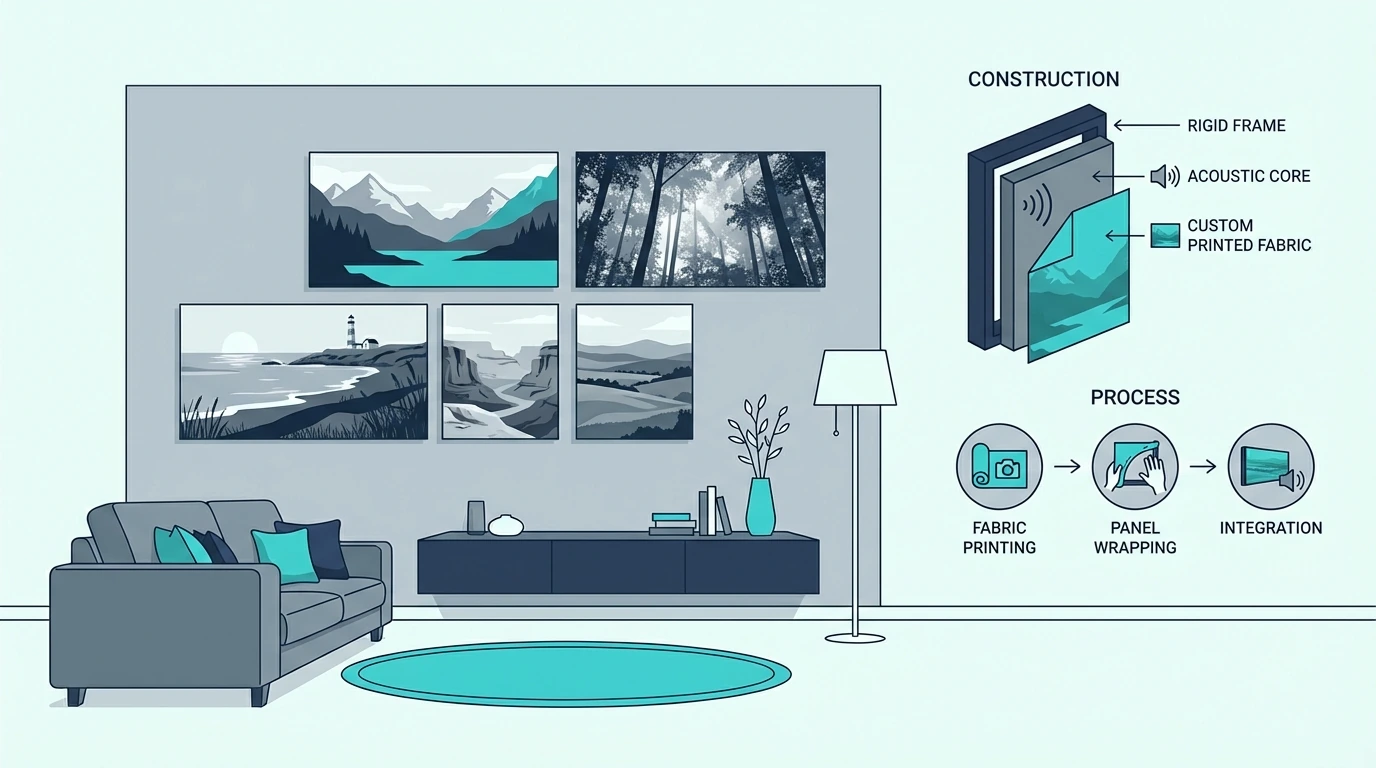
Digital Prints on Acoustic Fabric
Some companies print directly onto acoustically transparent base fabrics. These keep the base fabric’s acoustic properties intact while printing custom designs on top.
Guilford of Maine offers custom printing services specifically for acoustic applications. The prints look professional and the fabric remains acoustically neutral.
Professional printing costs more than buying fabric off a roll, but you get guaranteed acoustic performance and image quality that home inkjet printing can’t match.
DIY Printing Considerations
Inkjet printing on fabric adds ink that can partially block pores. Light prints typically maintain acceptable airflow.
Heavy coverage with dark colors may reduce permeability. Test printed fabric with the blow test before committing — print a sample swatch and verify airflow before printing your full design.
Heat transfer printing applies a plastic layer that seals the fabric pores entirely — avoid it. Any process that coats the surface rather than penetrating it destroys acoustic performance.
Photo Canvas vs. Acoustic Panels
Stretched canvas photo prints look similar to fabric-wrapped panels but aren’t acoustically functional. Canvas blocks sound rather than allowing absorption.
If you want photo art that also treats acoustics, start with acoustic panels and appropriate printing — not canvas stretching services that use non-permeable materials.
If aesthetics and treatment both matter — a living room, a professional office — choosing the right panel material from the start makes far more difference than the covering you put on top.
What Are Common Mistakes When Covering Panels?
When acoustic treatment fails, the core material is rarely to blame. Almost every ruined DIY panel or sloppy re-wrap job traces back to someone cutting corners during the fabric selection or the final stapling phase.
Choosing Fabric by Appearance Only
The most devastating mistake any builder makes is buying a fabric simply because the color matches their couch, without ever testing its acoustic transparency. Buying gorgeous, thick velvet to wrap an acoustic panel guarantees you will completely block the sound waves from reaching the fiberglass.
Always prioritize physics over aesthetics. You must order a small physical swatch of the material, run the blow test on it, and definitively verify the airflow before you commit hundreds of dollars to a bulk order that might ruin your entire studio build.
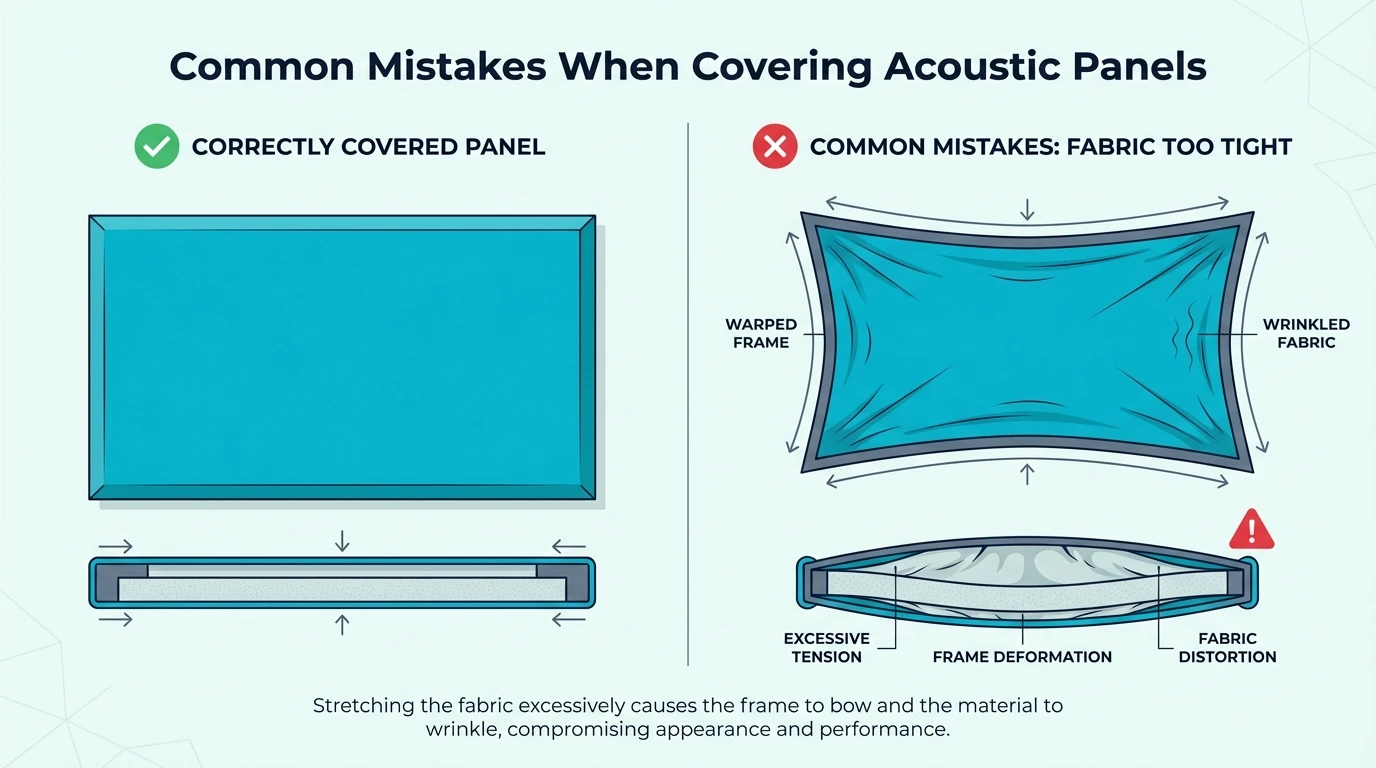
Stretching Too Tight
While the fabric must look smooth, treating the wrapping process like tuning a snare drum causes catastrophic structural failures. If you apply massive, aggressive tension across the fabric, the immense pulling force will actively bow and warp the thin wooden frame of the panel.
A warped acoustic panel will never sit flush against the drywall when mounted. The resulting gap behind the frame looks amateurish, and the excessive tension will eventually tear the fabric fibers cleanly through the metal staples holding them in place.
Ignoring Frame Condition
If you are re-wrapping an old, tired acoustic panel, you must respect the physical limits of the wood. A frame that has been stapled and stripped three or four times will have edges completely chewed up by old hardware, meaning the soft pine will no longer grip a new staple securely.
If you staple tightly into damaged wood, the staples will slowly pull out over the next few months, leaving you with sagging, wrinkled fabric on the wall. Before wrapping, you must rigorously assess the frame; filling the old staple holes with wood filler adds necessary strength, but a severely splintered frame must be discarded and rebuilt from scratch.
Skipping the Test After Covering
Assuming your newly wrapped panel actually absorbs sound without verifying it guarantees you will waste time on the installation. You must run the clap test on the very first finished panel before moving down the assembly line to wrap the remaining five.
Discovering a fabric failure after you have mounted six heavy panels to your drywall requires tearing down the entire room and starting over. When you have finally verified the absorption and are ready to hang the hardware, the guide on where to install acoustic panels breaks down the exact reflection points that require treatment first.
Conclusion
The blow test is the only real gate in this entire process.
Before you buy a single yard of fabric, hold it to your mouth and blow. If there’s resistance, put it back.
The rest — wrapping, stapling, mounting — is upholstery work that gets faster every time you do it.
People re-cover panels to refresh a room, match new furniture, replace stained fabric, or add printed artwork. It’s one of the few acoustic upgrades that costs under $30 and takes an afternoon.
The acoustic panels hub covers treatment options beyond fabric covering, and the build-from-scratch guide walks through the full DIY process.
Frequently Asked Questions
Can any fabric work for acoustic panels?
No. Tight-weave fabrics like canvas, denim, and velvet block sound before it reaches the panel core — which means you’ve paid for a fiberglass panel that functions as an expensive wall decoration.
The blow test takes five seconds and catches every problematic material before you spend money on it.
Will covering panels void warranties?
Warranties typically cover the acoustic core, not the fabric — but return policies are a separate issue. Most manufacturers won’t accept a panel back after DIY modification.
How often should acoustic panel fabric be replaced?
Ten to fifteen years is typical for quality acoustic fabric in a normal room. Dust is usually the deciding factor — once the fabric is too clogged to clean, it’s also restricting airflow to the core.
The frame and fiberglass inside will outlast the fabric by decades. Re-covering is routine maintenance.
Can I paint acoustic fabric instead of replacing it?
Diluted latex in a very light coat can work, but most people apply too much and seal the pores.
Always test a swatch first — not the panel itself.
Honestly, just buy fabric in the color you want. It’s cheaper than ruining a re-cover job with bad paint.
Does fabric color affect acoustic performance?
Color has no effect on acoustic performance — only the fabric’s physical structure matters. A black panel and white panel with identical fabric construction perform identically.
Choose colors based purely on aesthetic preference. Acoustic transparency is determined by weave density, not pigment.