How to Hang Acoustic Panels on Ceiling: Step-by-Step Guide [2026]
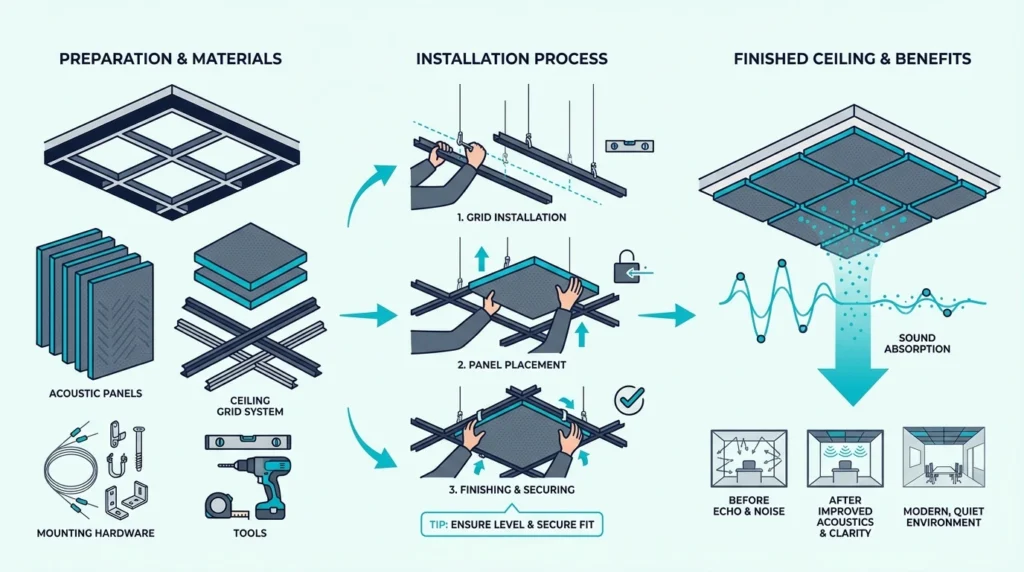
How to hang acoustic panels on ceiling surfaces is simple, but only if you mount them for overhead loads. Hardware that feels fine on a wall can fail when gravity pulls straight down.
If your room sounds harsh, smeared, or “phasey,” ceiling reflections are often a major cause. If a panel is not anchored correctly, the problem becomes safety, not just sound.
Do it right and you will get clearer imaging, tighter vocals, and less fatigue when you listen or mix. You will also end up with panels that stay secure for years.
Start by finding joists and deciding whether you are direct mounting or building a suspended cloud with an air gap. Once those two decisions are set, the rest is clean layout and the right fasteners.
Ceiling panels require secure anchoring—either into joists (preferred) or with rated drywall anchors. Direct mounting works for lightweight panels; suspended clouds need eye hooks with aircraft cable.
Can You Hang Acoustic Panels on the Ceiling?
Yes—and for many rooms, you should. Ceiling treatment addresses reflection points that wall panels miss entirely, particularly the first reflection above your listening position. Below is why that reflection matters and the three mounting methods you can choose from.
Why Ceiling Treatment Matters
Sound bounces off every surface in your room, including the ceiling. In untreated spaces, ceiling reflections arrive at your ears milliseconds after the direct sound, creating comb filtering that muddies your audio perception.
The ceiling first reflection point sits directly above your listening position. When you are mixing music, recording vocals, or even just watching movies, this reflection interferes with what you are trying to hear.
Wall panels alone cannot address it, so you need overhead treatment.
Recording studios prioritize ceiling clouds because the first-reflection improvement in imaging and clarity often exceeds what the same square footage of wall panels delivers.
The full priority order for treating an entire room is in the acoustic panels hub.
Methods Overview
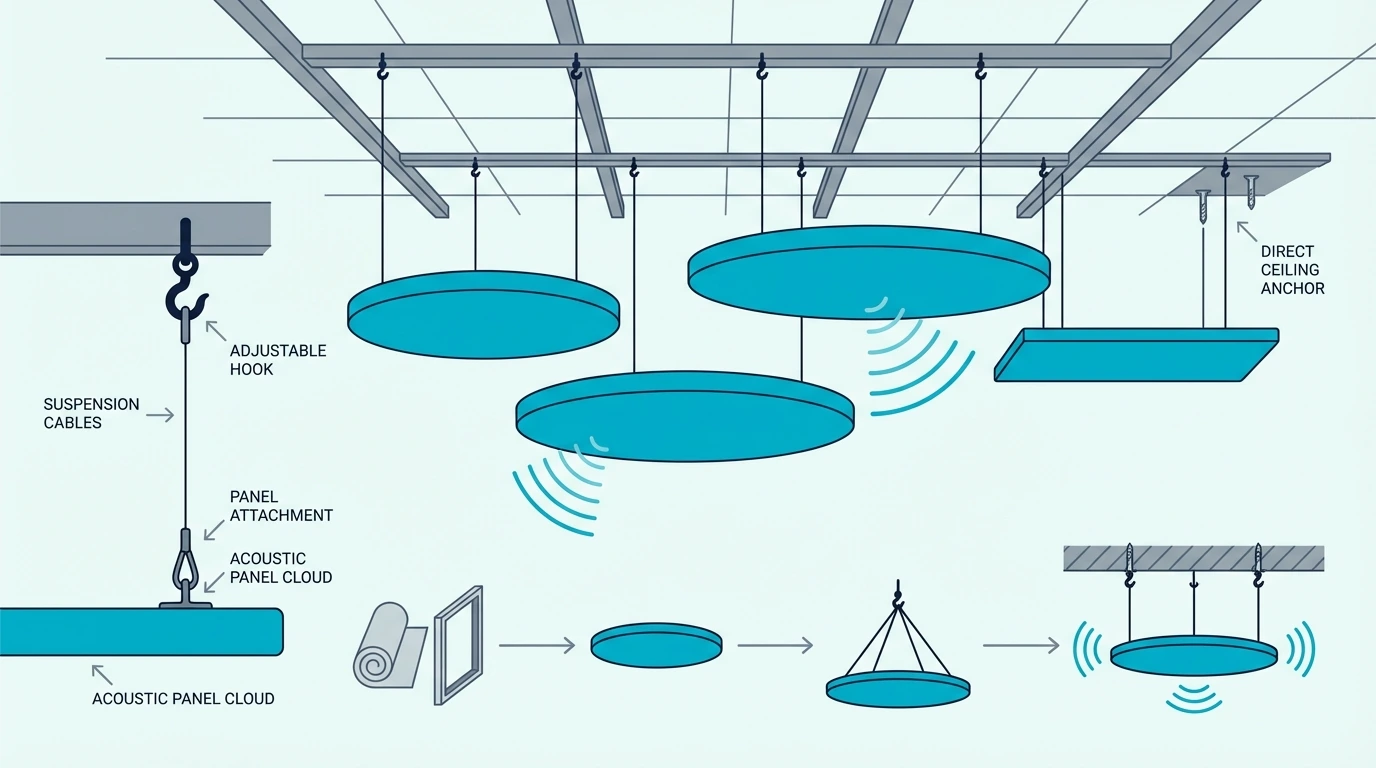
You have three main approaches for ceiling installation, each suited to different situations and panel types.
Direct mounting attaches panels flush to the ceiling using screws, clips, or adhesive. This works best for lightweight panels and provides a clean, integrated look.
The downside is there is no air gap, so low-frequency absorption is reduced.
Suspended clouds hang panels below the ceiling with cables or chains, creating an air gap of 2-6 inches. The gap maximizes absorption because sound passes through the panel twice—once on the way in and again on the bounce back.
Studios prefer this approach for its superior acoustic performance, and the air gap guide explains how gap depth affects absorption at different frequencies.
Adhesive mounting works only for foam panels. The lightweight nature of acoustic foam allows simple glue-up installation, though it is permanent and not suitable for renters.
What Do You Need?
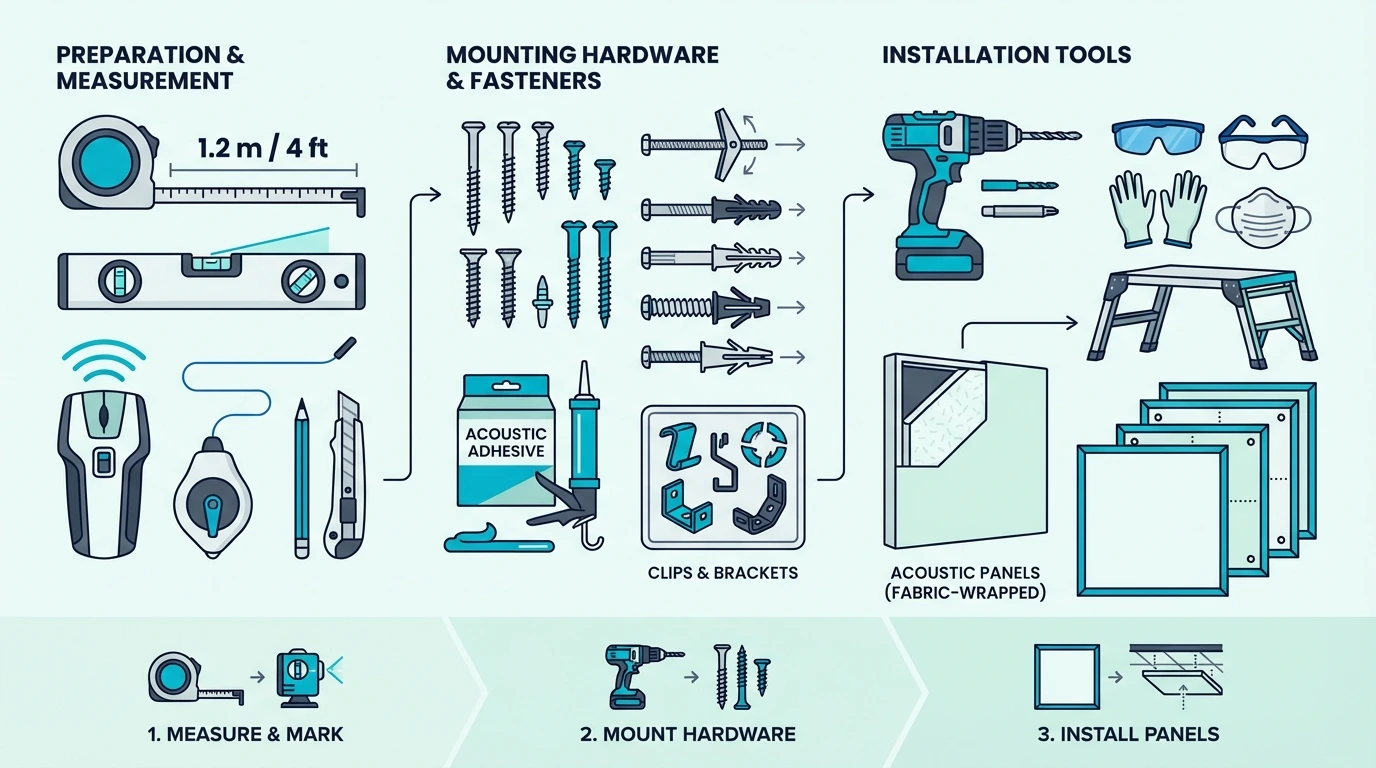
Before you climb the ladder, gather the right tools and hardware. Below are the tools, the mounting hardware for each method, and the safety gear you need when working overhead.
Tools Required
A quality stud finder is non-negotiable for ceiling work. Ceiling panels need solid anchoring, and joists are harder to locate overhead than wall studs.
The companion wall panel installation guide covers that process if you are treating walls at the same time.
You will also need a drill with both drilling and driving capabilities. Pre-drilling pilot holes prevents wood splitting and makes screw insertion much easier when you are working overhead.
A level ensures your panels hang straight. Crooked ceiling panels are obvious from every angle in the room.
A tape measure helps you mark joist locations and plan panel spacing. Pencil marks on the ceiling guide your installation and can be easily wiped away afterward.
Hardware Options
The hardware you need depends on your mounting method and what is behind your ceiling.
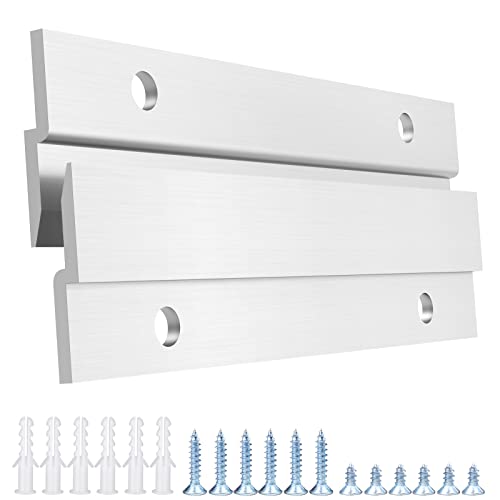
For direct mounting into joists, the French Cleat Z-Hangers provide a secure, removable mounting solution. The interlocking design lets you lift panels off for cleaning or repositioning without removing screws.
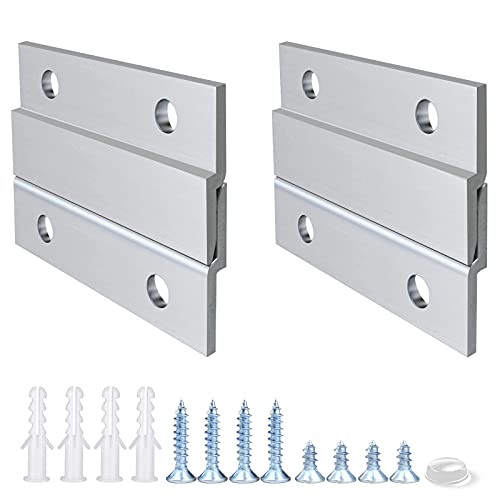
French Cleat Z-Hangers
For suspended clouds, you need eye hooks rated for your panel weight. The Heavy Duty Stainless Steel Eye Hooks screw directly into joists and support the weight of standard acoustic panels without issue.
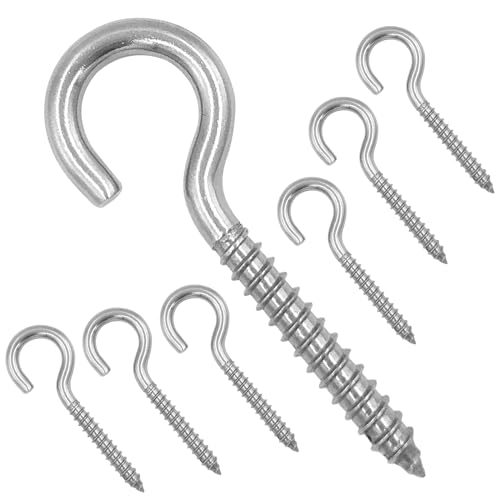
Heavy Duty Stainless Steel Eye Hooks
If you cannot locate joists where you need them, toggle bolts provide an alternative. However, toggle bolts in ceiling drywall have lower weight capacity than joist-mounted hardware, so verify your panel weight before relying on them.
Safety Equipment
Ceiling work means ladder work, and ladder work demands respect. Use a sturdy stepladder rated for your weight plus the weight of your panels.
Never stand on the top two steps.
Safety glasses protect your eyes from drywall dust when drilling overhead—debris falls directly toward your face. A dust mask is wise if you are drilling multiple holes.
If possible, have a helper steady the ladder and hand you panels. Wrestling a 4×2 panel overhead while balancing on a ladder is awkward at best and dangerous at worst.
Get Studio Tips Weekly
Join 5,000+ creators getting acoustic treatment advice every week.
No spam. Unsubscribe anytime.How Do You Direct Mount Panels to Ceiling?
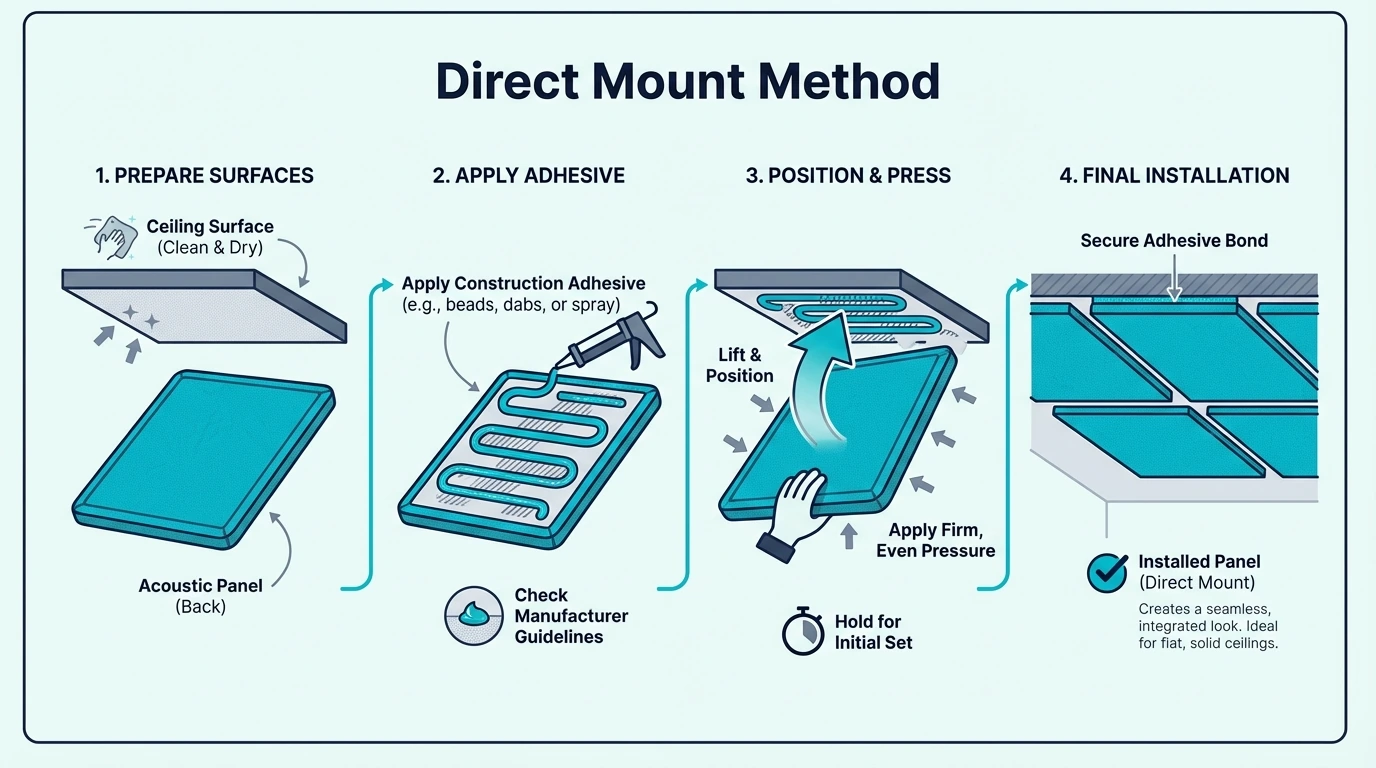
Because gravity is constantly pulling the hardware straight down, direct mounting requires driving metal fasteners directly through the drywall and deep into the wooden joists behind it.
Finding Joists
The entire structural integrity of your installation relies on mapping those hidden joists correctly. Ceiling joists typically run perpendicular to your roof rafters and are spaced exactly 16 or 24 inches apart. Your electronic stud finder will detect the edges of each wooden beam—you must mark both edges with a pencil to identify the absolute center where your screw needs to land.
By running your stud finder in parallel lines across the ceiling, you can map every joist in the target area before lifting a tool. If your stud finder struggles to read through thick ceiling texture, run a strong magnet across the drywall until it grabs a hidden screw; that screw is guaranteed to be driven into a joist, allowing you to simply measure 16 inches over to find the next one.
Step-by-Step Direct Mount Process
With your structural grid mapped out, you can focus on acoustic placement. For recording or mixing, you must position these panels exactly at the first reflection points directly above your mixing chair. You can find this spot by having someone hold a flat mirror flat against the ceiling while you sit at the desk; wherever you see your studio monitors reflected is the exact square foot where your panel belongs.
Once you outline that panel’s footprint on the ceiling, identify which marked joists cross through that box so you can align your hardware to hit the wood. Attach your Z-clips or French cleats to the back of the acoustic panel first, measuring their width to match the joist spacing on your ceiling map.
The secret to overhead work is never fighting the hardware. Always pre-drill pilot holes into the ceiling joists before attempting to drive the final screws. Have a helper support the heavy fiberglass panel tightly against the ceiling while you drive the screws through the mounting hardware into the pilot holes, checking the level one final time before tightening everything down.
How Do You Hang Cloud Panels (Suspended)?
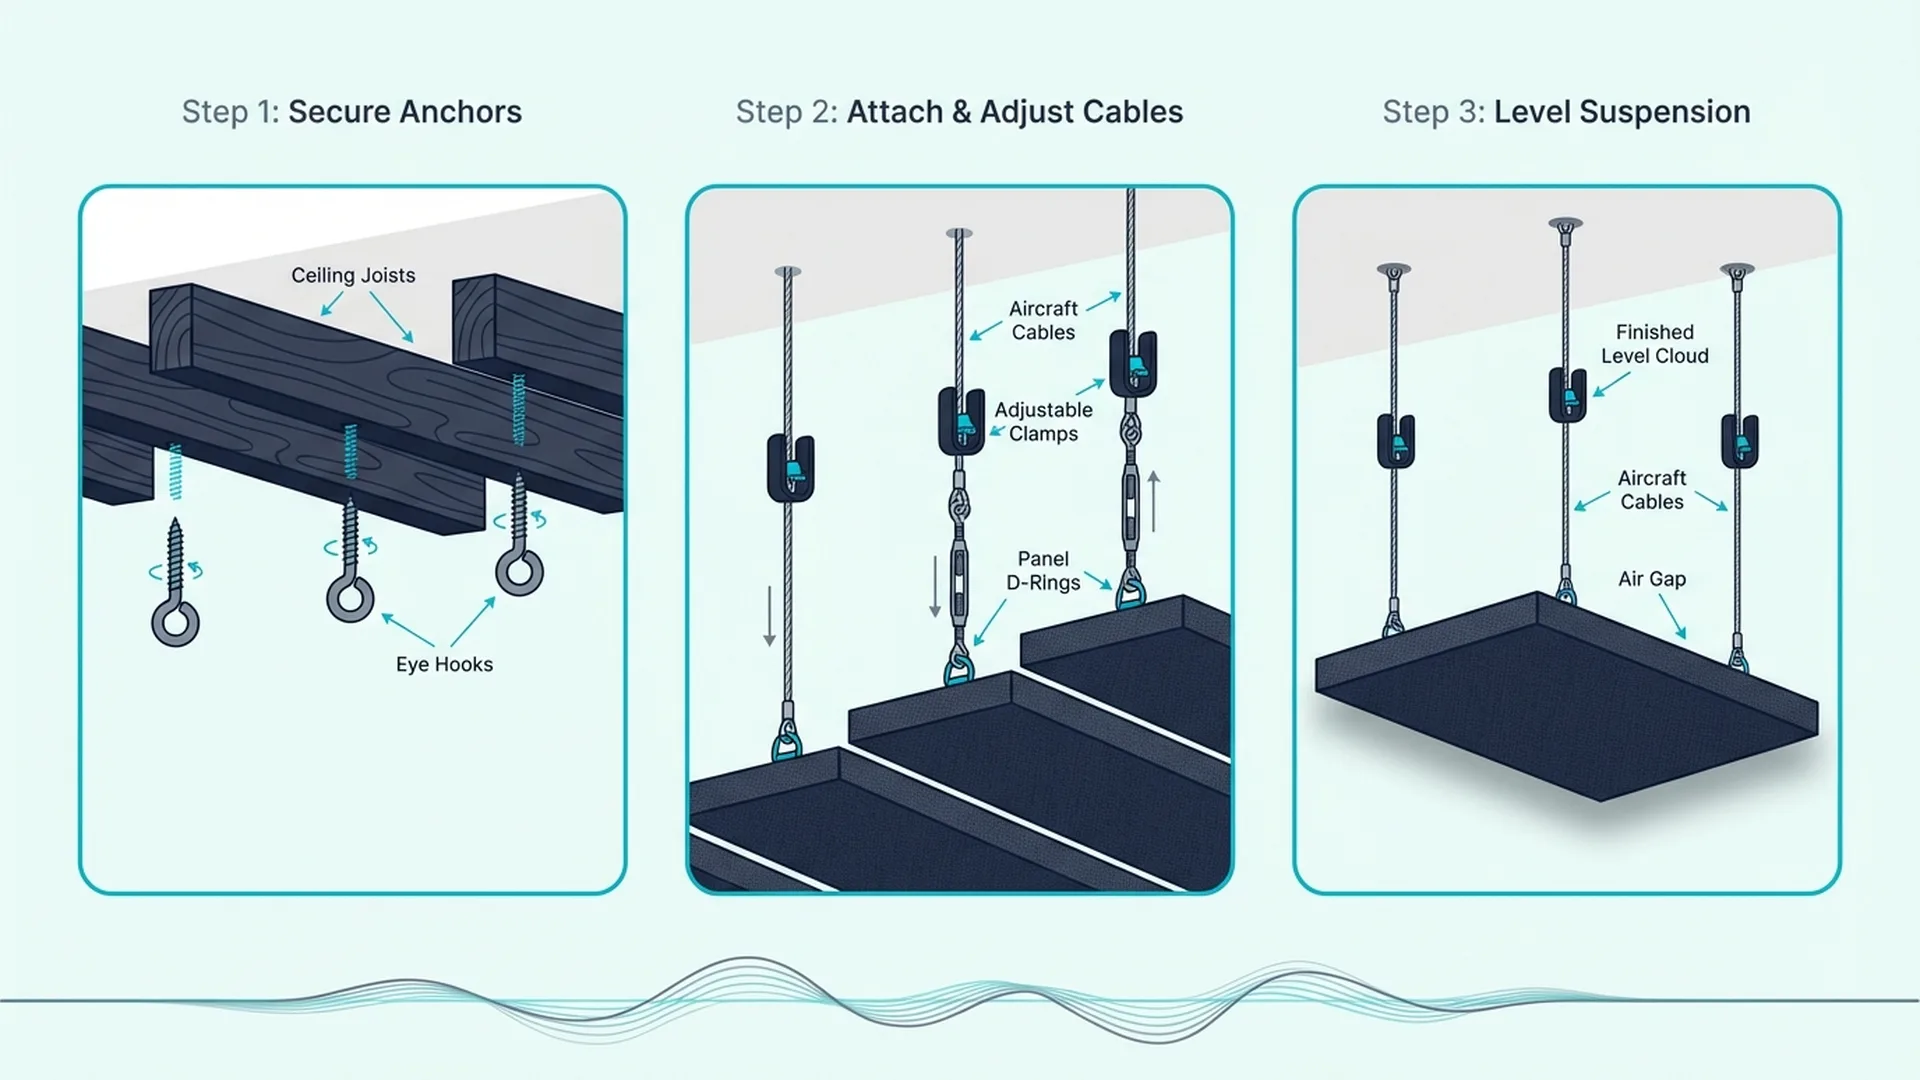
Suspended clouds require more preparation than a flush mount, but the massive improvement in low-frequency control makes the extra labor mandatory for serious studios.
What Are Ceiling Clouds?
A ceiling cloud is simply a standard rigid acoustic panel suspended several inches below the ceiling drywall using metal cables or chains. This “floating” configuration creates a deliberate air gap that forces sound waves to pass through the fiberglass twice—once on the way up, and again after bouncing off the hard drywall above it.
That double-pass effect sharply improves the panel’s low-frequency absorption, allowing a standard 2-inch panel to act like a makeshift bass trap. Because the panel is suspended in free space, both the top and bottom faces actively absorb sound, effectively doubling the working surface area of the material. Beyond the acoustic benefits, the floating aesthetic immediately signals that the room is a professionally designed listening space.
How to Suspend Panels
The suspension process requires four solid anchoring points perfectly aligned above the panel corners. After mapping the joists above your reflection point, pre-drill pilot holes and drive four heavy-duty steel eye hooks directly into the wood until the eyelets sit completely flush against the drywall.
Once your ceiling anchors are secure, cut four identical lengths of aircraft cable or black chain, ensuring they are long enough to cover your desired drop distance. Aircraft cable provides a sleek, nearly invisible aesthetic from below, while chain offers a rugged, industrial look that allows for easy height adjustments link-by-link.
Attach the cables to the ceiling hooks using locking carabiners or threaded quick links, then thread the opposite ends through the D-rings mounted on the back of your panel frame. You will absolutely need a helper for this final step, as balancing a heavy panel on a ladder while tightening small cable clamps is nearly impossible for one person.
What Height Should Clouds Hang?
The best drop distance depends entirely on your ceiling height and your low-end problems. A tight 2-to-4 inch air gap provides a solid boost to low-mid absorption while keeping the panel tucked safely out of the way, which is usually the smartest choice for rooms with standard 8-foot ceilings.
If you are fighting serious low-frequency buildup and have the headroom to spare, dropping the cloud 6 to 8 inches creates maximum bass absorption by allowing the waves to hit the panel at the quarter-wavelength mark. In commercial studios with massive 12-foot ceilings, engineers often suspend clouds multiple feet down to bring the absorption closer to the speakers while creating a dramatic architectural canopy over the mix desk. The tile you install matters as much as the method, and the materials differ more than the packaging suggests.
The panels from UMIACOUSTICS with Hanging Brackets come with the heavy-duty mounting hardware already included, simplifying the entire suspension process.
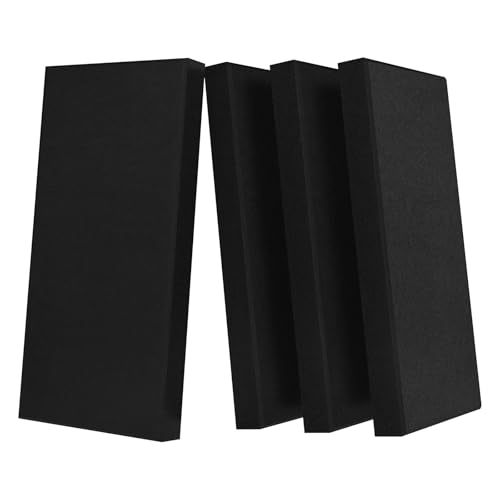
UMIACOUSTICS with Hanging Brackets
What About Foam Panels on Ceiling?
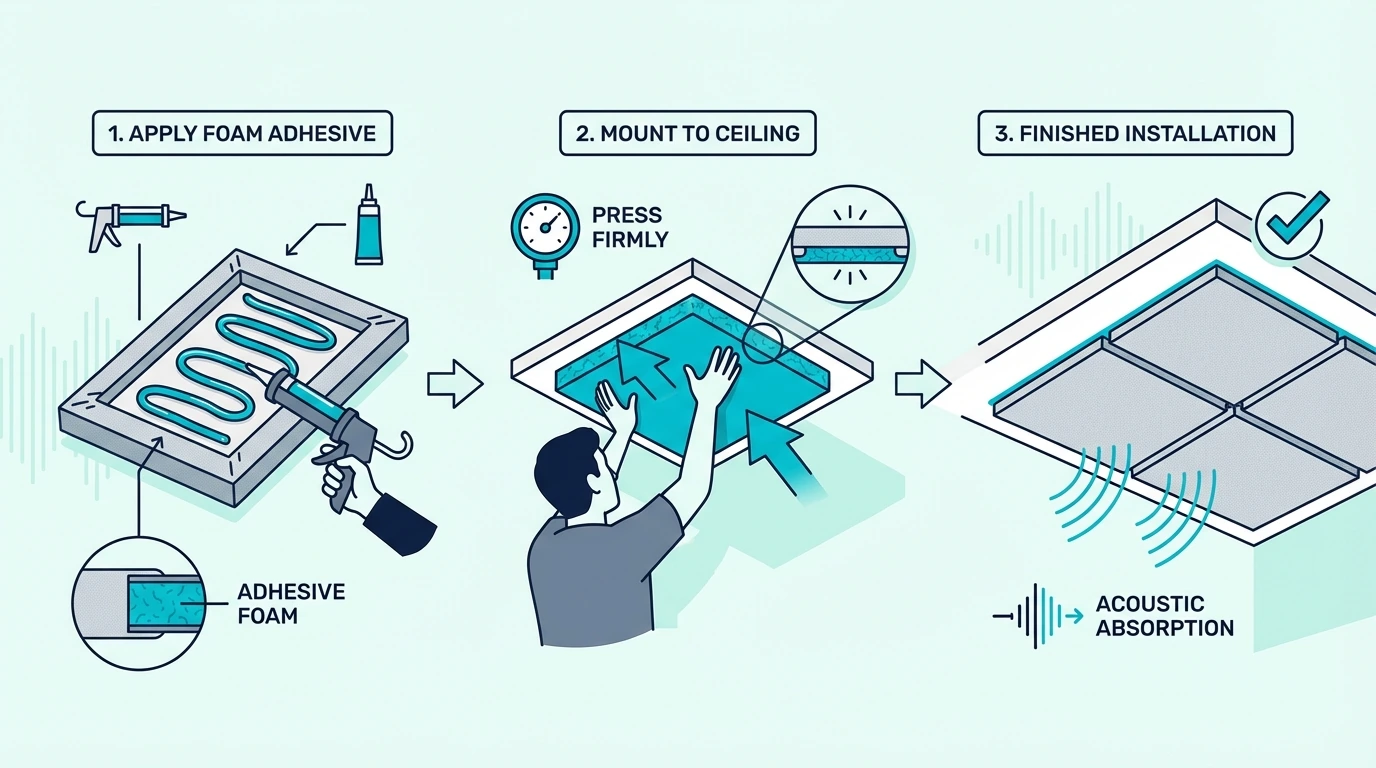
If you are working with lightweight polyurethane foam instead of heavy fiberglass boards, your installation options change entirely because you no longer have to fight massive gravitational loads.
Adhesive Method
The low weight of acoustic foam allows for adhesive-only installation directly to the drywall without hunting for joists. For a temporary setup, spray adhesive specifically designed for foam allows you to quickly coat the back of the tile, wait until it feels tacky to the touch, and press it firmly against the ceiling.
For a permanent studio installation where panels cannot shift over time, heavy construction adhesive or foam-specific VHB mounting tape creates an unbreakable bond. You must clean the ceiling surface thoroughly before applying any permanent glue, as the microscopic dust and oils accumulating on overhead drywall will cause the adhesive to fail within weeks.
If you hate the idea of scraping dried glue off your ceiling when you move, the Surface Mount Impalers offer a clever alternative. These flat metal plates screw into the drywall and feature sharp upward-facing spikes that bite directly into the foam body, holding it securely while still allowing for easy removal.
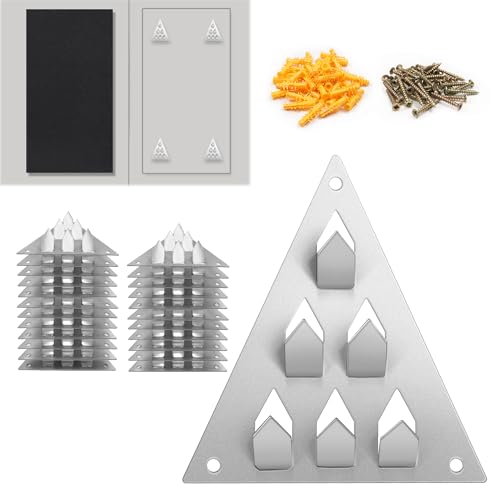
Surface Mount Impalers
Why Foam Is Easier
Foam ceiling installation completely eliminates the stressful parts of overhead mounting. You never have to calibrate a stud finder, pre-drill pilot holes while eating drywall dust, or wrestle with heavy hardware while balancing on a ladder. The placement guide maps the ceiling reflection points you should target regardless of mounting method.
The brutal tradeoff for that convenience is raw acoustic performance. Foam inherently provides much less absorption than rigid fiberglass, completely failing to touch the lower-mid frequencies where room boom actually occurs. The NRC rating guide shows exactly how much absorption you sacrifice when you choose foam over fiberglass.
You also have to remember that foam adhesives are notoriously vulnerable to climate changes. A humid summer can easily compromise the glue bond, meaning you must check your overhead foam tiles periodically to ensure they aren’t slowly peeling away from the paint.
What Are Common Mistakes?
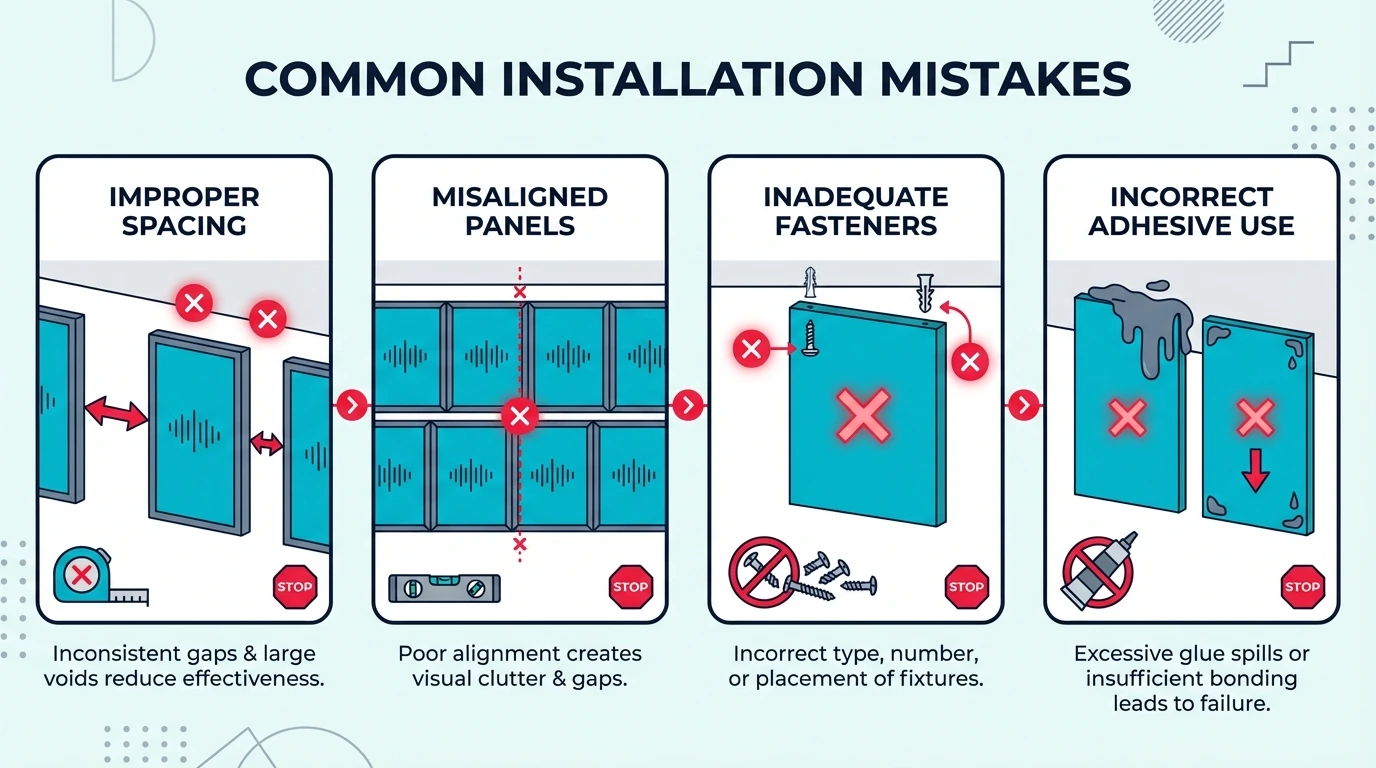
When a ceiling panel falls, it invariably traces back to someone ignoring the fundamental physics of overhead weight. Avoiding these three critical hardware failures guarantees your heavy fiberglass frames stay safely locked to the ceiling.
Wrong Hardware
The most dangerous assumption amateur builders make is assuming that heavy-duty wall hardware works exactly the same on the ceiling. When you mount a frame to a wall, the hardware only has to handle shear force—preventing the panel from sliding down. When you mount that exact same frame to the ceiling, gravity applies constant pullout force, actively trying to rip the anchor straight down out of the gypsum.
Picture hanging wire, D-ring loops, and small finishing nails are catastrophic choices for overhead mounting because they rely on friction against a vertical wall to hold tension. Under a direct overhead load, they simply rip straight out. Even heavy-duty toggle bolts lose nearly 70% of their rated capacity when shifted from a wall to a ceiling.
Weight Issues
You must calculate a massive safety margin into your hardware choices before drilling. A standard 2×4 foot professional fiberglass panel usually weighs between 8 and 12 pounds, while a massive 4×4 cloud can easily exceed 25 pounds once you add the wooden frame and suspension cables.
The golden rule of overhead rigging is to multiply your panel’s total weight by three and buy hardware rated for that maximum number. If your finished acoustic cloud weighs 15 pounds, you must use ceiling hooks and aircraft cable officially rated for at least 45 pounds of static load to account for room vibration and building settling over time.
Missing Joists
Driving a standard wood screw into nothing but 1/2-inch drywall paper guarantees an eventual failure. The gypsum core has absolutely zero structural strength to hold a threaded screw under tension, and the panel will eventually rip a massive, ragged hole through the ceiling when it falls.
If your ideal reflection point places the panel directly between two joists, you cannot just compromise and use drywall anchors. The only safe solution is to build a pair of wooden mounting rails that span across the two joists, screwing the rails firmly into the structural wood, and then suspending your acoustic cloud directly from those heavy-duty rails.
Conclusion
Every ceiling mounting method hinges on one question: are you screwing into a joist or not? If you are, the panel stays up.
If you are not, the weight limit drops fast and the risk of a fallen panel climbs.
Start with the direct mount if your joists line up with your reflection points, and move to a suspended cloud when you need the air gap or when joist placement forces a compromise. The best acoustic ceiling panels guide covers which panels are designed specifically for overhead use.
Larger mounting jobs benefit from the French Cleat Multi-Pack for consistent mounting across all your panels.
Ceiling coverage typically accounts for 20-30% of your total treatment area—use the panel quantity calculator to figure out the exact number for your room size.
Frequently Asked Questions
Is Ceiling Installation Hard?
It is more challenging than wall mounting, but not by much. The main complications are working overhead (which is tiring) and locating joists (which requires patience).
With a helper, most DIYers finish in an afternoon. The actual mounting follows the same principles as wall work: pre-drill, align, secure.
Can Renters Do This?
Suspended clouds work if your lease allows small screw holes. Eye hooks leave four tiny holes per panel that spackle covers in seconds at move-out.
Foam adhesive is riskier—removing it often pulls ceiling paint off with it.
Command strips rated for your panel weight are the only truly damage-free option, but most Command products are not tested for overhead gravity loads. Verify the ceiling rating before trusting them.
How Much Weight Can Ceilings Hold?
Into joists, a single #8 screw holds 80+ pounds—more than any acoustic panel weighs. Practical limits come from the mounting hardware, not the joist.
Into drywall only, expect roughly 15 pounds per toggle bolt in 1/2-inch board and 25 pounds in 5/8-inch board. Heavy panels need joist mounting or they risk falling.
Always use multiple anchors and stay well under the theoretical maximum. The hanging guide covers hardware ratings in more detail.