Did you know that a worn-out needle can make your favorite vinyl sound like it’s been dragged through a sandstorm? Yikes!
I learned that the hard way when I first got into collecting records. Trust me, there’s nothing worse than hearing your prized Led Zeppelin album sound like it’s being played underwater.
But don’t worry, my friend – changing a needle on your turntable or record player isn’t as daunting as it might seem. In fact, it’s a crucial skill for any vinyl enthusiast to master.
So, grab a cup of coffee (or whatever floats your boat), and let’s dive into the world of turntable maintenance. I promise by the end of this guide, you’ll be swapping needles like a pro and your records will thank you for it!
How to Change a Needle on a Turntable
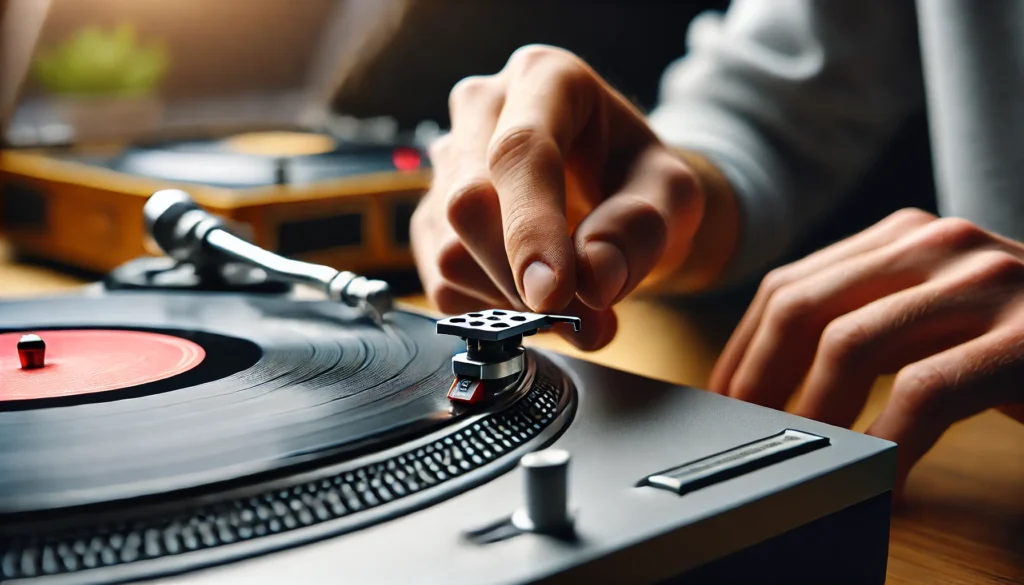
To change a needle on a turntable, follow these steps: 1) Gently remove the old needle by pulling it downward and forward from the cartridge. 2) Carefully insert the new needle into the cartridge, aligning the pins with the holes.
3) Push the new needle up and back until it clicks into place. 4) Reattach the headshell to the tonearm if you removed it.
5) Test the new needle by playing a record at low volume.
Now that we’ve got the quick answer out of the way, let’s dive deeper into the nitty-gritty of needle changing and explore all the juicy details that’ll make you a true vinyl virtuoso!
Understanding the Importance of a Good Needle

Alright, let’s get real for a second. When I first started spinning vinyl, I thought all needles were created equal.
Boy, was I wrong! It’s like thinking all coffee is the same – blasphemy, right?
A good needle, or stylus if you wanna get fancy, is the unsung hero of your entire setup. It’s the tiny little guy that’s actually touching your precious records and translating those grooves into sweet, sweet music.
Now, here’s the kicker – a worn-out or low-quality needle can seriously mess up your listening experience. I remember playing my dad’s old Beatles record with a needle that had seen better days, and let me tell you, it sounded like John, Paul, George, and Ringo were singing underwater while being attacked by angry seagulls.
Not cool.
But it’s not just about sound quality, folks. A bad needle can actually damage your vinyl.
Yeah, you heard that right. It’s like taking sandpaper to your records every time you play them.
I learned this the hard way when I ruined my first-edition copy of “Dark Side of the Moon”. Still hurts to think about it!
So, how do you know when it’s time to change your needle? Well, there are a few telltale signs.
First off, if you start hearing distortion, especially in the high frequencies, that’s a red flag. It’s like when your car starts making that weird noise – you know something’s up.
Another sign is if you see visible wear on the needle itself. If it looks flatter than a pancake, it’s time for a change.
Also, keep an ear out for any skipping or repeating. Sure, it might make for an interesting remix, but it’s not doing your records any favors.
And if you’re really not sure, there’s always the old-school method – use a magnifying glass to check the needle tip. If it looks more like a club than a point, it’s definitely time for an upgrade.
Remember, changing your needle isn’t just about maintaining sound quality – it’s about preserving your vinyl collection for years to come. Trust me, your future self (and your records) will thank you for it!
Gathering the Necessary Tools and Materials
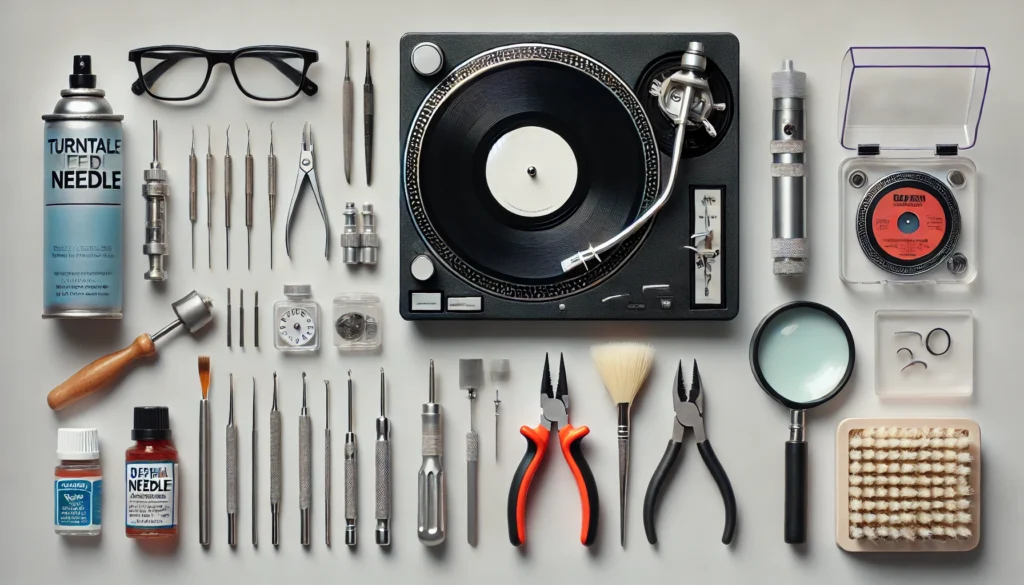
Alright, folks, it’s time to gear up! Changing a turntable needle isn’t exactly like gearing up for a space mission, but having the right tools can make all the difference.
Trust me, I’ve tried doing this with just my bare hands and a prayer – let’s just say it didn’t end well for my favorite Jazz record.
First things first, you’re gonna need a replacement needle. Sounds obvious, right?
But here’s where it gets tricky. Not all needles are created equal, and using the wrong one is like trying to fit a square peg in a round hole.
Been there, done that, got the T-shirt (and a very confused-looking turntable).
So, how do you find the right needle? Well, you’ve got a few options.
You can check your turntable’s manual (if you’re one of those rare organized souls who actually keeps manuals), or you can look up your turntable model online. If all else fails, you can always take a picture of your current cartridge and needle and show it to the folks at your local hi-fi shop.
They’re usually pretty helpful, even if they do sometimes look at you like you’re from another planet when you admit you’ve been using the same needle for a decade.
Now, onto the tools. You’re gonna need a small flathead screwdriver – emphasis on small.
The first time I tried this, I used a screwdriver that was way too big and nearly gave my poor turntable a heart attack. A pair of needle-nose pliers can also come in handy, especially if you’ve got butterfingers like me.
Oh, and don’t forget about cleaning supplies! A soft brush or a can of compressed air can help you clear out any dust or debris before you start.
Trust me, you don’t want to be sneezing all over your delicate equipment.
Lastly, and this might sound a bit weird, but grab a magnifying glass if you’ve got one. Those needles are tiny, and unless you’ve got superhuman vision, a magnifying glass can be a real lifesaver.
I once spent an hour squinting at my cartridge before I realized I could just use a magnifying glass. Facepalm moment for sure!
Remember, gathering the right tools is half the battle. With these items in your arsenal, you’ll be ready to tackle this needle-changing business like a pro.
Just don’t get too excited and try to change your needle in the dark like I did once. Spoiler alert: it doesn’t end well!
Identifying Your Cartridge and Needle Type
Okay, buckle up, folks – we’re about to dive into the wild world of cartridges and needles. Don’t worry, it’s not as complicated as rocket science…
well, most of the time.
First things first, let’s talk about cartridges. These little guys are like the brains of your turntable operation.
They come in two main flavors: moving magnet (MM) and moving coil (MC). Now, don’t ask me why they’re called that – I’m pretty sure it’s just to confuse us mere mortals.
Moving magnet cartridges are like the friendly neighborhood Spider-Man of the turntable world – they’re common, reliable, and generally easier on the wallet. Moving coil cartridges, on the other hand, are more like Tony Stark – flashy, high-performance, but they’ll cost you a pretty penny.
Now, here’s where it gets fun (or frustrating, depending on your perspective). Figuring out what type of cartridge you have can sometimes feel like you’re trying to decode ancient hieroglyphics.
I remember the first time I tried to identify mine – I ended up convinced I had some sort of alien technology in my hands.
But fear not! There are a few ways to crack this code.
First, check your turntable’s manual (if you haven’t used it as a coaster, that is). It should tell you what type of cartridge came with your turntable.
If that’s a no-go, try looking for any markings or model numbers on the cartridge itself. Just be careful – these things are more delicate than my grandma’s china.
Once you’ve figured out your cartridge type, it’s time to tackle the needle, or stylus if you’re feeling fancy. These come in different shapes – conical, elliptical, and some fancy ones like Shibata or micro-line.
Don’t worry if these sound like Pokemon types to you – I felt the same way at first.
Conical styli are like the vanilla ice cream of the needle world – simple, reliable, gets the job done. Elliptical styli are a step up, offering better sound quality but they’re a bit pickier about alignment.
The fancier types? Well, they’re for the real audiophiles who can hear the difference between a cat’s meow recorded in a studio versus one recorded in a bathroom.
(Spoiler alert: I can’t.)
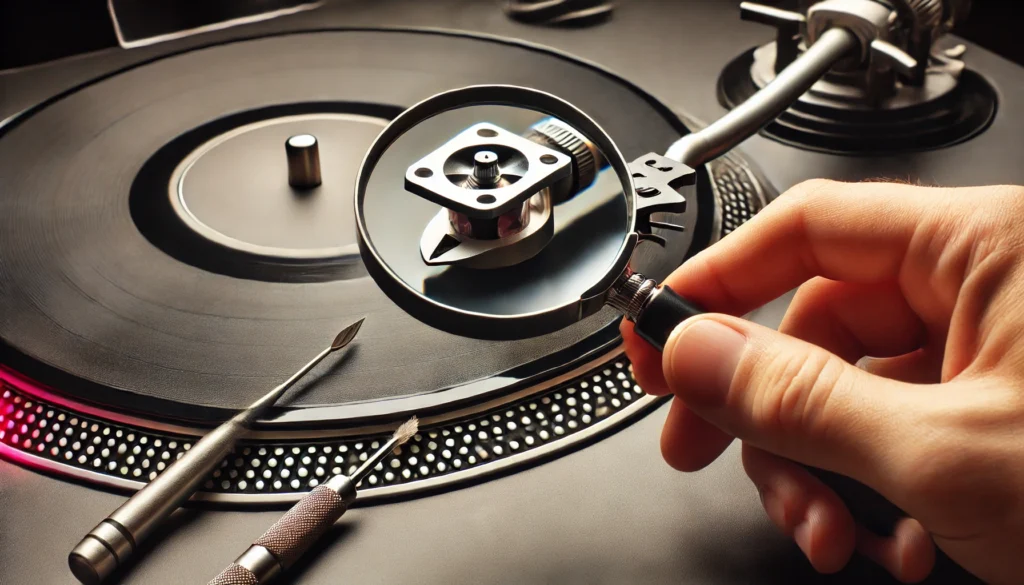
To figure out what type of stylus you have, you might need to channel your inner Sherlock Holmes. Look closely at the tip (this is where that magnifying glass comes in handy).
If it looks like a tiny ball bearing, it’s probably conical. If it’s more oblong, you’re likely looking at an elliptical stylus.
Remember, matching your new stylus to your cartridge is crucial. It’s like finding the right dance partner – if they don’t match, you’re gonna end up with some pretty funky moves (and not in a good way).
Don’t be afraid to ask for help if you’re stuck. I once spent an entire afternoon convinced I had a moving coil cartridge, only to find out it was just a particularly shiny moving magnet.
Live and learn, folks, live and learn!
Step-by-Step Guide to Changing Your Needle

Alright, it’s showtime! We’re finally ready to perform some turntable surgery.
Don’t worry, it’s not as scary as it sounds – no one’s life is on the line here. Well, except maybe the life of your records if you mess this up.
But hey, no pressure!
Step 1: Removing the old needle
First things first, we gotta get rid of the old needle. It’s like saying goodbye to an old friend, if that old friend was slowly ruining your favorite records.
Start by making sure your turntable is unplugged. I learned this the hard way when I accidentally started the platter while my face was right next to it.
Let’s just say I got a very close-up view of my reflection in the shiny metal.
Next, carefully remove the headshell from the tonearm. It usually twists off, but check your manual if you’re not sure.
If it doesn’t budge, don’t force it – we’re not trying to recreate a strongman competition here.
Now, look for a small clip or lever at the front of the cartridge. This is what’s holding your old needle in place.
Gently pull this forward and downward to release the needle. Remember, gentle is the key word here.
The first time I did this, I yanked it like I was starting a lawnmower. Spoiler alert: turntables don’t like to be treated like lawnmowers.
Step 2: Installing the new needle
Alright, out with the old, in with the new! Take your shiny new needle (try not to get distracted by how pretty it is) and line it up with the front of the cartridge.
There should be some small pins on the back of the needle that align with holes in the cartridge. It’s like a very tiny, very expensive game of pin the tail on the donkey.
Slowly push the new needle up and back into the cartridge until you hear a click. Don’t force it – if it’s not going in smoothly, double-check your alignment.
I once spent 10 minutes trying to jam a needle in upside down. Not my proudest moment.
Step 3: Testing the installation
Now for the moment of truth! Reattach the headshell to the tonearm and plug your turntable back in.
Put on a record you’re not too emotionally attached to (just in case) and gently lower the needle onto it.
If you hear music, congratulations! You’ve successfully performed turntable surgery.
If you hear something that sounds like a cat being strangled, don’t panic. Just double-check your installation and make sure everything’s aligned correctly.
Remember, it’s normal for a new needle to sound a bit different at first. It needs to be “broken in,” kind of like a new pair of shoes.
Give it a few hours of playtime and it should settle into its groove (pun absolutely intended).
And there you have it! You’ve changed your turntable needle like a boss.
Go ahead and treat yourself to your favorite album – you’ve earned it. Just try not to get too carried away with your newfound skills.
I once got so excited I changed my needle three times in one week. Turns out, that’s not necessary.
Who knew?
Maintenance Tips for Longer Needle Life
Alright, vinyl enthusiasts, now that you’ve successfully changed your needle, let’s talk about keeping it in tip-top shape. After all, you don’t want to be changing these bad boys as often as you change your socks (although if you’re changing your socks as infrequently as some people change their needles, we might need to have a different conversation).
First up, cleaning. I know, I know, cleaning isn’t exactly the most thrilling topic, but trust me, it’s crucial.
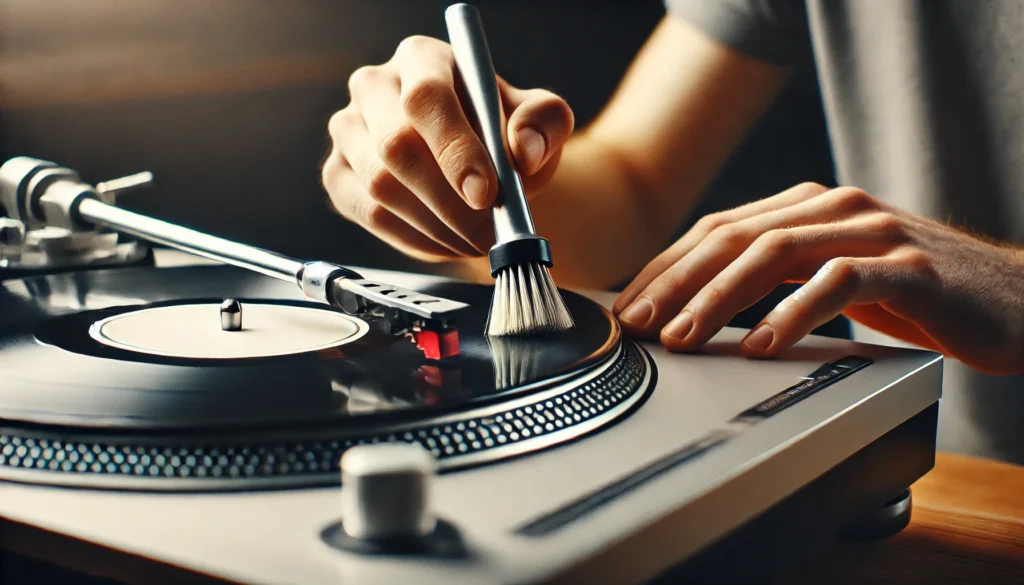
You want to keep your needle cleaner than a whistle – although why whistles are the benchmark for cleanliness, I’ll never understand. Anyway, use a soft brush specifically designed for stylus cleaning.
And for the love of all that is holy, brush from back to front, not side to side. I learned this the hard way when I nearly snapped my needle off trying to clean it like I was scrubbing a dirty dish.
Now, let’s talk about how to handle your tonearm. Treat it like it’s made of spun sugar – that means no dropping it, no letting it bounce around, and definitely no using it as a tiny diving board for your action figures (don’t ask).
When you’re done listening, always use the tonearm lift to raise it gently. I once tried to lift it manually after a few too many glasses of wine, and let’s just say my records still haven’t forgiven me.
Storage is another biggie. When you’re not using your turntable, keep that dust cover down.
Dust is like the Voldemort of the vinyl world – it must not be named, and it certainly must not be allowed near your needle. If your turntable didn’t come with a dust cover, you can use a stylus guard.
Just don’t forget to remove it before you play a record, unless you want to hear what it sounds like when a needle tries to play plastic.
Speaking of playing, here’s a pro tip: don’t leave the needle sitting in the run-out groove at the end of a record. It’s like leaving your car running in the driveway – a waste of energy and potentially damaging.
I once fell asleep with a record playing and woke up to find my needle had been riding that run-out groove all night long. Talk about a walk of shame for my poor stylus.
Lastly, let’s talk about pressure, baby. No, not the kind you feel when you’re trying to impress your audiophile friends.
I’m talking about tracking force. This is the amount of pressure your needle puts on the record, and it’s pretty important.
Too much pressure and you’ll wear out your records faster than I wear out my welcome at all-you-can-eat buffets. Too little, and your needle will be skipping more than a kid in a playground.
Check your cartridge’s specifications for the right tracking force, and use a stylus pressure gauge to set it correctly.
Remember, a little TLC goes a long way in the world of turntables. Treat your needle right, and it’ll reward you with sweet, sweet music for years to come.
And who knows? Maybe one day you’ll be the wise old vinyl guru, dispensing needle wisdom to wide-eyed newbies.
Just try not to let it go to your head – nobody likes a needle know-it-all!
Conclusion
Well, folks, we’ve come to the end of our needle-changing journey. Who knew such a tiny component could lead to such a big adventure, right?
From understanding why a good needle matters, to the nail-biting process of actually swapping it out, we’ve covered it all. And let me tell you, mastering this skill is like unlocking a secret level in the game of vinyl enjoyment.
Remember, changing your turntable needle isn’t just about maintaining your equipment – it’s about respecting the music and the medium. It’s about ensuring that every note, every beat, every whispered lyric comes through exactly as the artist intended.
So go forth, my vinyl-loving friends, and change those needles with confidence. Your records will thank you, your ears will thank you, and hey, you might even impress that cute audiophile at the record store.
But before you rush off to become the needle-changing champion of your neighborhood, don’t forget the most important step: sit back, drop the needle on your favorite record, and enjoy the fruits of your labor. After all, that’s what this is all about – the pure, unadulterated joy of music.
Now, if you’ll excuse me, I’ve got a date with my turntable and a stack of records that are begging to meet my shiny new needle. Happy listening, folks!
