Are you ready to dive into the world of vinyl and start spinning those records on your Victrola turntable? You’re in for a treat!
As a long-time vinyl enthusiast and proud owner of several turntables, including a beloved Victrola, I’m here to guide you through the process.
Let’s get that needle dropping and those tunes flowing!
How to Use a Victrola Turntable

Alright, so you’ve got your shiny new Victrola turntable sitting there, looking all sleek and ready to rock. But how exactly do you use this thing?
Don’t worry, I’ve been there too! When I first got my Victrola, I was a bit intimidated by all the components.
But trust me, it’s not as complicated as it looks. In a nutshell, you’ll need to set it up properly, learn how to operate it, and then maintain it for the best sound quality.
We’ll dive into all of that in more detail below, but I wanted to give you a quick overview first. Just remember, like riding a bike, once you get the hang of it, using your Victrola will become second nature!
Setting Up Your Victrola Turntable

Okay, let’s get this party started! Setting up your Victrola turntable is the first step to audio nirvana.
When I first unboxed mine, I was so excited I nearly tripped over my own feet trying to get it set up. Don’t be like me – take your time and do it right!
First things first, find a nice, level surface for your turntable. I made the mistake of putting mine on a wobbly table once, and let me tell you, it was not pretty.
You want something sturdy and flat – no dance floors here!
Next up, you’ll need to connect your Victrola to power and speakers. This part can be a bit tricky, especially if you’re not tech-savvy like yours truly.
I remember spending a good hour trying to figure out which cable went where. But don’t worry, your Victrola should come with clear instructions.
Just match the colored cables to the right inputs, and you’ll be golden.
Now comes the fun part – adjusting the tonearm and cartridge. This is where the magic happens, folks!
The tonearm is that long, slender arm that holds the cartridge (which houses the needle or stylus). Getting this right is crucial for good sound quality.
Here’s a pro tip I learned the hard way: don’t just eyeball it! Use the protractor that came with your turntable to align the cartridge properly.
And when you’re setting the tracking force (how heavily the needle sits in the groove), start light and adjust from there. I once set mine too heavy and nearly had a heart attack when I heard the resulting sound.
Thankfully, no records were harmed in the process!
Remember, setting up your turntable is an art form. It might take a bit of trial and error, but once you get it right, oh boy, is it worth it!
The first time I heard a perfectly set-up Victrola, I swear I could hear angels singing. Or maybe that was just Freddie Mercury.
Either way, it was magical!
Operating Your Victrola Turntable

Alright, you’ve got your Victrola all set up and ready to go. Now comes the fun part – actually using it!
Trust me, there’s nothing quite like the ritual of putting on a record. It’s like a little dance, and soon you’ll be doing it with your eyes closed.
First up, you need to select the correct speed. Most records play at 33 1/3 RPM, but some play at 45 RPM.
I learned this the hard way when I played my first 45 at 33 1/3 – let’s just say it sounded like the chipmunks on sedatives. Not my finest moment!
Next, you’ll want to carefully place your record on the platter. I like to hold it by the edges and label, avoiding those delicate grooves.
Oh, and make sure your hands are clean! I once left a greasy fingerprint on my favorite Beatles album and nearly cried.
Now comes the moment of truth – lowering the needle. This is where the cueing lever comes in handy.
It’s like a little elevator for your needle, allowing you to lower it gently onto the record. I used to try and do this by hand, but after a few heart-stopping scratches, I learned to love the cueing lever.
To start playback, simply lower the cueing lever and let the magic happen. The first time I heard the warm crackle of a vinyl record on my Victrola, I swear time stood still.
It’s a sound like no other!
When you’re done listening (if you ever want to stop, that is), just lift the cueing lever to raise the tonearm, and then move it back to its rest. Some Victrola models have an automatic return feature, which is pretty nifty.
But I kinda like doing it manually – it feels more authentic, you know?
Remember, operating a turntable is all about being gentle. Treat your Victrola and your records with love, and they’ll reward you with years of amazing sound.
And don’t be discouraged if you make a mistake or two along the way. We all do!
It’s part of the charm of vinyl.
Maintaining Your Victrola Turntable
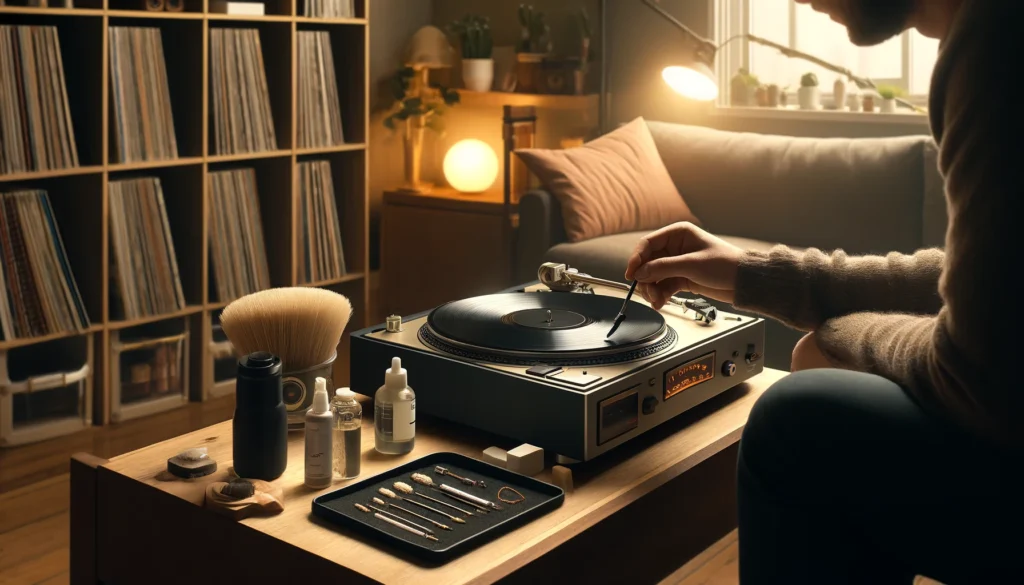
Alright, now that you’re a pro at using your Victrola, let’s talk about keeping it in tip-top shape. Trust me, a little TLC goes a long way in the world of turntables.
I learned this the hard way when I neglected my first turntable and ended up with more pops and crackles than a bowl of Rice Krispies!
First up, cleaning. Your stylus (that’s the fancy word for the needle) is like a little explorer, traveling through the grooves of your records.
And just like any explorer, it can get a bit dirty. I use a stylus brush to gently clean mine before each use.
Word of caution: be gentle! I once pressed too hard and bent my stylus.
Let’s just say it wasn’t my proudest moment.
Now, onto the records themselves. Keep ’em clean, folks!
I use a carbon fiber brush to remove dust before and after each play. For deeper cleaning, I use a special vinyl cleaning solution.
But whatever you do, don’t use water or household cleaners. I made that mistake once and… well, let’s just say that record now makes a lovely wall decoration.
Speaking of the stylus, these little guys don’t last forever. I replace mine every 1000 hours of play or so.
It’s like changing the oil in your car – a bit of a pain, but necessary for smooth operation. The first time I changed mine, I was sweating bullets!
But now it’s a breeze.
Lastly, let’s talk storage. Store your records vertically, never stacked.
And keep ’em away from heat and sunlight. I once left a record in my car on a hot day.
When I came back, it looked like a Salvador Dali painting. Not cool, man.
Not cool.
Remember, maintaining your Victrola is all about consistency. A little bit of care goes a long way.
And trust me, when you hear the crisp, clear sound of a well-maintained turntable, you’ll know it’s all worth it!
Troubleshooting Common Issues

Okay, so you’ve set up your Victrola, you’re using it like a pro, and you’re keeping it squeaky clean. But what happens when things go a little… sideways?
Don’t panic! Even the best turntables can have off days.
I’ve been there, and I’ve got some tricks up my sleeve to share.
First up, let’s talk about sound quality problems. If your tunes are sounding a bit off, it could be a few things.
Check your stylus – is it dirty or worn out? I once spent hours trying to figure out why my records sounded like they were underwater, only to realize my stylus was coated in dust.
Embarrassing, but an easy fix!
If you’re experiencing skipping or repeating, don’t throw your hands up in despair just yet. This could be due to a few things.
Is your turntable level? I once had a persistent skipping problem that was solved by simply adjusting the feet of my Victrola.
Also, check your tracking force. If it’s too light, your needle might be bouncing around like a kangaroo on a trampoline.
Now, let’s address the dreaded speed inconsistencies. You know, when your favorite song suddenly sounds like it’s being played by a drunk DJ?
This is often due to a worn-out belt (if your Victrola is belt-driven). Replacing the belt is usually a quick and easy fix.
I remember the first time I did this – I felt like a turntable surgeon!
Sometimes, the issue might be with the record itself. Warped records can cause all sorts of problems.
I once bought a “mint condition” record online that turned out to be as wavy as the ocean. Lesson learned: always check your records carefully!
Remember, troubleshooting is all about patience and process of elimination. Start with the simplest solutions and work your way up.
And don’t be afraid to consult your Victrola’s manual or reach out to other vinyl enthusiasts. We’ve all been there, and most of us are happy to help a fellow record lover in need.
Conclusion
Well, there you have it, folks! You’re now equipped with all the knowledge you need to use your Victrola turntable like a pro.
From setting it up just right to troubleshooting those pesky issues, you’re ready to dive headfirst into the wonderful world of vinyl.
Remember, using a turntable is as much an art as it is a science. Don’t be afraid to experiment and find what works best for you.
Maybe you’ll discover that slightly adjusting the tracking force brings out the bass in your favorite jazz records. Or perhaps you’ll find the perfect cleaning routine that keeps your vinyl in pristine condition.
Always keep in mind the importance of treating your equipment and records with care. These aren’t just pieces of plastic and metal – they’re gateways to incredible sonic experiences.
Treat them well, and they’ll reward you with years of amazing music.
And hey, don’t forget about safety! Make sure your turntable is placed somewhere stable, keep liquids away (trust me on this one), and always handle electrical connections with care.
Your ears will thank you for the great tunes, but they’d probably appreciate not being electrocuted, too!
Now, I’d love to hear from you! What’s been your experience with Victrola turntables?
Any tips or tricks you’ve discovered? Or maybe you have a funny story about your first time using a turntable?
Drop a comment below and let’s keep this vinyl conversation spinning!
Remember, every scratch, pop, and hiss is part of the vinyl experience. Embrace it, enjoy it, and most importantly, keep those records turning.
Happy listening!
