Acoustic Panels Behind Speakers: Should You Do It? [2026]
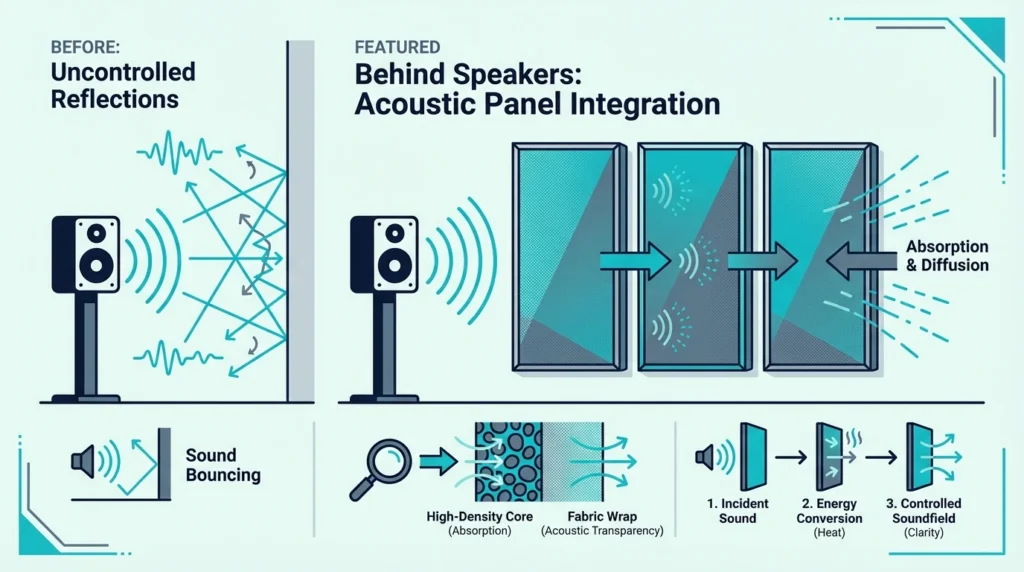
Should you put acoustic panels behind speakers? Yes, but only if you are solving the right problem.
When speakers sit close to the wall behind them, SBIR can carve dips in the low mids and make bass feel boomy in one spot and thin in another. When the stereo image feels smeared, the usual culprit is early reflections from side walls and the ceiling.
Start with the quick rule below, then use the placement priorities to decide what to treat next so you can lock in imaging and smooth out the low end.
Panels behind speakers can reduce SBIR (Speaker Boundary Interference Response) and low-mid buildup when speakers are close to the front wall. Treat first reflection points on side walls and the ceiling first, then use thick panels (4+ inches) behind the speakers if you still hear boomy or uneven bass.
Should You Put Acoustic Panels Behind Speakers?
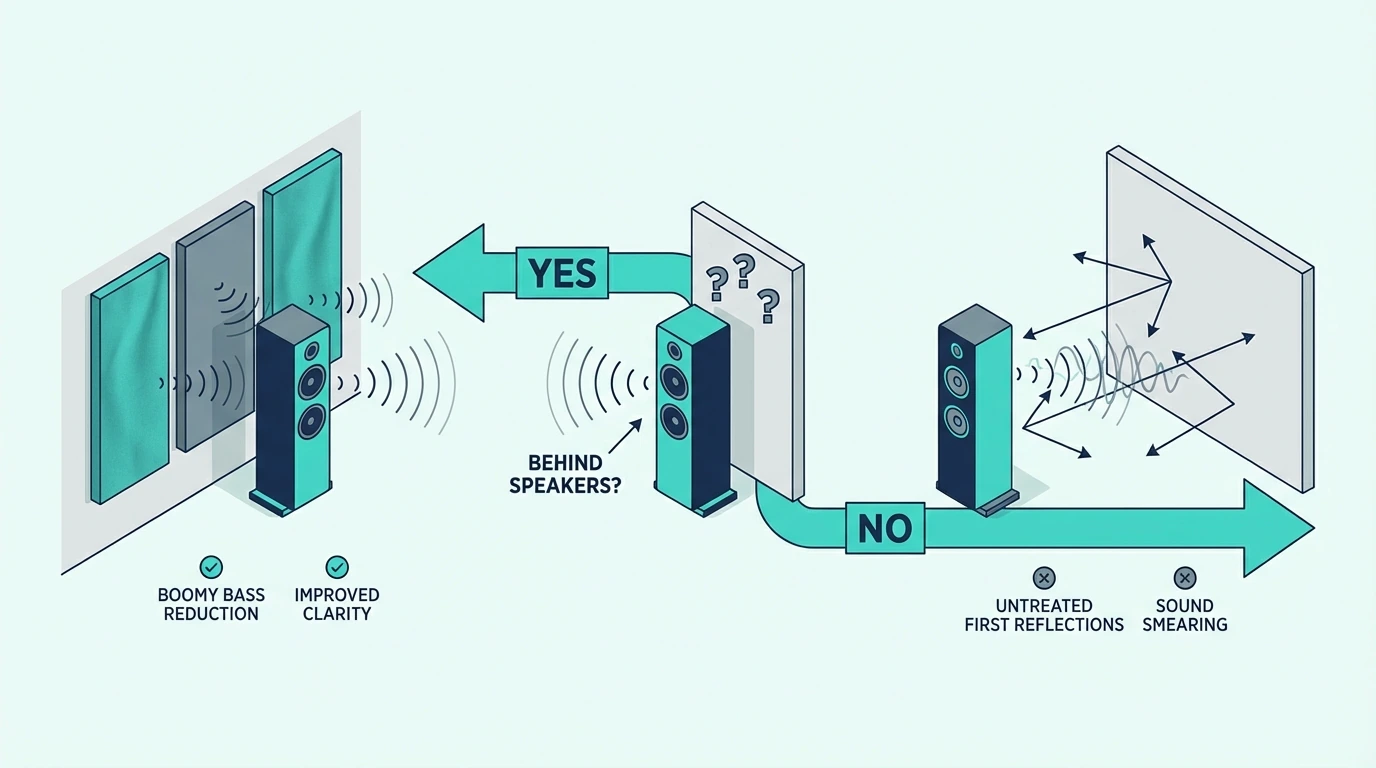
It depends on your setup. In most home studios and listening rooms, the fastest improvement comes from first reflection points, not the wall behind the speakers.
The wall behind the speakers mainly affects low-mid buildup and SBIR. Side walls and the ceiling shape clarity and imaging, so they tend to feel more obvious when you treat them.
If you are starting from zero, treat side walls and the ceiling first.
Rear wall treatment behind speakers becomes worth it when speakers are close to the wall, when bass feels uneven and hard to dial in, or when desk placement forces a short distance.
What Is SBIR and Why Does It Matter?
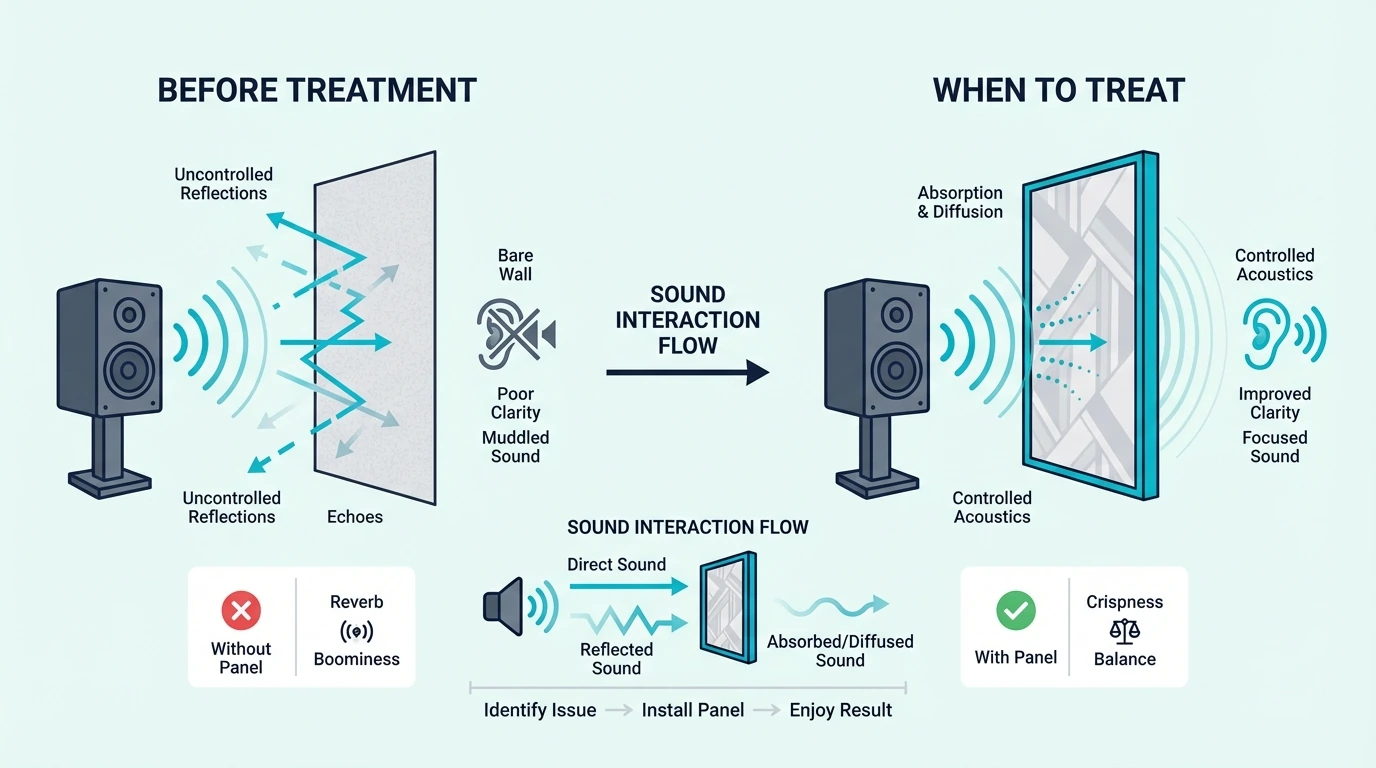
Because acoustic physics are confusing, most people assume that putting panels directly behind the speakers will stop the sound before it reaches the rest of the room. SBIR—Speaker Boundary Interference Response—explains what actually happens when sound hits that front wall.
How SBIR Works
When your speaker pushes a sound wave forward toward your ears, it simultaneously radiates low-frequency energy backward toward the wall behind it. The NRC rating of a panel tells you how much mid-range energy it absorbs, but SBIR lives lower than the NRC test range. That backward-traveling wave hits the drywall, reverses direction, and bounces straight back at you, eventually colliding with the direct sound coming out of the front of the speaker.
Because the reflected wave traveled further, it arrives slightly late. At certain frequencies, that delay causes the two waves to collide perfectly out of phase, creating a massive cancellation that literally deletes that frequency from the room. At other frequencies, they arrive perfectly in phase, doubling the volume and creating a boomy, overwhelming peak.
The Distance Factor
The exact frequencies that get destroyed by this collision depend entirely on the physical distance between your speaker cone and the drywall.
When speakers sit just 12 inches from the wall, the cancellation notch sits high in the low-mids, right around 280 Hz, destroying the warmth of a guitar or snare drum. Pulling the speakers back to 24 inches drops that notch down to 140 Hz. Moving them a full 36 inches off the wall pushes the SBIR cancellation down below 95 Hz, dropping it into the sub-bass territory where room modes take over anyway.
How Panels Help
Thick acoustic panels mounted directly behind the speakers act as a buffer against this collision. By forcing that backward-traveling wave to pass through dense fiberglass before hitting the drywall, the panel strips away the energy of the reflection.
When that weakened reflection finally bounces back and collides with the direct sound, it lacks the energy to cause severe cancellation. The deep notches in your frequency response flatten out, and the low-mids suddenly sound tight and defined rather than hollow and unpredictable.
However, a standard 2-inch panel is completely physically incapable of absorbing these long low-mid wavelengths. To actually reduce SBIR, you must use panels that are at least 4 inches thick. If you are unsure what thickness is worth choosing for the rest of the room, the 2-inch vs 4-inch comparison shows what that extra depth changes in real rooms.
Get Studio Tips Weekly
Join 5,000+ creators getting acoustic treatment advice every week.
No spam. Unsubscribe anytime.When Should You Put Panels Behind Speakers?
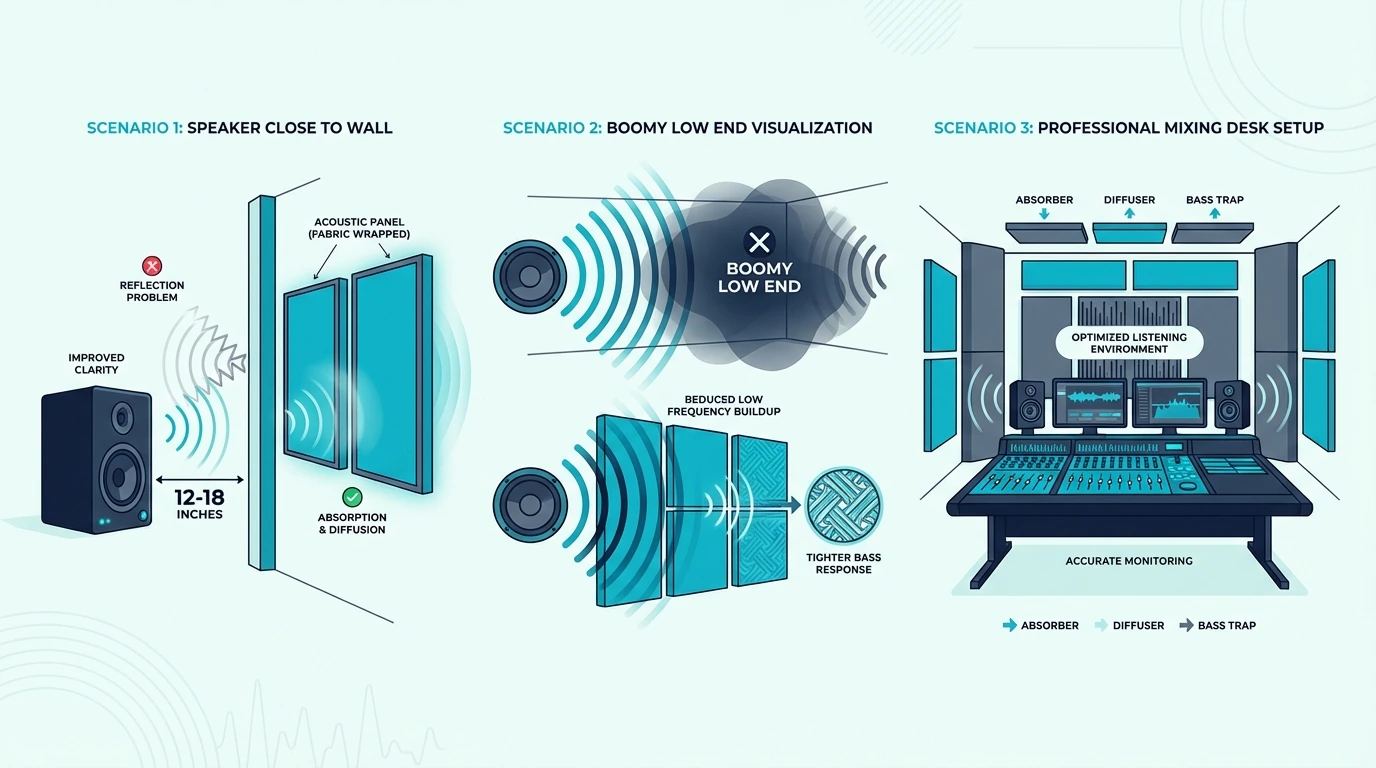
Because you are fighting physics, simply slapping panels behind the monitors isn’t a universal fix. The treatment only works if your room actually suffers from the specific problems that front-wall absorption solves.
Speakers Close to Wall
If your desk forces your monitors to sit within 18 inches of the front wall—the unavoidable reality of most bedroom studios and apartments—treating that boundary becomes critical. At that tight distance, the SBIR cancellation notches sit exactly in the upper bass and low-mid frequencies that make mixes sound punchy.
If you are working in a rental, the apartment treatment guide explains how to mount thick panels safely without losing your security deposit. Hitting that front wall with dense fiberglass pulls the coloration out of the low-mids, leaving you with a tight, highly defined bass response.
Boomy or Muddy Low End
Even if your speakers sit further out into the room, you might still suffer from a persistently muddy low-end that makes kick drums sound like a blurry, sustained rumble. This boominess usually occurs because the energy bouncing off the front wall is lingering in the room and muddying the direct sound.
Placing thick absorption behind the speakers acts like an acoustic brake, shutting down that secondary wave before it has a chance to wander the room. This is especially true for desktop bookshelf speakers, where the combination of desk reflections and the immediate front wall creates a nightmare of low-frequency chaos.
Professional Mixing Environments
In a dedicated critical listening environment like a mastering suite or a commercial control room, leaving the front wall bare is almost unthinkable. The goal in these rooms is absolute, clinical control over every single boundary in the space.
For home producers attempting to hit that level of translation, treating the wall behind the monitors is the mandatory final step after the first reflection points and corner bass traps have been locked in.
When Should You Skip Rear Wall Treatment?
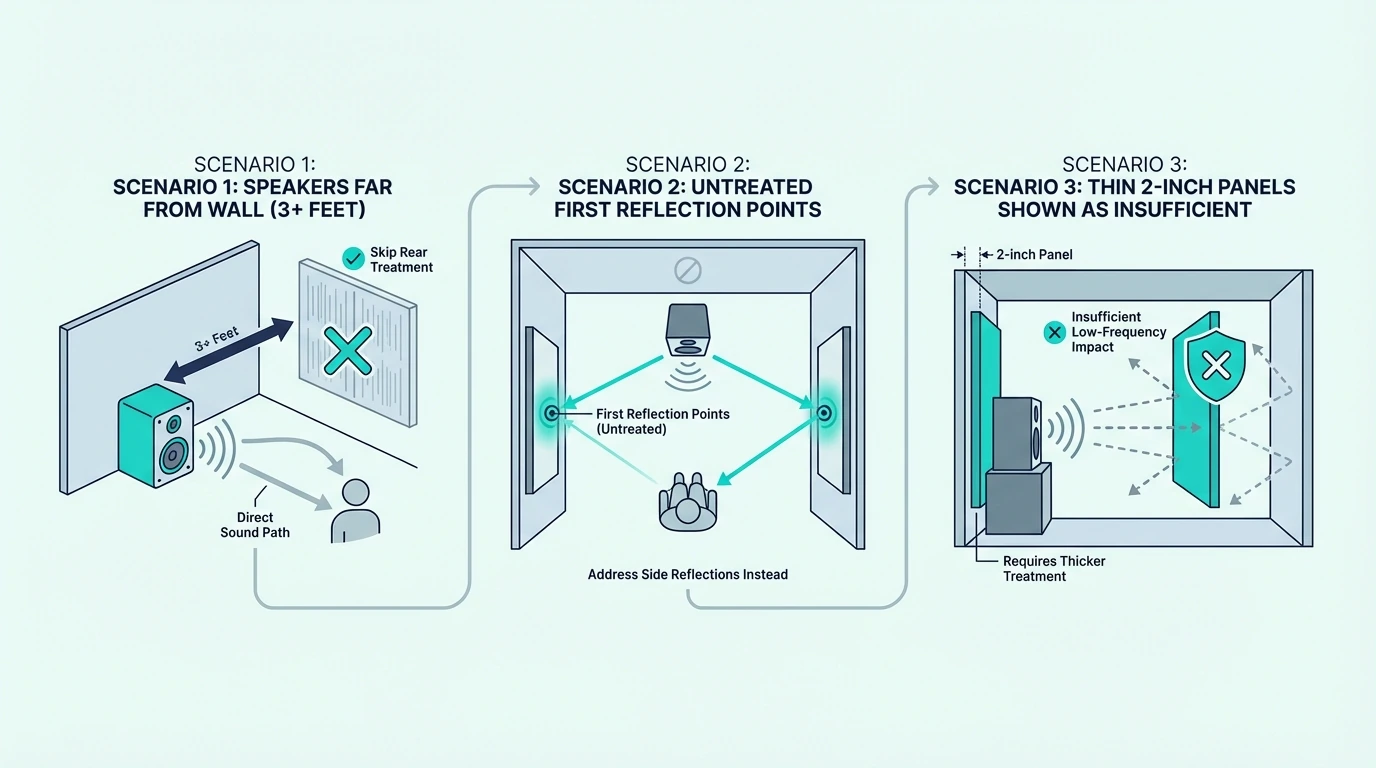
Many bedroom producers blow their budget buying massive 4-inch panels for the front wall when their room actually needs something else entirely. There are three scenarios where ignoring the front wall is the smarter move.
Speakers Far From Wall
If you have the luxury of pulling your speakers 3 or 4 feet away from the front wall, you move past the SBIR problem. At that physical distance, the cancellation notches drop so deep into the sub-bass frequencies that massive room modes take over the physics anyway.
Hanging panels behind speakers spaced that far out provides almost zero audible benefit to the mix position. Your budget is far better spent on floor-to-ceiling corner bass traps to control the deep room modes instead.
First Reflections Untreated
If the side walls beside your listening chair are still bare drywall, stop looking at the front wall. Hitting the first reflection points on your left and right is the single most critical step in acoustic treatment, and the placement guide maps those exact positions.
Those immediate side reflections destroy your stereo imaging, smear your high frequencies, and ruin vocal clarity. Treating the front wall before the side walls is like buying expensive racing tires for a car with a broken steering wheel—you are fixing a subtle refinement while ignoring a devastating flaw.
Thin Panels Only
If you only own standard 2-inch thick acoustic panels, putting them behind your speakers is a complete waste of material. While a 2-inch panel expertly absorbs high frequencies and flutter echo above 500 Hz, it is completely invisible to the 100-300 Hz low-mid waves where SBIR actually occurs.
Either invest in 4-inch or 6-inch panels specifically for the front wall, or save your 2-inch panels for the side walls where their mid-range absorption is needed most. If you do opt for the heavy panels, the hanging guide covers the heavy-duty mounting hardware required to keep them safely on the drywall.
What About Front-Ported vs Rear-Ported Speakers?
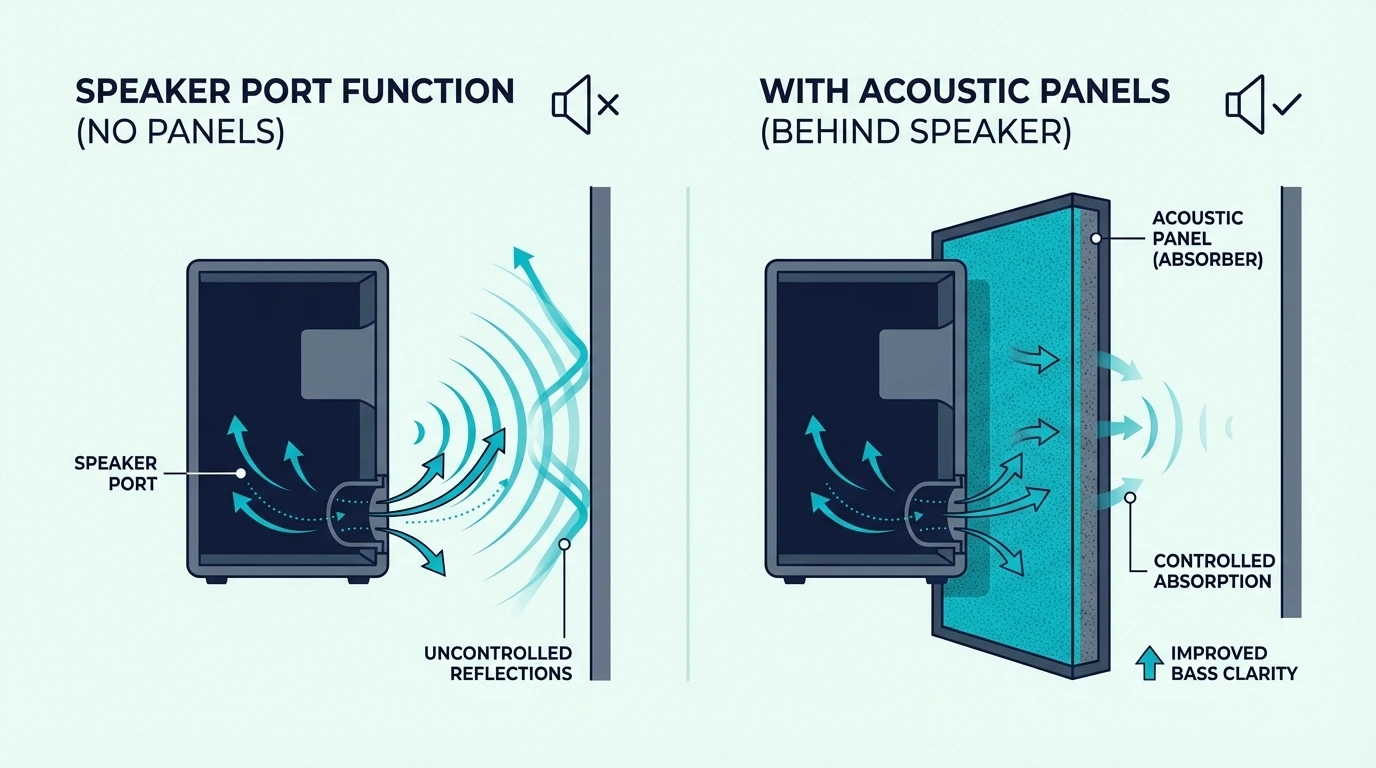
Speaker design affects how the rear wall interacts with sound output. This matters for placement and treatment decisions.
Front-Ported Speakers
Front-ported (or sealed) speakers direct all sound output forward. They are less sensitive to rear wall proximity because there is no port interaction with the boundary.
Treatment behind front-ported speakers is purely about SBIR reduction—helpful but not critical unless speakers are very close to the wall.
Rear-Ported Speakers
Rear-ported speakers have a bass reflex port on the back that directs low-frequency energy toward the rear wall. Placing these speakers too close to the wall causes port loading—boosted, undefined bass.
For rear-ported speakers, the first solution is distance: position them at least 12-18 inches from the wall. If space does not allow adequate distance, absorption on the rear wall can help control port reflections—but it is a compromise, not a fix.
The Distance Rule
Regardless of port type, more distance from the rear wall generally improves sound. Treatment cannot fully compensate for speakers crammed against walls.
If possible, move speakers forward first, then treat the remaining reflection.
Where Should You Actually Put Panels First?
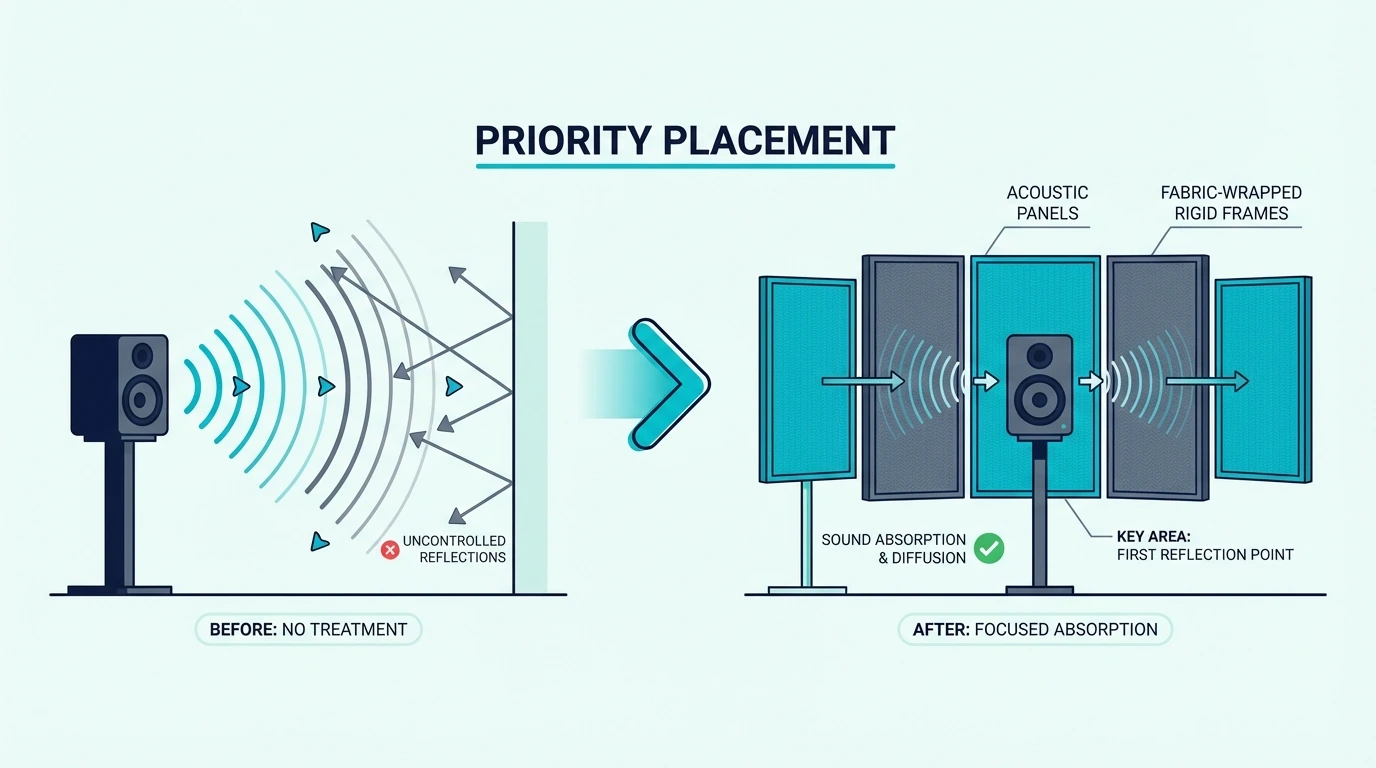
If your room is a blank slate, you must establish a strict hierarchy of treatment. Wasting your first panels on a subtle front-wall tweak while the rest of the room bounces out of control guarantees a terrible sounding mix.
The True Treatment Hierarchy
The absolute highest priority in any listening room is the side walls at the first reflection points. These are the exact spots where sound ricochets directly from the tweeter to your ear, creating the comb filtering that destroys your phantom center. By employing the simple mirror trick—having someone slide a mirror along the side wall until you see the speaker cone from your chair—you can locate the exact square foot where your first 2-inch panel belongs.
If you want a compact set that easily covers both side walls instantly, Olanglab 4-Pack Fiberglass Panels provide professional fiberglass absorption right at the source.
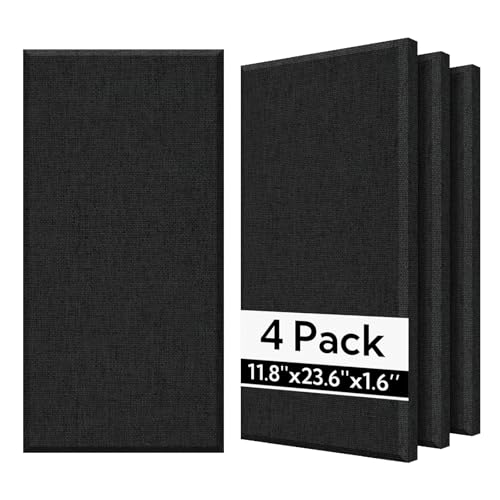
Olanglab 4-Pack Fiberglass Panels
Once the side walls are locked down, priority two is the ceiling directly above the mix position. A suspended acoustic cloud eliminates the vertical bounce that causes harsh flutter echo between the ceiling and the desk surface.
Priority three shifts to the deep low end, demanding thick bass traps stacked in the vertical corners to soak up the room modes that make bass notes linger for seconds after the track stops.
Only after those three foundational pillars are secured does the wall behind the speakers become priority four. Once the rest of the room is tight, placing 4-inch panels directly behind the monitors provides the final level of surgical refinement needed to clean up the low-mid SBIR dips. Finally, the rear wall directly behind your chair represents priority five, where professional rooms often deploy diffusion rather than absorption to maintain a natural sense of acoustic space.
How to Treat the Wall Behind Speakers
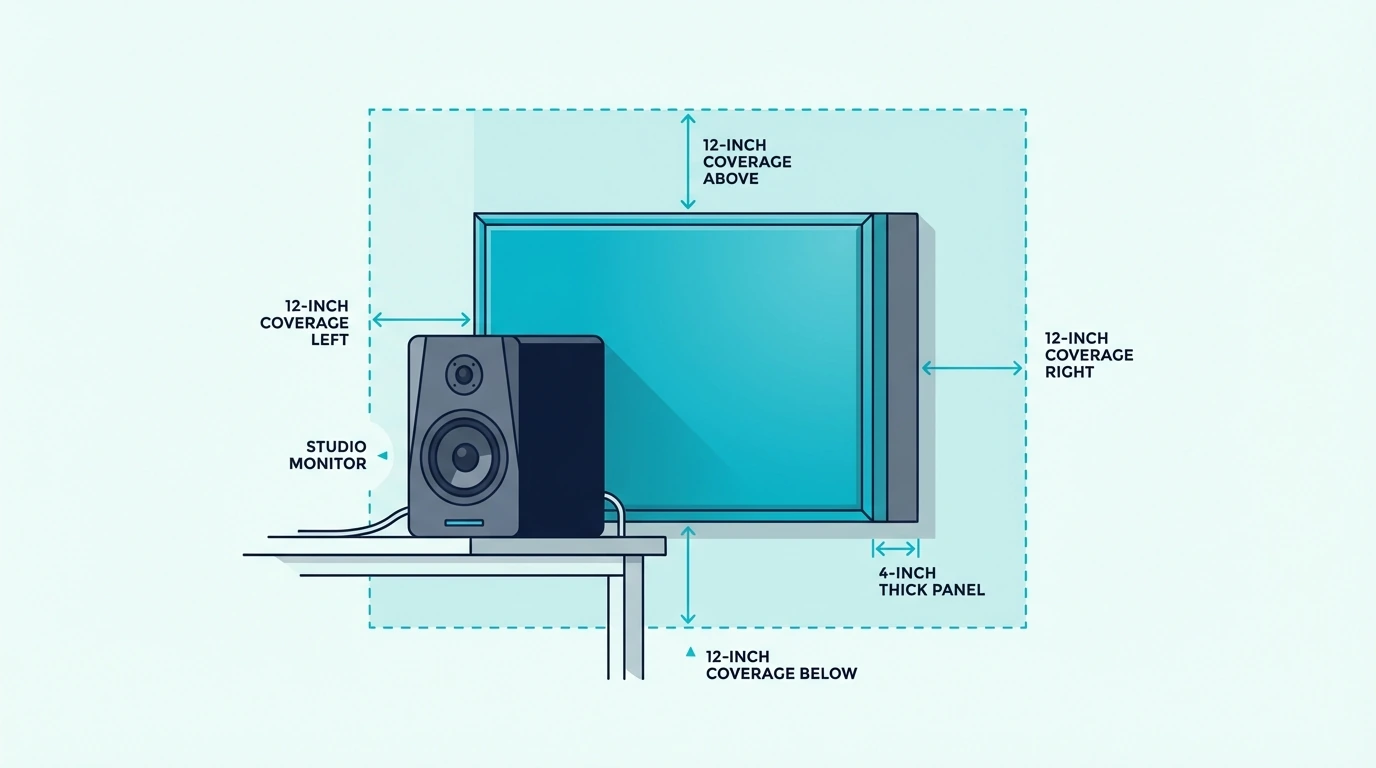
When you finally reach the point where front wall treatment is the logical next step, you have to execute it correctly. Hanging thin decorative panels where thick mass is required is a classic studio mistake.
Panel Thickness and Coverage Area
Because the goal is fighting SBIR in the low-mid frequencies, 4 inches of thickness is the absolute minimum requirement, while 6 inches of fiberglass or mineral wool provides ideal absorption. If you attempt to solve a 150 Hz null with a standard 2-inch panel, the wave will simply pass through it, bounce off the wall, and cancel out your monitors anyway.
If you prefer to buy a ready-to-hang solution rather than building a DIY box, the UMIACOUSTICS Large Panels deliver the necessary core depth and density to actually alter the front-wall reflections.
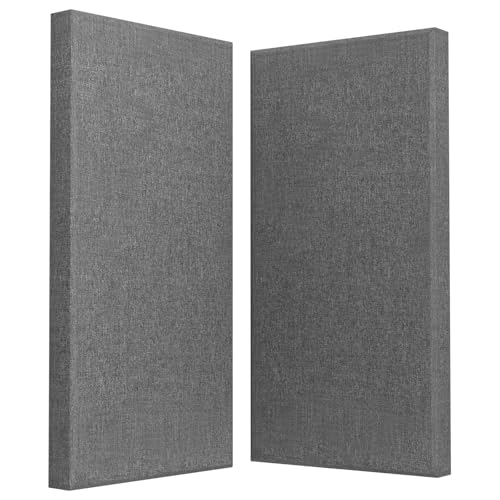
UMIACOUSTICS Large Panels
You must center these thick panels directly behind the speakers themselves, ensuring the material extends at least 12 inches past the outer edges of the speaker cabinet in every direction. A single massive 24×48-inch panel mounted horizontally behind each monitor is usually the perfect starting point. Panel spacing between those two panels matters less than centering each one directly behind its speaker. Hanging these heavy beasts requires rigid mounting; using French Cleat Z Hangers allows you to lock the frames securely to the drywall while keeping a flush, low-profile look.
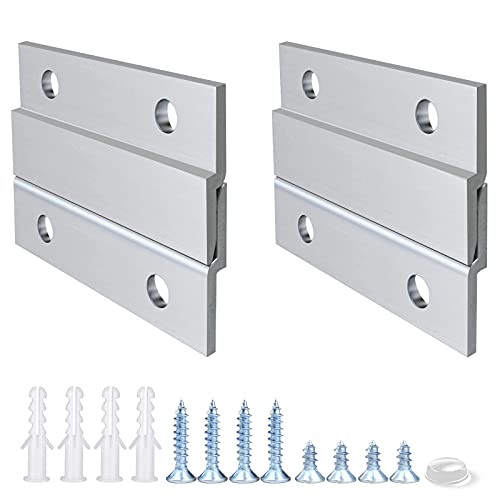
French Cleat Z Hangers
To Gap or Not to Gap?
Interestingly, while adding an air gap behind a standard side-wall panel massively increases its bass absorption, an air gap behind the front speakers is usually unnecessary. Because you are already using 4-to-6 inch thick panels to combat SBIR, the physical mass of the material provides more than enough low-frequency performance when mounted flush to the drywall.
If your room feels uncomfortably suffocating after hanging these massive panels, you might have over-treated the space. Swapping the thick absorbers for deep wooden diffusers can scatter the front-wall reflections without sucking all the acoustic energy out of the room, reducing the SBIR notches while keeping the room feeling alive.
What Are Common Mistakes with Speaker Area Treatment?
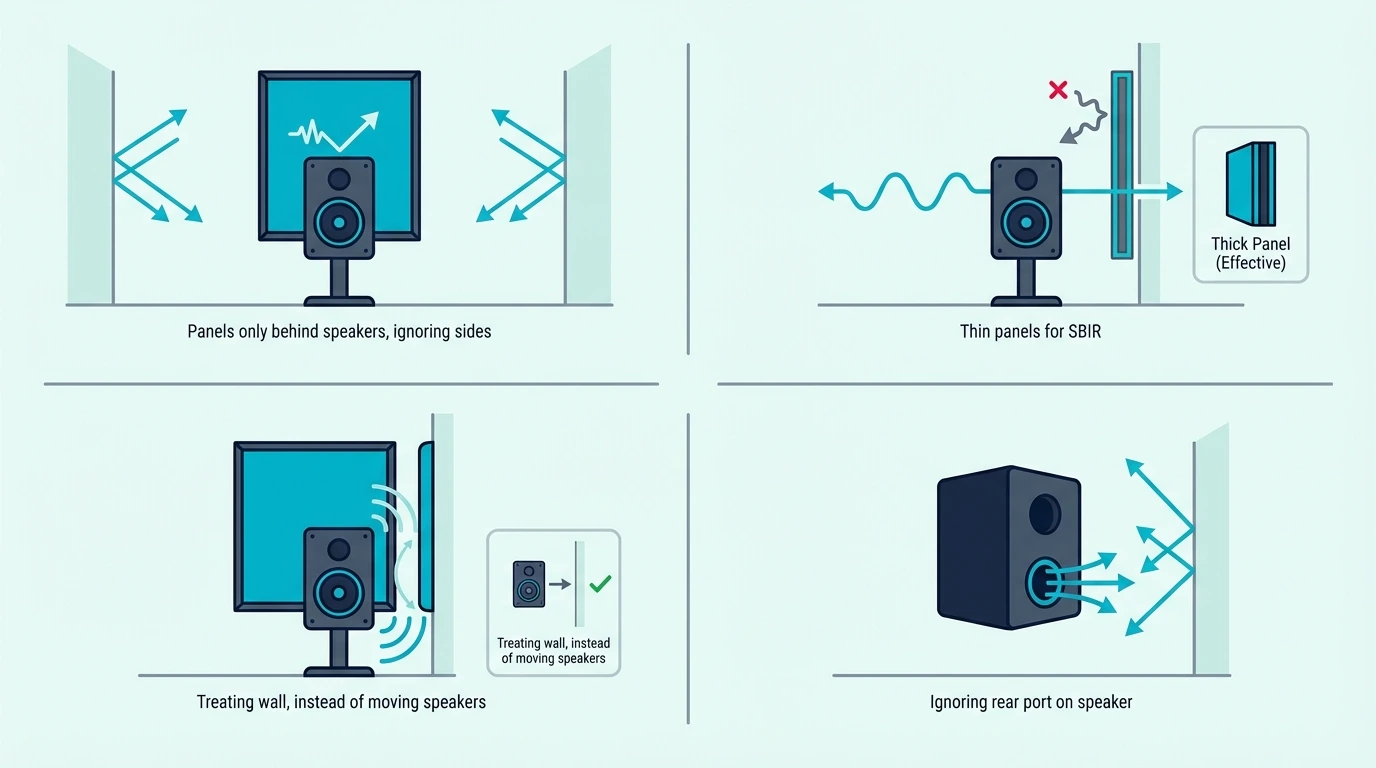
Even armed with the right panels, studio builders constantly make strategic errors regarding the front wall. Avoiding these four common pitfalls keeps your budget laser-focused on the problems you can actually hear.
The Danger of Ignoring Priorities
The most devastating mistake an amateur producer can make is buying six thick panels, mounting them all behind the desk, and leaving the side walls completely bare. Treating only the front wall fixes a subtle low-mid interference problem while completely ignoring the brutal flutter echo and stereo smearing caused by the untreated first reflection points. Side walls always take priority.
The second mistake is relying on 2-inch foam to fix SBIR. A thin foam wedge physically cannot absorb the low-mid frequencies bouncing off the front wall, meaning you have effectively spent money to change the way the wall looks without altering how it sounds in the low end at all.
Hardware Fixes vs Acoustic Fixes
Producers also frequently try to treat their way out of a bad layout. If your massive studio monitors are crammed exactly 6 inches away from the drywall, adding a panel will not solve the overwhelming bass buildup. Physically pulling the desk out to 18 or 24 inches from the wall fixes the physics of the room instantly, completely free of charge. Acoustic treatment should always act as a refinement to an optimized layout, not a band-aid for terrible speaker positioning. The 1-inch vs 2-inch comparison explains why thin panels miss the frequencies that matter most behind monitors.
Finally, failing to respect the port design of the speaker destroys the low end. If you own rear-ported monitors that vent bass directly out the back of the cabinet, shoving them flush against a thick absorption panel chokes the port. You must maintain adequate breathing room for the bass reflex port to function, or the speaker’s engineered low-end response collapses entirely.
How Does Each Treatment Zone Compare?
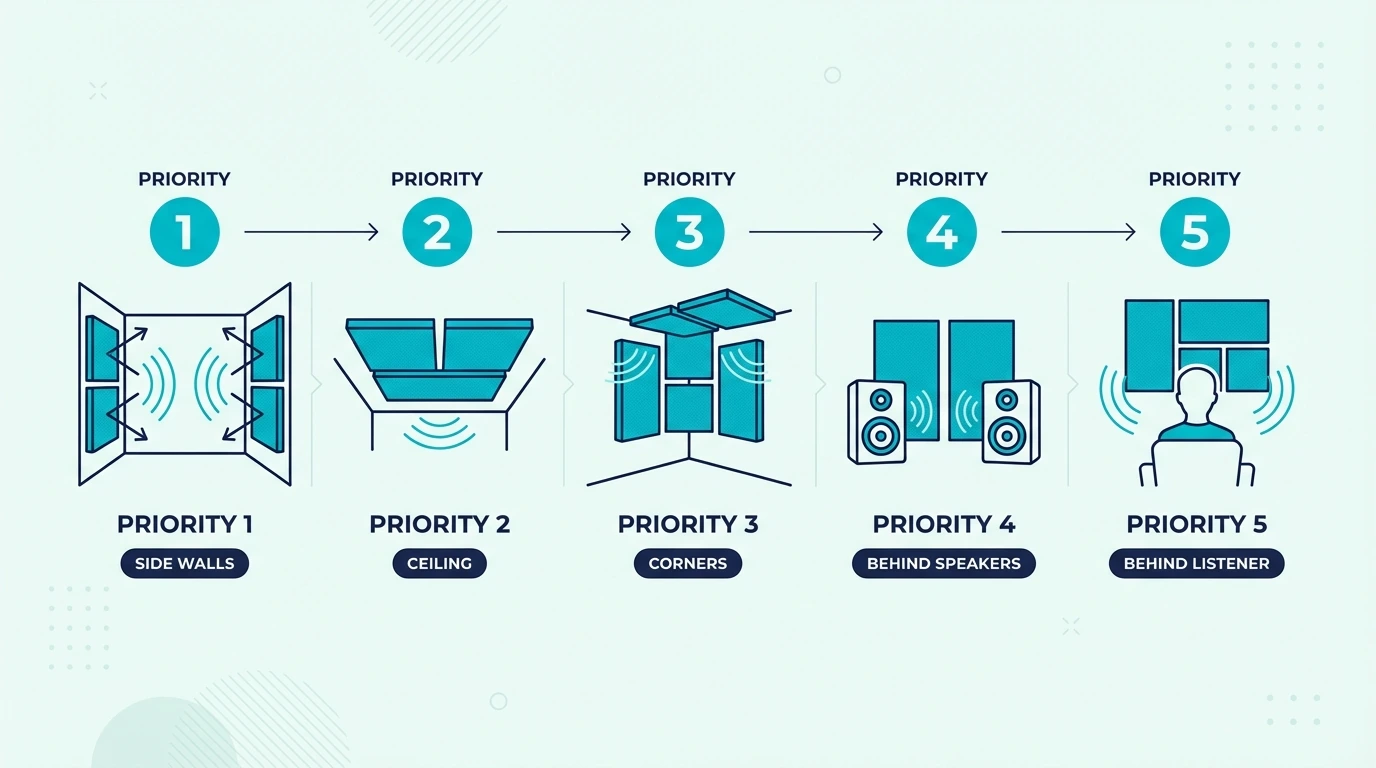
Not every surface deserves the same panel. The table below ranks each treatment zone by how much it changes what you hear, along with the minimum thickness that actually moves the needle at that location.
| Treatment Location | Priority | What It Addresses | Panel Thickness |
|---|---|---|---|
| First Reflection (Side Walls) | 1 | Imaging, clarity, comb filtering | 2-4 inches |
| Ceiling Cloud | 2 | Vertical reflections, flutter echo | 2-4 inches |
| Corners (Bass Traps) | 3 | Room modes, bass buildup | 4-6+ inches |
| Behind Speakers | 4 | SBIR, low-mid buildup | 4-6 inches |
| Behind Listening Position | 5 | Late reflections, room liveliness | Diffusion preferred |
Side wall reflections arrive just milliseconds after the direct sound from your speakers, and your brain uses that timing gap to build a stereo image. Treating those first reflection points tightens the phantom center and widens the perceived soundstage more than any other single treatment.
Ceiling clouds handle vertical reflections that cause flutter echo between a flat ceiling and a hard floor. A single 2-inch panel suspended above the mix position usually removes the problem entirely.
Corner bass traps target the low-frequency room modes that stack up where walls meet. Thick panels wedged into corners smooth out the peaks and dips that make bass sound uneven from seat to seat.
Behind-speaker treatment addresses SBIR, which becomes audible when monitors sit within 18 inches of the front wall. Four-inch panels absorb enough low-mid energy to clean up the one-note boom that EQ alone cannot fix.
The rear wall behind the listening position is the only zone where diffusion often outperforms absorption. Scattering those late reflections preserves a sense of room size without letting them smear the mix.
Where Should You Place Panels Near Speakers?
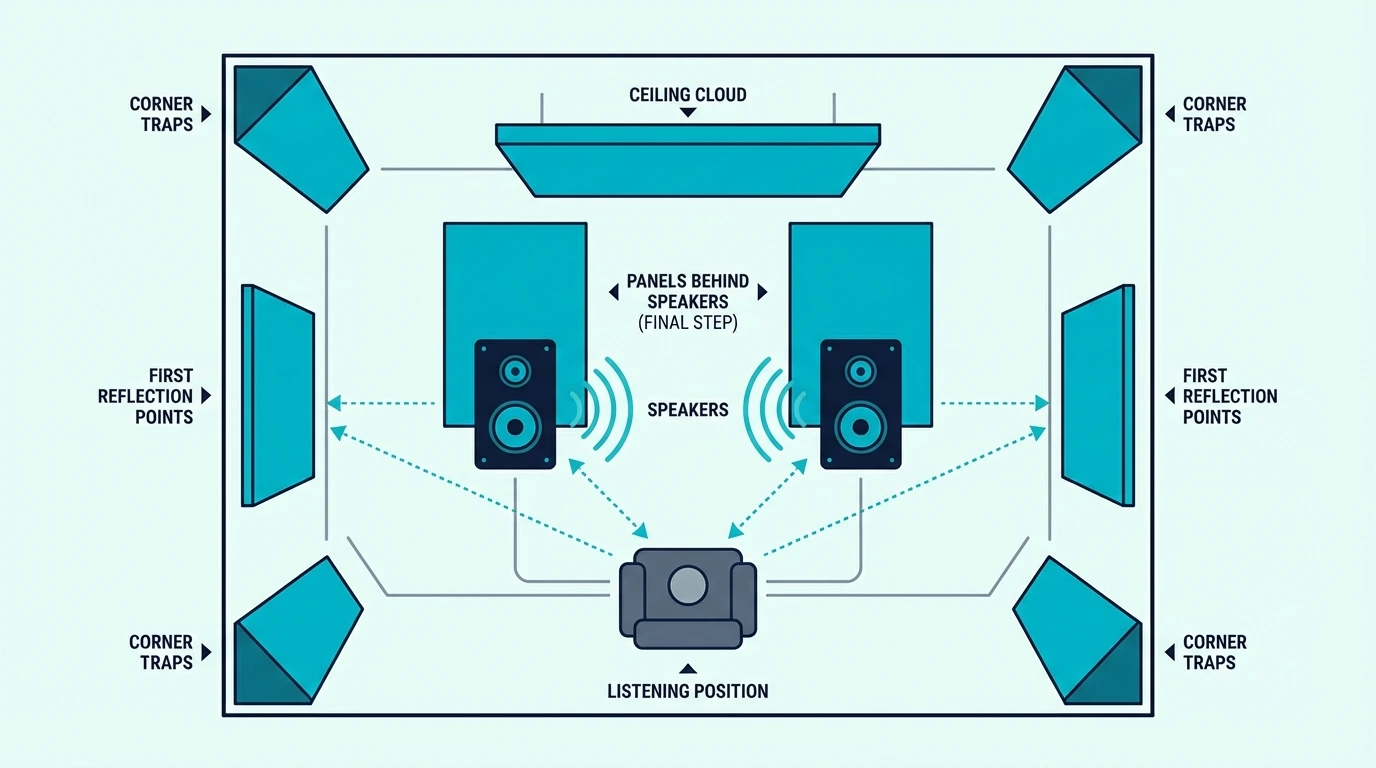
Treat first reflection points first because they provide the biggest improvement in clarity and imaging.
If you want a simple, practical order, start with side walls, then ceiling, then corners, then behind your speakers.
When you treat behind your speakers, use thick panels (4+ inches) and cover the area behind each speaker first rather than trying to blanket the entire front wall.
Conclusion
Acoustic panels behind speakers can reduce SBIR and low-mid buildup, but only after your main reflection points are under control. Treat side walls, ceiling, and corners first so you do not use your first panels on a subtle refinement. The installation guide has mounting options for every wall type and weight class.
If you still hear uneven bass with speakers close to the wall, add thick panels behind each speaker and re-check placement. Small changes in distance plus targeted absorption usually beat blanket “front wall coverage.”
Frequently Asked Questions
Should I Put Acoustic Panels Behind My Studio Monitors?
Only after treating first reflection points. Panels behind studio monitors help reduce SBIR and low-mid buildup, but this is refinement, not foundation.
Treat side walls and ceiling first for bigger improvements.
If your monitors are very close to the wall (under 18 inches), rear treatment becomes more valuable. Use thick panels (4+ inches) for meaningful absorption at the frequencies involved.
Will Panels Behind Speakers Reduce Bass?
Yes, but only if they are thick enough. Standard 2-inch panels have minimal effect on bass frequencies.
Thick panels (4+ inches) absorb low-mid frequencies where SBIR occurs, reducing problematic bass buildup rather than overall bass output.
The result should be tighter, more defined bass rather than less bass overall.
What Is the Best Placement for Acoustic Panels Near Speakers?
First reflection points on side walls are the priority. Find them using the mirror trick: where you see speakers reflected in a mirror on the side wall, that is where panels go.
After side walls, treat the ceiling above your listening position. Corners benefit from bass traps.
Behind speakers is fourth priority—helpful but not critical for most setups.
Can I Use Diffusers Instead of Absorbers Behind Speakers?
Yes, especially if your room already has heavy absorption. Diffusers scatter rear wall reflections without removing energy, which can address SBIR-related imaging issues while maintaining room liveliness.
This works best when first reflection points are already treated with absorption. Using diffusion behind speakers while first reflections are untreated will not provide the clarity benefits you are looking for.
The coverage calculator helps determine how many panels you need for full treatment.