Where to Place Acoustic Panels in Gym [2026]
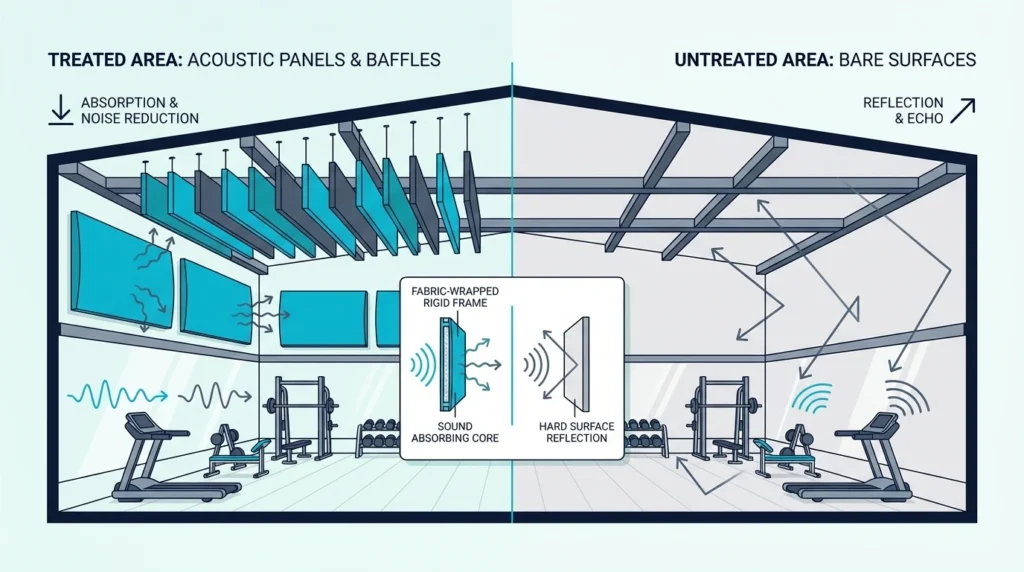
Where to place acoustic panels in gym sounds like a simple “cover the walls” problem. Yes, but gyms keep echoing unless you treat the ceiling and upper wall reflection paths first.
If coaching cues get lost, music sounds muddy, or every dropped plate rings through the building, you are hearing long reverberation plus early reflections. High ceilings, hard surfaces, and large open volume make those reflections pile up faster than they do in a typical room.
With the right placement, acoustic panels make instructions clearer and workouts feel less chaotic without making the space dead. You will also get more improvement per panel, because you are intercepting the loudest reflections instead of guessing.
Start with overhead treatment above the loudest zones and panels on upper wall sections near first reflection paths. Next up: wall, ceiling, corner, and budget priorities for commercial gyms, school gyms, and home gyms.
In a gym, prioritize ceiling baffles and clouds over the noisiest zones, then add panels high on the walls (above 7 feet) to stop wall-to-wall slap and flutter echo. Finish with corner and edge treatment for low-end buildup and use durable, easy-clean materials.
Why Are Gym Acoustics So Difficult to Treat?
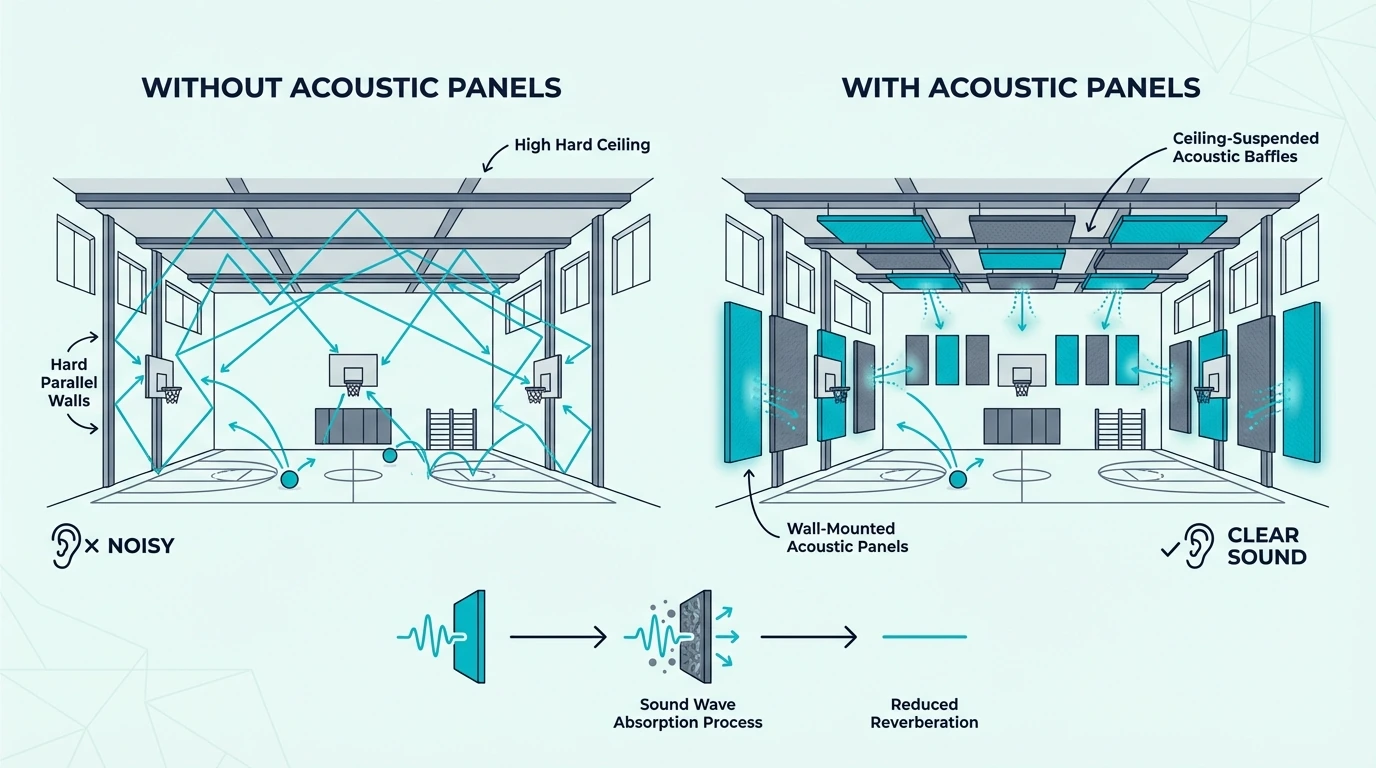
Most acoustic treatment advice assumes you are working with a standard room. Gyms break all those assumptions because of three factors: ceiling height, surface hardness, and room volume.
The problems start with ceiling height. In a gym with 20-30 foot ceilings, sound travels much further before it hits any surface.
That extra distance stretches reverberation time and creates more reflection paths. The fix is strategic placement that intercepts reflections before they build up.
High Ceilings Multiply Echo Problems
Ceiling height is the biggest factor because it controls how far sound travels before bouncing back. Sound moves at about 1,130 feet per second, so in a standard room reflections return to your ears within milliseconds.
In a gym with 25-foot ceilings, that same sound takes noticeably longer to return. This delay creates the “gymnasium echo” that makes speech unintelligible and transforms every dropped weight into a thunderclap.
The solution is not simply more panels — it is strategic placement that intercepts sound before it has time to build up. That is why ceiling treatment matters more in gyms than almost any other space.
Hard Surfaces Everywhere
Concrete walls, rubber flooring, and metal equipment create a perfect storm for sound reflection. Unlike offices with carpet and cubicle dividers, gyms offer almost nothing to absorb sound naturally.
Each hard surface acts like a mirror for sound waves. When you have parallel concrete walls, sound bounces back and forth dozens of times before finally dissipating — creating that characteristic muddy, boomy quality.
The floor presents a particular challenge. Rubber gym flooring, while excellent for protecting equipment and joints, reflects sound almost as efficiently as concrete.
Large Open Volumes Need Different Strategies
A 10×12 home studio needs perhaps 8-12 panels for effective treatment. A 50×80 gymnasium might need 50+ panels to achieve similar acoustic improvement — but placement becomes exponentially more important.
In large spaces, you cannot treat every surface. The key is identifying the positions where panels will intercept the most problematic reflections.
Think of it like placing defenders in sports — you cannot cover the entire field, so you position strategically to block the most dangerous attacks.
Where Should You Place Acoustic Panels in a Gym?
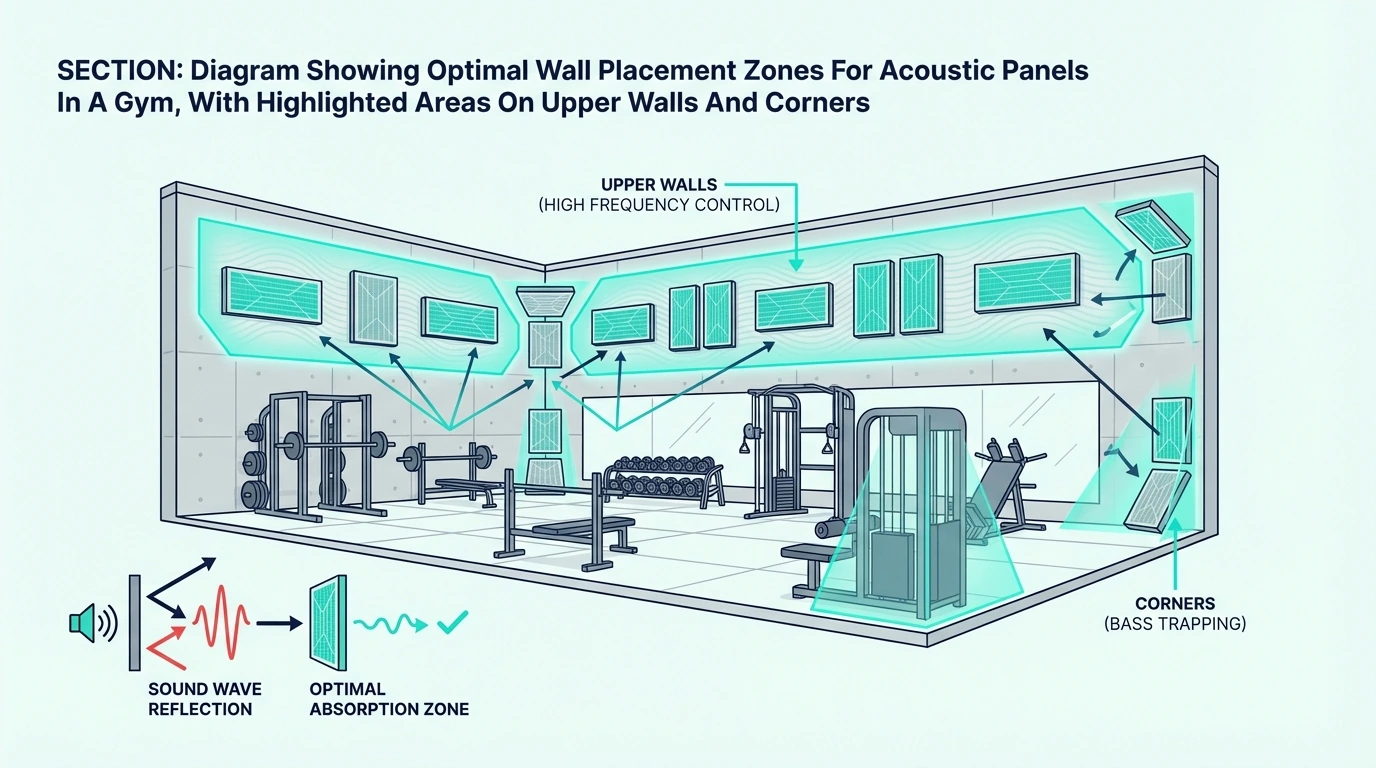
Wall placement in gyms differs fundamentally from smaller rooms. Three zones matter most: upper walls above 7 feet, the walls behind loud equipment, and corners where bass collects.
If you want a baseline process for finding first reflection points, start with the guide on where to place acoustic panels. Then scale the same approach up for higher ceilings and longer reflection paths.
Upper Wall Sections (Above 7 Feet)
The most effective wall placement in gyms targets the upper wall sections, typically from 7 feet up to where the wall meets the ceiling.
This zone matters for two reasons. First, it is where many ceiling-to-floor reflections intersect the wall.
Second, panels placed here are protected from impact damage, which matters in any gym environment. You get strong acoustic impact without putting panels where equipment or athletes can hit them.
Aim to cover 20-30% of the upper wall area. This typically means placing panels along the upper perimeter, creating a continuous absorption zone that catches sound before it can bounce between the ceiling and floor multiple times.
Behind Equipment and High-Impact Areas
Sound does not just come from voices and music. Weight drops, cardio machines, and equipment collisions generate heavy noise that radiates in all directions.
Position panels on walls directly behind the loudest equipment — typically the free weight area and any Olympic lifting platforms. This intercepts the initial sound burst before it can spread throughout the space.
For home gyms, this might mean treating the wall behind your squat rack or the area adjacent to your treadmill. The principle remains the same: get absorption close to the source.
Corner Treatments for Bass Control
Gym acoustics often suffer from bass buildup in corners. The low-frequency sounds from dropped weights and heavy music systems accumulate where walls meet, creating muddy, boomy spots.
Standard acoustic panels help somewhat, but dedicated bass traps in corners provide better low-frequency control.
Position these in at least the four main corners of the space, extending from floor level up to 4-6 feet. In smaller home gyms, treat the corners closest to the loudest equipment first.
This corner treatment works alongside your wall panels to create a more balanced sound throughout the gym.
Get Studio Tips Weekly
Join 5,000+ creators getting acoustic treatment advice every week.
No spam. Unsubscribe anytime.What About Ceiling Treatment?
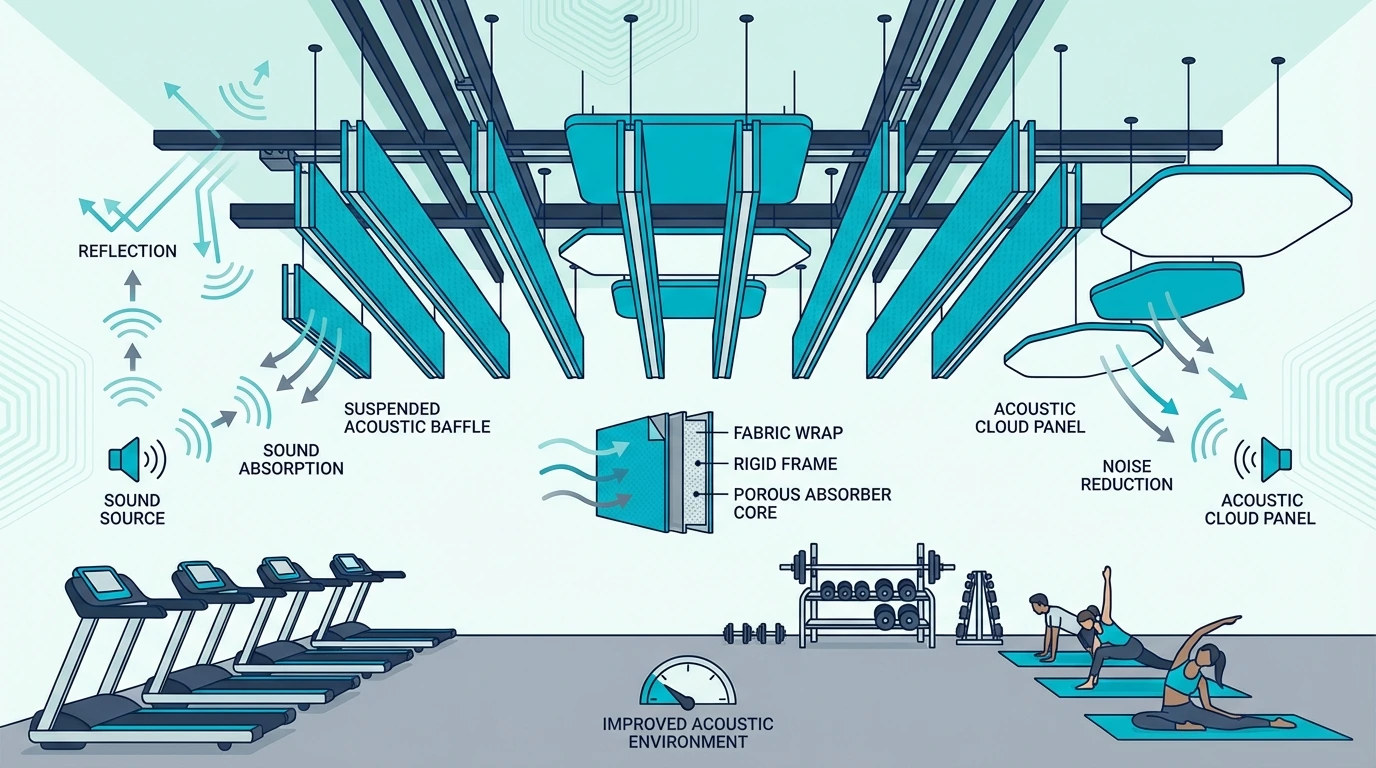
Ceiling treatment is where gym acoustics diverge most sharply from standard rooms. Three options cover most gyms: suspended baffles, direct-mount panels, and hybrid coverage calculated by ceiling height.
Ceiling Baffles and Clouds
Suspended acoustic panels — often called baffles or clouds — hang from the ceiling structure to intercept sound in the vertical dimension.
Baffles typically hang vertically in rows, creating absorption zones that sound must pass through as it travels up and down. Clouds hang horizontally, parallel to the floor, catching sound before it reaches the high ceiling.
For most gym applications, baffles work best because they are less visually intrusive and can be positioned to create effective absorption zones throughout the space.
Direct-Mount Ceiling Panels
If your gym has a standard ceiling height (under 12 feet), direct-mount ceiling panels become viable. These attach directly to the ceiling surface, typically covering 40-60% of the total ceiling area.
Home gyms often fall into this category. A garage conversion or basement gym with 8-10 foot ceilings benefits from ceiling panels placed directly above workout areas.
Focus coverage over the loudest zones — weight lifting areas, cardio sections, and any space where you need clear communication.
Coverage Calculations for Ceilings
The ceiling presents your largest single surface in most gyms. A simple formula covers coverage needs:
For high ceilings (20+ feet), suspended baffles should cover approximately 30-40% of the ceiling area when viewed from above. Space them to create overlapping absorption zones.
For standard ceilings (8-12 feet), direct-mount panels at 40-60% coverage provides good results. Prioritize placement over workout stations rather than walkways or storage areas.
How Do You Fix Echo and Reverberation in a Gym?
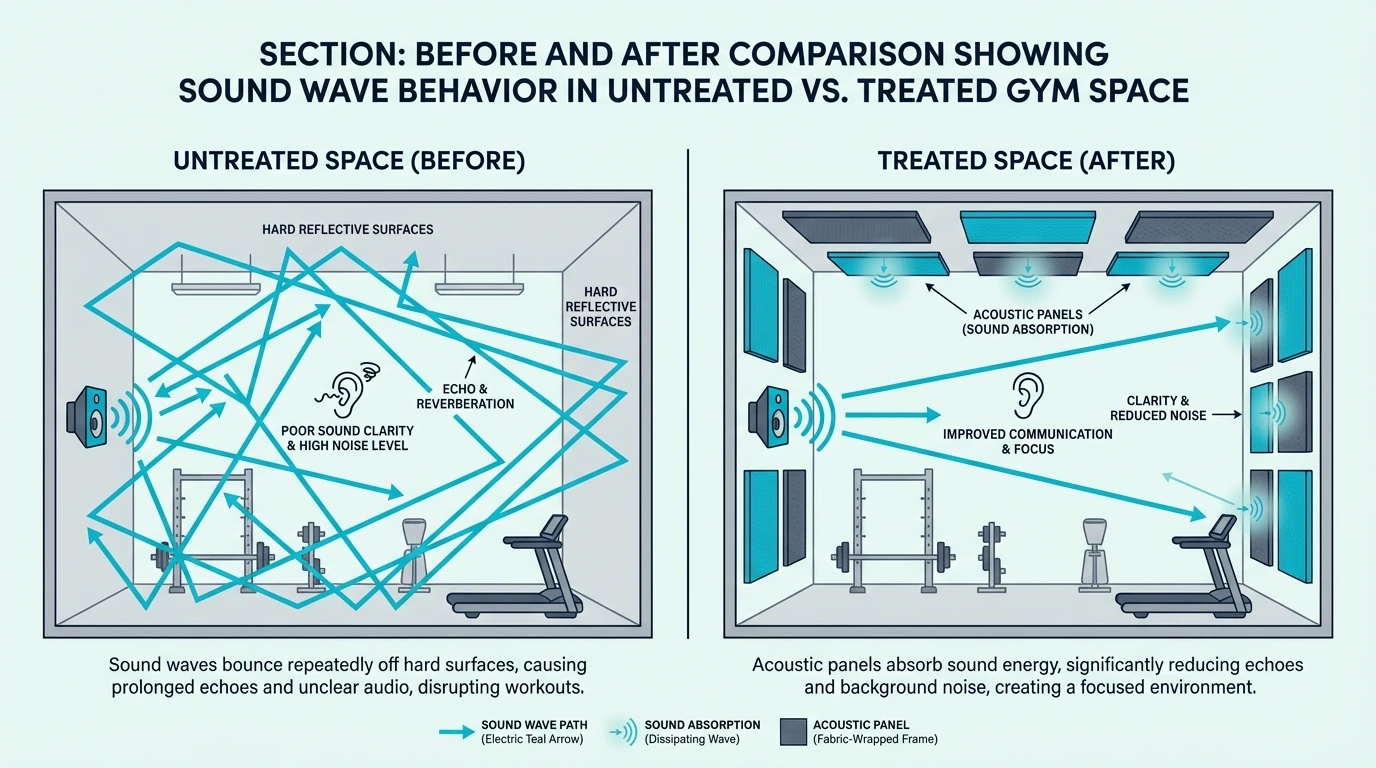
Echo and reverberation are related but distinct problems. Three steps cut through both: locating reflection points, breaking up parallel surfaces, and treating corners where bass collects.
Identifying Reflection Points
Flutter echo — that rapid, metallic sound you hear when clapping in an untreated room — comes from parallel surfaces. In gyms, this typically happens between opposing walls and between floor and ceiling.
Stand in the center of your gym and clap sharply. If you hear a distinct “ringing” afterward, you have flutter echo that needs treatment.
The fix involves breaking up at least one of the parallel surfaces. Panels on upper wall sections address wall-to-wall flutter, while ceiling treatment handles floor-to-ceiling flutter.
If you can only treat one surface in a big space, treat the ceiling first. Then add upper-wall panels to stop the wall-to-wall slap that keeps speech muddy.
Parallel Wall Solutions
When opposing walls create flutter echo, you do not need to treat both surfaces completely. Breaking up 30-40% of one wall often eliminates the problem.
Strategic placement matters here. Position panels at ear height on one wall and at different heights on the opposing wall.
This staggered approach prevents sound from bouncing cleanly between surfaces. It is a practical way to reduce flutter echo without covering both walls completely.
For home gyms, this might mean panels at 4-6 feet on one wall and 6-8 feet on the opposite wall.
Corner and Edge Treatments
Sound collects and amplifies in corners and along the edges where surfaces meet. These areas benefit from thicker treatment — either dedicated bass traps or doubled-up standard panels.
The four vertical corners and the upper perimeter where walls meet ceiling deserve special attention. Treatment in these zones provides disproportionate improvement relative to the coverage area.
What Materials Work Best for Gym Environments?
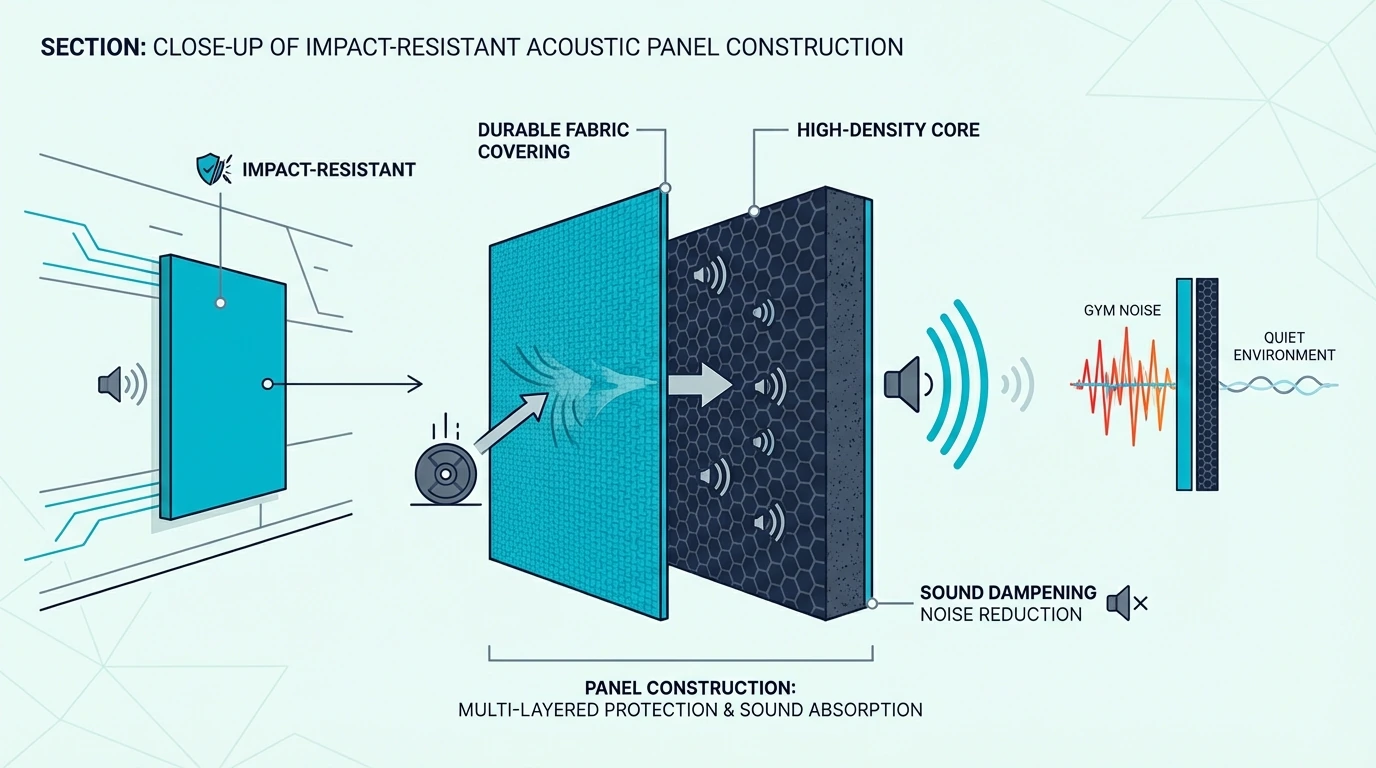
Gym environments punish flimsy materials. Three factors separate panels that last from panels that fall apart: impact resistance, moisture tolerance, and ease of cleaning.
Impact-Resistant Options
Standard acoustic panels use fabric wrapping that can tear or puncture on impact. For gyms, look for panels with either reinforced fabric or protective facings.
Some manufacturers offer “gymnasium grade” panels with Kevlar-reinforced fabric or perforated metal facings over the absorptive core. These withstand ball impacts and accidental contact without damage.
The UMIACOUSTICS 2 PCS Acoustic Panel offers a fiberglass core with durable fabric covering that handles typical gym wear without deteriorating.
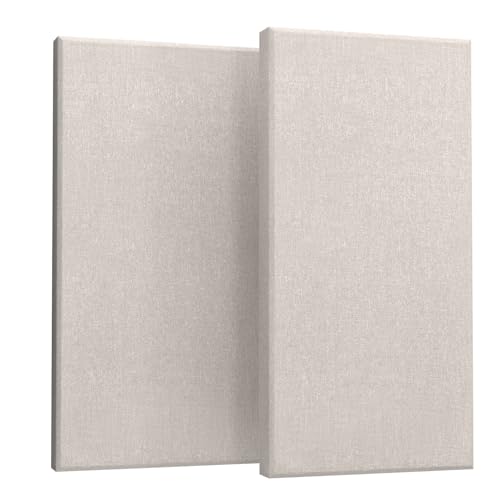
UMIACOUSTICS 2 PCS Acoustic Panel
Moisture and Humidity Considerations
Gyms generate heavy humidity from perspiration and climate control challenges. Standard mineral wool panels can absorb moisture and lose effectiveness over time.
Fiberglass cores handle humidity better than mineral wool. Polyester (PET) panels offer excellent moisture resistance for high-humidity environments like pool areas or hot yoga studios.
The fabric covering matters too. Some fabrics promote mold growth in humid conditions.
Others resist moisture and wipe down more easily, which is better for a gym. Ask manufacturers specifically about humid-environment suitability before you buy.
Easy Maintenance Requirements
Gym panels accumulate dust, sweat vapor, and airborne particles faster than panels in cleaner environments. Choose materials that can be vacuumed or wiped down without damage.
Avoid panels with loose fabric wrapping that can snag or collect debris. Tight-wrapped or faced panels clean more easily and maintain appearance longer.
How Should You Install Acoustic Panels in a Gym?
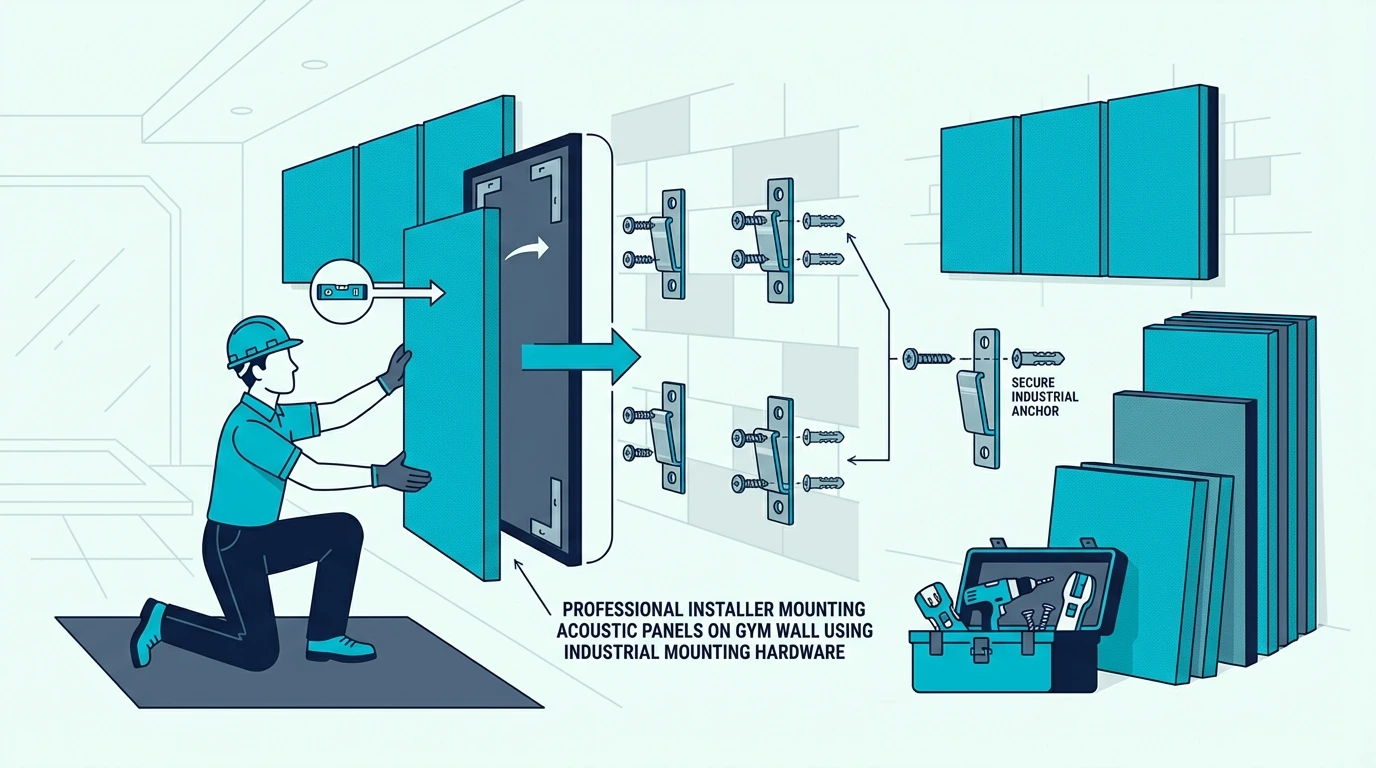
Gym installation differs from residential work in three ways: whether you need a pro or can DIY, how high and secure the mounts must be, and which fire ratings local codes require.
Professional vs. DIY Installation
Ceiling installations in high-ceiling gyms require scaffolding, lifts, or other equipment that most DIY installers do not have access to. For any ceiling work above 12 feet, professional installation makes sense.
Wall panels in the “safe zone” (below 7 feet) in home gyms are simple DIY projects. Standard mounting hardware works fine for most applications.
The UMIACOUSTICS 4 PCS Acoustic Panels with Hanging Bracket includes mounting hardware designed for quick installation — useful for both professional and DIY applications.
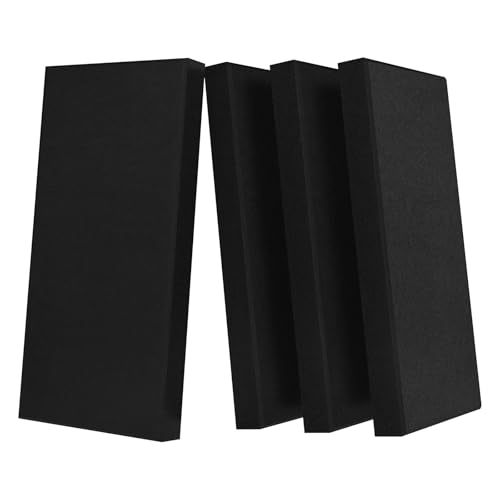
UMIACOUSTICS 4 PCS Acoustic Panels with Hanging Bracket
Height and Safety Considerations
Panels must be mounted securely to prevent falling during vibration or impact. This matters especially in gyms where dropped weights create strong vibration.
Use appropriate mounting hardware for your wall material. Drywall anchors work for lighter panels, but concrete anchors become necessary for masonry walls common in commercial gyms.
For ceiling-mounted panels and baffles, use aircraft cable or heavy-duty chains rated well above the actual panel weight. Building codes often require 4x safety factors for suspended objects in public spaces.
Fire Rating Requirements
Commercial gyms may require fire-rated acoustic materials depending on local building codes. Class A fire rating is the highest standard and typically required for schools and public facilities.
Most quality fiberglass panels meet Class A requirements. Verify certifications before purchasing for any commercial application.
How Can You Maximize Acoustic Impact on a Budget?
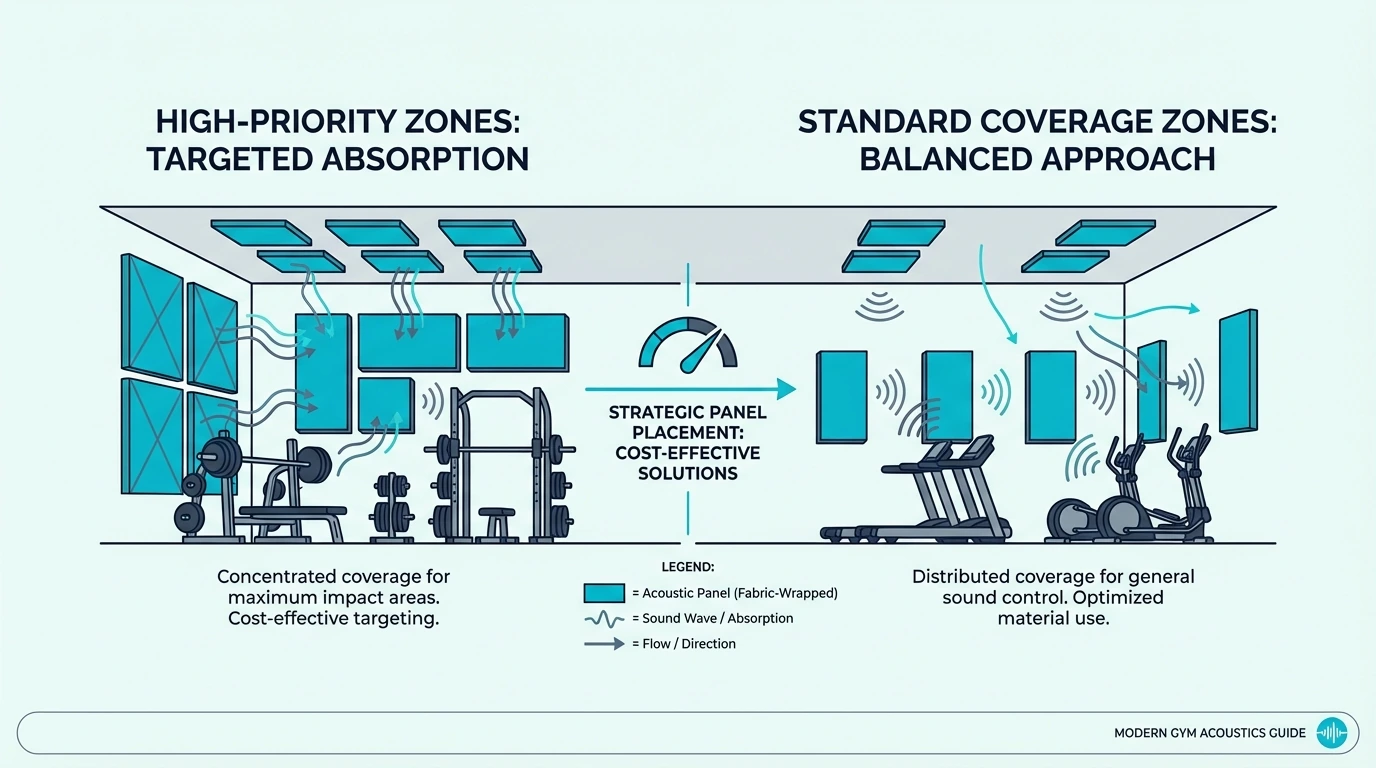
Full acoustic treatment of a large gym can run into the thousands. Three strategies keep costs reasonable: phasing the install, targeting priority zones first, and choosing cost-effective products.
Phase Your Installation
You do not need to treat everything at once. Start with the highest-impact zones and add treatment over time as budget allows.
Phase 1 should target the ceiling — either baffles in high-ceiling spaces or direct-mount panels in standard-height rooms. This single step often provides the most noticeable improvement.
Phase 2 addresses upper wall sections and corners. This builds on your ceiling treatment to create full sound control.
Phase 3 covers secondary areas and fine-tuning. Once the main treatment is in place, you can identify remaining problem spots and address them specifically.
Priority Zones vs. Complete Coverage
In a typical gym layout, 30-40% of the space generates 70-80% of the noise. Identify these zones and prioritize treatment there.
Weight areas, cardio sections, and group fitness spaces typically need the most attention. Stretching zones, walkways, and storage areas can often go untreated without noticeable acoustic penalty.
For home gyms, this might mean treating only the workout area while leaving storage or entry zones untreated.
Cost-Effective Product Selection
If you are treating a home gym, start with durable panels that mount securely and cover real surface area. Smaller decorative tiles often underperform in large, reflective spaces.
For commercial environments requiring durability, mid-range options like the Olanglab Fiberglass Acoustic Wall Panels balance performance and longevity without premium pricing.
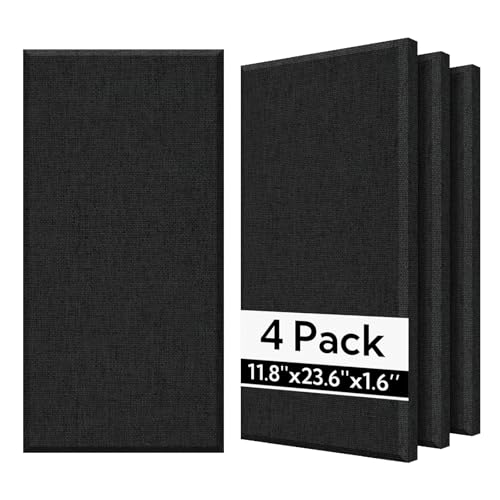
Olanglab Fiberglass Acoustic Wall Panels
Premium panels become worthwhile when you need specific performance characteristics — high NRC ratings, fire certification, or impact resistance that cheaper options cannot provide.
What Results Can You Expect?
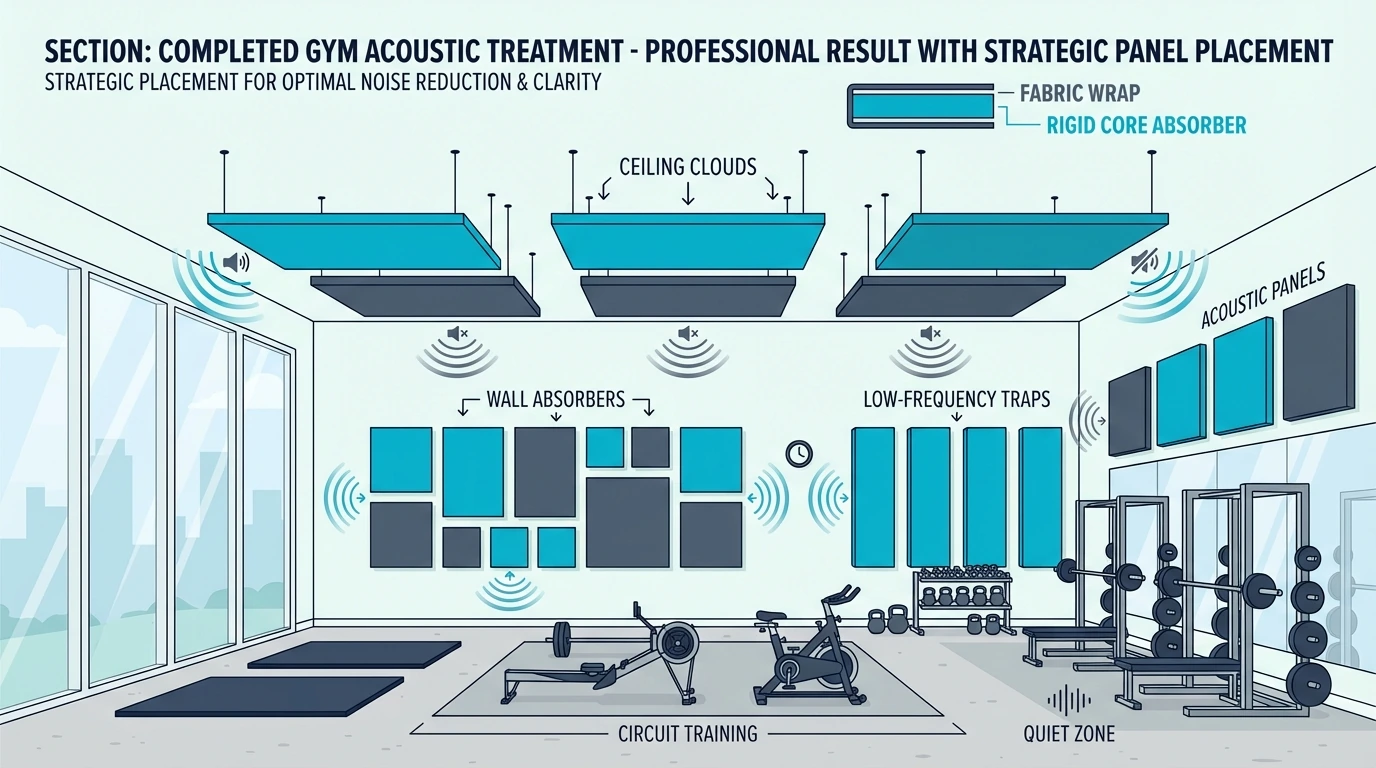
Acoustic panels transform gyms from echoey chaos into spaces where you can coach, train, and communicate. The biggest change is that speech becomes clearer and the room stops “ringing” after each impact.
If you start with ceiling treatment over the loudest zones, you will usually hear the improvement immediately. Upper-wall panels and corner/edge treatment then smooth out the remaining slap and low-end buildup.
A quick way to gauge progress is the clap test: stand in the center, clap once, and listen for the tail. In an untreated gym the ring can last two to three seconds.
After ceiling and upper-wall treatment, that tail typically drops below one second — enough for coaching cues and music to stay distinct instead of blurring together.
For home gym setups, the BXI High-Density Acoustic Panels (4-Pack) can be a strong starting point when you want a durable, simple install.
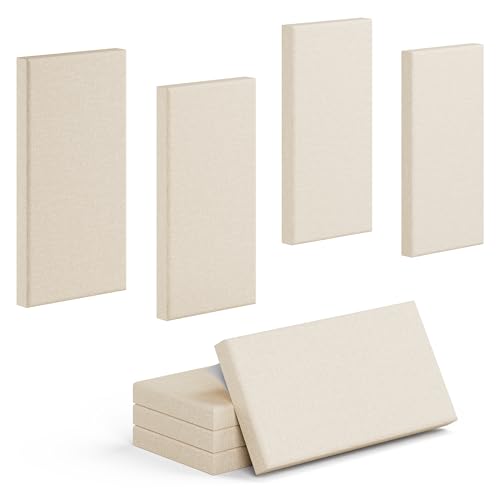
BXI High-Density Acoustic Panels (4-Pack)
The Bottom Line
Where to place acoustic panels in gym starts with the ceiling and upper walls, then moves to the reflection paths that keep speech muddy. Start with overhead treatment above the loudest zones, then add high wall panels and corner/edge treatment to balance the room.
Treat in phases so you can hear what each step fixes, and choose durable, easy-clean materials that survive impacts and humidity. For more installation and placement help, browse the acoustic panels resource hub.
Frequently Asked Questions
How many acoustic panels does a gym need?
The answer depends on ceiling height and room volume, but a general starting point is 20-30% coverage of wall surfaces above 7 feet plus 30-40% ceiling coverage.
For a 2,000 square foot gym with 20-foot ceilings, this might translate to 40-60 wall panels and comparable ceiling treatment.
Can acoustic panels soundproof a gym?
No — acoustic panels reduce echo and reverberation inside the space, but they do not prevent sound from traveling through walls to adjacent areas.
Soundproofing requires mass, decoupling, and sealing. Panels improve clarity inside the gym without blocking noise transmission to neighbors.
What is the difference between gym panels and studio panels?
Gym panels prioritize durability and impact resistance over maximum absorption. Studio panels often use softer materials that achieve higher NRC ratings but would not survive in gym environments — the tradeoff is roughly 5% less absorption for far greater longevity under impacts, humidity, and daily wear.
Do I need ceiling treatment in a home gym?
For home gyms with standard 8-10 foot ceilings, ceiling treatment provides noticeable improvement. Even modest coverage reduces the floor-to-ceiling flutter echo that makes basements and garages sound terrible.
Start with 4-6 panels directly above your primary workout area. Then add wall panels behind you and at side reflection points if the room still feels harsh.