How To Soundproof A Bathroom For Better Privacy
How to soundproof a bathroom can absolutely improve privacy, but only if you fix the path that is actually leaking the sound.
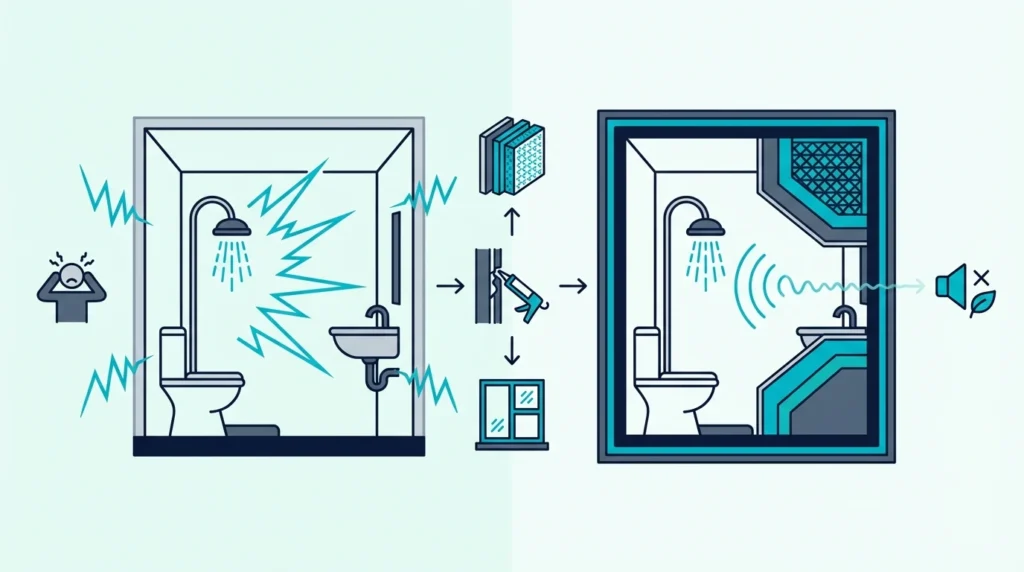
Bathroom soundproofing goes wrong so often because people throw soft décor at the room, hope the exhaust fan will hide everything, or buy a random product when the real leak is usually the door, the gap under it, the shared wall, the vent path, or the plumbing penetrations around the toilet side.
Bathrooms are brutally exposing because tile, mirrors, glass, hollow doors, and pipe cutouts give sound easy ways to bounce around the room and escape into the next space.
Get the diagnosis right and the bathroom usually improves faster than people expect. Better privacy often comes from a few targeted upgrades, not from trying to soften every hard surface you can see.
Below, you’ll figure out whether the main problem is the door, the shared wall, the vent path, or the plumbing route, which fixes matter most, and when a cheap privacy upgrade stops being enough.
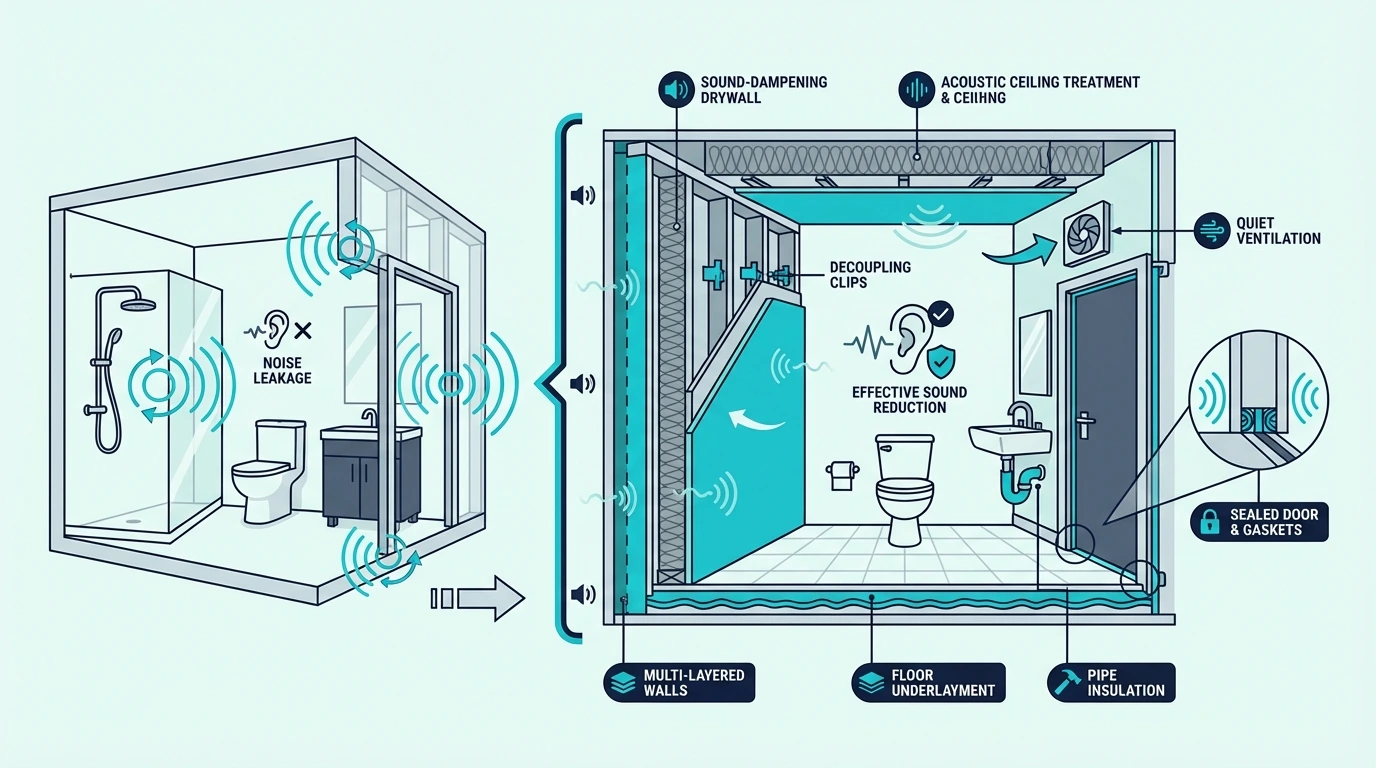
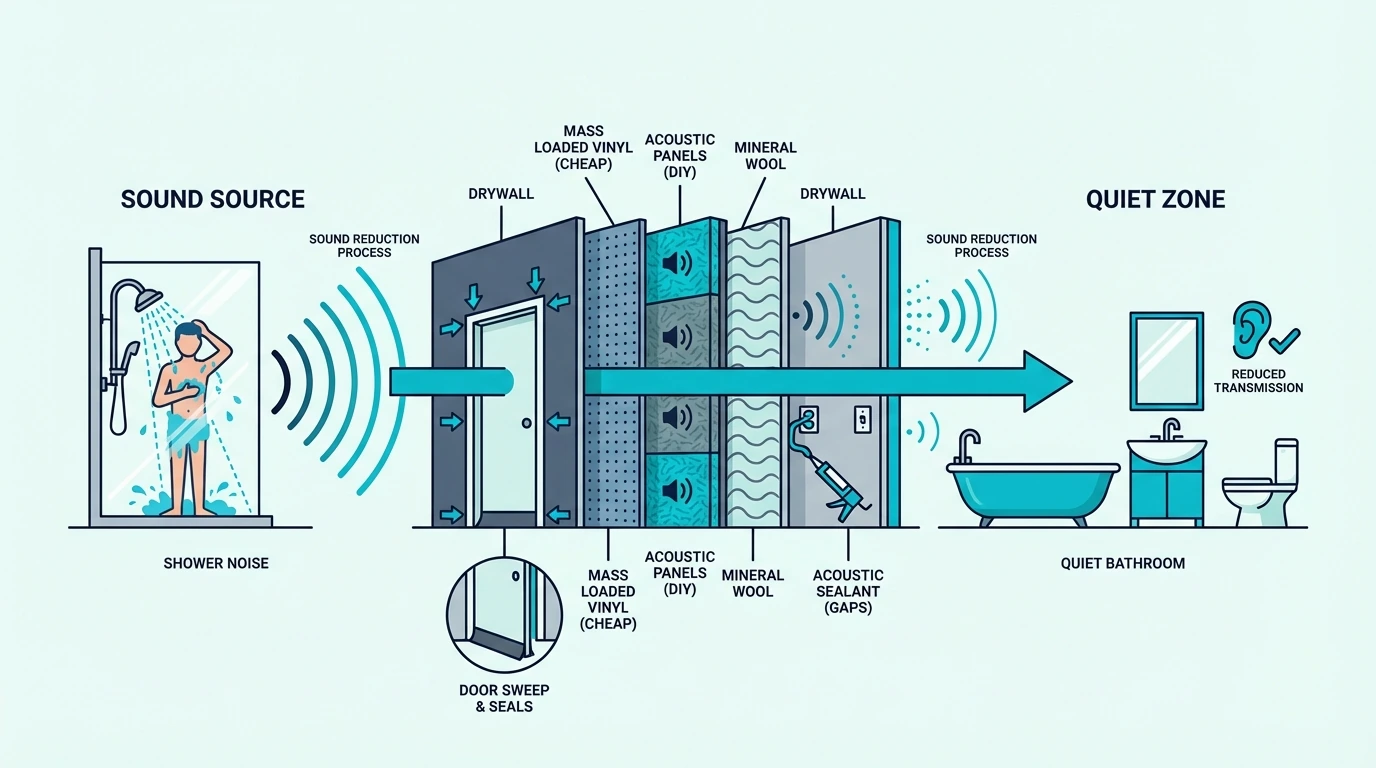
The best way to soundproof a bathroom is to fix the leak path in the right order: bathroom door gaps and the door slab first, shared-wall and pipe penetrations next, then vent, ceiling, floor, or window paths only if they are still carrying sound. Cheap fixes can improve privacy more than most people expect when the weak point is the door or an obvious penetration, but stronger results usually come from better sealing, added mass, damping, and smarter wall or pipe-chase treatment rather than soft décor or decorative acoustic products.
Diagnosing The Leak Path
The fastest way to improve a bathroom is to stop thinking about “soundproofing the whole room” at once.
In most bathrooms, one path is doing most of the leaking, and the next three sections show how to find it.
Start With The Sound You Are Hearing
Start with the kind of noise, not the kind of product.
Voices, toilet sounds, and general privacy leakage into a hallway usually point toward the bathroom door and its gaps, while flush noise, water rush, and vibrating supply or drain lines usually point toward the wall cavity, pipe chase, or the ceiling and floor route around the plumbing.
The same bathroom does not leak every sound the same way.
A door problem, a pipe problem, and a vent problem can all sit in the same room while needing completely different fixes.
If the sound is strongest around the slab and frame, the logic is close to how to soundproof a door. If it is strongest through one partition or around the pipe side, the better comparison is usually how to soundproof a wall, how to soundproof an existing wall, or how to soundproof a ceiling.
Bathrooms also have a unique embarrassment factor that changes what readers actually want. Most are not trying to build a silent room.
They are trying to stop private sounds from reaching a hallway, a bedroom, a living room, or a neighboring unit. A bathroom guide has to stay focused on privacy paths, not generic room acoustics.
Hard Surfaces Make Privacy Feel Worse
Once you know what kind of noise is escaping, the room itself explains why it feels so harsh.
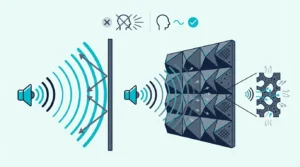
Hard, reflective finishes make ordinary sound feel more obvious than it would in a softer room. Tile, mirrors, stone, glass, and painted drywall bounce sound around instead of absorbing much of it.
That harshness is only half the problem.
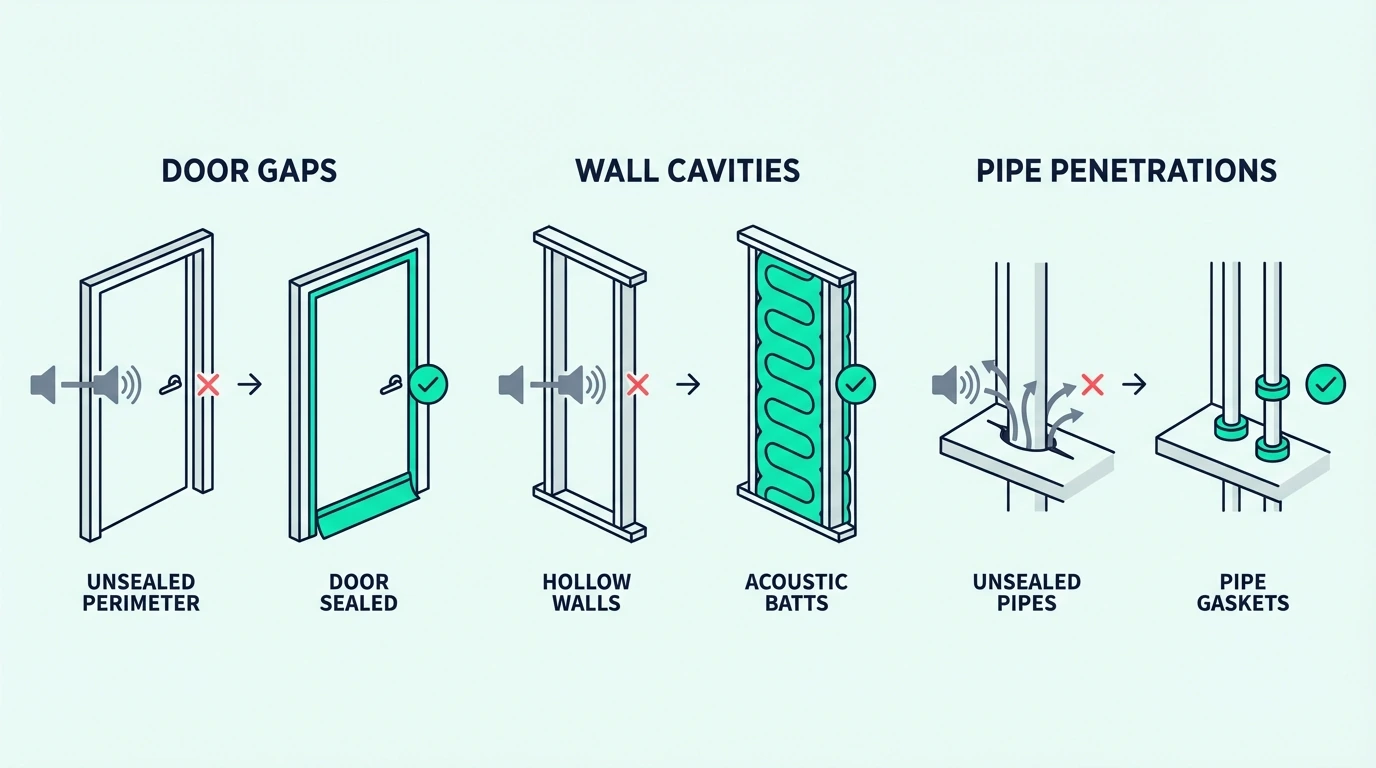
Bathrooms also tend to have unusually weak transmission points, including hollow doors, large bottom gaps, unsealed pipe cutouts, vent openings, fan housings, and lightweight shared walls.
Then the plumbing makes the room even trickier. Water movement, flush noise, and pipe vibration can turn one side of the bathroom into a speaker if the cavity around the drain or supply path is light and leaky.
This is why a bathroom can feel louder than a bedroom of the same size even when the walls look similar. The surfaces are harder, the openings are leakier, and the mechanical noise is more aggressive.
Bathrooms Need Moisture-Safe Fixes
Those leak paths are obvious, but bathrooms also punish the wrong kind of fix.
Moisture, cleaning, and ventilation constraints change what actually makes sense here, which is why generic room-treatment advice usually falls apart. A product that is fine in a bedroom can become damp, dirty, or simply impractical in a bathroom very quickly.
Soft “soundproofing” ideas are often worse here than in other rooms. Fabric-heavy blockers, decorative absorbers, and blanket-style hacks do not age well in wet spaces and rarely match the actual leak path anyway.
Ventilation also stays non-negotiable. A quieter bathroom that traps moisture, mildew, and stale air is not a good upgrade.
So the right bathroom plan has to respect three things at once: privacy, moisture, and airflow. If you need the broader decision sequence for stronger upgrades, use how to soundproof a room as the master page.
The Fixes That Matter Most
Once the leak path is clear, the order matters more than the shopping list.
In most existing bathrooms, the biggest gains come from the door assembly first, then the shared wall or plumbing side, then the vent or fan path, and only then the secondary routes.
Door Leaks Usually Come First
The bathroom door usually wins the race to worst leak because sound behaves like air.
A hollow slab, big bottom gap, or loose frame often leaks more privacy than the wall beside it.
The door is usually the best-value first fix in a bathroom.
If the privacy problem is reaching the hallway or nearby bedroom, start there before spending money on the far wall.
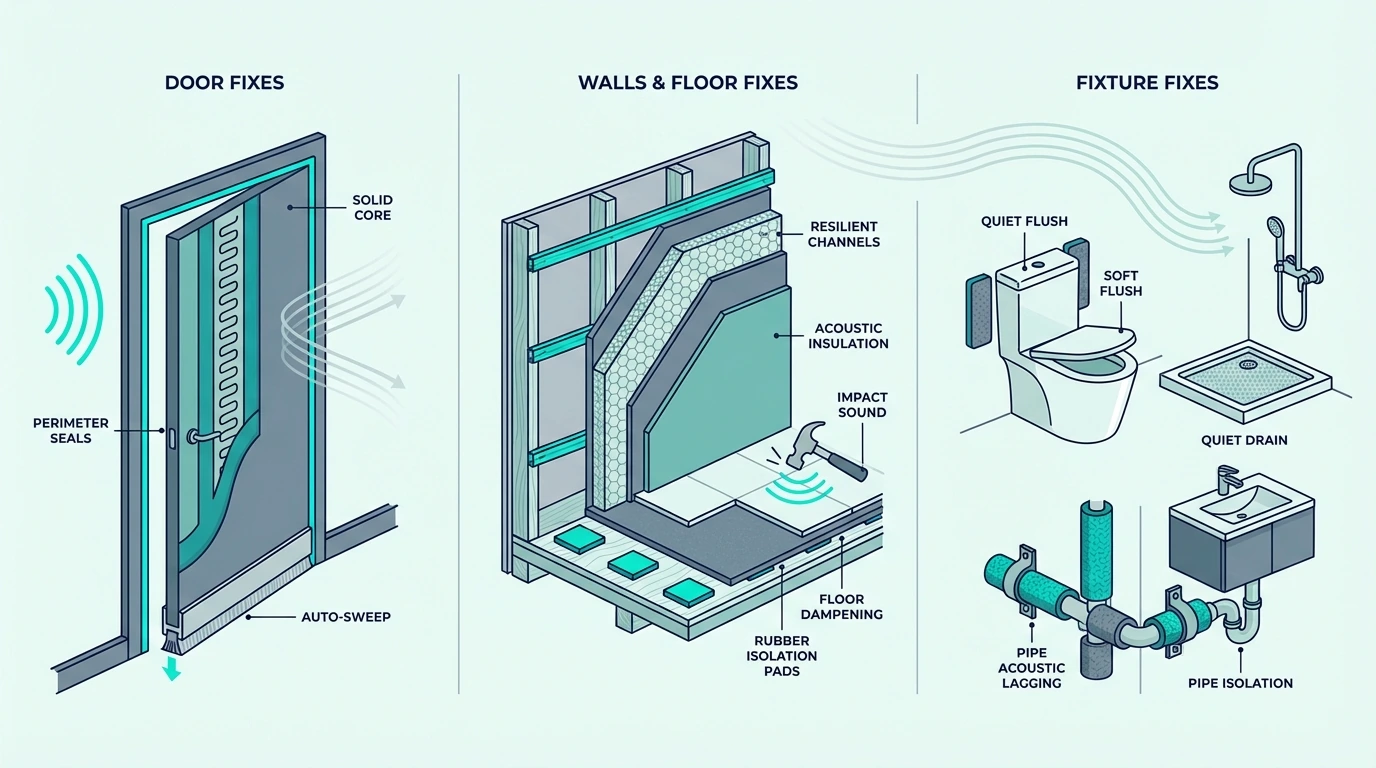
Frame leakage comes first. If privacy is slipping through the side and head gaps, a product like 33 Ft Gray Self-Adhesive Soundproofing Weather Stripping for Doors and Windows makes sense before the wall is even part of the conversation.
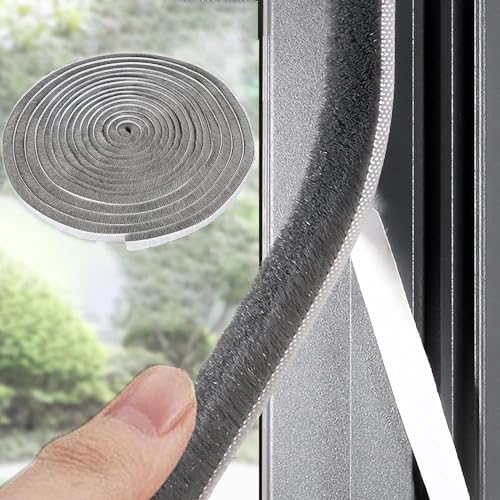
33 Ft Gray Self-Adhesive Soundproofing Weather Stripping for Doors and Windows
After that, the bottom gap usually deserves the next dollar. A moisture-tolerant sweep like Door Sweep Brush Silicone Seal Strip is a more bathroom-appropriate choice than a soft draft snake.
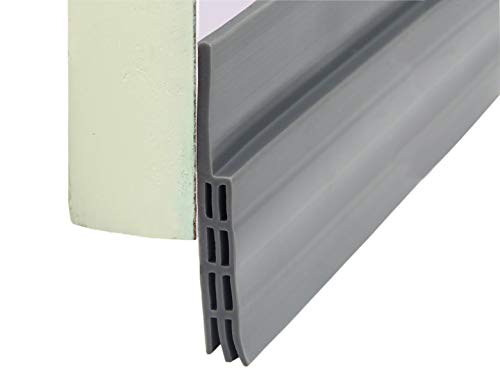
Door Sweep Brush Silicone Seal Strip
If the slab itself is still weak after the perimeter is sealed, the bathroom door needs a fuller strategy. That is where how to soundproof a door and the best door sweeps for soundproofing become the right handoff.
Shared Walls Matter Once The Door Is Better
A sealed door handles the hallway side, but it does nothing for a bedroom, nursery, office, or living room sharing the toilet wall.
When flushing and voices are still obvious after the door is improved, soft surfaces inside the bathroom may calm the room a little, but they will not add real isolation to a weak wall assembly.
The first wall move is not more décor. It is sealing the penetrations around trim, pipe cutouts, and any obvious gaps in the bathroom side of the partition.
That is where Acoustical Caulk (29 oz) 1 Tube with clean up wipe earns its place. It closes the air path first instead of pretending the room side surface alone is the whole answer.
Acoustical Caulk (29 oz) 1 Tube with clean up wipe
If the wall is already being opened, then real materials start to matter. A cavity product like AFB Acoustical Fire Batts, Mineral Wool Insulation makes sense around the shared wall or plumbing side.
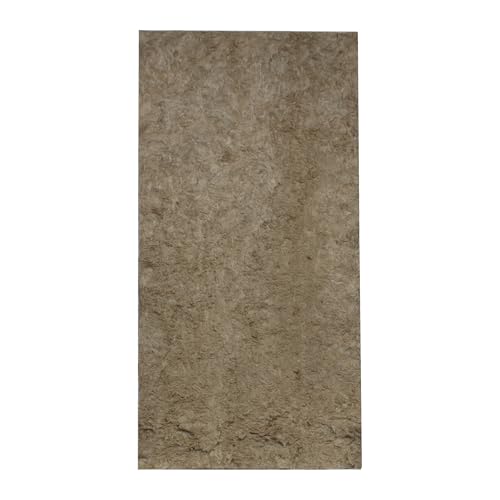
AFB Acoustical Fire Batts, Mineral Wool Insulation
If the wall needs more mass, a barrier layer like Trademark Soundproofing Mass Loaded Vinyl 1lb – MLV Soundproofing for Wall Sound fits the bathroom use case when it stays inside the assembly rather than exposed on the wet room surface.
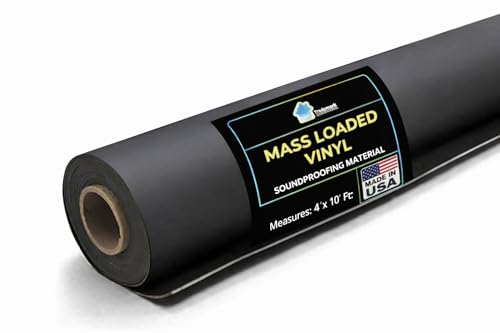
Trademark Soundproofing Mass Loaded Vinyl 1lb - MLV Soundproofing for Wall Sound
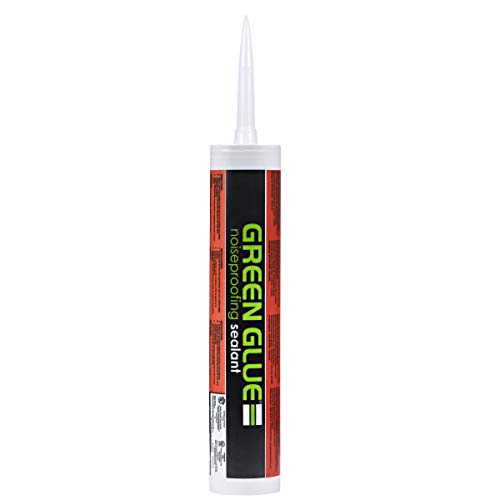
If the build includes another drywall layer, Green Glue Noiseproofing Compound is the kind of material that matches the physics better. That is the real handoff to how to soundproof a wall, how to soundproof an existing wall, and best insulation for soundproofing.
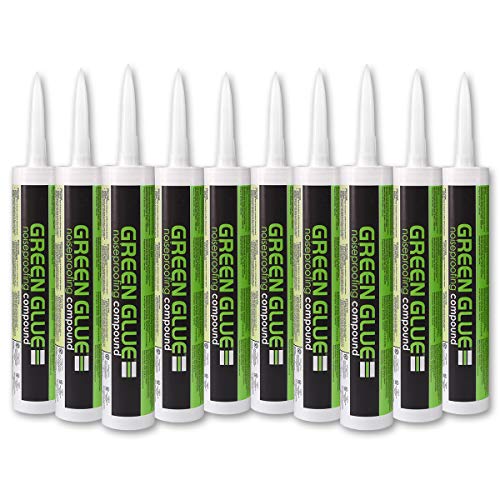
Green Glue Noiseproofing Compound
Vents Need Airflow-Safe Triage
Once the solid surfaces are less leaky, vents and fans become easier to judge honestly.
They can connect the bathroom to other rooms through a light, hollow path that is hard to control without hurting airflow. A bathroom fan can mask some noise while it is running, but masking is not the same thing as stopping sound from traveling.
A noisy vent path is tricky because you may hear privacy leakage through a grille, a ceiling opening, or a shared duct route even when the wall itself is not the main problem.
The wrong move here is choking ventilation to chase privacy. Bathroom airflow is still non-negotiable because moisture control comes first.
The better approach is to improve the stronger leak paths first, then evaluate whether the vent or fan route is still the obvious weak point. If that ceiling route is clearly involved, the next comparison is usually how to soundproof a ceiling or how to soundproof a vent.
Get Studio Tips Weekly
Join 5,000+ creators getting acoustic treatment advice every week.
No spam. Unsubscribe anytime.Cheap Bathroom Soundproofing
Once the high-value fixes are clear, the budget version gets much easier to judge.
Cheap bathroom soundproofing works best when it targets one obvious weakness at a time instead of spreading a small budget across several weak ideas.
Cheap Wins Still Start At The Door
Cheap fixes help most when they close a real leak with something that still makes sense in a damp room.
Bathroom cheap fixes usually mean seals, sweeps, caulk, and targeted penetration work instead of anything soft or decorative.
The highest-value cheap move is often still the door. A product like Door Sweep Brush Silicone Seal Strip is usually smarter than a fabric draft blocker because it targets the bottom leak without introducing another soft piece at floor level.
The next cheap win is the frame and penetration sealing around the room. Weatherstripping, caulk around plumbing cutouts, and fixing obvious gaps at trim lines can change privacy more than people expect because they treat the actual leak path.
Bathroom cheap-fix logic overlaps with how to soundproof a room cheaply, but with stricter moisture rules. The materials still need to make sense in a bathroom, not just on paper.
Cheap Products Fail When They Miss The Leak
Those cheap fixes work because they target real leak paths.
Thin foam, soft décor that never reaches the real leak, and any product that promises major privacy gains without adding mass or improving sealing all fall into the hype category. Towels and rugs can soften the room a little, but they do not change a hollow bathroom door, a pipe cutout, or a shared wall enough to be treated as primary fixes.
Bathrooms punish bad advice quickly. A blanket-style stopgap, a soft door blocker that stays damp, or a decorative panel that never addresses the door and penetrations can make the room uglier without making it more private.
Bathroom soundproofing has to be more disciplined than bedroom soundproofing in some ways. The wet environment removes a lot of the “maybe this helps a little” products from the table.
The simplest bathroom rule is this: if it is soft, exposed, and not solving a real leak path, it is probably not your first buy.
Cheap Fixes Stop Working When The Structure Takes Over
With the hype cleared out, a cheap fix is often good enough when the privacy problem is moderate rather than extreme and one obvious gap is doing most of the damage.
In a bathroom, that usually means a better door perimeter, a real bottom seal, and a sealed set of obvious cutouts around the pipe side.
That is especially true when the issue is the hallway hearing too much rather than the wall assembly being dramatically weak. Small upgrades can make a bathroom feel far less exposed without opening any wall at all.
The limit shows up when flushing, voices, or water rush are still strong after the obvious leaks are improved. That is the room telling you the structure, the chase, or the partition itself needs more than a cheap sealing pass.
So cheap bathroom fixes are not fake. They just work best when they are moisture-safe and tied to a single weak path instead of spread everywhere.
Reducing Plumbing And Toilet Noise
Door and wall fixes solve most privacy complaints, but bathrooms have one extra layer other rooms do not.
Once flushing, water rush, and pipe vibration start dominating, the job shifts from privacy leakage to mechanical noise at the source.
Toilet Privacy And Toilet Noise Are Not The Same
Toilet sounds get out in two ways.
Airborne sound leaves through openings, while vibration and water noise travel through the nearby wall, floor, or pipe route. A better door seal can help more than people expect, but it is not the whole answer if the wall behind the toilet is also light and full of penetrations.
Readers often misdiagnose the problem here. They hear a flush in the next room and assume the whole bathroom is loud, when the real problem may be the toilet-side wall, the chase behind it, or one cutout around the pipe path.
If the goal is simply to reduce how obvious the bathroom sounds from outside, start with the door and shared-wall side. If the goal is to reduce the actual mechanical rush and vibration, the work usually has to move closer to the plumbing.
The best bathroom articles keep privacy leakage and plumbing noise related but separate. One is often about openings, while the other is often about the assembly around the source.
Pipes Can Turn One Wall Into A Speaker
Once the rush of water is louder than voices, the pipe route becomes the better suspect.
One bathroom wall can act like a speaker if the cavity around a drain or supply route is light, open, and poorly isolated.
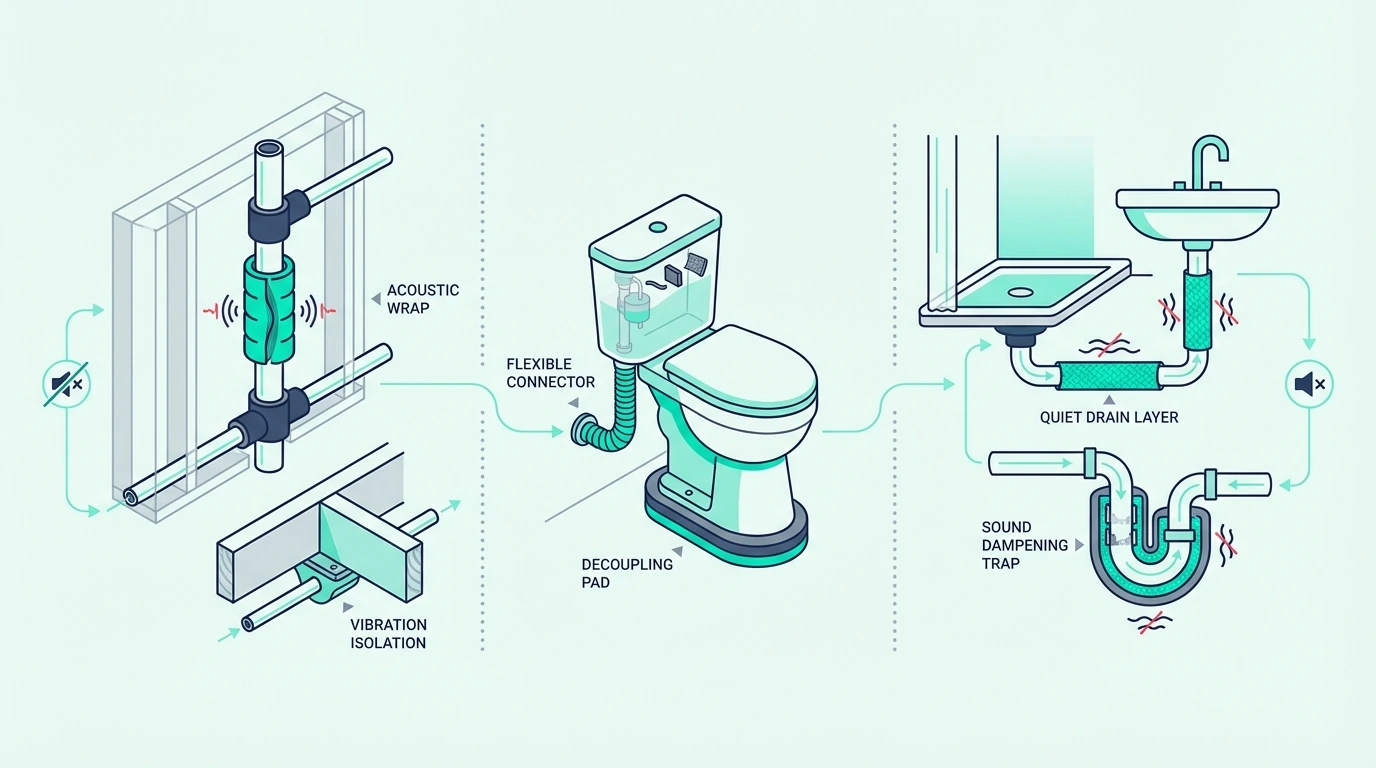
If the pipes are accessible, dense wrap materials can help more than soft foam sleeves. A short-run product like TroyStudio High Density Mass Loaded Vinyl Sound Proof Barrier, 1.1 lb/sqft, 1 x 8 Feet is the kind of material that matches the problem better.
TroyStudio High Density Mass Loaded Vinyl Sound Proof Barrier, 1.1 lb/sqft, 1 x 8 Feet
If the wall or chase is already open, then the strategy usually becomes absorption plus mass plus better closure around the route. That is where mineral wool around the pipe and a better boxed-in assembly start to matter more than any exposed room-side fix.
If one bathroom wall is clearly acting like a plumbing speaker, compare this page with how to soundproof drain pipes, how to soundproof a wall, and best insulation for soundproofing depending on where the route actually travels.
Open The Wall Only When The Room Keeps Pointing There
Pipe wrap helps at the source, but sometimes the room keeps pointing back to the assembly around it.
When the bathroom shares a critical wall with a bedroom, nursery, or living area and the noise is still obvious after the door, gaps, and easy weak points have been improved, opening the wall or calling a professional becomes the next step. If recurring flush noise, pipe vibration, or water rush still dominates, the assembly around the plumbing route usually needs real work.
The same is true when the vent path or ceiling route is clearly involved. A bathroom over another quiet room can push the problem into the floor and ceiling structure faster than readers expect.
This is also where continuing to buy small accessories becomes the expensive option. Once the bathroom is clearly telling you the wall, chase, or ceiling is the real problem, the next move should be planned around that route instead of around whatever product looks easy.
That is where how much it costs to soundproof a room and best soundproofing material become useful planning pages instead of just comparison content.
Common Bathroom Soundproofing Mistakes
Once you understand the routes, the mistakes become predictable.
Bathroom privacy is usually about leakage, mass, damping, and path control, not just softening the room a little.
Soft Decor Only Softens The Room
Soft décor changes the feel of the room faster than the privacy outside it.
A plush rug or extra towel can make the bathroom sound slightly less harsh inside, but it usually does very little for the actual leak path between the bathroom and the next room.
That mismatch is why so many bathroom privacy attempts feel disappointing. The room may sound a little less sharp inside while still leaking just as much through the door, vent, or wall cutouts.
Bathrooms are especially unforgiving here because the surfaces are so hard. Small internal comfort changes can be real, but they are rarely the main privacy fix.
So if the goal is privacy, décor belongs in the support category at best. The first money still belongs on leaks and weak assemblies.
Ventilation Is Not The Trade-Off
Once décor fails the privacy test, the next bad instinct is brute-force blocking.
Ventilation is non-negotiable because a quieter bathroom that traps moisture creates a different problem you do not want. Keep the bathroom functional while you improve privacy around it rather than treating airflow like an acceptable sacrifice.
Bad soundproofing advice becomes risky here. A bathroom is not a closet.
If a fix interferes with exhaust, airflow, or the room’s ability to dry out properly, it is not a stable solution. Bathroom upgrades have to work acoustically without breaking the room’s basic job.
The better bathroom strategy is tighter doors, better sealing, smarter wall work, and more thoughtful treatment of vents and chases rather than brute-force blocking.
The Door Usually Beats The Wall First
That airflow rule circles back to the same lesson as the rest of the article.
The door is often more important than the wall because it is usually lighter, leakier, and less sealed than the partition around it. In real homes, the hallway hears the opening before it hears the wall build.
A bathroom door fix can outperform more expensive wall ideas when the privacy leak is still basic. If the bathroom still needs more after a smart door upgrade, then the wall and plumbing side become the right next target.
Use how to soundproof a room, how to soundproof a door, and how to soundproof a wall to escalate in the right order instead of solving the wrong problem beautifully.
The Bottom Line
How to soundproof a bathroom is really a leak-path prioritization problem. The best results usually come from fixing the bathroom door and its gaps first, then the shared wall or plumbing side, and only then the vent, floor, ceiling, or window path if the noise is still obvious.
If the issue is moderate, a cheap sealing pass can improve privacy more than most people expect. If flushing, voices, or pipe noise are still strong after that, the bathroom usually needs more mass, better damping, better sealing, or a stronger wall or chase strategy rather than softer décor.
Use this page as the bathroom-specific decision guide, then move to the matching next step in how to soundproof a room, how to soundproof a door, how to soundproof a wall, how to soundproof drain pipes, and how to soundproof a vent if the real path points there.
Frequently Asked Questions
How to muffle toilet sounds?
Start by reducing the leak path first, especially the bathroom door gaps and the shared wall around the toilet side. If the sound is still strong after sealing and door fixes, the next step is usually the wall or pipe route rather than more soft décor.
Does rockwool soundproof?
Rockwool can help soundproofing when it is part of a proper wall or ceiling assembly because it absorbs energy inside the cavity. On its own, though, it is usually not enough to solve a bathroom privacy problem without better sealing, more mass, and a stronger overall assembly.
What is the cheapest way to reduce noise through walls?
The cheapest improvement is usually to seal obvious leaks and focus the budget on the one weak wall or opening doing most of the damage. If the wall is truly the path, cheap fixes can help a little, but stronger results usually need better sealing, more mass, or a better wall build.
What soaks up sound?
Soft and porous materials soak up sound best inside a room, which is why rugs, fabric, and absorptive panels can reduce echo. That is useful for room comfort, but it is different from bathroom soundproofing, which is mainly about stopping sound from leaking through the structure.