How To Soundproof A Room (What Actually Works And What Does Not)
How to soundproof a room works, but only if you stop treating every surface the same and fix the weak point that is actually leaking sound.
That is where most room projects go sideways. The real failure is often the door, window, vent, or ceiling, while the budget gets burned on foam, blankets, and decorative products that barely reduce transmission at all.
Get the order right and the room gets quieter in a way you can actually feel. Speech bleed drops, traffic softens, and the shell stops wasting money on fake shortcuts.
Start by figuring out whether your problem is airborne noise, impact noise, or simple leakage. That tells you whether the right next move is sealing, more mass, cavity insulation, decoupling, or source-side floor work.
The sections below walk through diagnosis first, then the weak-point order, then the right fixes for walls, doors, windows, floors, ceilings, and vents.
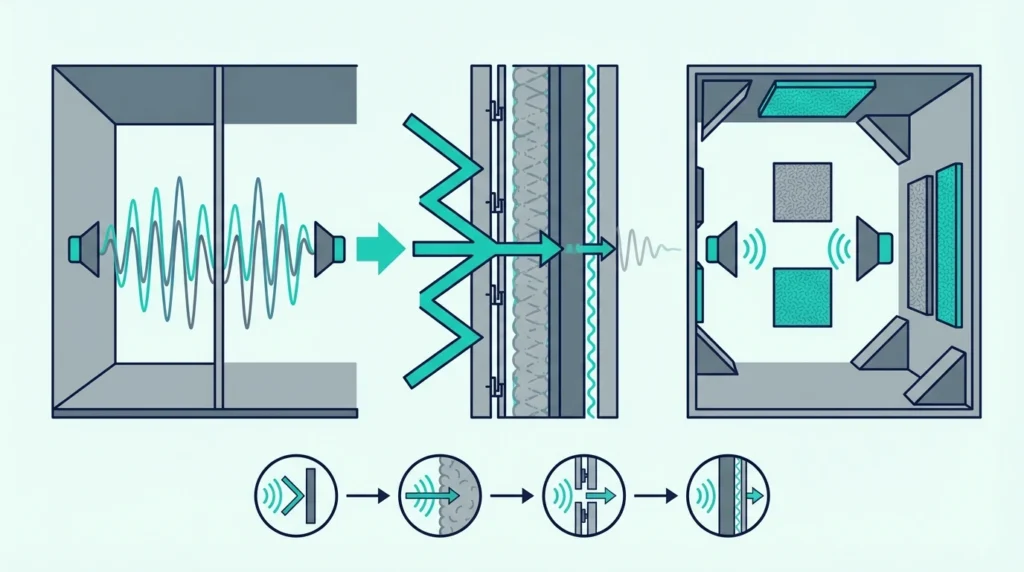
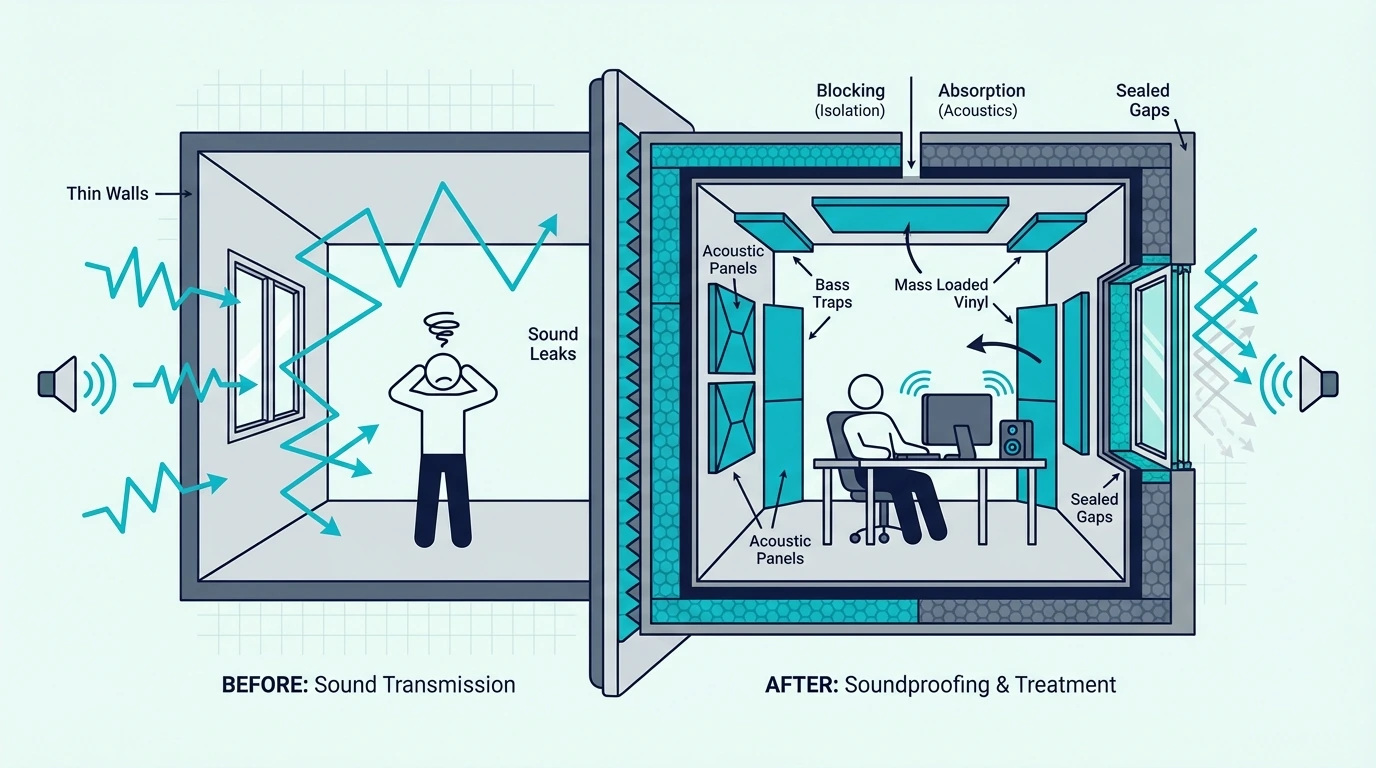
To soundproof a room, seal leaks first, then upgrade the surface that is actually failing: doors and windows for obvious air paths, walls for neighbor noise, ceilings and floors for footsteps, and deeper rebuilds when vibration is involved. Real soundproofing means mass, damping, insulation, and decoupling used in the right assembly, not foam panels or soft furnishings pretending to block sound.
What Soundproofing Actually Means
Before you decide which wall, door, or ceiling needs work, you need the right definition. If you mix up soundproofing with acoustic treatment, the whole plan starts solving the wrong problem.
The Line Between Soundproofing And Acoustic Treatment
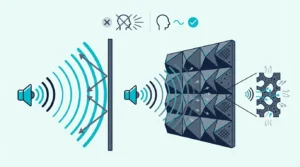
Soundproofing is about reducing transmission between spaces. If your goal is more sleep, more privacy, or less noise from outside the room, you are trying to stop sound from crossing the room shell.
Acoustic treatment is about how the room sounds after the noise is already inside. Panels, foam, bass traps, and curtains can calm reflections and reverb without doing much to block noise from the next room.
The easiest way to picture it is sponge versus brick. A sponge absorbs some energy in the room, but a heavier sealed barrier blocks more of it from passing through in the first place.
That difference is why people get fooled by “soundproof panel” marketing. If you want the physics behind that line first, how soundproofing works and do soundproof panels work make it clear fast.
Full Isolation Versus Practical Noise Reduction
That brick-side barrier can go very far, but a truly isolated room is a construction project, not a product purchase. The serious version uses a room-within-a-room layout, isolated framing, floating floors, sealed penetrations, and controlled ventilation.
Most homeowners and renters do not need that extreme. They need a room that drops speech, TV spill, traffic rumble, or footstep energy enough that the space feels usable again.
That is a realistic goal because sound reduction stacks. Even a moderate drop changes what your ears register, especially when the loudest leak gets fixed first instead of spreading weak upgrades across every surface.
So do not think in terms of “perfect” versus “worthless.” Think in tiers: sealing and door work first, better wall and ceiling assemblies next, and full decoupling only when the noise source justifies it.
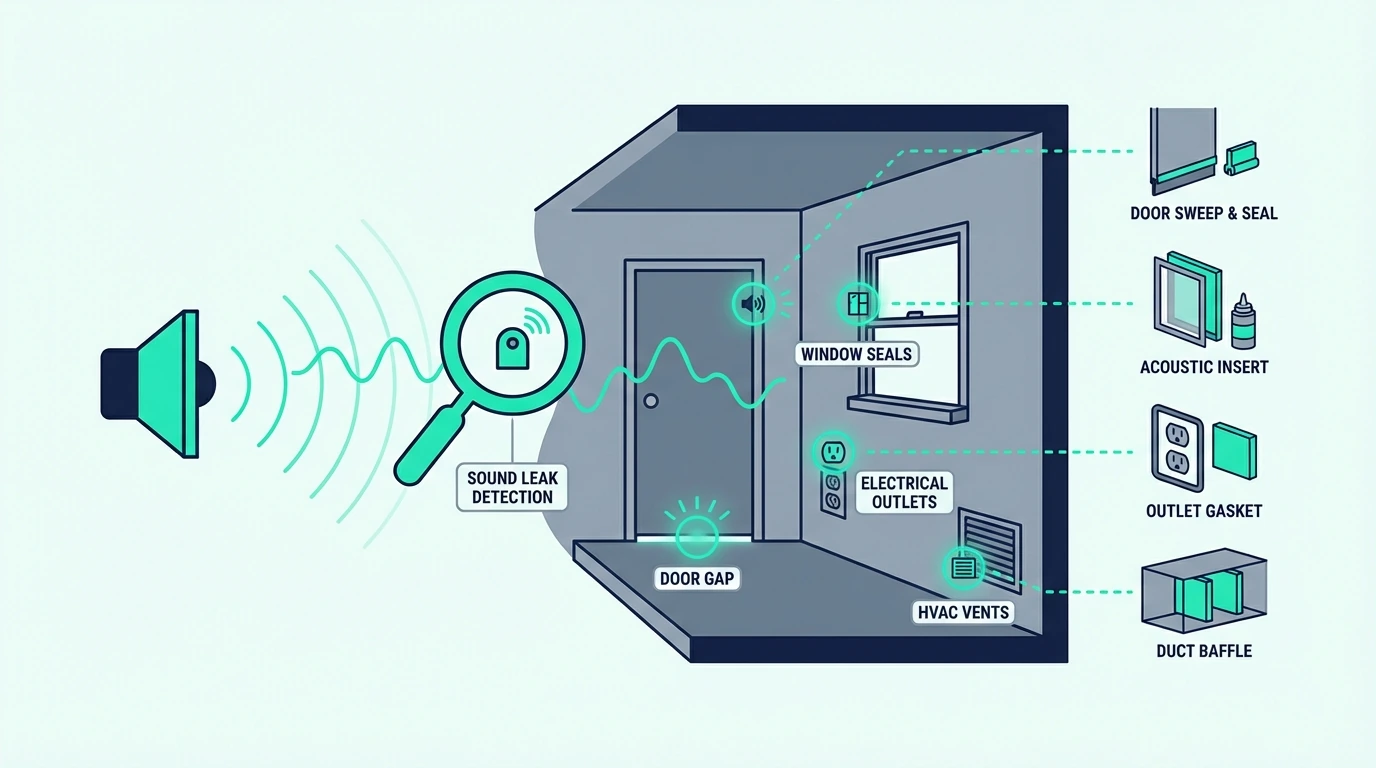
The Most Common Leak Points
Working in those tiers only helps if you know where sound is actually getting in. It goes through the weakest link in the room shell, then flanks around the stronger surfaces you paid to upgrade.
That is why a decent wall can still perform badly when the door has a visible undercut or the window frame leaks around the trim. The shell only performs as well as its worst opening.
The usual leak points are predictable: hollow-core doors, single-pane or leaky windows, wall-to-floor joints, outlet boxes on shared walls, vents, recessed lights, and lightly built ceilings. Once you see the room that way, the upgrade path gets much more practical.
Think of it like a cooler with the lid cracked open. The insulation still exists, but the opening is what controls the real-world result.
Finding The Weak Points In Your Room
Once the weak-link idea is clear, the next job is diagnosis. Five careful minutes of testing beats a weekend of buying the wrong materials.
Testing For Sound Leaks
The simplest test is still one of the best. Have someone talk, play music, or run the normal noise source outside the room while you walk the inside perimeter and listen for places where the sound suddenly gets clearer or sharper.
Pay close attention to the door edges, window trim, outlets, baseboards, and the ceiling line above the loudest wall. Those spots usually tell you more than the middle of the drywall does.
If you want a quick leak test, hold a tissue or light strip near the door and window edges. If air movement shows up, you already found a sound path too.
You can also use a phone sound meter for comparison. The point is not lab accuracy. It is identifying the three or four loudest spots so your first fixes hit the biggest leaks.
Airborne Noise Versus Impact Noise
Once those loudest spots are mapped, start sorting what each one carries. Airborne noise—voices, TV, traffic, barking—pushes on the wall, door, or window and gets through when that surface is too light, too leaky, or both.
Impact noise is footsteps, dropped objects, chair scrapes, and low thuds that travel through framing or concrete. That energy rides the structure, which is why it can stay annoying even after you add soft surface treatments.
The fix changes with the type. Airborne noise usually responds first to sealing and added mass. Impact noise usually pushes you toward source-side floor treatment or decoupled ceiling and wall assemblies.
Most rooms have both. If the sound is mostly speech and TV, think leakage and mass first. If the ceiling physically “thumps” when someone walks above, think structure and decoupling.
Gaps, Vents, And Hidden Sound Paths
Whether the noise is airborne or structural, it still exploits every opening in the shell. A strong wall with an unsealed door edge can perform worse than a simpler wall with a properly sealed perimeter.
Vents are one of the biggest misses in whole-room planning. A duct run can behave like a tunnel between rooms, which is why people sometimes fix a wall and still hear voices because the path was overhead the whole time.
Outlets and switches on shared walls are another repeat offender, especially when boxes are back to back. They reduce mass, create leakage paths, and sit exactly where people forget to look.
That is why the first step in any cheap soundproofing plan should be sealing, not surface decorating. If the room is leaking, heavier upgrades cannot show their real value.
Get Studio Tips Weekly
Join 5,000+ creators getting acoustic treatment advice every week.
No spam. Unsubscribe anytime.Walls, Doors, And Windows
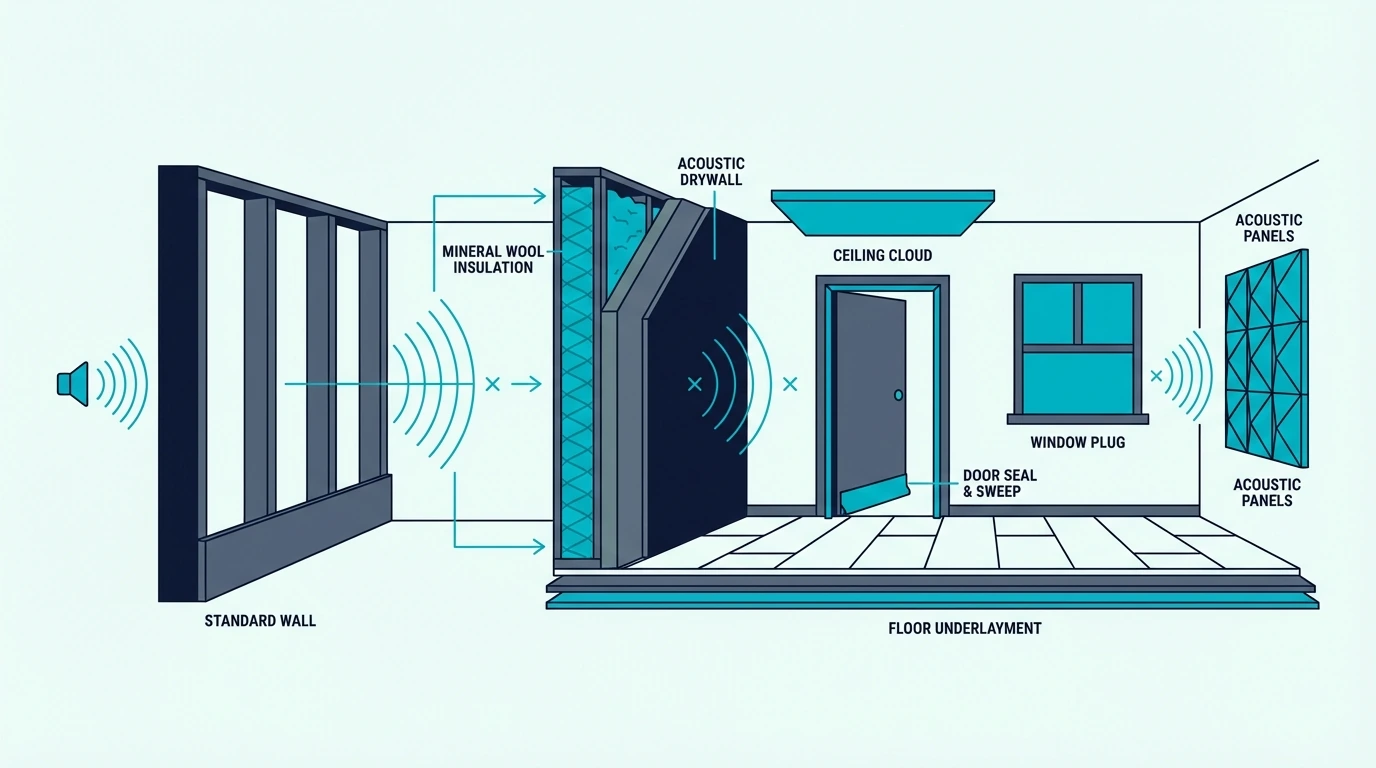
Once the leak paths are mapped, start with the parts of the shell that fail most often. In real homes, that usually means the door first, then the window, then the wall assembly behind them.
Shared-Wall Noise
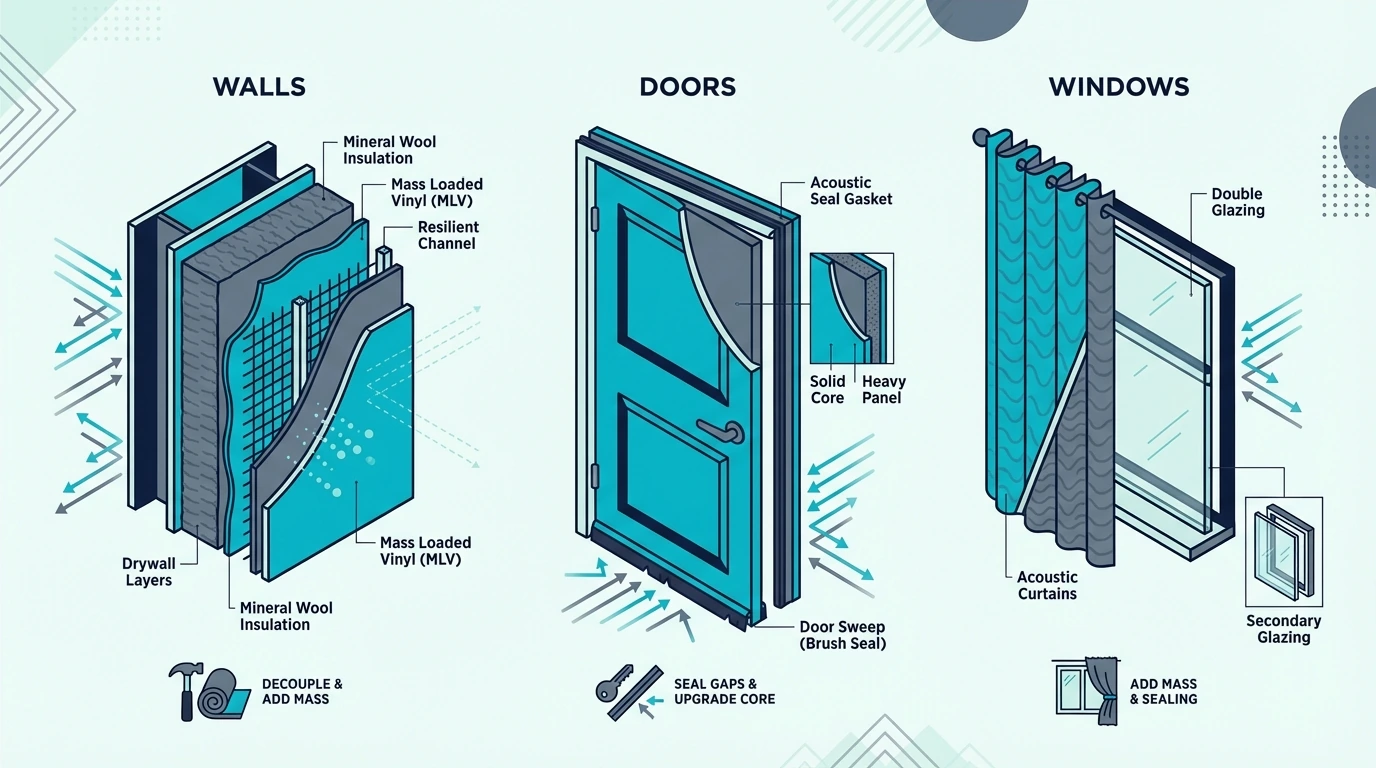
Shared-wall noise is usually voices, TV, and everyday living sounds, which means your first priority is sealing the wall perimeter and every penetration before you assume the whole wall needs rebuilding.
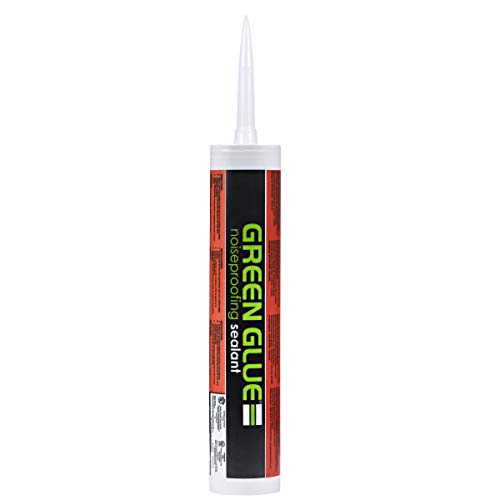
If the wall is staying closed, the best next move is usually another drywall layer with Green Glue Noiseproofing Compound between the layers. That gives you more mass and more damping without opening the studs.
Green Glue Noiseproofing Compound
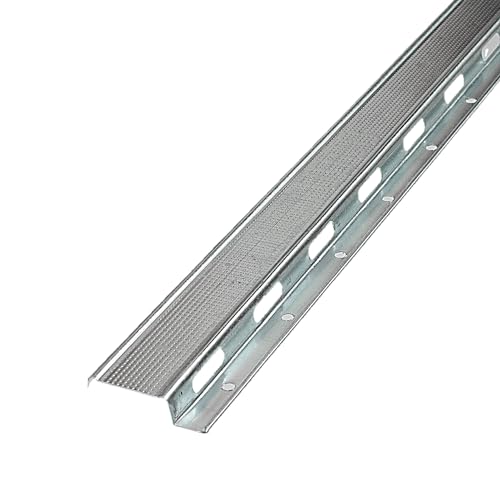
If the wall is already open, fill the cavity with AFB Acoustical Fire Batts, Mineral Wool Insulation or a denser mineral wool option, then rebuild the face with mass and airtight seams. If the noise includes bass or heavier vibration, go further with RSIC-1 Resilient Sound Isolation Clips or Trademark Soundproofing RC-1 Resilient Channel.
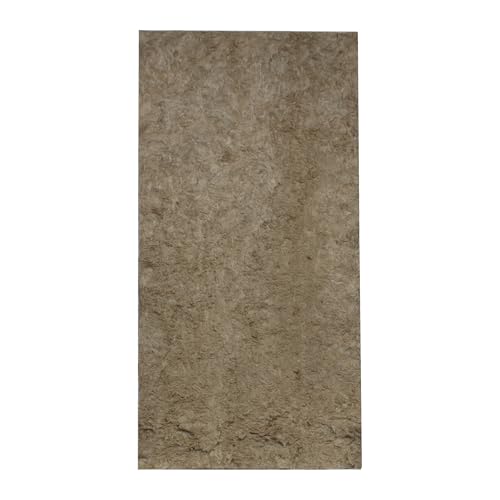
AFB Acoustical Fire Batts, Mineral Wool Insulation
That is the core wall workflow we use again and again: seal first, add mass second, add cavity absorption when the wall is open, and only jump to decoupling when the noise source is severe enough to justify it. If your whole problem lives on one party wall, go deeper with how to soundproof an existing wall or soundproofing a wall from noisy neighbors.
Hollow-Core Doors And Door Gaps
That same seal-first logic applies to doors, which fail in two ways at once: they are often too light, and they almost always leak. A door upgrade usually delivers more real-world improvement than starting with the wall beside it.
If you can see light under the slab, start with a real bottom seal like the HomeProtect Door Draft Stopper 36 Inch Under Door Draft Blocker Door Sweep. Then add frame compression with 33 Ft Gray Self-Adhesive Soundproofing Weather Stripping for Doors and Windows so the sides and head stop leaking too.
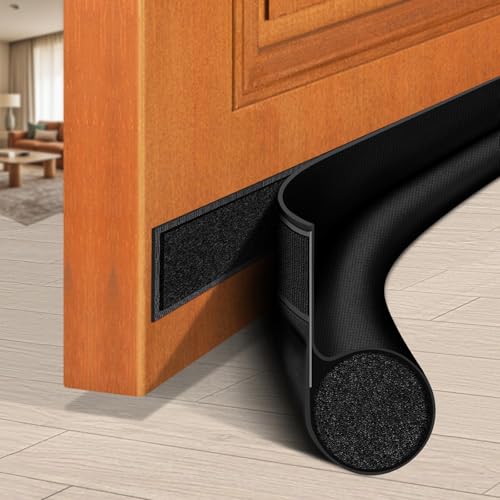
HomeProtect Door Draft Stopper 36 Inch Under Door Draft Blocker Door Sweep
If the trim-to-wall joint is cracked, run Acoustical Caulk (29 oz) 1 Tube with clean up wipe around the casing and any obvious frame gaps. Once the leaks are handled, the question becomes mass.
Acoustical Caulk (29 oz) 1 Tube with clean up wipe
If the room still has a hollow-core door, replacing it with a solid-core slab is usually the biggest single door upgrade you can make. For the full door workflow, use this page together with how to soundproof a door and the best door sweeps for soundproofing.
Window Inserts And Secondary Glazing
With the door sealed and upgraded, the next opening to check is the glass. If traffic, barking, or general street noise feels sharper near the glass than the wall beside it, the window should move to the top of your list.
Start with the seal. Re-caulk the trim joint with Acoustical Caulk (29 oz) 1 Tube with clean up wipe, replace worn sash seals with 33 Ft Gray Self-Adhesive Soundproofing Weather Stripping for Doors and Windows, and make sure the window closes tight enough to compress the seal.
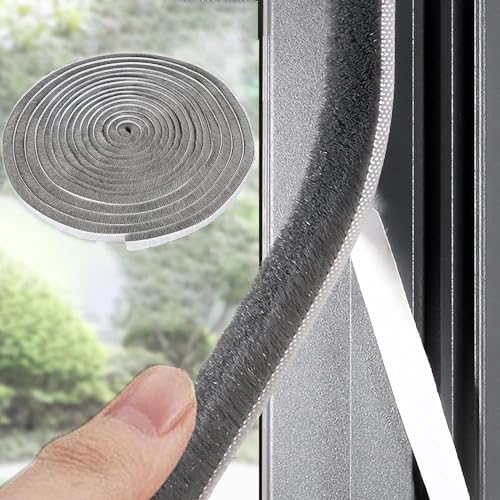
33 Ft Gray Self-Adhesive Soundproofing Weather Stripping for Doors and Windows
If the window is still the weak link, a properly fitted insert or secondary glazing panel makes much more sense than another soft curtain. The insert works by creating a sealed secondary barrier and a deeper air gap, which is why it outperforms lighter add-ons.
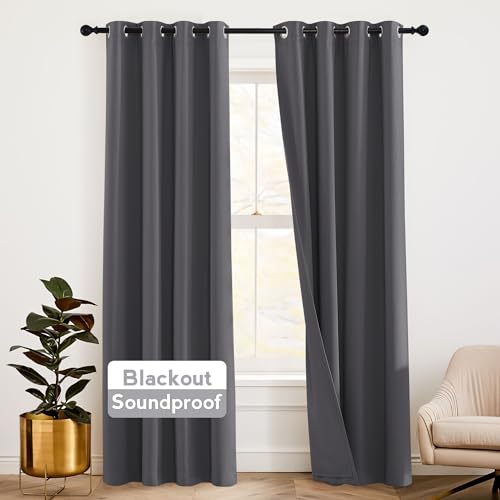
Curtains still have a role, just not the starring one. A product like RYB HOME Soundproof Divider Curtain can soften some reflected noise and make a room feel calmer, but it should be treated as a companion layer rather than the main fix. For a deeper window-only plan, go to how to soundproof windows and the best soundproof window inserts.
RYB HOME Soundproof Divider Curtain
Floors And Ceilings
Once the side-wall leaks are more under control, look up and down. Floors and ceilings are where people discover that impact noise follows a different playbook than speech and TV bleed.
Upstairs Footsteps And Source-Side Fixes
Upstairs footsteps are a source-side problem first. If you control the floor above, you will usually get more value treating that floor than throwing random materials at the ceiling below.
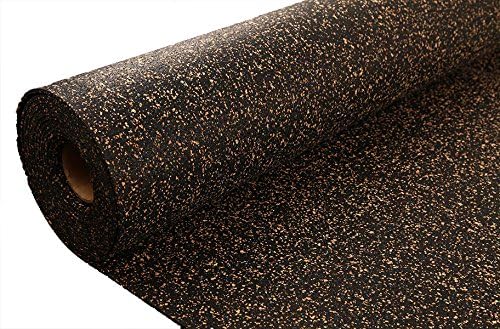
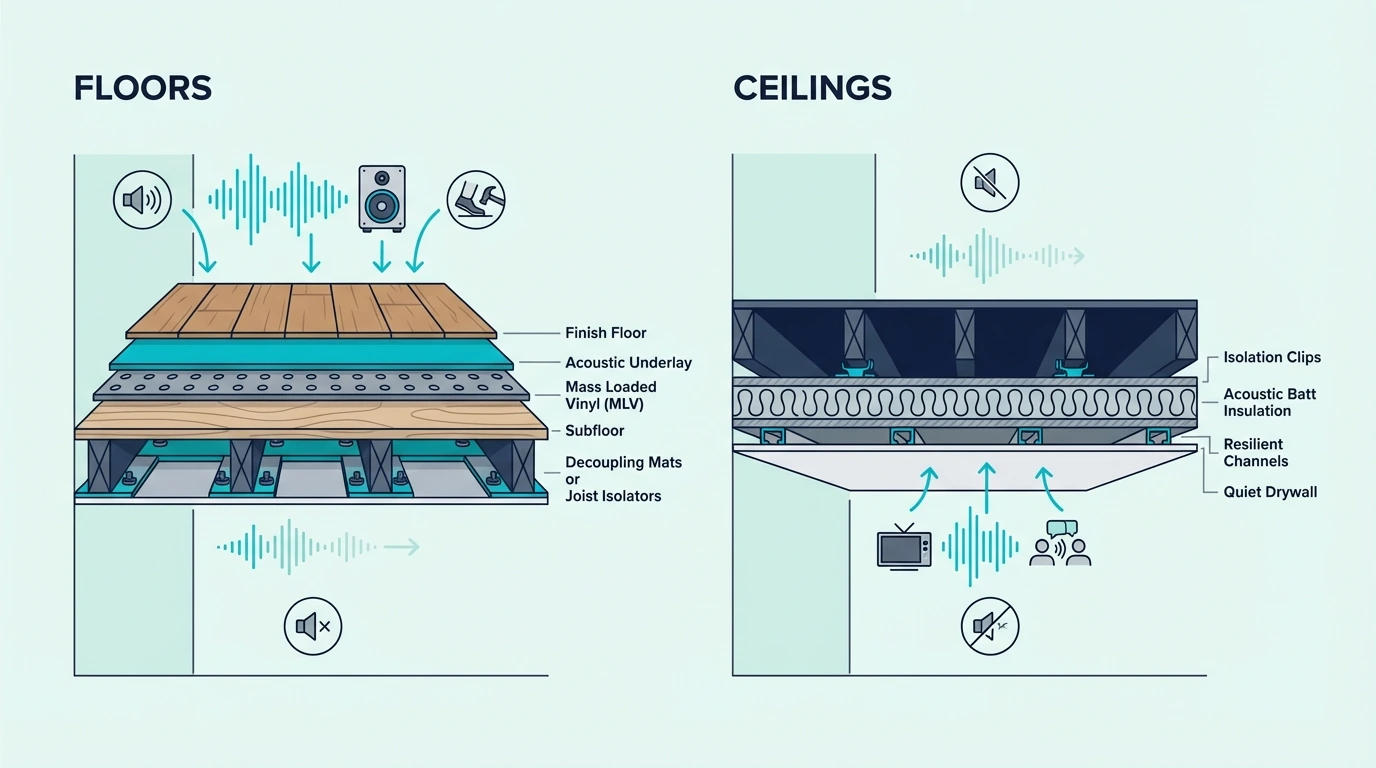
During a flooring renovation, a real acoustic underlayment like FloorMuffler Ultra Seal Underlayment 300SF or IncStores 10mm Thick AcoustiCORK RC1000 Rubber and Cork Flooring Underlayment makes far more sense than a thin stock pad.
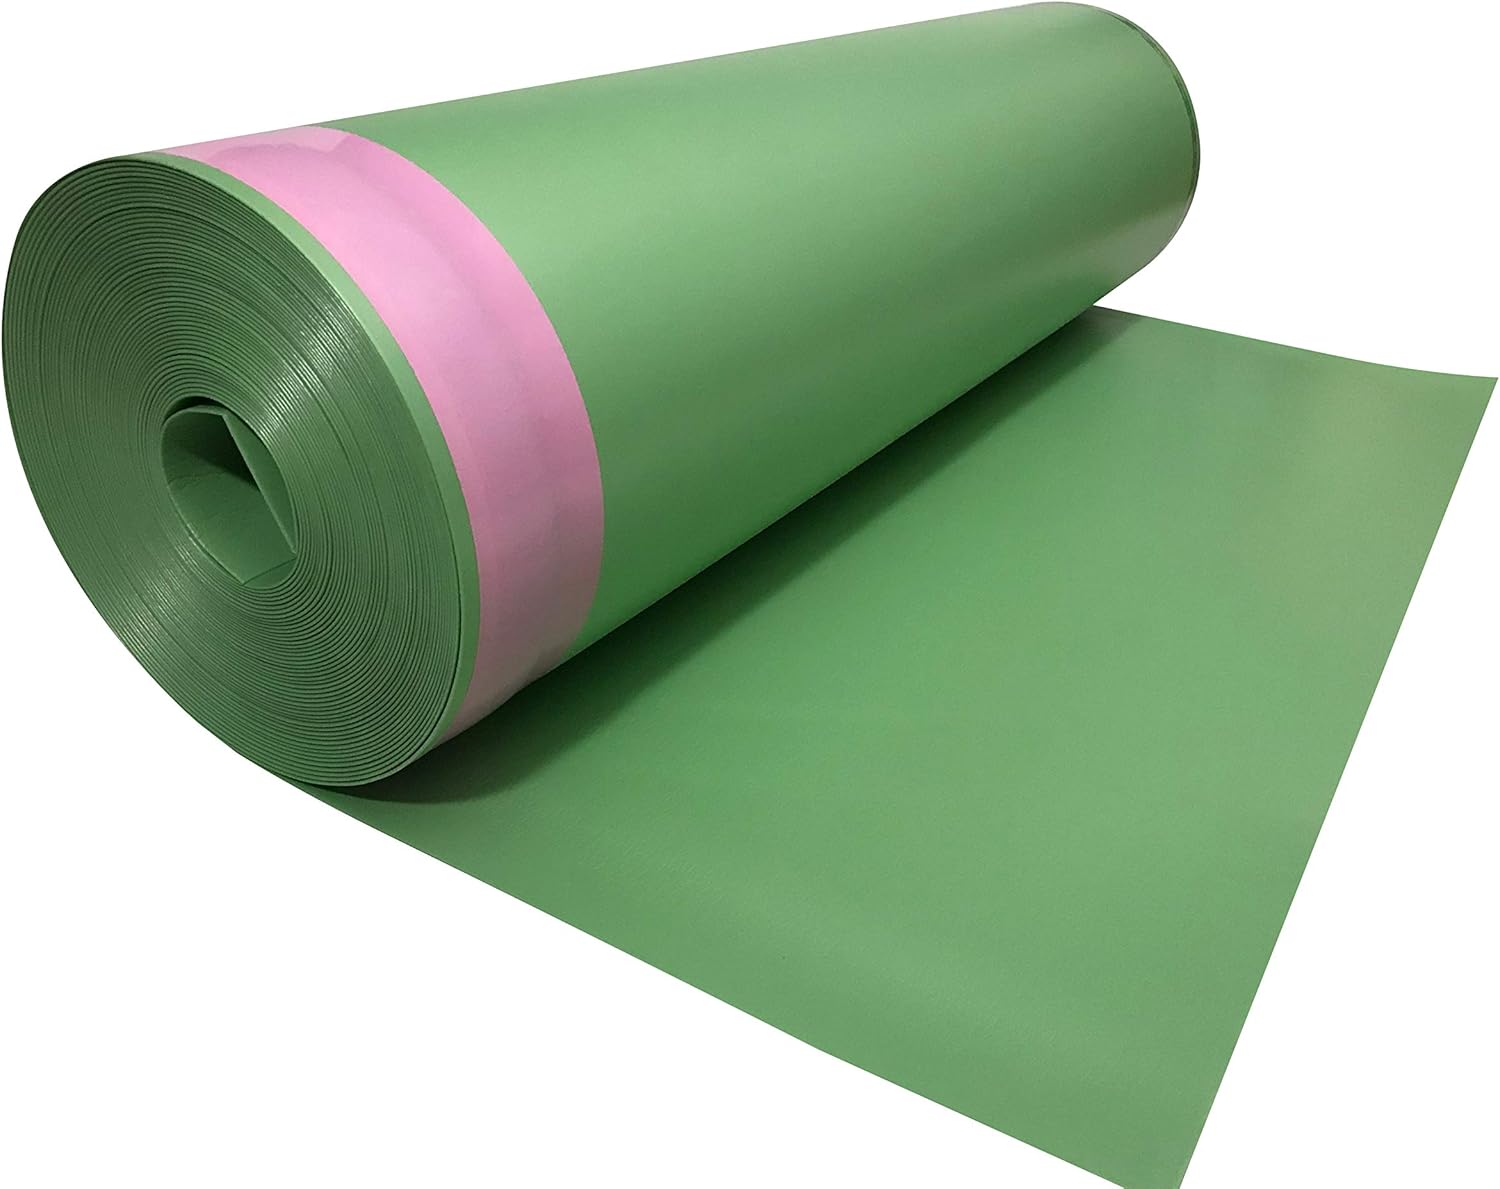
FloorMuffler Ultra Seal Underlayment 300SF
If you do not control the upstairs room, then the ceiling below becomes the main treatment surface. That usually means a decoupled ceiling build rather than a cosmetic patch.
Even before a rebuild, thick rugs with dense pads can still help reduce the sharpness of impact energy at the source. They are not a full fix, but they are one of the few removable changes that can improve footsteps from above.
Ceiling Noise From Below
That source-side priority flips when the ceiling is your only option. The assembly has to handle both airborne leakage and structure-borne vibration, so it needs to be tighter, heavier, and ideally less directly connected to the framing above it.
If the cavity is open, start with mineral wool between the joists. AFB Acoustical Fire Batts, Mineral Wool Insulation is the practical starting point, while Rockwool Roxul Mineral Wool 8 lb Density Soundproofing Fire Resistant Insulation Batts makes sense when you are already doing a more serious rebuild.

Rockwool Roxul Mineral Wool 8 lb Density Soundproofing Fire Resistant Insulation Batts 2 Inch (7-Pack)
Then add a heavier finished face. Another drywall layer with Green Glue Noiseproofing Compound is the most realistic next step for airborne noise.
When impact noise is the real problem, decoupling matters most. That is where RSIC-1 Resilient Sound Isolation Clips or Trademark Soundproofing RC-1 Resilient Channel become worth the effort. If ceilings are your main battle, pair this guide with how to soundproof a ceiling and how to soundproof a basement ceiling.
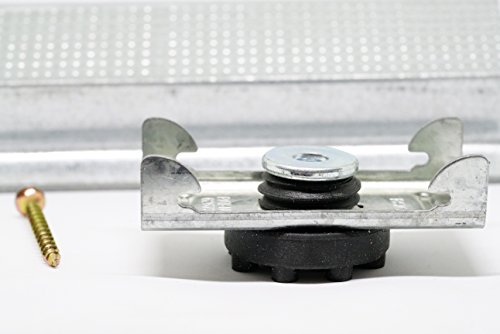
RSIC-1 Resilient Sound Isolation Clips (10 Pack)
Underlayment Timing And Value
If the ceiling path already has insulation and decoupling, the remaining impact energy often lives in the floor stack itself. Underlayment makes the most sense when that floor is already being replaced—especially in upstairs bedrooms, offices, nurseries, and media rooms with hard flooring.
It is much less attractive as a standalone project because finished floors have to come up first. If the floor is staying put, your effort usually goes farther on seals, doors, windows, or the ceiling below.
The key is coverage and context. Wall-to-wall underlayment inside a real floor assembly can help a lot, but partial coverage or a thin stock pad will not behave like a serious acoustic floor system.
If your main issue is upstairs transfer, learn the floor side and ceiling side together with how to soundproof a floor and the best soundproof underlayment for hardwood floors.
Materials That Actually Work
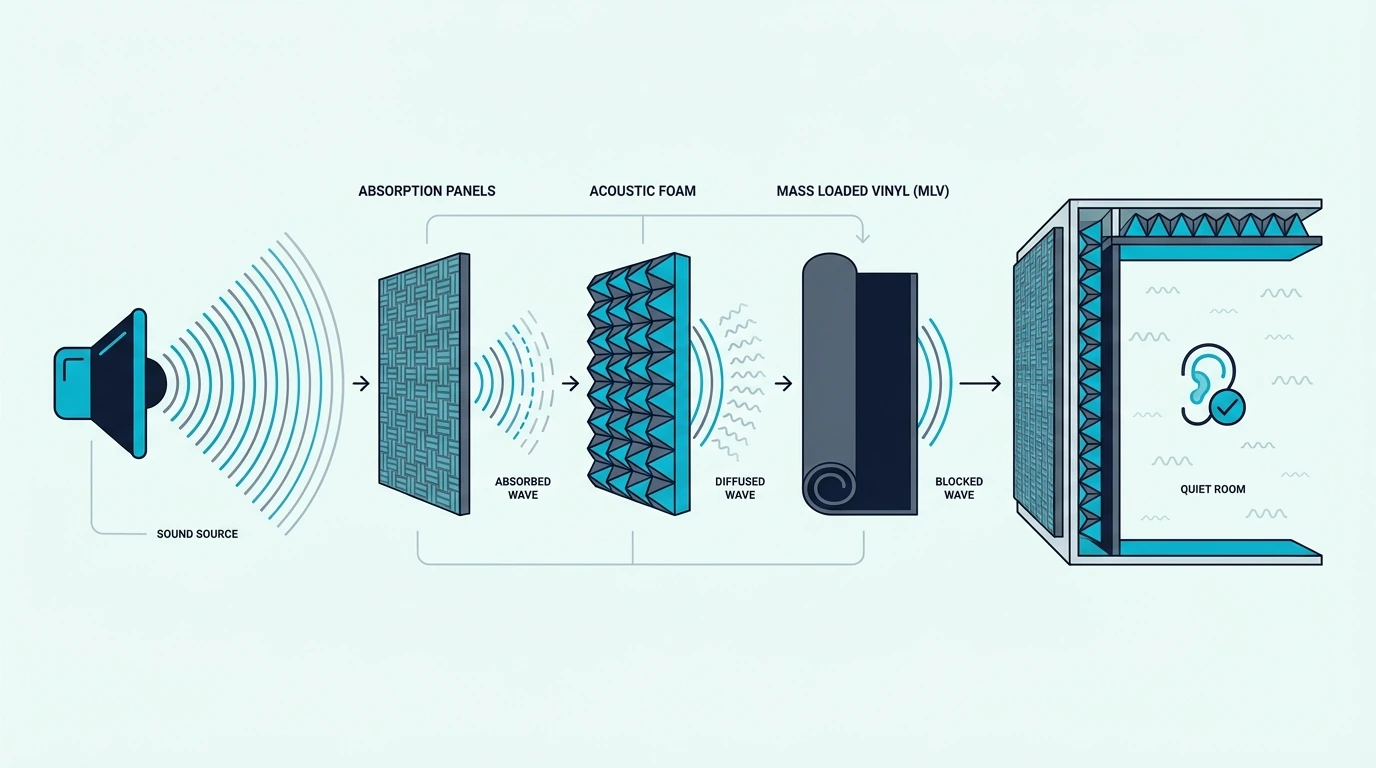
Once the room-by-room workflow is clear, it helps to sort the common materials by what job they actually do. That makes it much easier to avoid buying the right material for the wrong layer.
Mineral Wool As A Cavity Fill
Mineral wool helps inside a wall or ceiling cavity because it reduces resonance and absorbs some energy as sound moves through the assembly.
That is why products like AFB Acoustical Fire Batts, Mineral Wool Insulation and denser batts matter during open-wall and open-ceiling work. They support the system, but they do not replace mass, sealing, or decoupling.
The mistake is treating mineral wool like a surface product. It belongs inside the assembly, not exposed on the room side as a fake “soundproof wall” layer.
So if the room is already finished and you are not opening anything, mineral wool is usually not your first move. If the cavity is accessible, though, it is one of the best supporting materials you can add.
Mass Loaded Vinyl And Extra Drywall
Mineral wool handles the cavity, but the face of the assembly still needs enough mass to resist vibration. Mass loaded vinyl and extra drywall both target that need—adding barrier weight rather than fixing leaks or structure-borne shortcuts.
Soundsulate Next Generation, 1 lb. Mass Loaded Vinyl (MLV) makes sense when you need more mass but you are trying to preserve space or wrap around awkward areas during a rebuild.
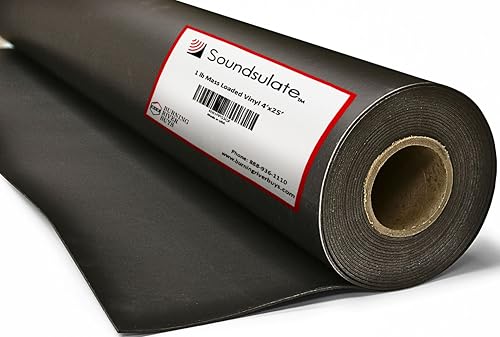
Soundsulate Next Generation, 1 lb. Mass Loaded Vinyl (MLV)
Drywall is usually the more straightforward move because it is cheaper, finish-ready, and easy for contractors to work with. Add Green Glue Noiseproofing Compound between layers, and the assembly behaves better across a wider range of noise.
So if you are rebuilding the surface anyway, extra drywall with damping is the default answer. If space is tight or the assembly needs a thinner heavy layer, MLV becomes more attractive.
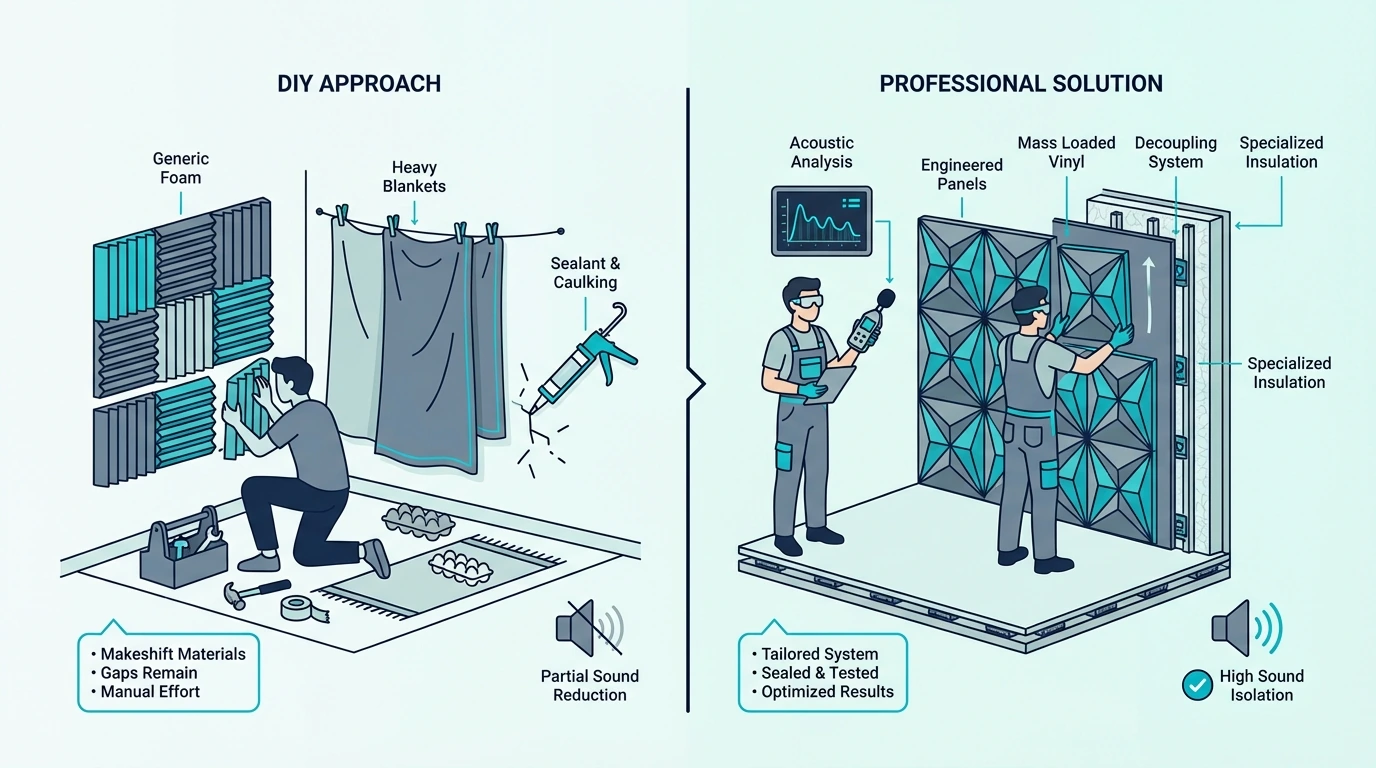
Acoustic Foam And Soft Furnishings
Mass and damping handle the heavy lifting, which is why lighter materials fall short. Foam, soft panels, blankets, and thick curtains can make a room sound less harsh without doing much to stop transmission through the shell.
That is because they are light. Real soundproofing materials are either heavy, well sealed, vibration-isolating, or all three.
Soft furnishings still help in supporting roles. Rugs can reduce floor reflections, curtains can calm a bright window wall, and a fuller room can feel less noisy because it is less reflective.
Just keep the goal straight. If you need to block sound between rooms, read does soundproof foam work once, then move your budget back toward sealing, mass, and better assemblies.
Soundproofing A Room On A Budget
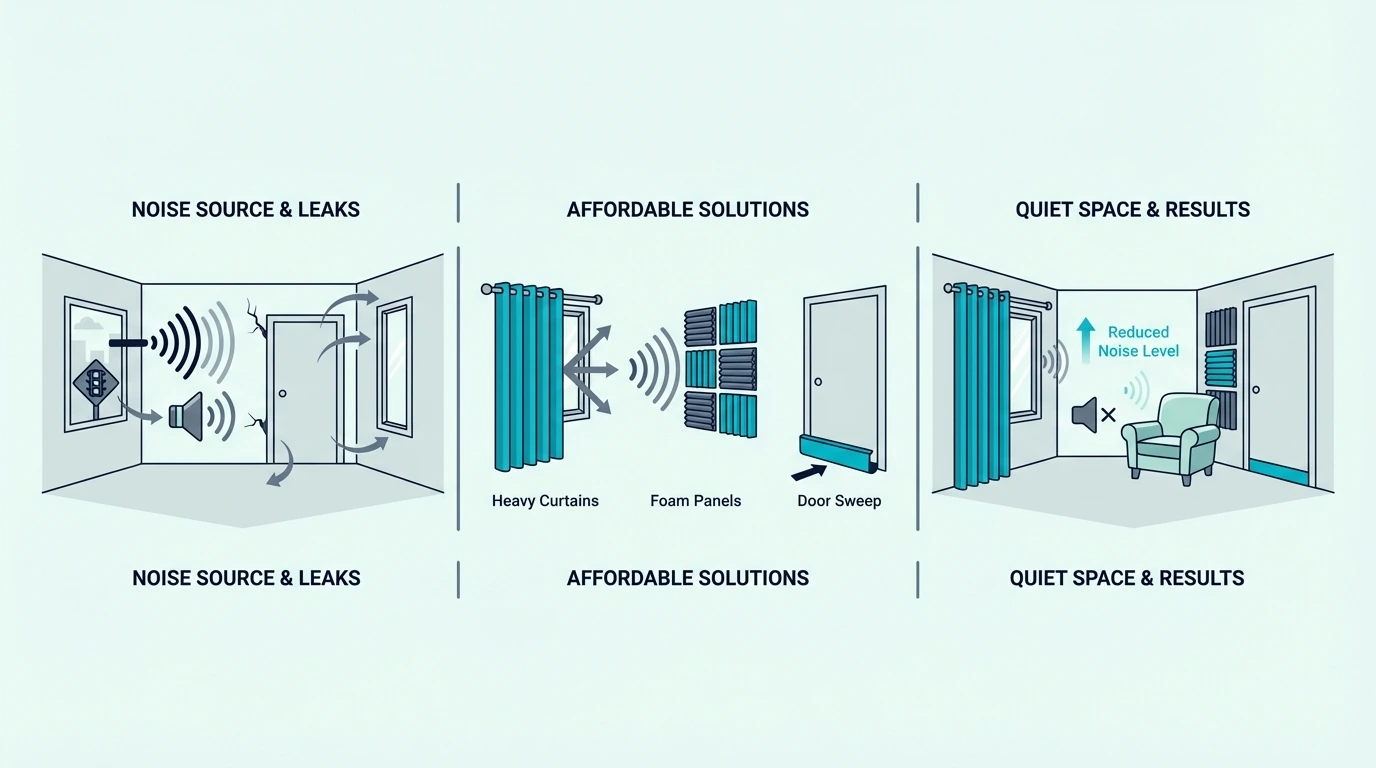
Most people should start cheap, but cheap only works when it targets the real leak. That means the order matters more than the budget number.
The Highest-Value Low-Cost Fixes
Start with the obvious air leaks. A bottom seal like the HomeProtect Door Draft Stopper 36 Inch Under Door Draft Blocker Door Sweep, perimeter 33 Ft Gray Self-Adhesive Soundproofing Weather Stripping for Doors and Windows, and Acoustical Caulk (29 oz) 1 Tube with clean up wipe usually return more than a decorative wall product.
After that, move furniture strategically. A loaded bookshelf on the noisiest shared wall and a thick rug in the room are not miracles, but they can support the main fixes without much added cost.
If the room still sounds bad after those steps, that is your sign the assembly itself is too weak. Then the budget conversation shifts from cheap sealing to real retrofit work.
Budget Strategy For Finished Rooms
Once those first-round sealing fixes are in place, the budget question shifts to how far the rest of the money can stretch. A finished room limits you to the outside of the shell, which means better door performance, window sealing, removable source-side floor softening, and selective added mass where it counts most.
For renters, the most realistic mix is door sealing, window sealing, thick rugs, and a removable companion layer like RYB HOME Soundproof Divider Curtain over the noisiest opening. It is not a primary barrier, but it is one of the few removable add-ons that can still provide some practical value.
For owners, the best budget strategy is still concentration, not coverage. Put the money into the single wall, door, or window facing the noise source instead of doing weak partial upgrades all around the room.
If the room is already built and the cheap fixes helped only a little, the next honest step is usually another drywall layer or a better door, not more accessories.
Cheap Fixes That Waste Money
Knowing where to spend also means knowing where not to. Egg cartons, lightweight foam tiles, and miracle paints all fail the same test: they do not add meaningful mass, they do not seal, and they do not decouple anything.
Loose door snakes and random fabric hung on a wall also get oversold. If they do not create a real seal or a real barrier layer, their contribution is usually tiny.
Curtains belong in the “supporting layer” category, not the “main fix” category. That is why soundproof curtains can be useful around a better window strategy without being the strategy.
The simplest rule is this: if the product is light, decorative, and sold as a universal answer, be skeptical.
Upgrading A Room That Is Already Built
Once the basic sealing and targeted cheap fixes are done, the next question is whether the finished room can be improved enough from the surface or whether the assembly itself has to change.
Surface-Side Upgrades Without Demo
The best no-demo wall upgrade is usually another drywall layer with Green Glue Noiseproofing Compound between layers. It is one of the few upgrades that can materially improve a finished room without opening the studs.
If the assembly needs a thinner heavy layer, Soundsulate Next Generation, 1 lb. Mass Loaded Vinyl (MLV) can be layered into a finished-room rebuild before the new face goes on.
Windows, doors, and vent penetrations can also be improved without demolition. Inserts, sweeps, weatherstripping, caulk, and better grille sealing are exactly the kinds of upgrades finished rooms respond to first.
For more surface-first retrofit logic, pair this section with how to soundproof an existing wall and how to soundproof an apartment.
The Threshold For Construction-Level Work
Surface-side mass and damping can only take you so far before the noise demands a deeper rebuild. Drums, subwoofers, repeated impact, and serious privacy requirements all push you in that direction.
That is when decoupling stops being optional. Clips, channels, rebuilt wall faces, and eventually room-within-a-room design are what keep structure-borne energy from walking straight through the framing.
The threshold is usually obvious in practice. If sealing and added mass improved the room but bass and heavy thuds are still dominating, the remaining problem is probably structural.
That is also the point where careful design matters more than buying more materials. A poorly executed “heavy” room can still lose badly to a properly decoupled one.
Music Rooms And High-Demand Spaces
That decoupling threshold arrives fastest in rooms built for loud, bass-heavy sources. Music rooms follow the same workflow, but the louder the source gets, the less forgiving the shell becomes.
For casual playing, seal the door and window, add mass to the worst wall, and treat the ceiling if the room is below someone else. For drums, subwoofers, or serious monitoring, plan on decoupling and likely some kind of floating or isolated floor strategy.
That is why a music room often becomes the clearest case for clips, channels, layered drywall, and airtight detailing everywhere. The room has to handle more energy over a wider frequency range than a normal bedroom or office.
If that is your actual use case, jump from this hub to how to soundproof a studio or how to soundproof a room for music before you commit to the build.
DIY Limits And When To Call A Pro
By this point, the real decision is no longer whether DIY is possible. It is whether the room still lives in the sealing-and-retrofit zone or has crossed into the assembly-rebuild zone.
Realistic Projects For Renters And Beginners
Door sweeps, weatherstripping, caulk, rugs, and window sealing are all realistic beginner projects. They are also the first projects renters and apartment dwellers should prioritize because they do not require opening the structure.
Removable window layers and heavier curtains can also be beginner-friendly when the room needs a non-destructive comfort upgrade. Just remember they are support layers, not substitutes for better assemblies.
Renters should focus on removable fixes, source-side softening, and the noisiest opening first. Owners can go a step further into new drywall, better doors, and more permanent ceiling or wall work.
If your room shares the same constraints, read this alongside how to soundproof an apartment so you do not plan a build your lease will never allow.
The Case For Professional Help
Those beginner-friendly fixes cover a lot of ground, but some projects cross a line where DIY risk outweighs the savings. Professional help becomes worth it when you are rebuilding ceilings, adding new drywall layers across large areas, modifying electrical boxes, or installing decoupling hardware that can be ruined by sloppy fastening.
This matters most on ceilings and heavier wall rebuilds. A bad install can short-circuit the whole system, waste materials, and leave you with a mess that still leaks sound.
Even if you stay hands-on, it can be worth getting an acoustician or experienced contractor to confirm the dominant path before you spend on a bigger build. That is especially true when the room has multiple possible weak points like a shared wall plus a vented ceiling line.
The more the room starts looking like a system build instead of a sealing job, the more valuable expert input becomes.
Cost By Project Depth
Whether you hire help or stay hands-on, the budget still follows the same pattern. Sealing and door work sit at the low end, layered wall and ceiling retrofits live in the middle, and decoupled or room-within-a-room projects are the expensive end of the spectrum.
That is why diagnosis matters so much. If the room only needs the door, window, and trim tightened up, you can improve it without turning it into a renovation.
If the room needs new drywall layers, ceiling rebuilds, or decoupled framing, you are no longer doing a light fix. You are doing construction, and the budget needs to be treated that way.
For a more detailed breakdown by project depth, see how much it costs to soundproof a room.
The Bottom Line
The best way to soundproof a room is to treat it like a shell and work in the right order. Seal the leaks, upgrade the weakest opening, then strengthen the surface that is actually failing.
For most rooms, that means door gaps, window leakage, and perimeter cracks first. After that, shared walls, ceilings, or floors get the next layer of attention depending on whether the problem is speech, traffic, or impact noise.
If those steps still leave you with bass, vibration, or heavy transfer, the room is telling you it needs decoupling instead of more accessories. That is the line between a simple fix and a real isolation build.
If you want to keep building the plan surface by surface, this hub connects directly to soundproofing a door, soundproofing windows, soundproofing a ceiling, and soundproofing a floor.
Frequently Asked Questions
How Do I 100% Soundproof My Room?
True 100% soundproofing means a room-within-a-room build with isolated walls, a floating floor, a decoupled ceiling, and sealed ventilation. For most homes, the smarter goal is strong noise reduction rather than absolute silence.
Can You Soundproof A Room Cheaply?
Yes, if the room’s main problem is leakage rather than major structural transfer. Cheap fixes like sealing the door, tightening the window, and caulking the trim can make a meaningful difference, but they will not solve bass-heavy or impact-driven noise on their own.
What Is The Best Material To Soundproof A Room?
There is no single best material because soundproofing works as a system. For most rooms, the best combination is airtight sealing, a heavier wall or ceiling face, damping between layers, and decoupling when the noise source is severe enough to require it.