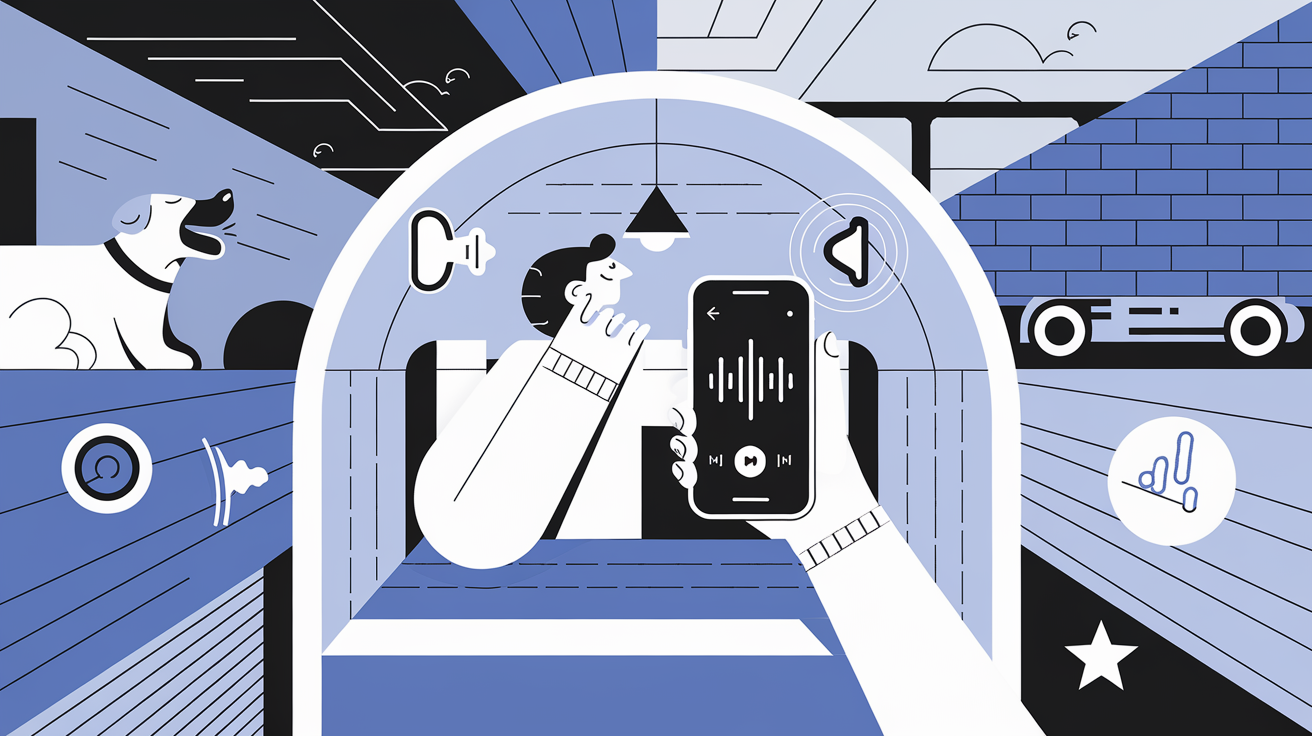
Installed soundproofing but unsure if it’s working? Testing it yourself reveals the truth—and saves you from guessing whether that new wall actually stops the neighbor’s dog from ruining your morning coffee.
Soundproofing’s only as good as its results—without testing, you’re flying blind, hoping noise stays out. This guide walks you through easy, effective ways to measure it, no fancy lab or sound engineer required—just tools you’ve got or can grab cheap.
If you’re new to the basics—or just want a refresher before diving in—start with soundproofing basics. It’s your crash course on what makes silence stick, setting you up to test like a pro.
Noise isn’t just annoying—it’s a sleep thief, a focus killer, and even a health hazard when it’s relentless. Studies tie chronic noise to stress spikes and heart trouble—so let’s make sure your soundproofing isn’t just decoration but a real fix.
You don’t need a PhD in acoustics to do this—simple steps and a bit of curiosity get you there. By the end, you’ll know if your space is truly quiet or if leaks are sneaking through—and what to do about it.
HOW CAN YOU TEST SOUNDPROOFING YOURSELF?
Test soundproofing with a decibel meter or smartphone app—measure noise levels before and after in a room, targeting a 10-20 dB drop for success. Simple tools like clapping or speakers help pinpoint leaks.
What Does Testing Soundproofing Mean?
Testing soundproofing checks if noise stays out—or in—like it’s supposed to, proving your barriers aren’t just for show. It’s about measuring how much quieter your space gets after adding drywall, seals, or insulation—quantifying the peace you’ve built.
Think of it as a reality check for your efforts—did that mass-loaded vinyl really cut the traffic hum? Without testing, you’re stuck wondering, while a quick check gives you hard numbers to brag about—or fix.
It’s not abstract—you’re listening for leaks or watching a meter drop, not guessing. For the nuts and bolts of what you’re testing, see what is soundproofing—it’s your foundation for this whole game.
This isn’t about perfection—some noise always slips through—but knowing the difference matters. A good test shows if you’re at whisper-level or still hearing every car horn outside.
Why Should You Test Soundproofing?
Testing proves your setup works—otherwise, you’re just hoping that new wall stops traffic noise or keeps your karaoke from the neighbors. It also spots weak points—like a drafty window or thin door—before they drive you nuts or waste your cash.
Imagine dropping $200 on insulation only to hear the same old rumble—testing avoids that regret. It’s your insurance against shoddy work or half-baked DIY fixes that look good but don’t deliver.
Plus, it’s satisfying—seeing a 15 dB drop feels like a win, not a mystery. Curious why this peace is worth chasing? Check benefits of soundproofing for the full rundown.
You’re not just testing for kicks—it’s about control over your space, your sanity. Skip it, and you’re gambling with every hammer swing or dollar spent—why risk that?
What Tools Do You Need to Test Soundproofing?

A decibel meter or free smartphone app—like Decibel X or Sound Meter—measures noise levels accurately, giving you real data in seconds. Speakers, a loud clap, or everyday sounds (think a vacuum or radio) work as test sources to push your barriers.
You don’t need pro gear—a $20 meter from Amazon or a free app gets you started. Pair it with something noisy—like a Bluetooth speaker blasting white noise—and you’re set to measure what’s getting through.
No fancy setup required—just grab what’s handy and make some racket. Wondering if those barriers hold up under pressure? See does soundproofing work for proof it’s worth testing.
A notebook or phone to jot down numbers helps too—tracking before-and-after is key. Add a flashlight to spot gaps visually, and you’ve got a full kit for under $30.
How Do You Measure Soundproofing Effectiveness?
Measuring soundproofing effectiveness means quantifying how much noise your barriers block—turning vague hopes into hard numbers you can trust. Here’s a step-by-step guide to do it right, using tools like a decibel meter or app, a noise source, and a little patience—no lab coat needed.
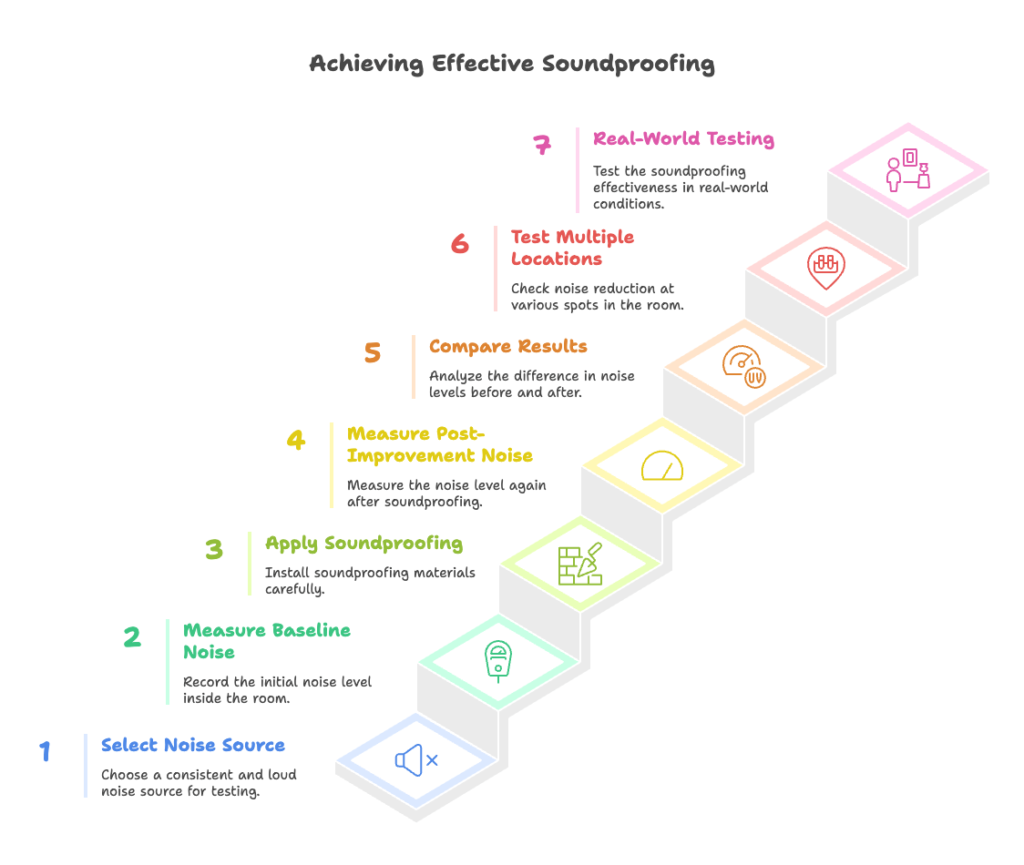
Step 1: Pick Your Noise Source
Start with something loud and steady—like a Bluetooth speaker blasting white noise at 80 dB, a vacuum cleaner, or even traffic outside if it’s consistent. Place it 5 feet from your test wall or door—close enough to challenge your soundproofing, far enough to mimic real noise.
Consistency is key—random honks won’t cut it, but a speaker looping pink noise works like a charm. Measure its output first—stand a foot away with your meter or app (e.g., Decibel X) to confirm it’s hitting 80 dB steady.
Step 2: Set Your Baseline Inside
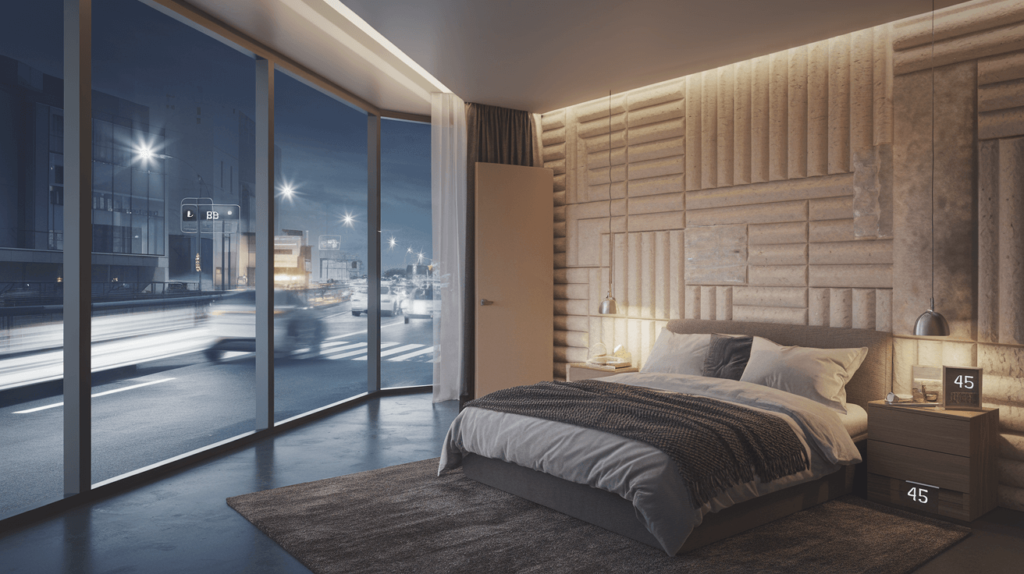
Go inside the room you’re testing—say, a bedroom with a thin wall—and close all doors and windows tight. Hold your meter in the center, about 3 feet off the ground, and record the noise level—maybe 70 dB with that speaker blaring outside.
This is your “before”—what you’re stuck with pre-soundproofing, like traffic bleeding through drywall. Test during a noisy time—rush hour, not 3 AM—to catch the worst your wall faces.
Step 3: Add Your Soundproofing
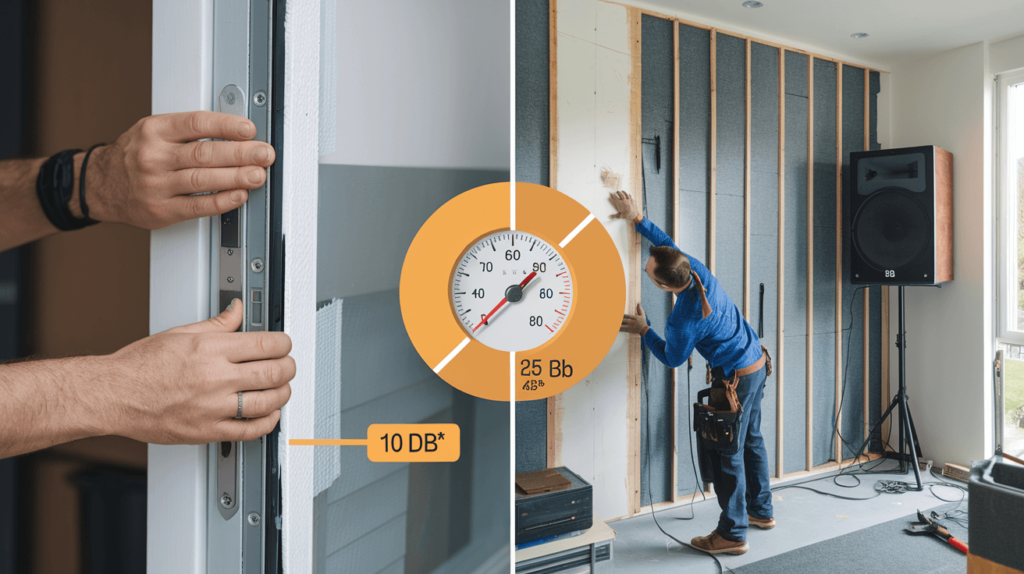
Now install your fix—slap on an extra layer of drywall, stuff fiberglass insulation between studs, or seal a door with weatherstripping. Make it real—say you’ve added 5/8-inch drywall and Green Glue, a combo pros swear by for 15-20 dB cuts.
Don’t rush—tight seals matter more than speed, so caulk every gap and tape joints. Once it’s set, you’re ready to see if that $100 investment was worth it—or just wall art.
Step 4: Measure Again Post-Soundproofing
Fire up that same 80 dB speaker outside—same spot, same volume—and head back inside with your meter. Stand in the same center spot, record again—maybe it’s 50 dB now, a 20 dB drop showing your wall’s got muscle.
Keep conditions identical—same noise, same position—or your numbers lie. A drop of 10-20 dB is solid—great soundproofing, like a studio-grade MLV wall, might hit 30 dB or more.
Step 5: Compare and Interpret
Subtract your “after” from “before”—70 dB minus 50 dB is 20 dB, meaning your soundproofing’s pulling its weight. Pros aim for 15-25 dB reductions—under 5 dB, and it’s barely a whisper of help; over 30 dB, you’ve built a fortress.
Numbers don’t lie—a curtain might shave 3 dB, while fiberglass and drywall combo crushes 20 dB easy. Metrics like STC and IIC define these wins—check measuring soundproofing effectiveness for the science behind your score.
Step 6: Test Multiple Spots
Don’t stop at one reading—move your meter around: near the door, by the window, against the wall. A spike to 60 dB near a window frame screams leak—your 20 dB average drops if gaps undo the work.
This pinpoints weak links—maybe the wall’s gold, but the door’s a sieve at 10 dB. Test each fix—add a sweep, remeasure—until every corner holds tight.
Step 7: Real-World Check
Run a final test during peak noise—like 6 PM traffic or your neighbor’s lawnmower—to see real results, not just controlled blasts. A bedroom dropping from 65 dB to 45 dB during rush hour proves it’s not just theory—it’s livable quiet.
This isn’t lab stuff—real noise varies, so your 15 dB cut might flex between 12-18 dB daily. If it’s stuck under 10 dB, beef it up—more mass, tighter seals, better silence.
What’s the Difference Between Testing Soundproofing and Absorption?

Soundproofing tests block noise transmission—measuring how much outside sound (e.g., traffic) drops inside, aiming for a big dB reduction. Absorption tests echo reduction—clap in a room, listen for reverb fade, or use a meter to check clarity, not transmission.
For soundproofing, you’re outside-in—speaker blaring, meter inside, chasing that 20 dB fall. Absorption’s inside-only—stand in the middle, clap or talk, and hear if the echo dies fast or lingers like a bad guest.
Tools overlap—meters work for both—but the focus shifts: soundproofing’s about barriers, absorption’s about softness. Confused by the two? See soundproofing vs sound absorption for the split.
A soundproofed wall might drop 15 dB but still echo—absorption fixes that separately. Test both if you’re combining—silence outside, clarity inside, two wins in one.
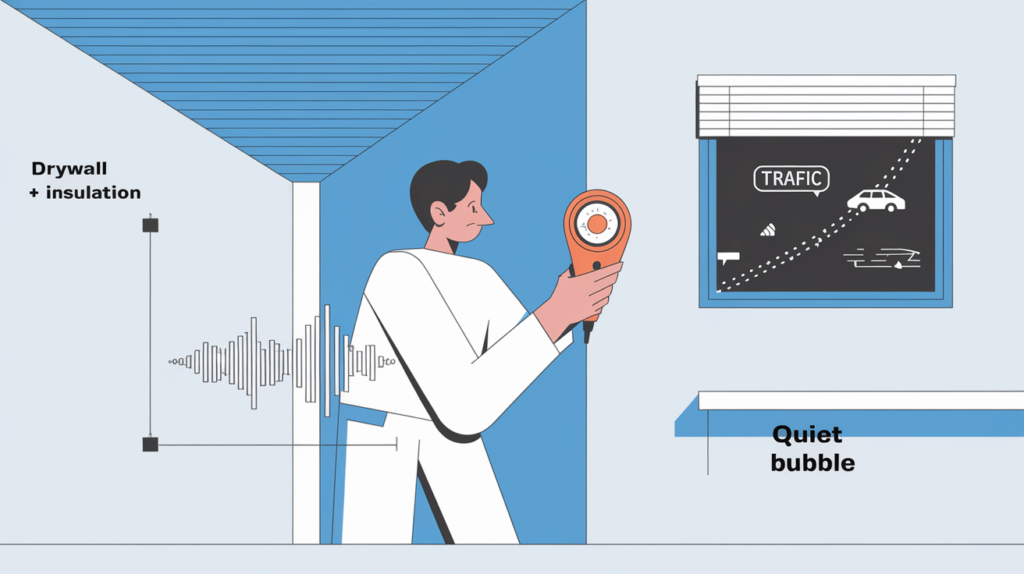
How Do You Find Soundproofing Leaks?
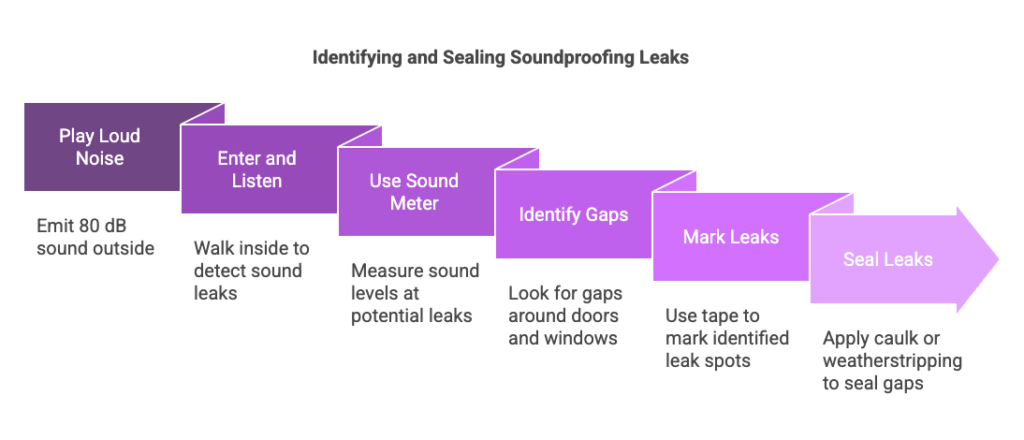
Play loud noise outside—say, 80 dB from a speaker—and walk inside with a meter or just your ears to spot where sound sneaks through. Gaps around doors, windows, or thin walls usually scream loudest—check edges, seams, or anywhere air moves.
Start at the obvious—crack a window slightly, and noise jumps 10 dB; that’s your baseline for failure. Move slow—hold the meter near outlets, baseboards, or ceiling joints—spikes mean leaks, like a 5 dB bump near a loose frame.
No meter? Listen close—a hiss or hum points to trouble, like wind through a keyhole. Noise type matters here—check types of noise to know what’s slipping in.
Flashlight helps too—light leaks often mean sound leaks, especially around doors. Mark spots with tape, then seal—caulk for cracks, weatherstripping for gaps—and retest ‘til it’s tight.
Can You Test DIY vs Professional Soundproofing?
Test both the same way—measure noise drop with a meter before and after each setup, comparing raw numbers. DIY might hit 10 dB with weatherstripping or a bookshelf; pros often push past 20 dB with fiberglass walls or MLV sealed tight.
Set up your speaker outside—80 dB again—and record inside pre-DIY (e.g., 70 dB). Add your fix—like a rug or extra drywall—then test again; pros might swap that for a decoupled wall, so compare fairly.
DIY’s quick—$50 and an afternoon might cut 8 dB if you’re lucky. Pros take longer—$500 and a week—but 25 dB isn’t rare with their precision; it’s your call on cost vs quiet.
Not sure which route fits? See choosing between DIY and professional soundproofing for the trade-offs. Either way, test it—numbers beat bragging rights every time.
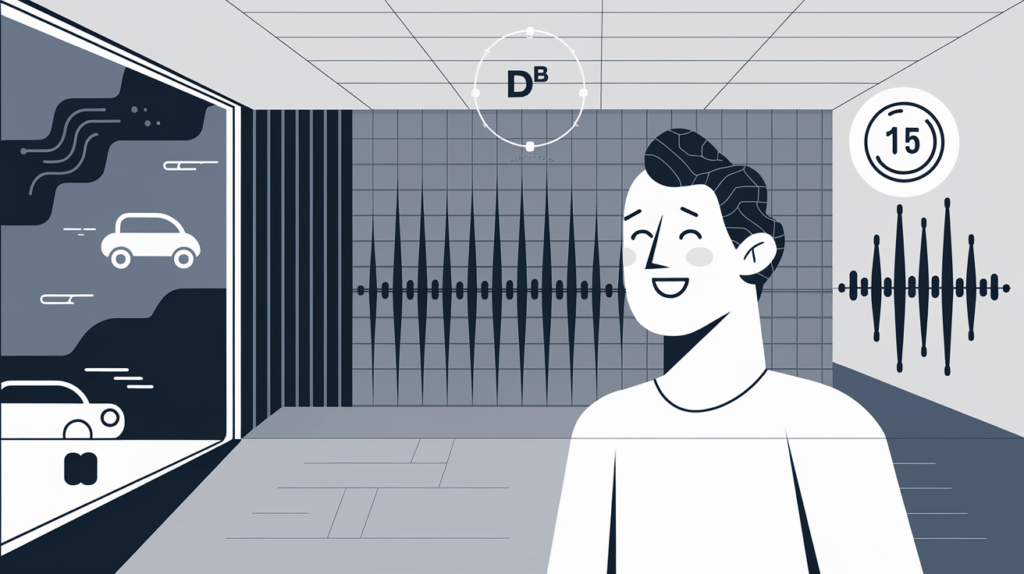
What Results Should You Expect When Testing Soundproofing?
Good soundproofing cuts noise by 10-20 dB—think traffic dropping from a roar to a murmur through a beefed-up wall. Great setups—like studio-grade with MLV or double drywall—hit 30+ dB, while weak ones (curtains alone) limp at 5 dB or less.
A bedroom near a busy street might start at 65 dB inside—post-fiberglass, 45 dB is solid. Garage with thin walls? Maybe 70 dB down to 60 dB with DIY seals—under 10 dB means it’s barely working, so add mass.
Expect variation—fiberglass or mineral wool walls beat foam or rugs every time; 15 dB is average for decent DIY. Test during peak noise—say, 7 PM traffic—and you’ll see real gains, not just quiet-hour flukes.
Materials matter—a hollow door leaks like a sieve (5 dB drop), but swap it for solid core and MLV, and you’re at 20 dB easy. If it’s not cutting at least 10 dB, tweak—more mass, tighter seals, better results.
Conclusion
Testing soundproofing with a meter, a clap, or a speaker shows if your space is truly quiet—or leaking like a cheap tent in a storm. It’s your proof, step-by-step, no guesswork—just hard data to back up every nail and seal.
You’ve got the tools—apps, speakers, a bit of time—and now the know-how to measure silence like a pro. Results don’t lie: 20 dB down means victory, 5 dB means back to the drawing board—either way, you’re in control.
Ready to master the whole soundproofing game? Dive into the ultimate guide to soundproofing—it’s your next stop for total noise domination.