How to Scratch on a DJ Controller Virtual DJ — Complete Tutorial

How to scratch on a DJ controller with Virtual DJ is one of the most searched DJ tutorials online — but most guides assume you already own a battle-style controller with large jog wheels. The reality is that scratching works on almost any controller running Virtual DJ, even budget units with small platters.
The difference is how tight the scratch response feels, and that depends on your controller’s jog wheel resolution and Virtual DJ’s scratch algorithm settings.
The problem is that Virtual DJ’s default scratch settings are tuned for smooth mixing, not turntablism. Out of the box, the jog wheel response feels sluggish for scratching because the software prioritizes avoiding accidental track nudges over tight scratch tracking.
That default behavior is caused by Virtual DJ’s “touch” sensitivity settings, which dampen jog wheel input to prevent beginners from accidentally moving tracks when they brush the platter. For scratching, you need the opposite — maximum sensitivity with zero dampening, so every finger movement translates instantly to audio.
Below, you will find a step-by-step guide to configuring Virtual DJ for scratching, plus the fundamental scratch techniques you can practice on any controller with jog wheels.
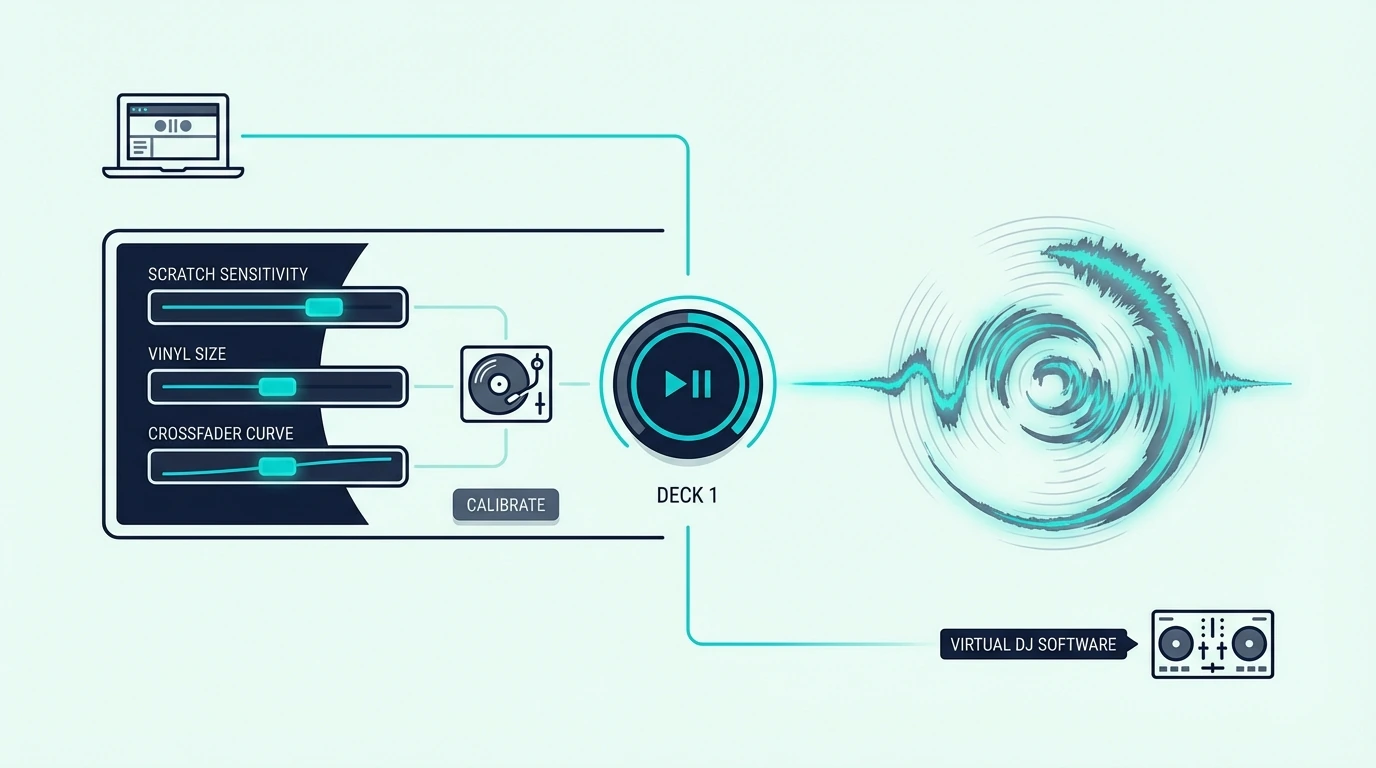
To scratch on a DJ controller with Virtual DJ, enable Vinyl Mode in VDJ settings, set the crossfader curve to sharp (scratch), and load a track with a clear vocal or horn sample. Practice the baby scratch first (forward-backward jog wheel movement with the crossfader open), then add crossfader cuts for chirps and transforms.
Setting Up Virtual DJ for Scratching
Enable Vinyl Mode
Open Virtual DJ and navigate to Settings > Options. Search for “vinyl” and enable Vinyl Mode for both decks.
This setting changes how the jog wheel interacts with the track — instead of nudging the track forward or backward (pitch bend), the jog wheel now directly controls the playback position, like a vinyl record under your finger.
Without Vinyl Mode, your jog wheel only speeds up or slows down the track. With Vinyl Mode on, touching the platter stops playback and lets you manually scrub through the audio — which is exactly what scratching requires.
Set the Crossfader Curve to Sharp
Navigate to Settings > Crossfader and change the curve from “smooth” to “sharp” (also called “scratch” or “cut”). A sharp crossfader curve means audio cuts instantly when the fader reaches either end.
That instant cut is what makes transform scratches and chirps possible. A smooth curve blends audio gradually, which sounds great for mixing but destroys the percussive precision that scratching demands.
Adjust Jog Wheel Sensitivity
Under Settings > Controllers, find the jog wheel sensitivity or “scratch sensitivity” slider. Increase it to 75-100 percent for tight scratch response.
Lower values introduce a delay between your finger movement and the audio response.
The Pioneer DJ DDJ-FLX4 responds well at 80-90 percent sensitivity in Virtual DJ. Budget controllers with smaller jog wheels may need 100 percent to compensate for lower hardware resolution.
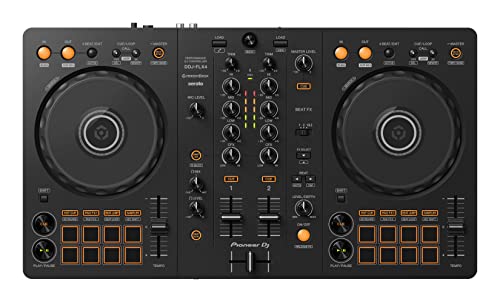
Pioneer DJ DDJ-FLX4
Load a Scratch Sample
Load a track with a clear, recognizable sound at a specific point — vocal stabs (“aaah”), horn hits, or drum breaks work best. Set a hot cue at the exact start of the sound.
When you scratch, the jog wheel scrubs through this sample, and the hot cue lets you reset to the starting position instantly.
Virtual DJ’s sampler also lets you load dedicated scratch samples that play independently from the main decks. Drag a sample into the sampler slot and trigger it with a performance pad while scratching on the jog wheel.
Basic Scratch Techniques on Virtual DJ
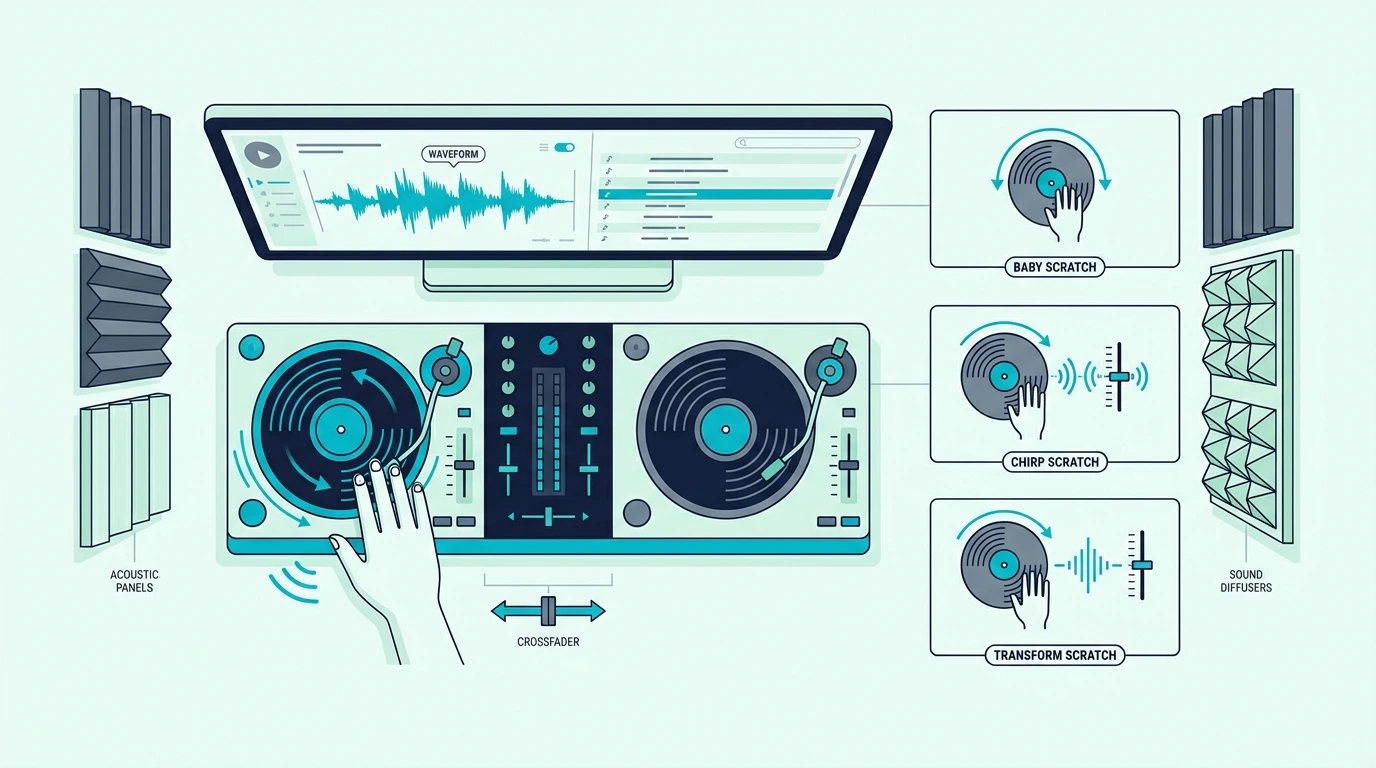
Baby Scratch
The baby scratch is the foundation of every scratch technique. With the crossfader open (centered), move the jog wheel forward and backward in a steady rhythm.
The audio plays forward when you push, and plays backward when you pull.
Keep the forward and backward movements equal in speed and distance. Uneven scratches sound sloppy.
Even, rhythmic scratches create a percussive pattern that locks into the beat of the track playing on the other deck.
Practice at a slow, steady tempo until the motion becomes automatic. Speed comes naturally once the muscle memory is solid.
Chirp Scratch
The chirp adds crossfader movement to the baby scratch. Close the crossfader as the jog wheel changes direction — the brief silence between forward and backward movements creates a sharp “chirp” sound.
The timing is the challenge: the crossfader must close at the exact moment the jog wheel reverses direction. Start slowly.
A clean chirp at 90 BPM is more impressive than a sloppy chirp at 140.
The Hercules DJControl Inpulse 200 MK2 works well for chirp practice because its native Virtual DJ mapping means the crossfader response is instant with zero configuration.
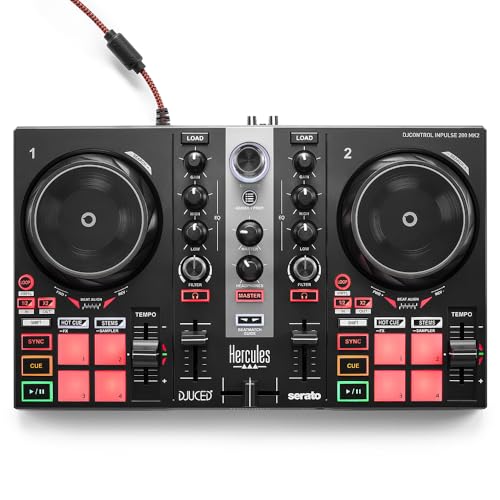
Hercules DJControl Inpulse 200 MK2
Transform Scratch
The transform keeps the jog wheel moving in one direction while you rapidly open and close the crossfader. The result is a stuttering, machine-gun-like pattern that chops a single scratch movement into multiple rhythmic hits.
This technique lives entirely in the crossfader hand. Your scratch hand maintains a smooth, constant motion while your fader hand does all the rhythmic work.
Virtual DJ’s sharp crossfader curve is essential for transforms. If the curve is set to smooth, the audio fades instead of cutting — which destroys the percussive effect.
Flare Scratch
The flare is an advanced technique where you start with the crossfader open, click it closed briefly (creating a gap in the audio), and open it again — all while the jog wheel moves. The brief silence creates a rhythmic accent within the scratch.
Single flares (one click per scratch stroke) are the entry point. Double and triple flares (two or three clicks per stroke) require faster crossfader speed and precise timing that takes months to develop.
Flares sound best on controllers with low-latency crossfaders. The Pioneer DJ DDJ-REV1 has the sharpest crossfader cut on any controller at this price, though it runs Serato rather than Virtual DJ.
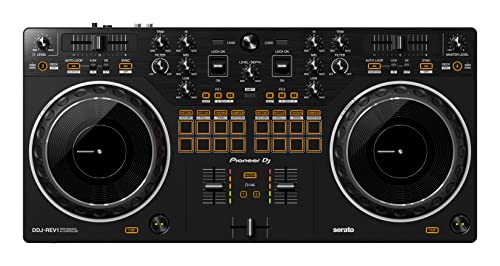
Pioneer DJ DDJ-REV1
Get Studio Tips Weekly
Join 5,000+ creators getting acoustic treatment advice every week.
No spam. Unsubscribe anytime.Practice Tips for Controller Scratching
Start Without the Crossfader
Spend your first week practicing baby scratches with the crossfader locked open. Focus entirely on jog wheel control — even forward-backward motion, consistent speed, and rhythmic timing.
Adding the crossfader before your scratch hand is steady creates two problems to solve simultaneously. Master one hand at a time.
Use a Metronome
Open a metronome app on your phone and set it to 90 BPM. Scratch in time with the metronome — one forward stroke per beat, one backward stroke per beat.
This develops the rhythmic precision that separates musical scratching from random noise.
Increase the tempo by 5 BPM once you can stay locked for 30 seconds without drifting. Most scratch routines happen between 90 and 110 BPM.
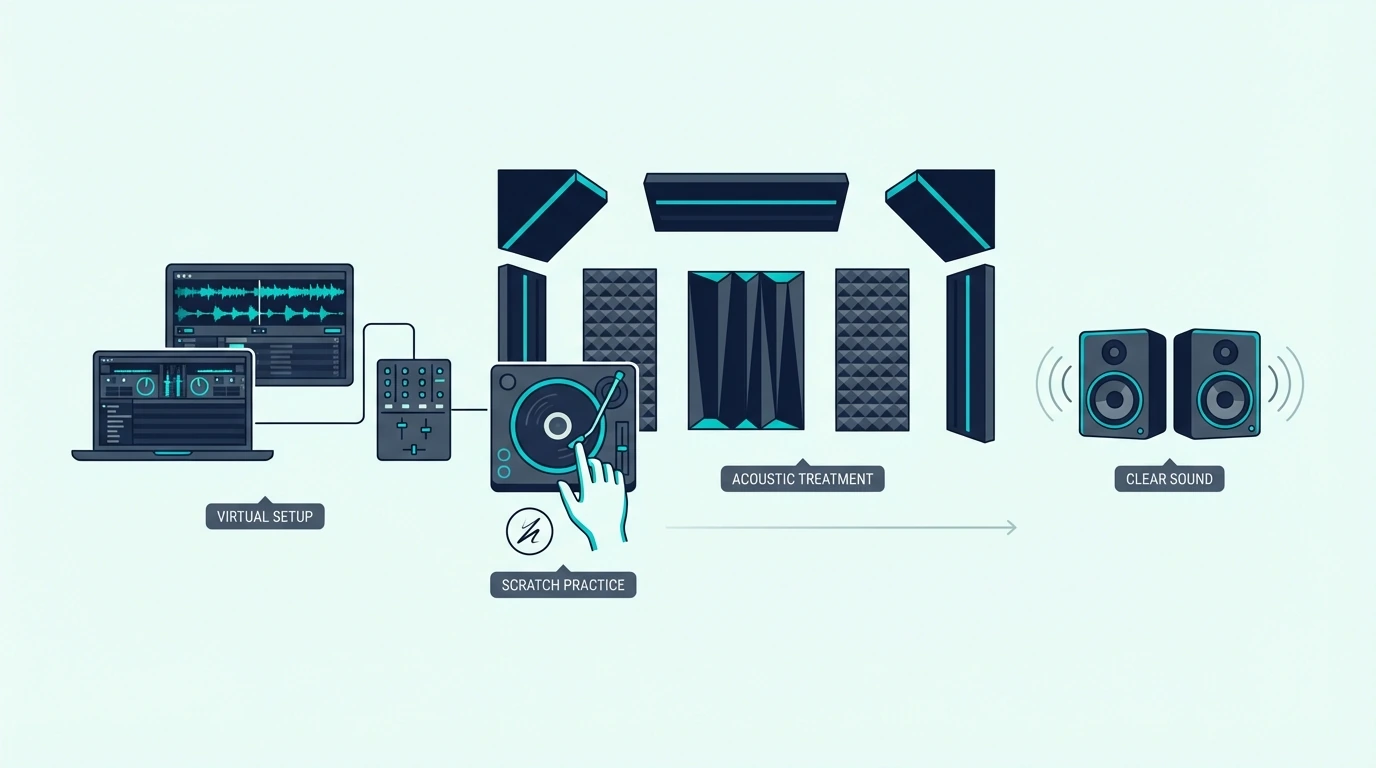
Record and Listen Back
Use Virtual DJ’s built-in recording to capture your scratch practice sessions. Listen back and identify where your timing drifts, where the crossfader clicks are late, and where the audio sounds uneven.
Recording is the fastest feedback loop for improving your scratch technique. What feels smooth under your fingers often sounds rougher than expected on playback — and that gap is where focused practice lives.
For details on recording, see our recording guide.
Jog Wheel Size Matters
Larger jog wheels give your fingers more surface area for scratch movements. An 8-inch wheel lets you execute full baby scratches without running out of platter space.
Budget controllers with 4-inch wheels limit the range of motion, which caps how expressive your scratches can be.
If scratching becomes your primary focus, upgrade to a controller with larger jog wheels — the DDJ-REV1 or Inpulse 500 deliver the best scratch response in the mid-range tier.
The Bottom Line
Scratching on a DJ controller with Virtual DJ requires three settings changes: enable Vinyl Mode, set the crossfader to sharp, and increase jog wheel sensitivity. Once configured, start with baby scratches (no crossfader), add chirps (crossfader timing), then progress to transforms and flares as your hands develop independence.
Virtual DJ’s scratch algorithm responds well on any controller with capacitive-touch jog wheels. The hardware determines how tight the response feels, but the technique transfers to any setup — and our best DJ controllers guide covers the top options across every price tier.
Frequently Asked Questions
Can you scratch on Virtual DJ with a controller?
Yes — Virtual DJ supports scratching on any controller with jog wheels. Enable Vinyl Mode in settings, set the crossfader to sharp, and increase jog wheel sensitivity.
The scratch quality depends on your controller’s jog wheel size and resolution.
What is the best Virtual DJ controller for scratching?
Controllers with large jog wheels and native Virtual DJ mapping deliver the best scratch experience. The Hercules DJControl Inpulse 200 MK2 offers native VDJ mapping at a budget price.
For serious scratching, pair VDJ with a controller that has 8-inch or larger platters.
Do I need Vinyl Mode to scratch in Virtual DJ?
Yes — without Vinyl Mode, the jog wheel only pitch-bends (speeds up or slows down the track). Vinyl Mode changes the jog wheel behavior to direct audio control, where touching the platter stops playback and lets you scrub through the track manually.
How long does it take to learn scratching?
Baby scratches take one to two weeks of daily practice to sound consistent. Chirps take one to two months.
Transforms and flares take three to six months. Developing a personal scratch style with musical phrasing takes a year or more of dedicated practice.