Where to Place Acoustic Panels for Drums [2026]
Where to place acoustic panels for drums is simple in theory, but drum rooms punish guesswork.
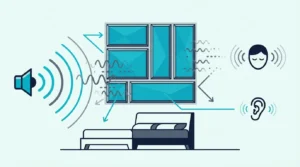
If your kit sounds harsh, phasey, or boxy, you are hearing ceiling and wall reflections hitting your ears and mics milliseconds after each hit. The louder you play, the more those reflections stack up.
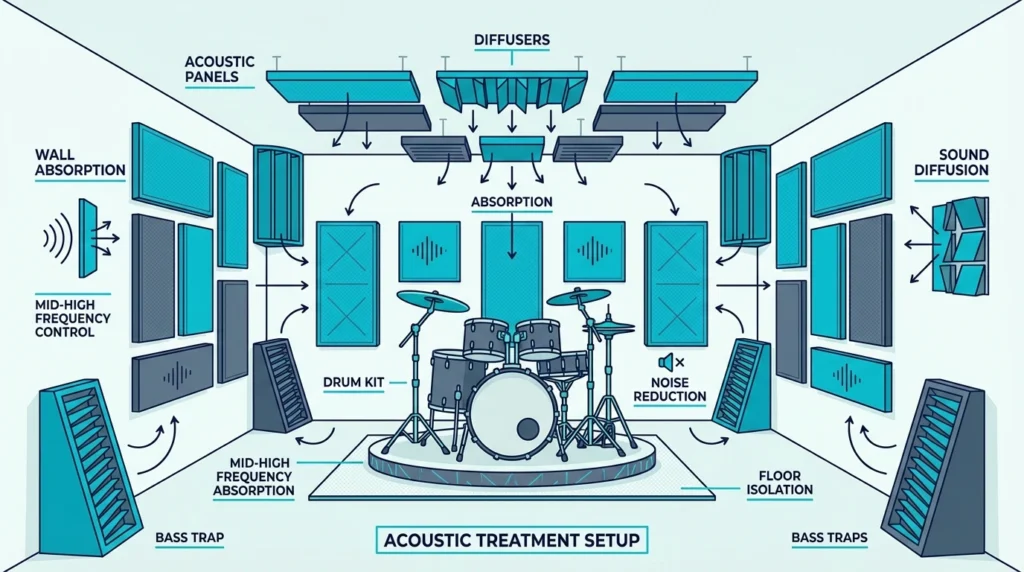
A ceiling cloud, wall treatment at ear height, and full corner bass trapping will make the kit sound tighter and give you cleaner tracks. You can also play longer without ear fatigue.
Start with absorption directly above the kit and bass traps in the corners, then fill in the nearest wall reflection points around the throne. Next, learn why drums need heavier coverage than most rooms and how to place panels step by step.
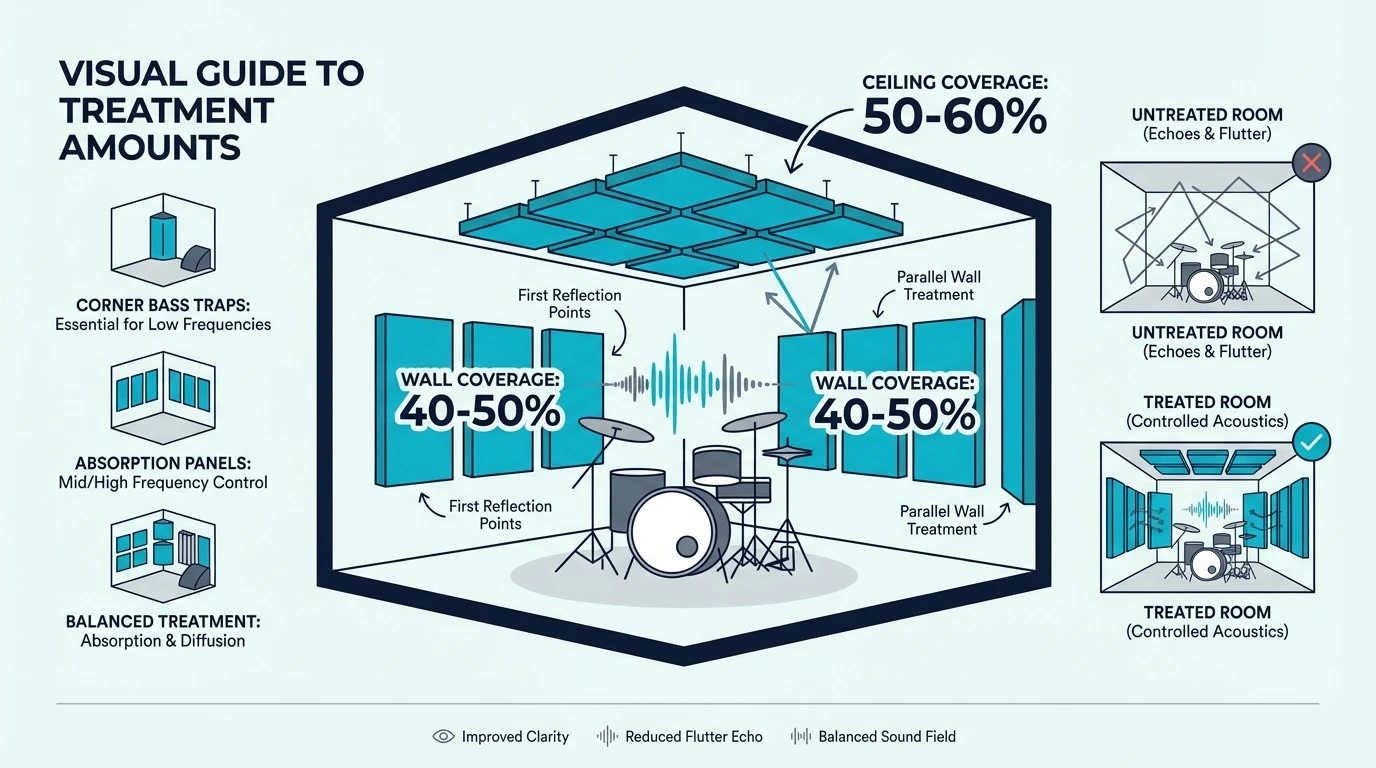
Place a ceiling cloud above the kit, treat the rear and side walls at ear height near the throne, and install bass traps in every corner. Most drum rooms need roughly 40–60% total surface coverage.
Why Do Drum Rooms Need Special Treatment?
Drums produce full-spectrum explosions from sub-bass kick energy below 100 Hz to cymbal splash above 10 kHz, all at 100+ decibels. That range and volume create two distinct problems: what makes drums acoustically unique compared to other instruments, and how those reflections color the sound before it reaches your ears or mics.
What Makes Drums Acoustically Unique?
Your drum kit produces sound differently than any other instrument. The 2-inch vs 4-inch comparison shows why thickness matters so much for the low-mid energy drums generate. Each drum creates a sharp transient attack followed by sustained resonance, and these events happen in rapid succession during even basic patterns.
The frequency range spans nearly the entire audible spectrum. Your kick generates sub-bass and low-mid energy, toms cover the low-mids and mids, snare pushes into the upper-mids, and cymbals splash across the high frequencies.
This full-spectrum assault means you cannot treat one frequency range and call it done. Panels that tame cymbal harshness will not touch the kick drum boom, and bass traps that control the low end do nothing for snare reflections.
The directional nature of drums matters too. Sound radiates outward in all directions from multiple sources positioned at different heights and angles.
Your snare fires upward while your kick aims forward, creating a complex web of reflections that hit walls, ceiling, and floor at different times.
How Do Reflections Affect Drum Sound?
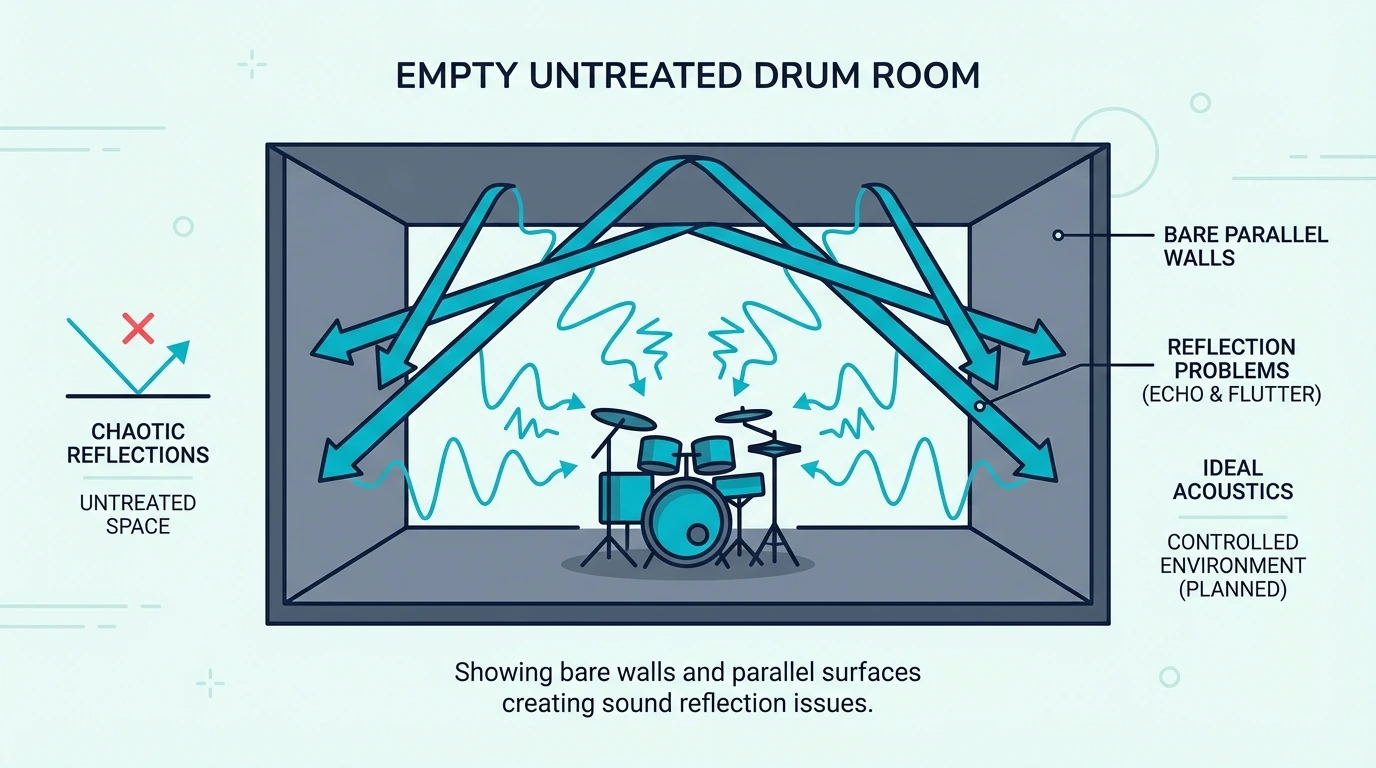
Because the instrument projects omnidirectionally, the resulting reflections are devastating to the human ear. Early reflections bounce off the closest walls and arrive at your ears within 20 to 50 milliseconds of the stick hitting the skin. Your brain cannot physically separate that delayed echo from the original hit, meaning those reflections actively color everything you hear with a harsh, smeared, and phasey metallic character.
In a small untreated bedroom, these violent reflections actually cause phase cancellation, making a massive 22-inch kick drum sound small, thin, and hollow. The comb filtering that occurs when the direct and reflected sounds collide literally deletes certain frequencies while boosting others completely unpredictably.
Once you add in the late reflections—the sound waves that have bounced three or four times before reaching you—you get the notorious washy reverb tail that muddies the entire kit. After just an hour of playing in this kind of untreated acoustic chaos, your ears will feel physically fatigued from constantly processing the dense, clashing reverb.
This problem multiplies when you introduce recording microphones, which pick up every single reflection indiscriminately. What sounds “live and energetic” to your ears in the room instantly translates to an “unusable wash of noise” in the DAW mix. This is precisely why professional drum recordings only happen in treated spaces—untreated reflections make raw drum tracks completely unusable, regardless of whether you are using a $50 mic or a $5,000 one.
Where Should Panels Go on the Ceiling?
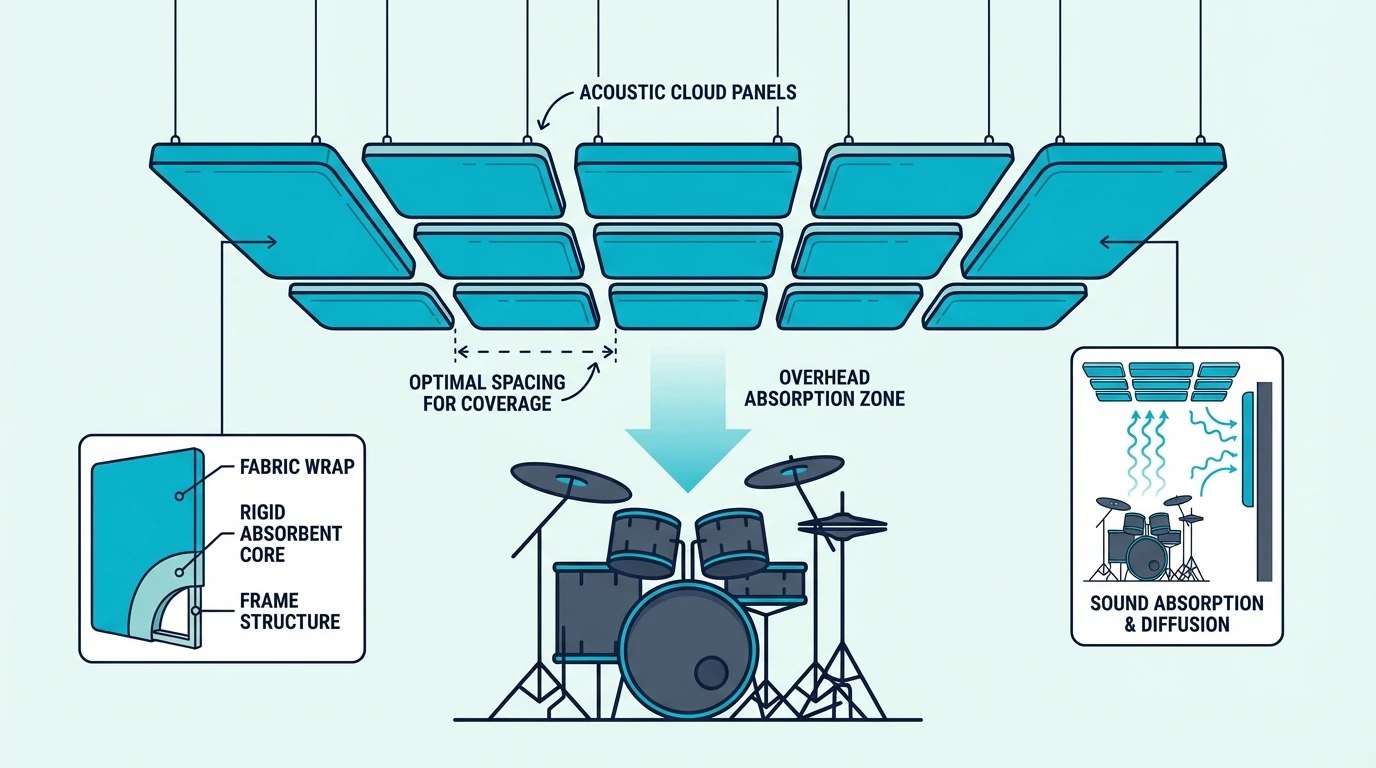
Cymbals and snare fire energy straight up, and in an untreated room that ceiling return is the single biggest source of harshness and phase in overhead mics. Ceiling treatment depends on sizing the cloud panel to your kit footprint and choosing how far below the ceiling to hang it for maximum low-frequency reach.
What Size Cloud Panel Works Best?
A ceiling cloud directly above your kit should cover roughly the same footprint as your drums. For a standard five-piece kit, that means a treatment zone approximately 6×8 feet — about 48 square feet of ceiling coverage.
You do not need to cover the entire ceiling, but you do need heavy coverage in this critical zone. The panel spacing guide covers gap calculations, and panels covering less than 75% of the kit footprint will leave noticeable gaps in absorption.
How Far Should Ceiling Panels Hang?
The gap between your ceiling and the panels affects how deep the absorption reaches. Mounting panels with a 4-6 inch air gap behind them extends their effective absorption into lower frequencies.
This air gap technique works because sound waves compress and expand as they travel. The gap allows the panel to absorb energy at a point in the wave travel where more energy can be captured.
Practical mounting typically uses cables or chains attached to eye hooks in the ceiling — the ceiling panel installation guide covers the hardware. Leave at least 3 feet between your highest cymbal and the bottom of the panels so crashes do not hit them.
Get Studio Tips Weekly
Join 5,000+ creators getting acoustic treatment advice every week.
No spam. Unsubscribe anytime.How Should You Treat the Walls?
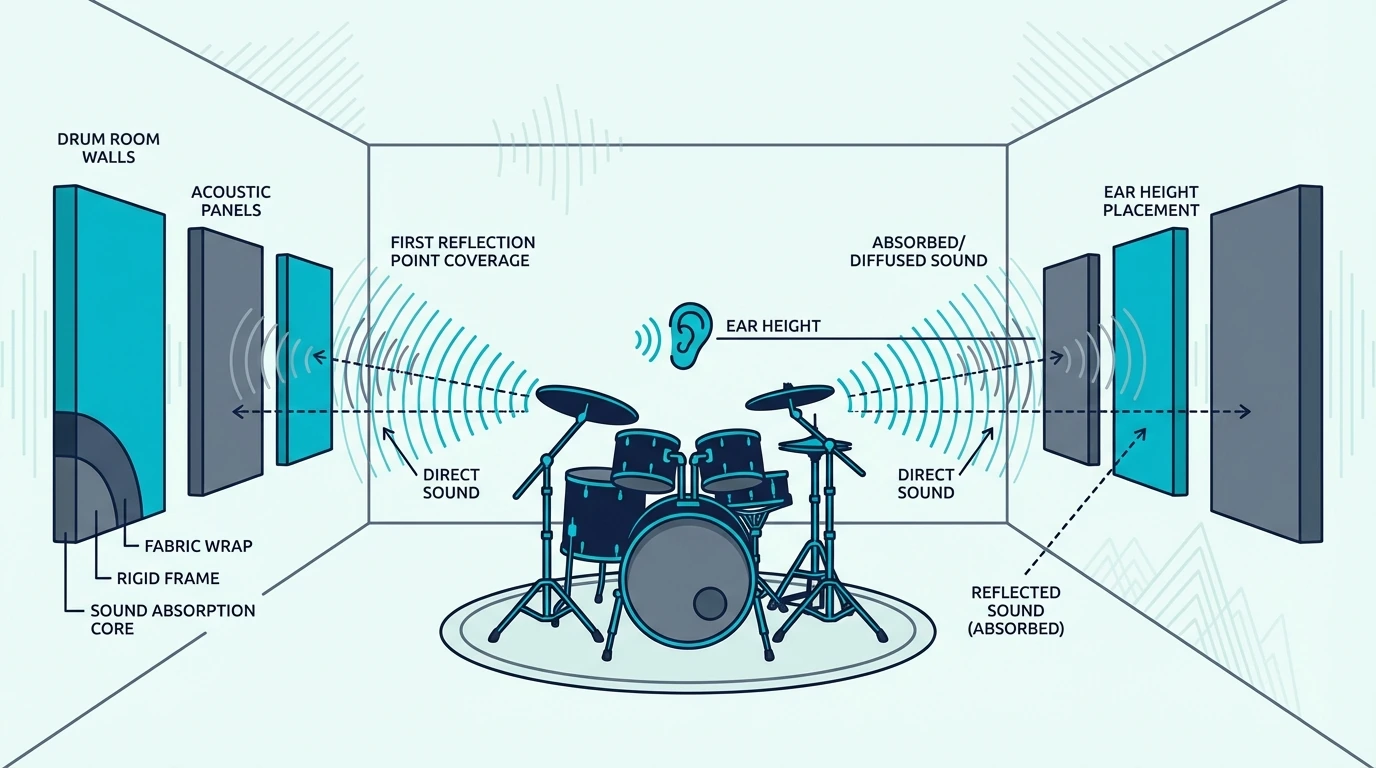
After treating the ceiling, you have to address the energy firing outward from the shells—and the walls closest to the kit create the earliest, most destructive reflections.
Which Walls Need Treatment First?
The absolute highest priority is the wall directly behind your drum throne. Every ounce of sound from your snare, toms, and cymbals travels straight past your ears, slams into this rear wall, and bounces directly back at the back of your head. When that reflection returns, it interferes violently with the next beat, creating the most noticeable comb filtering in the entire room.
Your side walls come next in the hierarchy—specifically the flat drywall positioned within arm’s reach of your seated position. These are your primary first reflection points, where the crash cymbals bounce directly off the drywall and back into the overhead mics.
Surprisingly, the wall facing you as you play (directly in front of the kick drum) is actually the lowest priority of the four walls. Because the sound has to travel across the entire physical depth of the kit before reaching it, the reflections return much later and contribute more to the general room reverb than to the destructive early reflection phase problems.
How High Should Wall Panels Be Mounted?
Once you identify the correct walls, you must mount the panels at the correct height to actually catch the sound. You want to blanket the zone from about 3 feet off the floor up to 6 feet high—the acoustic panel installation guide covers the exact hardware required for each surface type. This 3-to-6 foot band captures the critical reflections at ear level whether you are sitting at the throne playing or standing in the room listening back to a mix.
Because drums are positioned so low to the floor, they send acoustic energy upward at sharp angles that hit the walls much higher than you might assume. You can verify this yourself by holding a mirror flat against the side wall while sitting at the kit; move the mirror up and down until you can see your crash cymbals in the reflection, and you have found the exact height where your panel belongs.
While floor-to-ceiling wall coverage is the acoustic ideal, it is rarely practical for home budgets. If you are limited to a specific number of panels, concentrate them entirely in this dense 3-to-6 foot ear-level zone rather than scattering them randomly across the entire height of the wall.
Why Are Bass Traps Essential for Drums?

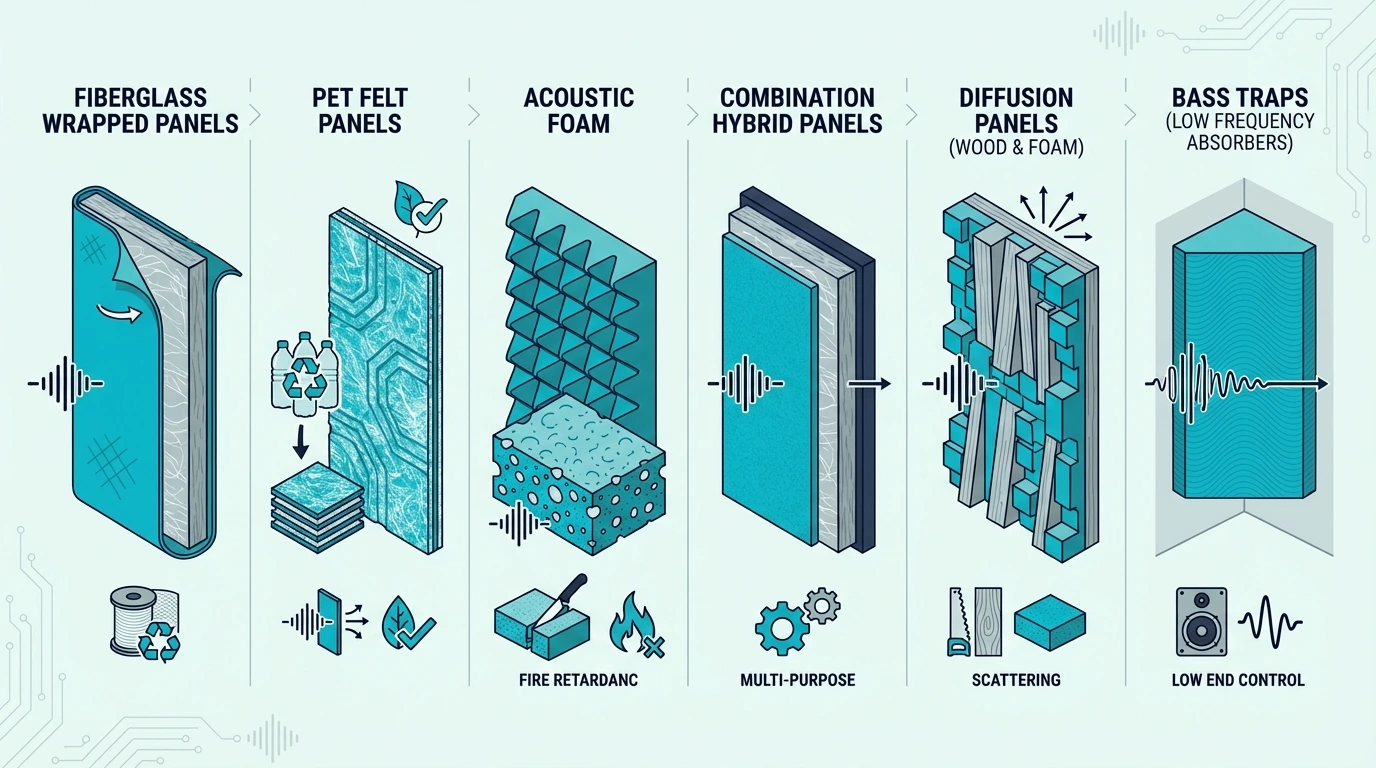
Flat panels expertly handle the mids and highs, but your massive kick drum generates low-frequency energy that standard 2-inch panels literally cannot absorb—the panels vs bass traps guide explains the brutal physics behind this. To stop the room from booming, you must deploy dedicated corner trapping.
Where Do Bass Traps Provide Maximum Effect?
Low frequencies behave like water, actively seeking out the corners of the room where the acoustic pressure is highest. Because a 100Hz wave is roughly 11 feet long, it literally wraps around the physical dimensions of a small room and piles up in the 90-degree corners.
To capture this pooling energy, floor-to-ceiling corner traps work best because they intercept the bass waves at multiple height intervals. Bass does not travel in a straight, directional line like a cymbal crash does—it fills the entire volumetric space of the room instantly.
If you are on a tight budget and only have four traps to deploy, you must place them in the two corners closest to the front of your kick drum. The front of the drum room always experiences the highest, most violent concentration of low-frequency pressure.
Once the vertical corners are treated, the upper wall-to-ceiling junctions become the next target. Many drummers completely overlook these horizontal corners, but they trap exactly as much bass energy as the vertical floor corners while also helping to kill the long, rumbling low-frequency returns coming off the ceiling.
How Thick Should Bass Traps Be?
When it comes to bass, you cannot cheat physics: thin traps simply do not trap bass. The physical depth of the absorptive material must be directly proportional to the massive wavelength you are attempting to stop.
For effective, tight kick drum control below 100Hz, you must use traps that are an absolute minimum of 4 inches thick, though 6-to-8 inch thick traps will perform noticeably better and reach much lower into the sub-bass frequencies.
If you prefer to start with professional fiberglass rather than foam, the UMIACOUSTICS Large Panels can be mounted diagonally across a corner to create a massive air gap, working as a giant bass trap.
UMIACOUSTICS Large Panels
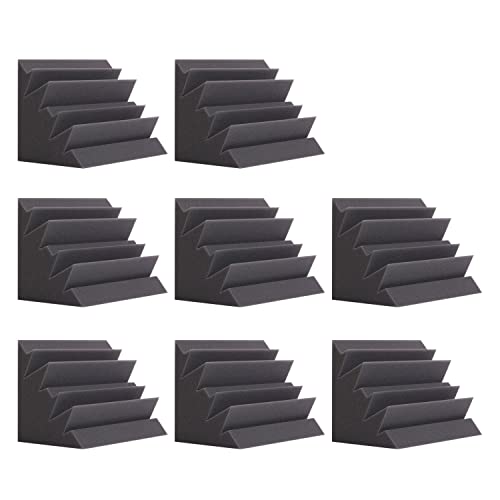
Basic foam wedges like the 8-Pack Foam Bass Traps work as a highly affordable starting point, though serious recording rooms inevitably require doubling up on corner coverage to get enough physical mass into the corners. If you need heavier low-end control on a budget, the 12-Pack Corner Bass Traps provide more individual pieces per pack, making it far easier to build continuous floor-to-ceiling stacks.
8-Pack Foam Bass Traps
How Much Coverage Does a Drum Room Need?
Nailing the placement is only half the job—drum rooms naturally demand far more total wall coverage than a vocal booth or a podcast desk. To handle the raw decibel output of a kit, you must calculate exactly how much total square footage you need to cover.
What Is the Minimum Effective Coverage?
For a casual practice space where pristine sonic perfection is not the ultimate goal, covering 30-40% of the total wall and ceiling surface creates a massive, noticeable improvement. In this scenario, you focus exclusively on the mandatory hotspots: the ceiling cloud, the rear wall directly at ear height, and at least four solid corner traps.
If the room is being built specifically for recording, that minimum target jumps sharply. You must push closer to 50-60% total surface coverage to ensure the overhead microphones are capturing the pristine sound of the maple shells rather than the chaotic wash of the drywall.
How Do You Calculate Panel Quantity?
To find your exact panel count, you must first calculate the total surface area of the room. A standard 12×14 foot room featuring 8-foot ceilings contains exactly 752 square feet of combined wall and ceiling space. You must use this combined wall-plus-ceiling number, not just the square footage of the floor—the panel quantity calculator handles this math automatically.
At a 50% coverage target, that 752-square-foot room requires exactly 376 square feet of acoustic treatment. Because a standard 2×4 foot panel covers 8 square feet of drywall, you would need to order roughly 47 standard panels to achieve full studio-grade coverage.
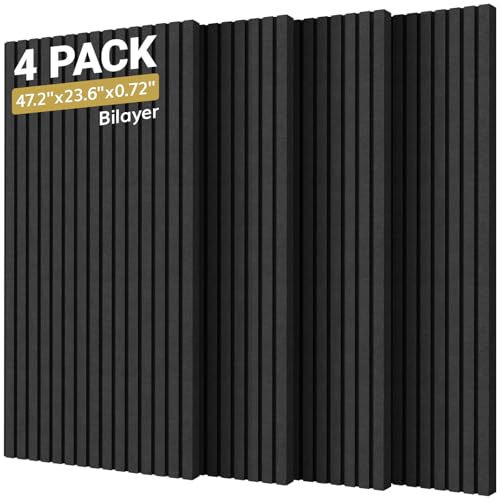
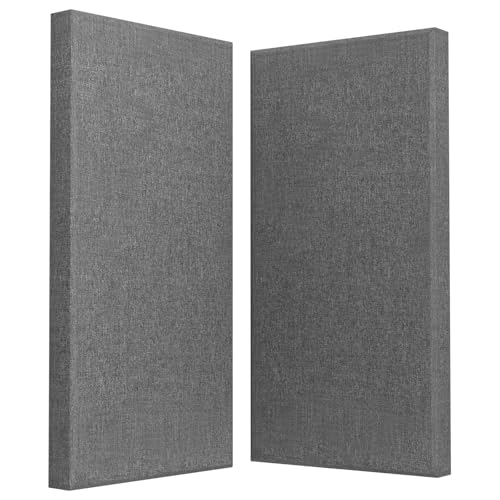
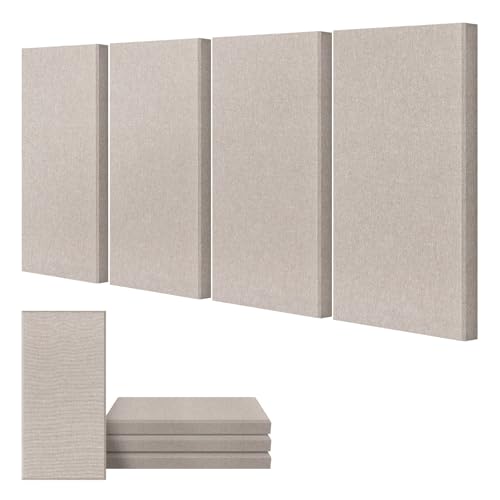
For a ready-to-mount fiberglass option that eats up square footage quickly, the UMIACOUSTICS 4-Pack Fiberglass Panels works exceptionally well for blanketing those critical first reflection points. If you realize you need substantially thicker absorption on the flat walls to handle aggressive tom resonance, the TONOR Dual-Layer Thickened Panels provide the extra mass required to pull the boxiness out of the room.
UMIACOUSTICS 4-Pack Fiberglass Panels
What Panel Types Work Best for Drums?
Those heavy coverage numbers assume you are actually using panels rated to handle the extreme sound pressure levels of a drum kit. The core material you select and its physical thickness determine whether the panel actually absorbs the low-mids or just acts like expensive wall decor.
Should You Use Fiberglass or Foam?
When dealing with the sheer volume of a drum kit, dense fiberglass panels will brutally outperform lightweight acoustic foam in every measurable acoustic metric. The heavy mass of a rigid fiberglass board—typically weighing between 3 and 6 pounds per cubic foot—forces the sound wave to work much harder to pass through it, converting vastly more acoustic energy into heat than airy, open-cell polyurethane foam ever could.
What Thickness Handles Drum Frequencies?
If budget and space allow, thick 4-inch panels are the undisputed best choice for drum rooms because they possess the physical depth to trap the fundamental frequencies of the toms and the batter head. Standard 2-inch panels are perfectly fine for killing cymbal harshness and snare rattle, but they are physically incapable of reaching down into the low-mid frequencies where a drum kit produces its most aggressive, muddying energy.
How Do You Install Panels in a Drum Room?

While basic installation follows standard acoustic principles, the sheer quantity of panels required for a drum room paired with the constant structural vibration of the kick drum demands highly secure mounting hardware.
What Mounting Methods Work Best?
For heavy, fabric-wrapped fiberglass panels, metal impaling clips mounted directly into the drywall studs provide the absolute most secure attachment. The heavy panel is simply pushed forcefully onto the sharp clips, permanently locking it in place and distributing its considerable weight across multiple anchor points so it cannot vibrate loose during heavy playing.
For thicker 4-inch panels or massive custom builds, heavy-duty aluminum Z-clips are the superior choice. One half of the interlocking metal bracket screws into the wall stud, while the receiving half screws into the wooden frame of the acoustic panel. These brackets easily hold 20+ pounds per pair, keep the panel perfectly level, and allow you to instantly lift the panel off the wall if you need to run microphone cables behind it.
For the mandatory ceiling clouds, flying the panels using heavy-duty aircraft cable or steel chain provides the safest and most flexible suspension method. The mounting points drilled into the ceiling joists only have to handle a straight vertical load, and the guide to hanging acoustic panels details exactly how to rig this hardware safely over your expensive cymbals.
Should You Leave Some Surfaces Untreated?
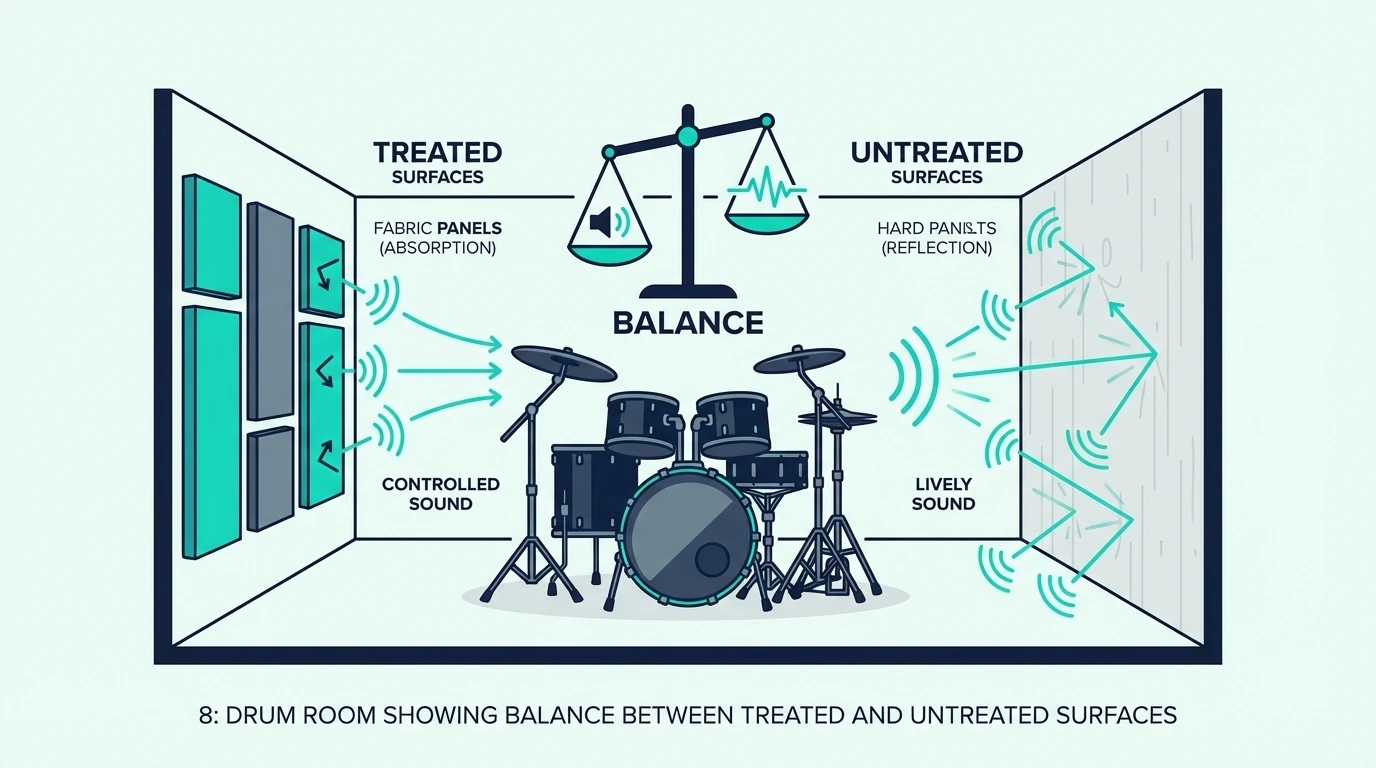
Despite pushing for high coverage percentages, complete absorption is absolutely not the ultimate goal. A perfectly dead room kills the natural resonance of the drum shells, forcing you to play harder to hear yourself. You must purposefully leave some surfaces bare or introduce diffusion to keep the room breathing.
How Much Liveliness Should Remain?
If the sole purpose of the room is tracking drums for commercial recordings, you should always err heavily on the side of aggressive absorption. It is infinitely easier to add lush, expensive-sounding digital reverb to a dry snare drum during the mixing phase than it is to surgically remove a terrible, boxy room echo from a ruined take.
For this reason, professional tracking rooms regularly push past 60% coverage, and the NRC rating guide explains exactly how to read the spec sheets to guarantee you are buying the heavy absorption those studios demand. However, if the room is primarily a personal practice space where you just want to enjoy playing, limiting your coverage to 40% preserves the exciting acoustic feedback that makes drums fun to hit.
What About Diffusion for Drums?
Instead of leaving drywall completely bare to maintain that liveliness, professional rooms deploy heavy wooden diffusers. Diffusion actively shatters the incoming sound waves and scatters them across the room instead of sucking the energy into a fiberglass core, brilliantly maintaining the acoustic volume of the drums while completely destroying the harsh, direct flutter echoes.
In drum rooms, heavy QRD diffusers mounted directly on the rear wall (facing the front of the kick drum) preserve the expansive size of the room without allowing a focused slap-back reflection to return to the overhead mics.
However, because diffusers require several feet of distance to allow the scattered waves to disperse properly, they only work in larger rooms. If you are playing in a cramped 10×10 bedroom, skip the diffusers entirely; absorption must be your sole priority because you simply do not have the physical square footage required to scatter sound properly.
Conclusion
Where to place acoustic panels for drums starts with the ceiling cloud and full corner bass trapping, then extends to the rear and side wall reflection points around the throne. Once those zones are treated, scale coverage toward the 40–60% range and listen for the shift — individual drums separate, overhead mics pick up kit instead of wash, and practice sessions stop hammering your ears after thirty minutes.
If you are building treatment in phases, start overhead and in the corners, then add wall panels until the room feels controlled but still lively. The placement guide covers fundamentals you can adapt to any room shape, and the best acoustic panels page ranks products by room type. The best acoustic ceiling panels page narrows the list to overhead-rated options.
Frequently Asked Questions
Where Should I Put Acoustic Panels for Drums?
Ceiling first — directly above the kit. Then the wall behind your seated position at ear height, side walls near the kit, and bass traps in every corner starting with those closest to the kick drum.
How Many Panels Does a Drum Room Need?
Plan for 40–60% surface coverage — in a 12×14 foot room with 8-foot ceilings, that means roughly 30–50 panels.
Start with the ceiling cloud and corner bass traps for maximum impact per panel, then add wall panels gradually until the room feels controlled.
Do I Need Bass Traps for Drums?
Yes — kick drums push energy below 100 Hz that flat panels cannot absorb. Without corner traps, that bass piles up and turns your low end into undefined boom. Floor-to-ceiling traps in at least the four main corners make the biggest difference.
What Thickness Panels Work Best for Drums?
Four-inch panels handle the full frequency range of drums best. Two-inch panels work for cymbal and snare frequencies but miss the low-mid energy from toms and kick drum attack.
Should a Drum Room Be Completely Dead?
No. A completely dead room sounds unnatural and kills the energy that makes drums fun to play. Aim for 40–60% coverage for practice, up to 70% for recording — you can always add reverb in a mix, but you cannot subtract room sound from a track.