Best Acoustic Panels for Gaming — Complete Streamer Guide [2026]
Best acoustic panels for gaming transform your streaming setup from echoey amateur hour to professional broadcast quality. Your viewers notice audio quality before they notice your gameplay — but most gamers skip treatment entirely and wonder why their mic sounds terrible.
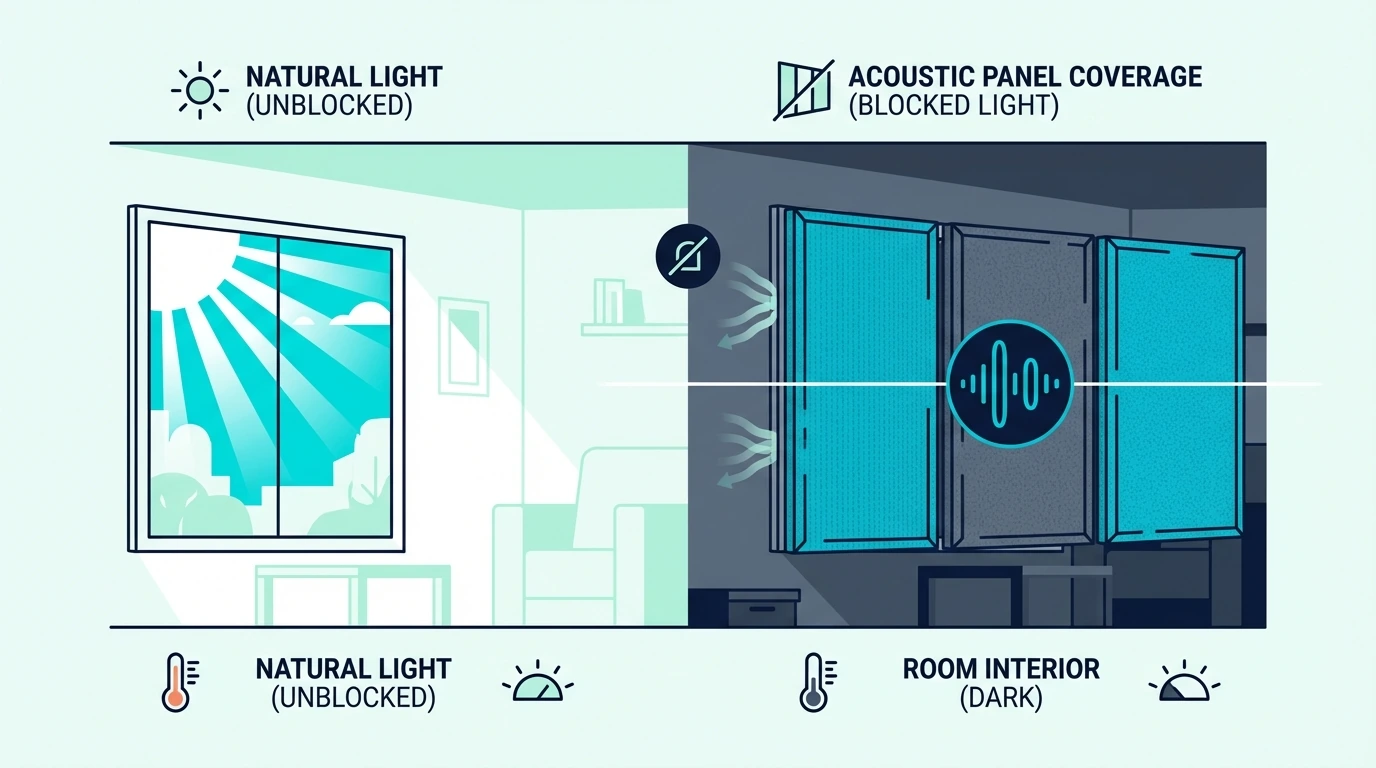
The uncomfortable truth most gaming gear sites skip: acoustic panels will not stop your neighbors from hearing your midnight rage sessions. They control echo and reverb inside your room, making your mic pick up your voice clearly instead of a muddy mess of reflections.
The difference between a treated room and an untreated one shows up immediately in voice chat clarity and stream audio quality — the same principle behind the best acoustic panels across every room type.
Below you’ll find which panels absorb voice frequencies most effectively, how to position them for maximum mic clarity, and why you’ll get more from two panels behind your gaming chair than from an expensive mic upgrade.
Best acoustic panels for gaming improve mic clarity and reduce room echo during streams and voice chat. Panels absorb reflections inside your room so your mic captures voice cleanly — not the muddy echo of hard walls. Prioritize 2-inch panels behind your gaming position first, then treat first reflection points on side walls.
Top Gaming Panel Picks
Gaming setups narrow the field to three priorities: voice-range absorption, camera-ready appearance, and damage-free installation.
Best Overall: The High-Density Core 4 Pack delivers the best absorption for voice frequencies. The 2-inch thickness handles the 100–4000Hz range where most voice audio lives, and self-adhesive backing means no drilling into walls.
High-Density Core 4 Pack
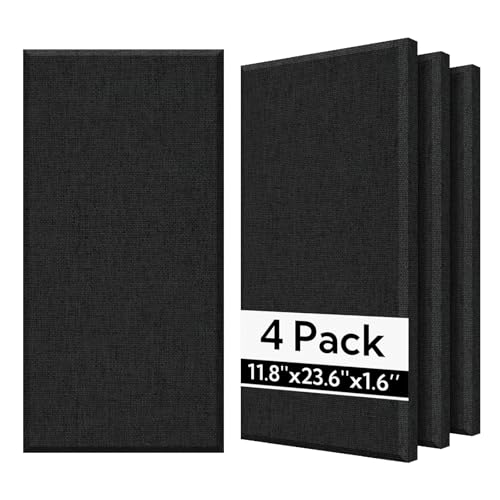
Best Budget: The 18 Pack Black Acoustic Panels gives you coverage without crushing your budget. Eighteen panels for under forty dollars means you can treat your primary gaming wall completely.
18 Pack Black Acoustic Panels
Best for Streamers: The TONOR Dual-Layer Panels combine absorption with aesthetics. The 47-inch panels create a professional backdrop that looks as good on camera as it sounds on mic.
TONOR Dual-Layer Panels
Why Gamers Need Acoustic Panels
Mic audio quality is the entire reason. Your gaming headset mic picks up every reflection in the room, and panels are the only fix that does not require construction work.
Hard walls, monitors, and glass windows bounce your voice around before it reaches the microphone, creating that hollow, echoey sound viewers hate. Acoustic panels absorb those reflections before they bounce back — the result is cleaner voice chat in competitive games and professional-sounding streams without expensive soundproofing.
The Echo Problem in Gaming Rooms
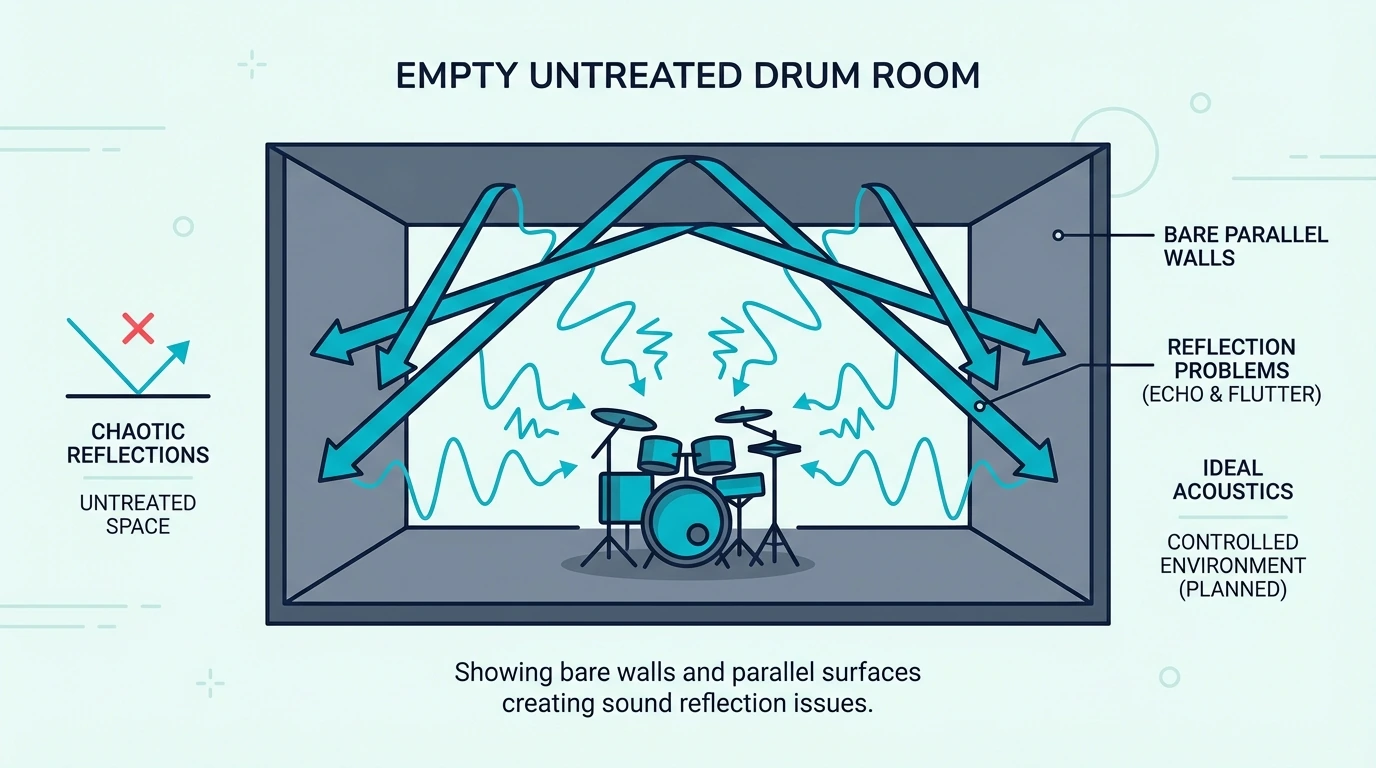
Most gaming setups are acoustic disasters. A desk, multiple monitors, and bare walls create a reflective nightmare for audio.
When you speak, sound waves hit these hard surfaces and bounce back to your mic milliseconds later. This creates what audio engineers call “flutter echo” — that metallic ringing that makes your voice sound like you’re in a bathroom.
Even mid-range mics like the Blue Yeti or Shure MV7 can’t fix room acoustics. No amount of software processing replaces real acoustic treatment — the acoustic panels hub explains why absorption is the foundation.
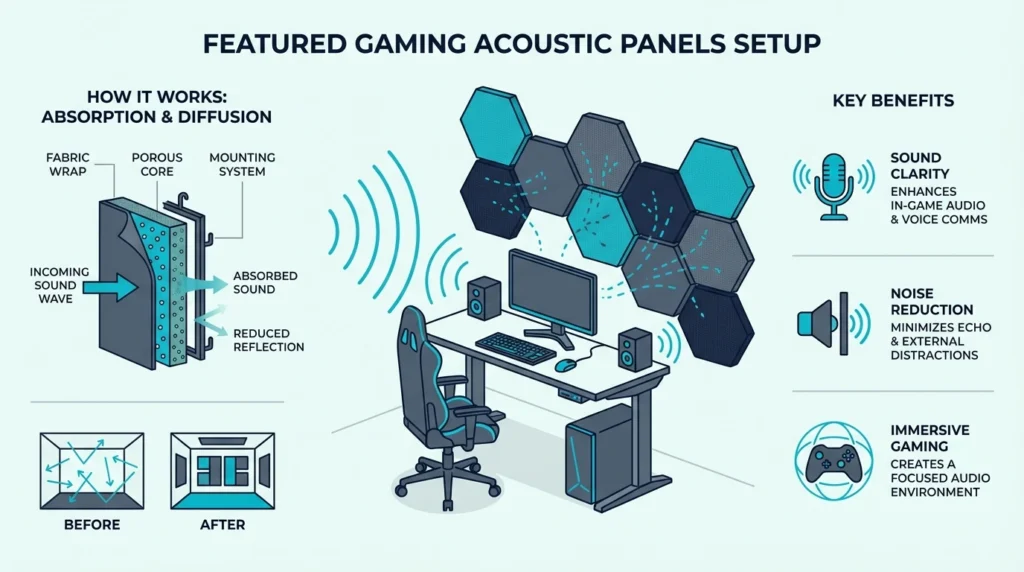
What Panels Actually Do
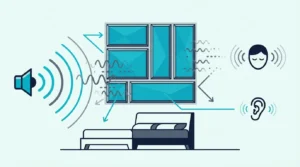
Acoustic panels absorb mid and high-frequency sound waves. When your voice hits the panel instead of a hard wall, the energy converts to tiny amounts of heat instead of bouncing back.
This doesn’t block sound from leaving your room — that’s soundproofing, which requires construction work. What it does is clean up the sound inside your room so your mic captures your voice, not your room’s reverb.
The practical result: your Discord calls sound clearer, your streams have better audio, and your recordings need less post-processing. Teams and squad members stop asking you to repeat yourself — a result consistent with how fiberglass acoustic panels perform in studio settings.
Get Studio Tips Weekly
Join 5,000+ creators getting acoustic treatment advice every week.
No spam. Unsubscribe anytime.Which Acoustic Panels Work Best for Streaming Setups?
Streaming panels have to absorb sound and look clean on camera at the same time. The two picks in this section handle both without compromise.
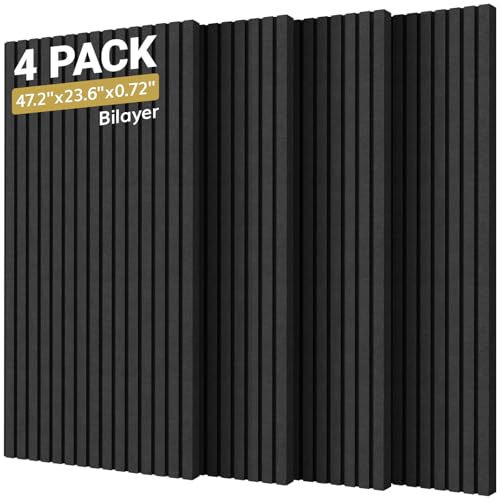
TONOR Dual-Layer Panels
The TONOR Dual-Layer Panels earned their reputation among content creators for good reason. The 47-inch panels cover serious wall space with just four units.
The dual-layer construction is the differentiator. The outer fabric layer handles aesthetics while the inner high-density core does the acoustic work — both absorption and a camera-ready backdrop in one product.
With 868 reviews from verified purchasers, these panels have been battle-tested in real streaming setups — including overhead positions where they double as ceiling panels above the mix desk. The self-adhesive backing simplifies installation, though Command strips work better for renters who want easier removal.
The size works both ways — you need dedicated wall space for these panels, and renters may find the large format harder to remove cleanly.
For smaller gaming rooms, the Olanglab fiberglass panels offer the same core quality in a more compact format.
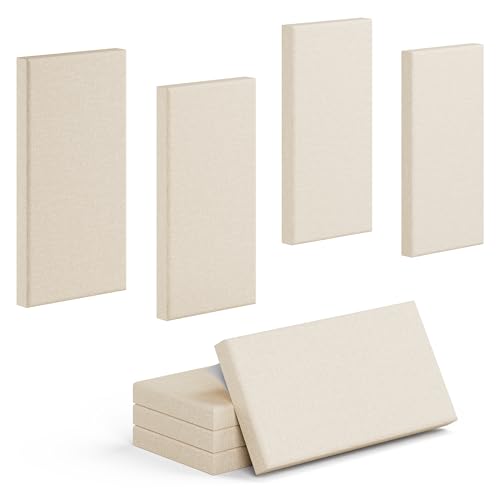
Olanglab Fiberglass Panels
If the TONOR’s size feels excessive, the Olanglab Fiberglass Panels offer a more flexible approach. The 24-inch panels work in tighter spaces while still delivering real acoustic improvement.
Olanglab Fiberglass Panels
The fiberglass core puts these in a different category than budget polyester panels. Fiberglass absorbs a broader frequency range — especially important for capturing deep voice tones without muddiness.
These panels work particularly well arranged in a grid pattern behind your streaming position. Four panels won’t transform your room, but they’ll noticeably improve the wall directly behind your mic.
What Are the Best Budget Gaming Panels?
Not every gamer needs studio-grade treatment. Coverage at a low price point often beats a single premium panel — wall area matters more than individual panel cost.
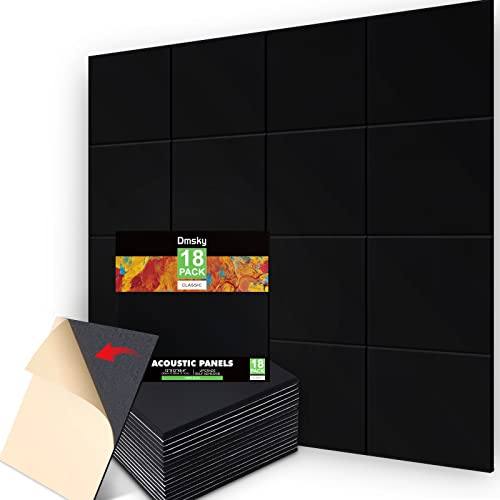
18 Pack Black Acoustic Panels
The 18 Pack Black Acoustic Panels lead Amazon’s budget category with over 3,400 reviews at time of writing.
Eighteen 12-inch panels give you enough coverage to treat your primary gaming wall completely. At the budget price point, you’re getting quantity over individual panel quality — and for gaming setups, coverage often matters more than peak absorption.
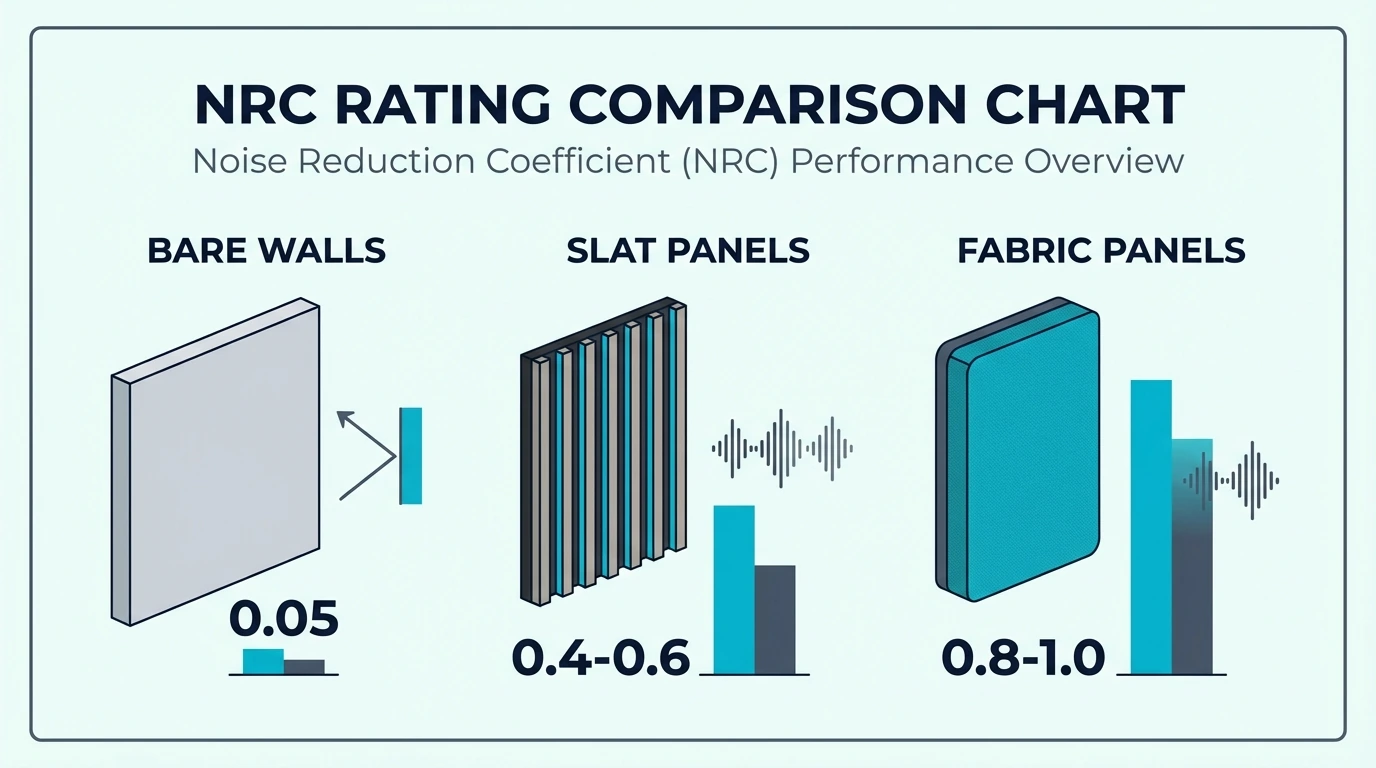
The 0.4-inch thickness won’t absorb low frequencies effectively. Bass rumble from subwoofers or low male voices won’t be fully controlled — but for high-pitched headset audio and standard voice chat, these panels make a noticeable difference.
The black color works perfectly for streaming backdrops. These panels create a clean, professional look that doesn’t distract from your webcam feed.
At this price point, replacing a worn set after a year of heavy use costs less than a single premium panel.
2 PCS Decorative Acoustic Panels
The 2 PCS Decorative Acoustic Panels cost the least of any real panel option. Under thirty dollars gets you two fabric-wrapped panels to test whether treatment makes a difference in your setup.
2 PCS Decorative Acoustic Panels
These won’t transform your room alone — two panels simply can’t cover enough surface area. Think of them as a starter kit to test whether acoustic treatment makes sense for your setup before committing to a full order.
The decorative fabric finish means these panels won’t look out of place in a bedroom gaming setup. For meaningful improvement, plan on ordering 3–4 packs once you’ve confirmed the placement works.
Which Decorative Panels Fit Gaming Aesthetics?
Black panels work for streamers, but gamers who want their setup to pop need options from the acoustic art panels category that still absorb. Four designs span the range from large-format prints to graffiti.
Large Format Art Panels
The 72×48 Inch Art Acoustic Panels 6-Pack deliver serious visual impact. Each panel covers six square feet — the pack treats 36 square feet of wall space with vibrant artwork.
72×48 Inch Art Acoustic Panels 6-Pack
At 4.6 stars with 243 reviews, these panels have proven themselves in real gaming setups. The large format means fewer seams and a cleaner overall look compared to arranging multiple smaller panels.
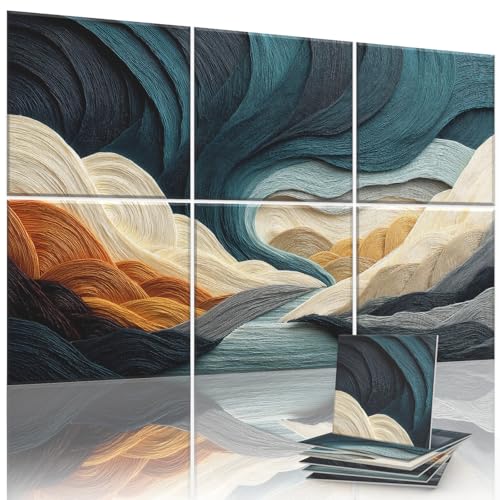
UMIACOUSTICS Art Collection
For a balance of style and performance, the UMIACOUSTICS Art Acoustic 6-Pack score the highest rating in the decorative category. The 0.7-inch thickness provides meaningful absorption while the printed designs add personality.

UMIACOUSTICS Art Acoustic 6-Pack
The 0.7-inch thickness provides real absorption while keeping panel weight low enough for adhesive mounting. For RGB gaming setups, brighter color variants from the same product line catch LED glow and add atmosphere without extra hardware.
Graffiti and Street Art Styles
The FurnoFlexArt Graffiti Panels bring street art energy to gaming spaces. The urban aesthetic fits gaming culture and esports vibes perfectly.
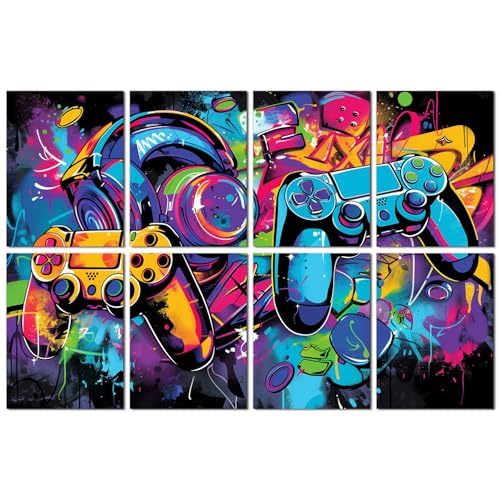
FurnoFlexArt Graffiti Panels
With 169 reviews and a 4.2-star rating, these panels deliver on both style and acoustic performance. The self-adhesive backing makes installation quick for renters.
Budget Decorative Options
The Art Acoustic Panels 8-Pack offer decorative treatment without breaking the budget. Eight 48×32-inch panels cover real wall space while adding visual interest.

Art Acoustic Panels 8-Pack
For gamers wanting more coverage, the HushHues 8-Pack Art Panels provide similar value with different design options. Both deliver meaningful acoustic improvement alongside gaming room aesthetics.
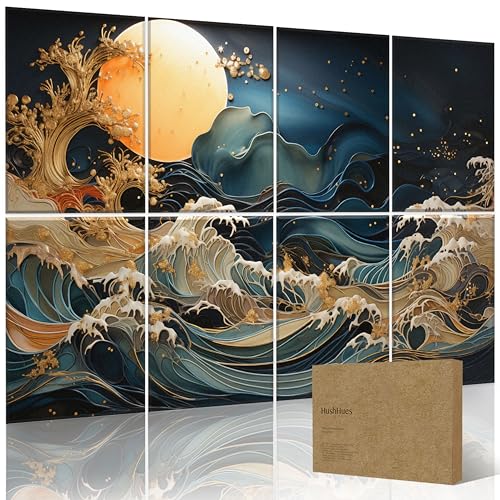
HushHues 8-Pack Art Panels
Complete Gaming Panel Reviews

Each pick earned its spot for a different reason. Build quality, absorption range, and price per panel vary enough that the wrong choice wastes money.
High-Density Core 4 Pack — Best Overall
The High-Density Core 4 Pack landed at the top of the list because the 4.8-star average holds up across different room sizes. Verified buyers consistently report cleaner mic audio within the first session.
The 2-inch thickness matters for gaming audio. Voice frequencies sit primarily in the 100–4000Hz range, and 2-inch panels absorb this range effectively — thinner panels let these frequencies pass through largely unaffected.
Self-adhesive backing eliminates the drilling and mounting hardware hassle. For renters or gamers who don’t want permanent wall modifications, this feature alone justifies the premium price.
The trade-off is cost. These panels cost roughly three times more per panel than budget options, and full room treatment means multiple packs — overkill for casual gamers, justified for serious streamers.
Best for: Serious streamers, content creators, and competitive gamers who prioritize audio quality in voice chat.
UMIACOUSTICS Panels with Hanging Bracket
The UMIACOUSTICS Panels with Hanging Bracket solve the installation problem elegantly. The included brackets mean you don’t need to figure out mounting separately.

UMIACOUSTICS Panels with Hanging Bracket
The 2-inch fiberglass core matches the absorption capability of professional studio panels. With 126 verified reviews and a 4.6-star rating, these panels deliver consistent results — on par with what the best recording studio panels offer at higher price points.
Best for: Gamers who want professional-grade absorption with included mounting hardware.
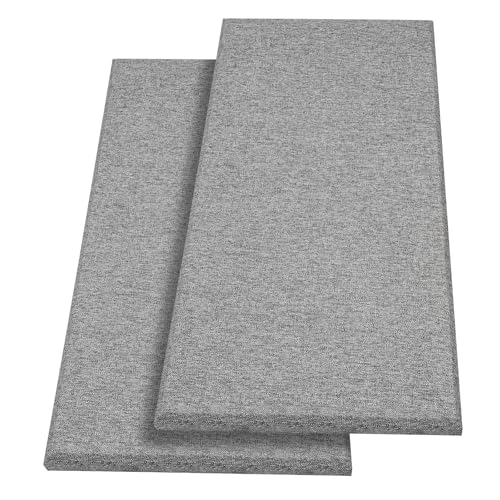
Olanglab Fiberglass Panels — Multiple Colors
The Olanglab Fiberglass Panels come in multiple color options to match your gaming room aesthetic. The same fiberglass core delivers consistent absorption across all color variants.

Olanglab Fiberglass Panels
Color choice matters for streaming setups where panels appear on camera. Black creates a professional, receding backdrop — gray or other neutrals can complement specific room designs.
The fabric wrapping adds visual polish that bare foam panels lack. These look like intentional design choices rather than obvious acoustic treatment.
Best for: Gamers who want acoustic treatment that enhances rather than compromises room aesthetics.
Where to Place Panels in Your Gaming Room
Strategic placement completely determines whether your panels actually improve your microphone audio. Dumping ten expensive panels randomly in the corners of the room will always perform worse than placing just two panels exactly where the reflections occur.
Behind Your Mic
The absolute most critical placement for any streaming or gaming setup is the wall directly behind your chair. When you speak into the mic, your voice travels past the desk, slams into the back wall, and bounces straight back into the microphone’s pickup pattern, creating a massive slap-back echo.
Hanging panels squarely on this wall intercepts those direct reflections before they ever have a chance to return to the microphone. Even two basic panels positioned at head-height behind your chair will create an immediate, night-and-day difference in your Discord voice clarity. Additionally, if you’re streaming with a face-cam, this rear wall usually serves as your background, meaning those panels double as a professional set design.
First Reflection Points
Once the back wall is secured, the next priority is the side walls immediately to the left and right of your desk. These are your primary first reflection points—the spots where the sound coming out of your desktop speakers bounces off the drywall and hits your ears.
You can easily locate these exact spots by sitting in your gaming chair and having a friend slide a flat mirror horizontally along the side walls. The exact inch where you can see the reflection of your desktop speakers in the mirror is the exact spot where a panel must be mounted.
Blanketing these reflection points strips the “smearing” effect out of the room, completely tightening up your stereo imaging. In competitive FPS games, that clarity lets you pinpoint enemy footsteps with vastly more accuracy because the room reflections aren’t confusing your ears.
Behind Monitors
Finally, your massive gaming monitors act as hard, reflective glass surfaces sitting just inches from your face. When you speak, your voice bounces off the screens, hits the wall immediately behind the desk, and ricochets right back into the mic.
Mounting wall panels directly behind your monitors absorbs that secondary bounce, completely killing the tight, boxy resonance that plagues desktop recording setups. However, you must place the panels to catch the reflections bouncing off the drywall—never place panels physically between your ears and the speakers. Full room treatment requires analyzing your specific layout; the best fiberglass panels guide breaks down wall-by-wall placement strategies for different sized rooms.
How Do Renters Install Panels Without Wall Damage?
The single biggest roadblock for gamers in apartments or dorms is figuring out how to mount heavy acoustic treatment without permanently damaging the drywall. To protect your security deposit, you must completely avoid drilling anchors and instead rely on Command strips, controlled adhesives, or freestanding mounts.
Command Strips
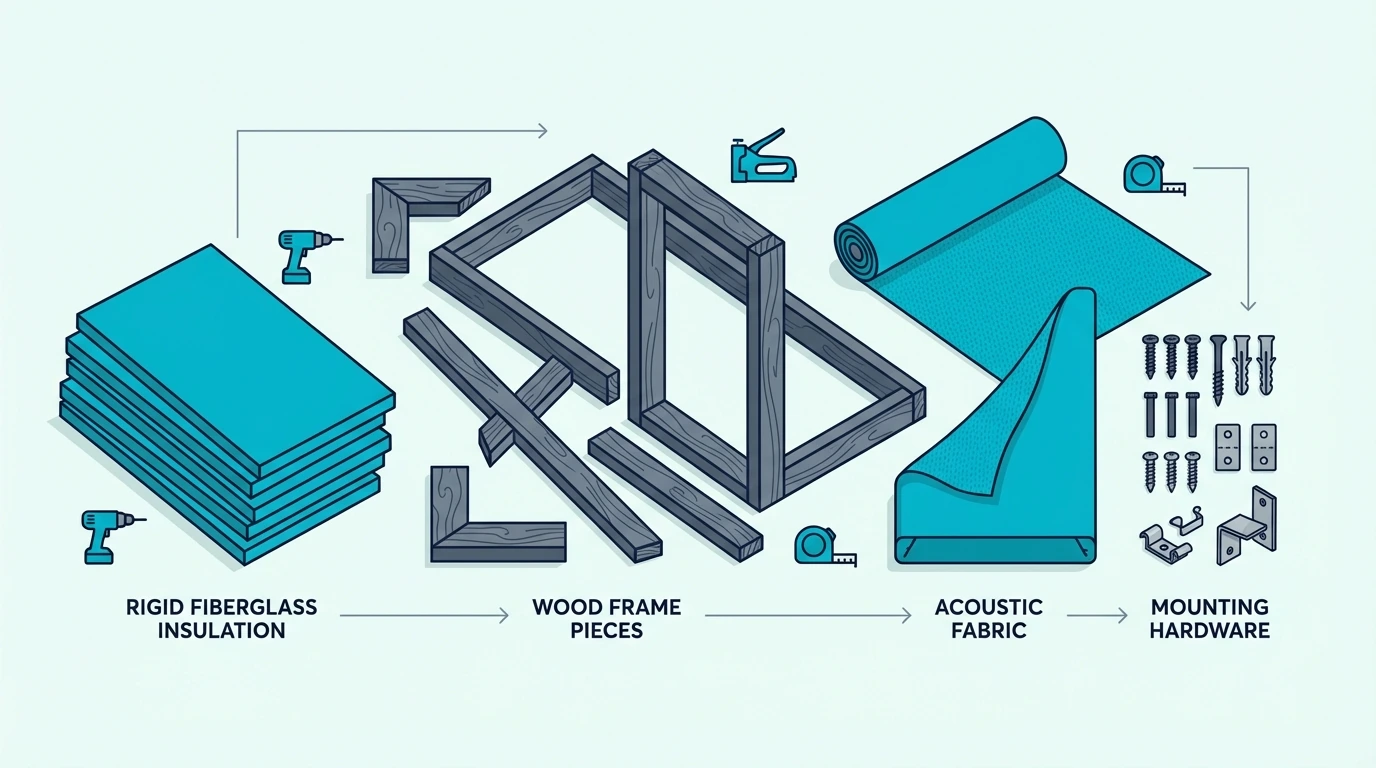
Heavy-duty 3M Command strips remain the absolute gold standard for damage-free mounting, provided you use enough of them to handle the weight. To properly secure a standard fiberglass panel, apply four large picture-hanging strips to the back of the wooden frame in a wide X pattern to evenly distribute the load.
You must let the strips cure against the drywall for at least an hour before applying the weight of the panel. When your lease finally ends, pulling the tabs straight down slowly stretches the adhesive until it releases cleanly, letting you pack up your acoustic investment without leaving a single mark or torn paint chip behind.
Self-Adhesive Panel Considerations
Panels that ship with built-in adhesive backing seem very convenient, but that speed comes at the cost of flexibility. Once that industrial adhesive hits the drywall, the panel is locked in place—attempting to reposition it five minutes later will usually tear the paper right off the drywall.
Because of this permanence, you must test your acoustic placement first. Use gentle blue painter’s tape to hold the panels temporarily on the wall, run a few mic tests, and only peel the permanent adhesive backing once you are absolutely certain the placement works.
Freestanding Options
If you have a brutally strict landlord and zero tolerance for wall damage, simply abandon the wall mounts entirely. A heavy, 4-foot fiberglass panel simply leaned against the wall directly behind your gaming chair provides massive acoustic absorption without a single drop of adhesive.
This freestanding approach allows you to reposition the treatment instantly and guarantees zero move-out headaches. The home office panels guide covers the same renter-safe mounting logic for desk setups. The only compromise is aesthetics and stability; leaning panels simply don’t look as sharp as flush-mounted ones, and they can easily get knocked over if you roll your chair back too aggressively.
Conclusion
Two panels behind your mic beats zero panels every time.
That’s not a simplification — it’s the actual starting point.
Before worrying about exact placement, first reflection points, or panel thickness, get something on the wall behind your gaming position. The improvement shows up immediately in voice chat.
From there, scale up based on what you hear. Streamers who depend on audio quality should invest in 2-inch fiberglass panels.
Gamers who want their setup to look as good as it sounds should check the best acoustic art panels for options that double as wall art. Budget-conscious buyers can cover a full gaming wall with the 18-pack for under forty dollars.
The full acoustic panels guide covers every room type and budget tier.
Frequently Asked Questions
Do acoustic panels stop sound from leaving my gaming room?
No. Acoustic panels absorb sound inside your room to reduce echo and reverb.
They don’t block sound from reaching your neighbors — that requires soundproofing, which involves construction work like adding mass to walls or decoupling surfaces.
How many panels do I need for a gaming room?
For a typical bedroom-sized gaming space, 4–8 panels behind your gaming position and at first reflection points create the most noticeable improvement.
Full room treatment might need 12–20 panels depending on room size and how many hard surfaces you have, but starting with two behind your chair covers the highest-impact location.
Will acoustic panels help my headset mic sound better?
Yes — headset mics pick up room reflections that muddy your voice, and even two panels behind your chair produce noticeably cleaner audio in Discord and on stream.
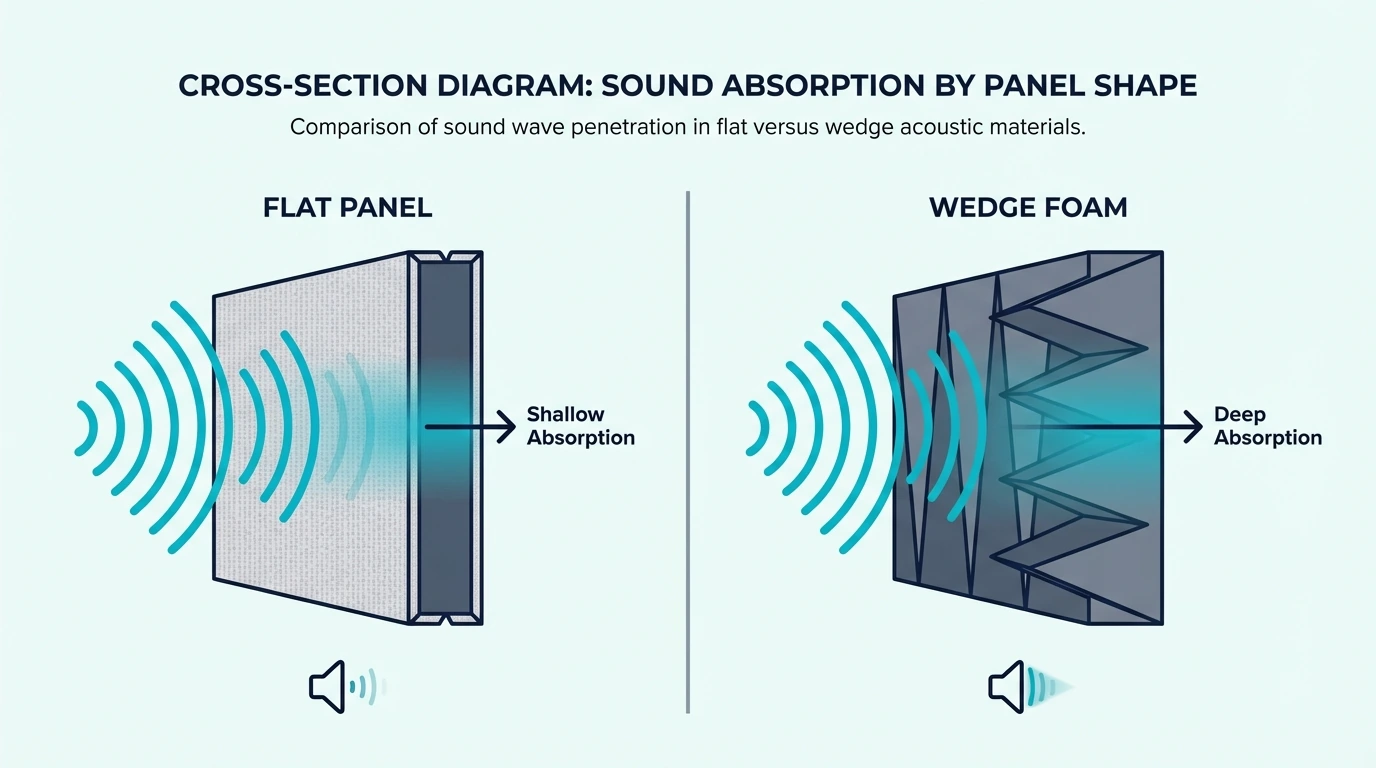
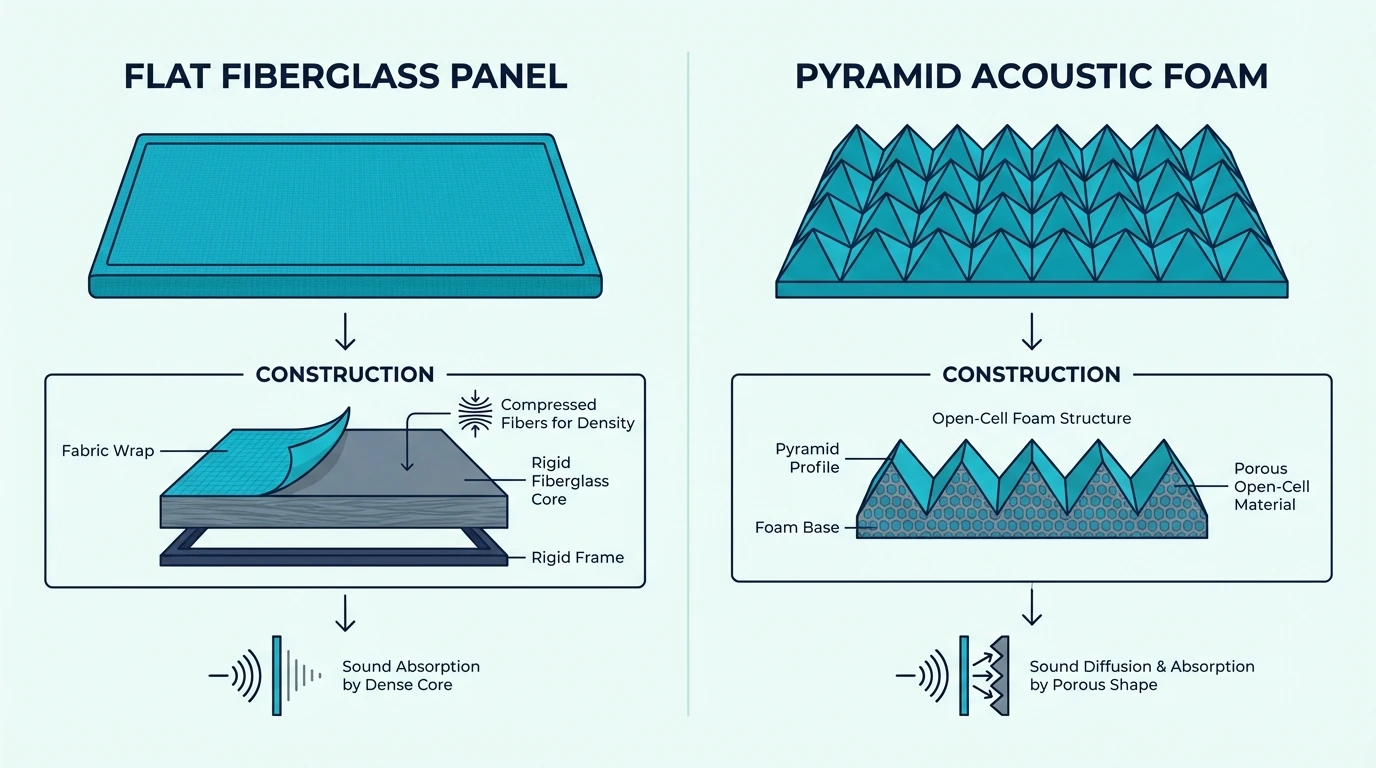
Can I use acoustic foam instead of panels?
Acoustic foam works for high frequencies but absorbs less in the voice range than real panels with fiberglass or high-density cores.
For gaming audio, the gap matters most in the 200–1000Hz band where voice fundamentals sit. The streaming panels guide compares foam vs fiberglass for content creators. If you already own foam, doubling it up partially closes the gap — but dedicated panels remain the stronger choice.
Do panel colors affect acoustic performance?
No — a black panel absorbs the same frequencies as a white panel of identical construction. Color is purely aesthetic, so choose whatever matches your streaming backdrop.
Where should I put panels if I can only afford a few?
The wall directly behind your gaming chair — that single surface catches the strongest mic reflections and gives the highest return per panel. The bedroom panels guide covers the same behind-the-seat logic for smaller rooms.