Where to Place Acoustic Panels in Church: Complete Placement Guide [2026]
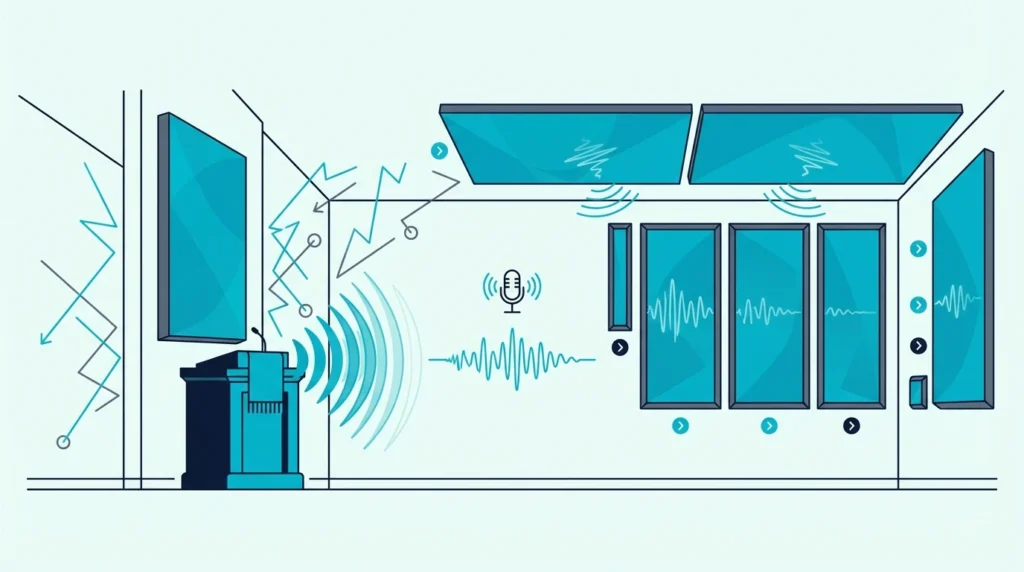
Where to place acoustic panels in church is simple enough—but only if you treat the surfaces that create the worst reflections first.
If your sanctuary sounds echoey or muddy, the problem usually is not your speakers. It is long reverb plus slap-back reflections that smear speech.
With the right placement, acoustic panels make sermons clearer and reduce listener fatigue without making the room feel dead. You keep musical warmth while tightening intelligibility.
Start with the rear wall behind the congregation, then treat side walls at ear height, and add ceiling clouds only where they reduce vertical reflections over seating.
Next, look at what makes churches acoustically difficult. Those problems point directly to the surfaces worth treating.
Start with the rear wall behind the congregation, then treat side walls at ear height, then add ceiling clouds over seating (not the stage). Most churches do well with 15–25% coverage spread across multiple surfaces.
Why Are Churches So Difficult Acoustically?
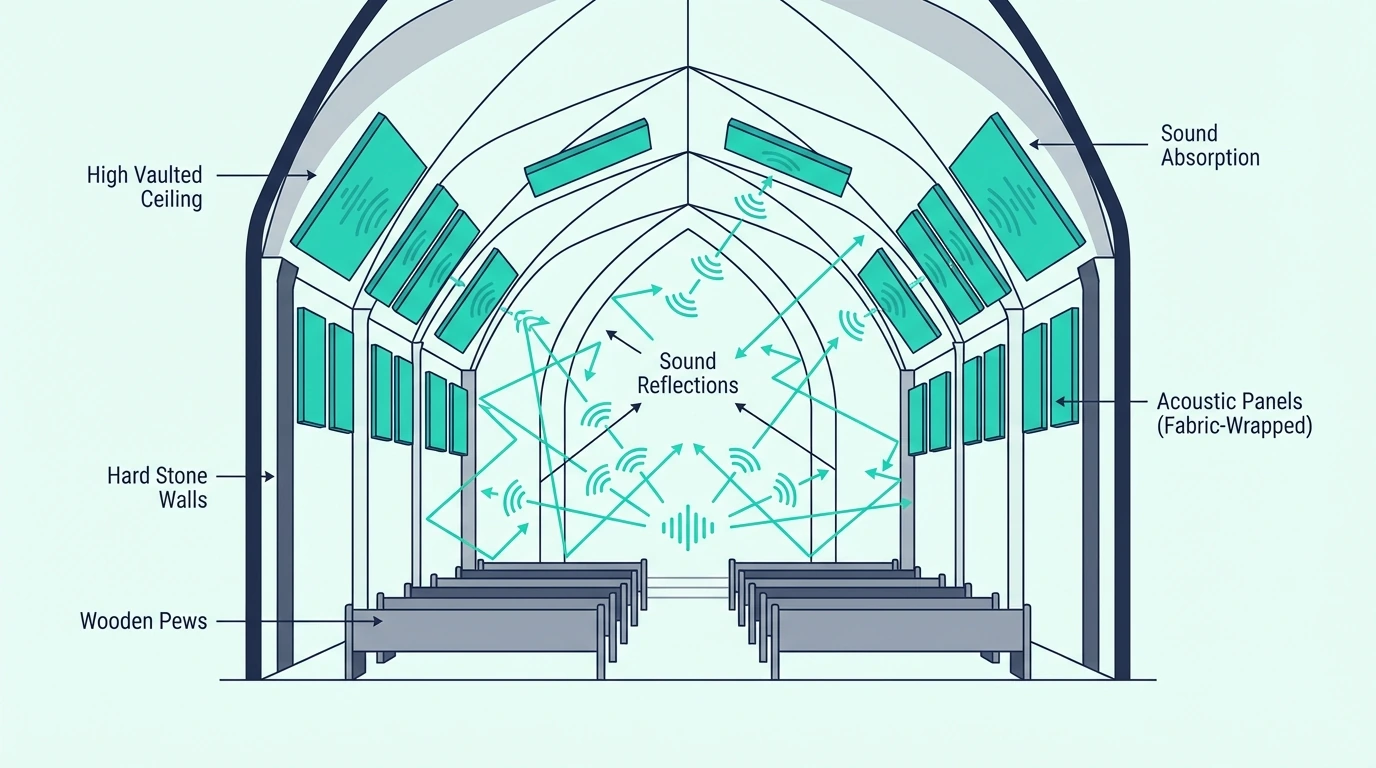
Church architecture combines high ceilings, hard parallel walls, and zero soft furnishings—three factors that stack into long reverb tails and smeared speech. Ceiling height adds the longest delays, hard surfaces keep energy bouncing, and parallel walls create distinct flutter echoes that smear every syllable.
High Ceilings and Massive Air Volumes
Most churches have ceiling heights between 20 and 40 feet — sometimes higher in cathedrals and historic buildings. This massive air volume means sound travels farther before hitting surfaces, creating long reverb tails that smear speech into unintelligible mush.
In a typical church, a spoken word can linger for three to five seconds before it decays. In a well-treated room, reverb time can be closer to half a second.
The congregation hears the direct sound from the speaker, then waves of reflections that arrive milliseconds later, each overlapping with the next syllable.
This reverb can be beautiful for organ music and choral performances, which is why cathedrals became famous for sound. Modern services with speech and amplified music need tighter control.
Hard, Reflective Surfaces Everywhere
Stone walls, wooden pews, tile floors, and plaster ceilings reflect almost all sound energy. Very little in the room absorbs sound naturally.
When sound hits these surfaces, nearly 100% bounces back into the room. It bounces again and again.
Each reflection adds to the reverberant field until the space becomes an acoustic chaos of overlapping sound waves.
Contrast this with a carpeted living room where sofas, curtains, and soft furnishings absorb real energy. Churches have almost none of these natural absorbers.
Every surface acts like a mirror for sound.
Parallel Walls Create Flutter Echo
Many churches feature long parallel walls running the length of the sanctuary. Sound bouncing between these parallel surfaces creates flutter echo — a rapid, metallic repetition that sounds like a playing card in bicycle spokes.
Flutter echo is particularly distracting during quiet moments. A single cough or page turn can trigger a cascade of repetitions that takes seconds to fade.
This effect is separate from general reverb and requires treatment on at least one of the parallel surfaces.
Where Should Acoustic Panels Go First?
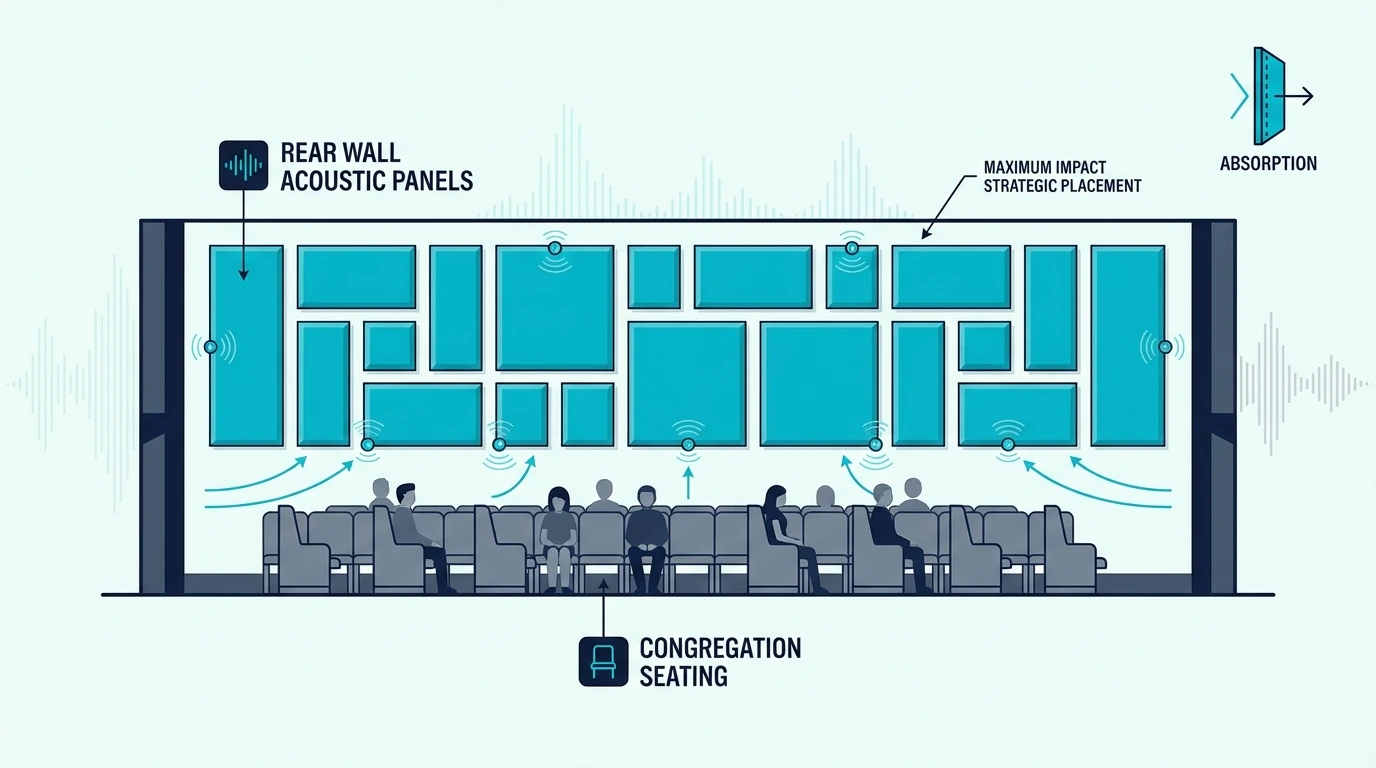
Not every surface matters equally. The rear wall, side walls, and ceiling each send reflections back into the seating area at different intensities—treat them in this order to get the biggest improvement per panel.
Rear Wall Behind the Congregation
The back wall is your absolute highest-priority treatment zone. Sound leaves the stage speakers, travels completely over the heads of the congregation, hits the hard rear wall, and bounces straight back toward the front.
This creates a devastating slap-back echo that actively fights the speaker’s direct voice. Treating 30-50% of the rear wall with acoustic panels completely severs this reflection path. The improvement in speech clarity is usually immediate and dramatic—congregants sitting in the middle rows who previously struggled to understand the sermon will suddenly hear every syllable cleanly.
Mount panels at seated ear height (roughly 3-5 feet from floor) and extend upward. The exact coverage depends on your reverb time goals and the balance between speech clarity and musical ambiance.
Side Walls at Ear Level
Once the rear wall is secured, the side walls become the next logical target. These parallel surfaces bounce sound rapidly back and forth across the seating area, creating a harsh flutter echo that severely degrades clarity.
You don’t need to cover the side walls from floor to ceiling to fix this. Focusing a horizontal band of treatment exactly at seated and standing ear level (roughly 3 to 6 feet off the floor) perfectly intercepts the critical reflection paths. This targeted approach is especially critical for long, narrow sanctuaries where the side walls are uncomfortably close to the outer seating sections.
Ceiling Treatment for Vertical Reflections
Finally, you must address the massive vertical dimension. High church ceilings create very long reflection paths that add devastating amounts of reverb to the room. Sound travels 30 feet up, bounces off the vault, and returns to the congregation a full 60 milliseconds later—which is more than enough delay to completely blur human speech.
Suspended ceiling clouds are the most effective solution for this specific problem because they intercept the sound wave twice: once on the way up, and again on the bounce down. You must hang these clouds directly over the congregation seating area rather than over the stage; the stage actually benefits from some natural ceiling reflection for monitor reinforcement, but the listeners need controlled, clear audio. The acoustic panel spacing guide shows how to calculate this cloud distribution across a massive seating zone.
Get Studio Tips Weekly
Join 5,000+ creators getting acoustic treatment advice every week.
No spam. Unsubscribe anytime.How Do You Balance Acoustics and Aesthetics?
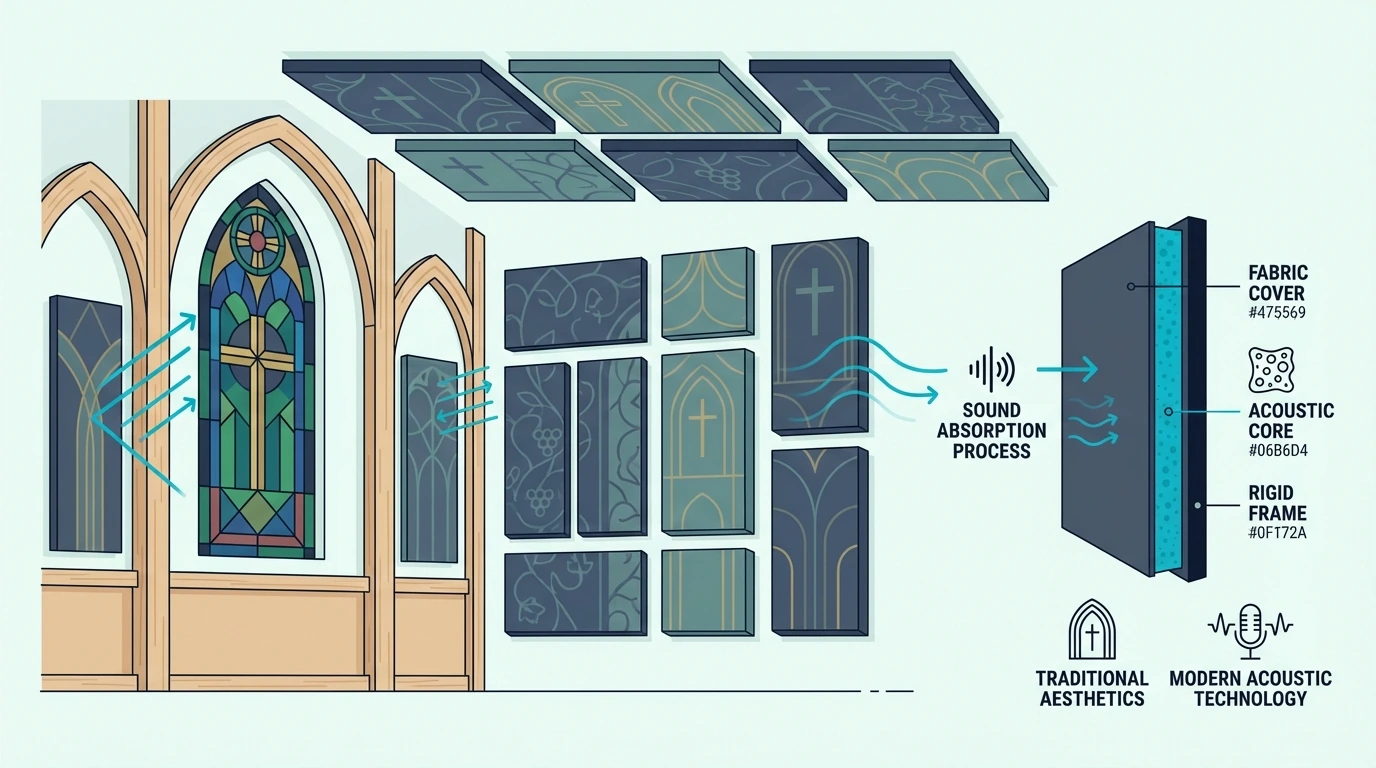
Placement solves the acoustic problem, but the congregation still needs to feel at home in the space. Fabric color matching, strategic positioning in low-attention zones, and working with existing arches and alcoves let you add absorption without turning the sanctuary into a recording studio.
Fabric-Wrapped Panels in Church Colors
Modern acoustic panels come in hundreds of colors and can match traditional church aesthetics beautifully. Custom fabric matching and strategic placement in less-visible areas help treatment blend with existing decor.
Deep burgundies, forest greens, navy blues, and warm golds work well in traditional church settings. The fabric hides the absorptive core while presenting a finished appearance that blends with surrounding architecture.
Panels like the Olanglab Fiberglass 4-Pack come in neutral colors that work in most traditional settings. Not every weave stays acoustically transparent, though—the acoustic panel fabric guide shows which ones let sound pass through to the core.
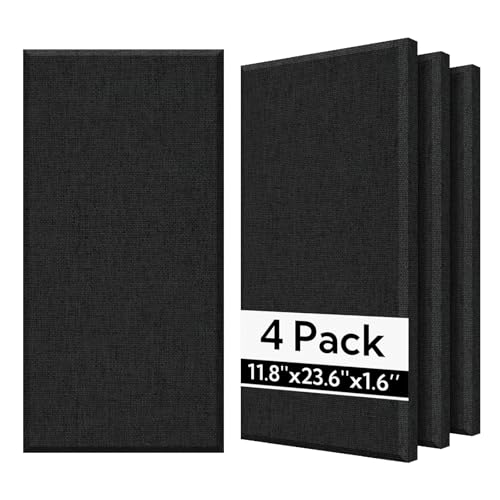
Olanglab Fiberglass 4-Pack
Custom printing allows panels to feature religious imagery, stained glass patterns, or other church-appropriate artwork. These acoustic art panels serve dual purposes — treatment and decoration.
Strategic Placement That Minimizes Visual Impact
Placement affects visibility as much as performance. Panels behind the congregation see less visual attention than panels flanking the altar.
Map sight lines and focal points before choosing mounting locations.
The rear wall and back sections of side walls receive less visual scrutiny than front areas. Concentrating treatment in these zones accomplishes acoustic goals while keeping the most visible areas untreated.
For historic churches with preservation concerns, removable mounting systems allow treatment without permanent modification to protected surfaces. Panels can be installed with minimal intervention and removed if needed.
Working With Architectural Features
Arches, alcoves, and architectural details can incorporate treatment invisibly. Panels installed within recessed areas or behind decorative screens provide absorption without visible modification.
Target surfaces that already have less ornamental value. Plain walls between windows or simple surfaces in auxiliary spaces offer treatment opportunities that do not compete with notable architectural features.
What Coverage Percentage Do Churches Need?
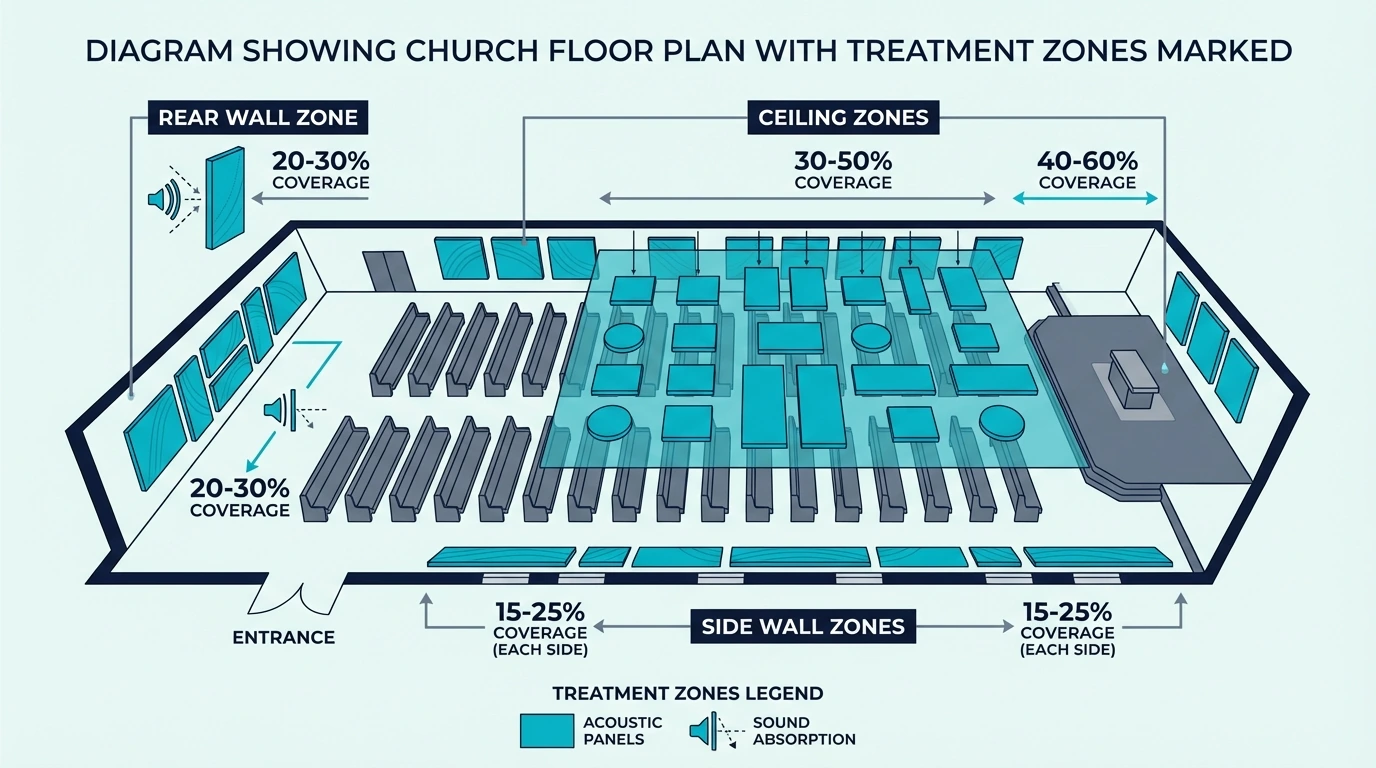
Coverage math matters more than picking a single perfect panel. Typical percentage ranges, the delicate tradeoff between speech and music, and knowing when to finally hire an acoustician all hinge entirely on your current reverb time and your ultimate acoustic goal.
Typical Coverage Ranges
As a baseline rule, most untreated churches achieve excellent results by covering 15-25% of their total wall surface area with absorption. Hitting that specific target range reliably cuts the overall reverb time by one to three seconds, tightening the room noticeably while preserving just enough liveness for the choir.
Massive, highly reverberant cathedrals suffering from 5+ second reverb times may need to push that coverage to 30% or more just to reach acceptable speech clarity. Conversely, modern architectural churches built with lower ceilings and carpeted floors might only need a surgical 10% coverage to lock the room in.
Whatever your target percentage, you must distribute that coverage evenly across the rear wall, side walls, and ceiling rather than dumping 30% of your panels onto one massive back wall.
Balancing Speech and Music
That exact coverage percentage is entirely dictated by what happens on your stage every Sunday. If your services are strictly speech and sermon-focused, you want a very short reverb time—often pushing down to one second flat. That hyper-controlled decay massively improves word intelligibility and sharply reduces listening fatigue for older congregants.
If your services lean heavily into traditional musical worship with choirs and organs, you actually need the room to breathe. Pushing the decay time out to two full seconds allows the musical notes to blend beautifully in the air. Over-treating a music-first room until it hits one second of reverb will make the choir feel painfully flat and disconnected.
Professional Assessment Value
If you are trying to walk that razor-thin line between perfect speech clarity and beautiful musical resonance in a 50,000 cubic foot sanctuary, guessing is an expensive mistake. Complex church acoustics absolutely demand a professional measurement before you order fifty panels.
An acoustic engineer will physically measure your exact reverb times across every frequency band, identifying the specific low-mid buildups that generic calculators miss. While DIY approaches work perfectly for home studios and small chapels, attempting to blind-treat a massive historic sanctuary usually results in over-buying the wrong materials.
If you just want to run the baseline math for your budget proposals before calling a professional, the acoustic panel quantity guide provides the raw coverage formulas that scale up to church-sized rooms. General acoustic principles that dictate how sound behaves in any room shape are covered in the acoustic panels placement guide, and the acoustic panels hub ties all these concepts together.
What Panel Types Work Best in Churches?
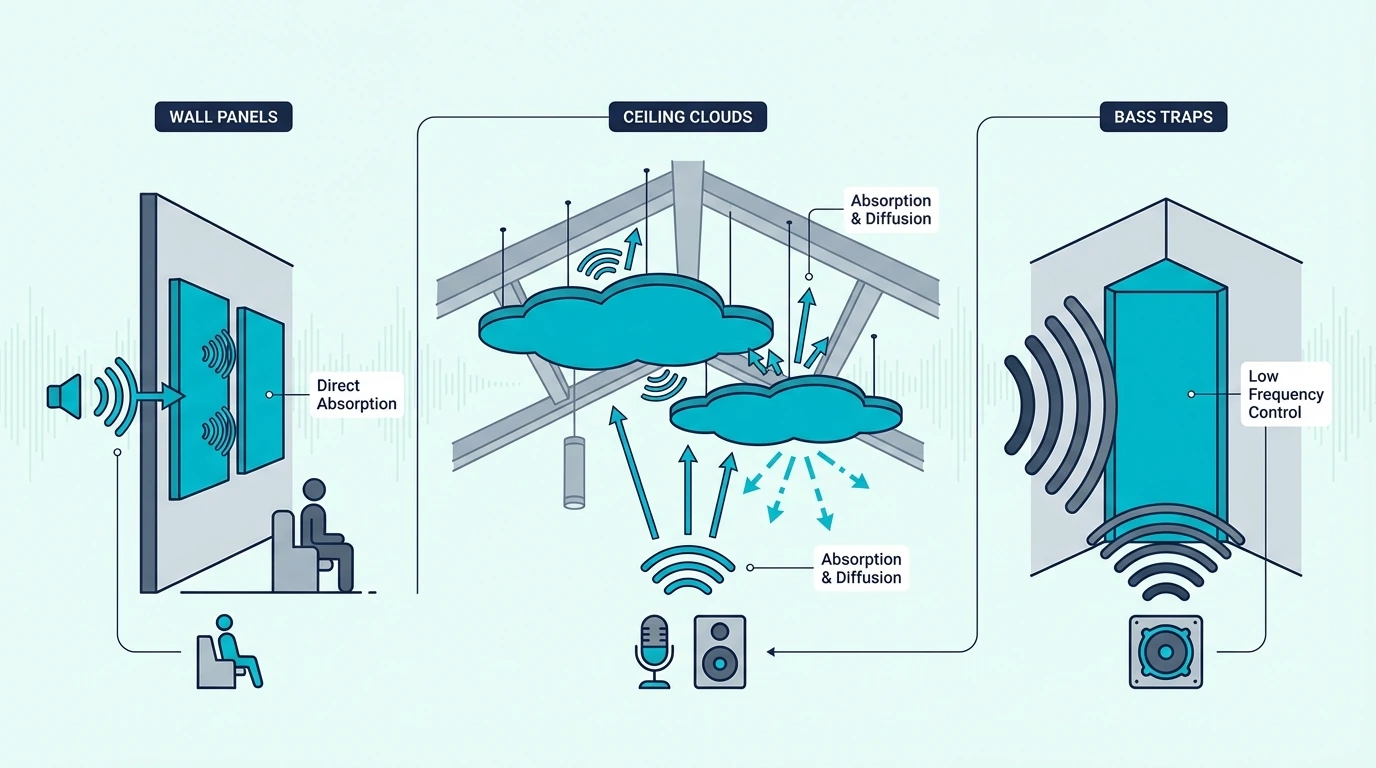
Once you know your total square footage target, panel selection becomes an exercise in scale. Trying to treat a 40-foot wall with tiny 12-inch foam squares is a logistical nightmare; you must move to large-format panels, heavy ceiling clouds, and dedicated corner traps to match the massive volume of the sanctuary.
Large-Format Panels for Coverage Efficiency
While standard 2×4-foot panels work perfectly in home studios, they require an absurd number of individual mounting brackets to cover a church wall. Transitioning to 4×4-foot or custom oversized fiberglass boards allows you to cover massive surface areas with a fraction of the installation labor and far fewer visible seams.
The UMIACOUSTICS 47×24” fiberglass panels offer exactly the kind of coverage efficiency churches require, knocking out nearly 8 square feet of reflection per unit.
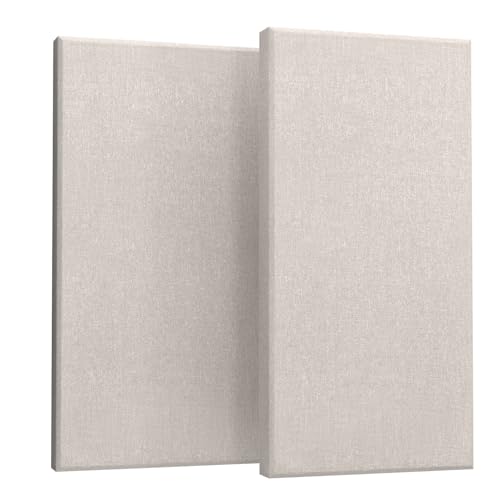
UMIACOUSTICS 47×24” fiberglass panels
These oversized, rigid panels also inherently feature better low-frequency absorption due to their mass, helping to control the muddy bass buildup that constantly plagues large reverberant spaces. To aggressively target that low-end rumble, you must insist on a 2-inch minimum thickness like the 2” Thick Fiberglass Panels with Hanging Hardware. That physical depth allows the panel to absorb frequencies all the way down to 125Hz, cleaning up the low male vocal ranges that thin panels completely ignore.
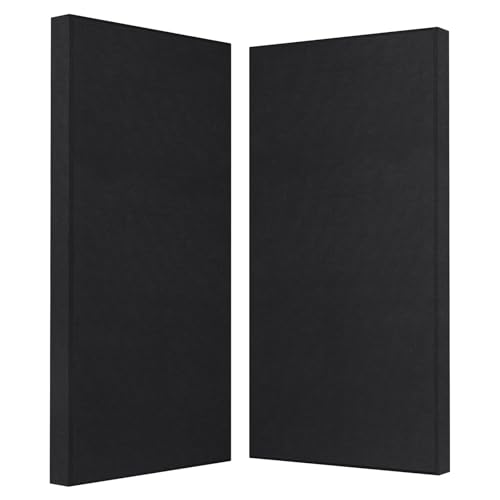
2” Thick Fiberglass Panels with Hanging Hardware
Ceiling Clouds and Baffles
When you shift focus to the ceiling, suspended treatments become mandatory. Hanging acoustic clouds flat below the ceiling—or dropping vertical baffles from the rafters—allows you to aggressively treat the overhead reflections without ever drilling into historic plaster or obscuring painted ceiling murals.
In a massive church setting, flat horizontal clouds generally provide better acoustic return on investment than vertical baffles. Because they sit parallel to the floor, clouds intercept the acoustic energy traveling up from the congregation, and then immediately absorb the secondary reflections bouncing back down from the hard ceiling above them.
Bass Traps for Low-Frequency Control
Finally, the sheer architectural volume of a church almost guarantees massive bass buildup in the corners and along the upper wall-ceiling junctions. If the organ or bass guitar sounds overwhelmingly boomy in the back rows, standard flat wall panels cannot fix it.
You must deploy dedicated bass traps in these high-pressure zones to physically stop the low frequencies from endlessly circling the room. Floor-to-ceiling corner traps address these massive wavelengths with a surprisingly minimal visual footprint, especially since the dark corners of a sanctuary rarely draw the congregation’s visual attention anyway.
Where Should You Avoid Placing Panels?
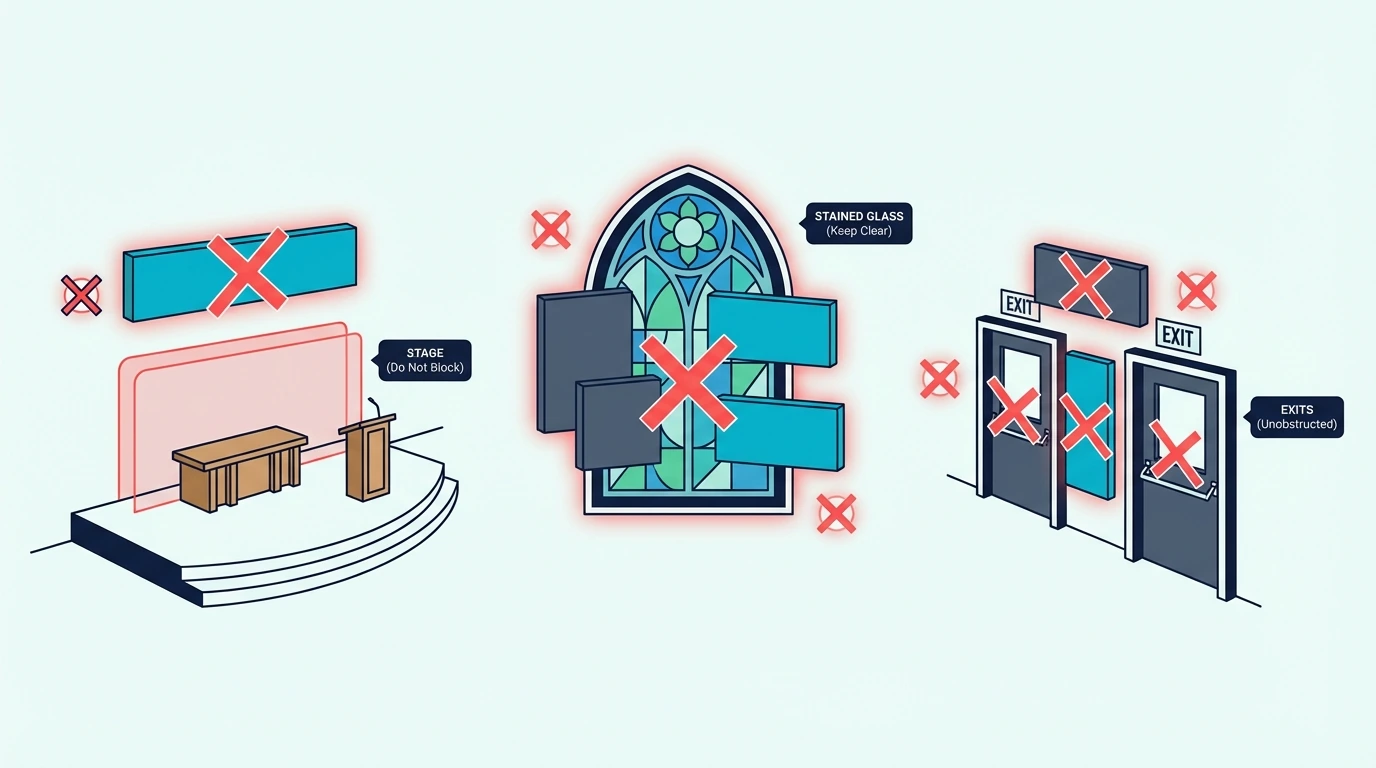
Some reflective surfaces must absolutely stay reflective. If you aggressively kill every hard surface in the room, the sanctuary loses the glorious natural liveness that makes congregational singing feel powerful and unified.
Stage and Platform Areas
The single biggest mistake is blanketing the entire front stage wall in thick absorption. Performers, choir members, and the pastor actually rely on that natural acoustic feedback bouncing off the wall behind them to hear themselves properly.
Creating an unnaturally dead black hole on the stage completely isolates the musicians from each other. If you have a specific slap-back problem causing feedback in the stage microphones, you must treat those specific reflection paths surgically rather than suffocating the entire platform in fiberglass.
Near Stained Glass and Artwork
From a purely aesthetic standpoint, acoustic treatment must never compete with the architecture. You should aggressively avoid mounting panels anywhere near historic stained glass windows, religious murals, or ornate woodwork where they will inevitably draw the eye away from the focal point of the room.
Exit Paths and Safety Signage
Most importantly, acoustic panels cannot override building codes. You must never mount thick panels where they narrow a required fire exit path, obscure emergency lighting, or block line-of-sight to safety signage. When treating tight hallways or sanctuary vestibules, always consult your local fire marshal or facilities director before bolting heavy fiberglass panels to the walls.
Conclusion
Where to place acoustic panels in church starts with prioritizing the reflections that hurt speech the most. The rear wall addresses slap-back echo, while side walls control flutter echo between parallel surfaces.
Ceiling treatment helps when high ceilings add long delays over the seating area. You do not need to treat every surface to hear a real improvement.
Start with the rear wall and expand to side walls and ceiling treatment as scope allows. The goal is not a dead room.
The goal is controlled clarity that still feels like a church during music and singing. The acoustic panels hub connects every topic covered here, and the best acoustic panels page ranks specific products by room type if you need a shortlist.
Leadership often asks what the numbers on a spec sheet mean—the NRC rating guide explains absorption scores in plain language. Once the panels arrive, the installation guide covers secure mounting on drywall, masonry, and suspended grid ceilings.
Frequently Asked Questions
Where should acoustic panels go in a church?
Start with the rear wall behind the congregation. This single surface often produces the most dramatic improvement in speech clarity.
Then treat portions of side walls at ear height to control flutter echo. Finally, add ceiling clouds over seating to reduce high-ceiling reflections.
How many acoustic panels does a church need?
Most churches land in the 15–25% wall coverage range. A 5,000-square-foot sanctuary typically needs 40–60 standard panels spread across the rear wall, side walls, and ceiling.
Will acoustic panels look bad in a church?
Not if you match fabric colors to existing woodwork, stone, or upholstery. Panels behind the congregation and along side walls draw far less attention than panels near the altar—most congregants never notice them.
Can you treat a church without permanent modifications?
Yes — many mounting systems allow installation without drilling into historic surfaces. Ceiling clouds can suspend from removable hardware.
Wall panels can mount to freestanding frames or temporary backing systems that do not damage original materials.
What is the difference between church acoustics and home studio treatment?
Scale. Churches can exceed 20-foot ceilings and 50,000 cubic feet; home studios rarely top 10 feet and 1,000 cubic feet.
That volume difference means churches need far more treatment area and must balance absorption with preserving the liveness that makes congregational singing and organ music feel full.