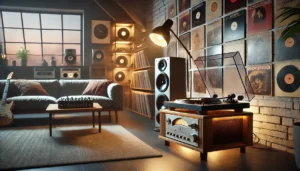
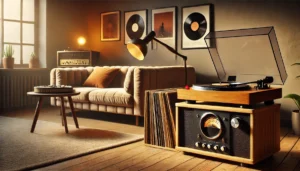
How to Connect a Turntable to a Receiver Without Phono Input: A Step-by-Step Guide

Hey there, vinyl enthusiasts! Ready to dive into the world of connecting turntables to receivers without phono inputs?
Buckle up, because we’re about to embark on a groovy journey through the ins and outs of getting your record player hooked up to just about any modern audio setup.
Trust me, I’ve been there – staring at my shiny new turntable and a receiver that looks like it’s speaking a different language.
But fear not! I’ve got your back, and by the end of this guide, you’ll be spinning those records like a pro.
How To Connect Turntable To Receiver Without Phono Input

Connecting a turntable to a receiver without a phono input isn’t as tricky as it sounds! I’ve been there, scratching my head over those mysterious connections.
Here’s the deal: you’ll need a phono preamp. It’s this nifty little device that boosts the turntable’s weak signal and applies the necessary equalization.
Just plug your turntable into the preamp, then connect the preamp to any standard input on your receiver (like AUX or CD). Voila! You’re ready to spin those records.
Don’t worry, we’ll dive into all the juicy details below, but that’s the gist of it. Now, let’s get into the nitty-gritty of making your vinyl sing through any modern receiver!
What is a Phono Input and Why It Matters

Alright, let’s break this down. A phono input isn’t just some fancy-pants audiophile term – it’s actually pretty crucial when it comes to playing vinyl.
See, back in the day, every receiver worth its salt had a phono input. But times change, and so does technology.
So, what’s the big deal? Well, the signal that comes straight off a turntable is super weak.
Like, whisper-in-a-hurricane weak. A phono input is specially designed to boost that signal and apply something called RIAA equalization.
Without getting too nerdy, this equalization basically makes sure your records sound the way they’re supposed to.
I remember the first time I tried to plug my dad’s old turntable directly into a regular input on my fancy new receiver. Let’s just say it didn’t go well.
The sound was so quiet, I thought I’d broken something! That’s when I learned about the magic of phono inputs.
But here’s the rub – a lot of modern receivers don’t have phono inputs anymore. It’s like trying to find a payphone in 2024.
Sure, they exist, but good luck finding one when you need it!
This is where things get interesting. Just because your receiver doesn’t have a phono input doesn’t mean you’re out of luck.
There are workarounds, and I’m gonna show you how to use them. Trust me, by the time we’re done, you’ll be able to make any receiver play nice with your turntable, phono input or not!
Get Studio Tips Weekly
Join 5,000+ creators getting acoustic treatment advice every week.
No spam. Unsubscribe anytime.The Problem: Connecting a Turntable to a Receiver Without Phono Input

Okay, so you’ve got your shiny new turntable (or maybe a vintage gem), and you’re all set to dive into the warm, rich sound of vinyl. But wait! You look at the back of your receiver, and… no phono input.
Cue the sad trombone.
This is a problem I’ve faced more times than I care to admit. It’s like showing up to a potluck with a dish that requires an oven, only to find out there isn’t one.
Frustrating, right?
The issue here is pretty straightforward. Your turntable is putting out a signal that’s too weak and differently equalized for a standard input to handle properly.
It’s like trying to fill a swimming pool with a garden hose – technically possible, but not very effective.
This scenario is becoming more and more common these days. I mean, vinyl is making a comeback (heck, I’ve got more records now than I did in the ’80s!), but receiver manufacturers haven’t quite caught up.
They’re still living in the digital age, focusing on things like HDMI ports and Bluetooth connectivity.
I’ve seen this problem pop up in all sorts of situations. There was the time my nephew got his first turntable for Christmas, only to realize his parents’ sleek, modern sound system didn’t have a phono input.
Or when I decided to set up a record player in my office, only to remember that my compact desktop speaker system wasn’t exactly vinyl-friendly.
But don’t worry! This isn’t a deal-breaker. In fact, it’s an opportunity to get a little creative with your setup.
And let me tell you, there’s nothing quite like the satisfaction of getting your system up and running, especially when you’ve had to overcome a hurdle or two.
In the next sections, we’re going to look at a few different solutions to this problem. Whether you’re working with a budget setup or a high-end system, I’ve got you covered.
So, let’s roll up our sleeves and get that turntable connected!
Solution 1: Using a Phono Preamp
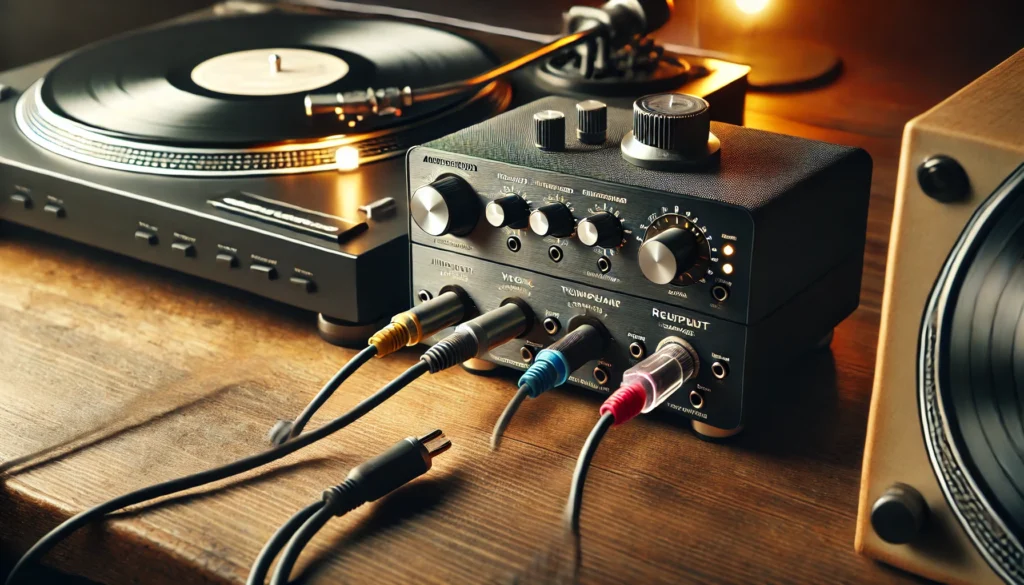
Alright, folks, let’s talk about the magic box that’s gonna solve our little phono input dilemma – the phono preamp. This little gizmo is about to become your new best friend in the world of vinyl playback.
So, what the heck is a phono preamp? Well, it’s basically a middleman between your turntable and your receiver.
It does the job that a phono input would do – amplifying that weak turntable signal and applying the RIAA equalization we talked about earlier. It’s like a translator that helps your turntable and receiver speak the same language.
Now, how do you use one of these bad boys? It’s pretty straightforward, even for a klutz like me. Here’s how it goes:
- Connect your turntable’s output cables to the input on the phono preamp.
- If your turntable has a ground wire (looks like a thin wire with a forked end), connect that to the ground terminal on the preamp.
- Connect the output of the phono preamp to any standard input on your receiver (AUX, CD, etc.).
- Plug in the preamp’s power supply.
- Turn everything on and start spinning those records!
Easy peasy, right? I remember the first time I set up a phono preamp.
I was so nervous I’d mess something up, but it turned out to be simpler than setting up my coffee maker!
Now, let’s talk about some phono preamps that won’t break the bank but will get the job done:
- Art DJ Pre II: This little guy is a workhorse. It’s affordable and does the job well.
I’ve recommended this to plenty of friends just starting out.
- Pro-Ject Phono Box DC: A step up in price, but it delivers clean, detailed sound. I use this one in my office setup.
- Schiit Mani: Don’t let the name fool you (though it’s fun to say). This American-made preamp punches way above its weight class.
- Cambridge Audio Duo: If you’re feeling fancy and have some extra cash, this one’s a beauty. It even has a headphone amp built in!
Remember, the key is to choose a preamp that fits your budget and needs. Don’t feel like you need to spend a fortune – even a basic preamp will be leagues better than no preamp at all.
I once made the mistake of buying a super expensive preamp for my entry-level turntable. Talk about overkill! It was like putting racing tires on a minivan.
Learn from my mistakes, folks – match your preamp to your setup.
With a phono preamp in place, you’ll be amazed at how good your vinyl can sound, even without a dedicated phono input on your receiver. It’s like unlocking a secret level in a video game – suddenly, everything sounds better!
Solution 2: Turntables with Built-in Preamps

Alright, vinyl heads, let’s chat about another nifty solution to our phono input predicament – turntables with built-in preamps. These bad boys are like the Swiss Army knives of the turntable world.
They’ve got everything you need in one package!
So, what’s the deal with these all-in-one wonders? Well, they’re exactly what they sound like – turntables that have a phono preamp built right into them.
It’s like having a turntable and a preamp that decided to move in together and save on rent.
Now, let’s break down the pros and cons, because like my Aunt Mildred’s fruitcake, they’re not for everyone.
Advantages:
- Convenience: Just plug and play, baby! No need for extra boxes or cables.
- Space-saving: Great for tight setups. I once had a turntable with a built-in preamp in a tiny apartment, and it was a lifesaver.
- Cost-effective: Often cheaper than buying a separate turntable and preamp.
Disadvantages:
- Less flexibility: You’re stuck with the preamp you’ve got. No mixing and matching for that perfect sound.
- Potential quality compromise: Sometimes (not always) the built-in preamps aren’t as high-quality as separate units. It’s like those all-in-one TV dinners – convenient, but not always gourmet.
- Upgraditis: If you catch the audiophile bug (trust me, it’s contagious), you might find yourself wanting to upgrade your preamp down the line.
Now, how do you use these built-in preamp turntables? It’s easier than falling off a log! Here’s the lowdown:
- Look for a switch on your turntable labeled something like “PHONO/LINE” or “WITH PHONO/WITHOUT PHONO”.
- Flip that switch to the LINE position (or WITHOUT PHONO, depending on your model).
- Connect the turntable’s output cables directly to any standard input on your receiver (AUX, CD, etc.).
- Fire it up and let the good times roll!
I remember the first time I used a turntable with a built-in preamp. I spent an embarrassing amount of time looking for where to connect the non-existent external preamp before I realized I didn’t need one.
Don’t be like me – read the manual!
Now, let’s talk about some popular turntables with built-in preamps that won’t let you down:
- Audio-Technica AT-LP120XUSB: This is like the Swiss Army knife of turntables. Built-in preamp, USB output, the works.
I’ve recommended this to more friends than I can count.
- Sony PS-LX310BT: If you want to go wireless, this one’s got Bluetooth. I once used this at a party, and people couldn’t believe the sound was coming from a turntable!
- Pro-Ject Debut Carbon EVO: A bit pricier, but oh boy, does it deliver. The built-in preamp is no slouch either.
- Fluance RT81: A personal favorite. It’s got a warm, rich sound that’ll make you wonder why you ever bothered with digital.
Remember, the key is to find a turntable that fits your needs and budget. Don’t get suckered into buying features you’ll never use – it’s like buying a speedboat for your backyard kiddie pool.
Solution 3: Using a Stereo Preamp

Alright, vinyl enthusiasts, we’re about to venture into slightly more advanced territory. Don’t worry, though – it’s not rocket science, just a bit of audio wizardry.
Let’s talk about using a stereo preamp to connect your turntable to a receiver without a phono input.
First off, what’s the difference between a phono preamp and a stereo preamp? Well, it’s kind of like the difference between a specialist doctor and a general practitioner.
A phono preamp is designed specifically for turntables, while a stereo preamp is a more general-purpose device that can work with various audio sources.
Here’s the kicker – some stereo preamps have a phono stage built in. It’s like finding out your Swiss Army knife also has a tiny espresso maker.
These are the ones we’re interested in.
So, how do you use a stereo preamp with a phono stage? Let’s break it down:
- Connect your turntable to the phono input on the stereo preamp.
- If your turntable has a ground wire, connect it to the preamp’s ground terminal.
- Connect the stereo preamp’s output to any standard input on your receiver.
- Power up the preamp and adjust the volume.
- Start spinning those records and bask in the audio goodness!
Now, when should you choose this option? Well, a stereo preamp with a phono stage can be a great choice if:
- You want flexibility to connect other audio sources.
- You’re looking to upgrade your overall audio setup, not just your turntable connection.
- You’ve got a bit more budget to play with and want higher-quality components.
I remember when I first used a stereo preamp with my turntable. I felt like a kid in a candy store with all the connections and settings.
Of course, I also managed to create a feedback loop that made a noise like an angry cyborg cat, but hey, live and learn, right?
Here are a few stereo preamps with phono stages that I’ve had good experiences with:
- Cambridge Audio AXA35: This little beauty has a great phono stage and plenty of inputs for other devices.
- Yamaha A-S301: A powerhouse that’ll handle your turntable and then some.
- NAD C 316BEE V2: Don’t let the alphabet soup name fool you – this is a solid performer.
Remember, using a stereo preamp is a bit more involved than the other solutions we’ve discussed. But if you’re looking to take your audio game to the next level, it can be a great option.
Just be prepared for a bit of trial and error. I once spent an entire afternoon tweaking settings on my stereo preamp, trying to get the perfect sound.
My wife thought I’d lost my marbles, but when she heard the result, even she had to admit it was worth it. (Though she still rolls her eyes when I start talking about audio equipment at parties.)
Troubleshooting Common Issues

Alright, folks, let’s talk troubleshooting. Because let’s face it, sometimes things don’t go as smoothly as we’d like.
Don’t worry, though – I’ve made every mistake in the book, so you don’t have to!
First up, let’s tackle the dreaded ground loop hum. You know, that annoying buzz that sounds like a swarm of electronic bees decided to crash your listening party? Yeah, that one.
The most common cause of this is a grounding issue. Here’s how to fix it:
- Make sure your turntable’s ground wire is connected to the preamp or receiver’s ground terminal.
- If that doesn’t work, try connecting the ground wire to a different ground point.
- Still humming? Try a cheater plug (an adapter that removes the ground pin from your power cable). But be careful – this can be dangerous if not done properly.
I once had a persistent hum that drove me nuts for weeks. Turns out, I had my turntable set up too close to my router.
Who knew WiFi and vinyl didn’t mix?
Next up, let’s talk about low volume problems. If your music sounds like it’s coming from the bottom of a well, try these steps:
- Double-check that you’ve selected the correct input on your receiver.
- Make sure your preamp is turned on and the volume is up.
- If you’re using a turntable with a built-in preamp, check that the PHONO/LINE switch is set to LINE.
I once spent an embarrassing amount of time fiddling with cables and settings, only to realize I’d accidentally hit the mute button on my receiver. Face, meet palm.
Now, let’s address distortion issues. If your music sounds like it’s being played through a kazoo, try these fixes:
- Check your stylus (needle) for dust or damage. A quick clean can work wonders.
- Make sure your turntable is properly balanced and the tracking force is correct.
- If you’re using an external preamp, try adjusting its gain settings.
I learned about tracking force the hard way when I set up my first serious turntable. Let’s just say my records sounded like they were being played with a cactus until I got it right.
Remember, troubleshooting is all about patience and methodical testing. Don’t be afraid to reach out to manufacturer support or local audio shops if you’re stuck.
And whatever you do, resist the urge to throw your equipment out the window. Trust me, it doesn’t help (and it makes a terrible mess).
Optimizing Your Turntable Setup for Best Sound Quality

Alright, audio aficionados, we’ve got our turntable connected and troubleshot. Now let’s talk about squeezing every last drop of audio goodness out of your setup.
Because let’s face it, if we’re going through all this trouble, we might as well make it sound amazing, right?
First things first – placement is key. Your turntable is like a diva; it needs the right stage to perform its best.
Here are some tips:
- Keep it level: Use a spirit level to make sure your turntable is perfectly flat. A tilted turntable is about as useful as a chocolate teapot.
- Isolation is your friend: Keep your turntable away from your speakers to avoid vibrations. I once had my turntable on the same shelf as my speaker, and it sounded like my records were being played underwater.
- Avoid direct sunlight: Unless you want your vinyl to do its best Salvador Dali impression, keep it out of the sun.
Next up, let’s talk about cartridge alignment and tracking force. These might sound like terms from a sci-fi novel, but they’re crucial for good sound.
Cartridge alignment: This is all about making sure your needle sits in the groove at the right angle. Use a protractor (you can print one online) to check the alignment.
It’s fiddly work, but worth it. The first time I aligned my cartridge properly, it was like someone had cleaned my ears out with Q-tips made of audio magic.
Tracking force: This is how heavily your stylus sits in the groove. Too light, and you’ll get distortion.
Too heavy, and you’ll wear out your records faster than a cat wears out a new scratching post. Follow your cartridge manufacturer’s recommendations, and invest in a tracking force gauge if you’re serious about your sound.
Now, let’s talk maintenance. A little TLC goes a long way in the world of vinyl:
- Clean your records: Invest in a good record cleaning solution and brush. Your records will thank you by not sounding like a bowl of Rice Krispies.
- Keep your stylus clean: A dirty stylus is like trying to listen to music through a sock. Use a stylus brush or cleaning gel regularly.
- Check your belt: If you have a belt-drive turntable, check the belt periodically for wear and tear. A stretched belt can make your music sound like it’s being played by a drunk DJ.
I learned the importance of maintenance the hard way when I pulled out my dad’s old records and tried to play them without cleaning. It sounded like someone was frying bacon in the background of every song.
Remember, optimizing your setup is an ongoing process. Don’t be afraid to experiment with different settings, and trust your ears.
After all, the goal is for the music to sound good to you, not to impress the audio snobs at the hi-fi store (though that can be fun too).
And hey, if all else fails, just crank up the volume and dance. Because at the end of the day, that’s what it’s all about, right?
Conclusion
Well, folks, we’ve come to the end of our vinyl voyage. We’ve navigated the treacherous waters of connecting turntables to receivers without phono inputs, troubleshot common issues, and even dipped our toes into the world of audio optimization.
It’s been quite a ride, hasn’t it?
Let’s recap our journey:
- We learned about phono inputs and why they matter.
- We explored three solutions to the no-phono-input problem:
- Using a separate phono preamp
- Opting for turntables with built-in preamps
- Employing a stereo preamp with a phono stage
- We tackled common issues like ground loop hum, low volume, and distortion.
- And finally, we dove into optimizing our setup for the best possible sound quality.
Remember, there’s no one-size-fits-all solution in the world of audio. What works for one person might not work for another.
It’s all about finding what sounds best to your ears and fits your lifestyle.
I encourage you to experiment, to try different setups, and most importantly, to enjoy the process. There’s something magical about dropping the needle on a record and hearing that first crackle before the music starts.
It’s a ritual that connects us to the music in a way that clicking ‘play’ on a digital file just can’t match.
And hey, don’t be discouraged if things don’t sound perfect right away. Like I said, I’ve made every mistake in the book (and probably invented a few new ones).
Each hiccup is just an opportunity to learn something new about your setup.
So go forth and spin those records! Whether you’re rediscovering old favorites or exploring new sounds, there’s a whole world of music waiting for you.
And now, armed with the knowledge from this guide, you’re ready to tackle any connection conundrum that comes your way.
Remember, at the end of the day, it’s all about the music. So crank up the volume, settle into your favorite listening spot, and let the vinyl vibes wash over you.
Happy listening, everyone!
Oh, and one last thing – don’t forget to share your vinyl adventures in the comments below. Did you successfully connect your turntable? What’s your favorite record to test a new setup? Let’s keep the conversation going and build a community of vinyl enthusiasts.
After all, music is meant to be shared!