How To Soundproof A Door (Seals, Mass, Upgrades — In The Right Order)

How to soundproof a door seems straightforward, but the door is almost always the weakest link in any room’s sound barrier — and most people try to fix the wrong part of it first. Adding foam panels or hanging a blanket on the door slab does almost nothing when there’s a half-inch gap at the bottom letting sound pour through like an open window.
The gap between a door and the floor, the crack between the door and the frame, and the hollow-core slab itself each leak sound in different ways. Fixing just one of those and ignoring the others leaves most of the noise problem untouched.
Once you address all three — seals, mass, and the door itself — in the right order, the noise reduction is dramatic and immediately obvious. The best part is that the most effective fixes are also the cheapest, so you won’t need to start with an expensive door replacement.
This guide walks through exactly why doors leak sound, how to diagnose your specific problem, which fixes deliver the most noise reduction per dollar, and when it actually makes sense to replace the door entirely. Every recommendation is ordered by impact so you spend money where it matters most.
To soundproof a door effectively, seal the gaps first — a door sweep at the bottom, weatherstripping around the frame, and acoustic caulk at the casing joints. These cheap fixes eliminate the air paths that leak the most sound. After sealing, add mass to the door slab with a dense barrier or upgrade to a solid-core door. A sealed solid-core door can reduce noise transmission by 25–30 decibels compared to a typical unsealed hollow-core door.
Diagnose Why The Door Is Failing
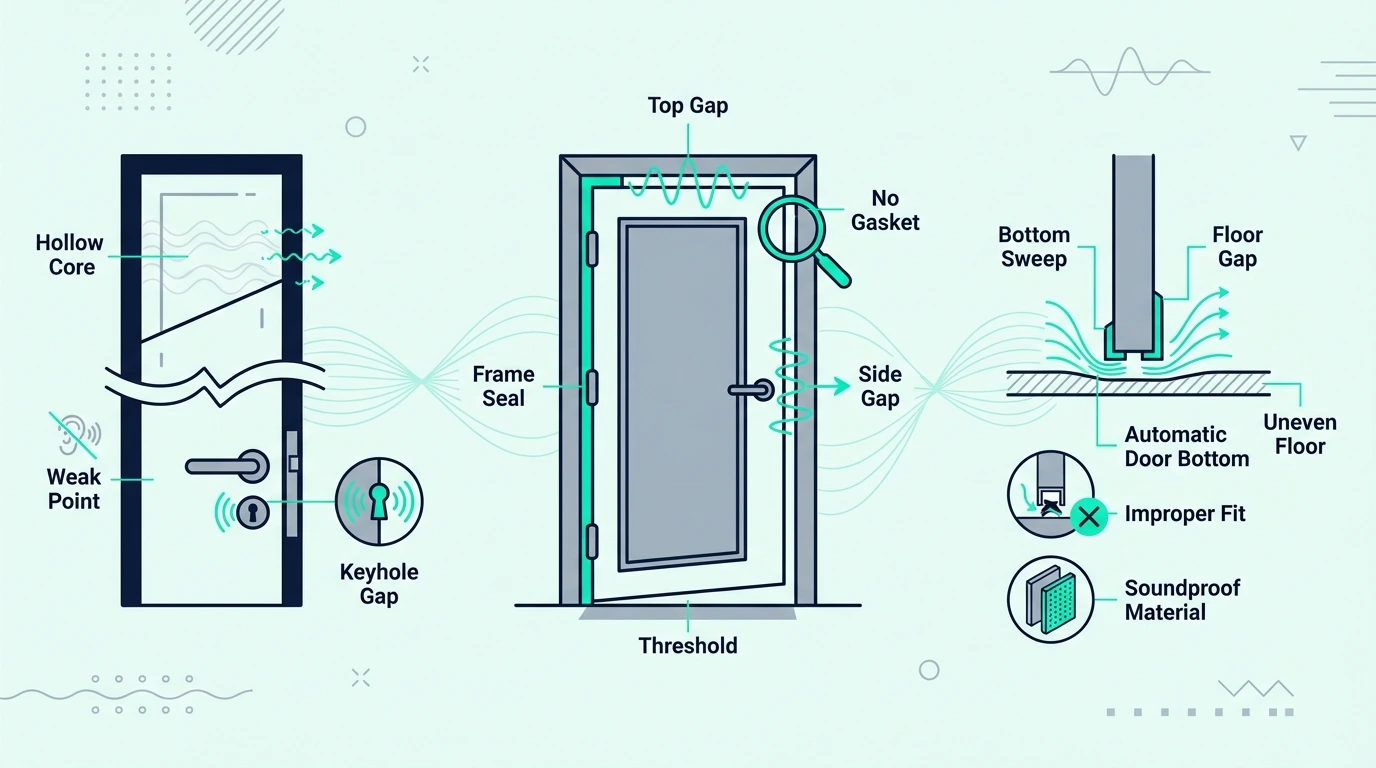
Every room is only as soundproof as its weakest point, and in most homes that weak point is the door. Understanding exactly where sound escapes explains why some fixes work and others waste your money.
Hollow-Core Slabs Leak Because They Have Almost No Mass
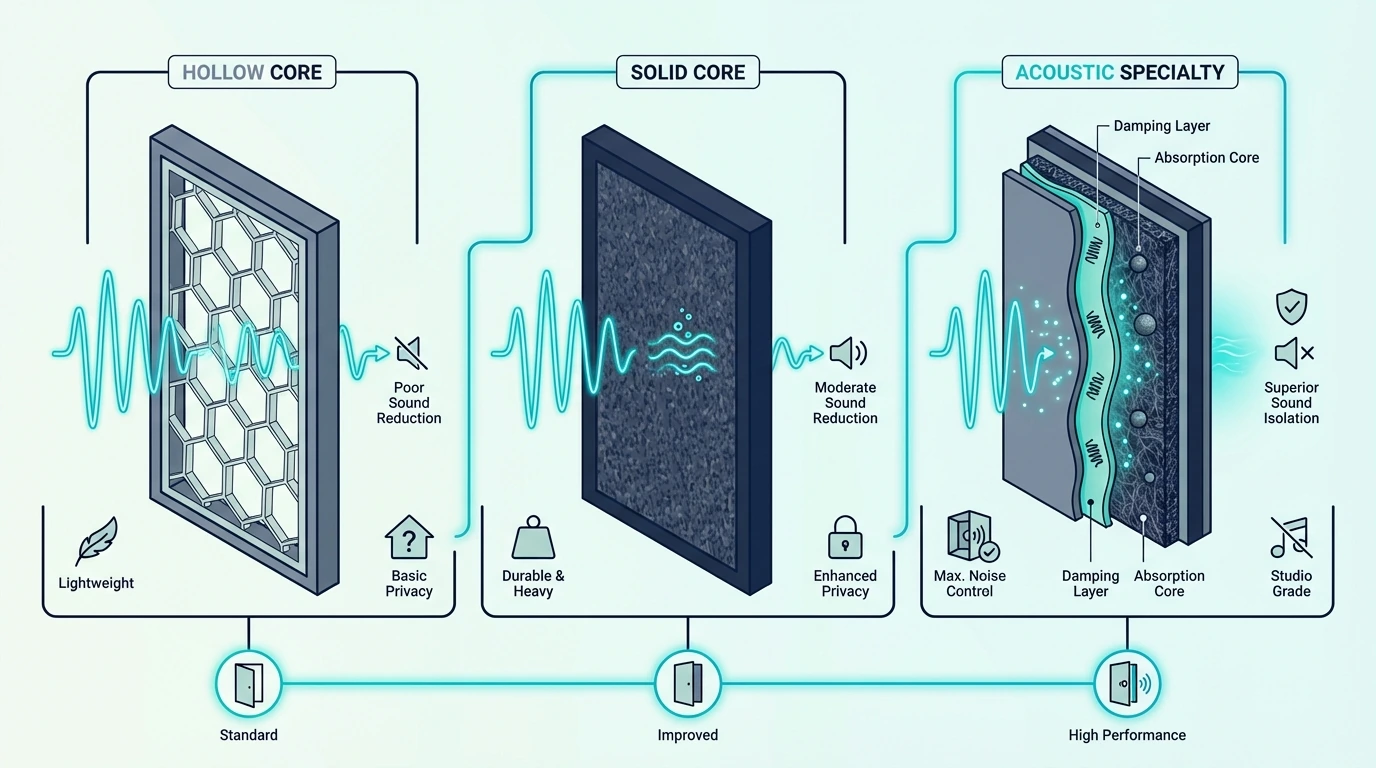
Hollow-core doors are the standard interior door in most homes built after the 1960s. They’re made from two thin sheets of hardboard or MDF over a cardboard honeycomb frame, and the entire assembly weighs around 15 to 20 pounds.
Soundproofing depends on mass — heavier materials resist vibration better and transmit less sound energy. A hollow-core door has almost no mass, which is why you can hear a normal conversation through one as clearly as if it were open.
The STC (Sound Transmission Class) rating of a typical hollow-core door is around 20 to 25, which means speech is easily understood through it. For comparison, a standard drywall wall with insulation rates around 35 to 40 STC, so the door is performing far worse than the wall it sits in.
Even a perfectly sealed hollow-core door will still transmit more sound than the surrounding wall. The slab itself vibrates like a drum head at speech frequencies, turning every conversation on the other side into clearly audible noise in your room.
If you knock on a hollow-core door and then knock on the wall next to it, you’ll hear the difference immediately. The door produces a thin, resonant thud while the wall gives a dull, flat sound. That resonant quality is the door vibrating freely — and every vibration radiates sound energy to the other side.
Gaps Around The Door Often Leak More Than The Slab
Here’s the part most people underestimate: the gaps around a door can leak more sound than the door slab itself. A gap of just 1% in a wall’s total surface area can let through 50% of the sound energy that would otherwise be blocked.
The gap at the bottom of the door is the biggest offender. Most interior doors have a visible gap between the bottom edge and the floor — sometimes a quarter inch, sometimes a full inch. That gap is acoustically transparent, meaning sound passes through it with almost zero resistance.
The side and top gaps between the door edge and the frame are smaller but still significant. When you close a standard interior door, there’s typically a sixteenth to an eighth inch of clearance on all three sides. Those thin gaps create a continuous air path that sound exploits.
Check this yourself right now: stand in a quiet room with the door closed and hold your hand along the bottom edge. If you feel air movement, sound is moving through the same path. The basics of room soundproofing always start with finding and sealing air gaps, and doors are where most of those gaps live.
The Noise Type Changes Which Fix Matters Most
Not all door noise problems are the same, and the fix depends on what you’re hearing. Voices from a hallway, bass from a neighboring apartment, and traffic noise from outside all behave differently when they hit a door.
Airborne noise — conversations, TV audio, music without heavy bass — travels as pressure waves through the air. Sealing gaps and adding mass to the door are highly effective against airborne noise because you’re eliminating air paths and adding resistance to vibration.
Low-frequency noise — bass, subwoofer rumble, deep mechanical hum — is much harder to stop with a door alone. Bass wavelengths are long, carry more energy, and pass through building materials that block higher frequencies. If bass is your main problem, door improvements will help but won’t solve it completely — you’ll also need to address the walls between you and the noise source.
Impact noise from the door itself — slamming, rattling in the frame, vibration transfer through the hinges — requires a different approach than noise passing through the door. Felt bumpers, adjusting the strike plate, and ensuring the door hangs plumb address impact noise directly.
Identifying your noise type before spending money saves you from buying the wrong fix. A quick test: if the noise gets dramatically quieter when you press a pillow firmly against the door face, the slab is the main path and mass will help. If the noise barely changes, the gaps are the primary leak and sealing comes first.
Understanding how soundproofing works at a basic level helps you make smarter decisions throughout the process. Mass, damping, decoupling, and absorption each solve a different part of the problem, and doors benefit primarily from mass and sealing.
Existing Doors Need Seals Before Mass
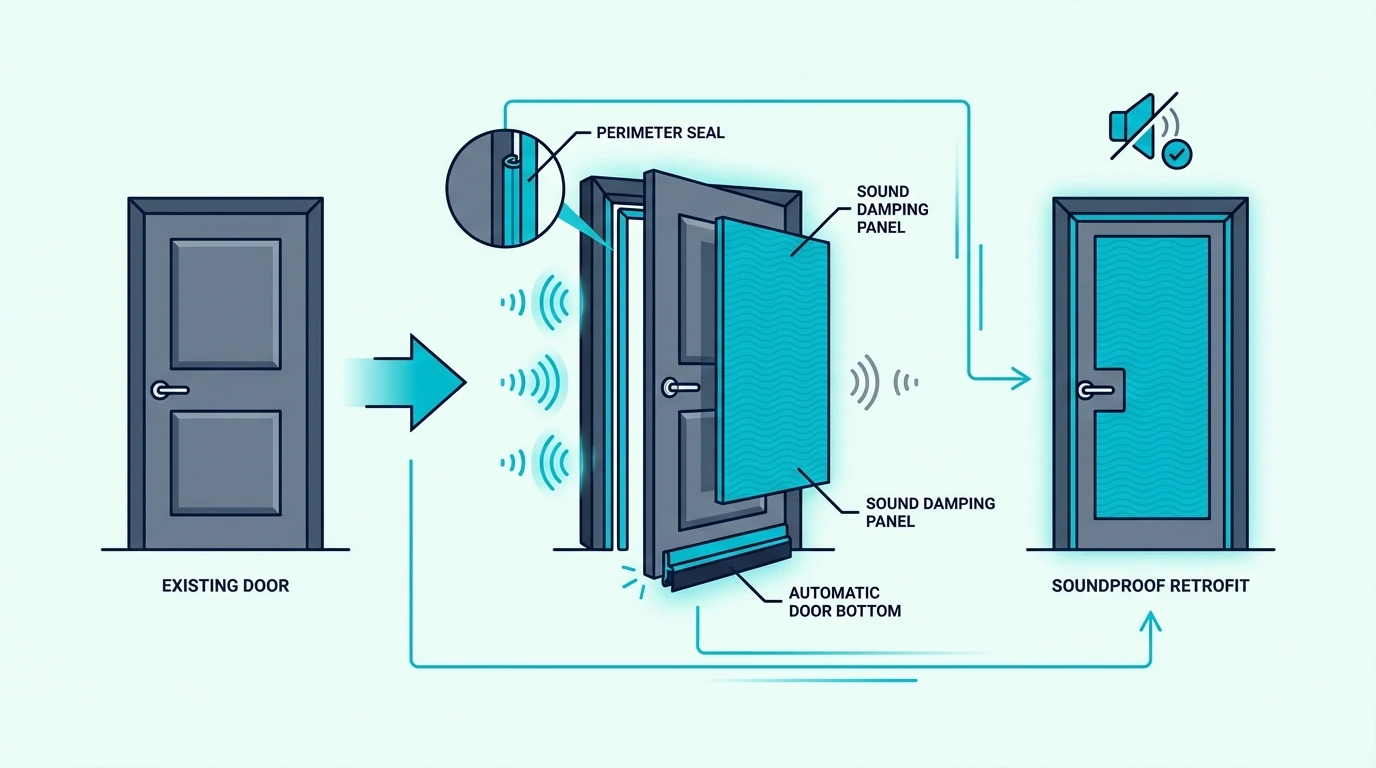
Now that you know where sound leaks and what type of noise you’re dealing with, the retrofit process follows a clear priority order. Start with seals because they’re cheap and effective, then add mass if sealing alone isn’t enough.
Seals And Sweeps Are The First Move
Always. Sealing the perimeter is the highest-value fix for any door soundproofing project, and it costs almost nothing compared to replacing the door.
A door sweep attaches to the bottom of the door and creates a seal against the floor or threshold when the door closes. The MAXTID Under Door Draft Stopper is a popular option with over 18,000 reviews because it screws directly to the door bottom and creates a reliable seal without adhesive that peels off over time.
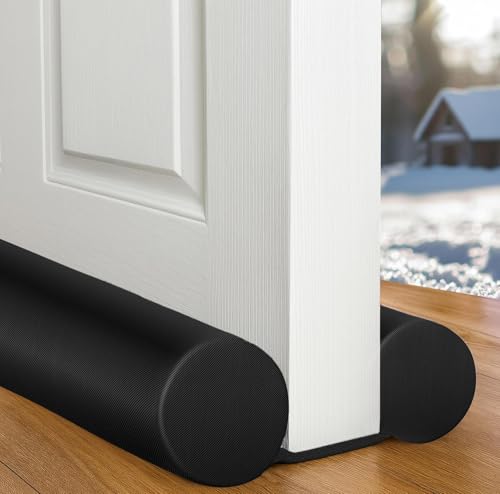
MAXTID Under Door Draft Stopper
Weatherstripping around the door frame handles the side and top gaps. Use compression-style seals — neoprene, EPDM rubber, or silicone — rather than the thin foam strips that come in cheap kits. Foam compresses permanently within a few months and stops sealing. The D-Shape Rubber Weather Stripping Seal uses EPDM rubber that maintains its compression over thousands of open-close cycles.
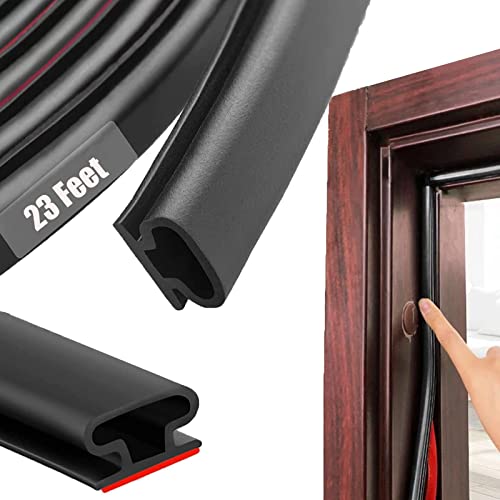
D-Shape Rubber Weather Stripping Seal
Together, a door sweep and perimeter weatherstripping can reduce sound leakage through the door assembly by 5 to 10 decibels — a difference you’ll notice immediately, especially with speech and TV audio.
The order matters: install the sweep first, then the weatherstripping. The sweep addresses the biggest single gap, so you’ll hear an immediate improvement that tells you whether the remaining side and top gaps need attention too. Many people find the sweep alone is enough for their needs and skip the weatherstripping entirely — though for best results, do both.
Mass Helps After The Gaps Are Controlled
After sealing, if you still hear too much noise through the door slab itself, adding mass is the next step. Mass resists vibration, and more mass means less sound energy passes through.
The simplest approach is a sheet of Trademark Soundproofing Mass Loaded Vinyl adhered directly to the door face. At one pound per square foot, MLV adds significant mass without excessive thickness, and it can be cut to fit around the doorknob and hinges.
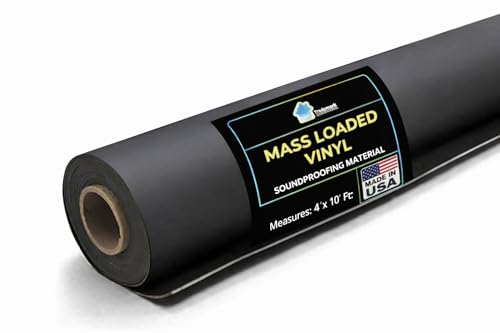
Trademark Soundproofing Mass Loaded Vinyl
A less expensive alternative is a sheet of 1/2-inch MDF (medium-density fiberboard) glued and screwed to the door face. MDF is dense, flat, and readily available at any hardware store. One sheet adds roughly 30 to 40 pounds to the door, which meaningfully increases its sound-blocking ability.
Be aware that adding mass changes the door’s weight, which affects how it hangs and swings. You may need to add a third hinge or upgrade to heavier-duty hinges if the door starts sagging. Check the hinge screws go into the stud, not just the door jamb, to handle the extra load.
The Frame Can Still Leak After The Slab Is Sealed
The door frame itself often has hidden gaps that leak sound even when the door is well-sealed. A product like Acoustical Caulk (29 oz) along the casing — where the door trim meets the wall — seals micro-gaps that aren’t visible but still transmit noise.
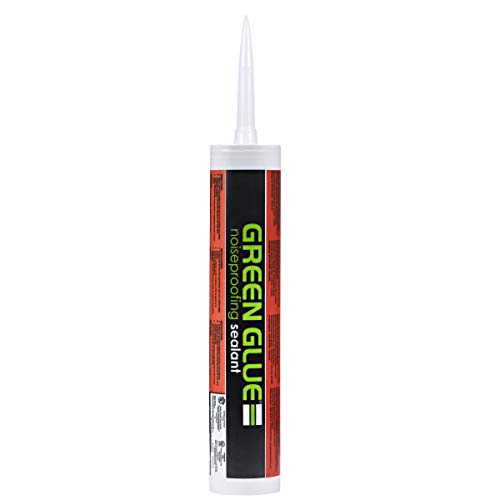
Acoustical Caulk (29 oz)
The threshold at the bottom of the door frame deserves attention too. If there’s no threshold (common on interior doors), the door sweep has to seal against bare floor, which is harder to make airtight. Adding an adjustable threshold gives the sweep a flat, consistent surface to seal against.
Check the gap between the door frame and the rough opening in the wall. Builders often leave this gap loosely filled with fiberglass or not sealed at all. Pull off the casing trim, fill the gap with acoustic caulk or low-expansion spray foam, and replace the trim.
Electrical outlets or light switches near the door are another flanking path. Sound that can’t get through the sealed door will find its way through the thinnest point in the nearby wall instead. Putty pads behind nearby outlet covers cost almost nothing and close this backdoor for sound.
Above-door transfer vents — the louvered grilles installed above some interior doors for HVAC airflow — are acoustic disasters. A transfer vent is essentially an open hole in the wall, and it can undo everything you’ve done to seal the door. If you have one, cover it with a solid plate or replace it with a sound-dampened transfer duct that maintains airflow while blocking the direct sound path.
Get Studio Tips Weekly
Join 5,000+ creators getting acoustic treatment advice every week.
No spam. Unsubscribe anytime.Cheap Door Fixes Work Best When They Target Leaks
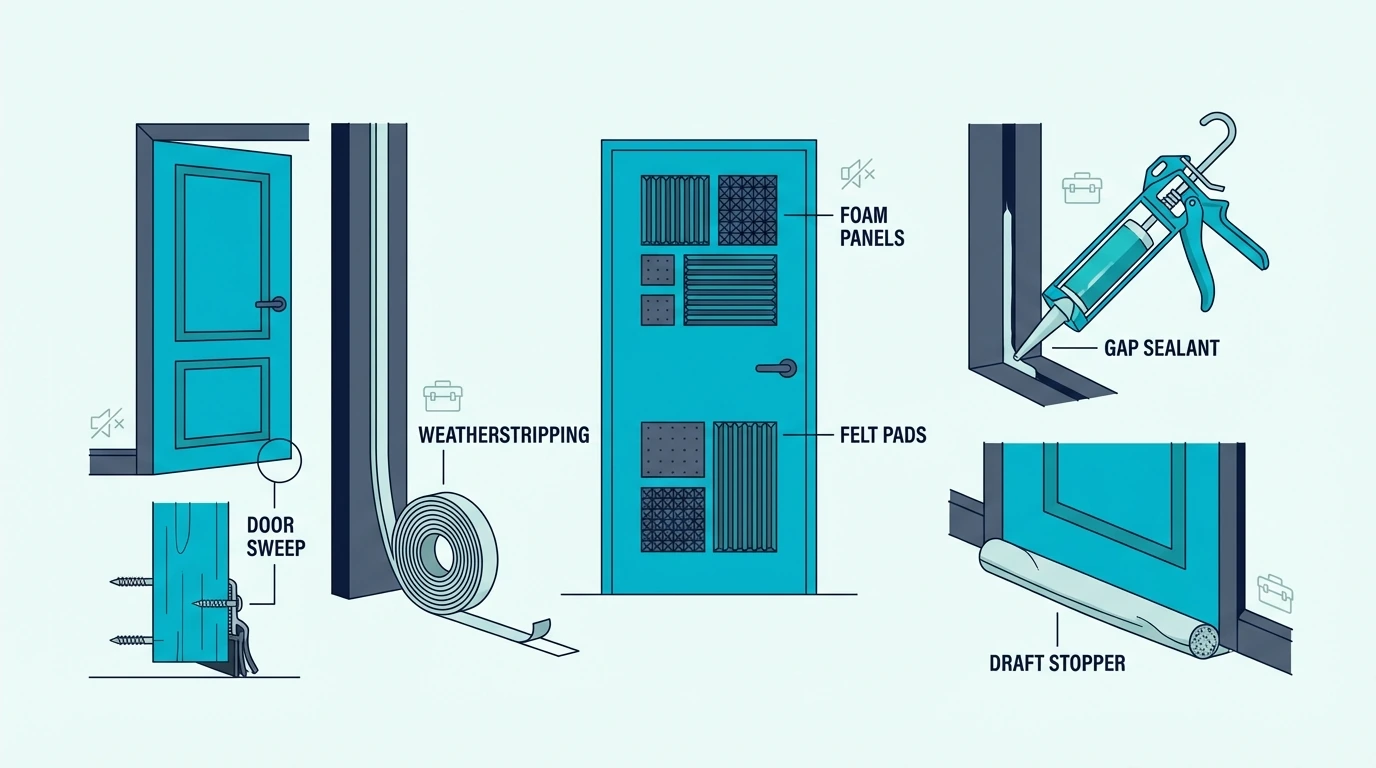
Those retrofit techniques range from inexpensive sealing to more substantial mass additions. If budget is the primary constraint, there’s a clear hierarchy of what delivers the most noise reduction per dollar spent.
Low-Cost Wins Start With The Sweep, Gasket, And Caulk
Door sweeps and weatherstripping together cost under thirty dollars and consistently deliver the biggest improvement for the least money. If you do nothing else, do this — it eliminates the paths that leak the most sound.
Acoustic caulk around the door casing is the second cheapest fix. A single tube costs a few dollars and takes 20 minutes to apply. Run it along every joint where trim meets wall and where trim meets door frame.
Adjusting the strike plate and latch so the door pulls tight against the weatherstripping when closed is free and makes the seal actually work. Many doors don’t close tightly enough for the weatherstripping to compress properly, which means you’ve installed seals that don’t seal.
Hanging a heavy moving blanket over the door during noisy hours is an ugly but effective temporary fix. A proper US Cargo Control Sound Dampening Blanket with grommets hangs on hooks above the door frame and adds a mass barrier that also absorbs some reflected sound.
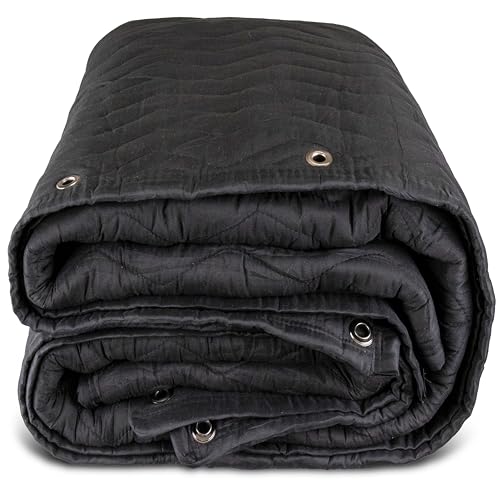
US Cargo Control Sound Dampening Blanket
Cheap Products Fail When They Add No Seal Or Mass
Thin adhesive foam strips marketed as “soundproofing tape” compress flat within weeks and stop creating a seal. They’re the most common waste of money in door soundproofing because they feel like they’re working when you first install them, then quietly fail.
Egg crate foam glued to a door does nothing measurable for soundproofing. Foam is lightweight and has no mass, so it cannot block sound transmission. It absorbs some echo inside the room, but that has zero effect on noise passing through the door.
Magnetic door seals designed for pet doors and draft prevention create a partial seal but can’t match the compression and coverage of proper weatherstripping. They work for drafts but don’t create the airtight barrier that sound reduction requires.
Door draft snakes — the weighted fabric tubes that sit on the floor against the bottom of the door — are marginally better than nothing but significantly worse than a proper door sweep. The snake doesn’t move with the door, so it creates a seal only when someone remembers to kick it into place.
Renters Need Removable Versions Of The Same Priorities
Renters face a specific constraint: every modification needs to be removable without damaging the door or frame. The good news is that the most effective fixes — sweeps and weatherstripping — install with screws or adhesive that leave minimal marks.
Adhesive-backed EPDM weatherstripping peels off cleanly from most painted or stained door frames when you move out. Clean the frame with rubbing alcohol before applying so it sticks properly during your tenancy, and use a hair dryer to soften the adhesive when it’s time to remove it.
For apartment-wide noise issues that go beyond the door, our guide to soundproofing an apartment covers the full range of renter-friendly fixes for walls, ceilings, and windows alongside doors.
A slide-under door sweep — the kind that wraps around the bottom of the door rather than screwing into it — works for apartment doors where you can’t drill holes. These sweeps use the door’s own weight to hold themselves in place and slide on and off in seconds.
Heavy curtains or sound blankets hung from a tension rod above the doorway add mass without touching the door or frame. They won’t match the performance of a proper seal-and-mass treatment, but they’re fully removable and provide meaningful noise reduction for bedrooms and home offices.
Upgrade The Slab Only After The Gaps Are Controlled
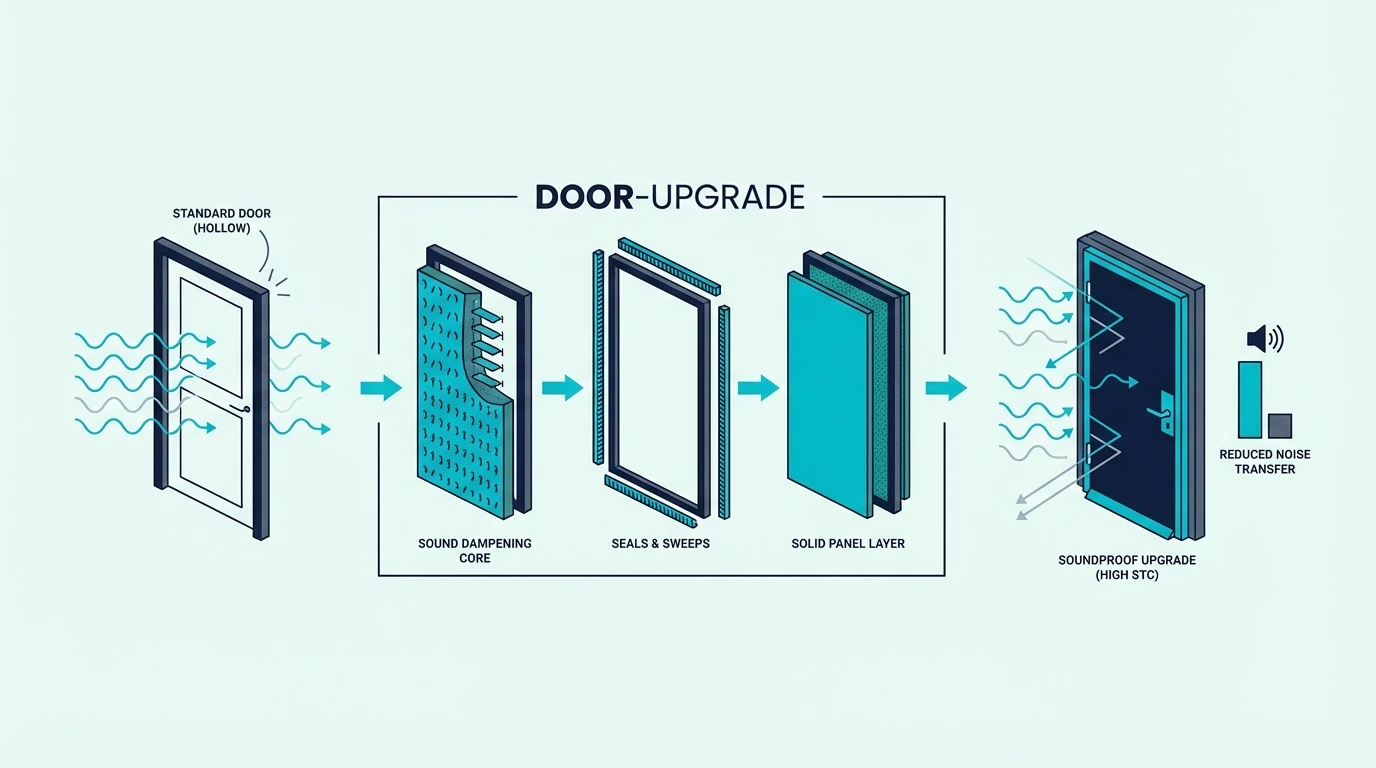
Those budget fixes handle sealing and temporary mass, but sometimes the door slab itself is the limiting factor. Once you’ve sealed every gap and the noise still comes through the door face, the slab needs to be heavier — and that means upgrading.
Solid-Core Doors Change The Baseline Fast
A solid-core door weighs 50 to 80 pounds compared to 15 to 20 pounds for a hollow-core door. That three-to-four-times increase in mass translates directly to better sound blocking.
In STC terms, a solid-core door typically rates 27 to 30 compared to 20 to 25 for hollow-core. When properly sealed with weatherstripping and a door sweep, a solid-core door can reach an effective STC of 30 to 35 — enough to reduce normal conversation to a barely audible murmur.
The improvement is most dramatic for mid-range and high-frequency sounds — voices, TV audio, and music. Low-frequency bass still passes through because even a solid-core door doesn’t have enough mass to resist those long wavelengths.
Solid-core doors come in two main types: particleboard core (cheaper, heavier) and solid wood (more expensive, slightly less heavy but better looking). For pure soundproofing performance, the particleboard core is usually the better value because it’s denser.
A quick way to check whether your door is hollow or solid: knock on it. A hollow-core door produces a distinct echoing thud, while a solid-core door produces a flat, dead knock with almost no resonance.
You can also check the weight — if you can swing the door with one finger on the edge, it’s almost certainly hollow.
Acoustic Doors Go Beyond A Heavy Residential Slab
A purpose-built soundproof door — the kind sold by acoustic manufacturers — goes beyond a solid core. These doors combine multiple features that residential doors lack: higher mass (some exceed 100 pounds), integrated perimeter seals with adjustable compression, automatic door bottoms that drop a seal when the door closes, and sometimes a limp-mass core designed specifically to dampen vibration.
Dedicated soundproof doors achieve STC ratings of 45 to 55, which is in the range where loud speech becomes inaudible. Studio doors and broadcast booth doors at the high end can exceed STC 60.
The construction is fundamentally different. Where a solid-core residential door is a single slab, an acoustic door may have a sand-filled core, a lead sheet layer, or a composite of dense materials separated by damping compounds. The frame and hinges are also heavier duty to support the weight.
These doors serve a specific market: recording studios, broadcast facilities, medical offices, and home theaters where genuine sound isolation is required. For most residential applications, a sealed solid-core door delivers enough improvement without the cost and complexity of a specialty door.
Replace The Door When The Slab Is Still The Bottleneck
Replace the door when sealing and mass additions have been done correctly and the noise is still unacceptable. If you’ve installed proper weatherstripping, a quality door sweep, and added MLV or MDF to the door face, and the noise level still bothers you, the door slab is the bottleneck.
A solid-core interior door costs roughly the same as the combined cost of weatherstripping, a sweep, and an MDF panel. If you’re starting from scratch on a hollow-core door, it often makes more financial sense to buy a solid-core replacement and seal it properly than to retrofit the hollow-core door with mass additions.
The installation matters as much as the door itself. A solid-core door that doesn’t close tightly against its seals — because the frame is warped, the hinges are misaligned, or the threshold is uneven — will perform worse than a well-sealed hollow-core door. Budget for proper hanging and alignment if you’re not confident doing it yourself.
For bedroom doors where the main complaint is voices or hallway noise, a sealed solid-core door is almost always sufficient. For music rooms and studios where heavy bass or high volume is involved, a dedicated acoustic door is the only way to reach the isolation level you actually need.
Different Door Types Fail In Different Ways
The retrofit techniques above work well for standard hinged interior doors, but not every door in your home swings on hinges. French doors, sliding doors, pocket doors, barn doors, and garage doors each have specific weaknesses that require different approaches.
French Doors Leak Through Glass And Meeting Seams
French doors are beautiful and terrible at blocking sound. The glass panels transmit noise easily because glass is thin and rigid, and the meeting point where the two doors close together creates a long vertical gap that’s nearly impossible to seal tightly.
The glass itself has an STC rating of around 26 to 28 for standard single-pane, which is comparable to a hollow-core door. Upgrading to laminated glass or adding a secondary glazing panel improves this, but the real problem is the seal between the two doors.
Astragal seals — vertical strips that mount on the edge of one door to overlap the gap where both doors meet — help close the center gap. Pair them with compression weatherstripping on all four sides of each door’s frame, plus a coordinated door sweep or threshold system at the bottom.
For rooms where you need serious noise isolation, French doors may need to be replaced entirely with a solid soundproof interior door. If keeping the French door aesthetic is essential, a second set of solid doors or acoustic window inserts mounted behind the French doors creates a double-barrier system with a meaningful air gap.
Sliding And Pocket Doors Struggle To Compress A Seal
Sliding doors — including closet sliders, barn doors, and patio sliders — share one fundamental problem: they don’t compress against a seal when they close. A hinged door pulls tight against weatherstripping when the latch engages, but a sliding door just parks next to the frame.
Barn doors mounted on exterior tracks are the worst offenders. They hang in front of the wall rather than sitting inside a frame, leaving gaps on all four sides — top, bottom, and both edges. Sound leaks around every edge because there’s no mechanism to create compression.
Pocket doors that slide into the wall have a different issue: the pocket cavity creates a resonant space inside the wall that can actually amplify certain frequencies. The door itself has no seal at all when closed — it just sits loosely in the opening. If you’re considering a pocket door for a new build, understand that you’re trading acoustic performance for space savings — a tradeoff that makes sense for closets but not for rooms where noise isolation matters.
Improving any sliding door starts with adding brush or compression seals to the top and sides, and a floor-mounted seal or guide at the bottom. For barn doors, mounting the track closer to the wall and adding perimeter weatherstripping to the wall surface around the opening helps close the edge gaps. None of these fixes will match a sealed hinged door, but they can reduce noise meaningfully if combined with the same budget sealing techniques you’d use on a standard hinged door.
If you’re choosing between door styles for a new installation, hinged doors always outperform sliding, pocket, and barn doors for sound isolation. The compression seal mechanism of a hinged door is the key advantage — no sliding door design can replicate it without complex and expensive modifications.
Garage And Exterior Doors Need Different Expectations
Garage doors present unique challenges because of their size, segmented construction, and the gaps between panels. A standard metal garage door has an STC of around 20 to 25 — similar to a hollow-core interior door but covering a much larger opening.
The gaps between garage door panels flex and shift every time the door opens and closes, which means rigid seals break down quickly. Rubber seals designed specifically for garage door panel joints are the first line of defense, along with a proper bottom seal that conforms to uneven garage floors.
Insulated garage doors with polyurethane or polystyrene cores perform significantly better than single-skin metal doors. If you’re using your garage as a workshop, band rehearsal space, or home gym and noise is an issue, upgrading to an insulated door is the most impactful single change.
Exterior entry doors are already heavier than interior doors — most are solid wood, fiberglass, or steel — so the slab itself is less of a problem. The weak points are usually the weatherstripping (which degrades with sun and weather exposure), the threshold seal, and the gap under the door. Inspect and replace exterior seals annually, especially the door sweep and the compression gasket in the frame.
Front doors that face a busy street benefit from a storm door as a secondary barrier. The air gap between the storm door and the entry door creates a buffer zone that reduces both outside noise and thermal transfer.
If your front door has sidelights (the narrow glass panels flanking many entry doors), those are often the weakest point in the entry assembly — even weaker than the door itself. Treat sidelights the same way you’d treat a glass panel for soundproofing: seal the frames, and consider adding a secondary glazing panel or acoustic window insert if outside noise is severe.
Accessories Decide Whether The Retrofit Actually Works
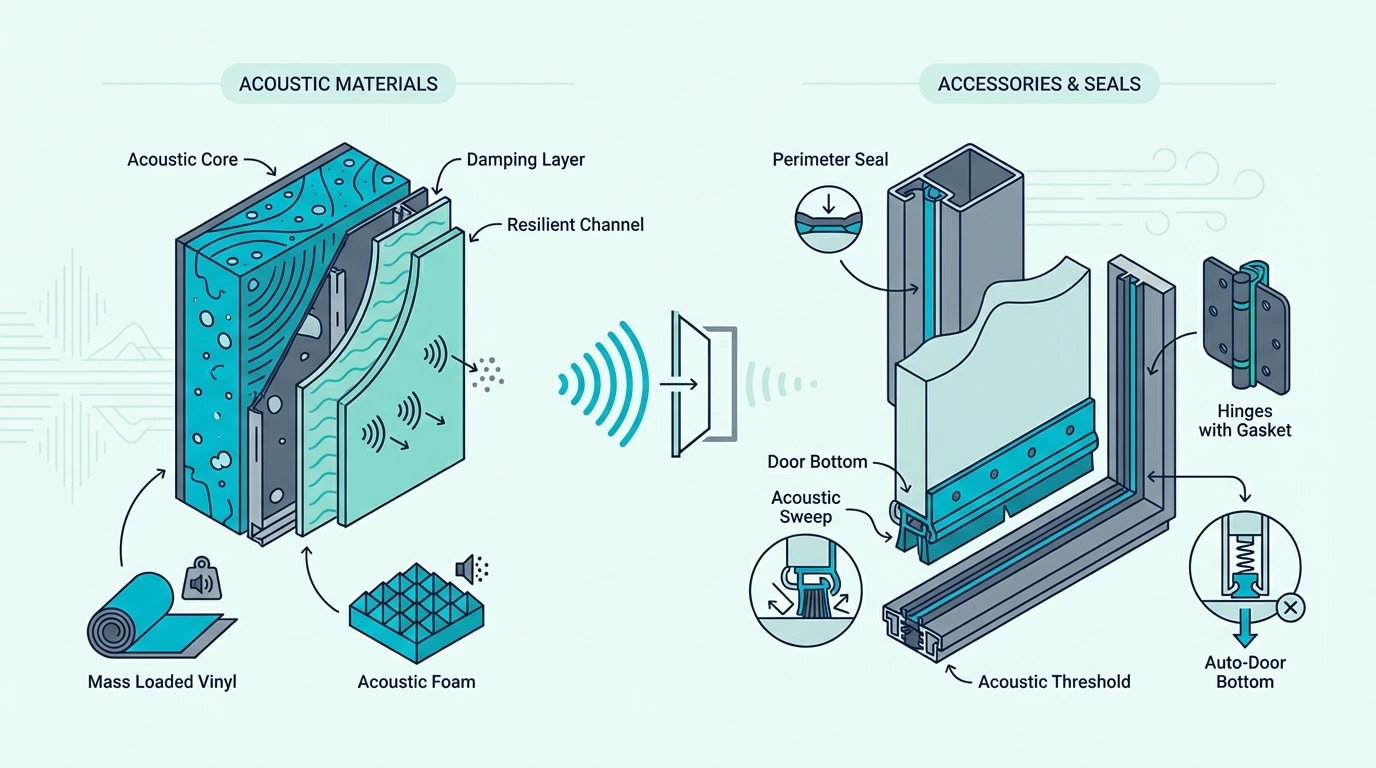
Whether you’re sealing an existing door or upgrading to a new one, the accessories and materials you choose determine how well the entire assembly performs. Here’s what each component actually does and when it’s worth the investment.
Sweeps And Thresholds Close The Biggest Leak Path
A door sweep seals the gap between the bottom of the door and the surface below it. A threshold provides the flat, elevated surface that the sweep seals against. Together, they create an airtight barrier at the largest opening in the door assembly.
Without a threshold, the sweep has to seal against whatever floor surface is there — carpet, hardwood, tile, or an uneven transition strip. Carpet compresses unevenly, hardwood may have gaps between planks, and transition strips create ridges. None of these provide a consistent sealing surface.
An adjustable aluminum threshold screws to the floor and lets you dial in the exact height for a tight seal. The best combination is an automatic door bottom (a seal that drops down when the door closes and retracts when it opens) paired with an adjustable threshold. This creates a tight seal when closed without dragging on the floor when the door swings.
For interior doors, where a raised threshold might be a tripping hazard, a surface-mount door sweep that seals against the flat floor is the practical compromise. It won’t create as tight a seal as a threshold-and-automatic-bottom combination, but it’s far better than the bare gap most doors have.
Gaskets Only Work When The Compression Is Right
A door gasket is weatherstripping specifically designed for the top and side gaps between the door and the frame. Unlike cheap foam strips, a proper gasket uses compression seals — typically kerf-in (slotted into a groove in the frame) or surface-mount — that maintain their shape and spring-back over time.
The gasket’s job is to create an airtight perimeter seal when the door latches closed. For this to work, the door must actually compress the gasket when it closes, which means the gasket needs to be the right thickness for your door’s clearance. Too thin and it won’t make contact; too thick and the door won’t latch.
Kerf-in gaskets sit inside a groove cut into the door stop and are nearly invisible when installed. Surface-mount gaskets attach to the face of the door stop with screws or adhesive and are visible but easier to install without special tools.
For soundproofing, look for gaskets rated for acoustic applications rather than just weatherproofing. Acoustic gaskets use denser rubber compounds and are designed to maintain consistent compression across the full perimeter, which matters more for sound blocking than thermal sealing. The same principle applies to choosing a door sweep — look for compression-style sweeps with dense rubber or silicone blades rather than brush or felt types.
The difference between acoustic-rated and standard weatherstripping isn’t always obvious from the packaging. Check the material — silicone and dense EPDM outperform foam and felt.
Check the profile — D-shape and P-shape compress more evenly than flat or hollow profiles. And check the mounting method — kerf-in and screw-mount last longer than adhesive-only options.
Blankets And Panels Are Support Layers, Not Seal Replacements
Sound blankets hung over a door add mass and some absorption, which reduces both transmitted sound and reflected sound. They’re a legitimate temporary fix for rental spaces, studios, and situations where you can’t modify the door permanently.
The limitation is that a blanket draped over a door doesn’t seal the gaps. Sound leaks around the blanket’s edges, through the gap at the bottom, and through any space between the blanket and the door. A blanket works best when combined with proper sealing — not as a replacement for it.
Rigid door panels — sheets of MDF, plywood, or mass-loaded vinyl cut to door size and mounted on the surface — add permanent mass. They’re more effective than blankets because they physically become part of the door, but they also add weight that affects how the door hangs.
Foam “soundproofing” panels sold for doors are the least effective option. They reduce echo inside the room but don’t add enough mass to block sound transmission — soundproof foam doesn’t work the way most people expect. If a product weighs next to nothing and advertises “soundproofing” for doors, it’s solving a different problem than the one you have.
The best material choice depends on whether your upgrade is temporary or permanent. For temporary or renter-friendly fixes, heavy blankets and removable sweeps are the practical choice. For permanent upgrades, MLV or MDF bonded to the door slab combined with purpose-built soundproofing materials for the seals delivers the most reliable long-term performance.
Door Costs Scale With The Performance Target
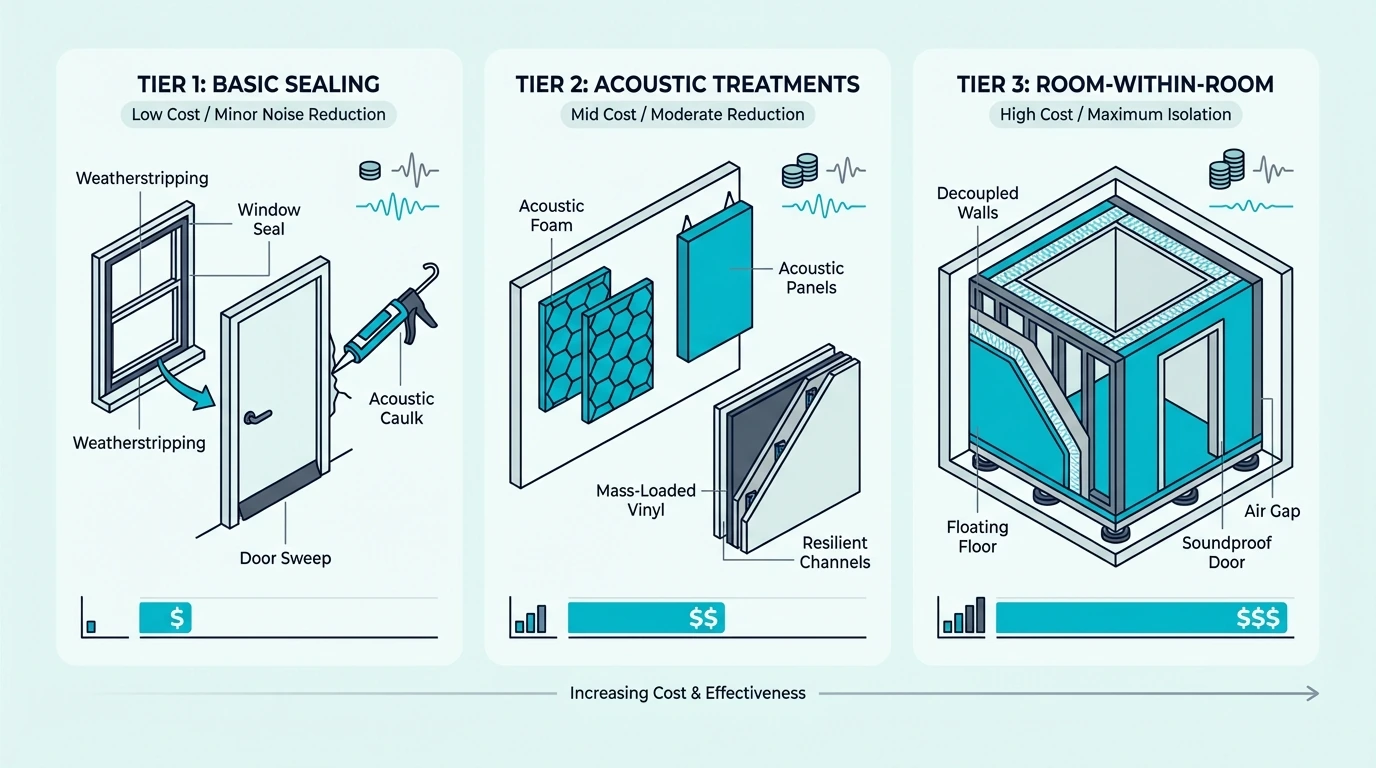
Those materials and accessories span a wide price range, and understanding what each tier delivers helps you budget for the result you actually need. Door soundproofing scales predictably from cheap DIY to professional installation.
Basic Retrofits Buy The Cheapest Real Improvement
A basic retrofit — door sweep, weatherstripping, and acoustic caulk — runs between twenty and fifty dollars for a single door. This is the starting point for everyone, regardless of budget, because it addresses the gaps that leak the most sound.
The tools required are minimal: a screwdriver, tape measure, utility knife, and caulk gun. Most people complete the installation in under an hour, including cutting the sweep to length and fitting the weatherstripping.
At this price point, you should expect a noticeable reduction in speech and TV audio coming through the door. The improvement won’t be dramatic enough for a recording studio, but it’s typically sufficient for bedroom privacy, home office quiet, and reducing hallway noise in apartments.
If you’re upgrading from a door with no sealing at all — which is the default state of most interior doors — this basic retrofit is the single biggest bang-for-your-buck improvement in home soundproofing. The same budget-friendly approach applies to every surface in a room, but doors give the fastest return because they start with the biggest gaps.
Mid-Level Budgets Buy More Slab Mass Or A Better Door
A mid-level upgrade adds mass to the sealed door. A sheet of 1/2-inch MDF for the door face costs roughly twenty to thirty dollars. MLV (mass loaded vinyl) costs more — typically seventy to one hundred and fifty dollars depending on the size of the door and the weight of the vinyl.
If you’re replacing the door entirely, a solid-core interior door ranges from one hundred to three hundred dollars depending on size, style, and material. Add another fifty to one hundred dollars for a new door sweep, threshold, and perimeter gaskets.
Total cost for a properly sealed solid-core door installation — including the door, hardware, sweep, gaskets, and acoustic caulk — typically falls between two hundred and four hundred dollars. If you’re installing it yourself, that’s all materials. Hiring a carpenter to hang the door adds another one hundred fifty to three hundred dollars.
This mid-range investment gets you into the STC 30-to-35 range when done correctly, which is where normal conversation becomes difficult to hear through the closed door. For most residential soundproofing goals, this tier delivers the best balance of cost and performance.
The exact cost depends on how many doors you’re treating. A single bedroom door is straightforward, but a whole-house upgrade — every bedroom, bathroom, and home office — multiplies the material cost while reducing the per-door labor if you batch the work. For a full-house estimate, see our breakdown of soundproofing costs by room.
Pros Matter When The Frame Or Performance Target Gets Serious
Call a professional when the door frame is warped, the rough opening is significantly out of square, or you need to install a heavy acoustic door that requires reinforced framing. A solid-core door weighing 60-plus pounds needs proper support, and a specialty acoustic door over 100 pounds requires professional installation.
Professional acousticians make sense when you need verified performance — for example, a home recording studio that needs to meet a specific STC target. An acoustician can measure the door assembly’s actual sound transmission, identify flanking paths you might miss, and specify the exact products and installation details needed.
Frame modifications — adding a threshold where none exists, deepening the door stop to accommodate thicker gaskets, or rebuilding the rough opening to eliminate air gaps — are carpentry tasks that benefit from professional skill. A poorly hung door with great sealing will still underperform because the seals won’t compress evenly.
For home theater rooms and drum rooms, professional installation is almost always necessary because the noise levels are extreme and the tolerance for sound leakage is near zero. These rooms typically need a dedicated acoustic door assembly — not just a solid-core residential door — and the framing must be reinforced to support the weight.
The cost for professional door soundproofing installation ranges from a few hundred dollars for hanging and sealing a standard solid-core door to several thousand dollars for a full acoustic door assembly with frame modifications. The investment makes sense when you’ve tried DIY approaches and can’t reach the performance level you need.
The Bottom Line
How to soundproof a door gets much simpler once you answer one question first: is the real leak in the gaps, in the slab, or in the whole door assembly?
If you can see or feel gaps, start with the sweep, the frame seals, and the casing leaks.
If the door is sealed and still sounds thin, add mass or move to a solid-core slab.
If the room needs high isolation for bass, drums, or theater-level volume, expect the solution to move beyond a normal residential door.
That is the rule that keeps you from wasting money in the wrong order.
Treat the door first because it is often the weakest link, then compare the remaining noise against how to soundproof a room, soundproofing a wall, soundproofing windows, soundproofing a ceiling, and soundproofing a floor if the leak is spreading through the rest of the room shell.
Frequently Asked Questions
How Do You Soundproof An Existing Door?
Start by sealing every gap: install a door sweep at the bottom, apply compression weatherstripping around the frame, and run acoustic caulk along the casing joints. After sealing, add mass to the door slab with a sheet of MDF or mass-loaded vinyl glued to the surface. These two steps — sealing and mass — address the two primary paths sound uses to pass through a door.
What Is The Cheapest Soundproofing Option For A Door?
A door sweep and D-profile weatherstripping together cost under thirty dollars and consistently deliver the biggest improvement for the least money. They seal the air gaps that leak the most sound, and the installation takes under an hour with basic tools.
How Much Does It Cost To Soundproof A Door?
Basic DIY sealing (sweep, weatherstripping, caulk) costs twenty to fifty dollars. Adding a mass layer like MDF or MLV brings the total to one hundred to two hundred dollars. A full solid-core door replacement with proper sealing runs two hundred to four hundred dollars in materials, or five hundred to seven hundred dollars with professional installation.
Is It Better To Replace A Door Or Retrofit It?
Retrofit first. Sealing a hollow-core door gives you an immediate baseline improvement for minimal cost.
If the sealed door still transmits too much noise, replace it with a solid-core model — but keep the seals you installed because the new door needs them too. The only reason to replace before sealing is if the existing door is physically damaged or won’t close properly.