How to Put Up Soundproof Foam (Without Wrecking Your Walls)
You’ve got the box of foam wedges open on the floor and you’re about to start sticking them to the wall.
Stop for two minutes, because the two decisions you’re about to make — where they go, and what holds them up — are the difference between a room that sounds noticeably better and a security deposit you don’t get back.
Most people work out how to put up soundproof foam by covering a whole wall evenly with spray adhesive, then end up with a dead-sounding room and paint peeling off in sheets a year later.
Do it properly and that boxy, roomy tail disappears from your recordings, calls get easier to follow, and every panel comes off the wall cleanly whenever you want it to.
Finding the right spots takes about two minutes with a hand mirror, so we’ll start there — right after one thing worth being sure about.
What Does Acoustic Foam Actually Do?
That thing worth being sure about comes first, because it decides whether any of this helps you.
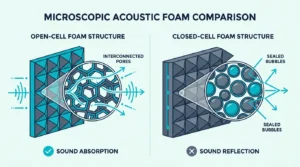
The foam you’re about to put up absorbs sound inside the room. It does not block sound leaving it.
If the goal is stopping a neighbor hearing you, foam won’t do it, and no amount of it will. What acoustic foam actually does sets out why, and treating the wall itself is the route to blocking.
If the goal is stopping your room sounding harsh and echoey on a recording or a call, foam does that well and cheaply.
Worth being sure which problem you have before you start sticking things to walls.
Where Should You Put Acoustic Foam?
With that settled, the placement question is where most of the benefit hides.
The instinct is to cover as much wall as possible, evenly, like tiling. That wastes foam and misses the point.
Sound reaches your ears twice. Straight from the source, and a fraction of a second later after bouncing off a surface.
That second arrival is what smears speech and makes a room sound boxy. So the panels want to go where those bounces happen, not spread thinly everywhere.
The mirror trick finds them in about two minutes. Sit where you normally sit, and have someone slide a small mirror along the side wall.
Wherever you can see the speaker — or the microphone position — reflected in the mirror, that spot is bouncing sound directly at you. Mark it.
Repeat on the other wall, the wall behind the speakers, and the ceiling directly overhead. Those marks are your panel positions.
Arranging foam around them goes into layout in more detail. Treating those points first gives you most of the available improvement from a fraction of the coverage.
Get Studio Tips Weekly
Join 5,000+ creators getting acoustic treatment advice every week.
No spam. Unsubscribe anytime.Should Foam Panels Touch Each Other?
Those marked spots raise an obvious follow-up — do the panels butt together or not?
Spaced panels outperform one solid block of the same area.
Sound diffracts around the edges of each panel and gets absorbed at the sides as well as the face. A checkerboard with gaps between panels does more work than the same panels butted together.
It also stops the room going acoustically dead, which is a real risk in a small space. A room with every surface covered sounds unnatural and unpleasant to work in.
Voices feel close and airless. Some reflection is what makes a room sound like a room.
Should You Leave an Air Gap Behind Foam?
Spacing panels apart helps sideways; spacing them off the wall helps downwards, into the lower frequencies.
A panel mounted flat against the wall absorbs high frequencies well and lower ones poorly. Mount the same panel with a small air gap behind it and its reach extends downward.
The physics is simple enough. Absorption depends on air moving through the material, and air movement is at its minimum right at a solid surface.
Standing the panel off the wall puts it where there’s more movement to absorb. That costs nothing but a spacer.
It’s the difference between foam that tames sibilance and foam that also does something for the body of a voice.
Wall Prep Decides Whether Anything Stays Up
You know where the panels go now, so the second decision from the start is what holds them there.
Almost every foam panel that falls off a wall does so because of what was underneath it.
Dust is the usual culprit. A wall that looks clean carries a fine layer, and adhesive bonds to that instead of to the wall.
The panel comes down weeks later with a gray film on its back. Wipe the area with isopropyl alcohol on a cloth and let it dry fully before anything touches it.
Freshly painted walls are the second trap. Emulsion keeps curing for weeks after it feels dry, and adhesive applied too early bonds to a surface that’s still moving.
If the room has just been decorated, wait.
Temperature matters more than people expect. Most adhesives are specified around 70°F and perform poorly in a cold garage or unheated loft.
Warm the space for a few hours first, or the bond will be weak from the start. Textured wallpaper, flaking paint and limewash won’t hold anything at all.
How to Put Up Soundproof Foam: Choosing a Fixing
With a clean, dry, warm wall you have real options, and they differ mostly in what they do to your paint.
Acoustic foam weighs very little, which widens your options compared with hanging heavy panels.
Spray adhesive gives the strongest and most permanent bond, and takes the wall surface with it on removal.
Reserve it for a wall you own and don’t intend to redecorate. Spray the panel rather than the wall, and let it go tacky before contact instead of pressing it on wet.
Double-sided foam tape rated for the weight works well and is the most common compromise. Purpose-made double-sided adhesive squares hold better than general-purpose tape and come off more cleanly.
Use several squares spread across the panel rather than one large piece in the middle. Otherwise the corners lift.
Hook-and-loop strips allow repositioning, which is genuinely useful because you’ll want to move panels after listening to the result. Large picture-hanging strips are the usual choice in rentals.
Mounting putty holds light foam and leaves the least trace, though it can stain over long periods on porous paint.
Whichever you choose, test one on an inconspicuous patch and leave it several days before committing. Tapes that promise clean removal frequently lift paint anyway.
Mount It to a Board If You’re Renting
If none of those fixings sound like something you want on a rented wall, there’s a way around all of them.
Fixing foam to a lightweight board and hanging the board solves several problems at once.
The wall stays untouched. Panels reposition freely while you tune the room by ear.
That air gap from earlier comes free, because the board naturally stands the foam off the surface. And the whole thing lifts off in one piece at the end of a tenancy.
Thin plywood, hardboard or even stiff foam board all work. Attach the foam to the board with spray adhesive — permanence is fine here, because the board is disposable.
Hang the board on picture hooks, adhesive strips or a French cleat depending on weight. Slightly more effort at the start, and it avoids nearly all of the regret.
How Do You Fix Acoustic Foam to a Ceiling?
Everything above assumed a vertical surface, and ceilings change the maths.
Gravity works on foam continuously. Adhesive that holds indefinitely on a wall will eventually release on a ceiling.
For overhead panels, use adhesive together with something mechanical. A few plastic push pins through the foam into the drywall, or a board fixed with proper ceiling fixings.
Panels falling from a ceiling aren’t dangerous given the weight. They will fall, though, usually onto the equipment you treated the room to protect.
Do You Need Foam on the Ceiling?
Awkward as it is, that overhead surface is worth the trouble.
The reflection directly above the space between you and your speakers or microphone is one of the strongest in the room.
It’s also the one people skip, because ceilings are awkward.
If you treat one surface beyond the side walls, make it that one. A single panel overhead often does more than several more added to a wall that’s already partly covered.
How Much Acoustic Foam Do You Need?
Knowing where panels go and how to fix them leaves one question: how many to buy.
Two rules of thumb save both money and a dead-sounding room.
Coverage. Somewhere between 15% and 30% of total wall area, concentrated at the reflection points, does the useful work in a typical small room.
Beyond that the returns fall away quickly.
Start low and listen. Put up the mirror-point panels first, then live with the room for a few days before adding more.
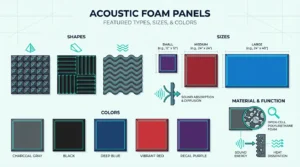
It’s far easier to add a panel than to recover a room you’ve made oppressive. A modest set of 2-inch foam panels at the reflection points beats a 52-pack spread thin.
What Mistakes Waste the Most Money?
Most of the wasted money in this category comes from four specific errors, and you’ve met three of them already.
Buying foam to stop noise reaching a neighbor. It can’t, and no quantity changes that.
Covering one wall completely and leaving the opposite wall bare. Reflections bounce between parallel surfaces, so treating one side of the pair leaves the problem largely intact.
Very thin foam for a bass problem. Thin foam addresses high frequencies.
Low end needs corner treatment — corner bass traps rather than more wall tiles. The alternatives to foam are worth reading if bass is the real complaint.
Gluing directly to a rented wall. Predictable, expensive, and entirely avoidable with a board.
How Do You Know It Worked?
Once the panels are up, there’s a test that takes one second and needs no equipment.
Clap once in the middle of the room. Before treatment you’ll usually hear a short ringing tail after the clap.
Afterwards that tail should be shorter, and the clap should sound flatter and duller.
That’s the whole effect. It won’t be quieter from outside the room — it was never going to be.
Recordings will sound closer and cleaner, calls will be easier to follow, and the room will feel calmer to work in.