Where To Put Acoustic Treatment (Strategic Placement That Actually Improves Your Room)
Where to put acoustic treatment matters more than how much you buy — yes, panels help, but four panels in the right spots outperform twelve scattered randomly because acoustic problems are location-specific.
Random placement treats symptoms you can hear (echo, brightness) while missing the real damage at first reflection points and in corners. Your room sounds different, but your mixes still do not translate because the comb filtering and bass buildup remain untouched.
The fix is targeting the exact wall and ceiling positions where early reflections and low-frequency modes do the most harm — positions you can find in minutes with the mirror trick.
Below, this guide covers those positions in priority order and breaks down how placement changes for acoustic treatment in home studios, home theaters, and offices.
Place acoustic treatment at first reflection points on side walls first (use the mirror trick to find them), then add bass traps in corners where walls meet walls and ceiling. A ceiling cloud between your monitors and listening position handles overhead reflections. Rear wall treatment depends on room size — absorption for small rooms, diffusion for larger ones. Symmetrical placement is mandatory for mixing rooms. Mount panels at ear level (seated), and leave an air gap behind panels for better low-frequency absorption.
Where To Put Acoustic Treatment — And Why Placement Matters More Than Quantity
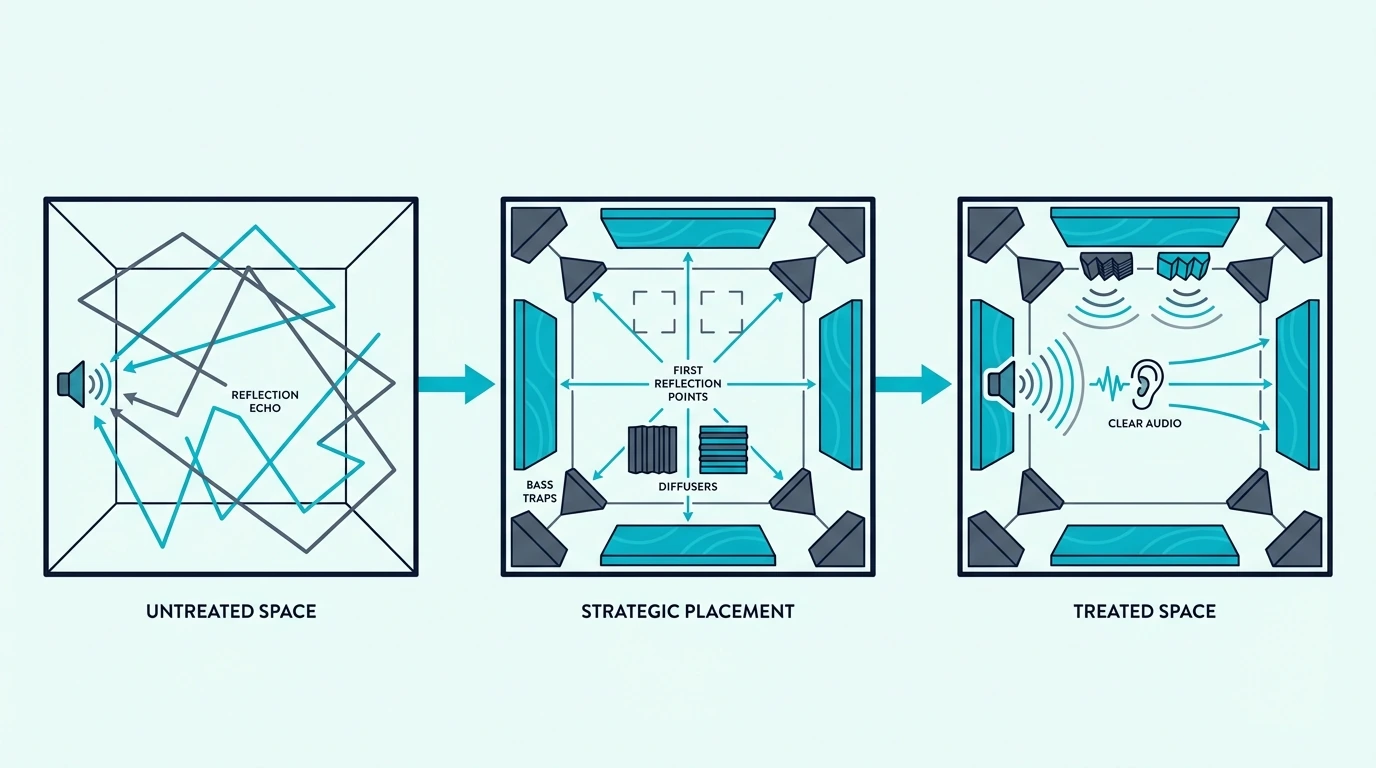
The most common mistake in acoustic treatment is buying a pack of foam wedges and sticking them evenly across every wall. That approach absorbs mid and high frequencies uniformly, making the room sound dead without solving the specific problems that ruin recordings and mixes.
Strategic placement works because acoustic problems are location-specific. Early reflections arrive from predictable angles.
Bass builds up in corners. Flutter echo happens between specific parallel surfaces.
When you place panels at these problem spots, each panel eliminates a measurable issue. When you spread them randomly, each panel makes a tiny dent in everything but solves nothing completely.
A room with four panels at first reflection points and four bass traps in the corners sounds dramatically better than a room with twenty foam squares glued to random wall sections. The difference is not subtle — it is the difference between a room that lies to you and one that tells the truth about what your mix actually sounds like.
How Do You Find First Reflection Points?
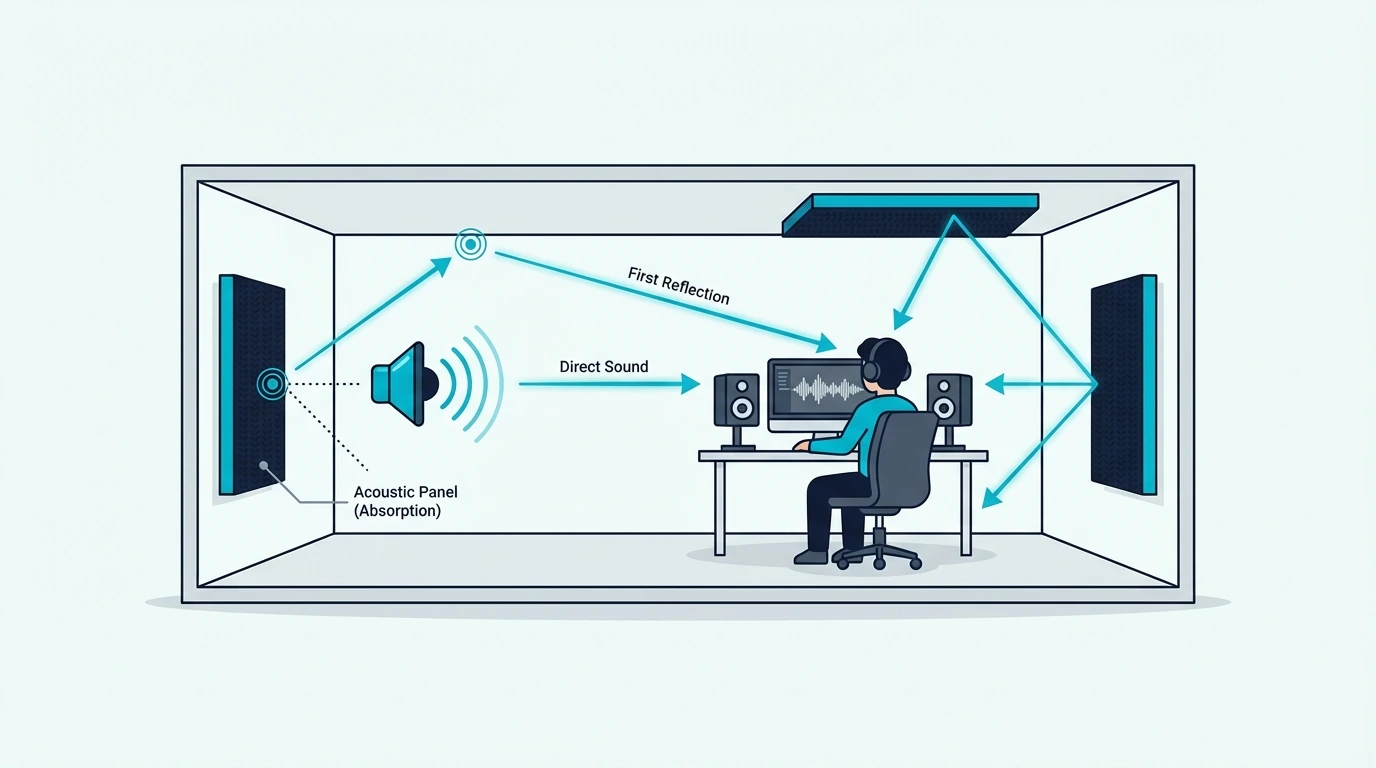
First reflection points are the spots on your walls and ceiling where sound from your monitors bounces once and reaches your ears. These reflections arrive within 5-15 milliseconds of the direct sound, creating comb filtering that colors everything you hear.
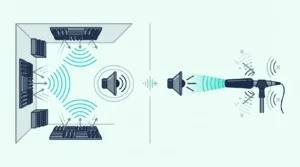
The mirror trick is the standard method for finding them. Sit in your listening position (or your primary recording spot) and have someone slide a small mirror flat along the wall surface.
The moment you can see the face of your monitor speaker in the mirror, that wall position is a first reflection point.
Side Wall Reflection Points
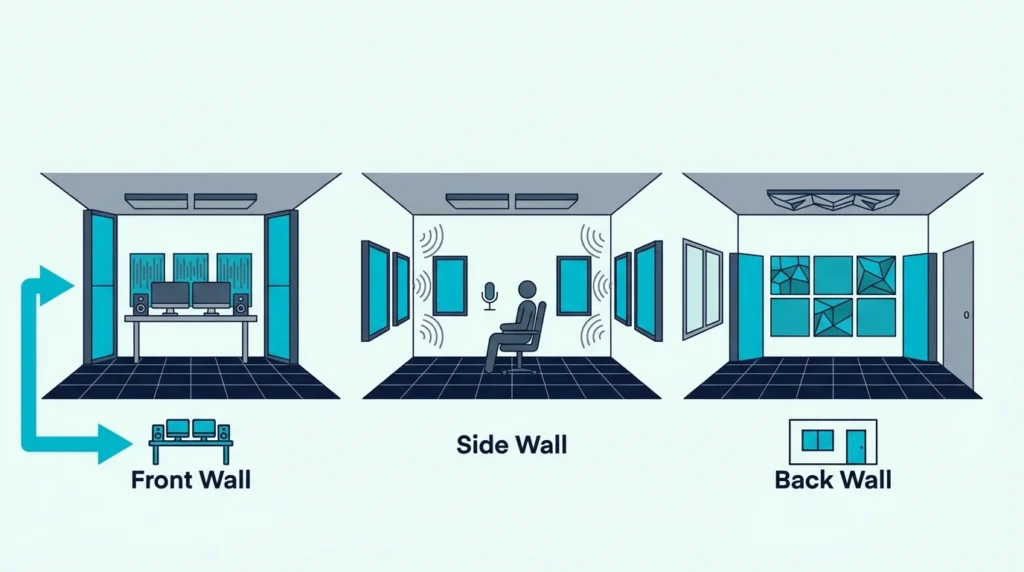
Side wall reflections are the highest priority because they arrive earliest and cause the most stereo image damage. Place panels at ear level (seated position) on both side walls at the mirror-trick positions.
In most rooms, these points land roughly one-third of the way between your monitors and the rear wall. The panels should be large enough to cover the reflection zone — at minimum 2 feet wide and 4 feet tall.
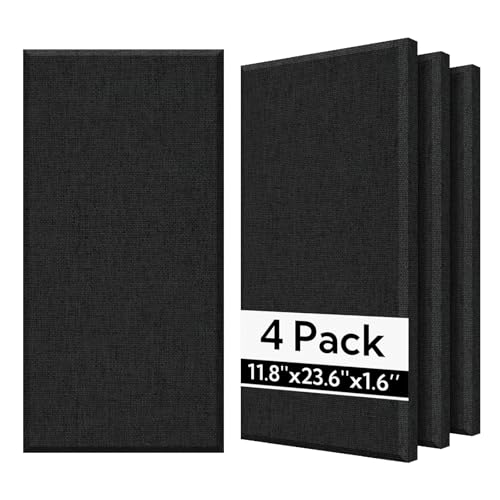
The UMIACOUSTICS 4-Pack Acoustic Panels cover both side wall reflection points with two panels per side.

UMIACOUSTICS 4-Pack Acoustic Panels
Symmetrical placement is mandatory for mixing and critical listening. If you place a panel on the left side wall, the right side wall needs a matching panel at the same position.
Asymmetrical treatment creates an unbalanced stereo image that pulls your mix decisions in the wrong direction.
Ceiling Reflection Points
The ceiling reflection point sits directly above the midpoint between your monitors and your listening position. Sound bouncing off the ceiling at this spot arrives within milliseconds of the direct sound, creating vertical comb filtering.
A ceiling cloud — a panel suspended horizontally 2-4 inches below the ceiling surface — eliminates this reflection. The air gap behind the panel improves low-frequency absorption by placing the absorptive material where particle velocity is higher.
In rooms with standard 8-foot ceilings, the ceiling reflection is especially strong because the short distance means the reflected path length is nearly identical to the direct path. That near-identical timing creates deep comb filtering notches.
Rear Wall Treatment
The rear wall is the last priority for a reason — rear wall reflections travel the longest path and arrive latest, so they cause less comb filtering damage than side and ceiling reflections.
In small rooms (under 12 feet deep), absorption on the rear wall prevents late reflections from muddying the sound. In larger rooms, diffusion on the rear wall scatters reflections to maintain a sense of liveness without creating focused echoes.
A pair of 24×48-inch fiberglass panels provides broad coverage for rear wall absorption.
A common mistake is over-treating the rear wall. Too much absorption behind you makes the room feel unnaturally dead.
One or two panels (or a diffuser) is usually enough.
Get Studio Tips Weekly
Join 5,000+ creators getting acoustic treatment advice every week.
No spam. Unsubscribe anytime.Where Should You Place Bass Traps?

Bass traps belong in corners — specifically where two surfaces meet (dihedral corners) and where three surfaces meet (tri-corners). Low-frequency sound waves naturally accumulate maximum pressure at these boundaries.
The four vertical corners of your room are the primary bass trap positions. Panels mounted across these corners at 45 degrees, with an air gap behind them, absorb the most low-frequency energy per square foot of any placement in the room.
Tri-corners (where the ceiling meets two walls) are the single most effective bass trap positions because three surfaces converge. If you can only place four bass traps, the two front tri-corners and two rear tri-corners deliver the maximum bass control.
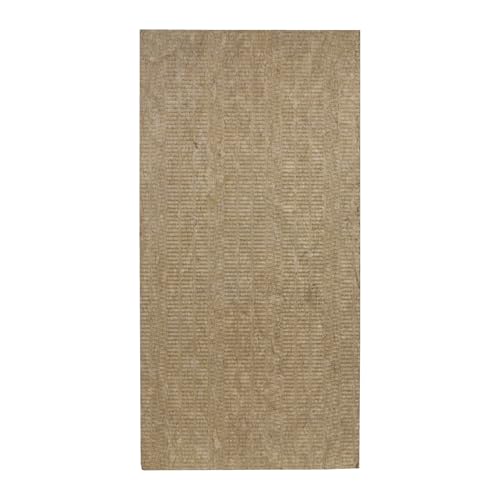
The thickness of your bass trap matters more than its position. Standard 2-inch panels absorb almost nothing below 250 Hz.
For meaningful bass absorption, you need 4-6 inches of dense fiberglass or mineral wool mounted with an air gap.
The UMIACOUSTICS 47×24 Panels work as corner bass traps when mounted diagonally across the corner.
UMIACOUSTICS 47×24 Panels
Floor-to-ceiling coverage in each corner is ideal. Stack two or three panels vertically in each corner to treat the full height of the room.
Placement By Room Type
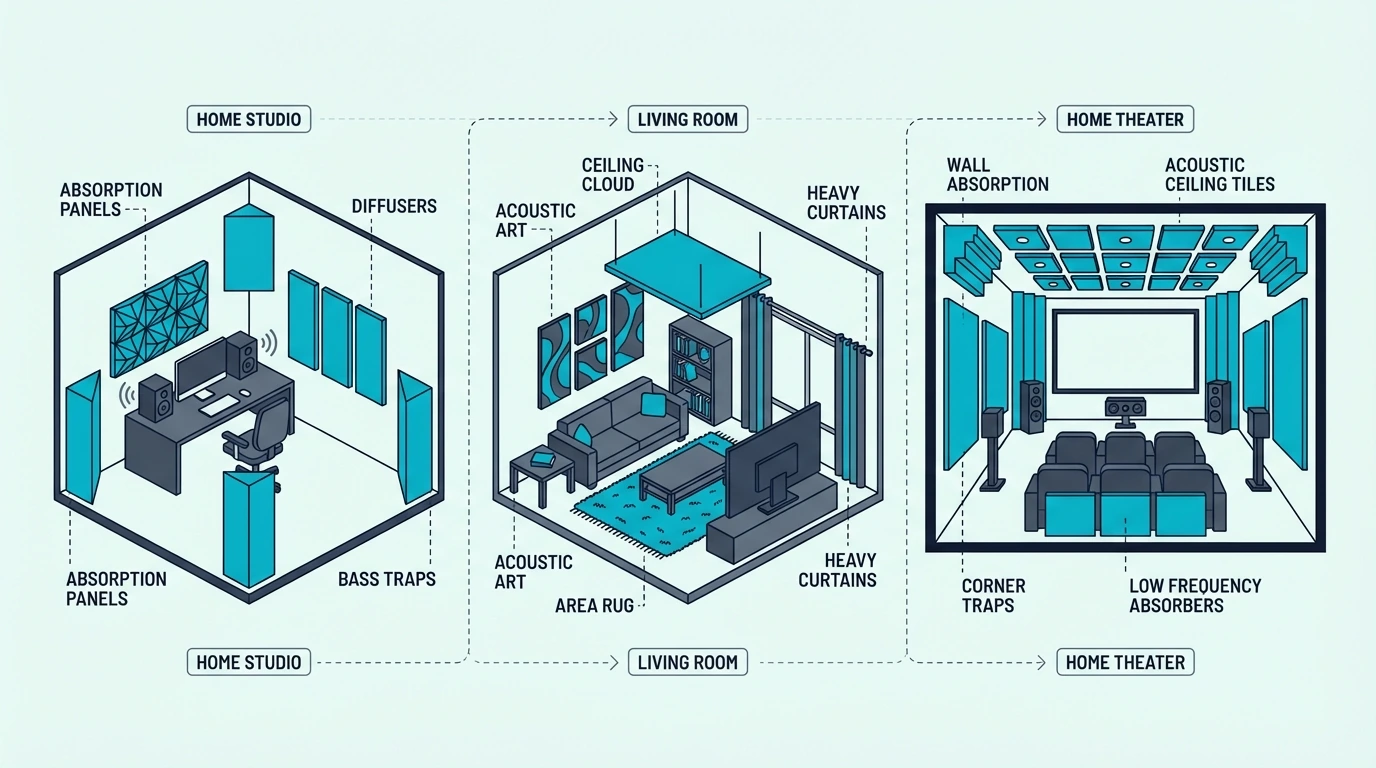
Different rooms serve different purposes, and the placement strategy shifts based on what you are optimizing for.
Home Studios And Mixing Rooms
Home studios demand symmetrical treatment around the listening triangle (the equilateral triangle formed by your two monitors and your head). Place panels at both side wall first reflection points, a ceiling cloud above the triangle, and bass traps in all four vertical corners.
The front wall behind your monitors benefits from absorption as well. Sound radiating from the back of your monitors reflects off the front wall and arrives at your ears with a short delay that muddies the low-mid range.
Keep your home studio setup oriented so you face the shorter wall. This positions you farther from the rear wall and reduces the strength of rear reflections at the mix position.
Home Theaters
Home theater placement differs from studio placement because the audience area is wider and surround channels add more reflection paths.
Place absorption panels at the side wall first reflection points between the screen and the primary seating position. Bass traps in the front corners tighten the low end from your subwoofer.
Absorption or diffusion on the rear wall prevents surround reflections from becoming distracting echoes.
Upholstered furniture — couches, chairs, curtains — already provides significant mid-high absorption. Factor existing room furnishings into your treatment plan before buying panels.
Offices And Bedrooms
Office and bedroom placement focuses on the area where you spend the most time. Panels on the wall directly facing your desk (or bed headboard) and on the wall behind you handle the strongest reflections in your immediate zone.
The Olanglab Compact 4-Pack Panels fit office and bedroom walls without overwhelming the space.
Olanglab Compact 4-Pack Panels
Ceiling panels above your desk reduce overhead reflections that cause fatigue during long calls or listening sessions. Even a single ceiling panel makes a noticeable difference in speech clarity.
The Bottom Line
Placement follows a clear priority: side wall first reflection points, then ceiling cloud, then corner bass traps, then rear wall. Every panel should target a specific acoustic problem — no random placement.
Symmetrical treatment is mandatory for any room used for mixing or critical listening. Mount panels at ear level with air gaps behind them for better low-frequency performance.
Start with the fewest panels that solve the biggest problems, then add more only if issues remain. A well-placed set of six to eight panels outperforms a room plastered with budget foam.
Frequently Asked Questions
Where Should Acoustic Treatments Be Placed?
Start with first reflection points on side walls and ceiling (use the mirror trick to find them). Add bass traps in all available corners, prioritizing tri-corners where ceiling meets two walls.
Treat the rear wall last with absorption or diffusion depending on room size.
Are Acoustic Panels Better On The Wall Or Ceiling?
Both positions serve different purposes. Side wall panels handle lateral reflections that damage stereo imaging.
Ceiling panels handle overhead reflections that cause vertical comb filtering. Prioritize side walls first, then add a ceiling cloud at the reflection point between your monitors and listening position.
Does Acoustic Treatment Need To Be Symmetrical?
For mixing and critical listening, yes. Asymmetrical treatment creates an unbalanced stereo image that shifts your perception of left-right balance.
Every panel on the left side wall needs a matching panel on the right. For general room improvement (offices, bedrooms), symmetry is helpful but not mandatory.
Should You Put Acoustic Panels Behind A TV?
Yes — the wall behind a TV or screen reflects sound from your speakers back into the room with a short delay. A panel behind the screen reduces that reflection, improving dialogue clarity and tightening the sound stage for movies and music. For a DIY panel behind the screen, a single Rockboard 60 board fits behind most screen setups and absorbs the low-mid reflections that cause the most dialogue smearing.