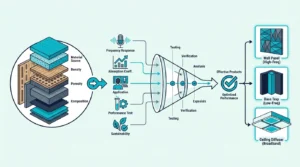
What Is Acoustic Treatment? (And Why Your Room Sound Matters More Than Your Gear)

What is acoustic treatment — it is the process of controlling how sound behaves inside a room using absorption, diffusion, and bass trapping, but most people confuse it with soundproofing and end up solving the wrong problem entirely.
You record a vocal take that sounded perfect in your headphones, only to play it back and hear a boxy, echoey mess that no amount of EQ can fix.
The fix is not a better microphone or a more expensive interface — it is treating the room itself so reflections, flutter echo, and bass buildup stop sabotaging every recording and mix you make.
The first move is usually a pair of panels on the wall behind your microphone, and you do not need to cover every surface to hear a massive difference.
Below, this guide breaks down exactly what acoustic treatment is, the three types you need to know, where it gets used, and how to choose the right option for your space.
To improve your room sound, you need acoustic treatment — not soundproofing. Treatment controls echo, flutter, and bass buildup inside your room using three tools: absorption panels, diffusers, and bass traps. Start with absorption at your first reflection points and corners, then add diffusion only after the major problems are solved.
What Is Acoustic Treatment — And Why Does It Matter?
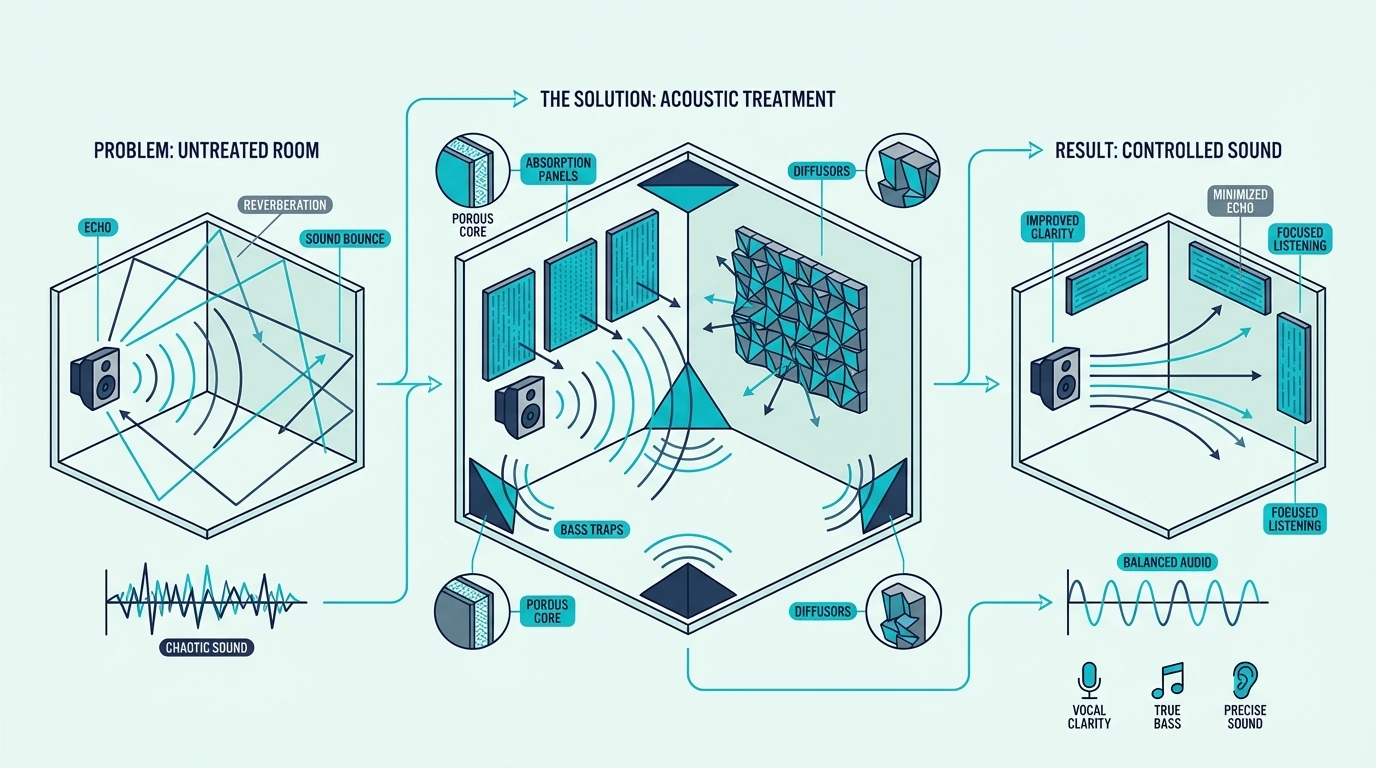
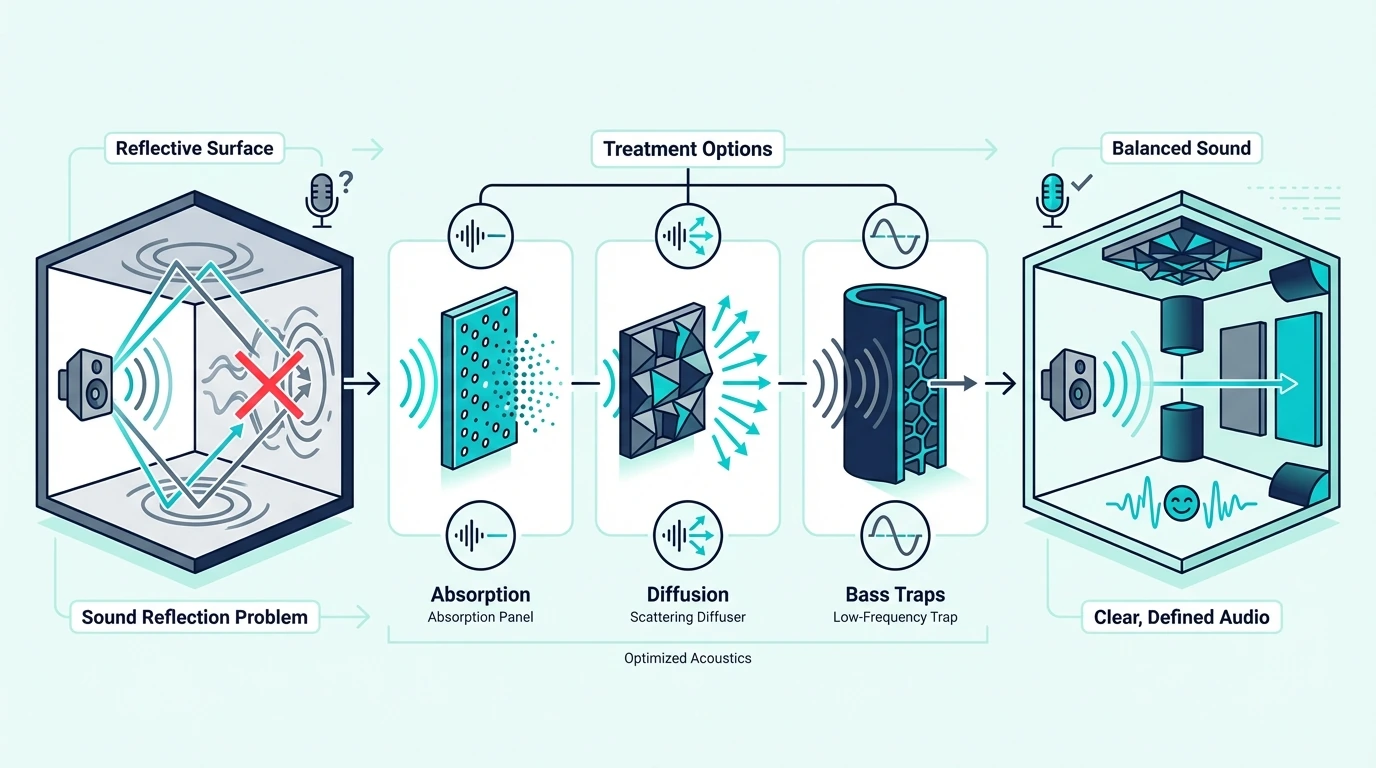
Acoustic treatment is the practice of adding materials to a room that change how sound waves interact with the walls, ceiling, and floor. The goal is to control reflections, reduce echo, and tame bass buildup so the room sounds accurate and controlled.
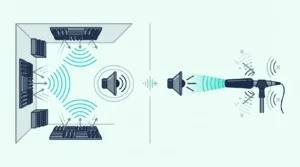
Every untreated room has acoustic problems. Sound leaves your speakers or instrument, hits a hard wall, and bounces back toward you with a slight delay.
Those reflections stack on top of the original sound, smearing the clarity of everything you hear. The technical term is comb filtering, and it is the reason a perfectly good vocal take can sound hollow or phased when you play it back.
The result depends on the room. Small rooms with parallel walls tend to produce flutter echo — that rapid, metallic ringing you hear when you clap your hands in an empty hallway.
Larger rooms with hard surfaces create longer reverb tails that muddy speech intelligibility and make music sound washy.
Bass frequencies are the worst offenders. Wavelengths at 100 Hz are roughly 11 feet long, which means they build up in corners and along walls regardless of what you do to the mid and high frequencies.
A room can sound reasonably clear in the upper range and still have a 15-20 dB bass hump at certain frequencies that makes mixing impossible. You turn up the bass in your mix to compensate for a null at your listening position, then wonder why it sounds boomy on every other system.
This is where acoustic treatment separates itself from soundproofing. Soundproofing blocks sound from traveling between rooms — it involves mass, decoupling, and sealing gaps.
Acoustic treatment controls sound within the room you are already in. They solve completely different problems, and no amount of foam on your walls will stop your neighbor from hearing your subwoofer.
The practical payoff of treatment is immediate. A properly treated home studio lets you trust what you hear from your monitors, which means fewer mix revisions and recordings that translate to other playback systems.
A treated office conference room means participants can actually understand each other without raising their voices. A treated home theater means dialogue stays crisp and surround sound effects land where the director intended.
What Are The Three Types Of Acoustic Treatment?
The foundation concepts are solid — now the question is what you actually put on the walls. Acoustic treatment breaks down into three categories, and each one targets a different part of the problem.
Absorption Panels And Foam
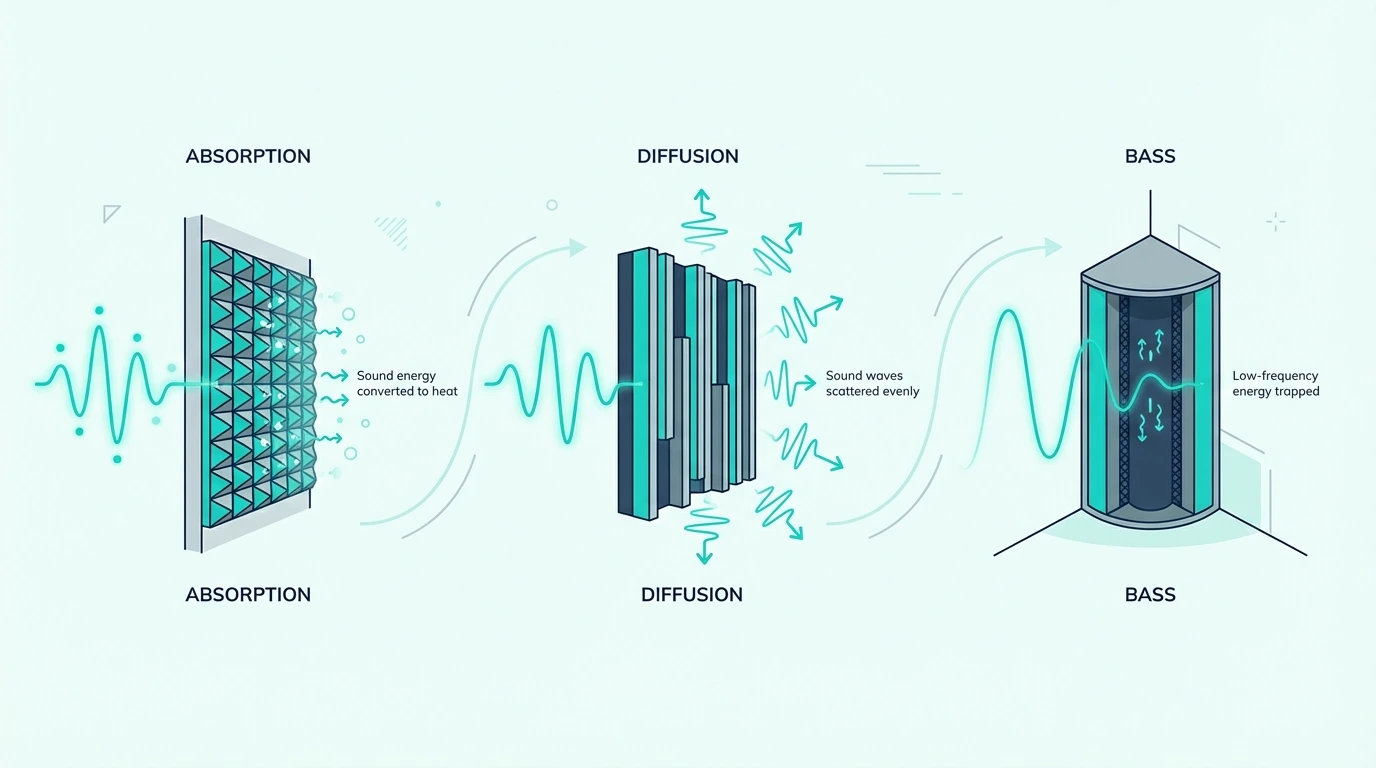
Absorption is the most common form of acoustic treatment, and it does exactly what the name suggests — it converts sound energy into heat as waves pass through a porous material. The thicker and denser the material, the more sound it absorbs across a wider frequency range.
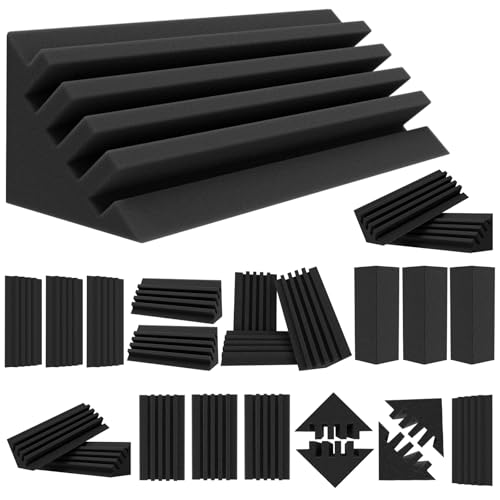
Fiberglass and mineral wool (rockwool) are the gold standard for absorption. A 2-inch thick fiberglass panel with an NRC rating of 0.95 absorbs 95% of the sound that hits it across the mid and high frequencies.
Compare that to bare drywall at roughly NRC 0.05, and the difference is staggering. Even carpet only manages about NRC 0.30, which means untreated rooms reflect the vast majority of sound energy back into the space.
Open-cell polyurethane foam — the pyramid and wedge shapes you see everywhere online — is the budget entry point. Foam absorbs mid and high frequencies reasonably well, but it does almost nothing below 500 Hz because it lacks the density and thickness to slow down longer wavelengths.
For vocal recording and taming flutter echo, foam works. For mixing accuracy across the full frequency spectrum, you need fiberglass or rockwool panels.
If you want the material breakdown behind that, fiberglass acoustic treatment and best budget acoustic treatment explain why dense broadband absorbers outperform thin decorative options.
Where you place absorbers matters as much as what you buy. The first reflection points — the spots on your side walls, ceiling, and rear wall where sound bounces from your speakers to your ears — are the highest priority.
A simple mirror trick helps you find them: sit in your listening position and have someone slide a mirror along the wall until you can see a speaker in the reflection. That spot gets a panel.
For a typical home studio, a set of fiberglass panels like the UMIACOUSTICS 2-inch fiberglass panels placed at first reflection points will dramatically clean up your monitoring accuracy.

UMIACOUSTICS 2-inch fiberglass panels
Sound Diffusers
Diffusers take a completely different approach. Instead of absorbing sound, they scatter it in multiple directions so that no single strong reflection reaches your ears.
The room stays lively and natural-sounding, but without the problematic echoes that come from flat, hard surfaces. This is why professional studios use diffusers alongside absorbers — a room that is 100% absorbed sounds dead and unnatural, which is just as bad for mixing as a room full of reflections.
The most common designs are QRD (quadratic residue diffusers) and skyline diffusers, both made from wood or rigid materials with wells or blocks at mathematically calculated depths. The varying depths scatter different frequencies at different angles, breaking up what would otherwise be a coherent reflection.
Diffusion matters most on the rear wall of a mixing room and on the ceiling above the listening position. You want the front of the room to be absorptive (so your direct speaker signal is clean), but the back of the room benefits from diffusion to maintain a sense of space without creating distinct echoes.
One common mistake is using diffusers in rooms that are too small. Diffusers need distance to work — the listener needs to be at least 2-3 meters from the diffuser surface for the scattered sound to blend properly.
In a 10×10-foot bedroom studio, diffusers on the back wall may be too close to do their job, and absorption is usually the better choice. Save diffusion for rooms where the rear wall is at least 8 feet from the listening position, and even then, test with absorption first to establish a clean baseline before introducing scatter.
That tradeoff is even clearer in small rooms, where the rear wall is often too close for diffusion to earn its keep.
Bass Traps
Low frequencies are the hardest to control because their long wavelengths pass through thin materials without slowing down. Bass traps are thick, dense absorbers specifically designed to handle frequencies below 300 Hz, and they belong in the corners of your room where bass energy naturally accumulates.
If you want the placement details, acoustic treatment for corners goes deeper into why corners outperform almost every other position for low-frequency control.
The most effective bass traps are thick panels (4-6 inches of dense fiberglass or rockwool) mounted across the corners of the room, spanning from floor to ceiling. Corner-mounted traps work because the pressure from bass waves is highest where two walls meet, so trapping energy at those points has maximum impact.
Straddling the trap across the corner with an air gap behind it extends absorption even lower. A 4-inch panel mounted 4 inches from the corner wall effectively behaves like an 8-inch trap for the lowest frequencies.
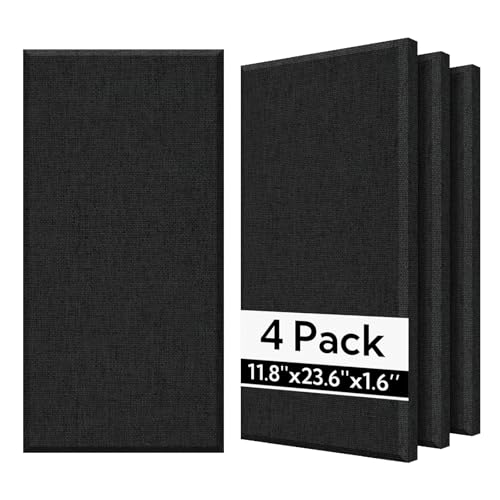
The difference bass traps make is not subtle. Before-and-after measurements with a calibration mic typically show a 10-15 dB reduction in the worst room mode peaks, which translates to a low end that finally sounds even and controllable. For a budget starting point, TroyStudio foam bass traps fit snugly into room corners and tame mid-bass buildup for under 35 dollars — a fraction of the cost of rigid fiberglass traps, though with more limited low-frequency reach.
TroyStudio foam bass traps
Get Studio Tips Weekly
Join 5,000+ creators getting acoustic treatment advice every week.
No spam. Unsubscribe anytime.Where Is Acoustic Treatment Used?
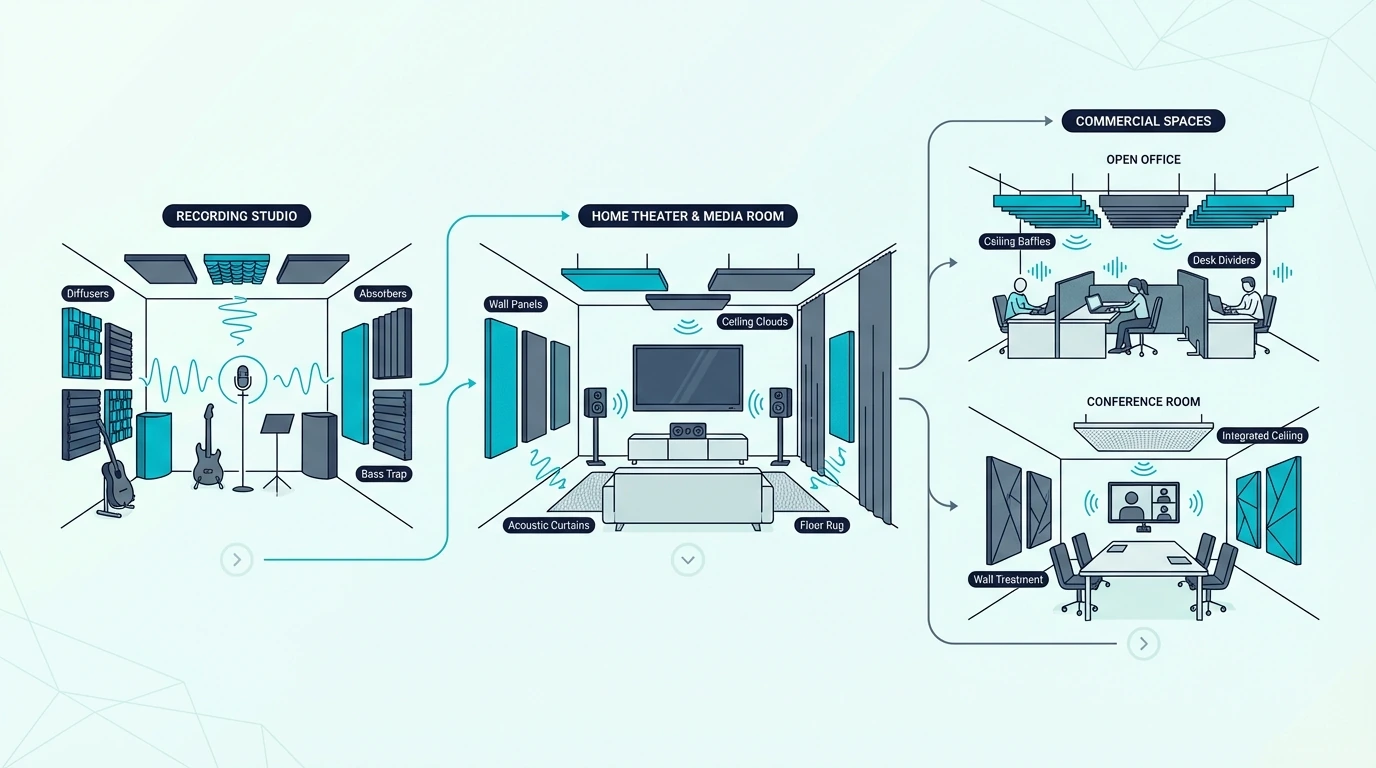
Those three treatment types show up in more places than you might expect. The principles are the same whether the room is a spare bedroom or a concert hall — only the scale changes.
Home Studios And Recording Rooms
This is where most people first encounter acoustic treatment, and for good reason. A home studio with untreated walls is like trying to mix on monitors with broken frequency response — you are making decisions based on what the room is doing to the sound, not what is actually in the recording.
The priority order for a home studio is clear. First, treat the first reflection points on the side walls and ceiling with 2-inch absorption panels.
Second, place bass traps in at least two corners (front corners of the room behind the speakers are highest priority). Third, treat the wall directly behind your listening position with either absorption or diffusion depending on room size.
That sequence alone covers 80% of the acoustic problems in a typical bedroom studio. The remaining 20% involves the wall behind the speakers, floor reflections (a thick rug handles this), and fine-tuning the rear wall treatment.
That is the same logic behind a good mixing room treatment plan: solve the listening position, reflections, and low end before you worry about cosmetics.
The investment pays for itself quickly. Mixes that used to need five rounds of revisions start translating on the first bounce, because you are finally hearing what the speakers are actually producing instead of what the room is adding on top.
Home Theaters And Living Rooms
Home theater acoustic treatment focuses on two things: dialogue clarity and bass management. Surround sound systems rely on precise speaker placement, but the room still determines how those signals arrive at your ears.
Side wall absorption at the first reflection points keeps the center channel (dialogue) sharp. Rear wall treatment — absorption or diffusion — prevents the surround channels from creating confusing echoes.
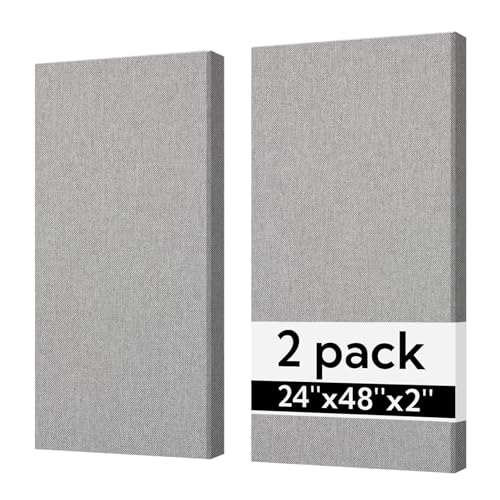
Bass traps in the corners tame the boomy, one-note bass that plagues most living room setups. Without corner treatment, action scenes rattle the walls while dialogue disappears into a muddy low-end haze. Larger format panels like the Olanglab 24×48 inch fiberglass panels cover more wall area per panel, which keeps the total panel count manageable in rooms where aesthetics matter.
Olanglab 24×48 inch fiberglass panels
The aesthetic challenge is real in living spaces. A recording studio can have exposed fiberglass panels everywhere, but a living room needs treatment that blends with the decor.
Fabric-wrapped panels in custom colors, acoustic art prints, and furniture placement (bookshelves act as natural diffusers) all help without turning the room into a padded cell. A well-stocked bookshelf on the rear wall acts as an accidental diffuser, scattering sound off the irregular surfaces of book spines at varying depths.
Offices, Classrooms, And Worship Spaces
Speech intelligibility is the main concern in commercial spaces. When background noise levels are high and surfaces are hard (glass, concrete, whiteboard), spoken words bounce around and lose clarity.
Open-plan offices are particularly bad — sound travels freely across the space, and everyone hears everyone.
Ceiling-mounted absorption panels are the most common commercial solution because they treat the largest reflective surface without taking up wall space. Suspended acoustic clouds and baffles catch sound before it can bounce between the ceiling and floor, reducing the overall reverberation time.
Conference rooms benefit from wall-mounted panels at seated ear height, targeting the first reflection paths between speakers and listeners. Classrooms need treatment focused on the front wall (where the teacher stands) and the ceiling above the student area.
The impact on productivity is measurable. Studies on open-plan offices consistently show that reducing reverberation time by even half a second improves focus, reduces fatigue, and cuts the number of times workers ask colleagues to repeat themselves.
Worship spaces face a unique challenge: the congregation needs to hear spoken word clearly, but music benefits from some natural reverb. The solution is usually heavy absorption on the walls and ceiling near the stage/pulpit area, with the rear of the space left more reflective or diffuse.
The same tradeoff shows up in home theater treatment, where you want dialogue to stay clear without making the room feel lifeless.
The key metric in all these commercial settings is RT60 — the time it takes for sound to decay by 60 dB after the source stops. An untreated conference room might have an RT60 of 1.5 seconds, which turns every spoken sentence into an overlapping mess.
Bringing that down to 0.4-0.6 seconds with ceiling panels and wall treatment makes the same room feel focused and controlled. Most acoustic consultants target an RT60 between 0.3 and 0.5 seconds for speech-heavy rooms, and between 0.6 and 0.8 seconds for rooms that also need to support live music.
How Do You Choose The Right Acoustic Treatment?
Knowing the types is one thing — figuring out what your room actually needs is where most people get stuck. The answer starts with listening, not shopping.
Start With Your Biggest Problem
Clap your hands in the center of your room and listen. If you hear a rapid metallic ringing (flutter echo), your parallel walls are bouncing sound back and forth and you need absorption panels on the walls.
If you hear a long, washy tail, the room has too much reverb and you need broader absorption coverage. If speech sounds unclear but the room does not seem particularly echoey, the problem is likely bass buildup masking the midrange.
Each symptom points to a different first purchase. Flutter echo means wall panels.
Excessive reverb means more panels plus ceiling treatment. Bass problems mean corner traps.
That is why budget acoustic treatment advice only works when the first purchase matches the actual problem.
Trying to solve bass problems with thin foam panels is the single most common waste of money in acoustic treatment — foam cannot absorb bass, period.
A quick measurement with a free app like REW (Room EQ Wizard) and a calibrated microphone reveals exactly which frequencies are problematic. The waterfall plot shows how long each frequency takes to decay, which tells you precisely where your room modes are and how much trapping you need.
Even without measurement gear, your ears give you reliable information. Record a voice clip in your untreated room and listen back on headphones — every problem the room adds becomes obvious when you remove the room from the monitoring chain.
Try this: clap once in the center of the room, record it on your phone, and play it back with earbuds. The flutter echo, the bass ring, the harsh reflections — they all jump out when you are not standing inside the problem.
DIY vs Commercial Options
The cost range for acoustic treatment spans from a single weekend DIY project to several thousand dollars for a professionally designed room. The good news is that DIY treatment using rigid fiberglass insulation (like Owens Corning 703) performs identically to commercial panels at a fraction of the cost.
A single 2×4-foot panel of 2-inch OC 703 from a building supply store costs less than a dinner out. Wrap it in acoustically transparent fabric, build a simple wooden frame, and you have a panel that matches or beats commercial products at a fraction of the retail cost.
If you want the full build route, DIY acoustic treatment and acoustic treatment cost help you decide whether to build from insulation boards or buy finished panels.
The physics does not care about the brand name.
For those who prefer ready-made options, panels like the Olanglab fiberglass acoustic panels deliver real broadband absorption with a clean, fabric-wrapped finish that works in studios and living spaces alike.
Olanglab fiberglass acoustic panels
Commercial panels make sense when you value convenience, aesthetics, or do not have the tools and space to build your own. DIY makes sense when budget is tight and you are willing to spend a weekend with a staple gun and some fabric.
If you are comparing bundled solutions instead of buying one piece at a time, acoustic treatment kits help narrow the realistic starter options.
Either way, the acoustic properties of the materials matter more than the finish. A hand-built panel stuffed with rigid fiberglass and wrapped in muslin absorbs just as much sound as a panel with a designer fabric cover — the sound waves do not care what it looks like.
The Bottom Line
The single most impactful thing you can do for your room sound is not upgrading your speakers, your microphone, or your audio interface — it is treating the room itself.
Start with two to four absorption panels at your first reflection points and a pair of bass traps in your front corners. That combination alone transforms a room from acoustically hostile to genuinely usable, and the difference is audible from the first note you play back.
You do not need to treat every surface or spend thousands of dollars. A targeted approach based on your room and your goals gets you 80% of the way there, and you can add more treatment over time as your ears tell you what is still missing.
If you need a practical next step, compare acoustic treatment cost with your room goals, then match that plan to a home studio treatment path or the priorities of a smaller room.
Frequently Asked Questions
What is the difference between soundproofing and acoustic treatment?
Soundproofing stops sound from passing through walls, floors, and ceilings using mass, decoupling, and airtight sealing. Acoustic treatment controls how sound behaves inside the room using absorption, diffusion, and bass trapping.
They address completely different problems — soundproofing keeps your bass from reaching the neighbors, while treatment keeps your room from lying to your ears about what your music actually sounds like.
What are the three elements of acoustic treatment?
Absorption, diffusion, and bass trapping. Absorption panels soak up mid and high frequency reflections.
Diffusers scatter sound to eliminate strong echoes while keeping the room lively. Bass traps handle low frequencies that build up in corners.
Most rooms need all three in some combination, but absorption and bass trapping cover 90% of the work in a typical home studio or listening room.
Is a mattress good for acoustic treatment?
A mattress absorbs some mid and high frequency sound, roughly comparable to a thick moving blanket. It will reduce flutter echo and tame some brightness in a pinch.
The problems are that it does nothing for bass frequencies, it is impossible to position precisely at reflection points, and it takes up far more space than a proper panel. For a temporary vocal recording setup, leaning a mattress behind the microphone is better than nothing — but it is not a substitute for even a basic set of 2-inch fiberglass panels.