Struggling with multiple remotes for your TV, soundbar, streaming device, and other gear?
You can conveniently consolidate by programming your Roku TV remote to control soundbar volume, mute, and more.
Let’s dive in to see how easy it is to set up, troubleshoot problems, and customize your audio settings after pairing devices.
How to Control Your Soundbar With a Roku TV Remote
With the right compatible Roku TV remote, you can quickly program it to directly control basic functions on your soundbar.
This greatly simplifies your home entertainment setup by reducing remote clutter and complications.
Check If Your Roku TV Remote is Compatible
Certain Roku TV remotes have an infrared blaster that allows you to control other devices, such as a soundbar, using the Roku remote.
This can be very convenient by reducing the number of remotes needed.
Not all Roku TV remotes have this capability, so you will first want to check if your Roku TV remote supports infrared control of other devices.
The following Roku TV models come with remotes that have an IR blaster and can control soundbars and other home audio devices:
Roku TV Models With IR Remote Support
The Roku TV Wireless Speakers connectivity bundle comes with a voice remote that can control other devices.
So if you have the Roku TV Wireless Speakers, the included remote will work.
Other Roku TV models that are designed to support Roku’s wireless audio products, like the Roku Smart Soundbar, also come with IR remotes.
These models include:
– TCL Roku TV models Series 5 and up
– Hisense Roku TV models R6, R7, and newer models
– Sharp Roku TV models Series 6 and newer
– RCA Roku TV models 7, 8, and newer
If you have one of those models, the remote that came with your Roku TV supports IR control.
Check Your Roku TV Remote
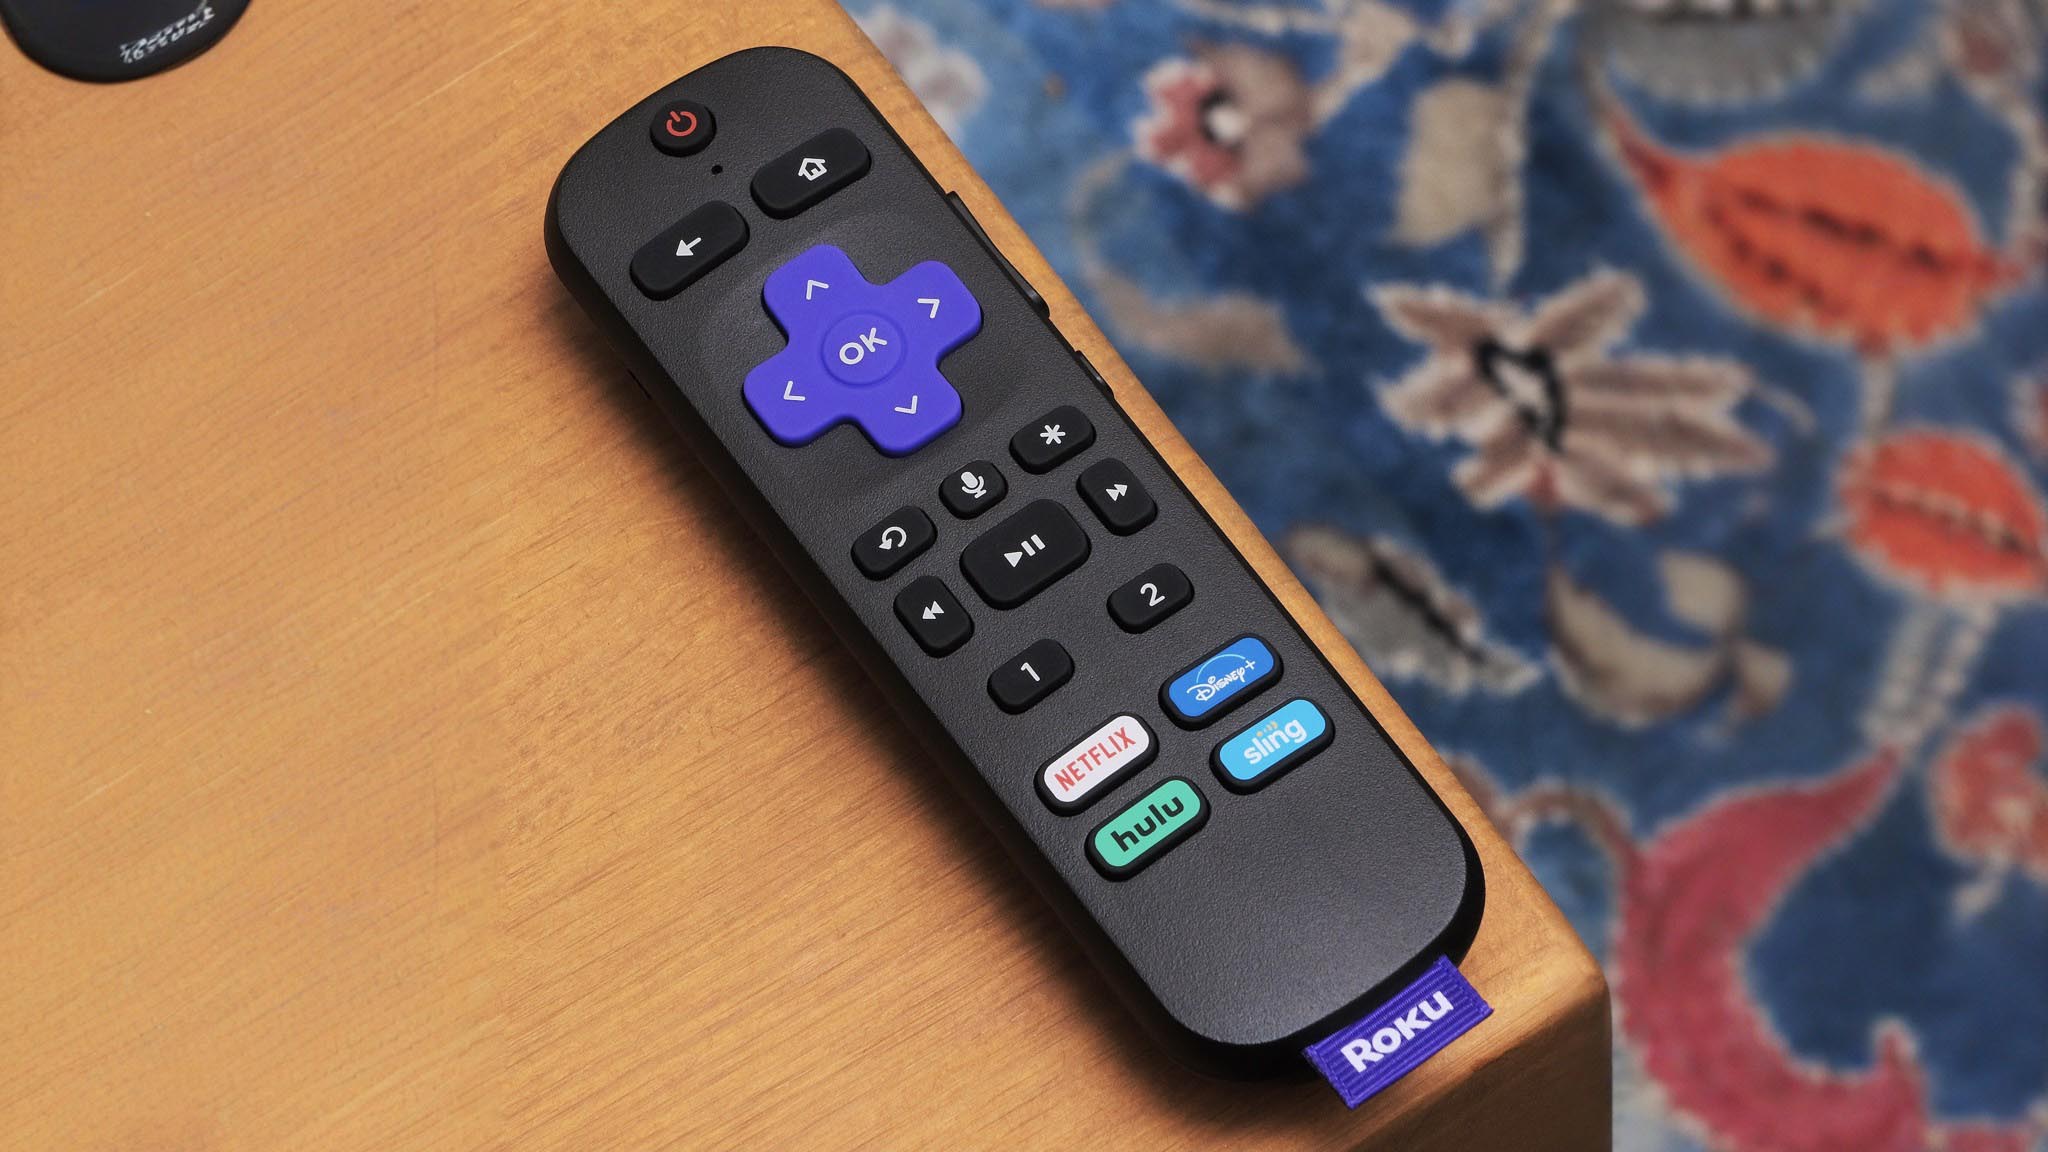
To verify, look at the bottom front area of your Roku TV remote, near the purple directional pad.
If you see a small opaque/dark purple window, usually to the left of the directional pad, that is the infrared (IR) blaster.
As long as your remote has that IR window, you can use it to control your soundbar.
If there is no IR window on the remote, then it does not support infrared control of other devices.
You would need to use the original soundbar remote instead.
Program Roku TV Remote to Control Soundbar
Once you have confirmed your Roku TV remote has IR capabilities, you need to pair it with your soundbar system.
The pairing process allows you to control basic soundbar functions like volume and mute using the Roku remote.
Here are the step-by-step instructions to program your Roku remote to control your soundbar:
Access Audio Settings
From the Home screen menu on your Roku TV, go to Settings > Audio > Volume mode.
Select Remote Programming
In the audio settings, choose Program remote.
This will start the setup process to pair your Roku remote with the soundbar.
Follow On-Screen Prompts
After selecting remote programming, your TV will display instructions to guide you through the paring process.
Make sure your soundbar is powered on and follow each step as directed.
Enter Device Details
During the process, you will need to enter details about the devices being connected.
When it asks for the TV brand, select Roku TV.
Then for the audio device, choose the appropriate option for your soundbar model – Sound bar or AV receiver.
Test and Ensure Proper Setup
Once remote programming is complete, test that you can now control volume and mute on the soundbar using the volume and mute buttons on your Roku remote.
Make sure the soundbar responds properly and audio plays as expected through the soundbar to confirm everything is working.
If issues persist, you may need to redo the pairing process.
Troubleshoot Issues With Controlling Soundbar
Sometimes there may be problems getting your Roku remote to properly control basic functions on your soundbar even after pairing.
Here are some troubleshooting tips for issues controlling your soundbar with the Roku remote:
Re-Pair the Devices
If commands like volume and mute are not registering on your soundbar after remote programming, try unpairing and then pairing the devices again.
Completely redo the pairing process by resetting remote programming in your audio settings.
Check IR Sensor on Soundbar
Make sure the infrared sensor window on your soundbar is not being obstructed by furniture or other objects.
The IR signal needs a clear line-of-sight between the Roku remote and soundbar to function properly.
If needed, adjust placement of devices so the Roku remote points directly at the soundbar’s IR receiver when using volume/mute commands.
Replace Batteries in Roku Remote
It could also be an issue with low battery power in the Roku remote.
Open the back of your Roku remote and replace the batteries with new ones.
This will ensure a strong IR signal.
Try controlling the soundbar again after inserting fresh batteries.
Use Analog Audio Instead of HDMI
If you still cannot properly control volume/mute on your soundbar using the IR functions on the Roku remote, connect your soundbar to the TV’s analog audio output instead of HDMI.
Then try programming the remote and controlling soundbar volume over the analog (RCA) audio connection instead.
Adjust Audio Settings After Setup
After you have successfully programmed your Roku television remote to control basic functions on your soundbar, you can dive into the audio settings and preferences to further customize your listening experience.
Refine Sound Modes
In the audio menu, select from various sound modes on your TV and soundbar to find one that fits your preferences and media type.
Sound modes like Movie, Music, and Night are common.
Set Audio Delay
If audio and video seem out of sync, increase audio delay in Roku settings.
Start with low values like 40ms and increase until audio properly times up with video.
Volume Leveling
Enable volume leveling to help balance overall volume, reducing loud scenes and boosting quiet dialog.
This is useful for evening TV watching.
Night Listening Mode
Similarly, night listening compresses the audio dynamic range so loud explosions don’t disturb others.
It emphasizes dialogue at lower volumes for late night TV.
Adjust Equalizer Settings
Customize equalizer presets to emphasize certain frequencies.
For example, boost bass and treble or reduce them based on your audio gear.
Dialogue Enhancement
Choose speech clarity settings that specifically raise and sharpen dialogue audio from TV programming to make it more audible and understandable over your soundbar.
Customize Button Functions
If wanted, you can assign soundbar commands like power and input selection to unused buttons on your Roku remote.
This further simplifies your setup.
After completing remote setup and programming, explore all of the built-in audio options on your TV and soundbar.
Having everything controllable with your Roku TV remote results in a clean, simplified home theater setup.
Conclusion
In conclusion, with the right compatible Roku TV remote, you can easily program it to control basic functions on your soundbar.
This simplifies your home entertainment setup.
Follow the instructions to pair devices, troubleshoot any issues, and customize audio to create an immersive, quality listening experience.
Controlling both your Roku TV and sound system with one remote reduces clutter and complications.