
Tired of tinny TV audio? You’re not alone.
Hisense TVs deliver stunning visuals, but their built-in speakers often fall flat.
If you crave immersive sound for movies, games, and music, a soundbar is your secret weapon. And for many Hisense TV owners, the easiest, most reliable connection is using an optical cable.
Think of it as a digital audio superhighway straight from your Hisense TV to your soundbar. No messy cables, no complicated setups – just pure, enhanced sound in minutes.
This step-by-step guide will show you exactly how to connect your soundbar to your Hisense TV using an optical cable. We’ll cover everything from essential checks to expert troubleshooting and sound optimization tips, all specifically tailored for Hisense TV soundbar setups.
Ready to unlock incredible audio and transform your home entertainment? Let’s dive in!
Become an Acoustics Insider!
Gain access to expert insights on acoustic panels, soundproofing, soundbars, DJ controllers, MIDI setups, turntables, and more—plus exclusive tips and gear recommendations to perfect your audio world.
We value your privacy—unsubscribe anytime, no spam ever, using the link in our newsletter.
Why Optical Cable? The Smart Choice for Hisense TV Soundbar Connections

You’ve got options when connecting a soundbar (See our comparison of all TV-to-soundbar connection methods). But for Hisense TVs, optical cable connections often hit the sweet spot.
Here’s why it’s a top choice for upgrading your audio. First, consider the universal compatibility with Hisense TVs.
Optical audio output (Digital Audio Out – Optical) is a standard feature on a vast range of Hisense TVs. This means seamless compatibility and a hassle-free connection for almost any soundbar.
It’s a plug-and-play solution designed for simplicity. Secondly, optical cables offer crystal-clear digital audio.
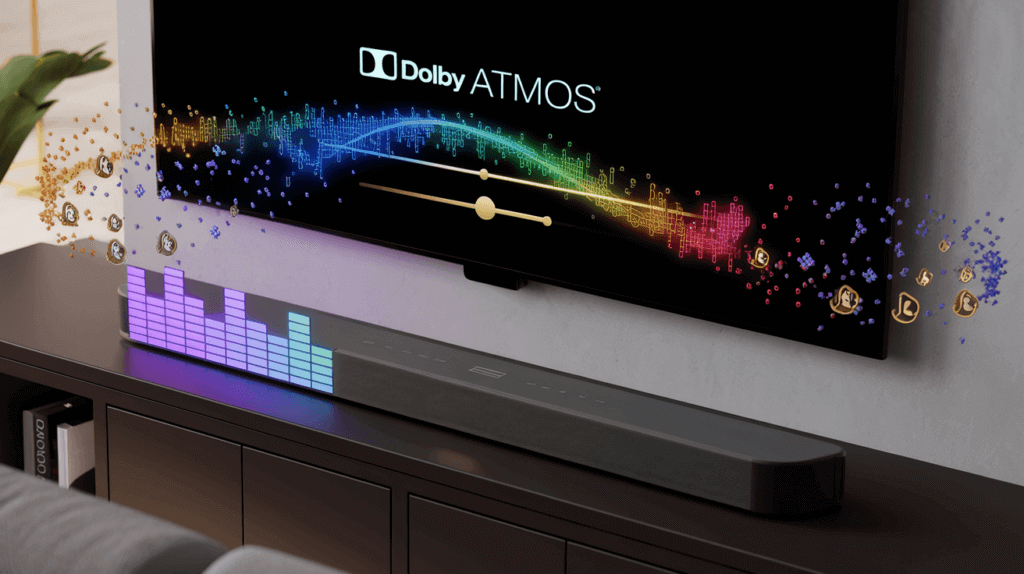
Because they transmit audio signals digitally, you benefit from pristine sound quality, effectively eliminating interference. You’ll enjoy richer, more detailed audio, especially with formats like Dolby Digital and DTS (How 5.1 systems enhance optical connections), common in streaming content and broadcasts on your Hisense TV.
While cutting-edge formats like Dolby Atmos might push the bandwidth limits of optical connections, requiring HDMI eARC for full potential, for the vast majority of users and typical soundbar setups paired with Hisense TVs, optical delivers an outstanding and readily noticeable audio upgrade.
Thirdly, the setup process is effortlessly simple and requires zero fuss. Connecting via optical cable is incredibly user-friendly, requiring no complex configuration.
It’s a direct and straightforward connection – simply plug it in, adjust one setting on your TV, and you’re done.
Volume control is then primarily and conveniently managed through your soundbar remote, keeping your entertainment streamlined (Universal pairing fundamentals).
Finally, optical connections are an ideal solution for older Hisense TVs. If you own a Hisense television that predates the common inclusion of HDMI ARC (Audio Return Channel), optical becomes your perfect digital audio solution.
It effectively provides a dedicated pathway for enhanced sound quality, ensuring you get the audio boost you desire, even without the latest HDMI technology. For many classic Hisense TV models still in use, optical remains the best and most accessible digital audio output option (Vizio-specific optimization techniques).
In short: Optical cables offer the ideal blend of quality, simplicity, and compatibility, making them a winning choice for connecting your soundbar to your Hisense TV.
How to Connect a Soundbar to a Hisense TV with an Optical Cable?

Connecting a soundbar to a Hisense TV using an optical cable involves three key steps: first, locate the “Digital Audio Out (Optical)” port on your Hisense TV and the “Optical In” port on your soundbar. Next, securely connect the optical cable between these ports, and finally, navigate your Hisense TV’s audio settings to select “Optical” or “External Speakers” as the audio output.
While those are the core actions, let’s explore these steps in a bit more detail to ensure a seamless and successful connection for your enhanced audio experience.
Pre-Flight Check: Your Hisense TV Soundbar Optical Connection Checklist
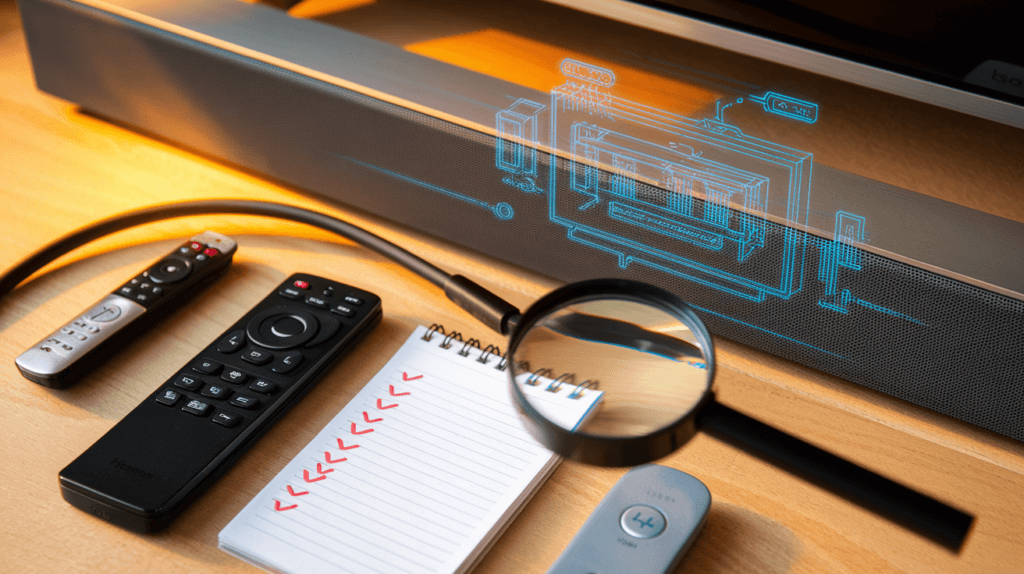
Before you start plugging things in, taking a moment for a quick pre-flight check will ensure a smooth and successful setup.
Gathering the necessary items and verifying compatibility before you begin will save you potential frustration.
First and foremost, it is essential to confirm that you have the optical audio cable itself readily available, often known as a TOSLINK cable.
These cables are specifically manufactured to transmit digital audio signals, easily recognizable by their distinctive TOSLINK connectors at each end.
Before proceeding, take a moment to inspect the cable to ensure it is in good working condition.
Carefully checking for any visible damage to either the cable itself or to the plastic connectors located at each end, as any cable damage could potentially result in unwanted sound issues.
Next, you will need to locate the correct audio output port on your Hisense television, specifically the “Digital Audio Out (Optical)” port.
This port serves as the optical digital audio output from your television, and you will typically find it situated on the back panel of your Hisense TV.
Although in some models it might be located on the side panel instead. When searching for this port, be sure to look very carefully for the clear label “Digital Audio Out (Optical)”.
Occasionally, it may be abbreviated to simply “Optical Out.” The port itself has a very distinctive shape, being small and rectangular, and is often protected by a small hinged flap or a removable dust cover.
If you encounter any difficulty locating this specific port on your particular Hisense TV model, consulting the user manual that came packaged with your Hisense television is a valuable next step. These manuals typically contain detailed diagrams of your television’s connections, and these diagrams will clearly label each port.
Including the optical audio output port you are seeking. Following the port check on your television, your next step is to identify the corresponding optical input port on your soundbar unit.
Just as you located the output port on your Hisense TV, you now need to find the “Digital Audio In (Optical)” or “Optical In” port on your soundbar. This port will have a shape that mirrors the optical output port you found on your Hisense TV, ensuring physical compatibility between the cable and the ports.
To ensure smooth control over your audio setup, make sure you have both your Hisense TV remote control and your soundbar remote control readily accessible and within easy reach. You will need both of these remotes throughout the setup process.
The Hisense TV remote will be necessary for navigating the television’s on-screen menus and adjusting the audio output settings to enable the optical connection. While the soundbar remote will be used to manage the volume levels and to select the correct input source on the soundbar itself.
As a final but important step in your pre-connection checklist, and as a general safety precaution whenever connecting or disconnecting electronic devices, please ensure that both your Hisense TV and your soundbar are completely powered OFF.
Pro-Tip
Struggling with connections in the dark? Use your phone’s flashlight!
A small light (or the flashlight app) is a game-changer when working behind your TV or audio setup, especially in dim lighting.
The extra illumination makes identifying ports a breeze!
The Step-by-Step Guide: Connecting Your Soundbar to Your Hisense TV with Optical Cable
Ready to connect your soundbar and enjoy superior audio?
Follow these simple steps to get your soundbar connected and delivering booming sound to complement your Hisense TV’s visuals in just a few minutes.
Step 1: Port Identification – TV & Soundbar
Begin by clearly identifying the optical audio ports on both your Hisense TV and your soundbar. Start by going to the back panel of your Hisense television and carefully examining the connection ports.
Look for the specific port labeled “Digital Audio Out (Optical).” Once you’ve located the output port on your Hisense TV, move to your soundbar and find its corresponding input port.
This will be labeled “Digital Audio In (Optical)” or “Optical In,” depending on your soundbar model.
Step 2: Connect Optical Cable – Hisense TV First
Take your optical cable and prepare to connect it to your Hisense TV. If your new optical cable has small plastic protective caps on each end (these are often brightly colored, perhaps red or clear plastic), be sure to remove these caps before attempting to make the connection.
Carefully take one end of your optical cable and align the connector with the “Digital Audio Out (Optical)” port you located on your Hisense TV in the previous step. It’s important to note that the optical connector is keyed, meaning it’s designed to fit into the port in only one correct orientation.
Take a close look at the shape of the connector and the port to ensure proper alignment before you proceed. Once aligned correctly, gently push the optical cable connector straight into the port on your Hisense TV.
Apply steady, gentle pressure until you feel a slight click or a reassuring secure feeling, indicating that the connector is properly seated in the port. It’s crucial to avoid forcing the connection at any point during this step.
If the connector doesn’t seem to insert easily, pause, re-check the alignment, and then try again.
Step 3: Connect to Soundbar – Complete the Circuit
Now that one end of the optical cable is securely connected to your Hisense TV, take the other end of the cable and prepare to connect it to your soundbar. Repeat the same process you used for the TV connection.
Carefully align the connector on the free end of the optical cable with the “Digital Audio In (Optical)” port on your soundbar. And gently push the connector in until it too clicks or feels securely in place.
Again, remember to avoid forcing the connector; if it doesn’t insert easily, double-check the alignment before applying more pressure.
Step 4: Power Up!
Turn ON your Hisense TV and your soundbar.
Step 5: Crucial Hisense TV Audio Output Setting
This step is essential for sound! On your Hisense TV remote, press the “Menu” button or the “Settings” button to access the main settings menu on your television.
(Note that the exact button label may vary slightly depending on your specific Hisense TV model). Once the settings menu is on screen, use the remote’s navigation buttons, typically arrow keys, to find and select the “Sound” menu or the “Audio” menu.
The precise menu names and the overall layout of the settings menus can differ somewhat between different Hisense TV models and software versions. So you might need to explore the menu options slightly to find the sound or audio settings on your particular TV.
Step 6: Select “Optical” Audio Output on Your Hisense TV
After navigating to the “Sound” or “Audio” settings menu, you’ll need to locate the specific setting that controls where your Hisense TV sends its audio output. Look for an option clearly labeled “Audio Output,” “Speaker Output,” “Digital Audio Output,” or something worded similarly.
Once you’ve found the correct audio output setting option, select the setting that corresponds to “Optical” or “External Speakers (Digital Out).” The exact wording you see on your Hisense TV’s menu might vary slightly from these examples.
But the key is to choose the option that directs the audio signal to be sent out through the optical port you just connected to. Selecting this option effectively tells your Hisense TV to bypass its internal speakers.
And instead send all audio signals through the optical output port to your newly connected soundbar.
Step 7: Soundbar Input to “Optical”
Now, you need to tell your soundbar to listen for the audio signal arriving through the optical connection. Using your soundbar’s remote control, locate the input selection controls.
This is often a dedicated “Input” button, a “Source” button, or a “Function” button on the remote. Use these controls to cycle through the available input sources until you confidently select “Optical” or “Digital In” as the active input source on your soundbar.
The exact labeling and button names for input selection will differ depending on your specific soundbar model. So if you’re unsure, consulting your soundbar’s user manual is always a helpful step.
Step 8: Test the Audio – Boom Time!
The moment of truth has arrived! It’s time to test your newly established sound connection and enjoy the enhanced audio.
Begin playing some audio content through your Hisense TV. Try tuning to a standard over-the-air TV channel, launching a streaming app directly on your smart Hisense TV, or playing a Blu-ray disc or other external source that’s connected to your television.
Once audio is playing, gradually increase the volume on your soundbar using its remote control. If you’ve successfully completed all the connection steps and configured the settings correctly, you should now hear the audio clearly and powerfully emanating from your soundbar.
And your Hisense TV speakers should be muted (or very quiet, depending on your TV’s specific settings). Congratulations!
You have successfully connected your soundbar to your Hisense TV using an optical cable, and you can now start enjoying dramatically improved audio quality.
Troubleshooting Silence: Hisense TV Soundbar Optical Connection – No Sound Fixes
Experiencing complete silence after connecting everything? Don’t panic or get discouraged!
This is a common initial hurdle, and in the vast majority of cases, the problem is easily identified and resolved.
Follow these systematic troubleshooting points to diagnose and eliminate the most frequent causes of no sound when using a Hisense TV soundbar optical connection.
And you’ll be enjoying your upgraded audio in no time.
Hisense TV Audio Output – Double-Check NOW!
By far, the single most frequent cause of no audio output after connecting a soundbar to a Hisense TV via optical cable is simply an incorrect audio output setting on the television itself. This is such a common oversight that it’s always the first thing to verify. Ensure “Optical” is selected (Managing multiple sources).
Revisit the Step 5 and Step 6 sections of this guide, and very carefully retrace your steps through the Hisense TV’s settings menus. Are you absolutely certain that you correctly selected “Optical” or “External Speakers (Digital Out)” as the audio output option?
It’s worth navigating back through the menus one more time and meticulously verifying that you have not only located the setting but also definitively confirmed and saved your selection of the correct optical audio output. Many users find that simply re-checking and re-confirming this Hisense TV audio output setting resolves their silence issue immediately.
Firm Cable Connections – Push It In!
Another common issue, and often easily overlooked, is a less-than-perfect physical connection of the optical cable itself. Even if you believe you connected the cable firmly during the initial setup, it’s worth double-checking now.
A slightly loose connection can be sneaky and still appear to be connected, but it can be enough to prevent the digital audio signal from passing through successfully. To ensure a solid connection, physically unplug both ends of the optical cable – both at the Hisense TV and at the soundbar.
Then, carefully re-insert each end, making sure to push them in firmly until you feel that slight “click” or a distinct feeling of secure connection. This re-seating process ensures that the connectors are properly aligned and making full contact.
Eliminating any potential for a loose or intermittent connection to be the source of your silence.
Inspect the Optical Cable – Look for Damage
The optical cable itself, while seemingly robust, is actually more delicate than it might appear, and damage to the cable can certainly disrupt the digital audio signal it carries. Take a moment to examine the optical cable closely from end to end.
Run your fingers gently along the length of the cable, feeling for any kinks, bends, or any signs of physical breaks within the cable itself. Also, pay close attention to the plastic connectors at each end of the optical cable.
Inspect them for cracks, fractures, or any other visible damage. If the plastic around the connector is damaged, it may not seat properly in the ports, or the internal optical fiber could be compromised.
If you have a spare optical cable available, a quick and effective diagnostic step is to try swapping out your current cable with the spare. If replacing the cable suddenly restores your sound, you’ve successfully identified a faulty cable as the culprit.
And simply replacing the cable will resolve the issue.
Soundbar Input – Is it “Optical”?
It may seem obvious, but it’s surprisingly easy to accidentally overlook the soundbar’s input selection. Using your soundbar’s remote control, take a moment to deliberately and methodically cycle through all of the available input sources.
These input options are often labeled as “Input,” “Source,” or “Function” on the remote. As you cycle through the inputs, carefully watch the soundbar’s display or indicator lights (if it has them) to confirm that you are indeed and very consciously selecting “Optical” or “Digital In” as the active input source on your soundbar.
If the soundbar is inadvertently set to a different input, such as HDMI, Bluetooth, or AUX, it will simply be ignoring the audio signal arriving from your Hisense TV through the optical connection. Resulting in no sound output.
Volume Check – TV & Soundbar
Another simple but crucial check is to make sure the volume levels are appropriately set on both your Hisense TV and your soundbar. It might sound too obvious, but it’s easy to accidentally mute either device, or to have the volume inadvertently turned down to a level that’s too quiet to hear.
Double-check that neither your Hisense TV nor your soundbar is muted – look for mute icons on the screens or indicators. Then, gradually increase the volume on your soundbar using its remote control.
Starting from a very low volume and slowly raising it to a comfortable listening level. This ensures that you haven’t simply set the volume too low to be audible.
Test Different Audio Content and Sources
In some cases, the absence of sound might not be related to the optical connection itself, but rather to the specific audio content you’re trying to play on your Hisense TV. To rule out content-specific issues, try switching to a completely different audio source on your Hisense TV.
For example, if you were trying to play audio from a streaming app, switch to a standard over-the-air television channel. If you were watching a Blu-ray disc, try playing audio from a different app or source.
If you find that sound works with some sources but not others, it indicates the problem might be with the original audio content itself. Or potentially with the audio settings within a specific app, rather than with the optical connection or soundbar setup.
Restart Time – Power Cycle Both
Just like with computers and other electronics, a simple restart or “power cycle” can often clear up temporary software glitches or minor electronic hiccups that might be causing the no-sound issue. To perform a proper power cycle, completely power OFF both your Hisense TV and your soundbar.
For an even more thorough reset, if it’s convenient to do so, unplug both devices from their power outlets for about 30 seconds to completely discharge any residual electricity. Then, plug both devices back into power, and power them back ON again.
Once both have fully restarted, re-test the audio output to see if the power cycle has resolved the silence problem.
(Advanced) Soundbar Test – Rule Out Soundbar Issues
If you’ve diligently gone through all of the previous troubleshooting steps and still haven’t been able to restore sound, and if you have the means to do so, it’s a good idea to test your soundbar independently with another audio source. This helps you definitively rule out the possibility that the issue might be with the soundbar itself.
Rather than with the Hisense TV connection. If your soundbar has Bluetooth capabilities, a simple test is to try pairing it with your smartphone or another Bluetooth-enabled device and play some music or audio wirelessly via Bluetooth. Test soundbar with Bluetooth (Expert tuning strategies).
If you get sound output from the soundbar when using Bluetooth, but still no sound via the optical connection from your Hisense TV, this strongly suggests that the problem is likely related to either the Hisense TV’s optical output itself. Or the audio settings on the TV, rather than a malfunction of the soundbar unit.
Alternatively, if you have another television or audio source with an optical output, you could try briefly connecting your soundbar to that device via optical cable to further isolate whether the problem is with the Hisense TV’s optical output specifically.
(Advanced) Optical Port Inspection – Dust Check
Although it’s not a very frequent occurrence, it is possible for small amounts of dust, lint, or other fine debris to accumulate inside the optical ports on either your Hisense TV or your soundbar. Over time, this accumulated debris can potentially obstruct the path of the light signal.
That carries the digital audio information through the optical connection, leading to signal degradation or complete signal blockage. Therefore, it’s worth taking a moment to carefully visually inspect the optical ports on both devices.
Look closely into the ports for any visible obstructions such as dust bunnies, lint, or any other foreign material. If you do see dust or debris inside the ports, you can attempt to gently dislodge it by using a can of compressed air.
The type of compressed air canisters sold for cleaning electronics is ideal for this purpose. Use short, controlled bursts of compressed air to gently blow out any dust or loose debris from within the optical ports.
Safety Note
Important safety note: Never attempt to insert any physical objects into the optical ports.
Items like cotton swabs, pins, or other tools can easily damage the delicate components inside optical ports.
(Advanced – Caution!) Optical Cable Light Test
For a more advanced diagnostic step, you can perform a visual check to see if the optical cable is actually transmitting the light signal that carries the digital audio data. It is crucial to exercise extreme caution during this test and to absolutely avoid looking directly into the end of the optical cable for any extended period.
In a darkened room, while audio is actively playing from your Hisense TV (ensure audio is set to optical output!), very briefly glance at the end of the optical cable that is connected to the Hisense TV’s optical output port. You should be able to see a faint red light visibly emitting from the connector end.
This faint red light indicates that the Hisense TV is indeed sending a digital audio signal through the optical output. And that the cable is likely transmitting it.
If you see no light emission at all from the cable end, even when audio is playing and the TV is set to optical output, it could potentially suggest a problem with the optical cable itself (perhaps a broken fiber inside). Or less commonly, a potential issue with the Hisense TV’s optical output circuitry.
Again, always remember to avoid staring directly at the light emitted from the optical cable for more than a brief glance, as it does have the potential to cause eye strain or discomfort with prolonged direct viewing. This light transmission test is an advanced diagnostic step and should be conducted cautiously and briefly.
(Rare) Compatibility Glitch?
In the vast majority of cases, optical connections are highly standardized and exceptionally compatible between different brands and models of devices.
However, in extremely rare and unusual circumstances, it is theoretically possible to encounter a very obscure and specific incompatibility issue between a particular older soundbar model and a very recent or newer Hisense TV (or vice versa).
These types of incompatibilities, if they exist, would typically relate to highly specific and nuanced differences in how the devices negotiate or interpret certain digital audio formats or communication protocols over the optical connection. Such incompatibilities are exceedingly uncommon with optical connections.
But if you have exhaustively tried all other troubleshooting steps outlined above, and you are still unable to get sound working through the optical connection, and if you happen to have access to another soundbar or another television with an optical output, a process of elimination testing could be considered.
Try briefly connecting your soundbar to a completely different television (via optical if possible) to see if it produces sound in that scenario.
Or, conversely, try connecting a different soundbar to your Hisense TV’s optical output to see if a different soundbar works with your TV.
If you suspect a very rare compatibility issue might be at play, consulting the user manuals for both your specific Hisense TV model and your specific soundbar model.
And reviewing their respective compatibility specifications or troubleshooting sections might occasionally reveal some relevant information. Although this level of in-depth troubleshooting is rarely necessary with standard optical connections.
Still no sound? Re-read this troubleshooting guide carefully – the answer is usually within these steps. Start with Hisense TV Audio Output – Double-Check NOW! again!
Unlock Premium Audio: Optimizing Your Hisense TV Soundbar Optical Connection
Connection complete! Now, let’s fine-tune your audio for a truly immersive experience.
Maximize your Hisense TV and soundbar optical setup with these sound optimization tips:
1. Hisense TV Sound Modes: Experiment to Find Your Perfect Sound.
2. Activate Soundbar EQ: Boost dialogue clarity or bass response (Maximize optical audio potential).
3. Equalizer Magic (If Available).
4. Digital Audio Format: “Auto” is Usually Best.
5. Soundbar Placement Matters!
Conclusion
Congratulations!
You’ve now mastered connecting your soundbar to your Hisense TV using an optical cable and unlocked a world of enhanced audio.
Enjoy significantly richer, more immersive sound for all your entertainment.
Remember, setting up your Hisense TV soundbar with optical is easier than you think! The key takeaway?
Always double-check your Hisense TV’s audio output settings!
Ready to experience incredible sound? Connect your soundbar via optical cable today and tell us about your audio transformation in the comments below! Got questions or extra tips for fellow Hisense TV owners?
Share them now – let’s build the ultimate Hisense TV soundbar optical connection resource!
Ready for more? Discover how surround systems enhance optical connections or explore Vizio optimization techniques.