How To Soundproof A Vent (What Works And What Doesn’t)
How to soundproof a vent is one of those questions that sounds simple, but only if you have never tried it. A vent is an intentional hole in an otherwise solid wall or ceiling, so it can behave like a shortcut for noise unless you treat the duct path as carefully as the rest of the room.
That is why so many vent soundproofing attempts fail. People tape foam over the grille, stuff insulation into the opening, or hang something heavy over the face, then wonder why the room is still noisy or why the HVAC system starts struggling.
The better approach is to treat the vent as a sound-leak path that still has to move air. Once you understand that constraint, the right fixes become much clearer and you stop wasting time on methods that either block airflow dangerously or barely reduce noise at all.
Below, you will learn why vents carry so much sound, how to separate voice transfer from mechanical noise and rattling, which vent-specific fixes actually work without killing airflow, and which common mistakes to avoid before you spend money on the wrong solution.
How to soundproof a vent depends on whether the problem is voice transfer through shared ducts, mechanical HVAC noise, turbulence, or a loose vibrating grille. The safest and most effective fixes usually treat the duct path, grille fit, or equipment side of the system rather than simply covering the opening, and they always preserve enough airflow to keep the HVAC system healthy.
Vent Soundproofing Starts With The Air Path, Not The Grille
Once you accept that a vent is an opening that still has to breathe, the logic of the problem becomes much clearer.
The first job is understanding why this one opening can undo so much of the surrounding room.
Vents Leak Noise Because They Bypass The Barrier
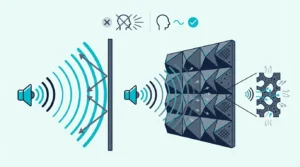
Vents create a direct air path between rooms. Sound waves follow that path the same way air does, which means a vent opening can transmit speech, music, and equipment noise almost as if there were no wall at all.
This is the same reason soundproofing a door matters so much. Any opening in an otherwise solid barrier becomes the weak link, and vents are often the weakest link in the entire room because the duct runs straight through the wall or ceiling cavity.
The problem is worse for return-air vents because they tend to be larger and connect to a common plenum. A single return duct can act as a bridge between every room on the same system, which is why apartment dwellers and condo owners often hear conversations from units they did not even know shared ductwork.
The First Diagnostic Split Is Transfer Noise Versus Mechanical Noise
Before you fix anything, figure out which problem you actually have. Voice transfer through shared ducts is a different problem from fan noise, rattling sheet metal, or airflow turbulence at the grille.
Turn the HVAC system off and listen. If the noise continues, the issue is sound traveling through the duct path from another room.
If it stops, the problem is mechanical, and the fix is usually closer to the air handler, fan, damper, or duct layout rather than the decorative vent cover.
This diagnostic step saves more money than any single product purchase. Many people buy vent covers, foam inserts, or random duct-wrap materials before they know what the actual noise source is, and that almost always leads to wasted spending and unchanged results.
Vent Work Is Different Because The Opening Has To Stay Open
The biggest difference is that you cannot seal a vent the way you seal a wall. Soundproofing a wall works by adding mass, decoupling layers, damping vibration, and closing every gap.
Vent soundproofing has to manage those same principles while still letting air pass through, and that constraint changes every product choice you make.
That is also why generic soundproofing advice often fails when applied to vents. What works on a solid surface does not automatically work on an opening that needs to stay open, and what helps a rattling vent cover is not always what helps voices traveling through a shared return.
The same logic applies when you compare vent work to soundproofing a floor or soundproofing an existing wall. Those projects focus on upgrading a closed barrier.
Vent work is fundamentally different because the weak point is an air path, so the goal is to make that path less direct, less leaky, and less resonant without turning it into a blockage.
Safe Vent Fixes Reduce Sound Without Choking Airflow

That requirement changes the fix order immediately.
In vent work, the wrong shortcut can reduce airflow faster than it reduces noise.
The Best First Fixes Usually Work Inside The Duct Path
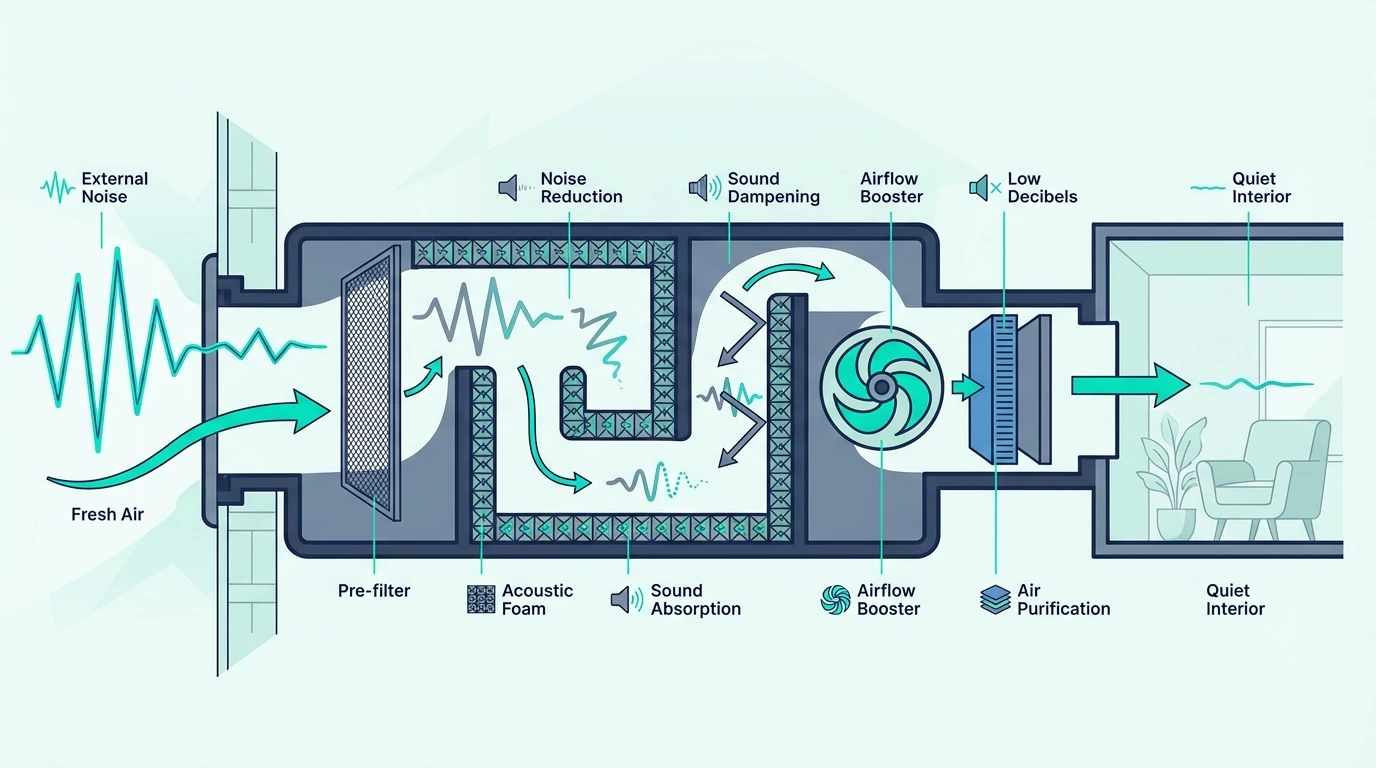
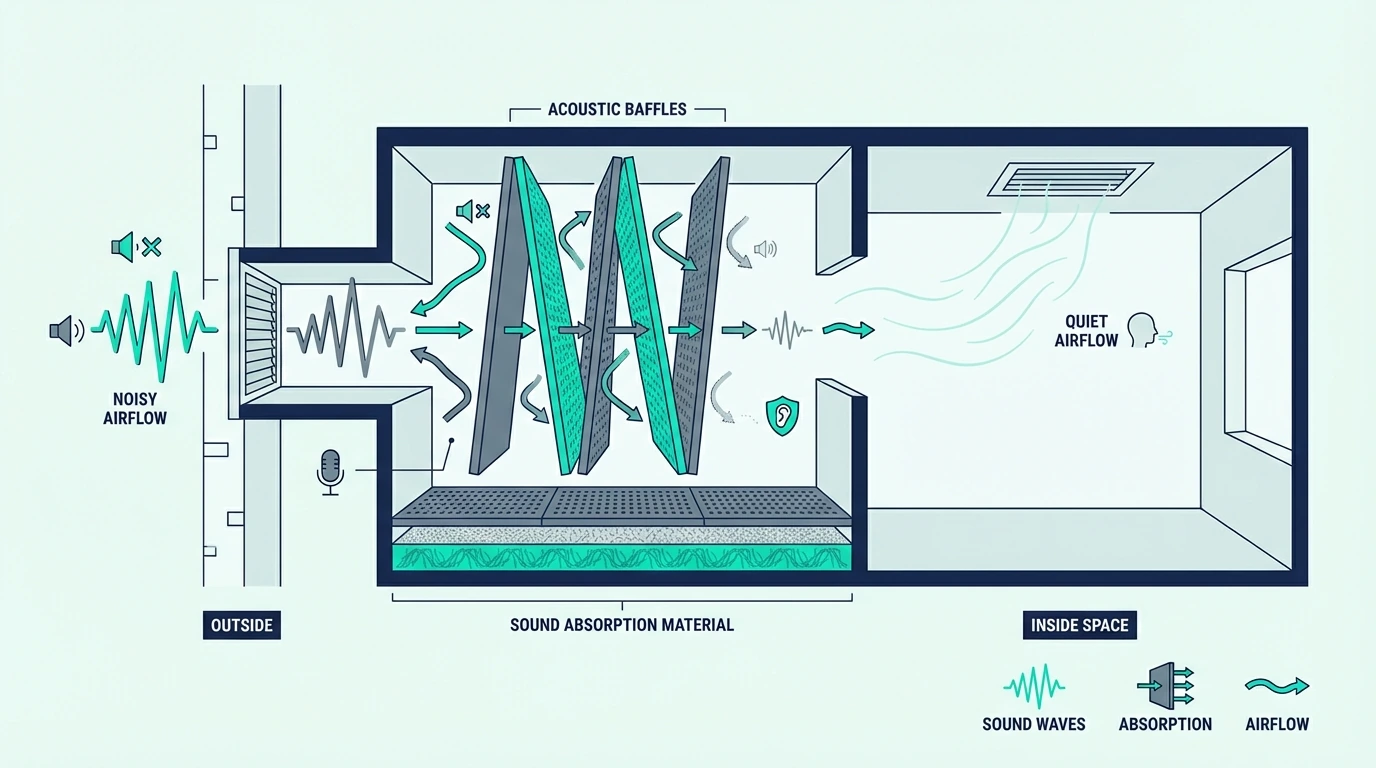
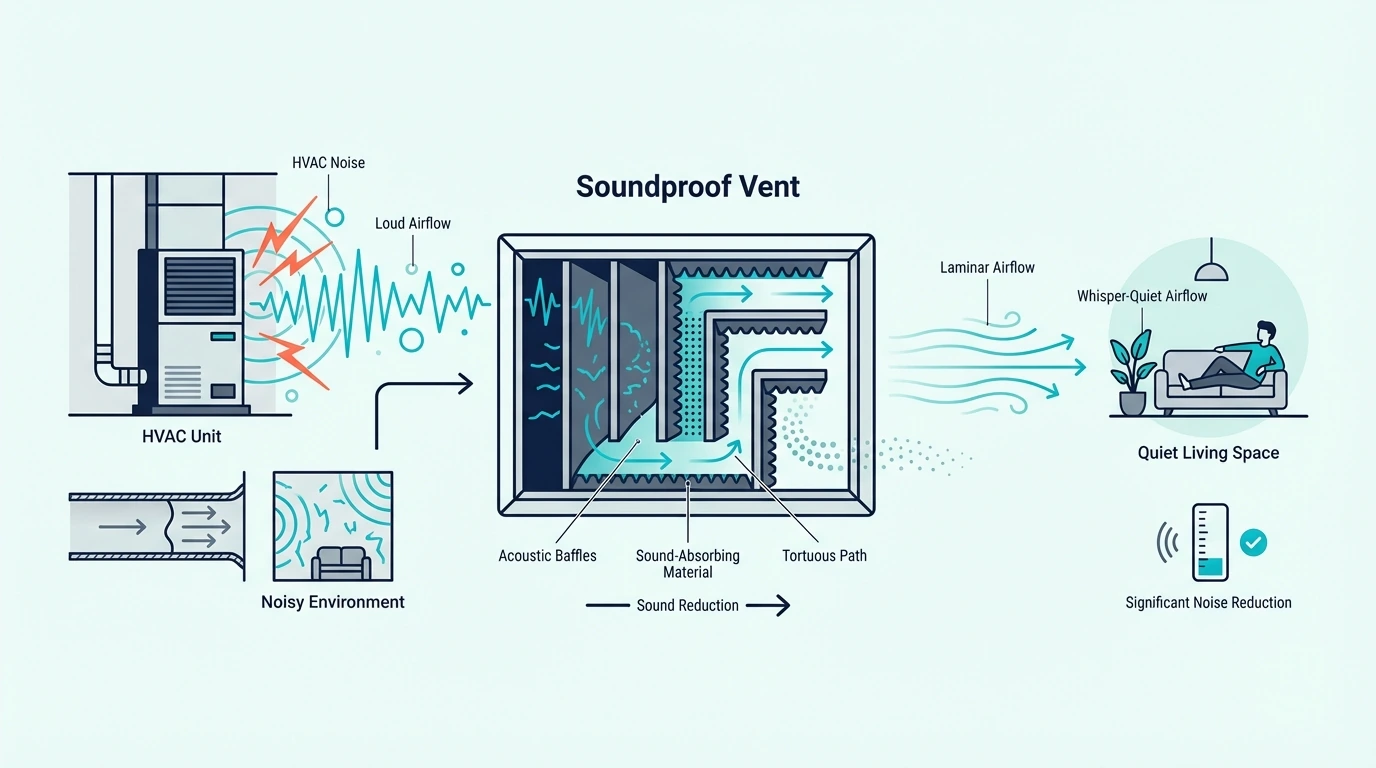
The most effective airflow-safe approaches work inside the duct path rather than only on the face of the grille. These include acoustic duct liners, inline silencers, cross-talk attenuators, and sound mazes that force the air to travel a longer path before reaching the room.
An acoustic liner inside the duct is usually the cleanest way to absorb some of the sound energy moving down the run. If you do not have access for a true liner, a dense barrier such as TroyStudio High Density Mass Loaded Vinyl can help by adding mass to a short vent box or accessible duct section so the sheet metal does not transmit as much sound.
TroyStudio High Density Mass Loaded Vinyl
Replacing a standard stamped-metal grille with a thicker, gasketed vent cover can also help. It will not stop all transfer, but it can reduce edge leakage and stop a thin grille from buzzing under strong airflow.
Blocking The Opening Is Where Safe Fixes Turn Into Bad Ones
Never seal a vent completely with tape, plastic sheeting, or solid foam blocks. Closing a supply or return vent changes the pressure balance in the HVAC system, which can cause the equipment to work harder, increase energy costs, and eventually damage the system.
Stuffing a vent with loose insulation is another common mistake. It restricts airflow unpredictably, can shed fibers into the air stream, and rarely reduces sound as much as people expect because the material is not dense enough to block the frequencies that matter most.
You should also avoid hanging a loose heavy flap, magnetic cover, or improvised panel over the opening during normal HVAC use. Those ideas sometimes seem logical because they add mass, but if the piece can vibrate under airflow it can create its own humming or “booming” noise while still failing to solve the deeper duct-path problem.
Sometimes The Real Solution Is Deeper In The System
Sometimes the vent is not the real problem. If you share ductwork with a neighbor or another room and the noise is loud enough to hear clearly, the issue may be that the duct run is too short, too straight, or too poorly isolated to attenuate sound before it reaches your space.
In that case, the better fix is deeper in the system: adding a longer duct run, inserting an inline silencer or cross-talk attenuator, building a dead-vent style transfer box, or rerouting the duct so it does not connect two noise-sensitive rooms with a direct path. That kind of work usually requires an HVAC professional, but it solves the root cause instead of masking it at the grille.
Get Studio Tips Weekly
Join 5,000+ creators getting acoustic treatment advice every week.
No spam. Unsubscribe anytime.Voice Transfer Problems Usually Mean The Duct Path Is Too Direct
Voice transfer through vents is one of the most common complaints in apartments, condos, and multi-room homes where ductwork connects spaces that should be private.
Shared Ducts Can Function Like Speaking Tubes
Shared ducts act like speaking tubes. When two rooms connect to the same trunk line with short branch runs, speech can travel from one room to the other with very little loss.
The shorter and straighter the duct path, the worse the privacy problem becomes.
This is especially common in older buildings and apartments where the HVAC layout was designed for efficiency rather than acoustic separation. It also shows up in home offices, bedrooms, and media rooms that share a return-air path with a noisier part of the house, which is why soundproofing an apartment and soundproofing a bedroom often lead back to the vent as the weak link.
If you are dealing with this in a rental, the vent path is one of the hardest problems to solve without landlord cooperation because the most effective fixes require access to the duct interior. Temporary measures like adding a dense blanket such as US Cargo Control Sound Dampening Blanket over the wall area around the vent can reduce some transfer as a short-term test, but it is not a substitute for treating the duct path itself.
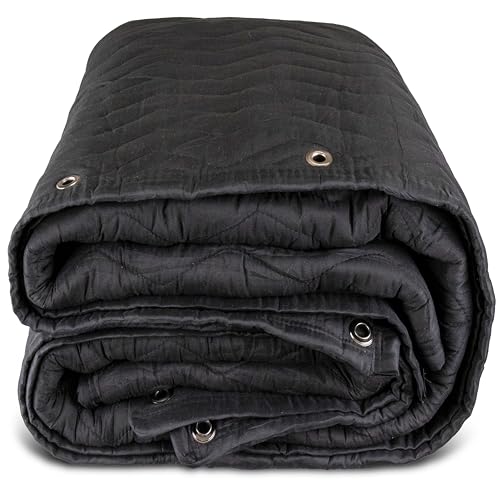
US Cargo Control Sound Dampening Blanket
Sound Mazes Work By Making The Path Longer And Less Direct
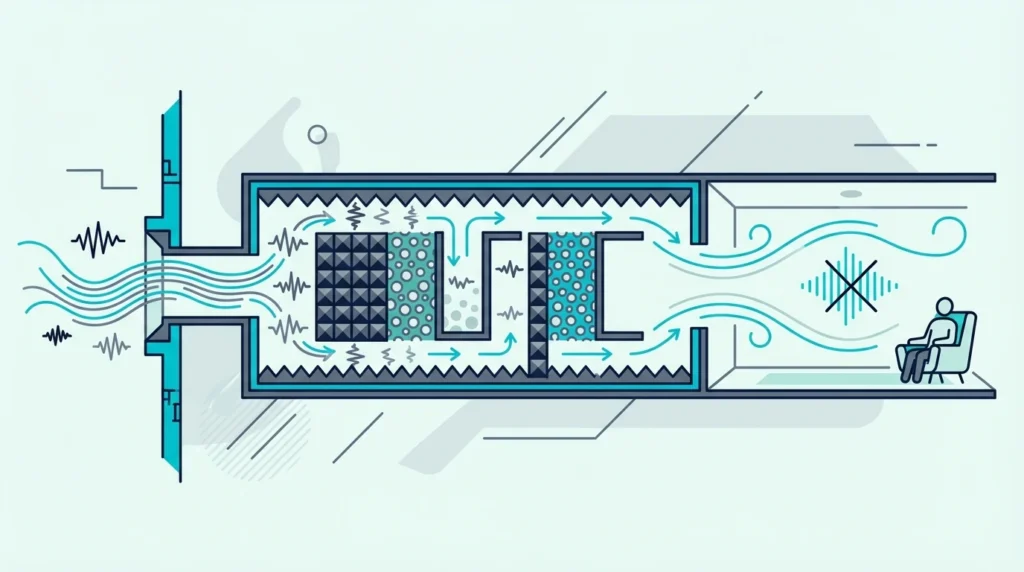
A sound maze is a baffle system inside the duct or transfer box that forces air to travel a longer, more indirect path before reaching the room. The idea is simple: sound waves lose energy every time they bounce off a surface, so adding more turns and absorptive surfaces inside the path reduces transmission without fully blocking airflow.
You can build a basic sound maze by lining the inside of a short duct section or transfer box with acoustic material and adding offset baffles that create a zigzag path. The longer and more indirect the path, the more sound it sheds before reaching the grille.
The trade-off is that every baffle adds some airflow resistance. A well-designed maze balances attenuation against static pressure drop so the HVAC system can still move the rated volume of air.
If you are not comfortable calculating that balance, a prefabricated inline silencer is usually the safer choice because it is already engineered for a specific duct size and airflow rate.
For DIY builders, the most common approach is a plywood box lined with acoustic material that connects between the vent and the main duct run. Two or three offset baffles inside the box create the zigzag path.
The box should be sized so the total open cross-section is at least as large as the original duct to avoid choking airflow. Even a basic two-baffle maze can noticeably reduce speech transfer, especially when the path is long enough and the lining is good at absorbing the mid-frequency range where voice clarity sits.
Liners And Silencers Make Sense When The Path Needs Real Attenuation
Duct liners make sense when you have access to the inside of the duct and the noise is moderate. They work best on shorter runs where you can treat the first few feet of duct near the vent opening or inside a transfer box.
Inline silencers and cross-talk attenuators make sense when the noise is louder, the duct run is longer, or you need a more engineered solution. Commercial silencers are designed to attenuate specific frequency ranges while maintaining rated airflow, and they are the standard approach in studios, equipment rooms, and other spaces where both quiet and ventilation are non-negotiable.
For the duct walls or vent box themselves, a heavier-grade barrier like Trademark Soundproofing Mass Loaded Vinyl can make sense because it adds real mass to the assembly rather than relying on lightweight foam that barely affects low-frequency transmission.
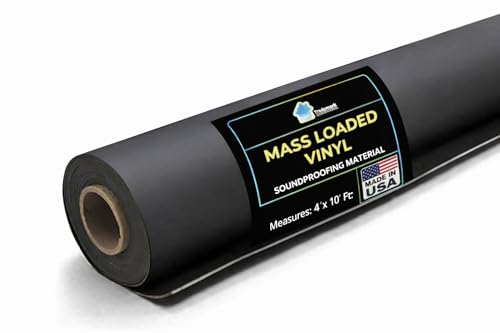
Trademark Soundproofing Mass Loaded Vinyl
Mechanical Vent Noise Needs A Different Fix Than Voice Transfer
If the noise stops when the HVAC system is off, you are no longer solving a privacy path.
You are solving equipment noise, airflow noise, resonance, or bad hardware.
Airflow Noise Usually Means Velocity Or Restriction Problems
Fan noise and airflow turbulence are the most common mechanical causes of vent noise. A system that is undersized, running too fast, or pushing air through restrictive ductwork will create audible turbulence at every vent in the path.
The first check is whether the noise is worse at specific vents. If it is, the issue may be a poorly sized duct, a sharp bend, a restrictive filter, or a damper that is partially closed and creating turbulence.
Fixing the restriction is usually more effective than adding material to the vent itself.
If the problem is general fan noise throughout the system, the fix is usually closer to the air handler. Adding vibration isolation to the unit, replacing a worn fan motor, correcting blower speed, or installing an inline silencer between the air handler and the first trunk line can reduce noise at every vent downstream.
If the noise is a strong whoosh rather than a transferred voice, think airflow first. Lower velocity, smoother duct geometry, and better vibration control usually outperform any attempt to make the vent cover itself heavier.
Rattles Often Come From Loose Trim, Not Failed Soundproofing
Rattling vent covers are one of the easiest problems to fix and one of the most commonly misdiagnosed. Before you spend money on soundproofing products, check whether the grille is loose, the screws are missing, the damper blade is vibrating, or the duct connection behind the grille has separated.
Tightening the grille, adding a thin gasket between the grille and the wall with soundproofing weather stripping, and securing any loose duct joints with foil tape can eliminate rattling noise completely. This is a five-minute fix that many people skip because they assume the problem is more complicated than it actually is.
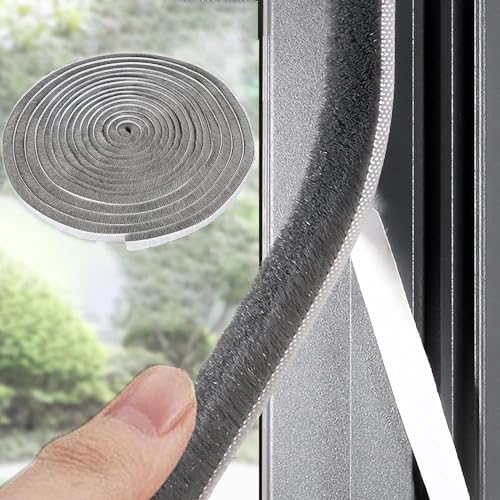
33 Ft Gray Self-Adhesive Soundproofing Weather Stripping
If the metal boot or trim leaves visible cracks around the opening, a bead of acoustical caulk around that perimeter can stop extra leakage without sealing the vent face itself.
Acoustical Caulk (29 oz)
If the metal itself is ringing, the problem may be resonance rather than leakage. In that case, a better-mounted grille, a small amount of damping on the vibrating metal, or lower airflow velocity is usually more effective than simply trying to hang more weight on the cover.
HVAC Pros Matter When The System Layout Needs To Change
Call a professional when the noise is coming from the equipment itself, when you suspect pressure imbalance across the system, or when the duct layout needs to be modified. HVAC systems are designed as balanced pressure networks, and changing duct sizes, adding baffles, or rerouting runs without understanding the system can create new problems.
You should also call a professional if you want an inline silencer installed correctly or if the duct run between two rooms needs to be extended to improve acoustic separation. These are not difficult jobs for an experienced technician, but they are easy to get wrong without the right tools and system knowledge.
Most Vent Mistakes Come From Treating The Face Instead Of The Path

Most vent soundproofing failures come from the same small set of bad ideas that keep circulating online.
Sealing The Vent Usually Creates A New Problem Faster Than It Solves The Old One
Sealing a vent changes the pressure balance in the HVAC system. Every supply and return vent is part of a designed airflow network, and closing one forces the system to compensate elsewhere.
That can increase noise at other vents, reduce system efficiency, and in some cases void equipment warranties.
Removing a vent entirely is even worse because it eliminates the controlled air path and can create condensation problems, temperature imbalances, and code violations depending on the building. The right approach is always to reduce sound transfer through the vent while keeping it functional.
The Grille Is Only The Last Few Inches Of The Problem
Because the vent cover is just the exit point, not the path. Sound travels through the duct behind the cover, and a thicker, heavier, or more absorptive grille only addresses the last few inches of a path that may run many feet through the wall or ceiling.
That is why the most effective vent treatments work inside the duct itself. A properly lined run, cross-talk attenuator, or sound maze inside the duct will outperform any amount of foam stuck to the outside of the grille because it addresses the transmission path rather than the exit point.
Diagnosis Should Always Choose The First Fix
Start by diagnosing the actual problem. Turn off the HVAC system and listen.
Check whether the noise is voice transfer, mechanical noise, turbulence, resonance, or some mix of those. Then match the fix to the diagnosis.
If the issue is voice transfer, focus on the duct path: liners, baffles, a sound maze, or a cross-talk attenuator. If the issue is mechanical, focus on the equipment and airflow: vibration isolation, fan repair, damper correction, or inline silencing.
If the issue is rattling or ringing metal, fix the hardware, fit, and vibration first before spending on anything else.
That diagnostic step is the same logic that applies across the broader soundproofing hub. The best fix is always the one that matches the real weak point, not the one that sounds most impressive in a product listing.
The Bottom Line
How to soundproof a vent comes down to understanding that vents are open paths in otherwise solid barriers, and the fix has to work inside that path without killing airflow. The strongest results come from treating the duct itself with liners, baffles, dead-vent style boxes, or silencers rather than just covering the grille.
For most people, the right first step is diagnosis: figure out whether the problem is voice transfer, mechanical noise, turbulence, or a loose vent, then match the fix to what you actually find. That approach saves money, avoids HVAC damage, and delivers real noise reduction instead of the false confidence that comes from taping foam over an opening and hoping for the best.
If you have already treated the vent and the room is still noisy, step back and check whether other openings are now the weak link. Doors, windows, and thin wall sections can all become the dominant leak path once the vent is handled, which is exactly why the broader how soundproofing works logic matters: the quietest room is always limited by its weakest barrier, and fixing one path just makes the next-weakest path more obvious.
If you are working on a broader room upgrade, compare this page with soundproofing a ceiling, soundproofing windows, best soundproofing panels, best soundproofing material, and best soundproof curtains so the vent fix stays in proportion to the rest of the room. If the room also has a noisy floor path, best soundproof underlayment for hardwood floors covers the other major transmission route that often overlaps with vent complaints in multi-story buildings.
Frequently Asked Questions
How do I stop hearing voices through my vents?
You stop hearing voices through vents by treating the duct path between the rooms, not just the grille. Adding a sound maze, duct liner, cross-talk attenuator, or more indirect duct path so speech loses energy before reaching your room are the most effective approaches.
Can my neighbors hear me through the vents?
Yes, if you share ductwork with a neighboring unit, sound can travel through the ducts in both directions. The shorter and straighter the shared duct run, the more clearly voices and other sounds carry between spaces.
Can I tape cardboard over my vent?
You should not tape cardboard or any solid material over a vent because it blocks airflow and changes the pressure balance in the HVAC system. That can increase noise at other vents, reduce system efficiency, and potentially damage the equipment over time.
If you want a quick test to see how much sound the vent is contributing, hold the cardboard temporarily while someone makes noise in the other room, but never leave it sealed during normal everyday HVAC operation.