How to Apply Acoustic Foam to Brick (Without Ruining It)
Brick walls look incredible, but they’re one of the hardest surfaces to treat cleanly. Foam that would stay put on drywall can peel off brick overnight.
The wall installation guide covers standard methods that work on flat surfaces.
The reason isn’t the foam—it’s the brick. You’re trying to bond a soft panel to an uneven, dusty, porous surface.
In this guide you’ll get four practical paths: a permanent adhesive method, a removable “foam on a board” method, a furring-strip method that creates a flat surface, and no-drill freestanding options. Start with the Quick Takeaway, then pick the method that matches your constraints.
If you want the strongest hold and you don’t care about removal, use a masonry-rated construction adhesive and support panels while it cures. On brick, surface prep and cure time matter more than the brand.
If you rent or you care about the brick finish, skip glue and mount foam to a backing board, then hang that board on anchors or a cleat system. If you don’t want to drill at all, treat the room with freestanding absorbers placed in front of the brick.
Quick note: this is acoustic treatment, not soundproofing. Foam helps with reflections in the room, not noise coming through the wall.
Why Is Brick Hard to Mount Acoustic Foam On?
Most brick mounting failures come from the surface, not the foam. Once you see what brick does to adhesives, the right mounting method becomes obvious.
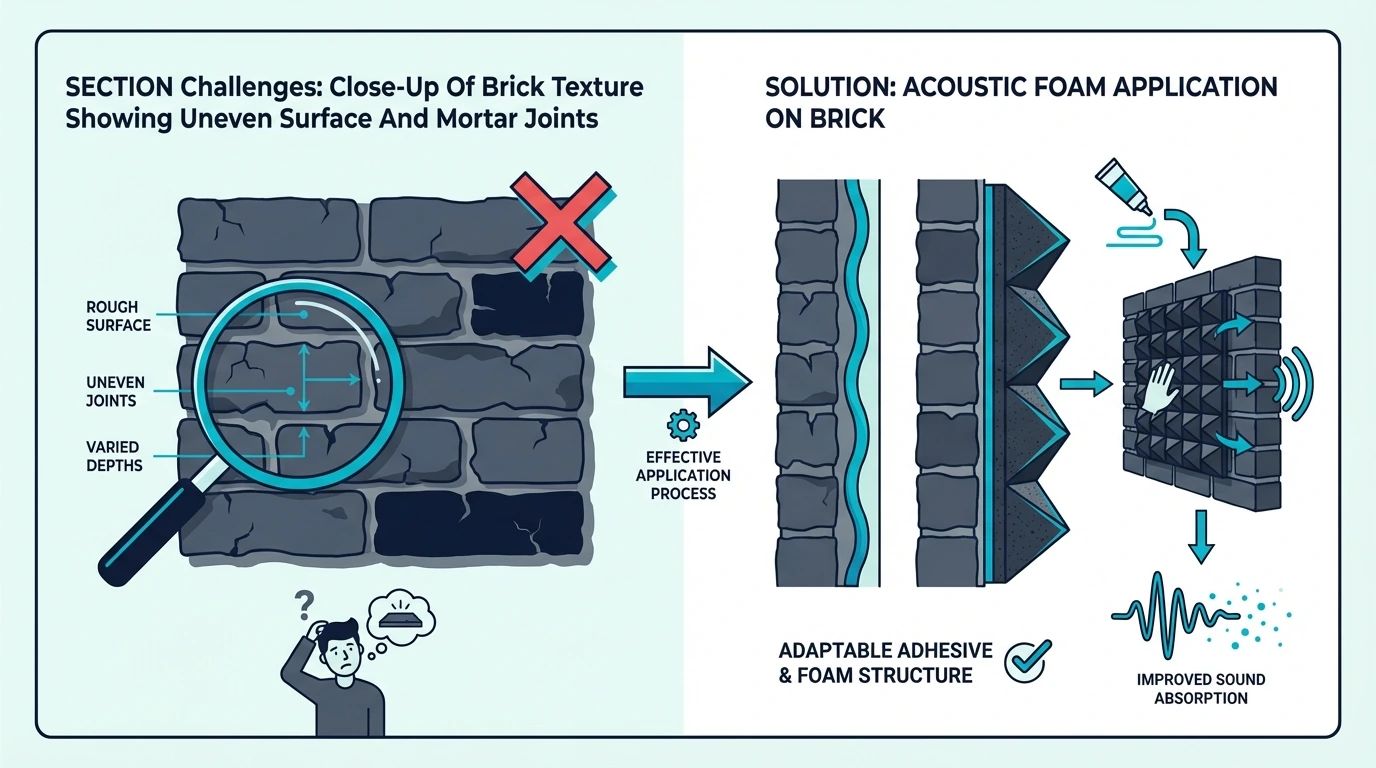
Brick Has Low Contact Area (Texture + Mortar Gaps)
Brick is a field of high points and valleys, so a foam panel only touches the peaks. That means your adhesive is holding onto a tiny percentage of the surface.
The best acoustic foam panels guide covers which products handle uneven surfaces better.
Mortar joints make the problem worse by creating voids behind the foam. Those air gaps let the panel flex, and flex is what slowly peels adhesives loose.
Brick Dust and Porosity Kill Adhesive Bonds
Brick and mortar shed fine dust, and that dust acts like a release layer. Even “clean” brick often has enough surface dust to make tape or spray adhesive fail.
Brick is also porous, so thin adhesives can soak in before they cure. That’s why thick, gap-filling adhesives or mechanical mounts tend to win on masonry.
Reversibility Matters More on Brick Than Drywall
On drywall, you can patch and repaint. On exposed brick, stains, chipped faces, and visible holes can be a dealbreaker.
So before you pick a method, decide whether you’re optimizing for maximum hold, easy removal, or preserving the look. That one decision will steer you toward glue, anchors, strips, or freestanding treatment.
What’s the Best Adhesive for Acoustic Foam on Brick?
If you’re going to glue foam to brick, you need an adhesive that can fill gaps and bond to masonry. Thin spray adhesives can work on smooth walls, but brick is a different job.
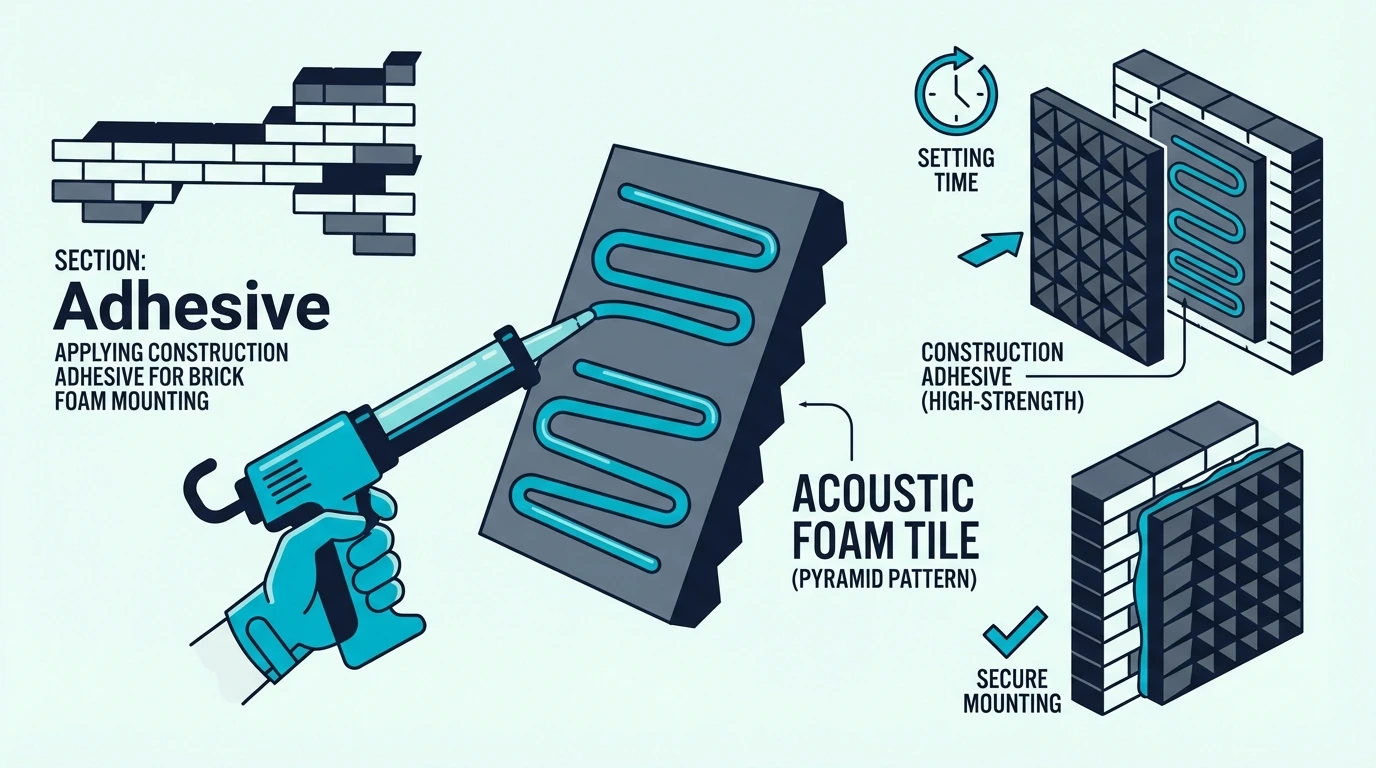
Use a Gap-Filling Adhesive Rated for Masonry
Look for a construction adhesive that explicitly lists brick/concrete/stone and cures thick. A product like fast-curing construction adhesive for brick is built for uneven, porous surfaces where you need thickness to get contact.
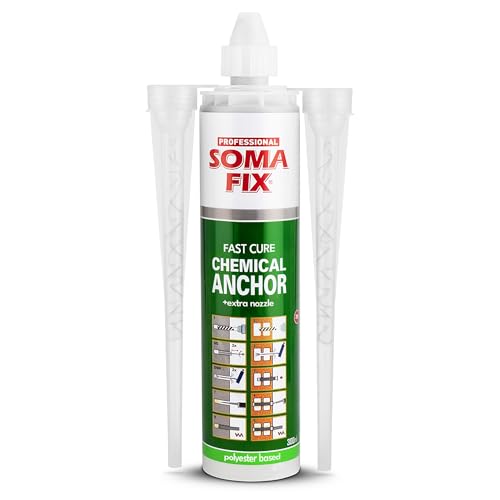
Fast-Curing Construction Adhesive for Brick/Concrete
This is the “I want it to stay up” option, not the “I want it to come down clean” option. If preserving brick is a priority, skip ahead to the no-glue mounting methods.
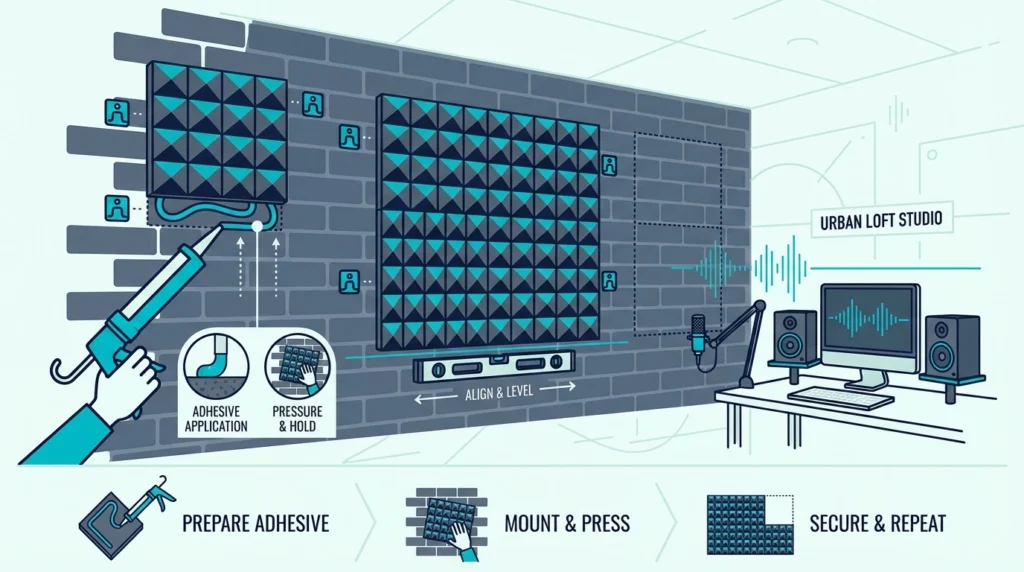
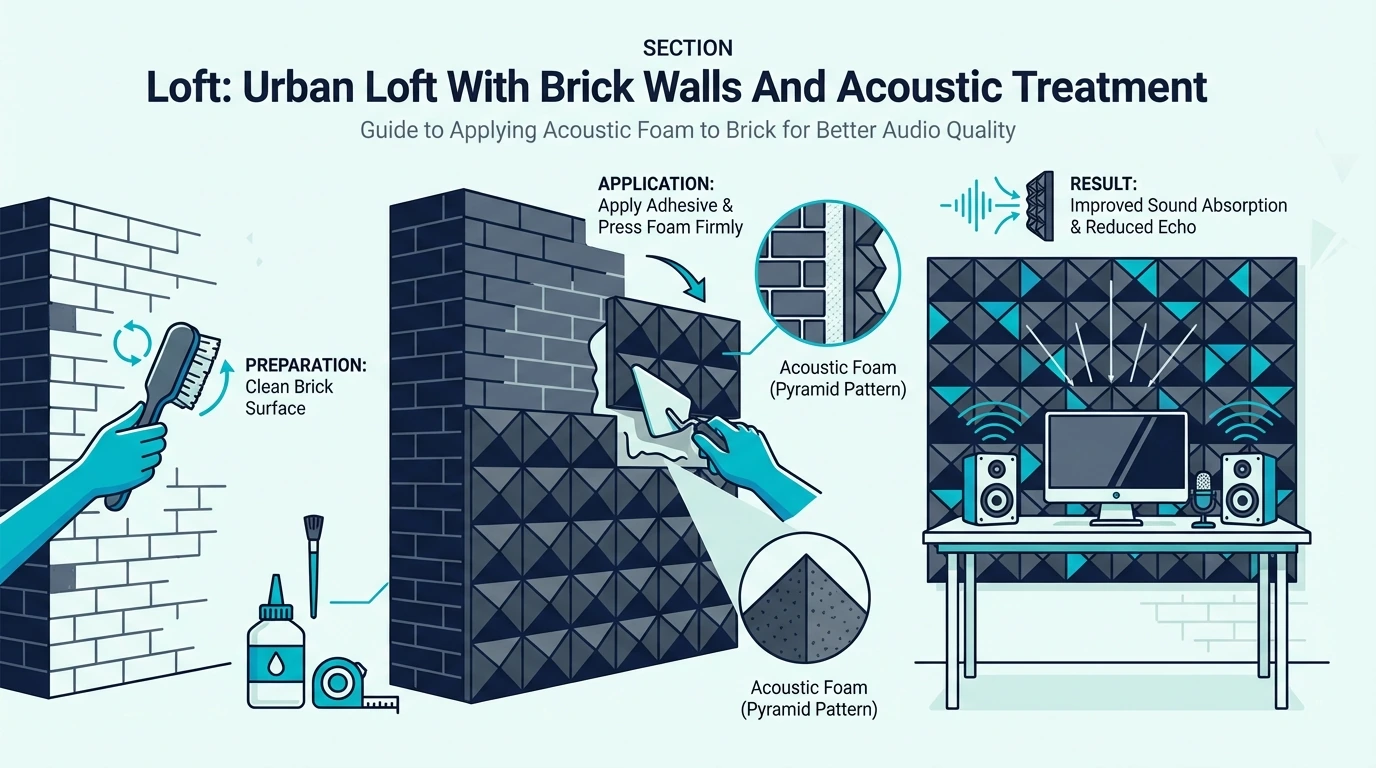
Prep and Support Matter More Than the Brand
Start by brushing the brick to knock loose debris off the surface. Then vacuum thoroughly and wipe with a damp cloth, because dust left behind is what makes mounts fail later.
Let the wall dry fully before you bond anything, because moisture slows curing and weakens adhesion.
When you mount the foam, press it into the texture and support it while the adhesive cures so it can harden without sagging.
When You Should Avoid Adhesive Completely
If your brick is painted, sealed, crumbling, or historically important, adhesive is a bad gamble. You can also end up with dark stains that don’t come out if the brick is very porous.
In those situations, it’s safer to mount foam to a board and mechanically hang the board, or treat the room with freestanding absorbers. That gets you acoustic improvement without turning “better audio” into “how do I fix my brick.”
For a similar masonry surface with less aesthetic risk, see how to put acoustic foam on cinder blocks. Brick is usually less forgiving than cinder block when you remove glued-on material.
Get Studio Tips Weekly
Join 5,000+ creators getting acoustic treatment advice every week.
No spam. Unsubscribe anytime.How Do You Mount Acoustic Foam on Brick Without Glue?
If you want a removable install, don’t try to anchor the foam itself. Build a mounting layer first, then attach foam to that layer with normal methods.
The Cleanest Method: Foam on a Backing Board
Mount your foam to a thin board (plywood or MDF), then hang the board on the brick. You get a flat surface for clean alignment, and you can take the whole thing down later.
A simple Z-hanger or French-cleat style bracket like aluminum Z-hanger (French cleat) makes this easy: mount one side to the brick, mount the other to your board, then lift the board on and off.
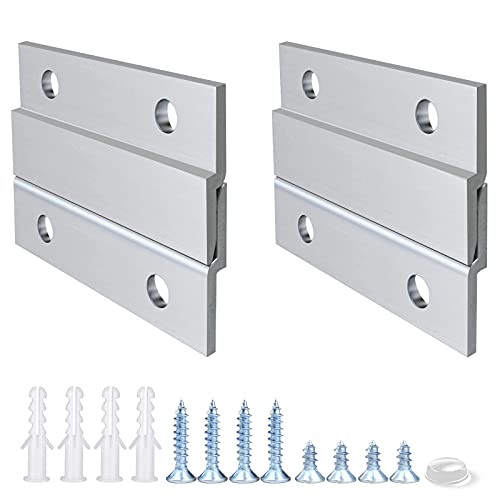
Aluminum French Cleat / Z Hanger (2 inch)
If you’re not sure where treatment belongs before you mount anything, start with placement first. The arrangement guide helps you pick the wall that actually affects recordings, so you don’t install a perfect mount in a useless spot.
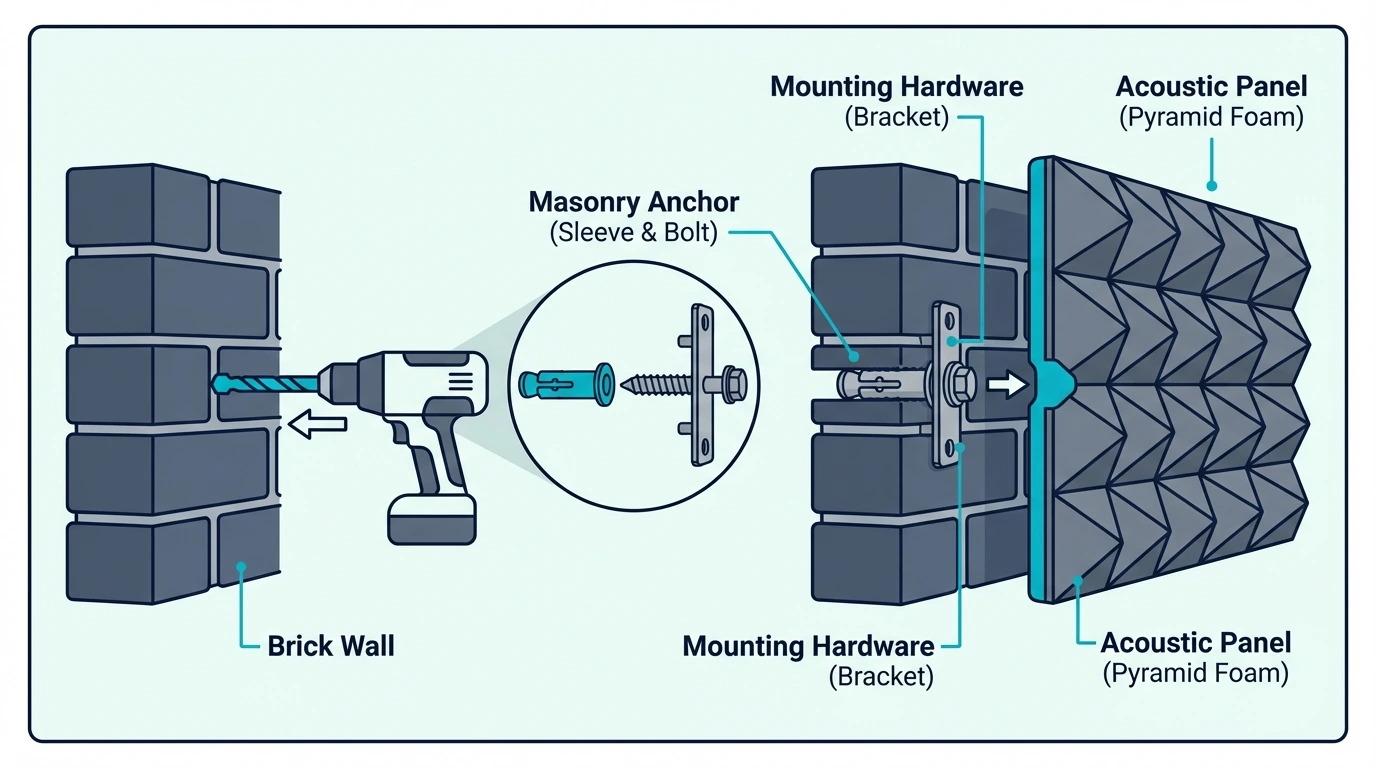
Should You Drill Into Brick or Mortar?
For maximum hold, brick is usually stronger than mortar. Mortar is easier to drill and easier to patch later, but it can crumble and loosen over time.
If you think you’ll remove the mount later, mortar can be a reasonable compromise. If you want the mount to last and you don’t mind permanent holes, brick is the safer long-term anchor point.
Reinforce Anchors When the Surface Is Weak
Old mortar and soft brick can strip out, especially if you overtighten fasteners. In those cases, anchoring adhesive can help you set hardware more securely in masonry.
An example product is SIKA AnchorFix-2, which is made for anchoring hardware in concrete and brick.
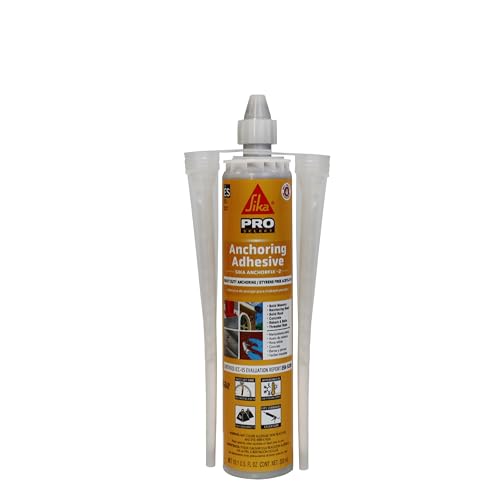
SIKA AnchorFix-2 Anchoring Adhesive
This isn’t necessary in good brick, but it’s a useful fix when your anchor holes keep failing. If you’re trying to avoid drilling entirely, the next section covers furring strips and freestanding options instead.
For a baseline mounting overview (including removal considerations), see how to put acoustic foam on walls. Brick adds complexity, but the same “plan first, mount cleanly” rule still applies.
Should You Use Furring Strips for Acoustic Foam on Brick?
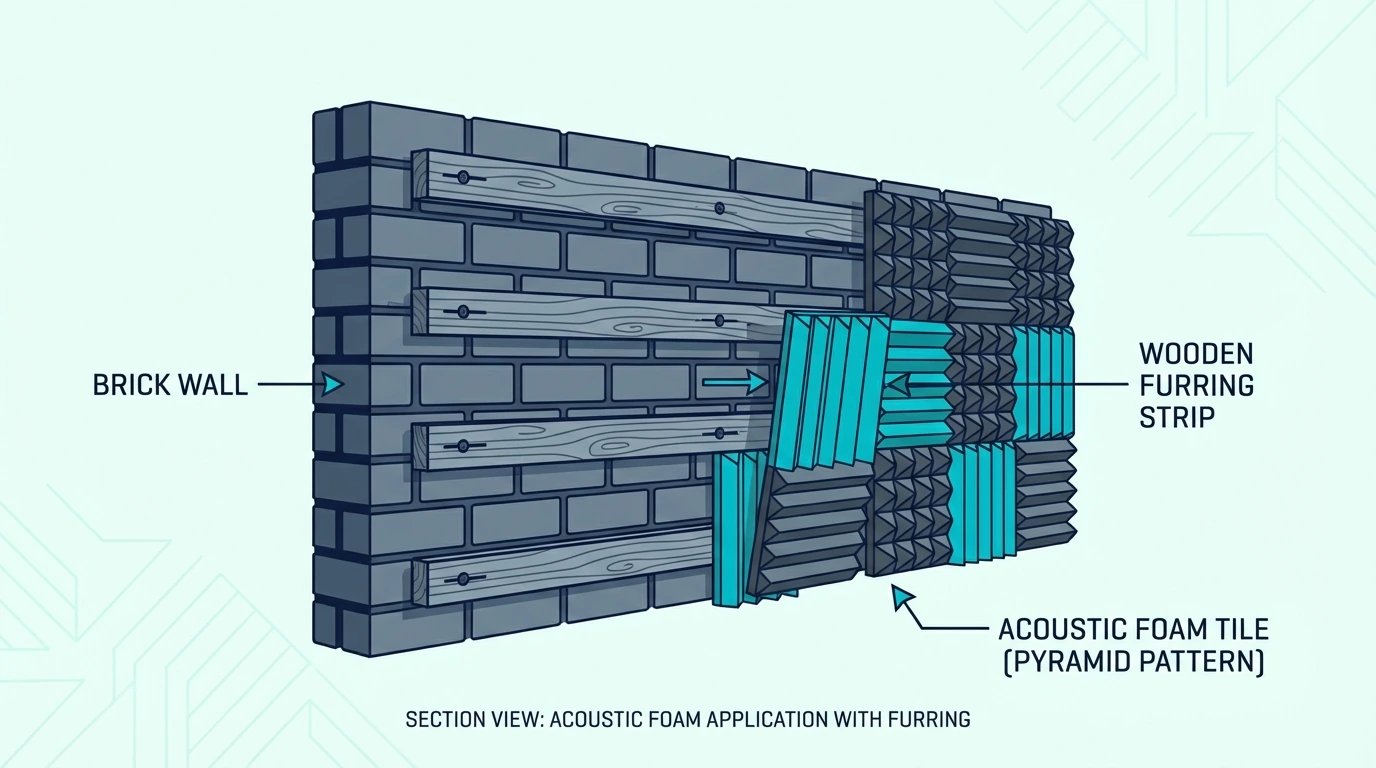
Furring strips solve the brick problem by removing it from the foam-mounting equation. You anchor wood strips to the brick, then mount foam to the wood like you would on a normal wall.
Why Furring Strips Work So Well on Brick
Once you have a flat wood surface, adhesives behave predictably and panels align cleanly. You also create a small air gap behind the foam, which can slightly improve low-mid absorption compared to foam glued directly to the brick.
This method is a strong middle ground when you want a “real install” but you don’t want to permanently glue foam onto a nice brick wall. The tradeoff is that the wood is a visible modification unless you design around it.
A Simple Layout That Stays Straight
Keep the strip layout simple and consistent, because the visual mess comes from crooked lines. If your panels are 12×12, plan strip spacing so panel edges land on wood instead of “floating” over mortar gaps.
Take the extra time to level the first strip, because every strip after that will visually follow it. If you rush this part, the foam can be perfectly mounted and still look sloppy.
Make Removal Easier Later
If you’re worried about resale or leases, treat the strips as the sacrificial layer. Foam can come off the strips later with less drama than foam coming off brick.
If you ever need to take treatment down cleanly, the removal guide is still relevant for “how do I avoid ripping things apart,” even though brick has different surface risks than drywall.
What’s the Best No-Drill Option for Brick Walls?
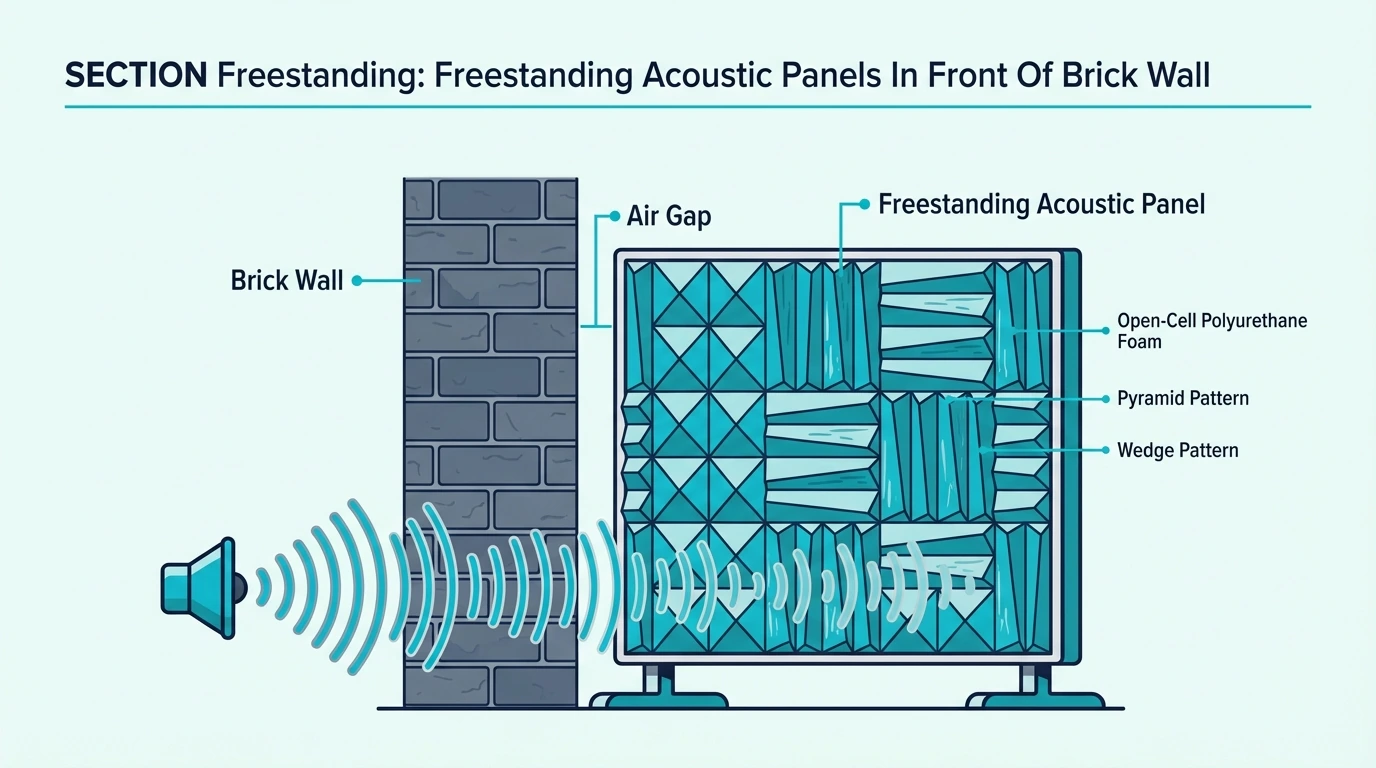
If you can’t drill, you can still treat the brick wall acoustically. You just treat the room in front of the brick instead of attaching foam to the brick itself.
Leaning “Absorber Wall” (Fastest Renter Option)
The easiest no-drill method is mounting foam to boards and leaning the boards against the wall. You get treatment at the reflection point without any brick contact, and you can move the boards if your layout changes.
This also works well in rentals where you need to remove everything without leaving a trace. If you’re setting up in an apartment, the apartment treatment guide helps set expectations for what foam can and can’t fix.
Ceiling-Hung Panels (If the Ceiling Is Allowed)
If drilling the ceiling is permitted, you can hang absorbers a few inches in front of the brick. That keeps the brick untouched and can be very effective in rooms where the brick wall is the loudest reflection.
It’s also a good solution for tall rooms where wall-only treatment isn’t enough. Just keep safety and load ratings as the priority over aesthetics.
Room Dividers for Open Plans
In open lofts, reflections don’t stay in one “room,” which makes freestanding treatment useful. A couple of movable absorbers can break up reflections and also create a quieter recording zone.
This is the same idea as “treat the mic position, not the whole building,” and it often beats trying to cover every hard surface. Once you’ve tested freestanding placement, you can decide if a permanent mount is worth it.
How Do You Treat Brick Walls Without Ruining the Look?
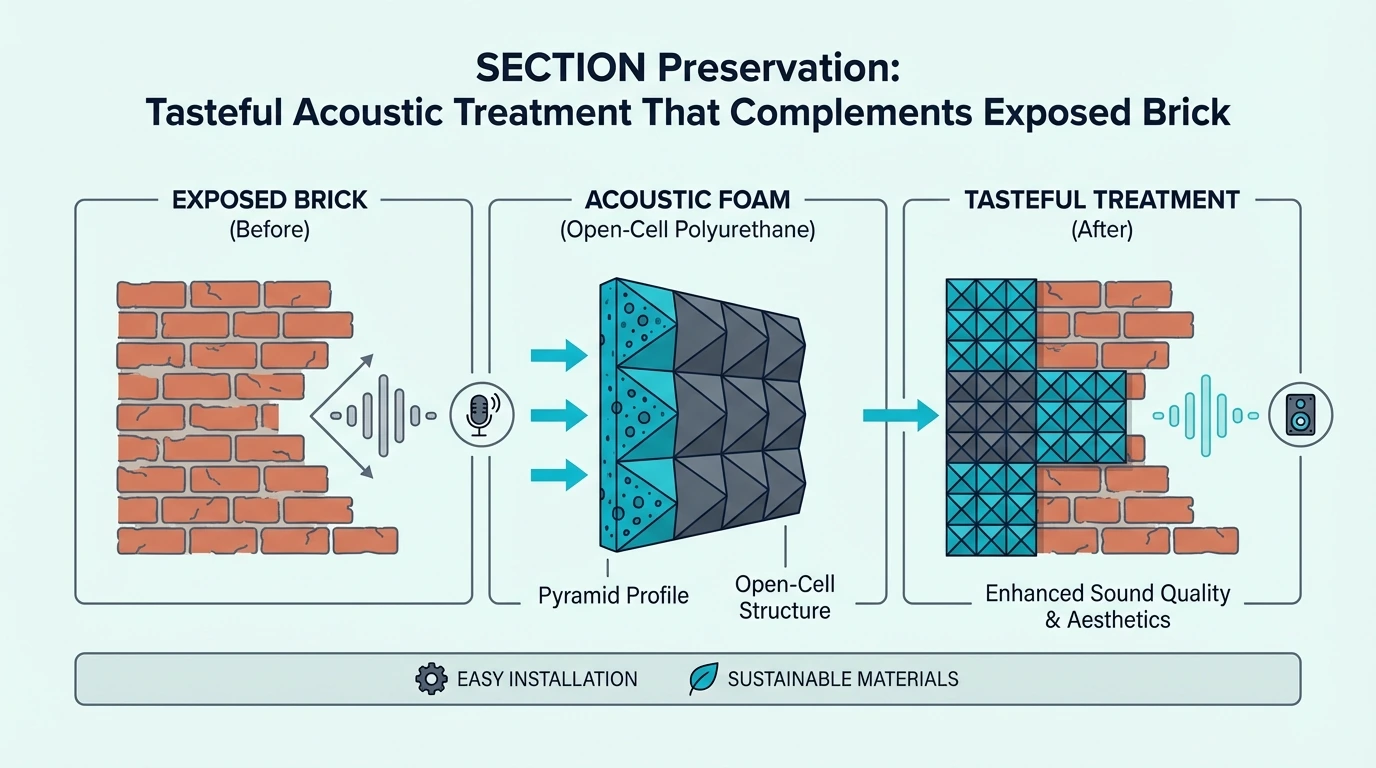
If your brick is part of the room’s character, wall-to-wall foam is usually the wrong move. Treating the right spots and keeping the brick visible gets more value per panel.
Treat Less Brick, But Treat the Right Spots
Start with first reflection points and the wall behind the mic/monitors, not random coverage. That usually gets you most of the clarity benefit while leaving most of the brick untouched.
The arrangement guide maps out those reflection points so you don’t waste material on surfaces that don’t matter.
Make Foam Look Intentional (Not Like a Patch Job)
When foam is visible, alignment and spacing matter as much as the product. Clean grids, consistent gaps, and deliberate color choices make foam read like design instead of clutter.
The styling guide covers layout and color choices that make foam read like design instead of a patch job.
Avoid Stains and Hard-to-Reverse Methods
Porous brick can stain from adhesives, especially on lighter-colored walls. If you care about the finish, reversible methods like boards, cleats, and freestanding mounts are the safer path.
What’s Different About Treating Lofts with Brick Walls?
Brick is common in lofts, but the loft itself changes the treatment strategy. Tall ceilings and open plans create long reflection paths that small patches of foam may not fully tame.
High Ceilings Make Ceiling Reflections a Bigger Deal
In a loft, reflections can bounce off the ceiling and come back late, which makes the room feel “live.” That’s why ceiling-hung absorbers or overhead treatment can matter more than you’d expect.
If you only treat the brick wall and ignore the ceiling, you may still hear the room in your recordings. Start with the biggest reflection paths, not the most obvious surface.
Hard Surfaces Stack Up Fast
Brick plus concrete floors plus big windows is a worst-case combo for reflections. Rugs, curtains, and soft furniture reduce the amount of work your foam needs to do.
The acoustic foam buying guide covers how to size coverage for larger rooms.
If you’re fighting the whole-room “ring,” it can be useful to look at broader solutions too. The acoustic foam alternatives guide covers options that can complement foam without turning the space into a studio cave.
Expect to Use More Coverage (But Don’t Place It Randomly)
Large spaces often need more surface area treated to hear a clear change. The mistake is buying more foam and scattering it everywhere, which looks bad and underperforms.
Pick one recording zone, treat the reflection points around that zone, then expand only if the room still sounds live. This keeps both the sound and the visuals under control.
Conclusion
If you want acoustic foam on brick to actually stay up, match the mounting method to the surface. Brick’s uneven texture and dust layer is why “normal wall” tape and thin adhesives fail.
For maximum hold, use a masonry-rated construction adhesive and support panels while it cures. For removable installs, mount foam to a board and hang the board with anchors or a cleat system, or treat the room with freestanding absorbers.
If your brick looks good, don’t destroy it to fix echo. Treat the right reflection paths, keep the install clean, and choose reversible methods when you’re not sure you’ll want it there forever.
Frequently Asked Questions
Will acoustic foam damage my brick?
It depends on the method. Adhesives can stain porous brick and are hard to remove cleanly, while anchors leave holes.
If you need zero brick damage, use freestanding or ceiling-hung treatment instead.
Can I use regular spray adhesive on brick?
Most spray adhesives are too thin for brick texture and don’t bond well through dust and porosity. If you’re going adhesive-based, use a thick, masonry-rated construction adhesive and support panels while it cures.
Should I mount into brick or mortar?
Brick is usually stronger and holds anchors better long-term, while mortar is easier to drill and easier to repair later. If you plan to remove the mount, mortar can be the “less permanent” choice.
How do I clean brick before mounting foam?
Brush the surface, vacuum the dust, wipe with a damp cloth, and let the wall dry fully. Skipping the dust step is the fastest way to make a mount fail later.
What’s the best method for renters with brick walls?
Use foam mounted to boards that lean against the wall, or freestanding absorbers placed at reflection points. Avoid adhesives and avoid drilling unless your lease explicitly allows it.
Can I cover the entire brick wall with foam?
You can, but it’s usually unnecessary and it erases the brick aesthetic. Strategic placement at reflection points usually delivers most of the acoustic benefit with less material.
If you feel like you need wall-to-wall coverage, it’s worth re-checking placement first. The goal is to treat the reflection path, not to blanket the room.

