Acoustic Foam Vocal Booth: Placement, Coverage & Thickness (2026)
Acoustic foam vocal booth setups can sound dramatically cleaner — but only if you treat the reflections the mic is actually hearing.
If your takes sound boxy, metallic, or like you’re singing into a cardboard tube, that’s usually early reflections slapping back into the capsule — kill those and you’ll need less EQ, less de-reverb, and fewer takes.
Foam isn’t magic and it definitely isn’t soundproofing, so don’t buy it expecting silence — use it for what it’s good at: cleaning up the inside of the booth.
This guide locks in thickness, coverage, and placement in the order you’ll actually hear on a take.
Start with 2-inch foam behind the mic, then aim for 60-80% coverage and adjust using real recordings. Foam improves reflections inside the booth, but it won’t block outside noise — sealing and mass are separate jobs.
Does acoustic foam work in a vocal booth?

Yes—acoustic foam works in a vocal booth when the problem is reflections, not isolation. It won’t turn a closet into a world-class studio, but it can take the “small box” edge off by reducing early reflections.
What foam actually fixes (the sound your mic hears)
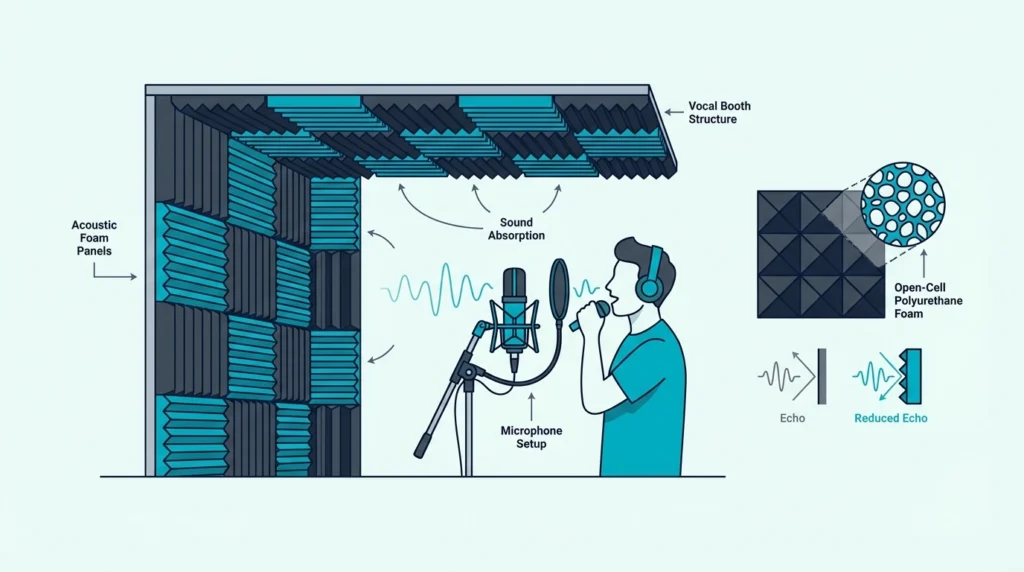
In a tight booth, your voice hits nearby walls so fast that reflections blend into the direct vocal. That’s why everything feels cramped even when the mic is fine.
Acoustic foam absorbs part of that reflected energy, so the mic hears more “you” and less “room.” When you get this right, vocals usually feel more forward and less scratchy.
Try this: record 10 seconds of speaking, then clap once in the booth and listen for a sharp ping or flutter. If you hear it, foam placed at the first reflection points will usually tame it immediately.
This is why foam helps podcasts and voiceover so much: the important vocal range lives roughly in the 250 Hz to 4 kHz area, and small rooms exaggerate it. Thickness decides how much of that range foam can actually touch—and it also explains why foam won’t do much for street noise or HVAC rumble.
What foam does not fix (and why people get disappointed)
If the issue is street noise, HVAC rumble, or a loud roommate, foam barely moves the needle because sound is still traveling through walls and gaps. That’s soundproofing territory, not treatment.
If your real problem is low-end boom or isolation, foam may not be the right spend – rockwool behaves differently. Our acoustic foam vs rockwool breakdown helps you pick the right tool for the job.
Before thickness, get this straight: foam fixes reflections inside the booth; it does not block noise coming through walls and gaps. If you’re chasing isolation, you’ll need sealing + mass first, then foam as the last step.
Will acoustic foam soundproof a vocal booth?

No—acoustic foam does not stop sound from entering or leaving a booth. It only changes what happens to sound once it’s inside, which is treatment, not soundproofing.
Soundproofing vs treatment, in plain English
Think of soundproofing like a brick wall: you add mass, seal gaps, and build an airtight barrier so sound has a hard time getting through. Think of acoustic foam like a sponge: it soaks up reflections so your voice does not bounce around.
Both are useful, but they solve different problems, and confusing them is why people say “foam doesn’t work.” Foam works great for reflections, but isolation starts with sealing leaks and adding mass.
If outside noise is the real issue, start here
Start with the door and any air gaps, because even a pencil-thin crack can leak a surprising amount of sound. Add weatherstripping, a door sweep, and make sure the booth closes tightly before you buy more foam.
After that, use foam as the finishing move to clean up the inside tone, not as the main tool for blocking noise. For broader room strategy, our guide on how to arrange acoustic foam helps you prioritize the highest-impact spots.
When foam is doing the right job (reflection control), thickness is the spec that actually changes what you hear. In booths, the jump from 1-inch to 2-inch is usually obvious on the first take.
Get Studio Tips Weekly
Join 5,000+ creators getting acoustic treatment advice every week.
No spam. Unsubscribe anytime.What thickness of acoustic foam is best for vocal recording?

For vocals in a booth, 2-inch foam is the practical starting point because it reaches further into the lower mids. One-inch foam can still be useful, but it is better as a supplement than the foundation.
Why 2-inch foam is the “booth minimum”
One-inch foam mainly grabs higher frequencies, which can make a booth sound less sharp but still boxy. Two-inch foam has more depth for sound to travel through, so it does a better job on the low-mid reflections that make vocals sound cramped.
In a closet-sized booth, that low-mid buildup is the whole game because the walls are inches from the mic. That’s why thicker foam behind the mic usually beats thin foam everywhere.
Don’t overthink NRC numbers if the listing does not publish real data, because sellers love to guess. Start with thickness and density, then fine-tune coverage with recordings.
Treat 2-inch as your baseline for the mic wall, because that’s where a booth gets most boxy. Then use 1-inch foam where space is tight and you just need to knock down fast reflections.
When 1-inch foam still makes sense
One-inch foam is handy on ceilings, doors, or tight spots where thicker panels steal too much space. It is also a solid way to add “just a bit more control” once the behind-the-mic wall is already treated with thicker foam.
If you’re choosing shapes, wedge vs pyramid is more about coverage consistency and aesthetics than some magical frequency difference. The best acoustic foam shape comparison covers when each pattern makes sense.
If you want a broader shortlist beyond booth-only setups, our best acoustic foam panels roundup gives you options across room types. Bring those picks back here and apply the booth placement order so the foam actually lands where it matters.
Thickness tells you what the foam can affect, but coverage decides how much of the booth stops throwing reflections back. Here’s the quick math using rough square feet.
How much acoustic foam do you need for a vocal booth?

Most booths sound better with targeted coverage than with wall-to-wall foam. Start with 60-80% on the surfaces closest to the mic, then adjust after each step with a quick recording.
A coverage target that works for most booths
Treat the wall behind the mic first, then the two side walls at head height, then the ceiling if it is hard and reflective. Record a quick before-and-after clip after each step, because your ears will tell you faster than any chart.
If you go too far, the booth can start sounding unnaturally dry and tiring, especially for spoken voice. That’s why “more foam” is not always better—and why it’s worth doing quick wall-area math before you buy packs.
Quick calculator (4×4 and 6×6 examples)
For a rectangular booth, wall area (not counting the ceiling) is roughly 2 x (width + depth) x height, minus the door. If you’re using 12”x12” panels, each panel covers about 1 square foot.
Example: a 4×4 booth with a 7-foot ceiling has about 2 x (4 + 4) x 7 = 112 square feet of wall area before subtracting the door. At 70% coverage, plan for roughly 75-80 square feet of foam.
That usually means a mix of packs, because you rarely want the same thickness everywhere. Many people start with a thicker “mic wall” and add lighter coverage only if the booth still sounds boxy.
Example: a 6×6 booth at 7 feet tall is about 2 x (6 + 6) x 7 = 168 square feet of wall area before subtracting the door. At 60% coverage, plan for about 100 square feet of foam.
If your booth is taller than 7 feet, scale the math linearly with height. If your booth has a big door, count it as a reflective surface unless you treat it too, and don’t forget the ceiling if it’s hard and low.
The two places people forget: the door and the ceiling
A hollow-core door is basically a big reflector, which is why some booths still sound “papery” even after you treat the walls. If you rent and cannot modify much, even a thin layer of foam on the door can reduce the slap you hear in the mic.
Ceilings matter because the mic “sees” them, especially with vocals where sound projects up and out. If you’re not sure where to start, use the mirror trick to find your reflection points and treat those spots first.
Clean cuts make installs look less DIY, especially around outlets and corners. The cut acoustic foam guide covers tools and techniques for clean edges.
With a coverage target in mind, placement beats brand every time. Put foam where the mic actually “sees” hard surfaces, not where the wall looks empty.
Where should you place acoustic foam in a vocal booth?

The goal is to stop early reflections from bouncing back into the mic. So you treat the surfaces the mic can “see” from your mouth, not random squares on the wall.
Start behind the mic (highest ROI spot)
Put your thickest foam directly behind the microphone position, because that reflection path is short and loud. In small booths, this one surface can make a bigger difference than covering the entire opposite wall with thin foam.
Record a few lines with no foam, then add foam behind the mic and record again at the same gain and distance. If the vocal suddenly feels more forward and less roomy, you’re doing it right.
Then move to the side walls and ceiling reflection points so the booth stops “talking back” from the sides.
Side walls and ceiling: treat reflection points, not grids
Next, treat the side walls at mouth height and the ceiling above the mic, because those are the other fast reflection paths. You do not need a perfect checkerboard, and a slightly staggered pattern often sounds more natural than a uniform grid.
Use the mirror trick: sit where you sing, have someone slide a mirror along the wall, and mark the spots where you can see the microphone capsule. Those marked zones are where foam gives you the most return; if the booth still feels thick and boomy after that, you’re dealing with low end.
Corners and low end: what foam can (and cannot) do
Corners build up low-frequency energy, and booths exaggerate that because there is nowhere for bass to go. Foam corner pieces can help a little, but they will not replace real bass trapping because the wavelengths are simply too long.
If your booth still sounds boomy after you fix reflections, you may need thicker materials or a different booth design, not more thin foam. This is why it helps to treat placement first – it prevents you from buying more of the wrong thing.
With placement dialed in, installation matters because sagging foam and messy adhesive turn into a maintenance problem. Start with the best adhesive for acoustic foam and how to put acoustic foam on a wall.
If the booth is also on camera, you can still make foam look clean without covering everything in black wedges. Our make acoustic foam look good guide has layout tricks that do not hurt acoustics.
At this point you’re shopping with specs: thickness for the problem range, coverage for reflection control. Below are a few sane picks – plus what to ignore.
What should you buy for a vocal booth (and what to skip)?

Start with a thick set for the mic wall, then add coverage packs for side walls and ceiling if you still hear slap or flutter. Ignore anything that promises soundproofing, and skip ultra-thin foam if your problem is boxiness.
A simple shopping checklist for booth foam
For most vocal booths, the cleanest combo is 2-inch foam behind the mic plus lighter coverage elsewhere. That matches what we covered in the thickness section, and it keeps the booth from feeling claustrophobically dead.
If you’re not sure what shape to buy, choose based on fit and coverage, then use placement to dial the sound. You can always tweak later, but it is hard to fix a booth that is under-treated behind the mic.
5 product examples for common booth setups
1) 2-inch starter pack for the mic wall
If you want one pack that covers a solid chunk of a small booth and gives you true 2-inch thickness, start with the 50 Pack Acoustic Foam Panels. This is the fastest way to hear the “boxy booth” problem start to disappear.
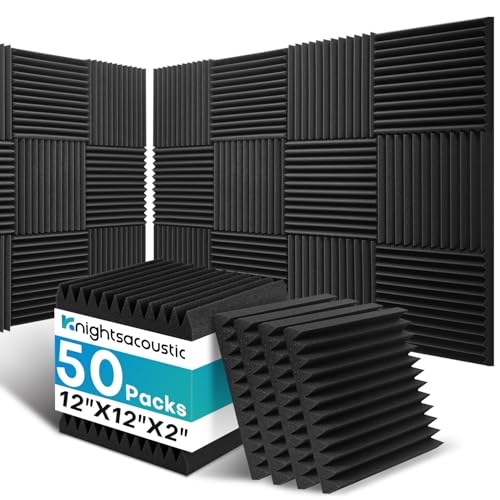
50 Pack Acoustic Foam Panels
Use it behind the mic first, then expand to side walls if you still hear slap or flutter. That sequence matches the placement order we covered earlier, and it keeps you from over-treating by accident.
2) 1-inch coverage pack for side walls and ceilings
When space is tight, 1-inch foam is often the practical choice for ceilings and side walls. The JBER Sound Proof Foam Panels is a straightforward way to add coverage without shrinking your booth.

JBER Sound Proof Foam Panels
Treat it as the “fill in the reflection points” pack, not the thing that fixes low mids. Pair it with thicker foam behind the mic if your recordings still feel cramped.
3) Budget coverage when you just need more square footage
If you’re mainly trying to tame high-frequency slap on a budget, the 52 Pack Acoustic Panels is the cheapest path to a noticeable improvement over bare drywall. It is also useful for rentals, because you can experiment and replace a few panels later if they get crushed.
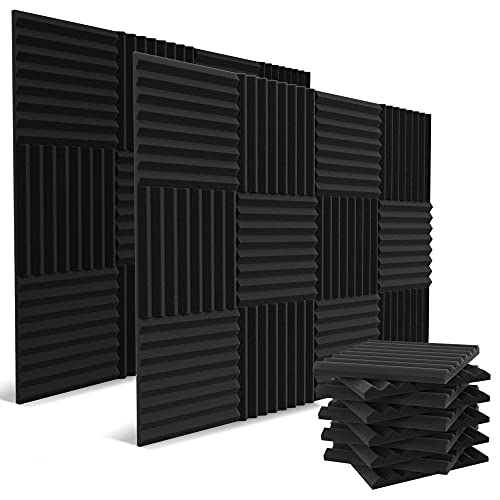
52 Pack Acoustic Panels
Start with behind the mic and the two closest side walls, then record again. If the vocal is already cleaner, stop there and resist the urge to cover everything.
4) Bulk pack for larger booths and closet builds
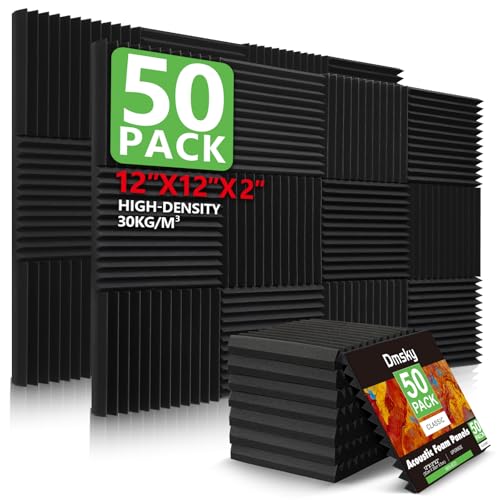
For bigger booths, bulk packs help you hit your 60-80% coverage target without buying ten small boxes. The 96 Pack Acoustic Foam Panels is the “cover a lot of wall fast” option.

96 Pack Acoustic Foam Panels
Use it for ceiling and side-wall coverage, then add a smaller amount of 2-inch foam where the mic “sees” a hard surface. That combo usually sounds more natural than going all-in on thin foam everywhere.
5) Denser 2-inch option when you want more consistent results
If you record often and want a more uniform 2-inch setup, the 50 Pack Premium Acoustic Foam is a good “buy once” choice. Higher-density foam tends to hold its shape better over time, which keeps your booth sound consistent.
50 Pack Premium Acoustic Foam
The best acoustic foam panels roundup covers options beyond booth-only setups. Use the specs from this guide (2-inch behind the mic, 60-80% coverage) and you’ll choose faster.
The Bottom Line
If you want a cleaner booth vocal, start by treating reflections, not by chasing a perfect product. That means 2-inch foam behind the mic, a sensible coverage target, and placement based on reflection points.
When those three pieces are right, your booth stops sounding like a small box and starts sounding like a controlled space. If you want to go deeper, start at the acoustic foam hub and the best acoustic foam panels guide.
Frequently Asked Questions
Do you need foam on all sides of a vocal booth?
No, you do not need 100% coverage, and too much treatment can make vocals feel unnaturally dry. Most booths sound best when you control early reflections but keep a little life in the room.
Start behind the mic with thicker foam, then add panels at the closest side-wall reflection points. If the booth still sounds boxy after that, add ceiling coverage before you cover every remaining inch.
Is thicker foam better for vocals?
Thicker foam generally affects lower frequencies than thin foam, which is why 2-inch is the common minimum for vocal booths. Past that, returns diminish quickly for voice, and thick foam eats into usable booth space.
Use your thickest foam behind the mic and keep side walls thinner if the booth is cramped. If you’re chasing deep bass control, foam will not replace real bass traps.
Can you use egg crate foam for a vocal booth?
Egg crate mattress foam is better than bare walls, but it is not the same as purpose-made acoustic foam. It is usually thinner and less consistent, so you need more of it to hear the same improvement.
If budget is extremely tight, use it as a temporary step while you save for real 2-inch foam. Focus first on behind the mic and the closest reflection points.
Where should foam go first in a vocal booth?
Start behind the microphone, because that is the strongest early reflection path back into the capsule. It is the highest ROI placement in most small booths.
After that, treat side walls at mouth height and the ceiling above the mic. Use the mirror trick to find reflection points so you are treating the right spots, not guessing.

