Acoustic Foam vs Rockwool: Stop Buying The Wrong Treatment
Acoustic foam vs rockwool is the argument that never dies in home studio forums — and both sides oversimplify it.
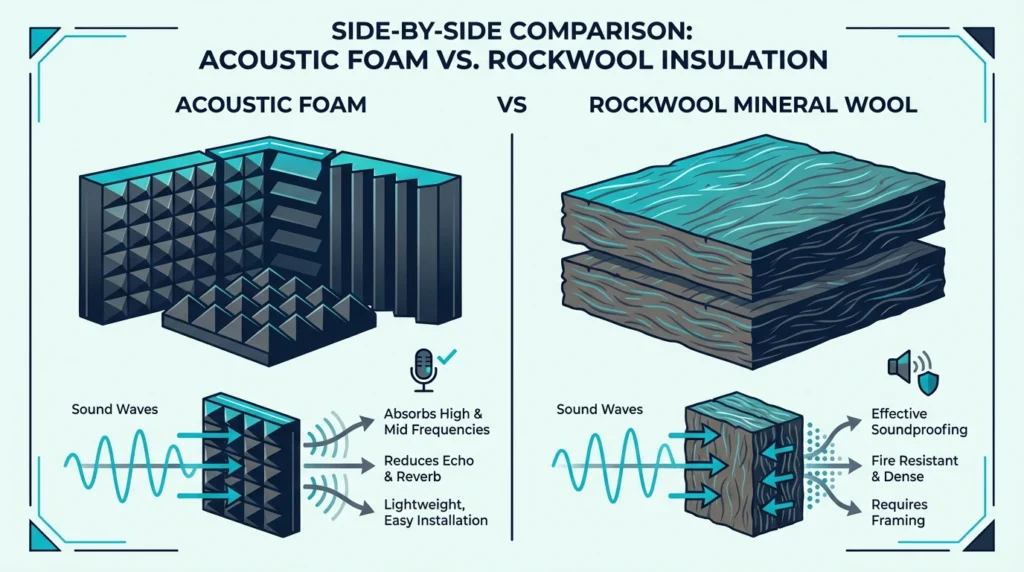
Foam handles high-frequency reflections well, but it does almost nothing below 500Hz, while rockwool absorbs down into the bass range where most room problems actually live.
If you don’t treat those low frequencies, your room will lie to you, making your mixes sound completely wrong everywhere else. Getting the right material in the right spots gives you the honest sound needed for mixes that translate perfectly.
Start with the quick takeaway below, then we’ll walk through the physics and the exact hybrid setup that gives most home studios the best results for the least money.
Acoustic foam absorbs above 500Hz but does almost nothing for bass, while rockwool absorbs down to 125Hz and below — where most room problems live. If you only record voice, foam works fine; for music mixing or home theater, rockwool bass traps are non-negotiable.
What’s the Difference Between Acoustic Foam and Rockwool?
The gap between these two materials starts at the molecular level and only gets wider from there. Once you see how each one actually absorbs sound, the performance difference stops being surprising.
How Acoustic Foam Actually Works
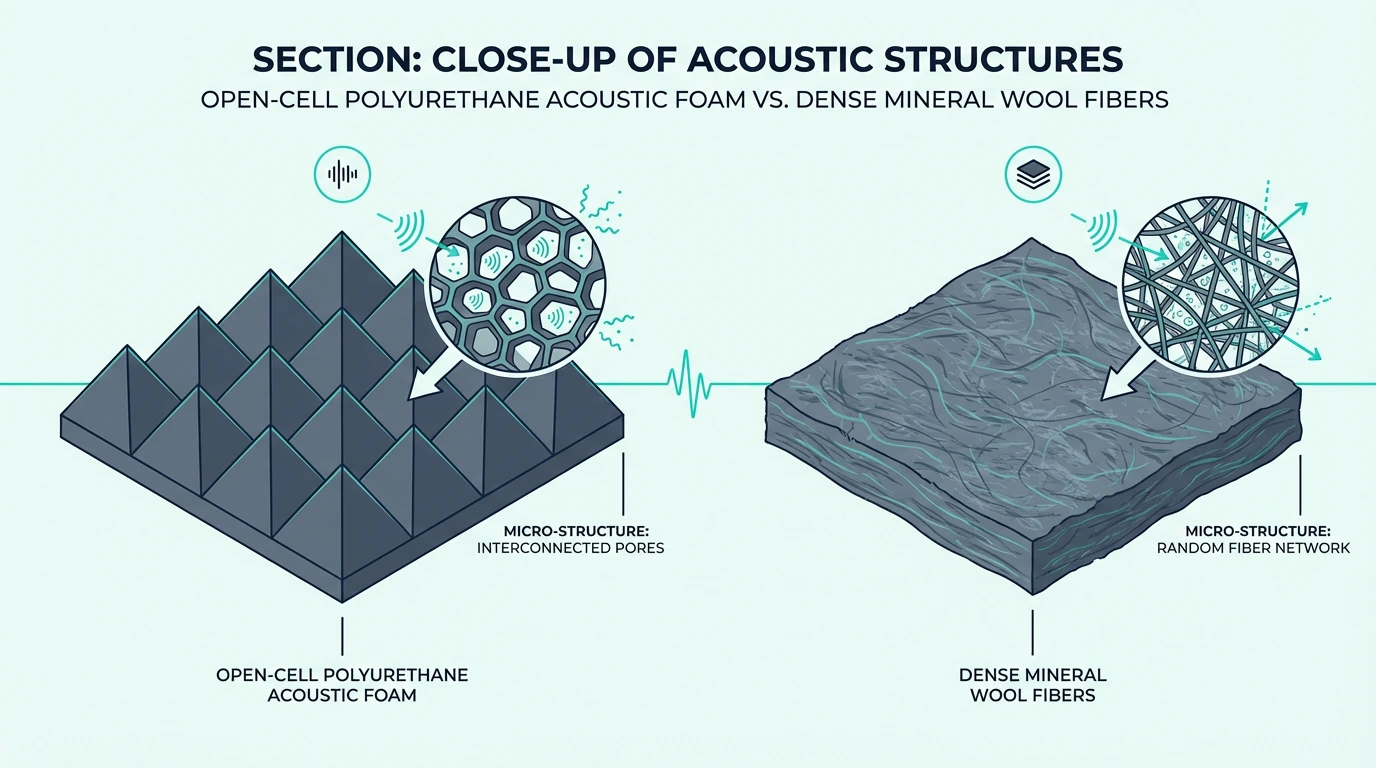
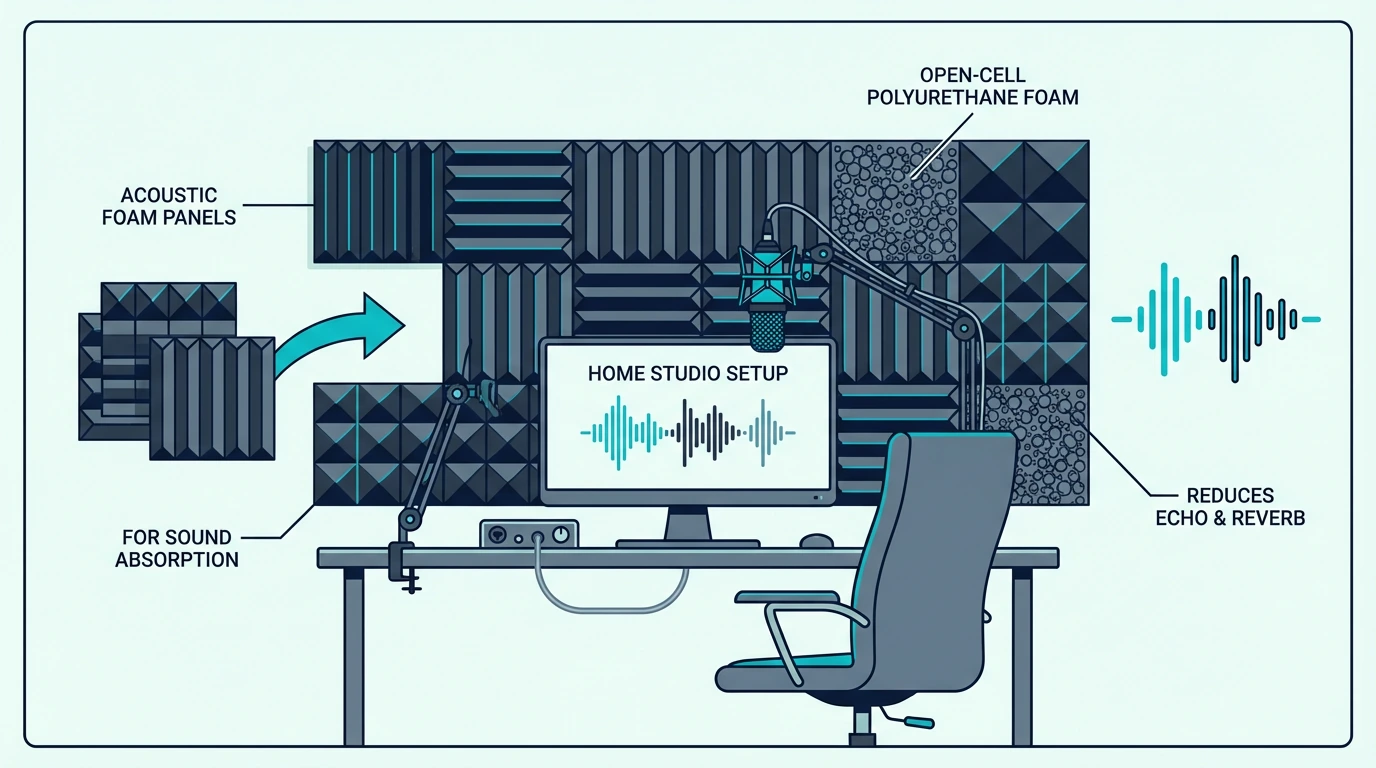
Acoustic foam is open-cell polyurethane — air pockets throughout the structure that trap sound waves and bleed off energy through friction. High frequencies with short wavelengths lose energy quickly inside those cells, which is why foam handles the 1kHz-and-above range reasonably well.
The trouble is physics. A sound wave needs to travel roughly one quarter of its wavelength before it loses meaningful energy, and a 1000Hz wave has a wavelength of about 1.1 feet — short enough for 2-inch foam to work with.
Drop to 100Hz and the wavelength stretches to 11.3 feet. That same 2-inch foam covers maybe 3% of the distance needed, so the bass passes through like the foam isn’t even there.
No amount of clever design changes this — it’s a hard limit baked into the material. Which acoustic foam shape absorbs best matters for mid-range performance, but no profile fixes the bass problem.
How Rockwool Actually Works
Rockwool is spun from molten rock into densely packed fibers — 3 to 8 pounds per cubic foot versus foam’s 1 to 2 pounds. That density difference is where everything changes.
The denser fiber matrix gives sound waves two ways to lose energy: the same frictional losses foam uses, plus the sheer mass of the fibers resisting movement. Together, those mechanisms keep working at much lower frequencies than foam can reach.
A 4-inch rockwool panel absorbs effectively down to around 125Hz — right where bass buildup, muddy mixes, and room modes live. That’s the frequency range where the material choice stops being a preference and becomes a physics constraint.
This isn’t just about rockwool, though.
Fiberglass or Rockwool — Does It Matter?
You’ll see “fiberglass panels” and “rockwool panels” used interchangeably in studio acoustics, and honestly, they’re close enough that the choice between them is minor compared to the choice between either one and foam. Owens Corning 703 (fiberglass) and Rockwool Safe’n’Sound (mineral wool) are the two most common cores, and both outperform foam by the same margin.
The practical difference: rockwool is naturally non-combustible and earns a Class A fire rating without additives, while fiberglass is slightly lighter, which helps for ceiling-mounted panels. Both need PPE during handling and both become inert once wrapped in fabric.
The Numbers That Actually Matter
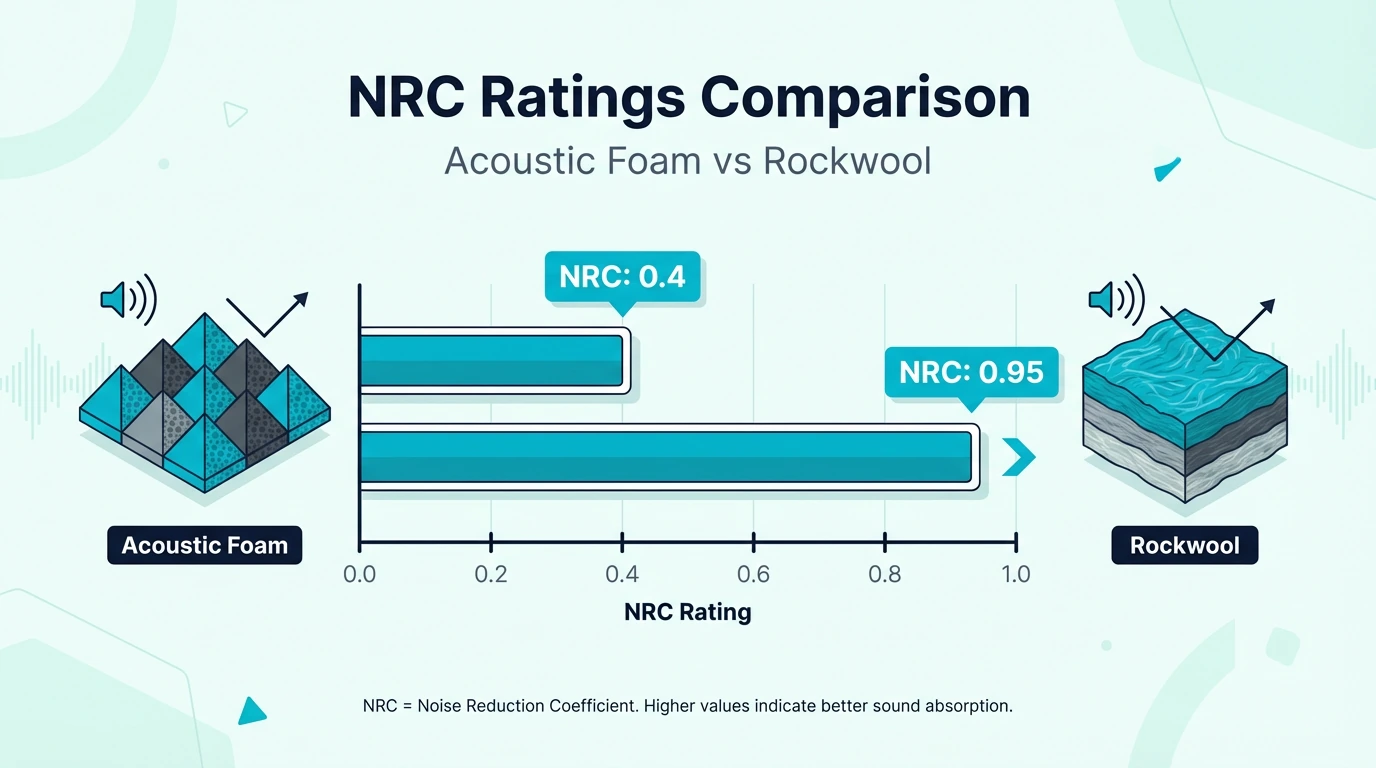
Those density differences show up clearly in absorption coefficients. Here’s what 2-inch versions of each material actually do at different frequencies:
| Frequency | 2” Acoustic Foam | 2” Rockwool | What This Means |
|---|---|---|---|
| 125Hz | 0.11 (11%) | 0.52 (52%) | Bass guitar fundamental, kick drum body |
| 250Hz | 0.28 (28%) | 0.93 (93%) | Male vocal low end, snare body |
| 500Hz | 0.68 (68%) | 1.00 (100%) | Female vocals, guitar midrange |
| 1000Hz | 0.90 (90%) | 1.00 (100%) | Vocal presence, cymbal body |
| 2000Hz | 0.93 (93%) | 1.00 (100%) | Vocal sibilance, hi-hat attack |
| 4000Hz | 0.96 (96%) | 1.00 (100%) | Cymbal brightness, consonants |
At 125Hz — where most small-room problems concentrate — rockwool absorbs nearly 5x more sound than foam of the same thickness. Above 500Hz the gap narrows, which is exactly why foam works fine for voice-only setups.
Why Bass Absorption Matters More Than You Think
That absorption table explains the material science, but the real question is: does bass absorption actually matter for your room? For anyone mixing music, the answer is more urgent than most people realize.
Bass doesn’t just pass through foam — it gets amplified by your room.
The Room Mode Problem
Every room has resonant frequencies — called modes — where bass piles up. In a 10-foot-long room, there’s a mode at 56Hz where bass can be 10 to 15dB louder than it should be.
Your monitors play a bass note at the correct level, but the room amplifies it by 12dB. You hear too much bass, turn it down in the mix, and when that mix plays in a car — no room modes — suddenly the low end has vanished.
This is why bedroom producers consistently make bass-light mixes. The room lies to them, and foam does nothing to fix it because those 56Hz wavelengths are almost 20 feet long.
Rockwool bass traps in corners absorb that excess energy. The modes don’t disappear, but they drop 6 to 8dB — enough to hear what your mix actually sounds like instead of what the room wants you to hear.
The other problem you hear is more obvious, but often confused with bass issues.
Flutter Echo vs Standing Waves
Flutter echo — that metallic ringing when you clap in an empty room — is the problem most people notice first. Foam kills it almost instantly because flutter echo is high-frequency energy bouncing between parallel walls.
Standing waves are the bass version of the same physics, but they don’t sound like echo — they sound like resonance, the way a guitar body makes a string louder. Foam can’t touch standing waves because the wavelengths are simply too long for the material to interact with.
The distinction matters for diagnosis: clap your hands and hear ringing, foam fixes that. Walk around the room and notice bass changing volume depending on where you stand, you need rockwool — and whether acoustic foam is worth it depends entirely on which of those two problems you’re actually hearing.
The Mirror Test for High Frequencies
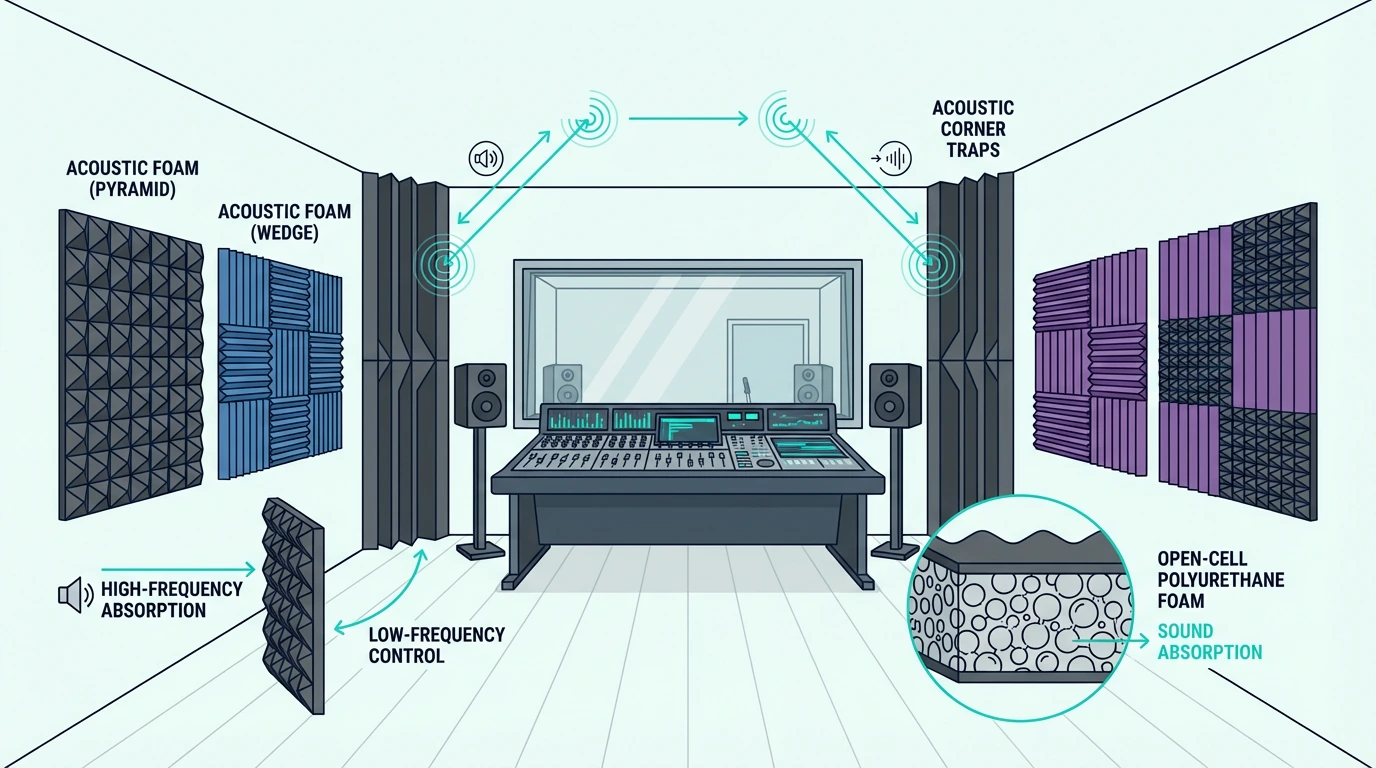
Here’s a practical way to find where foam actually earns its keep. Sit in your mixing position and have someone slide a mirror along each wall — wherever you can see your monitor’s tweeter in the mirror, that’s a first reflection point.
Sound bouncing off those spots reaches your ears milliseconds after the direct signal, creating comb filtering that wrecks stereo imaging. Foam at those specific locations — usually two per side wall, one ceiling, one rear wall — tightens the image dramatically.
That’s foam’s real job: targeted treatment at 8 to 12 reflection points, not wallpapering the room. The money saved by not covering every surface is better spent on corner bass traps, which brings us to what things actually cost.
Get Studio Tips Weekly
Join 5,000+ creators getting acoustic treatment advice every week.
No spam. Unsubscribe anytime.Real Cost Breakdown: Foam vs Rockwool for a 10×12 Room
Saying “foam is cheaper” doesn’t help you plan a budget. Here’s what treating a typical 10×12 home studio actually costs with each approach, so you can compare real numbers instead of vibes.
Foam-Only Treatment Cost
A solid foam setup covers 8 panels at first reflection points plus corner pieces. Using quality 2-inch wedge foam:
- First reflection panels: 8 panels × 24”×24” = ~$80-120
- Corner pieces: 4 corners × bass trap foam = ~$60-80
- Adhesive/mounting: ~$20-30
- Total: ~$160-230
The TroyStudio 2-inch Foam Panels cover reflection points at a reasonable price for a 36-pack.
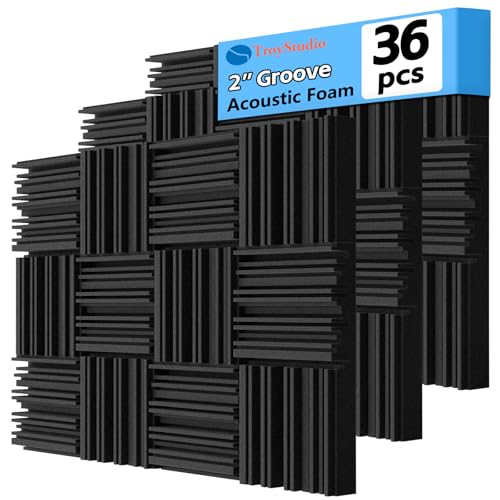
TroyStudio 2-inch Foam Panels
This handles the flutter echo and high-frequency reflections from the absorption table above, but leaves bass completely untreated. For voice-only recording, that’s usually enough.
DIY Rockwool Panel Cost
Full-spectrum treatment means 6 to 8 wall panels plus 4 corner bass traps. Building them yourself:
- Rockwool batts: 2 bags of 2” mineral wool = ~$100-140
- Lumber for frames: ~$60-80 for 1×4 pine
- Fabric: 15 yards acoustic fabric = ~$75-120
- Hardware: Staples, hangers, screws = ~$30-40
- Total: ~$265-380
The Rockboard 60 Mineral Wool Panels are rigid boards that skip the “floppy batt” problem and make frame construction much simpler.
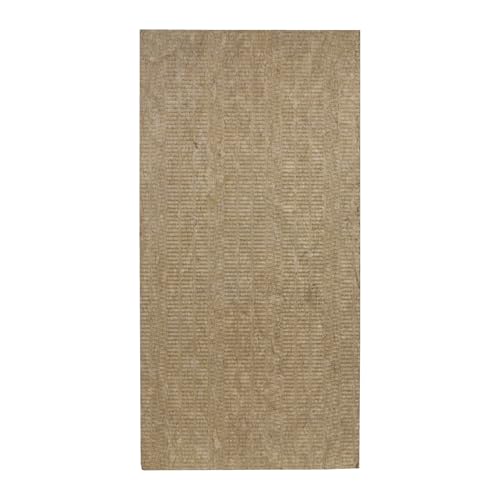
Rockboard 60 Mineral Wool Panels
This covers the full frequency range including bass — the minimum for music production where you need to trust what your monitors are telling you. If you don’t have the tools or time, you’ll pay someone else to do it.
Pre-Made Panel Cost
If building panels isn’t your thing, commercial options from ATS Acoustics run about $80 each.
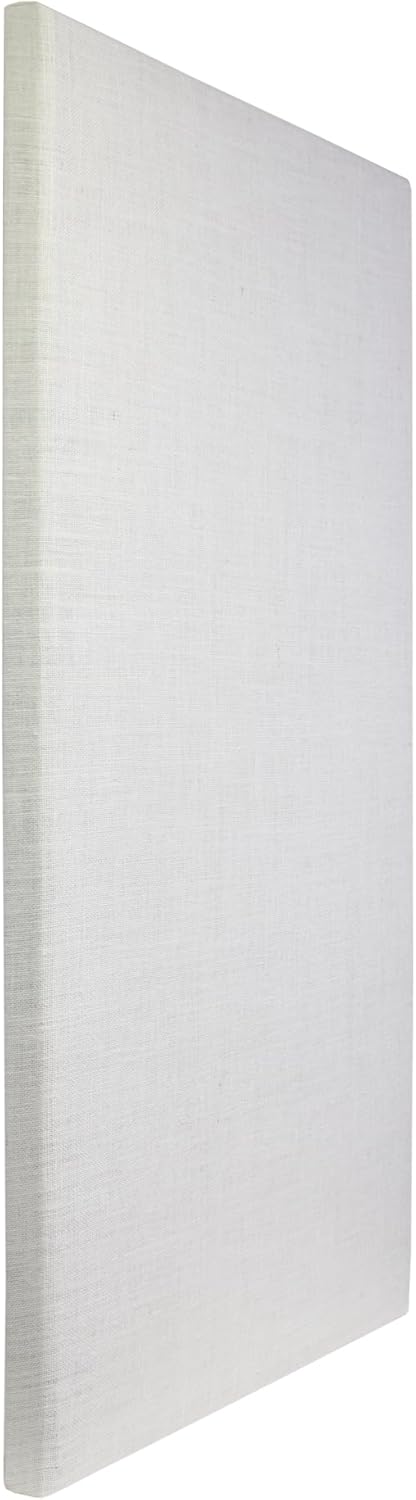
ATS Acoustics
- 8 wall panels: 8 × $80 = ~$640
- 4 corner bass traps: 4 × $100 = ~$400
- Total: ~$1,040
Three times the DIY cost, but zero build time and a look that belongs in a client-facing studio. For spaces where appearance matters as much as performance, that premium pays for itself in credibility.
You don’t actually have to choose just one material for your whole room, though.
The Hybrid Approach Most People Should Use
Here’s where the cost math gets interesting. Instead of choosing one material, spend 60% on rockwool bass traps and 40% on foam for reflection points:
- 4 DIY corner bass traps: ~$120
- 8-12 foam panels for reflections: ~$80-100
- Total: ~$200-220
Bass traps handle the low-frequency buildup that wrecks mix translation, foam handles the high-frequency reflections that smear imaging, and together they outperform either material alone. The total lands right between the foam-only and rockwool-only budgets.
How to Build Rockwool Panels That Actually Work
If the hybrid budget above convinced you, the next question is how to actually build rockwool panels without them falling apart or underperforming. The process is straightforward, but a few details separate panels that work from panels that disappoint.
Material Selection That Matters
Not all rockwool is created equal — you want mineral wool rated for acoustic use, typically 3 to 8 lb per cubic foot density. Standard pink fiberglass building insulation is too light at 0.5 to 1 lb per cubic foot and absorbs far less than the numbers in that table above.
For wall panels, Rockwool Safe’n’Sound, Owens Corning 703, or Rockboard 60 all perform well at 2-inch thickness. For 4-inch corner bass traps, double-stack two batts or source 4-inch mineral wool directly.
Fabric needs to be acoustically transparent — sound passes through instead of bouncing off. Speaker grill cloth and burlap both work, but tight-weave cotton reflects too much.
Quick test: hold the fabric over your mouth and breathe. If you feel noticeable resistance, it’s too tight for acoustic use.
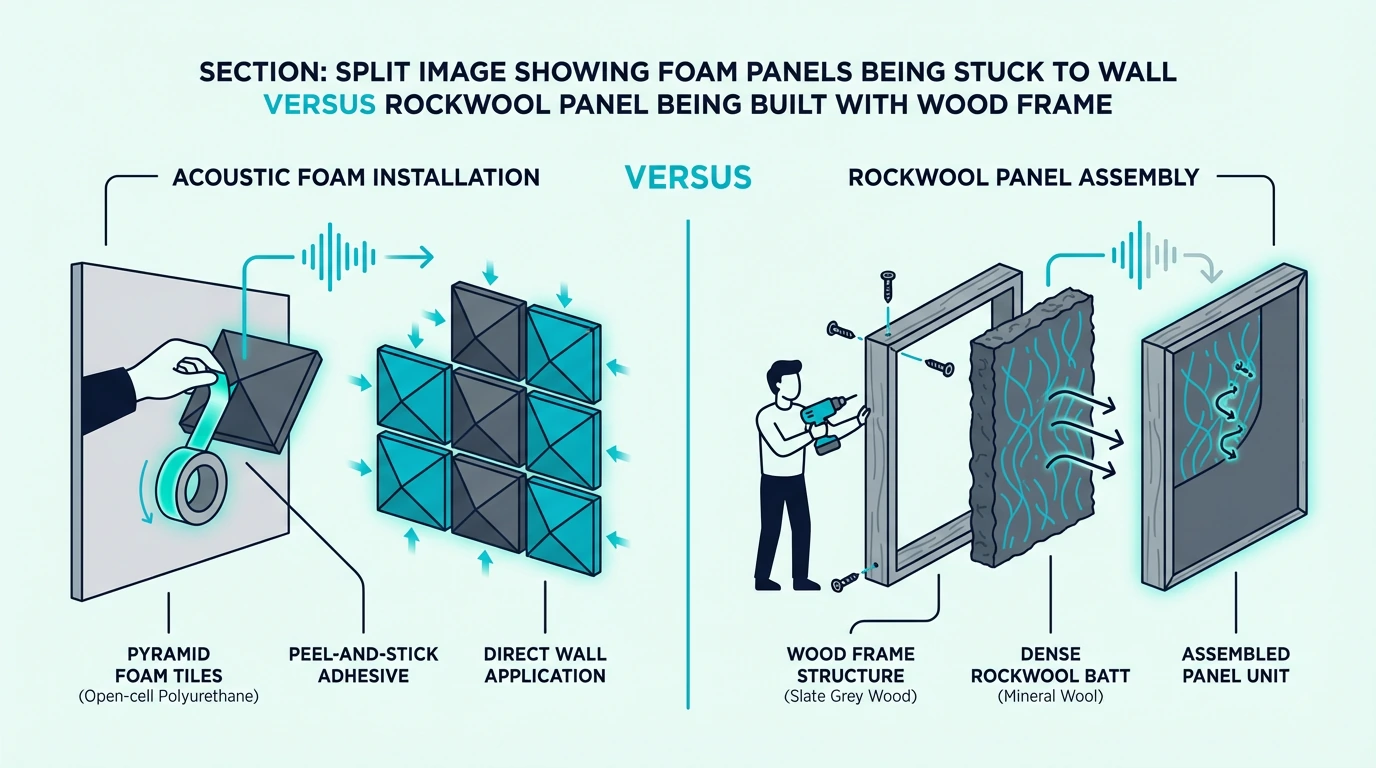
Frame Construction Details
The standard build uses 1×4 lumber for the frame perimeter with the rockwool recessed about 1/4 inch from the front edge. That recess gives fabric room to wrap cleanly without compressing the insulation.
For corner joints, use pocket screws or metal brackets — wood glue alone fails eventually from seasonal wood movement. The back panel is optional; leaving it open actually performs slightly better because sound can enter from both sides.
The Fabric Wrap Process
Start by stretching fabric tight across the front face, stapling to the back of the frame every 2 to 3 inches. Work from the center of each side toward the corners — this prevents the wrinkles that make DIY panels look amateur.
Corners are the hardest part — fold fabric like you’re wrapping a present, one flap over, then the perpendicular flap over it, staple through both layers, and trim the excess. The acoustic foam adhesive guide covers mounting methods that work for heavier rockwool panels too, and French cleats are the safest option for anything over 10 pounds.
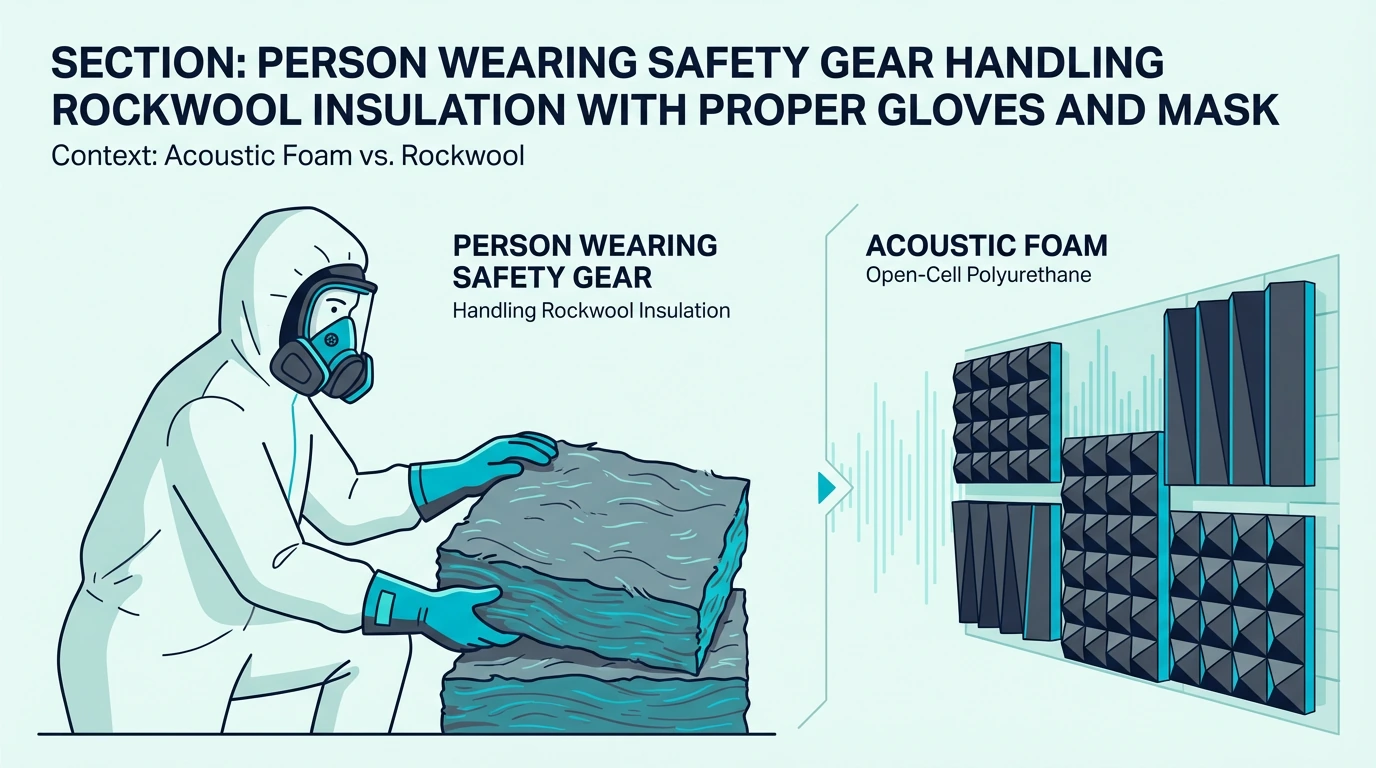
Safety During Construction
Rockwool fibers will make you miserable if you skip protection. This isn’t optional-but-recommended — it’s skip-at-your-own-regret.
N95 respirator (not a paper dust mask), long sleeves and pants, work gloves, safety glasses. If you’re building more than a couple panels, disposable coveralls are worth the $10.
Cut rockwool outdoors or in a ventilated garage with a serrated bread knife — not scissors, not a utility knife. And shower immediately after handling, because fibers trapped in clothing will itch for hours.
When Foam Actually Makes Sense
Everything above might sound like rockwool wins every time, but that’s not the full picture. There are real situations where foam is the smarter choice — not a compromise, but the right tool for the job.
Voice-Only Recording
Podcasters, voice-over artists, streamers, and YouTubers work almost entirely in the frequency range where foam performs well. Voice fundamentals sit between 85Hz and 255Hz, but the energy you actually need to control is mostly harmonics in the 500Hz to 4kHz range — exactly where foam shines.
Foam at first reflection points plus behind the microphone creates a dead zone that strips room sound from vocal tracks. The 48 Pack Self-Adhesive Foam Panels cover a full voice setup with peel-and-stick mounting, and for speech frequencies, bass treatment adds almost nothing.
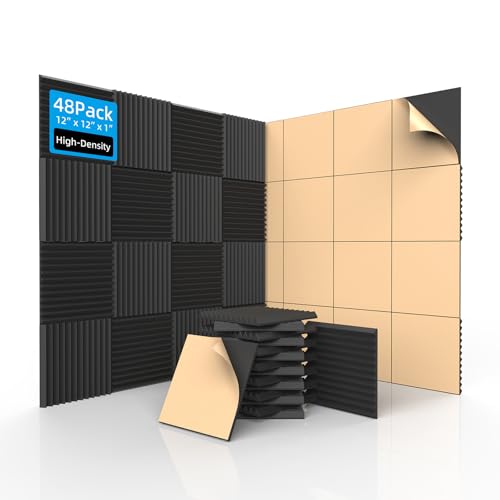
48 Pack Self-Adhesive Foam Panels
For voice work, foam isn’t a compromise — it’s the appropriate tool. The acoustic foam vocal booth guide covers the exact placement and thickness order for booth setups.
Rental Spaces and Temporary Setups
Building rockwool panels assumes you’re staying put. If you’re renting and might move within a year or two, portable foam makes more sense financially.
Foam attaches with command strips or removable adhesive — peel it off when you move, pack it in boxes, reinstall in the new space. Rockwool panels weigh 10 to 25 pounds each and often damage walls when removed, so moving eight panels plus four bass traps becomes a real hassle.
The how to arrange acoustic foam guide covers positioning for renters who need results without permanent wall commitment.
Budget-First Situations
When $100 is the entire budget, foam treats more surface area than rockwool materials alone would cost. Something treating first reflections beats nothing treating anything.
Start with foam, learn your room’s remaining problems by ear, then add DIY rockwool bass traps when the budget opens up. This staged approach often works better than buying half the rockwool you need and ending up with incomplete bass treatment.
Plenty of studios that sound great now started with foam and upgraded over time. Perfect treatment isn’t required for good work — it just makes good work easier.
When Rockwool Is Non-Negotiable
Those foam-friendly scenarios share one thing: bass accuracy doesn’t matter. The moment it does, rockwool stops being optional.
Music Mixing and Mastering
If you’re making EQ decisions on anything with bass content — so basically all music — you need to hear the low end accurately. Foam-only treatment means your room is lying about bass levels, and every mix decision you make below 300Hz is a guess.
Professional mixing engineers obsess over room treatment because they’ve learned the expensive way — a kick drum that sounds punchy in an untreated room sounds flabby on every other system. Those room modes from earlier are exactly where it costs you money in revision requests.
Corner bass traps using 4-inch rockwool are the minimum for mixing work. The investment pays back immediately through fewer “can you bring up the bass?” emails.
Home Theaters
Movie sound design puts enormous energy in the 30 to 80Hz range — explosions, scores, effects. Untreated home theaters have massive bass problems that turn every action scene into a boomy, fatiguing mess.
That overwhelming bass isn’t the movie — it’s the room resonating at its modes. Proper bass treatment reveals the detail and punch the sound designers actually intended.
Corner traps plus panels at first reflection points improve home theater sound more than a speaker upgrade in most rooms — and cost less.
Any Room Smaller Than 15×15 Feet
Small rooms have worse bass problems than large rooms, which surprises most people. The reason: resonant modes are spaced further apart in frequency, so some notes boom while others vanish.
A 10×10 room has its first length mode at 56Hz and the second at 113Hz — a massive gap where bass response is wildly uneven. Larger rooms have modes clustered closer together, which averages out to smoother bass naturally.
If your room is under 200 square feet, budget for rockwool bass traps before anything else. The bass problems in small rooms overpower everything.
Fire Safety and Foam Off-Gassing
Beyond acoustics, there’s a safety angle worth knowing — rockwool and fiberglass are both non-combustible, with most mineral fiber panels carrying a Class A fire rating without chemical additives. That matters for commercial studios, basement builds, and anywhere code compliance is a factor.
Foam is the opposite — standard polyurethane is highly flammable, releases toxic smoke when it burns, and even with fire retardants rarely earns better than a Class B rating. New foam also off-gasses VOCs that cause the “new foam smell,” headaches, and respiratory irritation for the first few weeks, which is worth factoring in if you’re chemically sensitive.
The Practical Hybrid Setup
If you’ve read this far, you’ve probably figured out the punchline: most rooms need both materials, not one or the other. The trick is putting each one where it does the most good. Here’s exactly how to mix them.
Placement Strategy That Works
Corners — rockwool. Bass energy piles up where walls meet. Floor-to-ceiling traps in at least two corners (all four if you can swing it) handle the biggest chunk of low-frequency problems.
First reflection points — foam or rockwool. The mirror test spots from earlier benefit from any absorption. Foam works fine here; rockwool works better but costs more, and the difference at these frequencies is smaller than in the corners.
Behind monitors — rockwool. Low frequencies radiate from monitor rear ports. A rockwool panel directly behind each monitor stops that energy from bouncing back and muddying the stereo image.
Ceiling — foam. Ceiling reflection points matter for imaging, and lightweight foam is dramatically easier to mount overhead than a 15-pound rockwool panel. The acoustic foam ceiling install guide covers adhesive and mounting options for overhead panels.
Rear wall — depends on distance. If your listening position is less than 4 feet from the rear wall, rockwool helps catch bass reflections. More than 6 feet back, foam is sufficient.
Common Mistakes to Avoid
Covering entire walls with foam. More foam doesn’t mean better treatment — it means you’ve over-damped the highs while the bass is still untouched. Rooms treated this way sound oppressively dead in the upper range and still boomy in the low end.
Believing foam “bass traps.” Those triangular foam wedges marketed as bass traps absorb almost nothing below 300Hz. The name is marketing fiction. Real bass trapping requires the density and thickness that only rockwool or fiberglass provides.
Thin panels everywhere instead of thick panels strategically. One 4-inch rockwool panel absorbs more bass than four 1-inch foam panels combined. For low frequencies, thickness beats coverage every time.
Skipping corners. Bass problems concentrate in corners because that’s where room modes build up most. Treating walls while ignoring corners addresses maybe 20% of the problem while the other 80% continues unchecked.
Asymmetric treatment. Treatment should be roughly symmetrical left-to-right, or the phantom center of your stereo image drifts toward the more absorptive side. This is subtle enough to miss but significant enough to affect mix decisions.
Conclusion
The foam vs rockwool decision comes down to frequency range. Foam handles 500Hz and above — fine for voice recording, podcasting, and spaces where bass isn’t a concern.
Rockwool absorbs into the 125Hz-and-below range where room modes, muddy mixes, and bass buildup live. For music mixing, home theaters, and any situation where bass accuracy matters, rockwool is the only affordable option that actually works.
For most home studios, the answer is both: rockwool in corners for bass, foam at reflection points for imaging. That combination costs roughly $200 and outperforms either material used alone.
Start with corner bass traps if budget is tight — they solve the biggest problems first. Add reflection treatment second, and acoustic foam wall install covers the mounting details so nothing ends up on the floor at 3 a.m.
Frequently Asked Questions
Is rockwool better than foam for recording?
Rockwool absorbs more sound across a wider frequency range, but “better” depends on what you’re recording. For voice-only work, foam at reflection points handles the frequencies that matter and costs less.
For music with instruments that produce bass — guitars, drums, synths — rockwool prevents the room from coloring your recordings with its own resonances. The practical answer for most studios: rockwool bass traps in corners regardless, then whichever material fits your budget for wall panels — the acoustic foam vs panels comparison covers that decision in detail.
Is rockwool safe to breathe?
The fibers irritate respiratory passages during handling but don’t cause permanent lung damage the way asbestos does — the fibers are larger and can’t penetrate deep into tissue.
Wear an N95 respirator during cutting and installation, and work in a ventilated space. Once wrapped in fabric, rockwool panels pose zero ongoing risk — the fabric permanently contains all fibers, and properly built panels are completely safe to live with indefinitely.
Can you use rockwool without covering it?
Technically yes, practically no. Uncovered rockwool sheds fibers that irritate skin and lungs, looks industrial, and provides no clean way to mount it.
Fabric wrapping contains the fibers, makes the panel look intentional instead of like exposed insulation, and gives you a surface for mounting hardware. If budget is tight, landscaping fabric at about $0.50 per square foot contains fibers nearly as well as acoustic fabric with minimal performance difference.
How thick should rockwool panels be?
For wall panels treating mid and high frequencies, 2 inches works well — going thicker doesn’t significantly improve absorption above 250Hz.
For bass traps targeting below 250Hz, 4 inches is the minimum and 6 inches is better — corner traps should be as thick as practical, because the floor-to-ceiling dimension matters more than width. The most common mistake is using 2-inch panels everywhere including corners, then wondering why those bass problems from earlier in this guide haven’t improved.

