How to Attach Acoustic Foam to a Ceiling: 5 Methods That Actually Hold (2026)
Attaching acoustic foam to a ceiling works — but only if you mount it like a ceiling project, not like a wall project.
Gravity never takes a break, so the same method that “held fine on the wall” can fail overhead — corners peel, panels fall, and you’re left with adhesive residue and foam bits to scrape.
Pick the right method and you get stable coverage at the reflection points without turning your ceiling into a repair job.
Start with your constraint (permanent vs removable), then match the mount to your ceiling type.
Spray adhesive (like 3M Super 77) provides the strongest permanent bond for ceiling foam. For renters, mount foam on cardboard backing first, then attach the cardboard with heavy-duty Command strips — this protects both the ceiling and allows removal later.
What’s the Best Way to Attach Foam to a Ceiling?
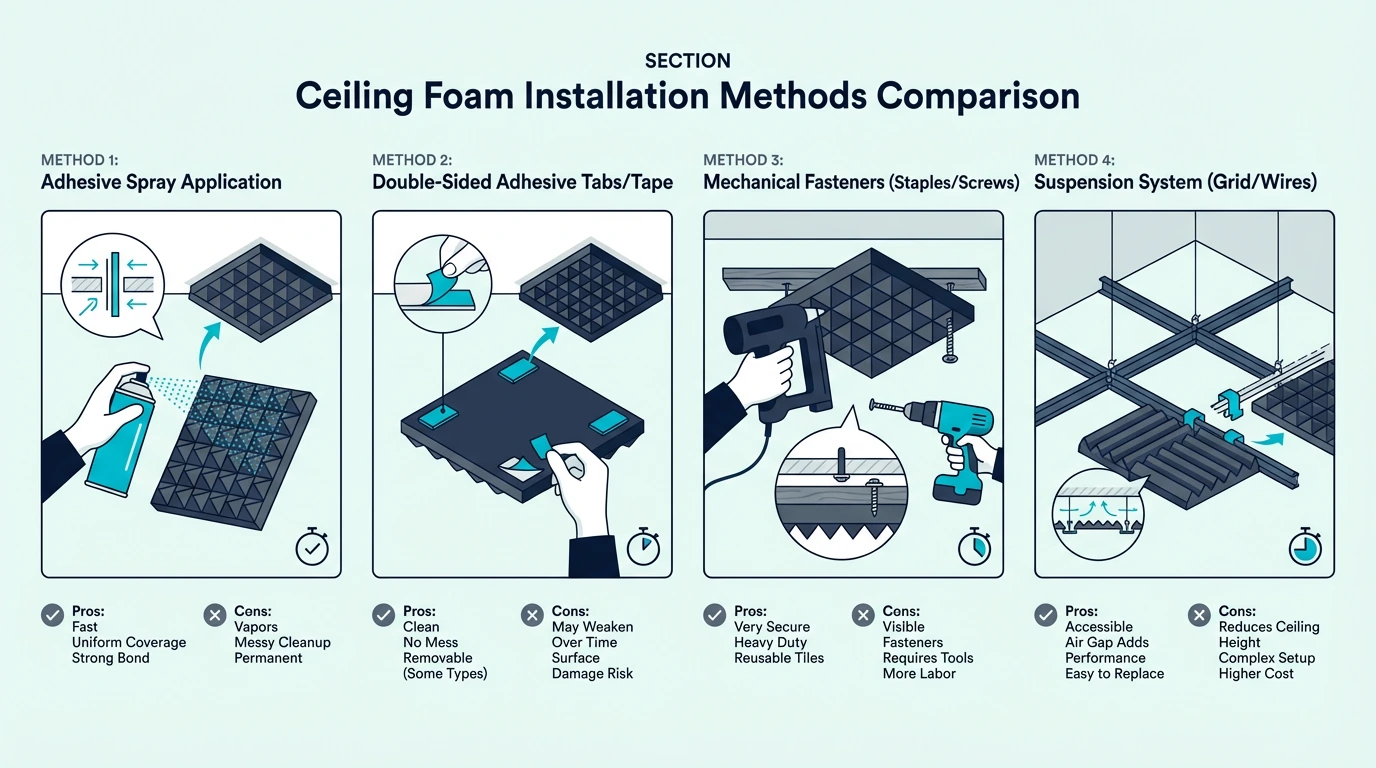
The short answer depends on whether you need permanent installation or renter-friendly removal. Spray adhesive wins for strength, but cardboard backing gives you flexibility.
The Short Answer: Spray Adhesive or Cardboard Backing
For permanent installs, spray adhesive creates the strongest bond between foam and the ceiling. It spreads evenly, cures quickly, and holds panels against gravity long-term.
If you want the full breakdown (spray vs removable options), start with our acoustic foam adhesive guide. It’ll help you match the product to your ceiling and your “I might move later” reality.
Spray adhesive works because it penetrates the porous foam and bites into ceiling texture. It can hold on drywall, painted ceilings, and many textured finishes when your prep is solid.
If you want the wall version first, see our acoustic foam wall install guide. Ceilings are the same idea, just less forgiving when you rush.
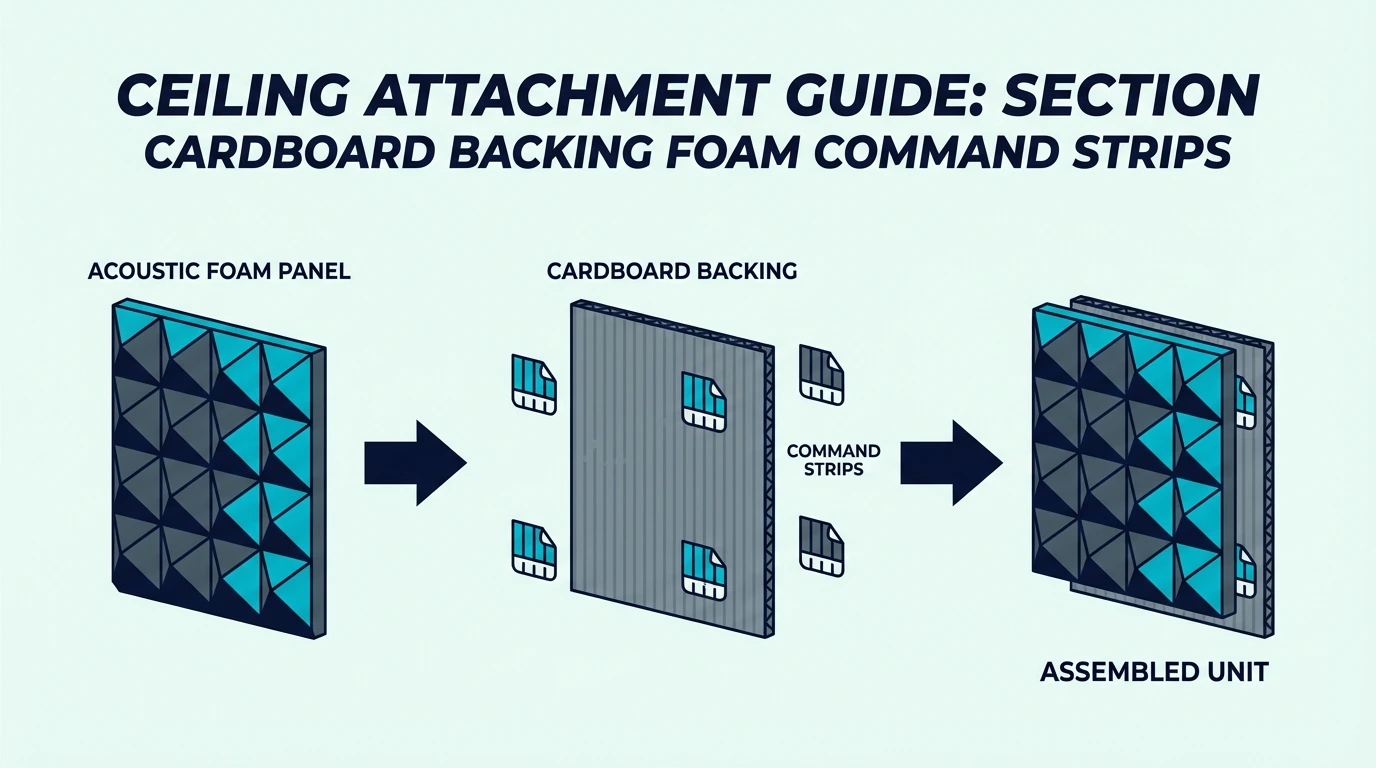
For renters or anyone who might remove the foam later, the cardboard backing method is your best option. You glue foam to a rigid cardboard panel first, then mount that panel using removable mounting strips.
removable mounting strips
This two-layer approach distributes weight better and protects your ceiling from direct adhesive contact. When you move out, the cardboard comes down cleanly.
Why Ceiling Installation Is Harder Than Walls
Gravity works against you constantly with ceiling mounts. A foam panel that holds fine on a wall will peel away from a ceiling within days if you use the same adhesive.
On a wall, adhesive mostly prevents the panel from sliding. On a ceiling, it has to fight the full panel weight pulling down, 24/7.
Temperature swings make things worse. Heat rises, so ceilings experience more variation than walls.
That expansion-and-contraction cycle slowly weakens many adhesives over time. It’s one of the reasons “it held for a week” doesn’t mean much on a ceiling.
Ceiling texture also complicates adhesion. Popcorn, stipple, and textured paint reduce how much surface area the adhesive can grab.
That’s why “it sticks fine on the wall” isn’t good evidence. You need a method that still holds when contact isn’t perfect.
That’s why spray adhesive is usually the first method to consider — it’s the most forgiving on real-world ceilings.
How Does Spray Adhesive Work for Ceiling Foam?
If you’re okay with a permanent install, spray adhesive is the strongest option. It’s the closest thing to a “put it up once and stop thinking about it” ceiling install.
Tape and strips can work in specific cases, but spray wins on raw holding power. That matters when the ceiling is dusty, textured, or slightly uneven.
Best Spray Adhesives for Ceiling Foam
3M Super 77 Multipurpose Adhesive has become the industry standard for acoustic foam installation. It bonds foam to most ceiling surfaces within 15 seconds and reaches full strength in 24 hours.
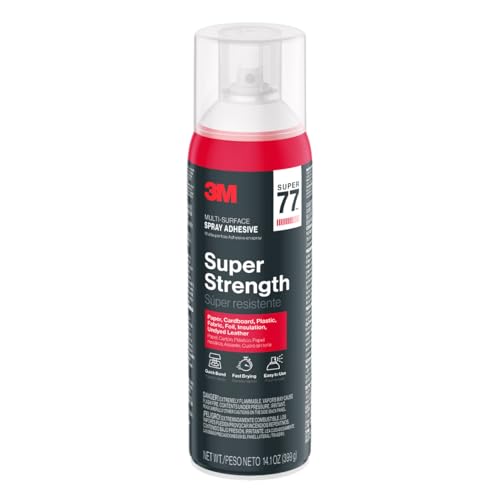
3M Super 77 Multipurpose Adhesive
The spray pattern covers large areas quickly without dripping, which makes overhead work less messy. One 16.75-ounce can typically handles 10–15 standard 12×12 panels.
If you’re treating a ceiling reflection zone, thicker foam tends to work better than 1-inch. For example, 2-inch pyramid foam panels give you more meaningful absorption.
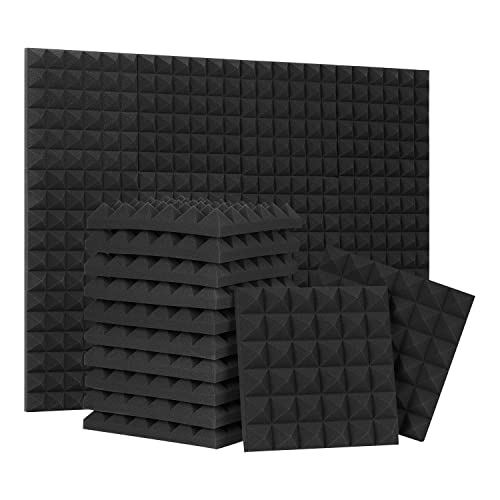
2-inch pyramid foam panels
Just remember: thicker foam also weighs more, so your mounting method matters even more. Don’t pick “better foam” and then mount it like a poster.
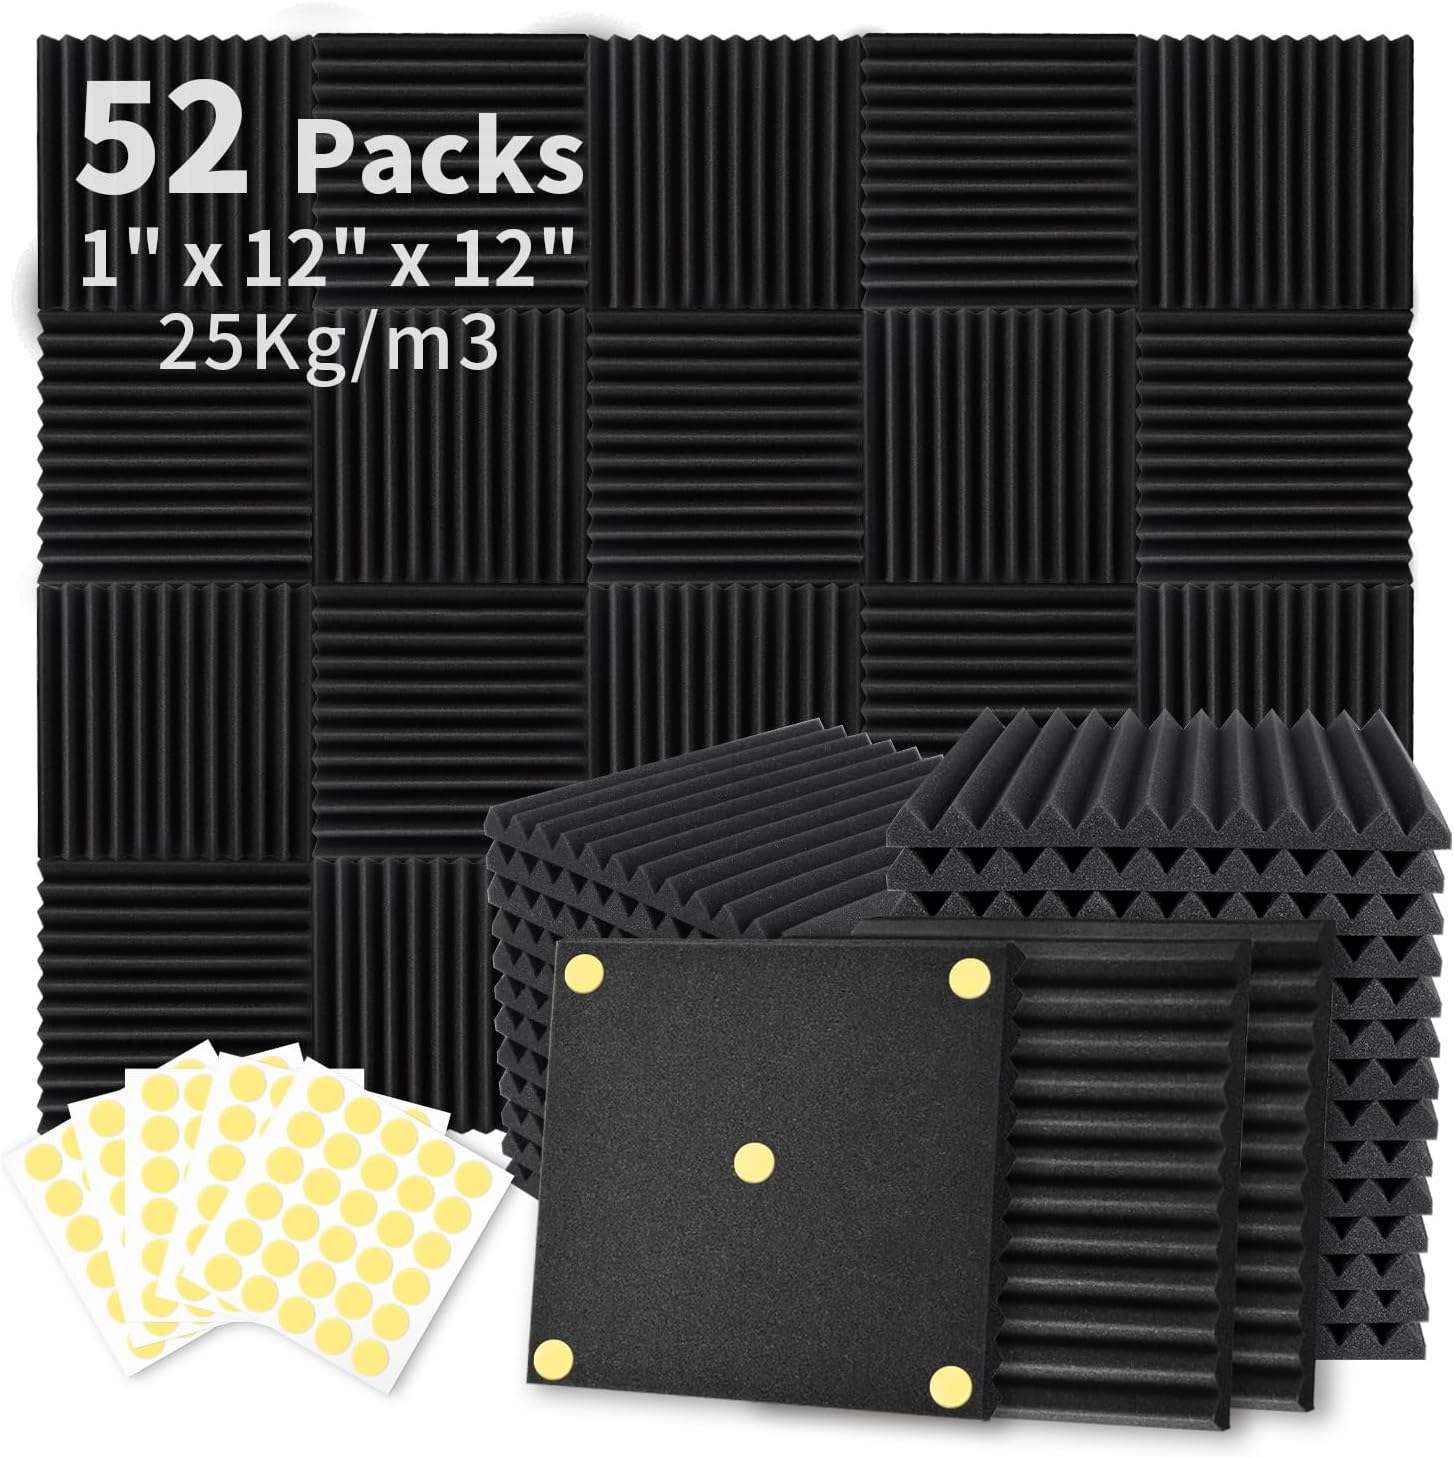
If you’re treating a bigger area and want lighter panels, a 52-pack foam bundle can be easier to keep up on a ceiling. Just expect it to tame flutter and brightness more than it controls low-end reflections.
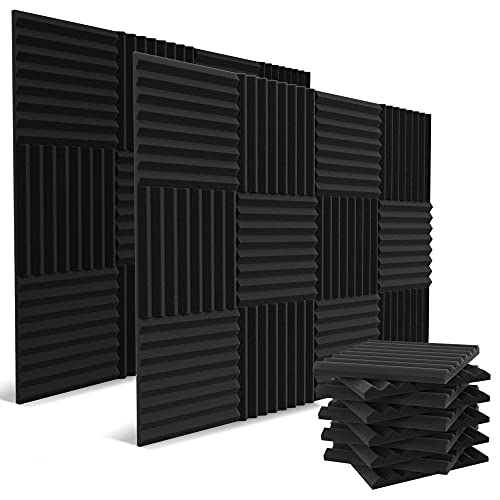
52 Pack Acoustic Foam Panels
Loctite General Purpose Spray Adhesive offers similar performance at a lower price point. It’s slightly tackier during application, which actually helps on textured ceilings where instant grab matters.
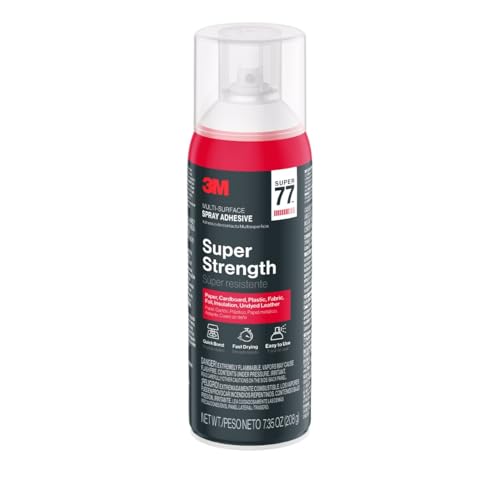
Loctite General Purpose Spray Adhesive
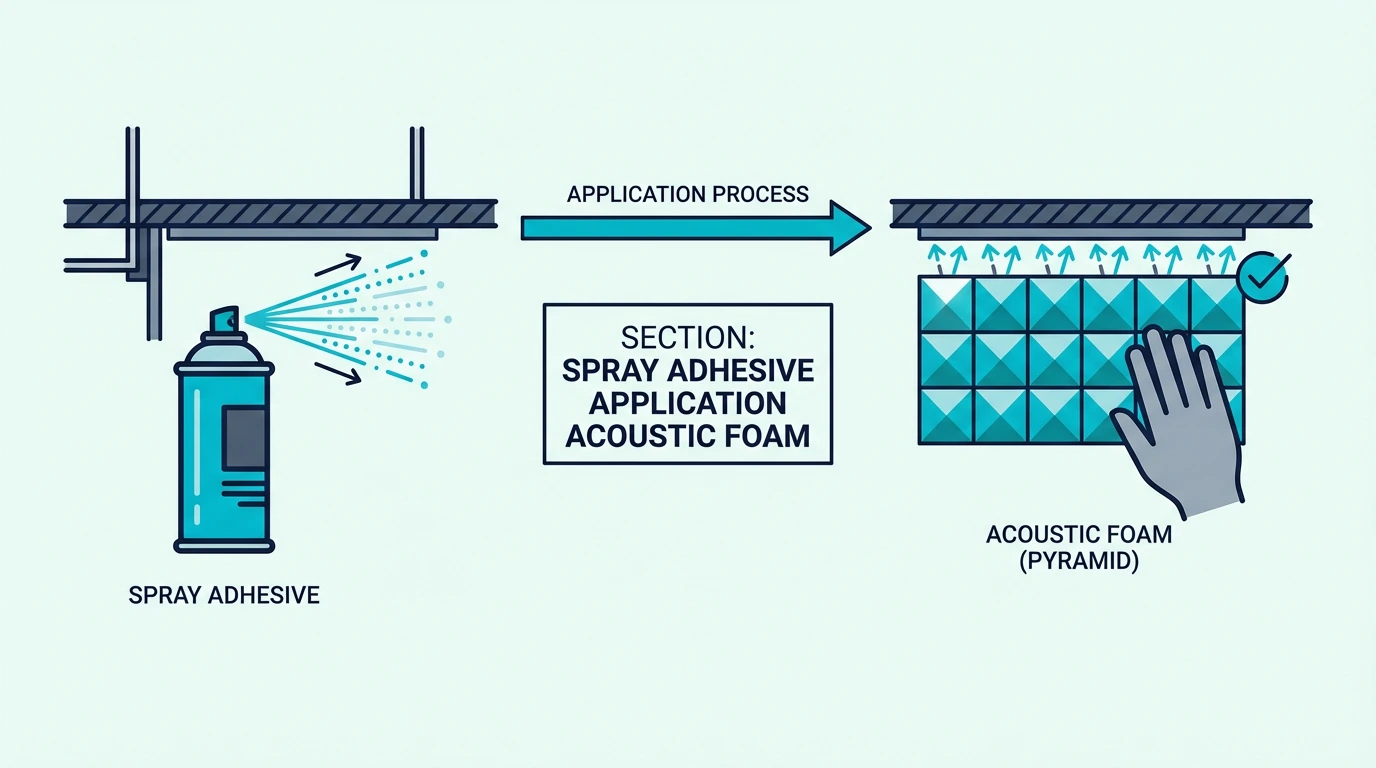
For the best hold, spray both the foam and the ceiling surface. When the two tacky layers meet, the bond is stronger than spraying only one side.
If you’re still deciding whether foam is the right material for your goal, see our foam vs rockwool comparison. It’ll keep you from over-expecting what foam can do.
Step-by-Step Instructions
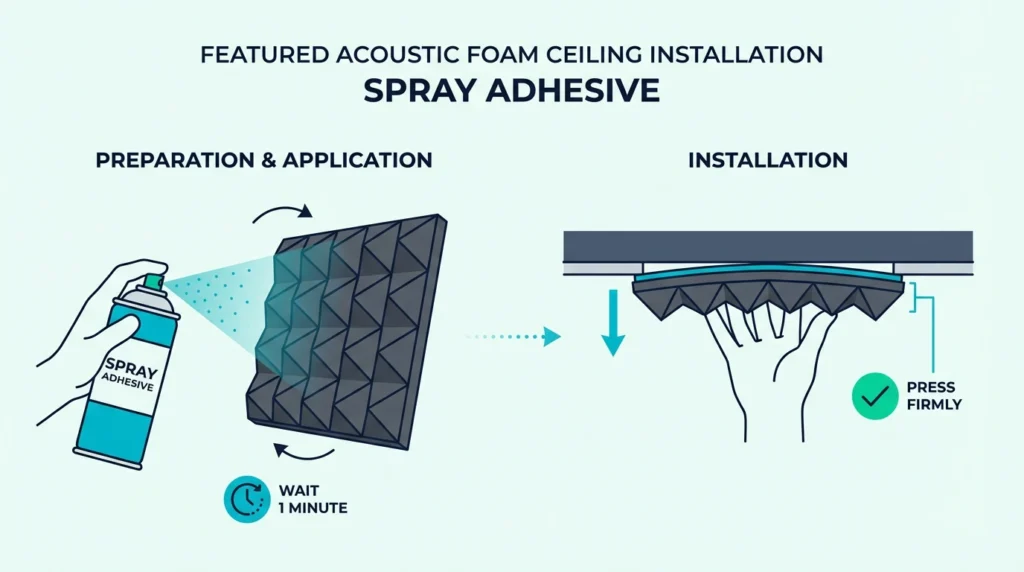
Start by cleaning the ceiling area with a damp cloth to remove dust and cobwebs. Any debris between the adhesive and surface will create weak spots that fail first.
Mark your panel positions with painter’s tape before applying any adhesive. You won’t have time to adjust once spray adhesive touches both surfaces. If you need to trim panels to fit, our guide to cutting acoustic foam covers clean techniques.
Shake the can vigorously for at least one minute to ensure proper mixing. Cold cans spray unevenly, so warm the adhesive to room temperature if needed.
Hold the can 6-8 inches from the surface and spray in a sweeping motion. Cover about 80% of both the foam back and the ceiling area — you don’t need edge-to-edge coverage.
Wait 30-60 seconds for the adhesive to become tacky before pressing the foam into place. This tackiness stage is crucial — wet adhesive won’t hold as well as tacky adhesive.
Press firmly for 30 seconds, paying extra attention to edges and corners. Use a stepladder or scaffold that lets you apply even pressure without straining.
Pros and Cons
The strength of spray adhesive is unmatched by any other consumer-grade method. Properly applied, foam will stay attached for years without maintenance.
Coverage cost is reasonable — one can handles a typical home studio ceiling. The learning curve is minimal if you follow the tackiness timing.
The downside is permanence: removing spray-glued foam usually damages both the foam and the ceiling. If you ever take it down, plan on patching and repainting.
Ventilation during application is essential. These adhesives contain solvents that require fresh air circulation while they cure.
Get Studio Tips Weekly
Join 5,000+ creators getting acoustic treatment advice every week.
No spam. Unsubscribe anytime.Can You Use Command Strips for Ceiling Foam?
Spray adhesive works great, but it’s a bad idea if you’re renting. You can use Command strips for ceiling foam—you just don’t use them directly on the foam.
The trick is a backing board (cardboard/foam board) that the strips can actually grip. It spreads the load and gives you a clean removal point later.
Why This Method Works for Renters
Command strips alone often fail on ceilings because foam panels exceed their rated capacity. A 12×12 inch foam panel weighs about 4-6 ounces, which sounds light — but gravity’s constant pull eventually overwhelms the strips.
Cardboard backing changes the equation in two ways. First, the rigid surface distributes strip adhesion across a larger area, reducing stress at any single point.
Second, the foam-to-board bond (using spray adhesive) is permanent and strong, while the board-to-ceiling connection (using strips) stays removable. You get a “stays up” install without turning your ceiling into a glue project.
When removal time comes, the strips release cleanly from the backing board. Your ceiling never touches permanent adhesive.
If you’re also choosing panels on a budget, see our budget foam recommendations. Cheap foam is fine—as long as you mount it the right way.
Step-by-Step Instructions
Cut cardboard panels about half an inch smaller than your foam panels on all sides. This creates a hidden mounting surface that doesn’t show from below.
Use corrugated cardboard from shipping boxes — the thicker, the better. Single-layer cardboard bends under foam weight and creates visible warping.
Apply spray adhesive to both the foam back and the cardboard front. Wait for tackiness, then press together firmly.
Let this bond cure for at least two hours before ceiling mounting. Rushing this step risks the foam separating from the cardboard while hanging overhead.
Apply Command Large Picture Hanging Strips to the cardboard according to package directions — typically one strip per corner for a 12×12 panel.
Command Large Picture Hanging Strips
If you’re hanging heavier boards (2-inch foam, larger panels, or humid rooms), step up to Command 20 lb X-Large Picture Hanging Strips and use extra pairs per board. You’re buying contact area and redundancy, not a single-point failure.

Command 20 lb X-Large Picture Hanging Strips
Press the assembly to the ceiling and hold for 60 seconds. Wait the full hour before considering the installation complete.
Pros and Cons
Damage-free removal is the primary advantage. Your security deposit stays intact, and you can take your foam investment to your next apartment.
The cardboard adds minimal weight while significantly improving strip performance. Total cost adds maybe two dollars per panel beyond foam and strips.
Installation takes longer than spray adhesive alone — roughly double the time when accounting for cardboard prep and cure time between steps.
Visual appearance is nearly identical to direct mounting if you cut cardboard smaller than the foam edges. Nobody sees the cardboard layer from normal viewing angles.
Do T-Pins Work for Drop Ceiling Installation?
Both methods above work on standard drywall ceilings. But if you have a drop ceiling, the rules change.
Drop ceiling tiles are soft enough to accept pins, so you can mount foam without adhesive. That makes installation reversible and tool-free.
When This Method Works
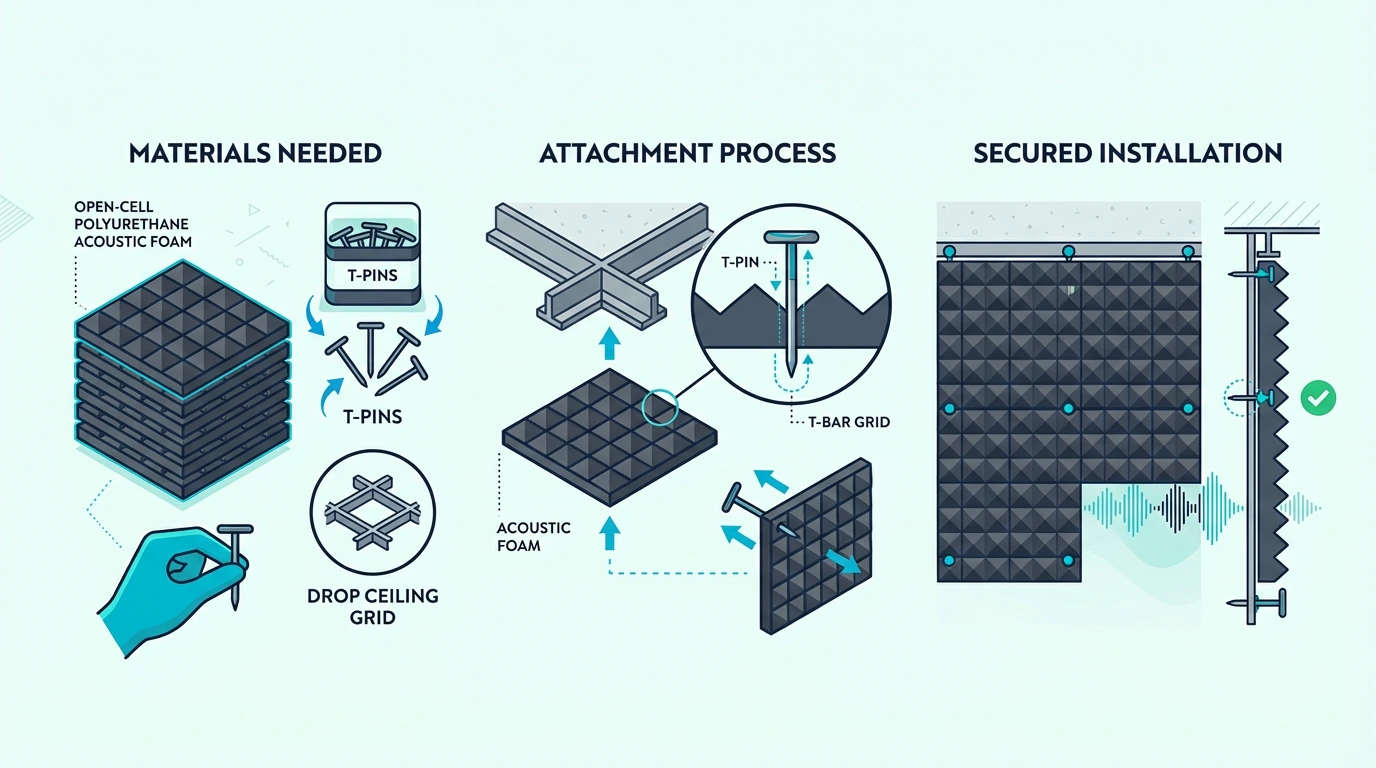
Drop ceiling tiles are made from compressed mineral fiber or fiberglass — materials soft enough for T-pins to penetrate easily. Standard drywall ceilings won’t work with this method.
The pins push through the foam edge and into the tile behind, creating mechanical attachment without adhesive. You’re essentially pinning the foam to the tile like fabric to a corkboard.
This approach is ideal for office spaces, basements, and commercial buildings where drop ceilings are common. Installation and removal take minutes, not hours. If you’re deciding between pyramid and wedge panels for this method, our best acoustic foam shape guide helps you pick.
This only works with suspended tile systems. If you have drywall, plaster, or concrete overhead, skip to another method.
Step-by-Step Instructions
Use T-pins instead of standard push pins for this application. The T-shaped head spreads pressure across the foam and won’t pull through as easily.
A basic pack of 1.5-inch T-pins is enough for most small rooms. If you’re mounting a lot of panels, buy extra—pin quantity is what keeps edges from sagging.
Position your foam panel where you want it on the ceiling tile. Hold it in place with one hand while inserting pins with the other.
Push pins through the foam edge at a 45-degree angle, directing them toward the ceiling tile behind. This angle locks the pin in place and prevents the foam from sliding.
Use four pins minimum per 12×12 panel — one near each corner, about an inch from the edges. Larger panels need six to eight pins for secure mounting.
Press each pin until the T-head sits flush against the foam surface. Pins that stick out will catch on things and eventually work loose.
Pros and Cons
Completely reversible installation is the biggest benefit. Pull the pins and the foam comes down without any surface damage to either material.
Zero tools required beyond the pins themselves. A package of T-pins costs about three dollars and covers dozens of panels.
The method only works on drop ceilings — that’s a hard limitation. Drywall, plaster, and concrete require adhesive-based approaches.
Aesthetic results depend on pin visibility. From directly below, T-pin heads may be noticeable, especially on lighter-colored foam.
Should You Use Furring Strips for Professional Installation?
Everything we’ve covered so far is DIY-friendly. If you want a more “built-in” install, furring strips are the pro approach.
You mount thin wood strips into joists, then attach foam to the wood instead of gluing it to the ceiling. That gives you a consistent mounting surface and easier panel replacement later.
Professional-Grade Installation
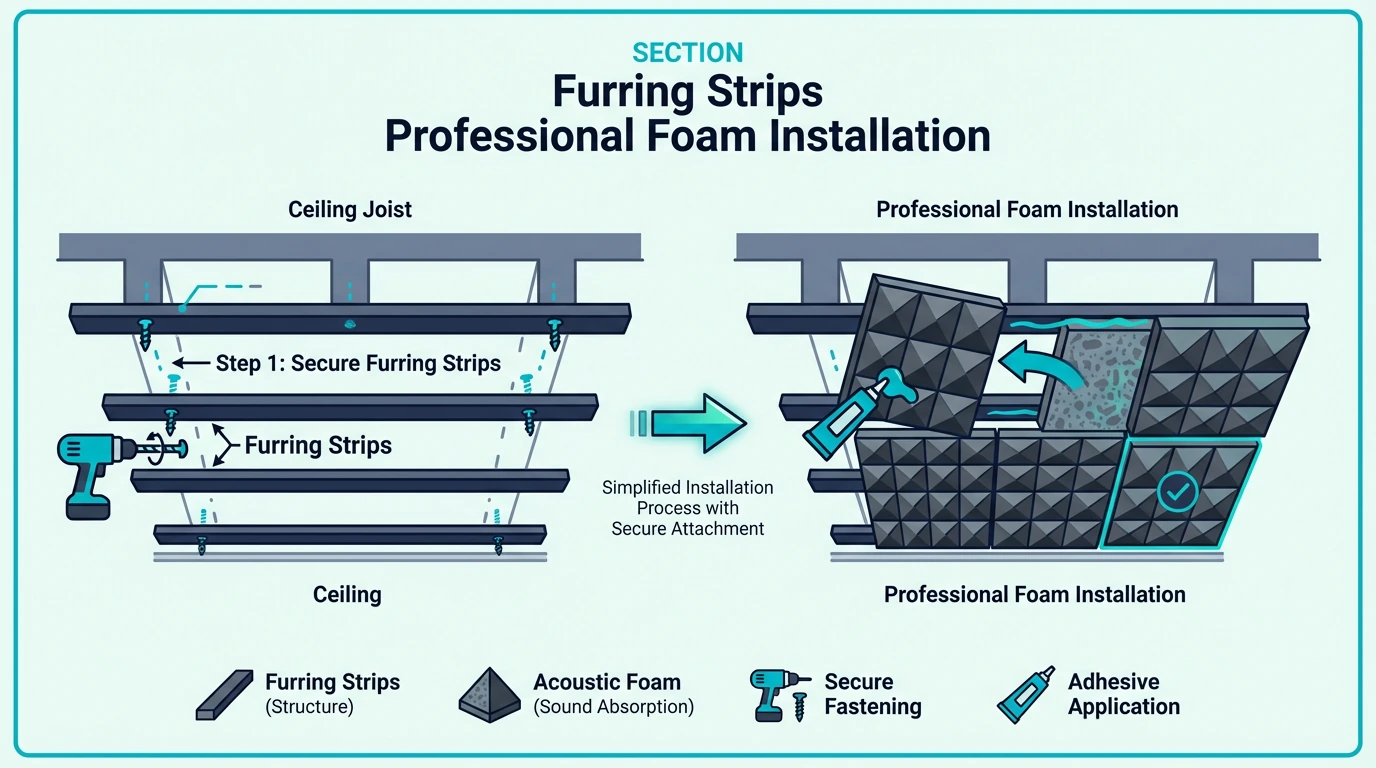
Furring strips are thin wooden boards (typically 1×2 or 1×3 inches) screwed directly into ceiling joists. The foam then attaches to these strips rather than the ceiling surface itself.
This approach decouples the foam from the ceiling structurally. Vibrations and temperature changes affect the strips, not the foam-to-ceiling bond.
Professional recording studios use this method because it allows easy panel replacement and creates a consistent mounting surface regardless of ceiling texture or condition.
The initial installation requires more work — you’re essentially building a grid framework — but long-term maintenance becomes trivial.
Step-by-Step Instructions
Locate your ceiling joists using a stud finder. Mark their positions across the entire installation area before mounting any strips.
Cut furring strips to span your foam panel layout. Plan the grid so strip edges align with foam panel edges — this creates invisible mounting lines.
Screw strips into joists using 2.5-inch wood screws. Pre-drill pilot holes to prevent splitting, especially at strip ends.
Once your strip grid is complete, attach foam using either spray adhesive or staples driven through foam edges into the wood. Staples allow easier replacement later.
Paint furring strips to match foam color before foam installation. Any visible wood between panels becomes part of your acoustic aesthetic.
Pros and Cons
The most professional-looking results come from this method. Commercial studios worldwide use furring strip frameworks for good reason. If aesthetics matter, our guide to making acoustic foam look good pairs well with this approach.
Panel replacement is simple — remove the old foam and attach new material to the existing framework. No ceiling repairs needed.
Installation time and material costs exceed simpler methods significantly. You’re building infrastructure before you even touch the foam.
This method isn’t renter-friendly at all. The screw holes in ceiling joists are minor but present, and removing the entire framework later requires proper repair.
When Should You Suspend Foam Instead of Mounting It?
Every method so far attaches foam directly to the ceiling. Suspension is different: the panels float below the ceiling instead of sticking to it.
That air gap can improve absorption, especially in the low-mids. It’s also useful when you don’t want to touch the ceiling surface directly.
When to Suspend Instead of Mount
High ceilings benefit most from suspension. If your ceiling is 10+ feet high, sound bouncing off it creates significant reverb problems that panels need to address at ear level, not at the ceiling itself.
Suspension also works well when you can’t or don’t want to touch the ceiling surface directly. Historic buildings, textured ceilings, and rental restrictions all make suspension attractive.
The air gap behind suspended panels actually enhances low-frequency absorption. Sound waves interact with both the panel surface and the cavity behind it.
Cloud panels in professional studios are essentially this concept — large acoustic absorbers hung horizontally below the ceiling to control reflections in the listening zone. If you’re building a complete studio setup, consider the best acoustic foam panels for your budget.
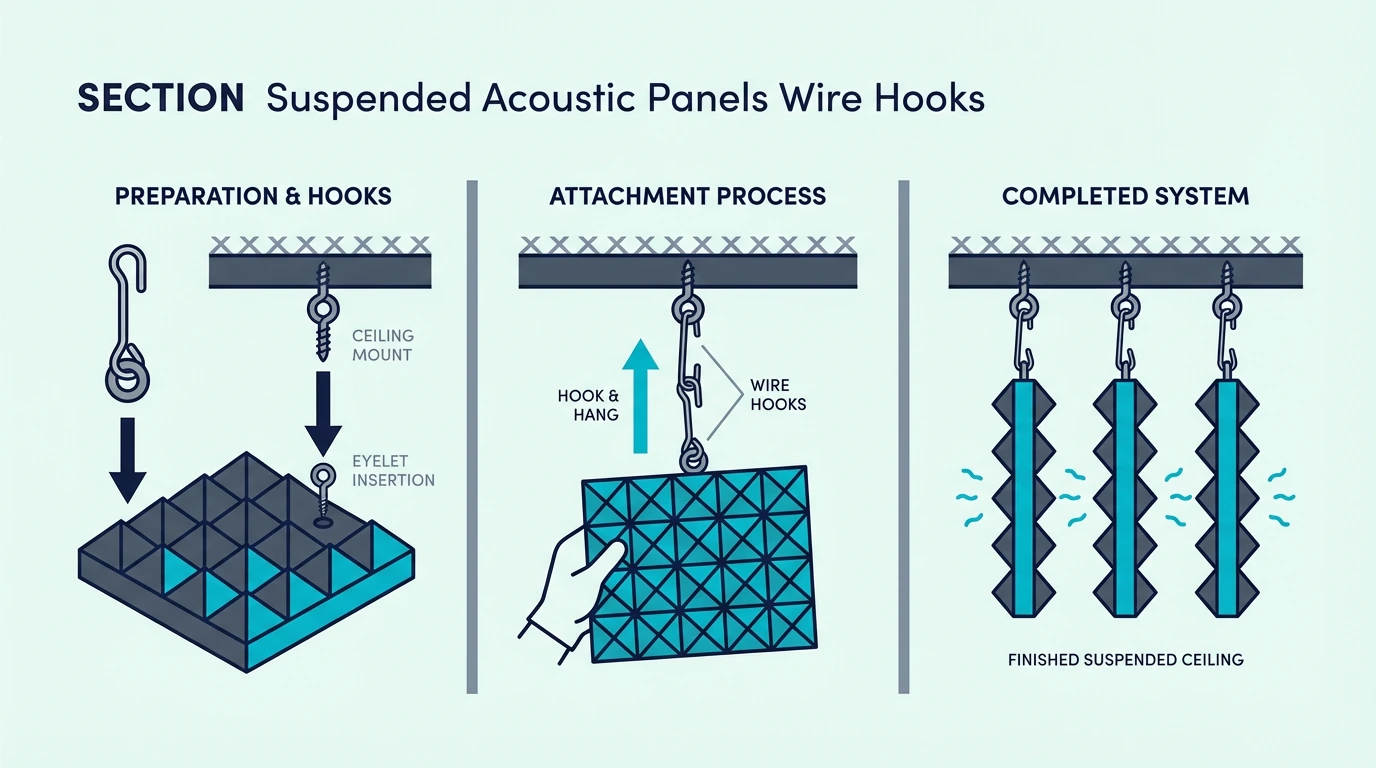
Step-by-Step Instructions
Install hooks into ceiling joists—not drywall alone. Use a stud finder so you’re hanging from structure, not just paint and paper.
If you want a ready-made option, a ceiling hook + wire kit saves you a trip to the hardware aisle. Just make sure you’re anchored into a joist.
ceiling hook + wire kit
Spacing depends on panel size. For 24×24 panels, hooks at opposite corners can work, but larger panels should use four hooks—one per corner.
Cut picture hanging wire or monofilament to equal lengths for each hook point. Consistent lengths ensure the panel hangs level.
Thread wire through panel edges using large upholstery needles or by creating holes with a screwdriver. Foam compresses around the wire, creating a secure grip.
Attach wire ends to ceiling hooks, adjusting until the panel hangs level. Check from multiple angles — what looks level from one position may tilt from another.
Pros and Cons
The air gap can also improve absorption, not just convenience. Lower frequencies respond well to that “panel + cavity” effect.
Adjustability exceeds any direct-mount method. Raise, lower, or reposition panels by simply adjusting wire lengths.
Visual appearance differs noticeably from flush-mounted foam. Some people prefer the floating aesthetic; others find it busy or unfinished.
Ceiling hook installation still creates screw holes, though fewer than furring strip grids. Damage is minimized but not eliminated.
What Methods Will Fail on Ceilings?
We’ve covered five methods that work. Now let’s talk about what fails.
Some wall-safe methods fall apart on ceilings. Knowing what to avoid saves you cleanup headaches and wasted panels.
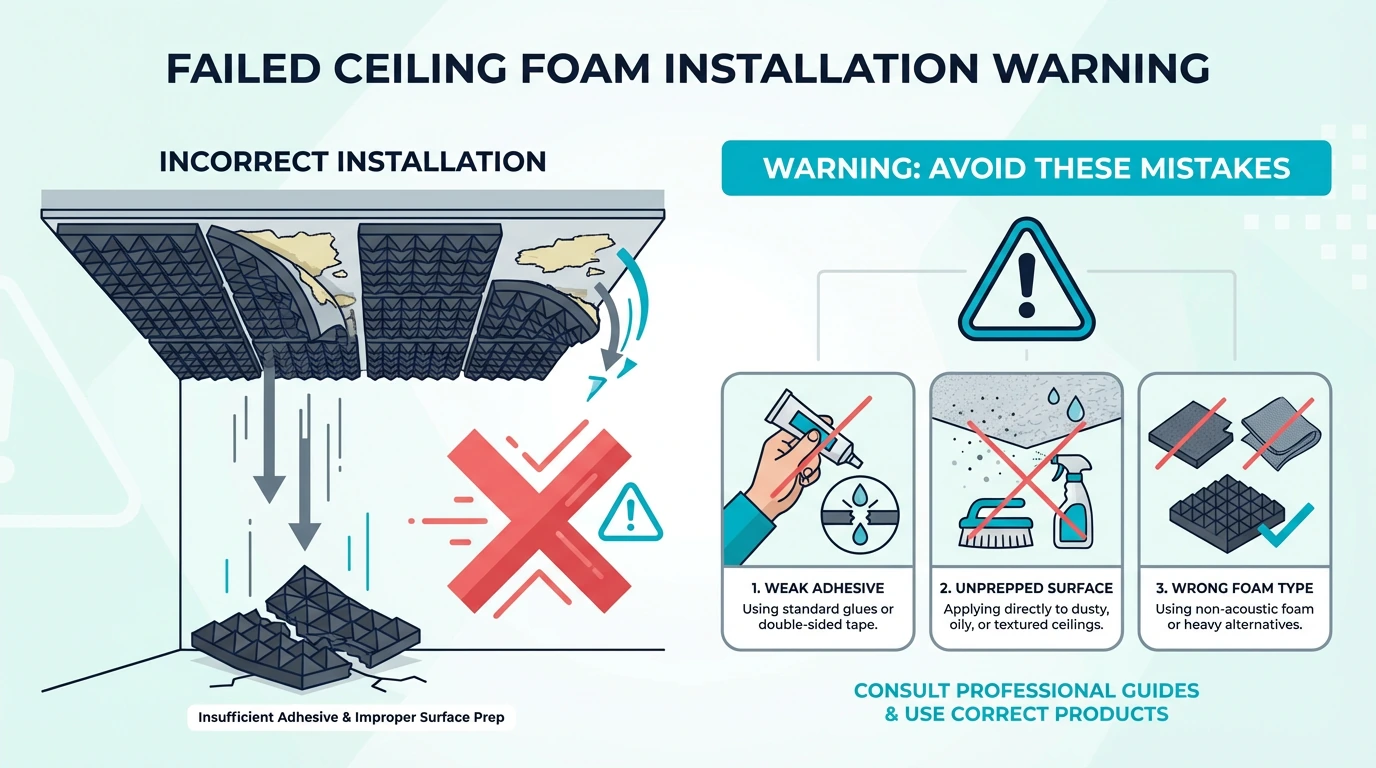
Regular Double-Sided Tape (Will Fall)
Standard double-sided tape lacks the shear strength needed to resist gravity’s constant pull. On walls, tape only needs to hold foam in place horizontally — gravity actually helps keep it down.
On ceilings, that same tape must support the entire panel weight indefinitely. Thermal cycling loosens the bond, and typically within two to four weeks, you’ll find foam on the floor.
The foam-to-tape bond usually fails before the tape-to-ceiling bond. You’ll see tape residue overhead and clean foam panels below.
Even “heavy duty” double-sided tape isn’t rated for ceiling applications. The manufacturers know this — check the packaging, and you won’t find ceiling use mentioned.
Command Strips Alone (Too Heavy)
Command strips work by distributing weight across their adhesive surface. They’re engineered for specific weight ranges, clearly stated on the packaging.
Most Command strips max out at 4-7 pounds depending on the variant. That sounds adequate for lightweight foam — until you account for constant gravitational stress versus occasional wall bumps.
The rated capacities assume wall mounting where force is intermittent. Ceiling applications apply maximum force continuously, exceeding the engineering assumptions.
That cardboard backing trick from earlier? It works around this limitation by improving weight distribution and creating a better adhesive surface.
Nails/Screws Through Foam (Damages Foam)
Driving fasteners directly through foam panels seems logical but destroys the material over time. The foam compresses around the fastener, creating stress points that tear.
Within weeks, the foam sags around each nail or screw head. The torn areas expand until eventually the panel drops or hangs awkwardly.
Foam is meant to absorb impact, not resist point loads. That same flexibility that helps acoustics makes it structurally weak under screws and nails.
If you’re choosing panel thickness for ceiling use, start with our 1-inch vs 2-inch acoustic foam guide. Heavier panels demand better mounting.
If you must use mechanical fasteners, the furring strip method we discussed creates wood surfaces that accept screws without damaging foam.
Conclusion
After covering all five methods, ceiling installs come down to two reliable approaches. Spray adhesive wins for permanent strength, while a backing board preserves removal options.
Renters should always use the backing board method. The extra setup time is worth protecting both your security deposit and your foam investment for the next space.
Homeowners with permanent studio plans can confidently use spray adhesive. The bond strength exceeds anything else available to consumers, and the application learning curve is minimal.
For drop ceilings, T-pins are a completely reversible option that takes minutes to install. This method is ideal for temporary setups or spaces where you might reconfigure the layout later.
If you’re building a DIY vocal corner, our vocal booth foam guide helps you keep reflections out of the mic. It’s the same “treat the reflection path” idea, just focused on recording.
Those gravity challenges we discussed at the start are why method choice matters. Whichever approach you choose, skip the predictable failures: regular tape, strips directly on foam, and fasteners through foam.
Check out our acoustic foam adhesive guide for product options, or visit our acoustic foam hub for full treatment planning.
Frequently Asked Questions
Will foam fall off the ceiling?
Not if you use the right mounting method. Spray adhesive and cardboard backing both create permanent or semi-permanent bonds that resist gravity indefinitely.
Foam falls when people use wall-appropriate methods on ceilings. Regular tape and basic Command strips simply aren’t designed for constant gravitational stress.
How long does spray adhesive take to dry?
Initial bond happens within 30-60 seconds — that’s when you press the foam into place. Full cure strength develops over 24 hours as the solvents evaporate completely.
You can safely stop holding the panel after about 30 seconds of firm pressure. Just don’t stress the bond heavily during the first day while it finishes curing.
Can I remove foam from ceiling later?
That depends entirely on your mounting method. Cardboard backing, T-pins, and suspension systems all allow clean removal without ceiling damage.
Spray adhesive creates permanent bonds. Removal will damage both the foam and the ceiling surface — plan on both being destroyed if you need to take directly-adhered foam down.
Do I need to cover the entire ceiling?
Rarely. Most ceiling treatment goals are achieved with 25-40% coverage concentrated at reflection points directly above your listening or recording position.
Full ceiling coverage can make a room feel unnaturally dead. Strategic placement above reflection points gives better results with less material—our foam placement guide walks you through the logic.

