Best Acoustic Foam for Podcasts: Top 7 Picks for Clear Voice Recording
Best acoustic foam for podcasts can make your recordings sound cleaner — but it won’t fix the wrong problem.
If your voice sounds hollow or far away, quick reflections are hitting the mic milliseconds after you speak.
Here’s the good news: you don’t need to cover every wall.
Start by treating the wall behind the microphone, then add panels at your closest reflection points.
In many bedrooms, 6-12 panels is enough to make your voice sound more direct and consistent.
Below are seven acoustic foam picks that work for typical podcast setups, from a simple “behind the mic” wall to full room treatment.
If you want the fast answer, check the Quick Takeaway, then use the rest of the guide to match a pack to your room and placement.
For most podcast rooms, 6-12 panels behind the microphone eliminate the worst reflections. Treat the wall you face first, then add side-wall panels if echo remains. One-inch foam handles the 500Hz-4kHz speech range where clarity lives. If budget forces a choice, start small and expand only where recordings still sound hollow.
| Product | Rating | Size | Pack | Shape | Link |
|---|---|---|---|---|---|
Best Overall Value 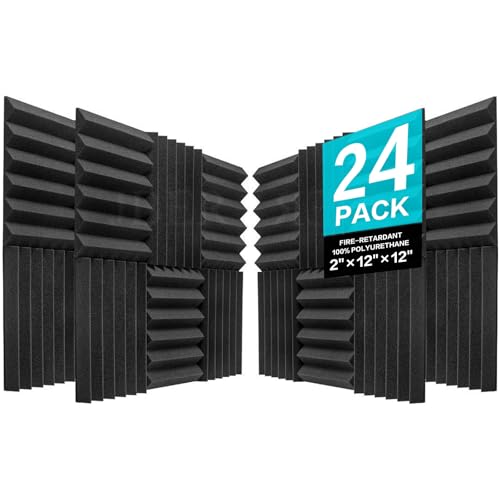 | 1 inch | 48 pack | Wedge | View | |
Best Budget Starter 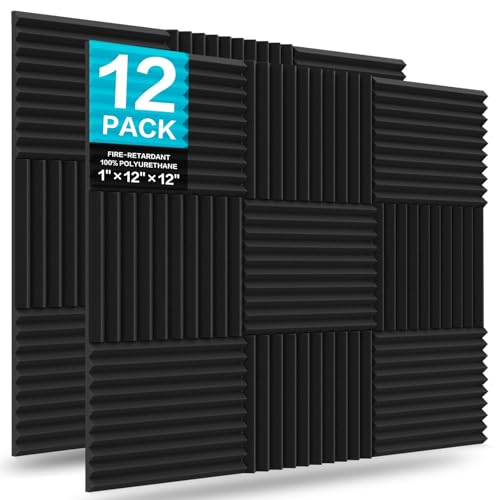 | 1 inch | 12 pack | Wedge | View | |
Best Large Room Coverage 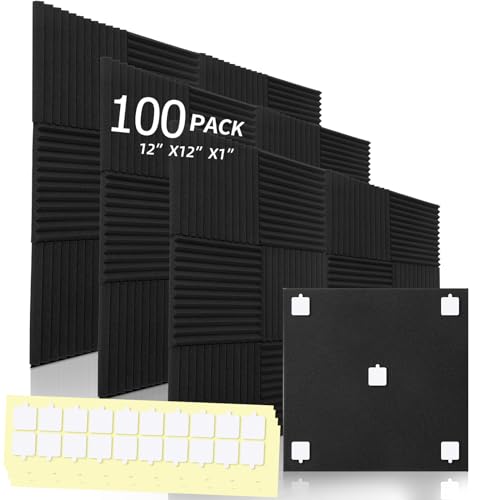 | 1 inch | 100 pack | Wedge | View | |
Best for Tight Spaces 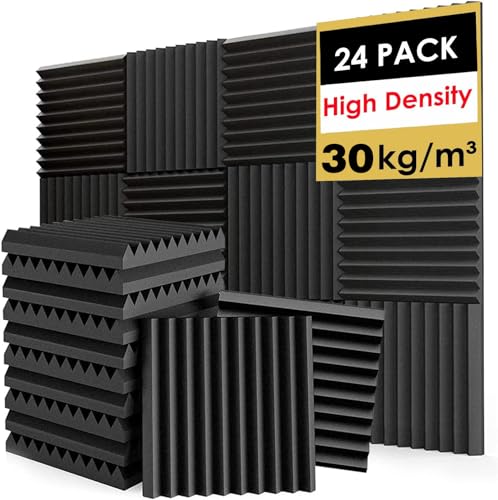 | 1 inch | 24 pack | Pyramid | View | |
Best Bulk Value  | 1 inch | 96 pack | Wedge | View | |
Best 2-Inch Thickness 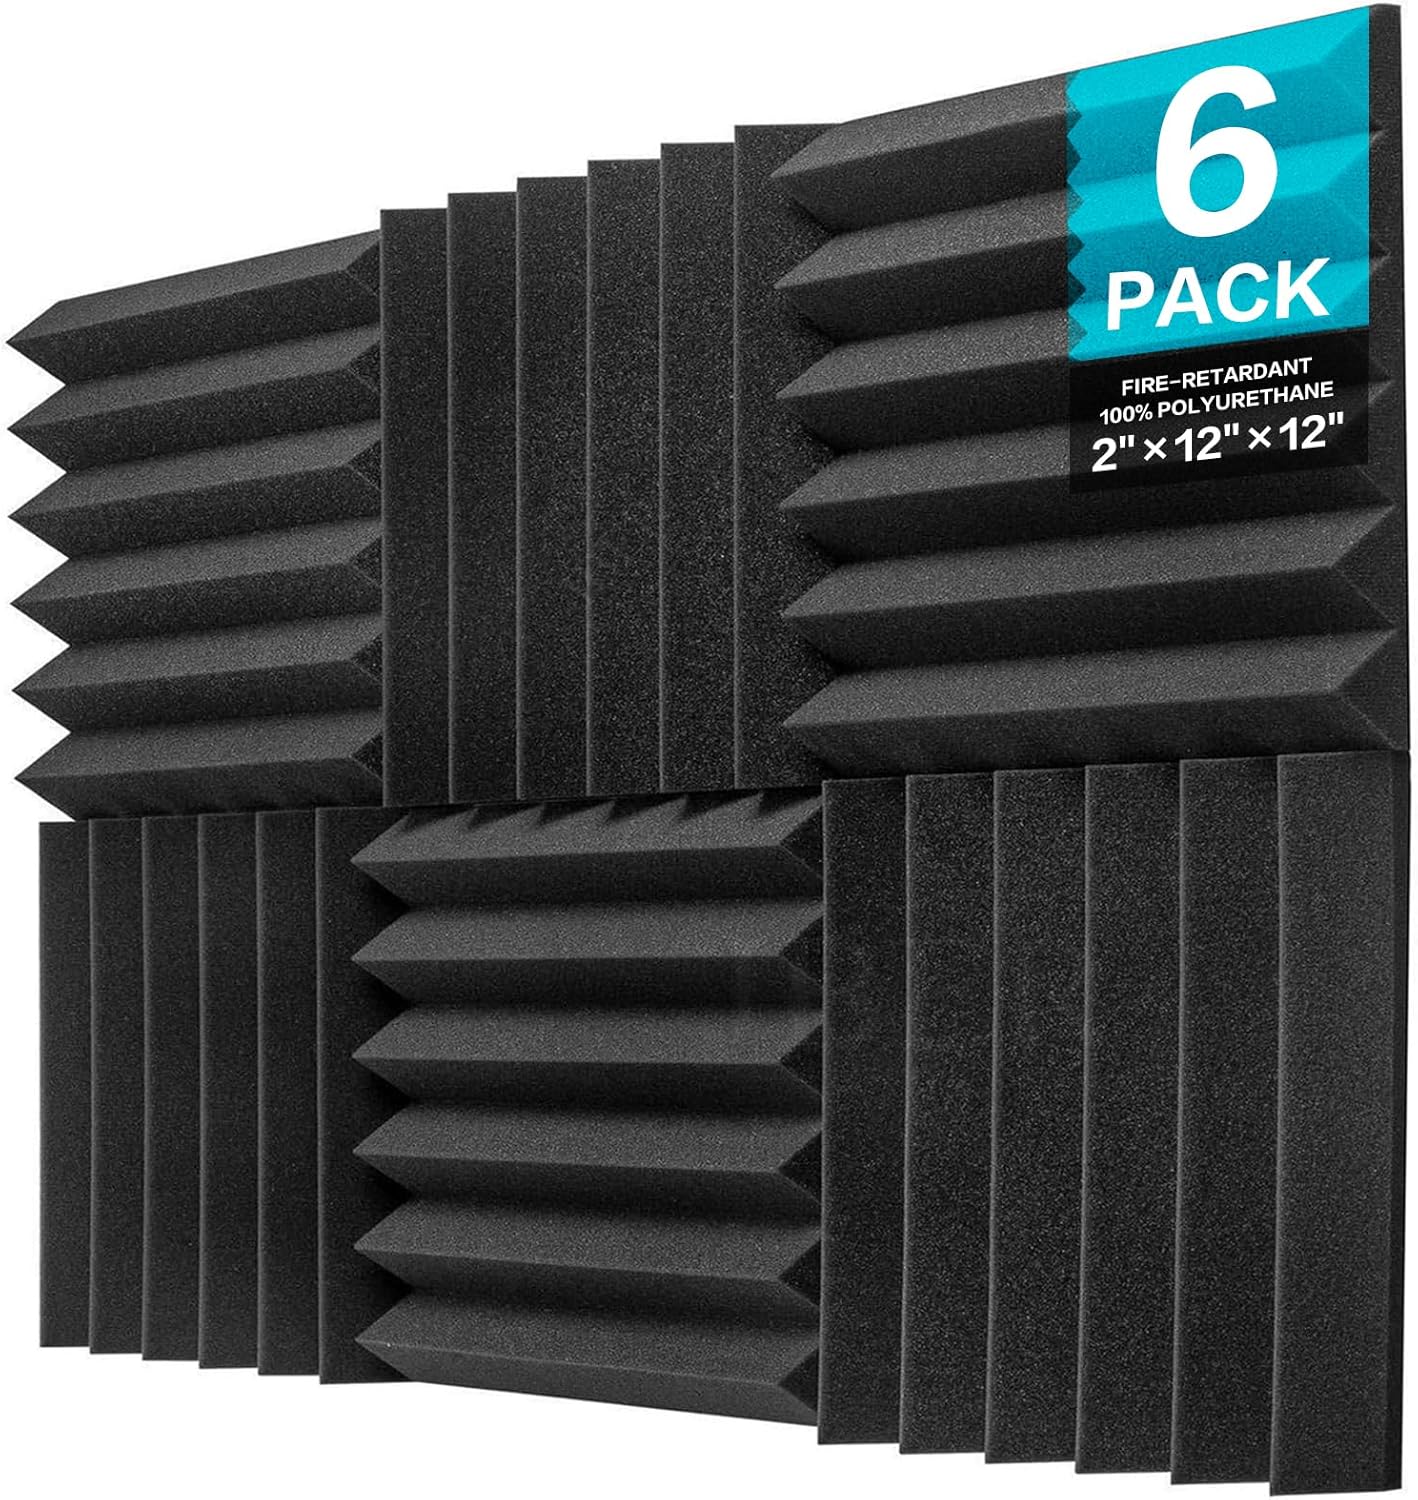 | 2 inch | 6 pack | Wedge | View | |
Best for Corners  | 12 inch | 8 pack | Corner | View |
Quick Picks: Best Acoustic Foam for Podcasts
If you just want the buying list, start here.
These picks cover the most common podcaster setups, from a basic “behind the mic” wall to full room treatment.
What’s the Best Acoustic Foam for Podcasts?
With the shortlist out of the way, here is how to choose the right pack for your room.
Podcasters need foam that tames voice reflections without breaking the bank. The goal isn’t studio perfection — it’s eliminating the echo that makes recordings sound like you’re in a bare room.
After reviewing a range of popular packs and sizes, these seven picks cover the most common podcast setups. The best choice depends on how much wall area you can realistically treat.
Best Overall: JBER 48 Pack Acoustic Foam Wedges
The JBER 48 Pack dominates the podcast foam market for good reason. You get enough foam to treat a small room without turning it into a major expense.
JBER 48 Pack
But what matters for many home studios is the fire rating. Foam near lights, PCs, and chargers can get warm.
Lower-quality foam can discolor or soften over time near heat sources. Fire-retardant panels reduce that risk and make the setup easier to forget about once it’s on the wall.
The 1-inch thickness handles the 500Hz-4kHz range where voice clarity lives. That’s exactly what podcasters need.
You’re not recording bass-heavy EDM tracks — you’re capturing speech. One inch is sufficient for that job.
The honest take: These won’t win awards for density or premium feel. They’re workhorses, not show ponies.
But for podcasters who need coverage without complexity, this is the pack to beat.
Best Budget Starter: JBER 12 Pack
If you’re new to treatment, the JBER 12 Pack is often enough to hear a clear difference. Twelve panels behind your microphone can remove a big chunk of room echo in many setups.
JBER 12 Pack
That’s not marketing fluff — it’s physics. Your mic’s cardioid pattern rejects sound from behind, making the wall you face the primary problem.
Treat that wall, and you’ve solved most of your acoustic issues.
At this price point, you can test whether foam actually helps your specific room before committing to full treatment. The best budget acoustic foam roundup compares more entry-level options if you want alternatives.
Some rooms surprise you — maybe yours has enough soft furniture and carpet that minimal treatment is enough.
When to upgrade: If you record video and your background needs to look treated, or if side-wall reflections remain audible after treating the front wall. If that solves it, you can stop there.
Best Large Room Coverage: 100 Pack Premium Acoustic Foam
The 100 Pack Premium Acoustic Foam exists for a specific situation: you have a dedicated podcast studio, it’s larger than a bedroom, and you want to treat it properly the first time.
100 Pack Premium Acoustic Foam
Bulk packs like this can be a solid value when you actually need the coverage. The “premium density” claim actually holds up — these feel noticeably more substantial than budget alternatives.
The reality check: This is overkill for 90% of home podcasters.
A 10×10 bedroom needs maybe 36-48 panels for thorough treatment.
Buying 100 panels for that space means you’ll have 50+ panels sitting in a closet.
Measure your room and calculate your actual needs. Then decide if bulk buying makes sense.
Best for Tight Spaces: FONESO 24 Pack
Closet podcasters, this one’s for you.
The FONESO 24 Pack hits the sweet spot for small, dedicated recording spaces.
FONESO 24 Pack
Twenty-four panels treat approximately 24 square feet — enough for the wall behind you plus partial side coverage in a walk-in closet or small bedroom corner.
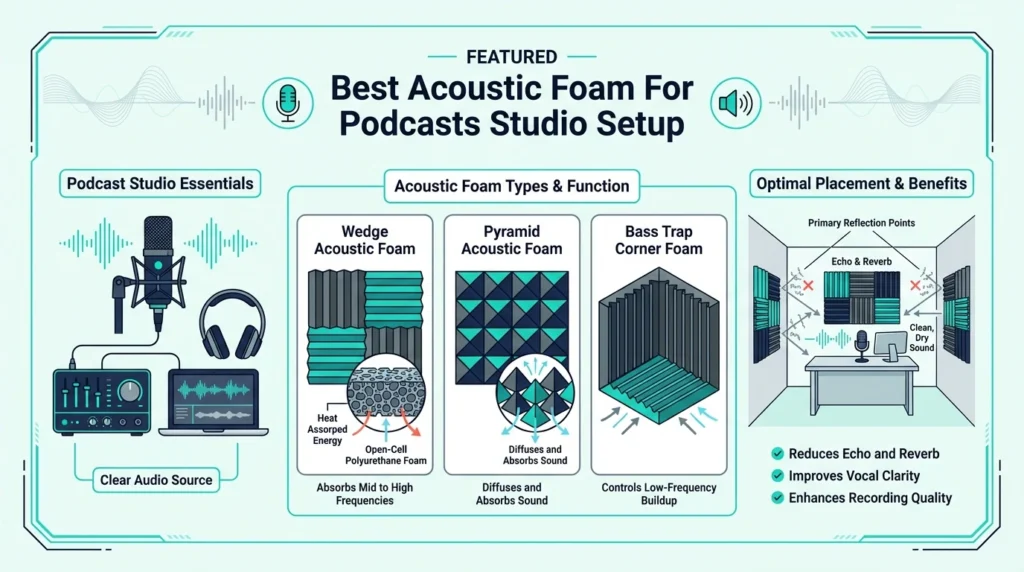
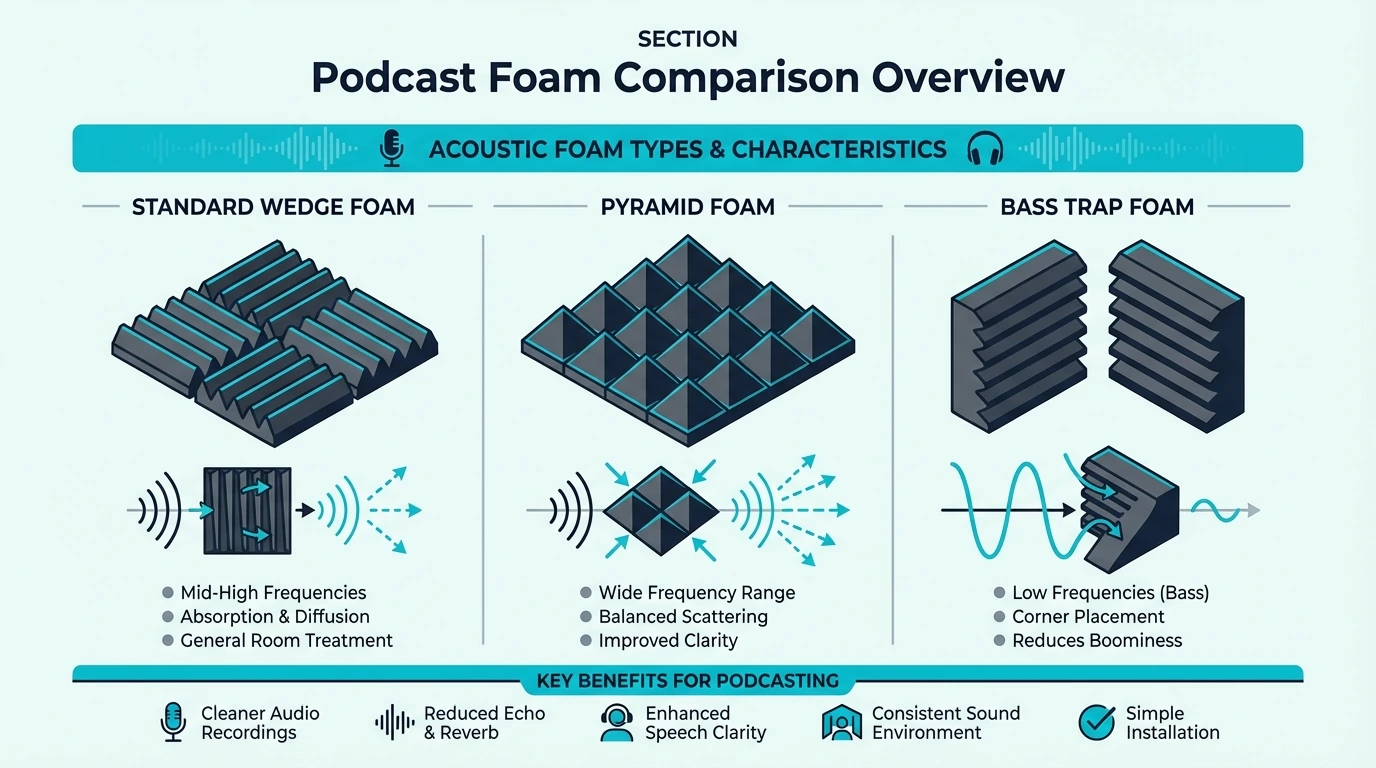
The pyramid shape is worth discussing. The best foam shape guide breaks down when wedge, pyramid, and egg-crate profiles make a difference.
Unlike wedge foam that directs sound in predictable angles, pyramids scatter reflections in multiple directions.
Most listeners can’t tell the difference, but your ears might disagree.
Installation note: Pyramid foam is harder to cut cleanly than wedge foam. If your layout requires trimming panels around outlets or windows, plan carefully or choose wedge-shaped alternatives.
Best Bulk Value: 96 Pack Sound Proof Foam
The 96 Pack Sound Proof Foam plays the comparison game.
96 Pack Sound Proof Foam
Amazon prices fluctuate constantly, so compare the 96-pack and the 100-pack on the day you buy.
Pick whichever is cheaper; the four-panel difference won’t matter on your wall.
The product itself: Solid, consistent, unremarkable in the best way. It does exactly what foam should do without surprises.
Best 2-Inch Thickness: JBER 6 Pack Thick Panels
This is where strategic upgrades come in.
The JBER 6 Pack 2-Inch Panels absorbs frequencies that 1-inch foam physically cannot touch.
JBER 6 Pack 2-Inch Panels
That extra inch extends absorption down to around 250Hz. The best foam for recording guide covers thicker options in more detail, capturing the lower end of male voices and reducing room resonance that thin foam misses entirely.
Six panels won’t cover much area, and that’s intentional. Use these at your primary reflection point (directly behind your mic), then fill the rest with cheaper 1-inch panels.
This hybrid strategy — thick foam where it matters most, thin foam elsewhere — delivers better results than uniform 1-inch coverage throughout. You’re optimizing absorption at the critical spot while staying budget-conscious everywhere else.
Who needs this: Podcasters with deeper voices, rooms with noticeable low-mid “boominess,” or anyone who’s treated their room with 1-inch foam and still hears problems.
Best for Corners: Bass Traps Acoustic Foam Corner Pieces
If your recordings have that low-mid “boxy” buildup, corners are usually the culprit. Thin wall foam helps voice clarity, but corners are where bass energy stacks up.
The Bass Traps Corner Foam (8 Pack) is a practical corner upgrade for podcast rooms.
Bass Traps Corner Foam (8 Pack)
Use these where two walls meet (and especially where wall meets ceiling) near your recording position. You don’t need to treat every corner in the room to hear a difference.
Who it’s for: Podcasters who already have basic wall foam but still hear boominess, mud, or “room resonance” in the low end.
Get Studio Tips Weekly
Join 5,000+ creators getting acoustic treatment advice every week.
No spam. Unsubscribe anytime.Why Podcasters Need Acoustic Foam
Those product picks only make sense if you’re solving the right problem.
Most podcasters have had this moment: you record an episode that felt great, then play it back and hear that hollow, echoey room sound.
Your voice can feel distant, like it’s bouncing around bare walls. For a deeper look at this problem, the acoustic treatment hub explains the full range of solutions.
That’s not your microphone’s fault. It’s your room.
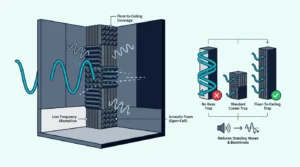
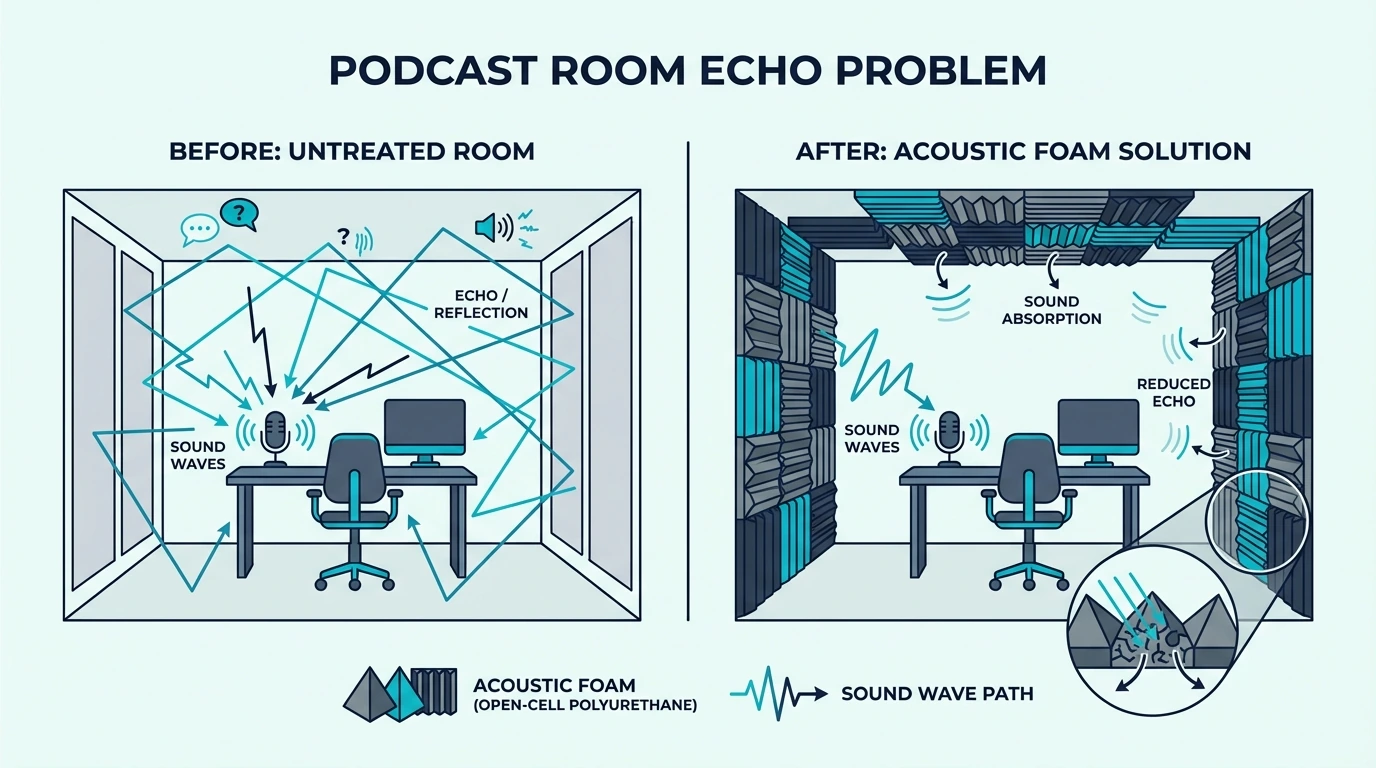
What’s Actually Happening (The Physics in Plain English)
Your microphone doesn’t just capture your voice. It picks up every reflection bouncing off walls, ceiling, and floor — arriving milliseconds after your direct voice signal.
Sound travels at roughly 1,130 feet per second. In a 10×10 room, reflections return to your microphone in under 20 milliseconds.
Your brain can’t separate these reflections from your direct voice. The result sounds muddy, distant, and unprofessional.
Hard surfaces make this exponentially worse. Drywall reflects about 95% of sound energy.
Hardwood floors, windows, and bare walls turn your room into an echo chamber. Every word you speak bounces around multiple times before dying out.
This is why podcasters get outsized results from even basic treatment. For more context on how foam works (and what it can and can’t do), start with the acoustic foam hub.
How Foam Solves the Problem
Acoustic foam converts sound energy into tiny amounts of heat through friction. Sound waves enter the foam’s open-cell structure and lose energy as they bounce between cell walls.
The reflection that would have returned to your microphone simply doesn’t.
The result is cleaner, more direct sound—your voice arrives without the room’s acoustic signature layered on top.
Listeners hear your voice, not your room.
Foam works best on mid and high frequencies — exactly where voice clarity lives.
The 500Hz-8kHz range that makes speech intelligible is foam’s sweet spot, which is why even thin, affordable foam can noticeably improve podcast audio.
The Critical Distinction: What Foam Cannot Do
Here’s where expectations need managing: foam absorbs sound inside a room but doesn’t block sound from entering or leaving.
If your problem is noise coming through walls (neighbors, traffic) or noise leaving the room, foam won’t help.
That’s soundproofing territory.
If you’re trying to solve noise coming through walls, start with the acoustic foam hub so you don’t buy foam expecting it to act like soundproofing. Soundproofing requires mass, decoupling, and sealing — construction-level interventions that foam simply cannot provide.
Foam fixes echo, not noise.
Know which problem you’re solving before you buy.
How Much Foam Do Podcasters Need?
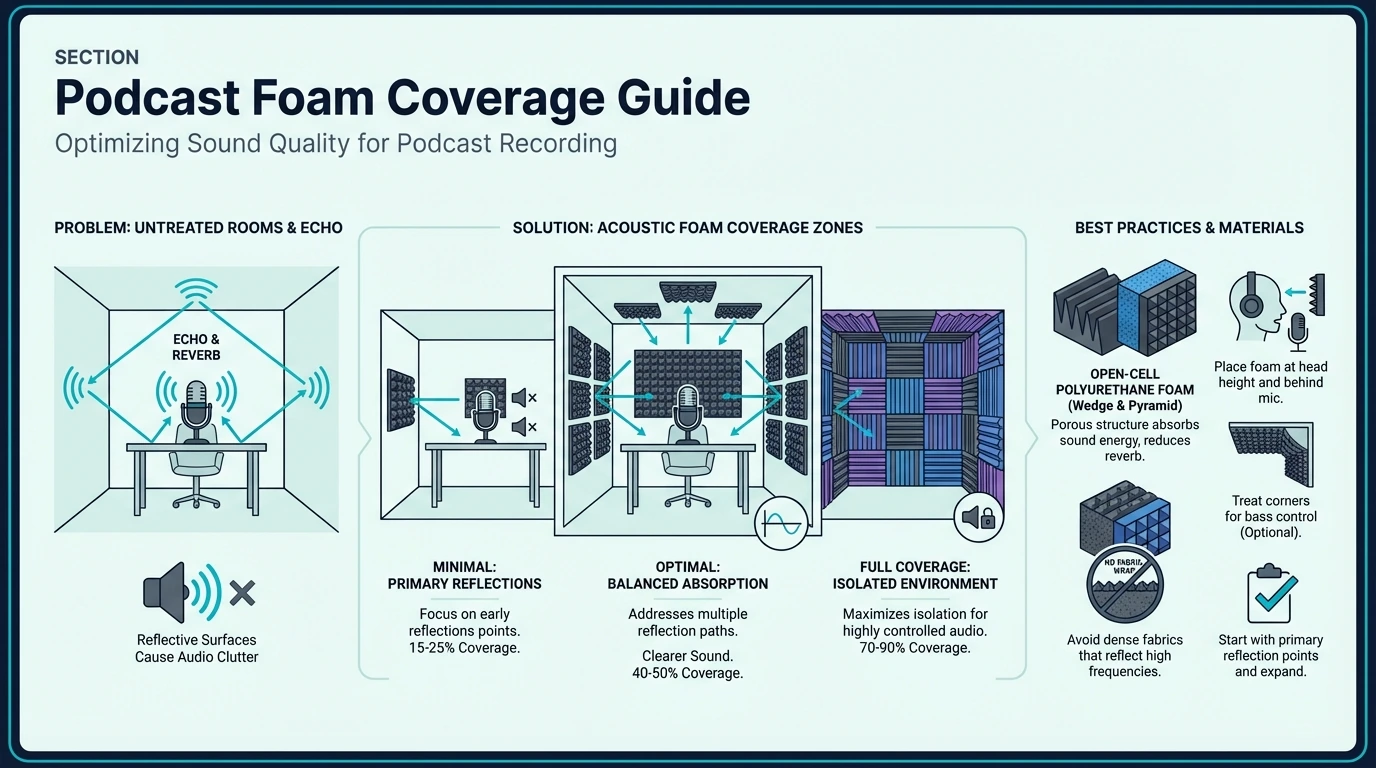
Once you’re clear that foam fixes echo (not outside noise), the next question is how much you actually need.
More foam isn’t always better. Over-treatment creates an unnaturally dead sound that listeners find uncomfortable.
Minimal Setup: Behind the Microphone
Start with 6-12 panels on the wall directly behind your microphone. This single treatment point eliminates the strongest reflections in most setups.
If you want a simple starting point for planning coverage, the acoustic foam hub walks through common room sizes and how much treatment typically works.
Your mic’s pickup pattern determines which reflections matter most. Cardioid mics (the most common type) reject sound from behind, making the wall you face the primary problem.
This minimal approach is very affordable with the JBER 12 Pack and delivers 60-70% of the improvement you’d get from full room treatment.
Standard Setup: Three-Wall Treatment
Treating the wall behind your mic plus both side walls handles first reflection points comprehensively. This requires 24-36 panels depending on room size.
First reflection points are where sound bounces off walls and returns to your mic most directly. Use the mirror trick: sit in your recording position and have someone slide a mirror along each wall.
Where you see your mic reflected, place foam.
The FONESO 24 Pack or JBER 48 Pack provides enough material for this level of treatment.
Full Treatment: Complete Room Coverage
Covering 40-60% of wall surfaces creates a controlled acoustic environment suitable for professional podcast production.
This doesn’t mean foam on every inch of wall. Strategic placement with gaps between panels often sounds better than solid coverage.
The best acoustic foam panels guide ranks products suited for larger installations.
The 100 Pack Premium Foam or 96 Pack handles full room treatment for spaces up to 12×12.
The Over-Treatment Trap
Rooms with too much absorption sound dead and unnatural. Your voice loses warmth and presence when all reflections disappear.
Aim for controlled acoustics, not anechoic chamber silence. Some room sound actually helps — it’s the excessive echo you’re eliminating, not all ambience.
If your recordings sound lifeless after treatment, remove some panels. Finding the right balance takes experimentation.
The best foam for recording guide covers how studios dial in the right amount.
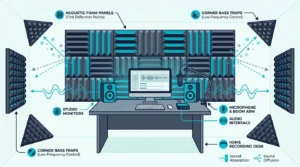
Where to Place Foam for Podcast Recording
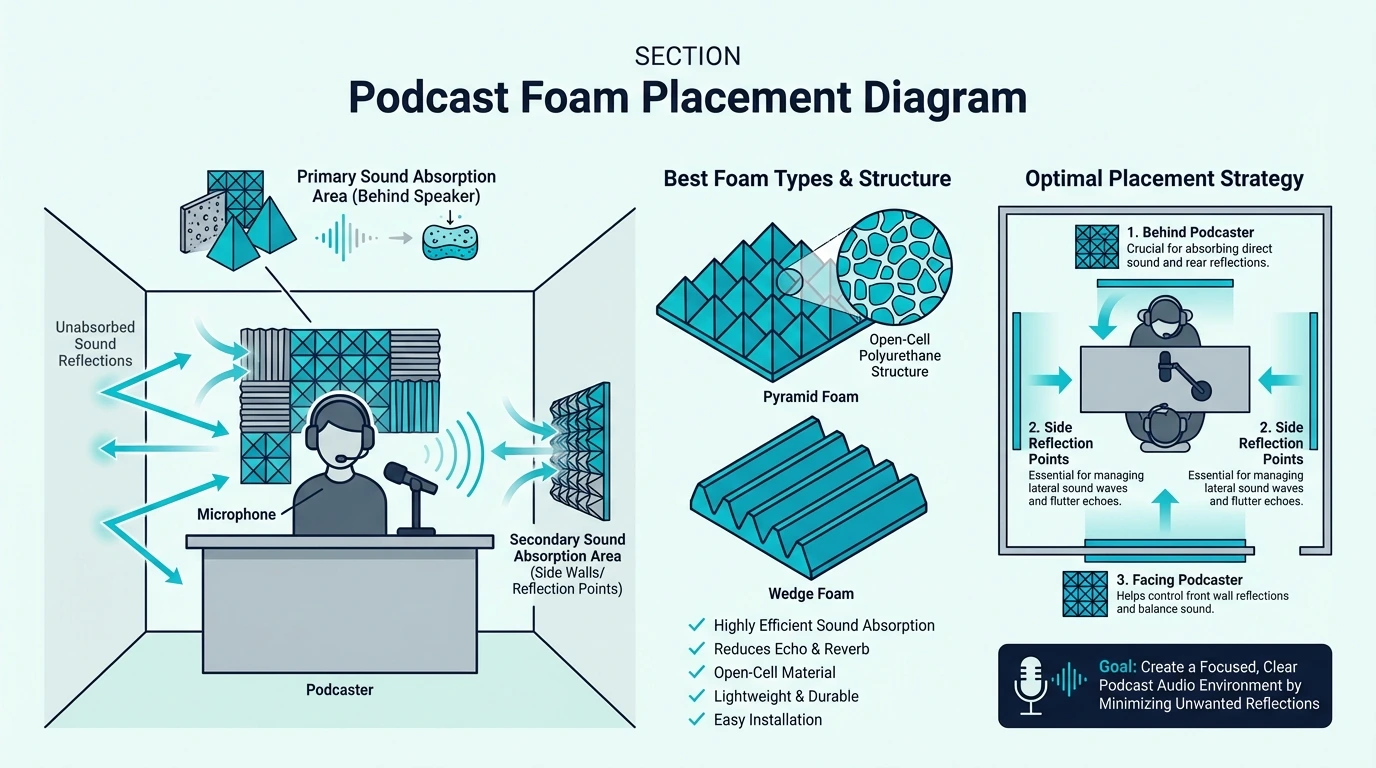
The coverage numbers only work if the panels go on the right surfaces.
Placement matters more than quantity. Twelve panels in the right spots outperform fifty panels scattered randomly.
Behind Your Microphone (Priority 1)
The wall you face while recording is your first treatment priority. Sound from your mouth bounces off this wall and returns directly into your mic.
For a bigger-picture overview of placement strategies, visit the acoustic foam hub.
Cover a 4×4 foot area minimum, centered at mouth height. This catches the strongest reflections from your voice.
If you only treat one surface, make it this one. The improvement is immediately audible.
The best foam for recording guide covers mic-position priorities for music and voice.
First Reflection Points (Priority 2)
Side walls create the next strongest reflections. Sound bounces off these surfaces at angles that direct it straight back to your recording position.
The mirror trick identifies exact placement: where you see your mic in a mirror held against the wall, that’s where foam belongs.
Treat both side walls equally. Asymmetric treatment creates an unbalanced sound that’s harder to fix in post-production.
The bass traps hub explains when corner treatment should come before additional wall panels.
Ceiling (Priority 3)
Ceiling reflections get overlooked, but they’re brutal because the path is short.
If you’re hearing a “slap” or hollow ring on spoken words, that ceiling bounce is often part of it.
Try this: record 10 seconds in your normal spot, then hold a thick blanket above your head (or tape a moving blanket temporarily) and record again.
If the second take sounds tighter, treat the ceiling area above the mic and your mouth.
If your ceiling is drywall or plaster, a 3×3 foot section makes a noticeable difference. Fabric-wrapped acoustic panels are another ceiling option if you want a cleaner look.
Drop ceilings with acoustic tiles may not need extra treatment. Your recordings will tell you faster than any guess.
Corners (Priority 4)
Corners are where rooms “store” low-end energy.
Foam won’t turn a corner into a true bass trap, but it can reduce the boxy low-mids that make voices sound like they’re stuck in a closet.
If you’re dealing with boomy low-end, visit the bass traps hub to understand when foam is enough and when corner treatment matters.
Triangular corner pieces or standard panels mounted diagonally across corners provide some low-frequency control.
For serious bass problems, dedicated bass traps work better than foam. The best corner acoustic foam guide covers dedicated corner solutions.
Podcast Foam Setups by Budget
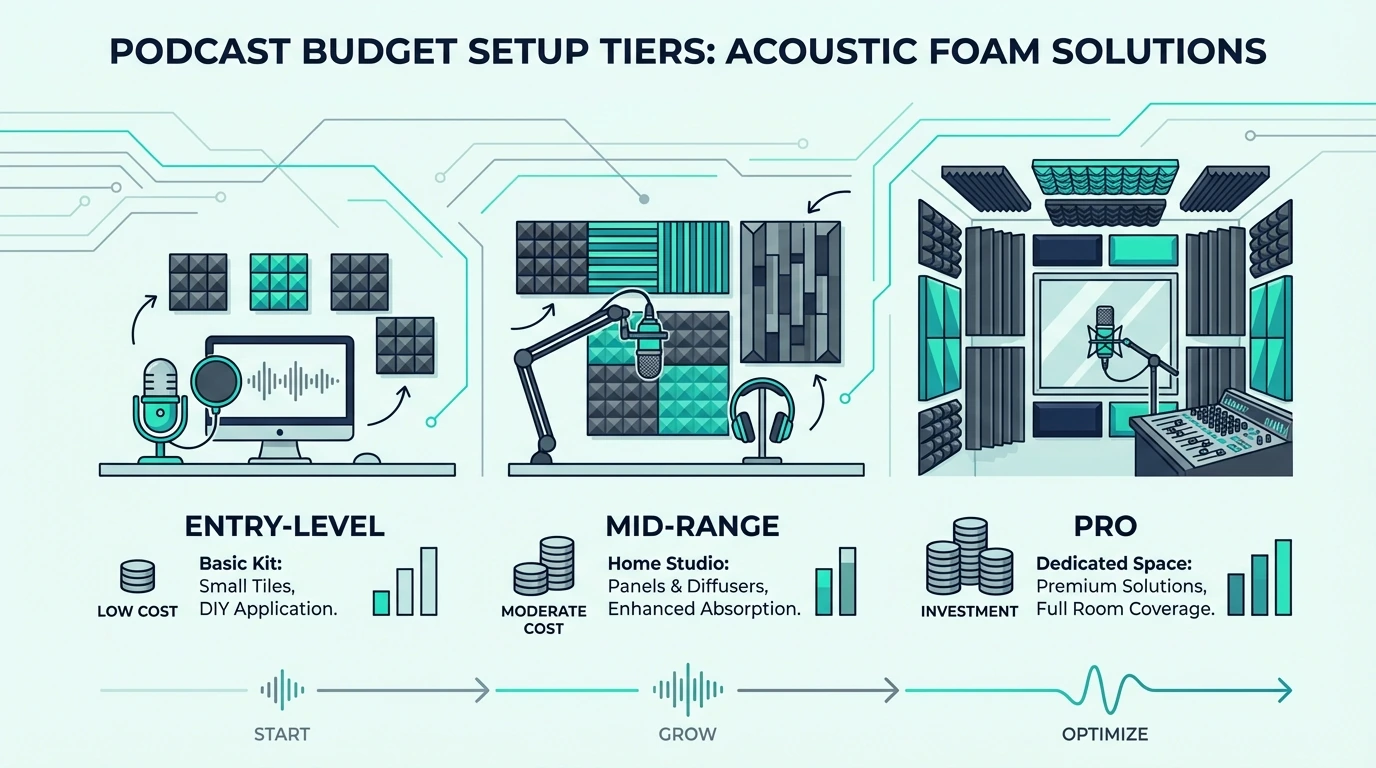
If you want a practical plan (instead of theory), budget is the easiest way to map this out.
Your budget determines how comprehensively you can treat your space. Here’s what each price tier delivers.
Budget Tier: Starter Treatment
The JBER 12 Pack treats the wall behind your microphone. Add Command strips for damage-free mounting.
This minimal setup eliminates the worst reflections. Your recordings will sound noticeably cleaner than untreated rooms.
The best beginner foam guide has more starter picks if you want to compare.
Expect 60-70% of the improvement you’d get from full treatment. For many podcasters, that’s enough.
Mid-Range: Standard Treatment
The JBER 48 Pack covers three walls comprehensively. This handles first reflection points and provides professional-level room control.
Add the JBER 6 Pack 2-Inch Panels for strategic thick-foam placement at primary reflection points.
Total investment in this range delivers results comparable to studios spending hundreds on treatment. The best budget foam roundup has more mid-range picks worth comparing.
Premium Tier: Complete Treatment
Combine the 100 Pack Premium Foam with corner treatment and ceiling panels for full room control.
This budget allows full wall coverage plus strategic 2-inch panels at key positions. The result rivals professional podcast studios.
You’ll have panels left over for future expansion or treating a second recording space. The best corner foam guide covers what to add after wall coverage is handled.
Common Podcast Foam Mistakes

Once you’ve got a budget plan, the next step is not wasting money on the wrong moves.
Even experienced podcasters make these errors. Avoid them to get maximum value from your foam investment.
Mistake 1: Expecting Soundproofing
Foam absorbs sound inside your room. It doesn’t block sound from entering or leaving.
This confusion between room treatment and soundproofing is extremely common. If you’re deciding what category of solution you need, start at acoustic treatment.
If neighbor noise is your problem, foam won’t solve it. The acoustic panels hub covers heavier panel options, but true soundproofing requires mass-loaded vinyl, acoustic caulk, and construction work.
Set expectations before you buy. Foam fixes echo, not noise transmission.
Mistake 2: Covering Every Surface
More foam isn’t always better. Over-treated rooms sound dead and unnatural.
Your voice needs some room ambience to sound warm and present. The best acoustic foam panels guide discusses how coverage percentage affects room feel.
Start with minimal treatment and add panels only if echo remains problematic. The best beginner acoustic foam guide is designed for first-time buyers.
Mistake 3: Random Placement
Foam scattered randomly across walls wastes material. Strategic placement at reflection points delivers better results with fewer panels.
Use the mirror trick to identify where reflections actually originate. The best foam shape guide helps match panel profiles to specific reflection types.
Twelve panels at the right positions outperform fifty panels placed without purpose. The best acoustic foam panels guide ranks products that work well at reflection points.
Mistake 4: Ignoring the Ceiling
Podcasters often treat walls thoroughly while ignoring the ceiling entirely. Ceiling reflections contribute noticeably to room echo.
If your ceiling is hard (drywall, plaster), it needs treatment. Even a small section above your recording position helps.
Mistake 5: Cheap Adhesive
Foam falling off walls mid-recording ruins takes and damages equipment. Invest in proper mounting.
Command strips work well for renters. Spray adhesive provides permanent mounting for owned spaces.
The acoustic foam hub covers mounting methods in detail.
Never use hot glue — it melts foam and creates fire hazards.
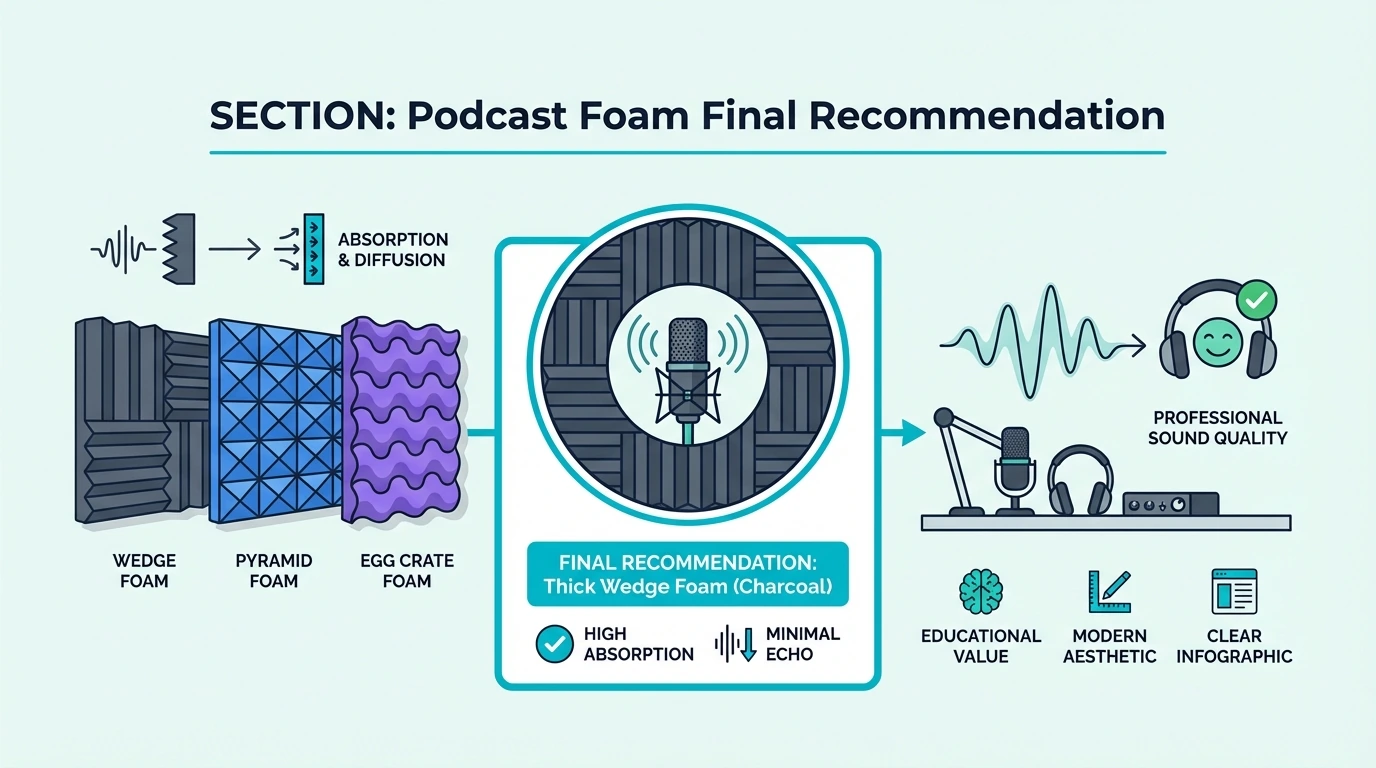
The Bottom Line
If you keep the soundproofing myth out of the equation and treat the right surfaces first, foam becomes a simple buy.
For most podcasters, the JBER 12 Pack provides the best starting point. This budget-friendly option gets you enough foam to treat the wall behind your microphone — the single most impactful placement for voice recording.
If you want complete room treatment, the JBER 48 Pack delivers unbeatable value. With 48 fireproof panels, you get professional-grade acoustic control without overcomplicating your setup.
Start simple. Treat the wall behind your mic first, record some test audio, and add panels only where echo remains problematic.
The goal isn’t perfect acoustics — it’s eliminating the amateur sound quality that makes listeners click away. Even minimal foam treatment achieves that goal.
If you record music as well as podcasts, the best foam for recording guide covers thicker options for instruments. For a broader look at foam options beyond podcast-specific setups, see the best acoustic foam panels guide.
Frequently Asked Questions
These are the questions that come up most from podcasters who want better audio without rebuilding their room.
How much acoustic foam do I need for a podcast?
Most podcasters need 12-48 panels depending on room size and goals. Start with 12 panels behind your microphone — that single treatment point eliminates 60-70% of room echo.
For complete treatment, calculate 25-40% coverage of your wall surfaces. A 10×10 room has roughly 320 square feet of wall space, so 80-128 square feet of foam (80-128 panels) provides full treatment.
Is acoustic foam worth it for podcasts?
Yes, for echo reduction. Foam eliminates the hollow, amateur sound quality that plagues untreated rooms.
The difference is immediately audible in recordings.
No, for soundproofing. If you’re trying to block outside noise or prevent sound from leaving your room, foam won’t help.
That requires construction-level solutions.
Where should I put acoustic foam for podcasting?
Priority order: (1) Wall behind your microphone, (2) Side walls at first reflection points, (3) Ceiling above recording position, (4) Corners.
Use the mirror trick for precise placement. Sit in your recording position and have someone move a mirror along each wall.
Where you see your microphone reflected, place foam.
Does acoustic foam soundproof a room?
No. This is the most common misconception about acoustic foam.
Foam absorbs sound waves inside a room, reducing echo and reverb. It does not block sound from traveling through walls, floors, or ceilings.
Soundproofing requires mass (heavy materials), decoupling (breaking vibration paths), and sealing (eliminating air gaps). Foam provides none of these.
Can I use egg cartons instead of acoustic foam?
Egg cartons provide minimal acoustic benefit. Their thin cardboard construction doesn’t absorb sound effectively.
If you’re looking at budget-friendly “egg crate” style foam instead, look for egg crate style foam panels designed for acoustic absorption rather than actual egg cartons.
The myth persists because egg cartons look similar to acoustic foam. But appearance doesn’t equal performance.
Real acoustic foam is very affordable for a starter pack. Don’t waste time with ineffective DIY alternatives.
How long does acoustic foam last?
Quality foam lasts 5-10 years in normal conditions. Cheap foam may degrade in 2-3 years, especially in humid environments or direct sunlight.
Signs of degradation include crumbling edges, color fading, and reduced firmness. Replace foam when it starts breaking down.
The best budget foam guide covers affordable replacement options.
Fireproof foam like the JBER 48 Pack typically lasts longer than untreated alternatives.