DIY Acoustic Panels: How to Build Your Own (Step-by-Step) [2026]
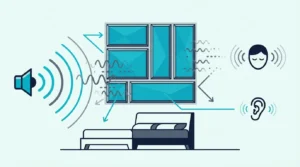
DIY acoustic panels can cut your treatment costs by 60–80% — but only if you use the right core material, because the wrong insulation type produces panels that look identical but barely absorb anything.
Most DIY builds fail quietly: the room still sounds boxy, the echo is still there, and the builder doesn’t understand why. It happens because open-cell foam and cheap polyester batting have a fraction of the absorption of correct mineral wool or rigid fiberglass — the cause is always the core, not the frame or the fabric.
With the right materials, a DIY panel performs identically to a commercial version costing three times more — so you can treat your whole room without spending a fortune.
Every step is covered below with specific measurements, material recommendations, and the mistakes that waste time and money — whether you’re treating a home studio, a podcast room, or a home theater. First up: whether DIY panels can truly match commercial quality.
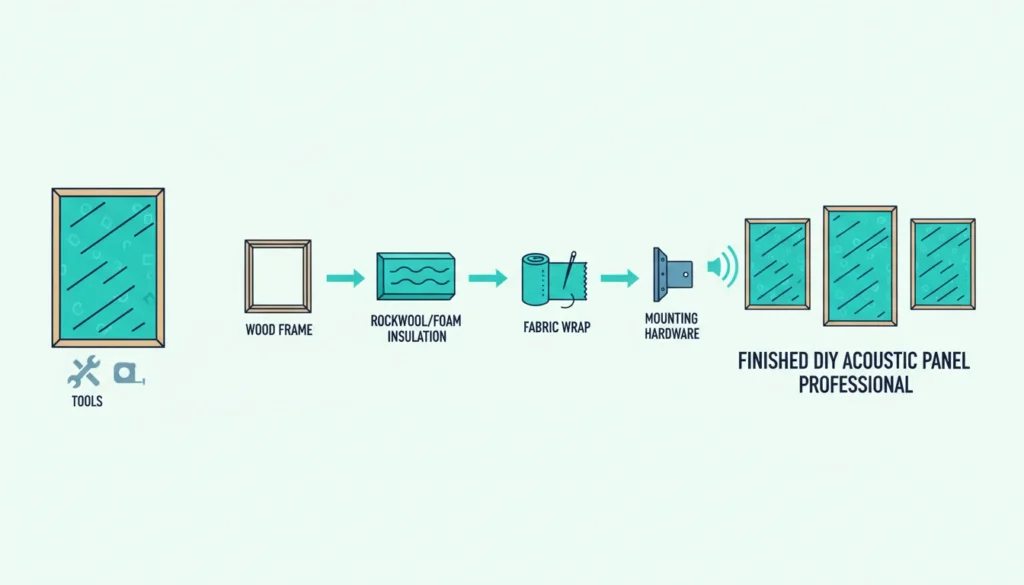
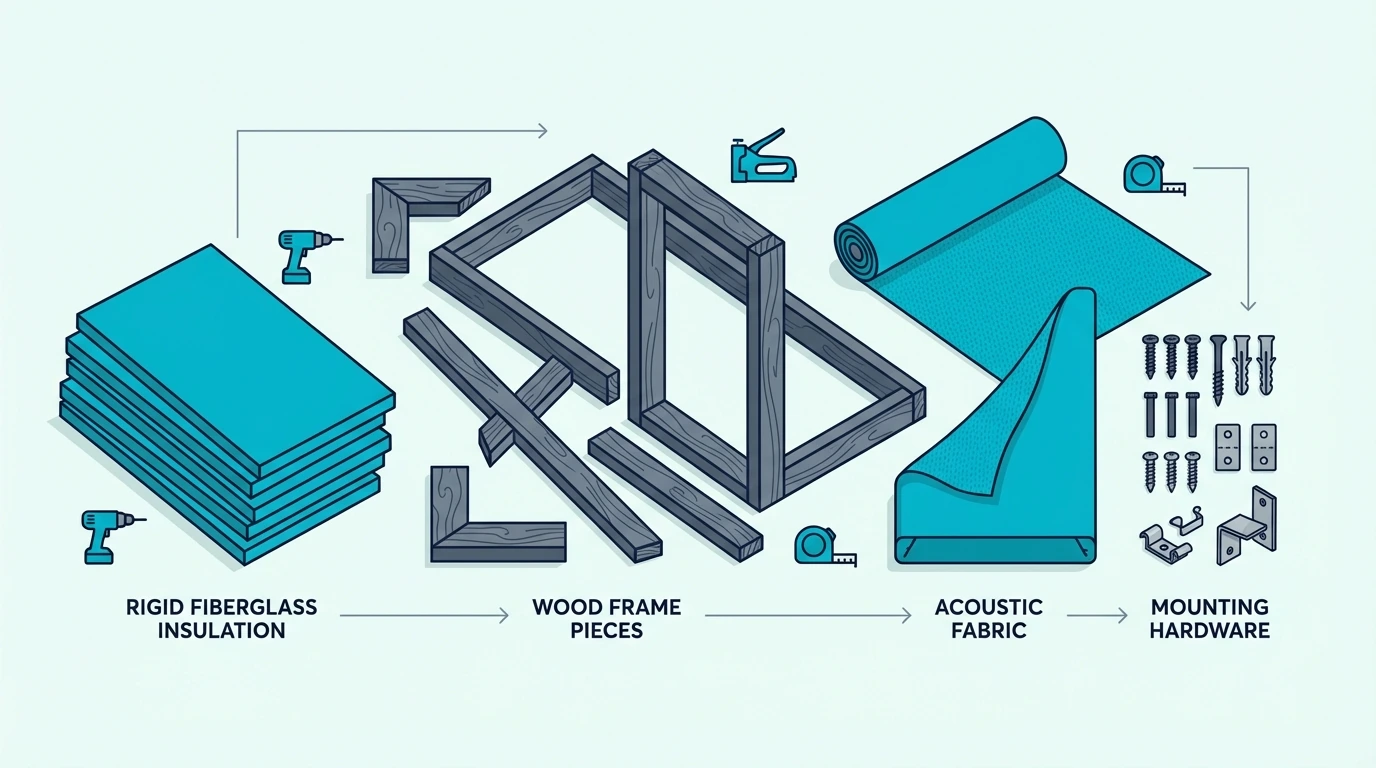
Build professional acoustic panels at home for a fraction of retail prices. You need four materials: 1×4 lumber for the frame, 2-inch rigid mineral wool insulation, acoustically transparent fabric, and a staple gun.
The entire build takes 1-2 hours per panel with basic tools. DIY panels achieve the same NRC ratings (0.80-1.0) as commercial options when built correctly.
Can You Really Make Professional Acoustic Panels at Home?
Yes — a DIY panel is just rigid insulation wrapped in fabric and held in a wooden frame, and when you use the right core material, the results match or beat budget commercial options. Two things determine whether the project is worth starting: the actual cost savings and the skill level required.
How Much Will You Actually Save?
A standard 24×48 commercial panel costs 3-5x what you’ll spend on DIY materials for the same size. For a home studio needing 8-12 panels, that multiplier adds up fast.
Larger projects stretch the gap further — a home theater requiring 12-16 panels makes DIY the obvious financial choice.
What Skill Level Do You Need?
Basic woodworking skills are sufficient. If you can measure, cut straight lines, and use a staple gun, you can build acoustic panels.
No specialized tools required — a hand saw works fine if you don’t have a miter saw. The most challenging part is stretching fabric smoothly, which takes practice on the first panel but becomes intuitive quickly.
Plan 1-2 hours for your first panel as you learn the process. Subsequent panels take 30-45 minutes each.
Building a batch of 4-6 panels in one session is most efficient.
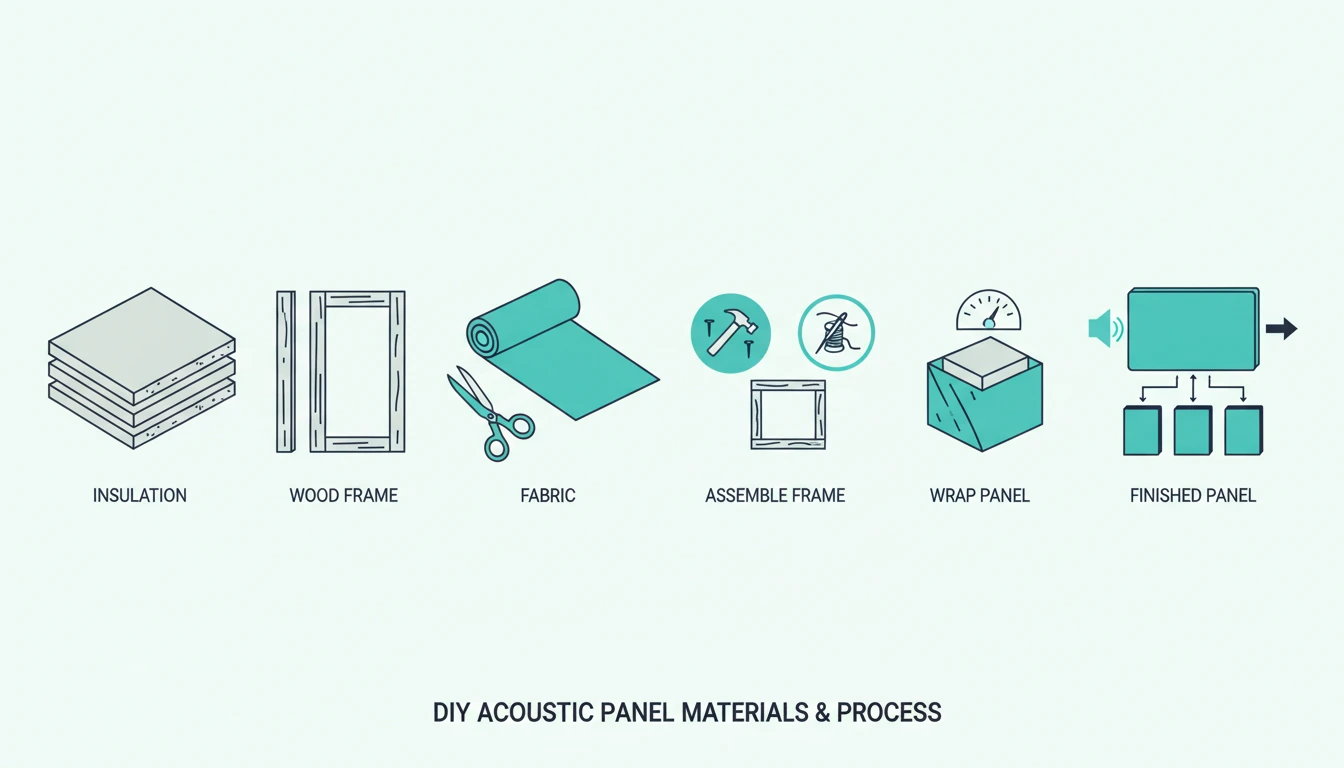
What Materials Do You Need to Make Acoustic Panels?
Four components make up a DIY panel: insulation core, wood frame, fabric wrap, and fasteners. The insulation choice has the biggest impact on sound absorption — the other three mainly affect durability and appearance.
What Type of Insulation Should You Use?
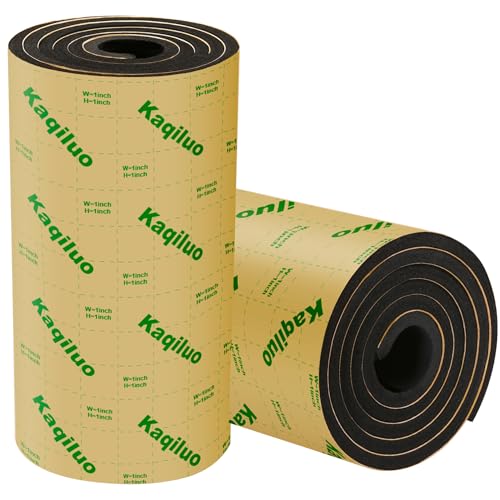
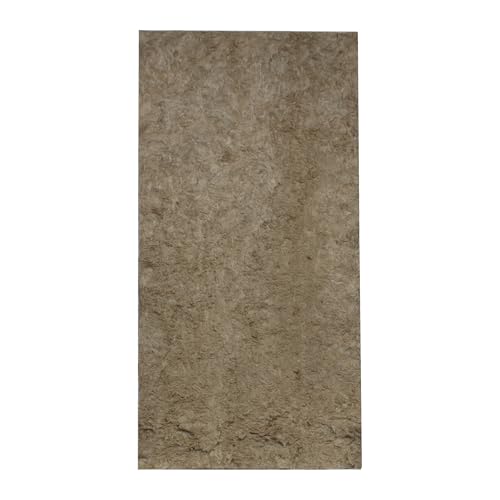
Rigid mineral wool is the gold standard for DIY acoustic panels. It absorbs well, cuts cleanly, and doesn’t shed loose fibers the way fiberglass batts do.
Rigid Mineral Wool Board (Rockboard 60): This denser, fully rigid option holds its shape better and doesn’t require as much frame support. The AFB Acoustical Fire Batts at 2-inch thickness is ideal for panel builds — it delivers excellent acoustic results while being easier to work with than loose batts.
AFB Acoustical Fire Batts
For a budget-friendly alternative, the BXI High Density Sound Absorber Panels work as temporary treatment while you save for correct mineral wool.
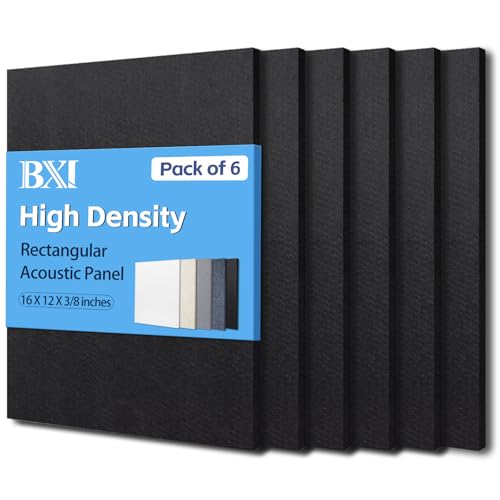
BXI High Density Sound Absorber Panels
The thickness gap between 1-inch and 2-inch panels is real — 2-inch cores absorb mid frequencies that thinner panels miss entirely.
What Wood Works Best for the Frame?
Standard 1×4 lumber (which actually measures 3/4” x 3-1/2”) works perfectly for panel frames. Choose straight boards without real warping — sight down the length at the store to check.
Pine is the most economical choice and works well. If budget allows, poplar offers straighter boards with fewer knots.
Avoid pressure-treated lumber — the chemicals aren’t necessary indoors and make the wood harder to work with.
Which Fabric Should You Choose?
Fabric must be acoustically transparent — meaning sound passes through it rather than bouncing off. The quick test: hold the fabric to your mouth and blow.
If air passes through easily, it’s suitable for acoustic panels.
Guilford of Maine FR701: The industry standard for commercial panels. Available in dozens of colors, inherently fire-resistant, and designed specifically for acoustic applications.
Burlap: Budget-friendly option with natural texture. Works acoustically but frays more easily than purpose-built acoustic fabrics like FR701.
Where Can You Buy These Materials?
Mineral wool insulation: Home Depot, Lowes, or local building supply stores. Call ahead — not all locations stock it.
For budget builds, Frost King natural cotton insulation offers an affordable alternative.
Lumber: Any home improvement store. Buy a few extra feet to account for cutting mistakes.
Fabric: Online fabric retailers, local fabric stores, or specialized acoustic fabric suppliers.
Get Studio Tips Weekly
Join 5,000+ creators getting acoustic treatment advice every week.
No spam. Unsubscribe anytime.How Do You Build the Wooden Frame?
With materials gathered, the build starts with the frame — it provides structure and gives you a surface to staple fabric to. Get the dimensions right and keep every corner square, because a twisted frame guarantees wrinkled fabric later.
What Are the Best Dimensions for DIY Panels?
Standard sizes work best for both efficiency and aesthetics:
24” x 48”: The most common size. Fits standard insulation dimensions, covers good wall area, and remains manageable weight.
24” x 24”: Good for flexible placement and smaller rooms. Easier to handle solo.
48” x 48”: Maximum coverage per panel, but heavier and harder to mount. Best for permanent installations.
Match your frame dimensions to your insulation size to minimize cutting. Most rigid mineral wool comes in 24” widths.
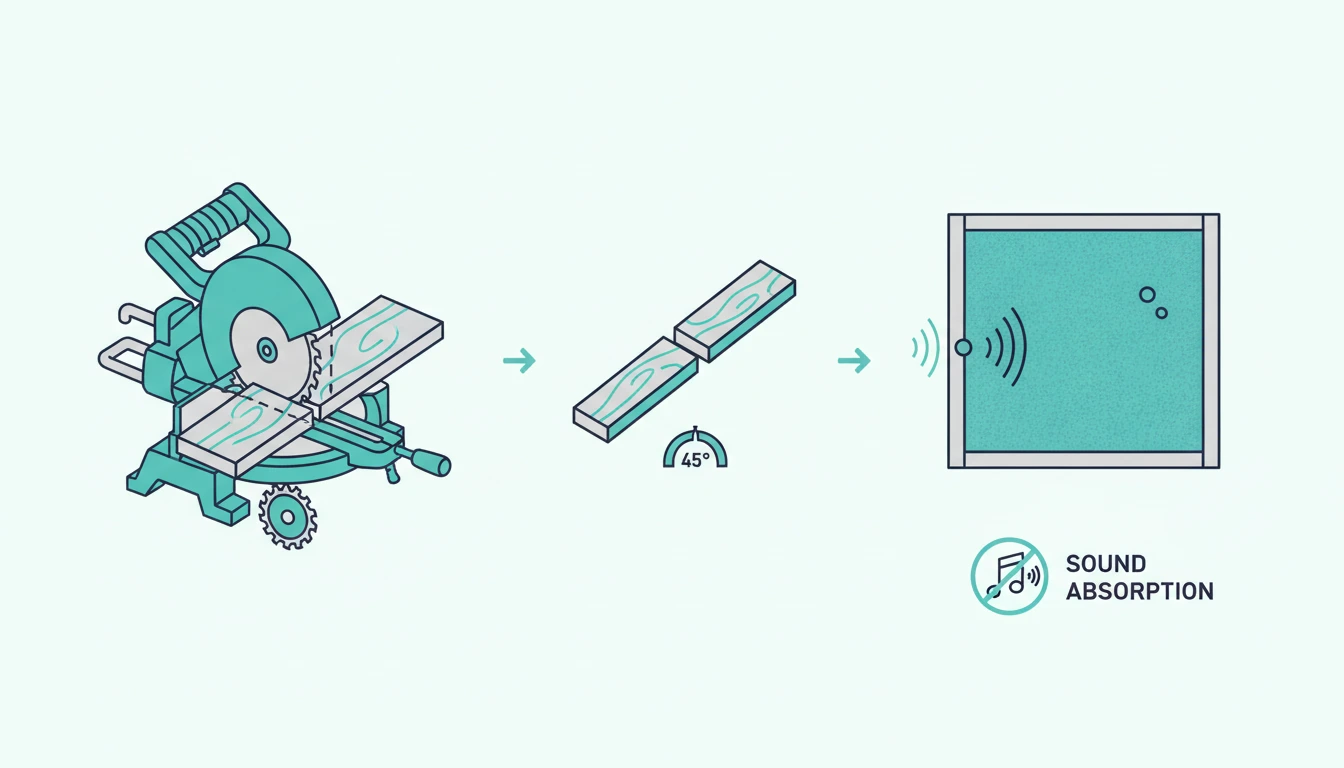
How Do You Cut and Assemble the Frame?
For a 24” x 48” panel with 1×4 lumber:
Cut list: Two pieces at 48” (sides), two pieces at 22-1/2” (top and bottom — accounting for the wood thickness at corners).
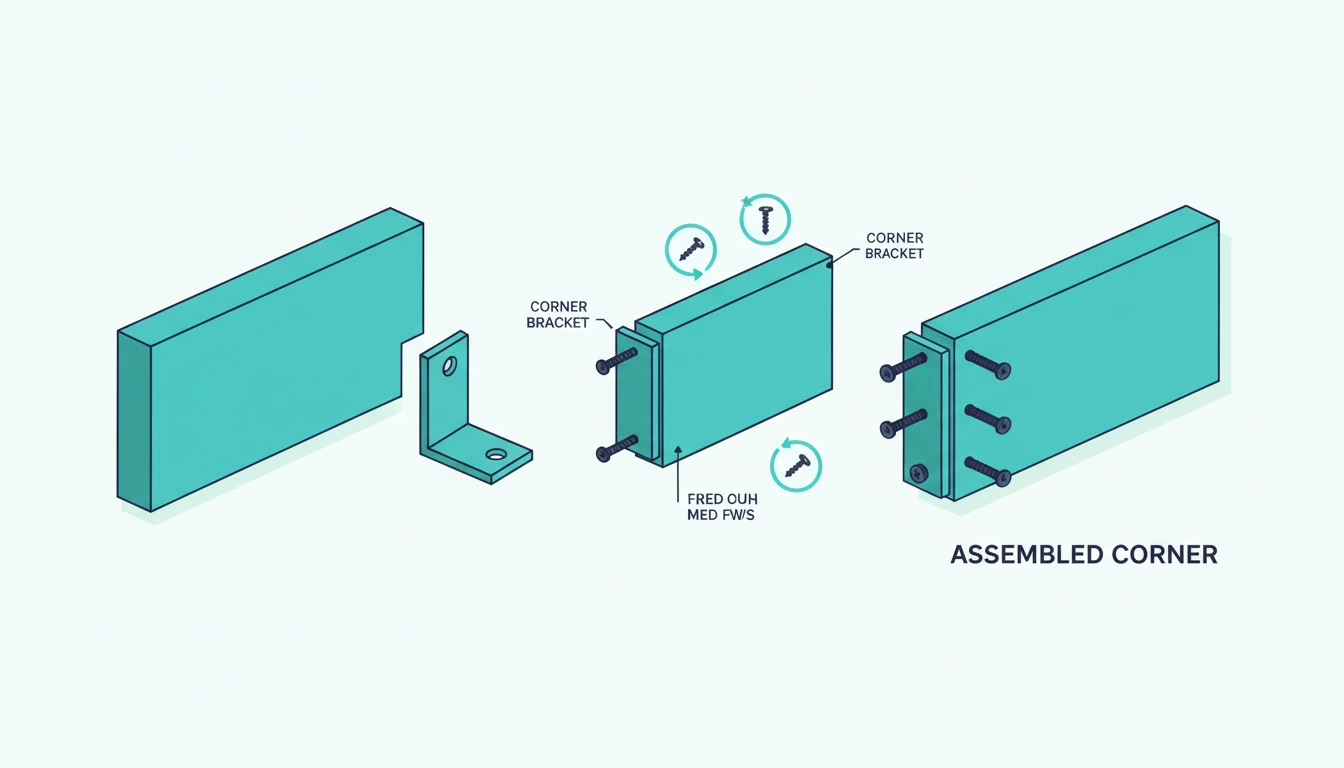
Assembly options:
- Pocket screws: Strongest joint, requires a pocket hole jig
- Corner brackets: Easiest method, available at any hardware store
- Wood glue + screws: Simple and effective for lighter panels
Check corners with a framing square before the glue sets. A twisted frame creates fabric wrinkles that are impossible to fix later.
How Do You Add the Acoustic Insulation?
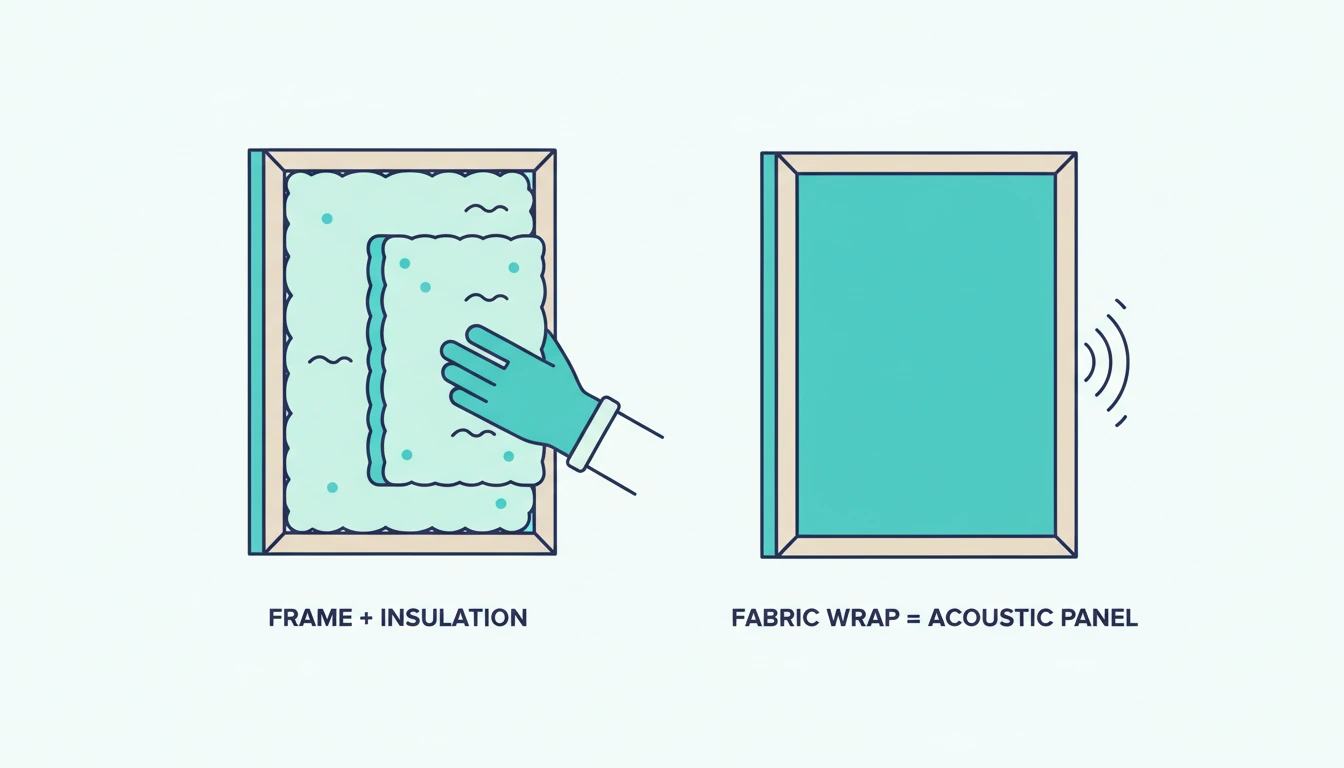
The insulation is where the actual sound absorption happens — the frame and fabric just hold this critical layer in place. Cutting mineral wool to size takes one tool and a few minutes, but you need correct protection before you touch it.
How Do You Cut Insulation to Size Safely?
Measure your frame’s interior dimensions and cut insulation slightly oversized — about 1/4” extra on each side. The friction fit holds the insulation in place without adhesive.
Cutting technique: Use a long serrated knife (a bread knife works) or a drywall saw. Score deeply on one side, then snap along the line.
Clean cuts aren’t critical since fabric covers everything.
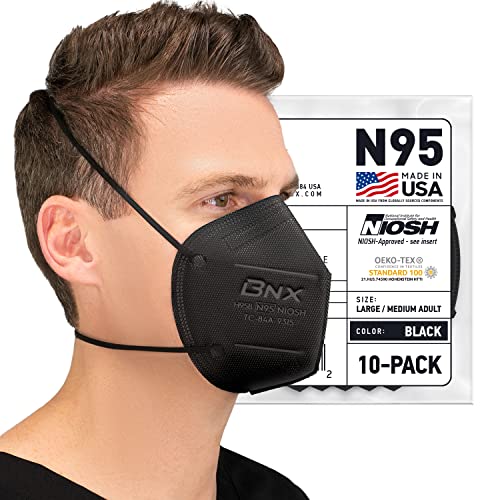
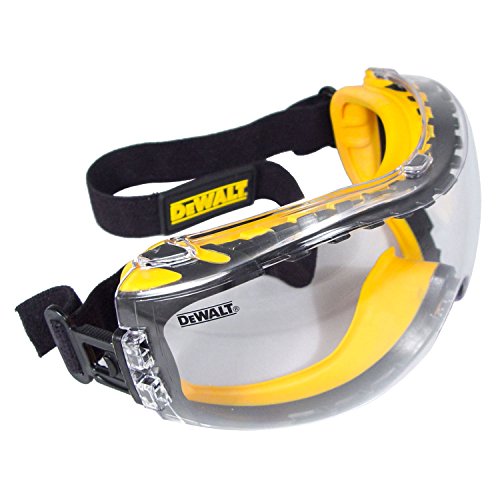
What Safety Gear Do You Need?
Mineral wool fibers irritate skin and lungs. Wear:
- N95 respirator mask (NIOSH approved)
- Safety glasses with anti-fog
- Long sleeves and work gloves
Work outdoors or in a well-ventilated area. The fibers settle quickly — just vacuum the work area when you’re done.
How Do You Wrap the Panel in Fabric?
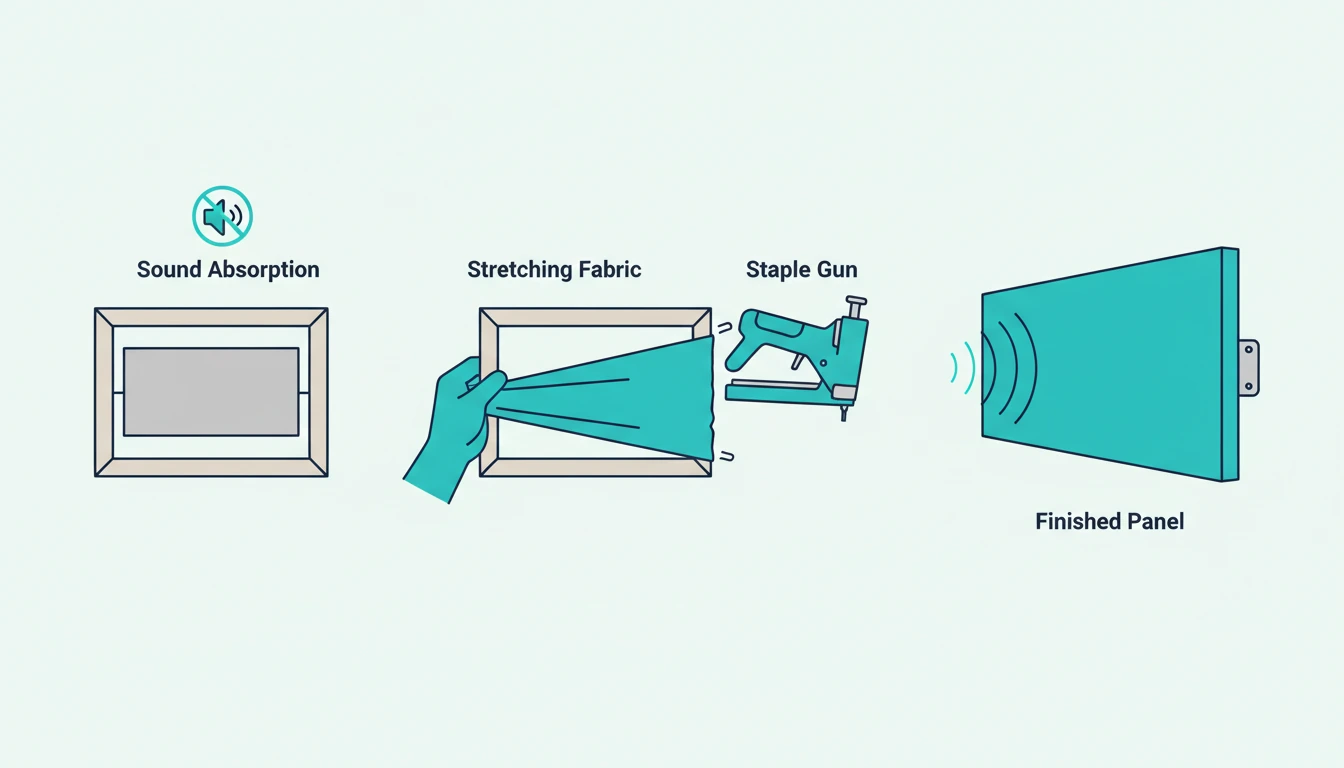
Rushed fabric work always shows, so this step deserves more patience than any other. The two skills that matter most are even tension across the face and clean corner folds.
What’s the Best Method to Stretch Fabric Tight?
Cut fabric 4-6 inches larger than ythe panel on all sides. This extra material gives you grip for stretching.
Step 1: Lay fabric face-down on a clean surface. Center the panel (insulation side down) on the fabric.
Step 2: Starting at the center of one long side, pull fabric over the frame and staple. Move to the opposite side, pull tight, and staple at center.
Step 3: Repeat for the short sides. You should now have four staples holding the fabric taut.
Step 4: Work outward from center on each side, pulling and stapling every 2-3 inches. Keep tension even to avoid waves or wrinkles.
How Do You Get Clean, Professional Corners?
Corners are where amateur builds show — one method handles every one cleanly:
Hospital corner method: Fold the corner fabric at 45 degrees, creating a diagonal seam that runs from the corner to the frame edge. Staple the diagonal fold, then fold the remaining flaps over and staple flat.
Practice on scrap fabric first. The motion becomes natural after 2-3 corners.
How Do You Mount Your Homemade Panels?
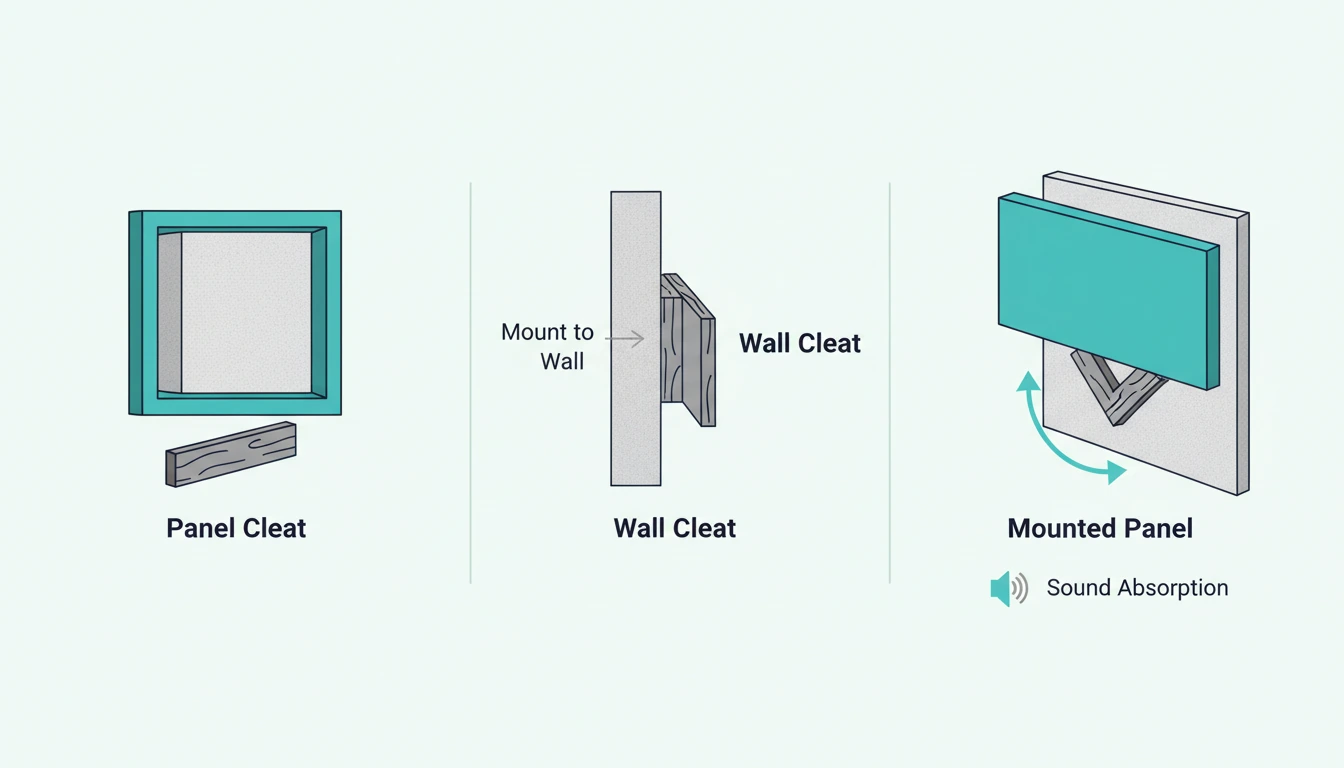
Ythe panels are built — now it’s time to get them on the wall. The mounting method you choose depends on wall type and whether you want easy removal later.
Which Mounting Method Works Best?
French cleats: The most secure option for heavy panels. The French Cleat Aluminum Z-Hangers support real weight and install in minutes.
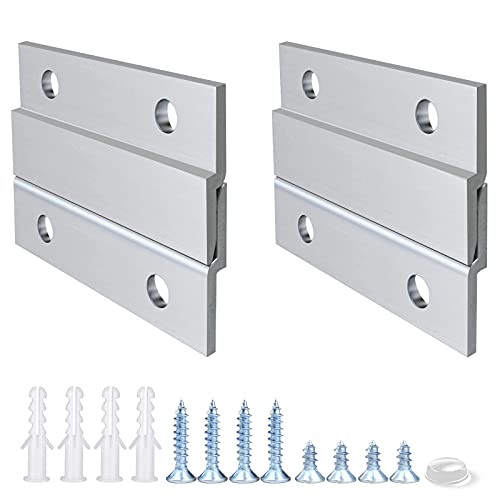
French Cleat Aluminum Z-Hangers
You’ll need one set per panel.
Picture hanging wire: Works for lighter panels. Less secure than cleats but easier to adjust positioning.
Direct mounting: Screws through the frame into wall studs — the most permanent option, covered in depth in the installation guide.
Can You Hang DIY Panels Without Drilling?
Yes, but with weight limitations. Command strips work for panels under 16 pounds — typically smaller 24×24” panels with lightweight frames.
For larger panels, drilling is recommended for safety — and placement matters as much as mounting method, so plan your positions before you start.
How Do DIY Acoustic Panels Compare to Commercial Options?
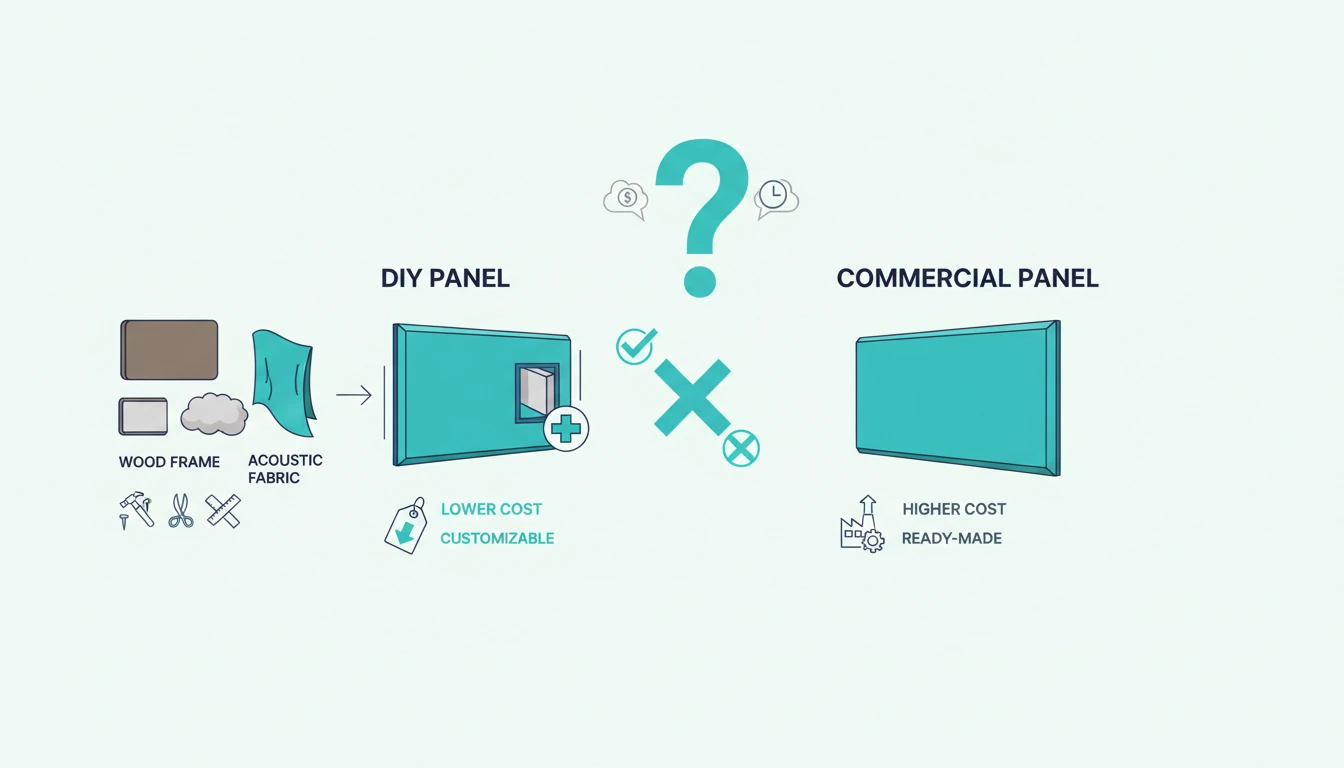
Is DIY actually worth the effort compared to just buying panels?
The short answer: DIY panels perform identically to commercial panels using the same materials. The acoustic properties come from the insulation, not the brand name.
If DIY isn’t for you, ready-made options like the UMIACOUSTICS 6-Pack Acoustic Panels deliver comparable performance without the build time — the full roundup covers a dozen more options across every budget.

UMIACOUSTICS 6-Pack Acoustic Panels
What Are the Most Common DIY Mistakes to Avoid?
Most DIY panel failures trace back to two decisions: insulation choice and fabric selection. Both mistakes are completely avoidable once you know what to look for.
Can Wrong Materials Ruin Your Panels?
Yes. The biggest mistake is using the wrong insulation:
Don’t use: Fiberglass batting (the pink fluffy stuff), foam boards, or polyester fill. These materials have poor acoustic properties and won’t absorb much below the high-frequency range.
Do use: Rigid mineral wool (Rockwool/Roxul) or dense fiberglass boards (Owens Corning 703). The density matters — acoustic insulation is denser than thermal insulation.
If you want an even easier option, self-adhesive high-density sound insulation panels skip the build process entirely.
Does Fabric Choice Affect Sound Absorption?
Absolutely. The breath test mentioned earlier applies here too: hold fabric to your mouth and blow.
Fabric that blocks airflow also blocks sound from reaching the insulation.
Avoid canvas, vinyl, or tightly-woven fabrics. Stick with acoustically-transparent options like speaker cloth, burlap, or Guilford of Maine.
Conclusion
Panels are done — maximizing their impact depends on placement and quantity.
Test placement before permanent mounting: Lean panels against walls and listen to how the room sounds. Move them around to find best positions before drilling any holes.
Prioritize first reflection points — the spots on side walls where sound from your speakers bounces to your listening position. the hanging guide covers how to find and mark these positions accurately.
One panel won’t transform a room. Most home studios need 6-12 panels for meaningful treatment — use the calculator on that page to get an exact count for your space.
The same frame-insulation-fabric method works for bass traps — just swap in 4-inch mineral wool and build deeper frames.
Ceiling clouds are just panels mounted horizontally.
Frequently Asked Questions
How Long Does It Take to Make One Panel?
Plan 1-2 hours for your first panel as you learn the process. Once you’ve built a few, subsequent panels take 30-45 minutes each.
Batch building (making 4-6 at once) is most efficient since you can cut all wood, then cut all fabric, then assemble — rather than switching tasks repeatedly.
Do Homemade Panels Work as Well as Commercial Ones?
Yes — when you use correct materials. DIY panels with 2-inch rigid mineral wool achieve NRC ratings of 0.80-1.0, identical to commercial panels using the same insulation.
A 2-inch mineral wool core hits the same NRC whether it was wrapped in a factory or in your garage.
What’s the Minimum Thickness That Actually Works?
Two inches is the minimum for effective broadband absorption. Thinner panels only absorb high frequencies, leaving problematic mid and low frequencies untreated.
For bass trapping, 4-inch or thicker panels are necessary. The extra depth extends absorption into lower frequencies where thin panels fall off sharply.
If budget is tight, a single 2-inch layer is far more effective than doubling up on thinner foam.
Can I Make Panels Without a Frame?
Rigid mineral wool boards can be wrapped directly in fabric without a frame. This works but has limitations: the panels are more fragile, harder to mount securely, and the fabric tends to loosen over time.
Frames add minimal cost and much improve durability and appearance.