Best Serato DJ Controller — 6 Picks That Actually Unlock Serato Pro Features

Best Serato DJ controller searches return dozens of options — but most lists ignore the single factor that matters most: which Serato tier your controller actually unlocks. A controller bundled with Serato DJ Lite gives you two decks and basic mixing, while one that unlocks Serato DJ Pro gives you four decks, stem separation, and DVS support.
That distinction isn’t marketing fluff — Serato DJ Lite caps your creative options at two virtual decks with no recording, no sampler, and no Serato Stems. Upgrading to Serato DJ Pro later costs an additional subscription unless your controller unlocks it natively.
The problem is caused by Amazon listings that rarely clarify which Serato tier ships with each controller. You end up buying a unit that says “Serato compatible” on the box, only to discover it includes Lite with a paid Pro upgrade path.
Below, you will find six controllers ranked by their Serato integration depth — from budget Lite bundles to Pro-unlocking powerhouses — so you know exactly what software features your purchase activates before you spend a dollar.
To find the best Serato DJ controller, check which Serato tier (Lite vs Pro) the controller unlocks out of the box. The Pioneer DJ DDJ-FLX4 is the best overall Serato controller because it supports both Serato DJ and Rekordbox natively, with a clean 2-deck layout and built-in sound card.
What Makes a Great Serato Controller
Serato DJ Lite vs Serato DJ Pro
Serato DJ Lite ships free with most entry-level controllers, giving you two virtual decks, basic EQ, crossfader control, and access to your local music library. That covers every fundamental mixing technique a beginner needs.
Serato DJ Pro unlocks four decks, the sampler, recording, DVS support, Serato Stems for real-time vocal isolation, and expanded effects. Controllers that natively unlock Pro — like the Rane Performer or Pioneer DDJ-FLX10 — save you the subscription cost.
Hardware Mapping Quality
Not all Serato controllers map identically. Pioneer and Rane units have the tightest integration because Serato co-develops the mappings with those manufacturers.
Every pad mode, filter sweep, and effect toggle responds instantly with zero configuration.
Third-party controllers from Hercules and Numark also support Serato, but some advanced features require manual MIDI mapping. For beginners, the difference is negligible.
For working DJs who rely on pad modes and stem controls during live sets, native mapping matters. A controller with co-developed Serato integration responds to every input without lag or misconfigured controls.
Jog Wheel Feel on Serato
Serato’s scratch algorithms depend on precise jog wheel data. Controllers with high-resolution jog wheels (like the DDJ-REV1’s battle-style platters) produce tighter scratch response than budget wheels that send fewer data points per rotation.
If scratching is your primary style, jog wheel resolution should rank higher than channel count or effects in your decision.
Our Top 6 Serato DJ Controllers
1. Pioneer DJ DDJ-FLX4 — Best Overall
The Pioneer DJ DDJ-FLX4 wins best overall because it natively supports both Serato DJ and Rekordbox — the only controller at this price with genuine dual-platform compatibility. You can practice on Serato at home and switch to Rekordbox for club prep without buying new hardware.
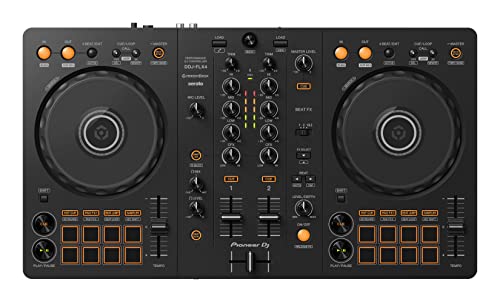
Pioneer DJ DDJ-FLX4
The Smart Fader smooths transitions by automatically managing bass EQ during crossfader moves. It produces clean mixes from day one while you build manual technique.
USB-C connectivity and a built-in sound card handle headphone cueing with zero perceivable latency. The compact layout keeps the learning curve gentle while still offering eight performance pads per deck for hot cues and loops.
2. Pioneer DJ DDJ-REV1 — Best for Scratching
The Pioneer DJ DDJ-REV1 is the only controller on this list designed specifically for scratch DJs running Serato. The battle-style layout flips the traditional orientation — jog wheels sit above the mixer section — mirroring turntable positioning that scratch DJs prefer.
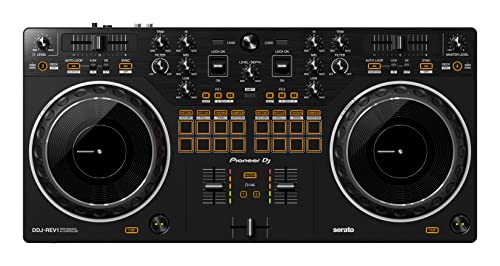
Pioneer DJ DDJ-REV1
Large jog wheels with low-latency response deliver tight scratch performance that budget controllers cannot match. The Serato-exclusive mapping means every scratch technique (chirps, flares, transforms) tracks accurately.
The REV1 also includes Lever FX — dedicated hardware toggles that trigger Serato effects with a flick, keeping your hands on the platters during scratch routines instead of reaching for software buttons.
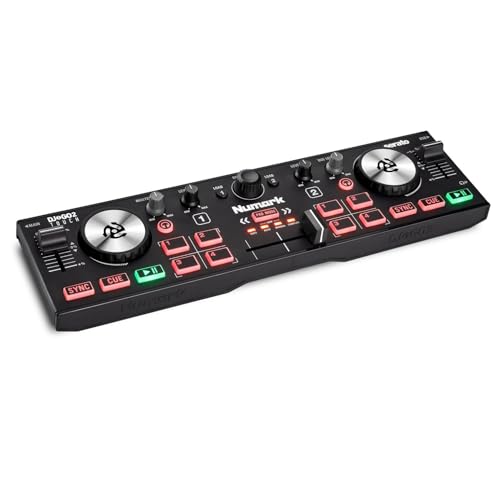
3. Numark Mixtrack Platinum FX — Best 4-Deck Serato
The Numark Mixtrack Platinum FX is the most affordable way to run four decks on Serato. Jog wheel displays show track position, BPM, and time remaining directly on the hardware — so your eyes stay on the controller instead of bouncing to the laptop screen.

Numark Mixtrack Platinum FX
Dedicated effects paddles on each deck let you trigger filter sweeps, echoes, and reverb without touching the software. That hands-on approach to effects is what separates the Platinum FX from simpler Serato controllers in this price range.
4. Hercules DJControl Inpulse 500 — Best for Learning
The Hercules DJControl Inpulse 500 pairs Serato DJ Lite compatibility with built-in LED light guides that physically show you when to start transitions. The IMA coaching algorithm suggests compatible tracks from your library in real time.
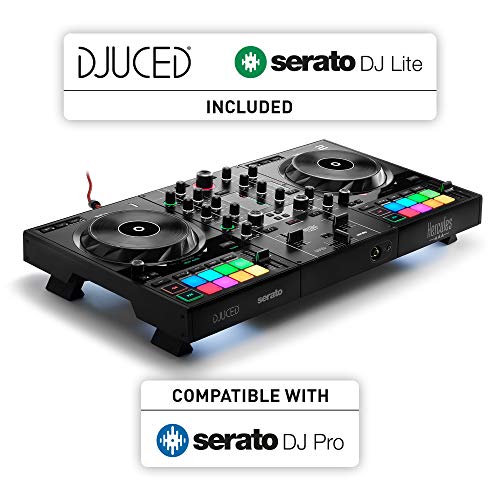
Hercules DJControl Inpulse 500
Large jog wheels with adjustable tension give this unit a premium feel. The tradeoff is dual-software management — Hercules bundles DJUCED alongside Serato, so you need both installed, though you only use one at a time.
5. Hercules DJControl Starlight — Best Budget Serato
The Hercules DJControl Starlight is the cheapest Serato-compatible controller that includes a built-in sound card. That combination — Serato support plus headphone cueing — makes it the best entry point for DJs who want to learn the Serato workflow without a large upfront investment.
Hercules DJControl Starlight
The pocket-sized form factor means tiny jog wheels, which rules out scratching. For beatmatching and blend-style mixing on Serato, the Starlight handles the fundamentals at a price that most budgets can absorb.
6. Numark DJ2GO2 Touch — Best Under 100
The Numark DJ2GO2 Touch proves you can run Serato DJ Lite for less than a pair of headphones. Touch-capacitive jog wheels and a built-in audio interface handle the core Serato workflow — load, cue, match, blend.
Numark DJ2GO2 Touch
The missing performance pads mean hot cues and loops require mouse clicks in the software. That limitation matters less on Serato DJ Lite, which caps these features anyway.
Get Studio Tips Weekly
Join 5,000+ creators getting acoustic treatment advice every week.
No spam. Unsubscribe anytime.Serato DJ Lite vs Pro — Which Do You Need
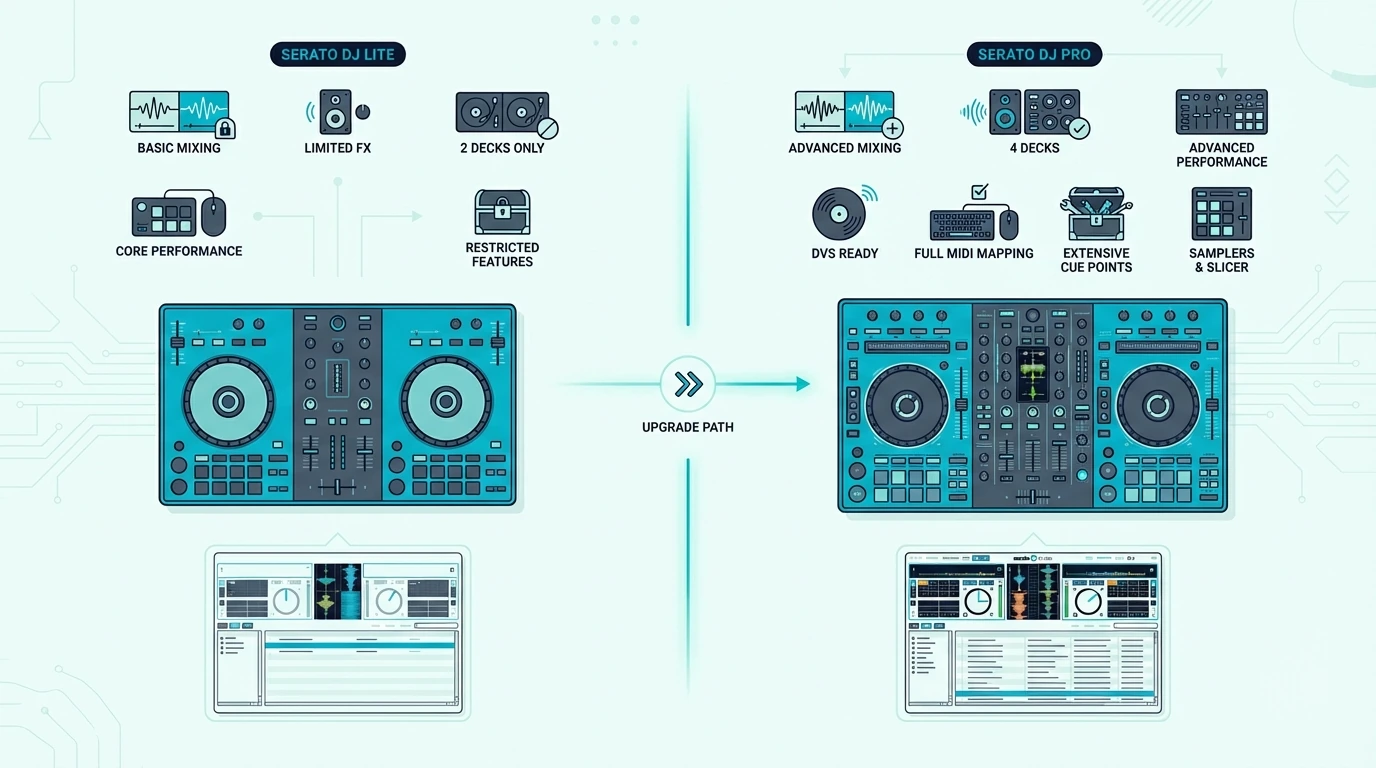
When Lite Is Enough
Serato DJ Lite covers two-deck mixing with basic EQ, crossfader, and filter control. If your goal is learning beatmatching, practicing transitions, and building a music library, Lite has everything you need for your first six to twelve months.
Most beginner controllers bundle Serato DJ Lite. The software is free with any compatible controller — no subscription, no activation code, no expiration.
When You Need Pro
Serato DJ Pro becomes essential when you outgrow two decks. Four-deck mixing, Serato Stems, DVS support for controlling software with real vinyl, and the full effects suite all require Pro.
Pro costs a monthly subscription or a one-time purchase unless your controller unlocks it natively. The Pioneer DDJ-FLX10 and Rane controllers include Pro activation, saving you the ongoing cost.
Upgrade Path Strategy
Start with a Lite-bundled controller and master two-deck mixing on the free tier. When you consistently feel limited by two decks or need stems and recording, upgrade to a controller that unlocks Pro natively rather than paying the subscription on top of your current hardware.
That sequential approach avoids the most common Serato mistake: paying for Pro features before you have the skills to use them. The money saved on software goes further when invested in a better controller down the line.
The Bottom Line
The Pioneer DJ DDJ-FLX4 is the best Serato DJ controller because dual-platform support gives you Serato and Rekordbox in one device. For scratch DJs, the DDJ-REV1 delivers the tightest scratch response at this price.
Every controller on this list bundles Serato DJ Lite at minimum. Pick the one that matches your budget and mixing style, then let the software grow with you.
Frequently Asked Questions
Which DJ controller uses Serato?
Most Pioneer DJ, Numark, Hercules, and Rane controllers support Serato — the DDJ-FLX4, DDJ-REV1, Mixtrack Platinum FX, and DJControl Starlight all bundle Serato DJ Lite. Higher-end units like the Rane Performer and Pioneer DDJ-FLX10 unlock Serato DJ Pro natively.
What is the best Pioneer DJ controller for Serato?
The Pioneer DJ DDJ-FLX4 is the best Pioneer Serato controller for most DJs because it supports both Serato and Rekordbox. For scratch-focused DJs, the DDJ-REV1 offers a battle-style layout with Serato-exclusive mapping optimized for turntablism.
Can I upgrade from Serato DJ Lite to Pro?
Yes — Serato offers both monthly subscriptions and a one-time purchase to upgrade from Lite to Pro on any compatible controller. Alternatively, buying a controller that natively unlocks Pro (like the Rane Performer or DDJ-FLX10) eliminates the ongoing subscription cost.
Is Serato better than Rekordbox?
Neither is objectively better — they serve different ecosystems. Serato supports the widest range of controller brands, while Rekordbox integrates tightest with Pioneer CDJ club setups.
If your local clubs run Pioneer gear, Rekordbox prepares you for that workflow. If you want maximum hardware flexibility, Serato is the safer choice.
Do I need Serato DJ Pro as a beginner?
No — Serato DJ Lite covers every beginner mixing technique including two-deck mixing, beatmatching, EQ blending, and basic effects. Upgrade to Pro only when you need four decks, stems, DVS, or recording capabilities.