Struggling to hear clear, balanced sound from your flat screen TV? A cutting-edge soundbar like the Bose Soundbar 900 can vastly improve audio and intensify entertainment.
Installing and integrating this top-rated single speaker unit is an straightforward process anyone can tackle in less than an hour.
Let’s dive into the key steps for seamlessly incorporating this soundbar into both your living space and components.
How To Install Bose Soundbar 900

Installing the Bose Soundbar 900 involves four main steps: preparing the physical hardware and cables, securely mounting the soundbar, connecting it to AC power and WiFi, then configuring optimal audio settings.
Expect the complete installation to take 45 to 60 minutes. First unpack all included components from the box to inventory and organize parts.
Determine placement either centered below a wall-mounted TV or alone on a shelf.
Use the audio cables to connect the soundbar to your TV’s HDMI ARC or optical digital output.
Connect the soundbar to power, internet, and external devices like a Blu-ray player as needed.
Refer to the included guides or online support articles throughout the installation process.
Now let’s explore each phase of installing the Bose Soundbar 900 in more helpful detail.
Prepare the Soundbar

Unpacking the soundbar is the first step in the installation process.
Open the box and remove the soundbar itself, the remote control, various cables, and any mounting hardware that is included.
Be careful when lifting the soundbar out of the box, as it may be heavier than it looks.
Set the soundbar on a flat, stable surface for now.
Next, open the small bag that contains the remote control.
Remove the remote and insert the included batteries, which are usually AA or AAA batteries.
Follow the diagram inside the remote control battery compartment to insert both batteries in the correct positive and negative orientation.
With fresh batteries now powering the remote, set it aside for later use.
Examine the remaining contents of the box to take inventory of all included cables and hardware.
Locate the power cord, HDMI cable, optical audio cable, and wireless adapter if your model contains one.
Also make note of any wall mount brackets, screws, templates, or other mounting hardware.
Having all equipment unpacked and laid out beforehand streamlines the overall installation.
One very important cable connection needs to be made on the back of the Bose Soundbar 900 prior to physically mounting it.
A main audio connection sends sound from a central device like a TV into the soundbar.
This is achieved by connecting an HDMI cable from the TV’s HDMI ARC port into the HDMI port on the soundbar labeled ARC.
If your TV does not have HDMI ARC capability, use the included optical audio cable instead, connecting between the TV’s Optical port and the port on the back of the soundbar labeled Optical.
Ensure the appropriate cable plugs securely into the correct ports on both ends.
Connect to Power

Like any audio/video equipment, the Bose Soundbar 900 needs power from an electrical outlet to operate.
This is a simple matter of connecting the included power cord from the soundbar itself into an AC power adapter.
Examine the power cord and notice that while one end connects securely into the power input on the back of the soundbar, the other end terminates into a large “box” shape.
This goes into the enclosure of the AC power adapter, which then has a typical two or three prong plug extending out the other side.
With the power cord correctly inserted into the rear of the soundbar, plug the AC power adapter into a nearby unswitched electrical outlet.
Make sure this is an accessible, unobstructed outlet that is not overloaded with too many other devices.
Also confirm that the outlet is continuously powered and not controlled by a wall switch, which could accidentally turn off power to the soundbar.
With the adapter powered on and transmitting AC power to the soundbar, it’s now ready to finish installing and configure.
Mount the Soundbar

There are a few placement options for properly mounting the Bose Soundbar 900.
If placing in front of a TV, it likely works best mounted to the wall below the TV or simply sitting on a shelf or media console below the TV.
There should not be any obstructions between the soundbar and primary listening area.
Consider cable lengths for added components like gaming consoles or streaming devices as well.
To wall mount the soundbar, determine optimal positioning centered below your wall-mounted TV or on its own wall if not pairing it with a TV.
Use a stud finder first to locate wood studs behind the drywall and mark their locations with tape.
The included template shows exactly where pilot holes need to be drilled in relation to those wall studs.
Carefully use a drill to create these holes, then insert the included wall anchors if needed.
With anchors in place, securely screw the wall mount brackets to the wall following instructions.
Finally, once brackets are anchored to the wall, the soundbar hangs directly onto them.
Rather than wall mounting, the Bose Soundbar 900 can simply sit on an entertainment center shelf below a TV, or be placed alone on any stable surface.
The key is that the surface is flat to prevent wobbling and that any front-facing audio ports are accessible for connecting additional components.
Make adjustments to placement later on if needed.
Connect to WiFi Network

For full functionality including access to software updates, the Bose Soundbar 900 connects wirelessly to your home WiFi network.
This is accomplished through the Bose Music smartphone app, available for iOS or Android devices.
Use your phone or tablet’s app store to locate and install the Bose Music app if you don’t already have it.
Then find the WiFi credentials needed so the soundbar can access your wireless internet router.
With the app downloaded and WiFi password ready, power on the soundbar using either the remote control or power button on top.
Launch the Bose Music app and follow the on-screen instructions to add the soundbar to your home WiFi network.
Enter your network’s name and password when prompted by the app during device setup.
Allow a few minutes for the soundbar to obtain an IP address from your router and connect to the internet, completing the WiFi portion of installation.
With WiFi connectivity established, explore the Bose Music app’s additional settings and features available for the Soundbar 900.
Configure Audio Settings

Several audio and system settings should be configured for optimal sound quality and overall usage.
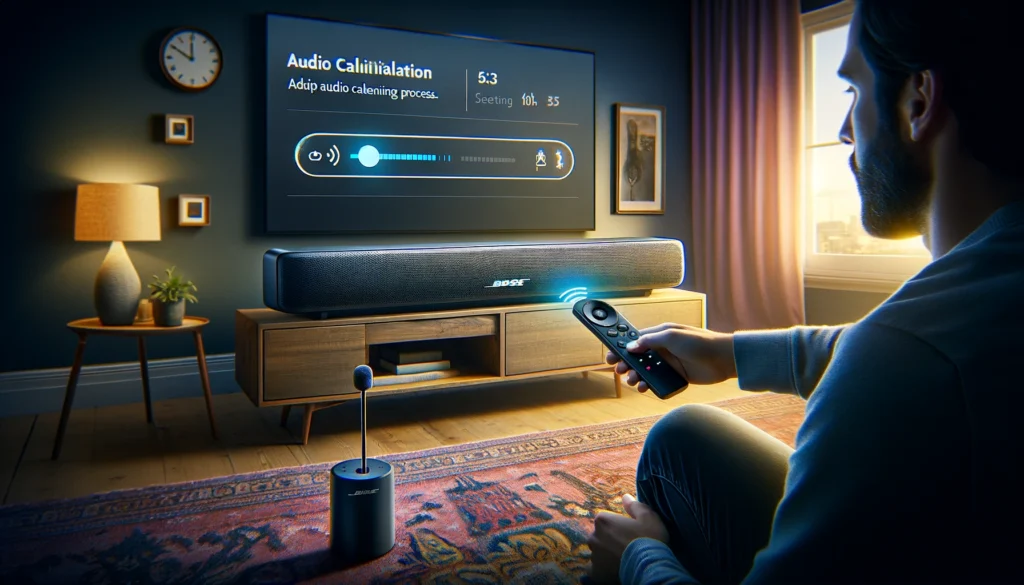
Begin by using the supplied remote control to navigate to the Settings menu on the soundbar itself, then selecting ADAPTiQ audio calibration.
Have the remote handy as you get into position to calibrate room acoustics based on precisely where the soundbar is placed.
The setup process involves placing a calibration microphone at your seating location which measures ambient noise and room characteristics.
Following prompts, this tunes the soundbar’s equalization specifically for your environment.
Additionally access your TV settings menu to enable a feature called HDMI Consumer Electronics Control or HDMI CEC.
This allows interconnected HDMI devices like soundbars to be controlled together with just the TV remote.
So volume changes or mute functions will sync between grouped HDMI CEC devices automatically.
Enable any related settings like HDMI ARC as well so audio from the TV can pass through the single HDMI cable into the soundbar unimpeded.
While playing music or TV audio through the soundbar, experiment with various sound modes and bass levels using the Bose Music app and remote control.
Select modes best suiting the media being played, such as Movie mode while streaming films from Netflix or Music mode for stereo recordings.
The soundbar has several options so decide what preset operates ideally in your room when watching or listening to different media types.
Connect External Devices

For an even more robust home theater setup, consider connecting external devices like a cable box, streaming stick, video game system, Blu-ray player or network media center to ports found on the back of the Bose Soundbar 900.
Begin by connecting another HDMI cable from your secondary device’s HDMI output directly into an available HDMI input on the soundbar.
Access the soundbar’s input menu either with the remote control or mobile app to switch between HDMI ports.
Other devices like a smartphone or laptop can optionally stream audio directly to the soundbar over a wireless Bluetooth connection.
Initiate Bluetooth pairing or discovery mode by pressing the Bluetooth button located either on the remote or top of the soundbar itself.
With the speaker now discoverable, activate Bluetooth on your connecting device and select the “Bose Soundbar 900” from available connections.
Most mobile devices will remain continuously connected to the soundbar while Bluetooth is enabled, allowing wireless music playback anywhere in the room.
Enjoy Your New Soundbar!

After all main components are unpacked, powered on, mounted securely and connected properly to both your TV and WiFI router, the Bose Soundbar 900 setup process is essentially complete.
While experimenting with various modes and streaming apps via the TV or directly from a mobile device, enjoy your new cinema-like audio experience.
Add rear speakers or external subwoofers over time for an even deeper surround sound effect.
As you live with the system, consider moving furniture around to balance the room acoustics and soundbar placement.
Over-the-air software updates through WiFi keep the soundbar current so always maintain that wireless internet connection for new features and performance improvements from Bose.
If any future issues arise or setup help is needed, use Bose’s online knowledge base support for the Soundbar 900 model.
Keep in mind Bluetooth also permits quick wireless connections for friends to play their own music through your new Bose centerpiece speaker system.
Conclusion
The Bose Soundbar 900 delivers an immersive audio experience that can transform any home entertainment system.
With the soundbar securely installed, connected and optimized following the steps outlined, you’re now ready to fully enjoy movies, music, and more in stunning clarity.
As your needs change over time, explore additional Bose speakers and Bass Modules for surround sound expansion.
