How To Soundproof Windows (Without Replacing Them)

How to soundproof windows without replacing them starts with one uncomfortable truth: many noisy windows are failing at the edges before they are failing at the glass, but most people spend money on the glass first. Loose seals, dried caulk, and sloppy sash contact often leak more sound than people realize.
That is good news if you want a retrofit instead of a renovation. It means the first real wins usually come from better sealing and a stronger secondary barrier, not from tearing the whole unit out on day one.
The harder part is knowing where the simple fixes stop being enough. Traffic rumble, weak single-pane glass, and badly designed window types can still push you toward inserts, plugs, or eventually replacement.
Start by working out whether the weak point is the frame, the glass, or the whole window design. Then you can move through the retrofit ladder without wasting money on upgrades that solve the wrong problem.
That is the order the rest of this guide follows.
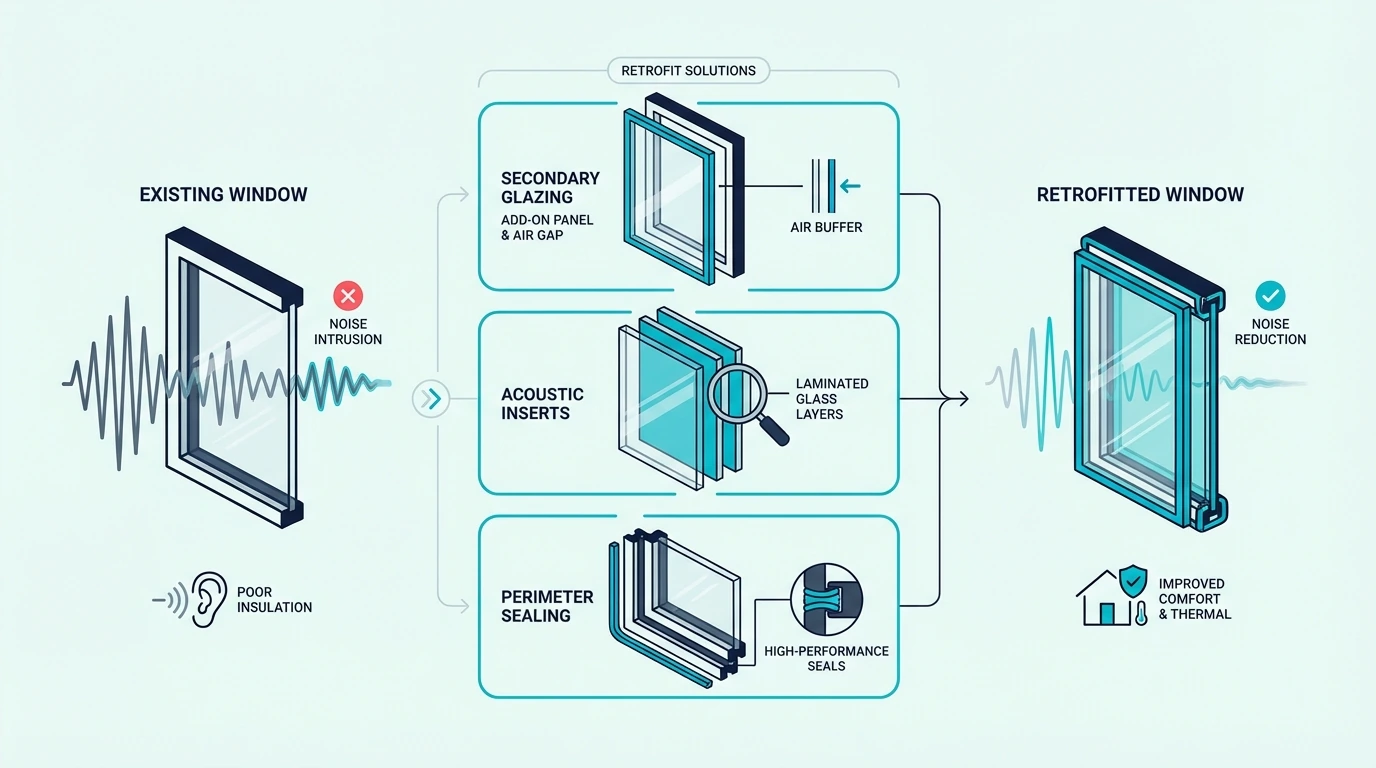
Seal gaps around the window frame first — acoustic caulk and compression weatherstripping eliminate the air paths that leak the most sound. After sealing, add a secondary barrier like a window insert or heavy curtain. A sealed window with an acoustic insert can reduce outside noise by 15–20 decibels compared to a single-pane window with worn seals.
Noisy Windows Usually Fail Through Leaks, Light Glass, Or Weak Designs
Windows are usually the lightest part of the exterior wall, so they start behind the rest of the room before you even look at the details.
What matters next is identifying which weakness is actually dominating the noise path.
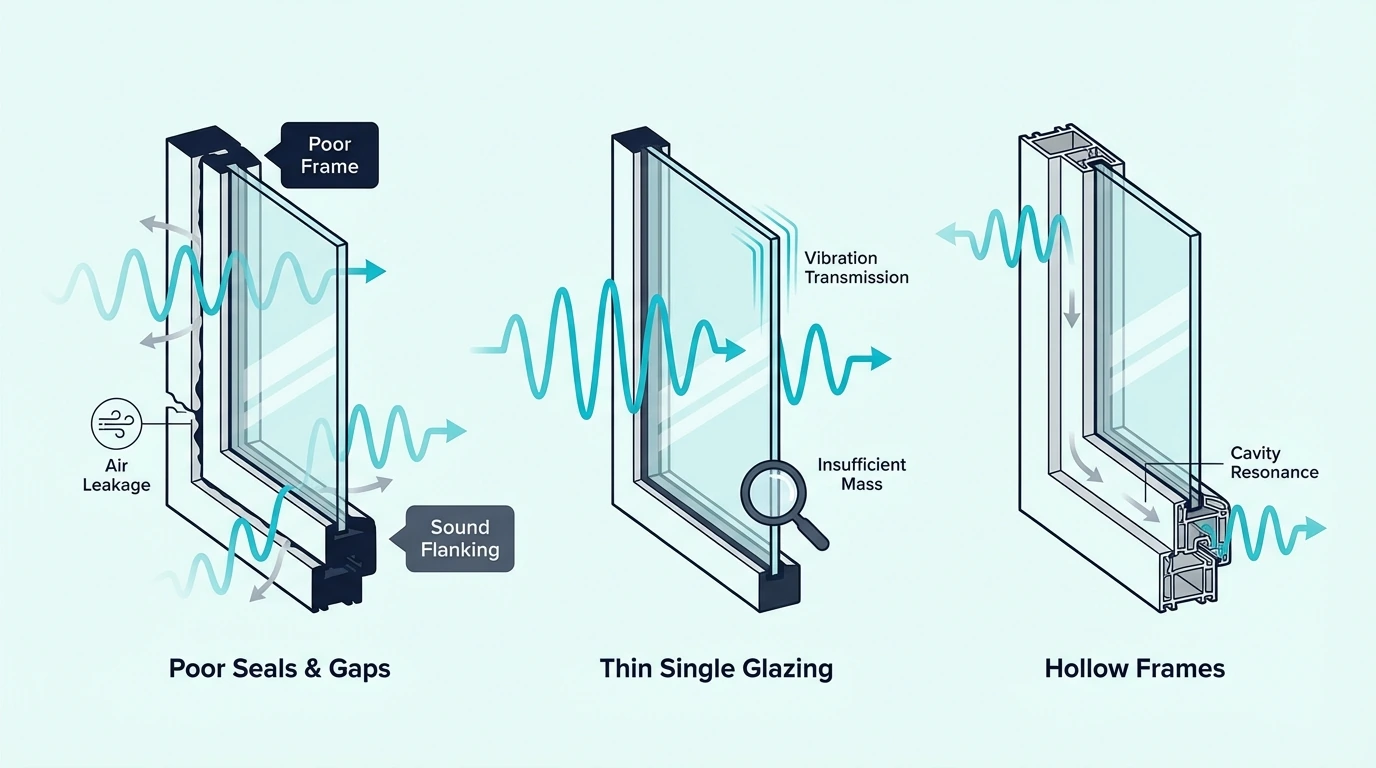
Existing Windows Often Leak More At The Frame Than Through The Center Of The Glass
In most cases, the gaps are the bigger problem. A window with worn weatherstripping or cracked caulk around the frame has visible air paths that sound exploits freely.
Test it yourself: press your ear close to the window frame edges while traffic or music plays outside. If the noise is loudest at the edges, gaps are your primary leak.
If it’s loudest at the center of the glass, the pane itself is the weak point.
Single-pane windows have an STC rating of around 26 to 28. Standard double-pane windows rate 28 to 32.
Neither is impressive compared to a basic insulated wall at STC 35 to 45, but the difference between a sealed and unsealed window is far larger than the difference between single and double glazing.
Traffic Rumble Exposes The Limits Of Lightweight Glazing
That edge-versus-center test also explains why some window fixes feel impressive for voices but disappointing for road noise.
Traffic noise contains a heavy low-frequency component — engine rumble, tire roar, and exhaust drone all sit below 500 Hz. Low-frequency sound waves are long, carry more energy, and pass through lightweight barriers like glass more easily than mid-range or high-frequency sounds.
This is why you might seal every gap and still hear a deep rumble from the road. The glass vibrates at those frequencies because it doesn’t have enough mass to resist the pressure waves.
Addressing traffic noise specifically requires either thicker glass, laminated glass, or a secondary barrier with a meaningful air gap — reducing outside noise at the window is always harder than blocking voices or TV audio. The same low-frequency challenge applies to choosing soundproofing materials for any surface in the room.
Some Window Types Start From A Worse Position Than Others
Once low-frequency limits are in view, window design matters more too.
Old single-pane windows with wood or aluminum frames top the list. The frames shrink, warp, or corrode over time, opening gaps that didn’t exist when the window was new.
The putty glazing that holds the glass in place dries out and cracks, creating another air path.
Sliding windows — both horizontal sliders and single-hung or double-hung sash windows — perform worse than casement windows because the sliding mechanism creates gaps that can’t be compressed with weatherstripping the way a casement window seals against its frame.
Jalousie (louvered) windows are the worst of all. The overlapping glass slats create multiple air gaps that are nearly impossible to seal.
If you have jalousie windows and noise is a concern, replacement is the only realistic option.
Existing Windows Improve Most When You Climb The Retrofit Ladder In Order
That weak-point diagnosis leads directly to the retrofit order.
Most people do not need to jump straight from a noisy window to a replacement quote. The practical path is sealing first, then secondary barriers, then heavier compromises only when the smaller tiers have clearly hit their ceiling.
Sealing The Frame And Sash Is The First Real Upgrade
Start with acoustic caulk along every joint between the window frame and the wall. Standard silicone caulk works, but acoustic caulk stays flexible longer and doesn’t crack with building movement.
Acoustical Caulk (29 oz)
Run a bead along the interior trim where it meets the wall and along the frame where it meets the trim.
Replace worn weatherstripping around the sash with compression-style EPDM or silicone strips. Foam weatherstripping compresses permanently within months — spend a few dollars more on rubber or silicone that maintains its seal.
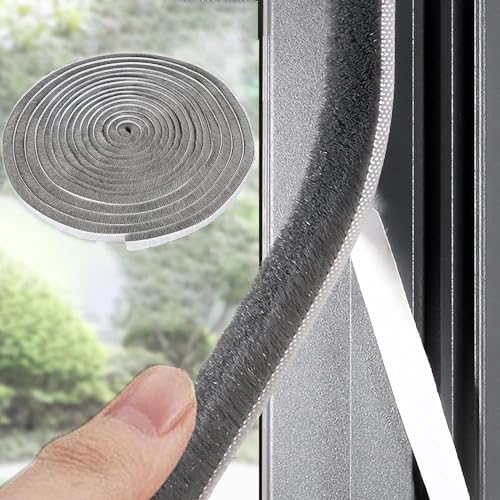
33 Ft Gray Self-Adhesive Soundproofing Weather Stripping
For operable windows, check the lock mechanism. Many windows don’t pull tight enough against their seals when locked.
Adjusting or replacing the lock hardware so the sash compresses firmly against the weatherstripping costs nothing and makes the seals actually effective.
Inserts Work When You Need A Better Barrier Without A Full Tear-Out
Once the obvious leaks are under control, the question changes from air path to barrier strength.
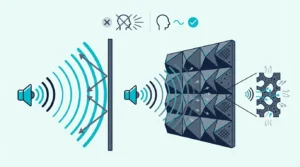
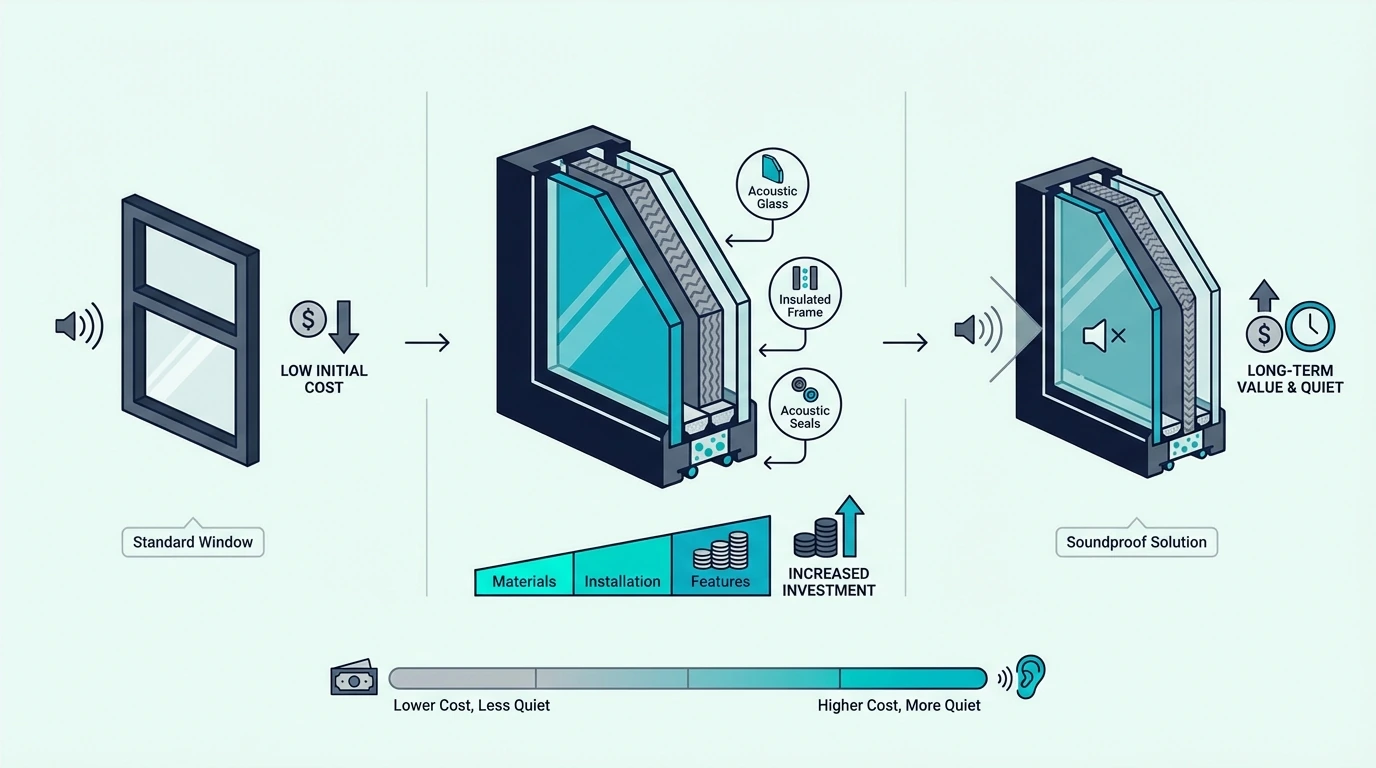
Window inserts — secondary acrylic or glass panels that mount inside the existing window frame — are the most effective retrofit short of full replacement. They create an air gap between the insert and the existing glass, and that air gap is what blocks sound.
The wider the air gap, the better the noise reduction. A two-inch gap provides meaningful improvement; a four-inch gap approaches the performance of a dedicated acoustic window.
Most inserts mount with compression tubes or magnetic strips and can be removed seasonally.
Inserts work especially well for apartment windows and rental properties because they’re fully removable and don’t modify the existing window. They’re also effective for bedroom windows facing busy streets where traffic noise disrupts sleep.
Curtains And Plugs Solve Different Versions Of The Same Constraint
That stronger insert tier is not always the immediate answer, though.
Heavy curtains add a layer of mass and absorption between the window and the room. RYB HOME 3-Layer Soundproof Curtains use a felt core sandwiched between fabric layers, which adds more mass than standard blackout curtains.
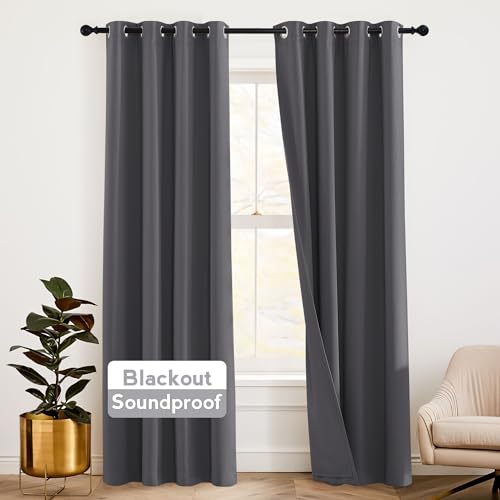
RYB HOME 3-Layer Soundproof Curtains
Curtains won’t match inserts or secondary glazing for noise reduction, but they’re the fastest, cheapest option for renters who need some improvement now. Mount the curtain rod wide enough that the curtains overlap the wall on both sides of the window, and let them puddle slightly on the floor to minimize gaps.
Window plugs — dense foam or MDF panels cut to fit snugly inside the window frame — block sound effectively but also block all light and ventilation. Backing a plug with a US Cargo Control Sound Dampening Blanket adds mass and absorption to the plug face.
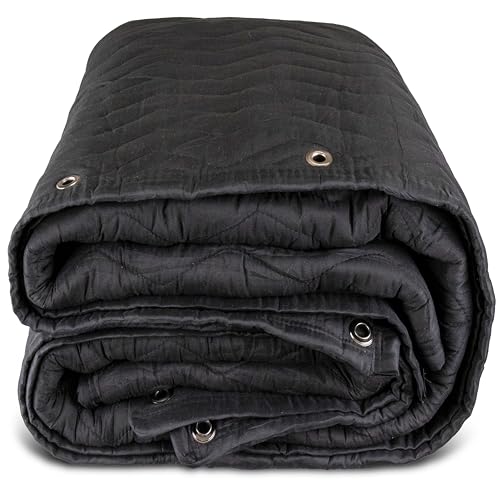
US Cargo Control Sound Dampening Blanket
They’re a practical solution for music rooms or recording spaces where total blackout is acceptable, but not for living spaces where you need the window to function.
Get Studio Tips Weekly
Join 5,000+ creators getting acoustic treatment advice every week.
No spam. Unsubscribe anytime.Cost Rises In Clear Tiers As The Retrofit Gets Stronger
Once the retrofit ladder is clear, the budget becomes easier to read.
Each tier costs more because it is trying to solve a harder version of the problem, not because the prices are random.
Basic DIY Sealing Stays The Cheapest Meaningful Tier
Acoustic caulk, weatherstripping, and lock adjustment costs ten to thirty dollars per window and takes under an hour. This fixes the gap leaks that account for most noise transmission in older windows.
Inserts And Secondary Layers Occupy The Middle Ground
Once sealing is no longer enough, you move into the tier that changes the barrier itself rather than just tightening the edges.
Acoustic window inserts range from roughly two hundred to five hundred dollars per window depending on size and brand. Secondary glazing panels installed by a professional run three hundred to eight hundred dollars per window including labor.
Heavy soundproof curtains cost fifty to one hundred dollars per window and provide moderate improvement with the advantage of easy installation and full removability.
Replacement Earns Its Cost Only When The Existing Window Is The Limiting Factor
That is the point where retrofit logic runs out.
Full window replacement with acoustic-rated units costs five hundred to fifteen hundred dollars per window installed. It makes sense when the existing frames are damaged, the glass is single-pane, and you plan to stay in the home long enough to justify the investment.
Laminated glass windows — which sandwich a damping layer between two glass panes — outperform standard double-pane for sound because the interlayer absorbs vibration. If you’re replacing windows specifically for noise, specify laminated glass rather than standard insulated glass units.
For a full breakdown of costs across all surfaces, see our guide to soundproofing costs.
The Bottom Line
Good window soundproofing is really about sequencing. Seal the gaps first, add the strongest removable barrier that matches your needs, and replace the window only when the unit itself is too weak or too damaged for retrofits to carry further.
Windows are one piece of a room’s sound barrier. Even perfectly soundproofed windows won’t help if the door or walls are leaking noise.
For a complete approach, see our guide to soundproofing a room, and check window soundproofing costs for detailed pricing by window type.
Frequently Asked Questions
How Do I Stop Traffic Noise On My Windows?
Seal the frame gaps with acoustic caulk and compression weatherstripping first. Then add a window insert with at least a two-inch air gap — the air space between the insert and existing glass is what blocks low-frequency traffic rumble most effectively.
What Is The Best Way To Soundproof Existing Windows?
Acoustic window inserts deliver the best retrofit performance without replacing the window. They mount inside the frame, create a secondary air barrier, and can reduce noise by 10 to 15 decibels when combined with proper frame sealing.
Do Soundproof Curtains Really Work On Windows?
They help, but expectations matter. Heavy three-layer curtains reduce mid and high-frequency noise by 5 to 8 decibels — enough to soften voices and general street noise.
They won’t block bass-heavy traffic rumble or construction noise because they lack the mass and air-gap separation that inserts or secondary glazing provide.