
Have you ever been in the middle of an intense recording session, only to have it ruined by the blaring horn of a passing car or the distant chatter from the next room?
Soundproofing a recording studio is the unsung hero behind every crystal-clear track and album, ensuring that external noises stay out, and pure, unadulterated music stays in.
To achieve studio-quality recordings from the comfort of your home, it’s imperative to understand the intricacies of soundproofing.
It’s not just about blocking external noises; it’s about creating an acoustically balanced environment that enhances the natural sounds of your instruments and voice.
But how does one transform an ordinary room into a soundproof sanctuary? Let’s dive into the world of decoupling, acoustic treatments, and innovative soundproofing techniques to elevate your home studio experience.
Why You Should Decouple Your Home Studio?
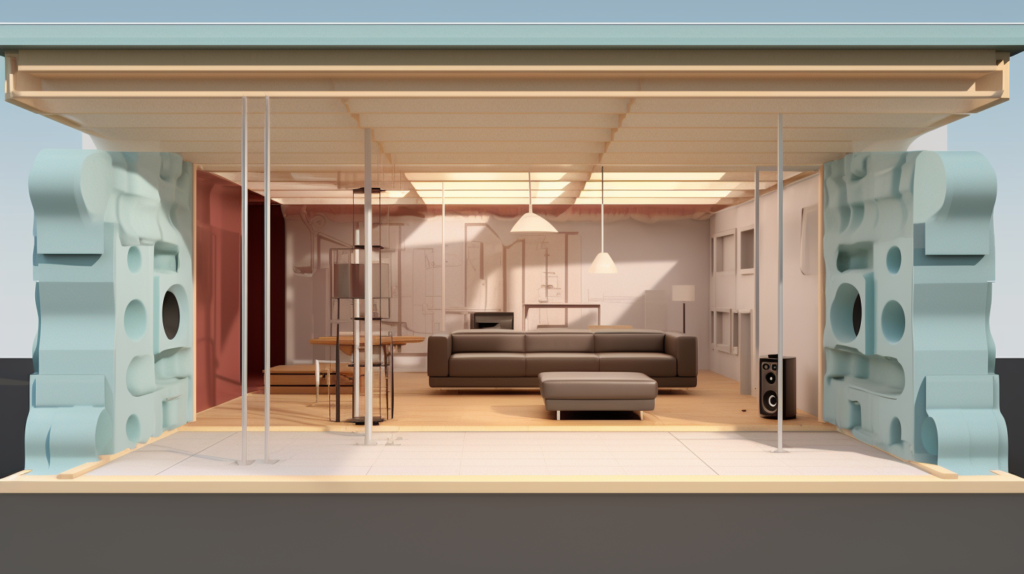
Decoupling is an essential technique in soundproofing, especially in a home studio setting.
It’s the process of separating or isolating different parts of the studio from one another to prevent sound vibrations from traveling through.
This separation ensures that the sounds inside the studio don’t get affected by external noises, and vice versa.
Decoupling involves a combination of various methods and materials.
Before diving into the individual steps, it’s crucial to understand the foundational elements of decoupling:
- Suspended Ceiling: Much like a floating floor, a suspended ceiling is an additional layer below the primary ceiling. It’s separated by a gap filled with insulating materials, preventing vibrations from traveling through.
- Floating Floor System: Instead of laying the floor directly on the building’s foundation, a floating floor is an elevated platform, providing an added layer of insulation and separation.
- Soundproof Doors: These are dense, heavy doors that block out external sounds effectively. They often come with seals and gaskets to ensure no sound leaks through gaps.
- Soundproof Windows: Double or triple-pane windows with specialized seals prevent sound from seeping through. They are crucial in decoupling the studio from outdoor noises.
With the foundational elements in place, let’s delve into how to decouple and soundproof the walls.
How To Decouple Your Home Studio?

The principle behind decoupling is relatively straightforward. Sound travels via vibrations.
When an instrument is played or someone speaks, it creates vibrations that travel through the air and can also transfer to solid objects.
If these objects are parts of your studio’s structure, like its walls or floor, then the vibrations can pass through these and be heard on the other side.
Why is decoupling important?
Imagine a scenario where your studio shares a wall with another room.
If the studio’s structure is directly connected with that room without any breaks or gaps, then any sound created in the studio can vibrate through the shared wall and be audible in the next room.
This can be particularly problematic if you’re recording a loud instrument like drums.
How does decoupling work? At its core, decoupling introduces breaks or barriers in the studio’s structure to prevent vibrations from passing through.
There are various methods to achieve this:
- Floating Floors: Instead of having the studio’s floor directly on the building’s foundation, a secondary floor is built on top using isolating materials like rubber or springs.
- This ‘floating’ floor doesn’t directly touch the main foundation, preventing vibrations from passing through.
- Staggered Stud Walls: Traditional walls have studs (the vertical wooden pieces) placed directly opposite each other on each side of the wall.
In a staggered stud design, the studs are offset, so they don’t directly align.
This means that one side of the wall doesn’t directly connect with the other side, reducing the path through which sound can travel.
1. Soundproofing Walls for Decoupling

Walls are the primary barriers that separate the studio’s internal environment from the external world.
Ensuring they are soundproofed and decoupled is paramount to achieving a clean, noise-free recording.
Option 1: Tearing Down Existing Walls
If the current walls are not up to the mark and renovation is an option, this method is highly effective.
- Dismantling the Wall: Begin by tearing down the existing drywall or wall surface to expose the wall studs.
- Filling with Soundproofing Foam: With the studs exposed, fill the spaces between them with soundproofing foam. This foam acts as a barrier, absorbing sound vibrations and preventing them from traveling through.
- Installing Resilient Channels: These are metal channels that are fixed across the wall studs. They create a separation between the wall and the drywall that will be added next, providing an added layer of decoupling.
- Mounting the Drywall: Place the drywall over the resilient channels, ensuring it doesn’t directly touch the wall studs.
- Seal with Acoustic Sealant: Once the drywall is in place, seal all edges, corners, and seams with acoustic sealant. This ensures that there are no gaps or cracks for sound to seep through.
Option 2: Soundproofing Concrete or Fixed Walls
In cases where tearing down walls isn’t feasible, such as with concrete walls, this method offers an effective solution.
- Installing Wall Studs: Start by drilling holes into the concrete wall and fixing vertical wooden studs (joists) onto them. These studs provide the framework for adding soundproofing materials.
- Filling with Soundproofing Foam: Between these studs, insert soundproofing foam. This foam acts as an insulating layer, preventing sound from penetrating the concrete wall.
- Installing Resilient Channels: Attach these metal channels across the wall studs. They decouple the drywall from the concrete wall, further enhancing the soundproofing.
- Mounting the Drywall: Fix the drywall onto the resilient channels. It’s essential to ensure the drywall doesn’t come in direct contact with the concrete wall or the studs.
- Seal with Acoustic Sealant: As with the previous method, once the drywall is up, seal all its edges and seams with acoustic sealant. This step is crucial to ensure a completely airtight surface, leaving no room for sound leaks.
2. Soundproofing Windows
1. Seal the Cracks: Before delving into more extensive modifications, start by inspecting your windows for any visible cracks or gaps, especially around the frames.
Even tiny openings can let in a significant amount of sound.
Use acoustic sealants, which remain pliable over time, to seal these gaps and ensure a tight, soundproof fit.
2. Upgrade to Double or Triple Pane Windows: The single most effective upgrade for window soundproofing is switching to double or triple-pane windows.
These windows feature two or three layers of glass separated by gaps filled with air or inert gases like argon.
The multiple layers and the insulating gap significantly reduce the amount of sound that can pass through.
3. Weatherstripping: Weatherstripping isn’t just for thermal insulation.
By ensuring a tighter seal between the window sash and the frame, weatherstripping also acts as a sound barrier.
There are various types of weatherstripping, like adhesive-backed foam tape or V-strip (tension seal), so choose the one that best fits your window type.
4. Use Acoustic Caulk: For any seams or junctions around the window frame, especially if you’ve recently installed a new window, use acoustic caulk to seal off potential sound leak points.
This type of caulk is specifically designed for soundproofing purposes and remains flexible, ensuring gaps don’t develop over time.
3. Soundproofing Doors

1. Upgrade to a Solid Core or Soundproof Door: Most interior doors in homes are hollow core, meaning they have a lightweight, hollow center.
While cost-effective and lightweight, they are poor sound insulators.
Switching to a solid core door, made of solid wood or filled with a dense material, can drastically improve soundproofing.
For even better results, specially designed soundproof doors, which come with additional layers and materials for sound dampening, can be considered.
2. Seal All Cracks: Like with windows, start your door soundproofing journey by inspecting the door and its frame for cracks or gaps.
Any visible gaps, especially around the frame, should be sealed with acoustic sealant.
3. Weatherstrip the Door Frame: Weatherstripping isn’t just for windows.
When applied to doors, it ensures a tight seal when the door is closed, preventing sound leaks.
Adhesive-backed foam tape or door-specific weatherstripping kits can be used.
4. Install a Door Bottom: While door sweeps are popular, door bottoms offer a more effective and durable solution for soundproofing.
A door bottom is attached to the bottom of the door and features a rubber or silicone seal that compresses against the floor or a threshold when the door is closed, ensuring no sound leaks through the gap.
5. Address Door Hardware: It’s easy to overlook, but the door’s hardware, like handles, locks, and even the peephole, can be potential sound leak points.
Ensure that these components fit snugly and consider adding thin gaskets or seals if necessary.
4. Create A Suspended Ceiling

While walls and windows are obvious points of focus, the ceiling plays a no less critical role in soundproofing, especially if there are spaces above the studio, such as another floor of a building.
Sound from footsteps, moving furniture, or even just general activity can easily penetrate a regular ceiling.
Why consider a suspended ceiling? A standard ceiling attached directly to the floor joists of the space above provides a direct path for sound.
By introducing an additional layer, i.e., a suspended ceiling, this direct path is broken, significantly reducing sound transmission.
Designing a suspended ceiling: This involves creating a secondary ceiling below the primary one.
The gap between the two becomes an air cavity that acts as an insulator. But the effectiveness doesn’t stop there.
The materials used for the suspended ceiling, such as acoustic tiles or panels, can further enhance its sound-blocking capabilities.
Additionally, resilient channels or sound isolation clips can be used to mount the secondary ceiling, providing even more decoupling from the structure above.
But it’s not just about blocking sound. A suspended ceiling also offers opportunities for acoustic treatment. By selecting the right materials or even incorporating diffusers or bass traps into the design, one can address both soundproofing and room acoustics in one go.
5. Soundproof Any Ventilation Into And Out Of The Room

A room’s air quality is vital for comfort and health.
In the endeavor to soundproof a studio, one might think of sealing it off completely, but this would be detrimental.
A balance needs to be struck to ensure fresh air circulation without compromising on soundproofing.
The challenge with ventilation: Any opening, including vents or ducts, is a potential weak point for sound to enter or exit the studio.
Additionally, the very sound of the air moving through vents or the hum of an HVAC system can be disruptive.
Soundproofing ventilation: There are several techniques to ensure silent and effective ventilation.
Flexible ducts, as opposed to rigid ones, can reduce the noise of airflow. These ducts can be installed with bends and curves, which act as barriers for sound.
Adding acoustic liners or insulation around these ducts can further dampen any noise.
For the HVAC system itself, placing it as far away from the studio as possible and using silencers or mufflers can significantly reduce any operational noise.
Sound baffles can also be incorporated into the ventilation design, trapping and neutralizing sound before it enters or exits the studio.
6. Treating The Inside Of The Studio After Soundproofing

Once you’ve effectively soundproofed your home studio, the next crucial step is to treat its interiors.
This doesn’t just mean decorating it to look aesthetically pleasing, but ensuring the room’s acoustics are optimal for recording and playback.
Acoustic panels, diffusers, and bass traps are the primary tools in this endeavor.
Here’s a guide on how to install and utilize them effectively in a home studio setting.
Install Acoustic Panels
Acoustic panels are designed to absorb sound, particularly the reflections that bounce off walls, ceilings, and floors. By reducing these reflections, they prevent echoes and ensure a clearer sound within the studio.
1. Identify Primary Reflection Points: To maximize the effectiveness of acoustic panels, they should be placed at primary reflection points. Sit in your listening position and have someone move a mirror along the wall. Wherever you can see the studio monitors/speakers in the mirror are your primary reflection points.
2. Mounting the Panels: Once you’ve identified these points, mount the acoustic panels there. Ensure they are at ear level, as this is where most critical listening takes place. Panels can be mounted using adhesive strips, hanging brackets, or even impaling clips.
3. Spacing and Arrangement: While it’s essential to treat primary reflection points, avoid over-dampening the room. There should be spaces between the panels to ensure a balanced sound. This can be achieved by placing them in a checkerboard pattern or ensuring some wall space remains exposed between panels.
Install Diffusers
Diffusers are designed to scatter sound waves, preventing them from focusing in one direction and causing echoes.
They maintain a room’s liveliness without letting reflections become problematic.
1. Choosing the Right Diffuser: Quadratic diffusers are commonly used in studios.
They are designed based on mathematical principles to ensure optimal sound scattering.
2. Placement: Diffusers are most effective when placed at the back of the studio, opposite the speakers.
This position ensures they scatter the reflections coming directly from the speakers. They can also be placed on the ceiling or side walls to enhance the room’s ambient sound quality.
3. Mounting: Like acoustic panels, diffusers can be mounted using adhesive strips, brackets, or clips. Ensure they are securely attached, as they can be relatively heavy.
Install Bass Traps
Bass traps absorb low-frequency sounds. These sounds have longer wavelengths and can lead to issues like room modes, where certain bass frequencies are amplified.
1. Corner Placement: Bass frequencies tend to build up in corners. Hence, bass traps are most effective when placed in room corners, both vertically (floor to ceiling) and horizontally (wall to wall and wall to ceiling).
2. Types of Bass Traps: Broadband bass traps can absorb a wide range of low frequencies and are suitable for general purposes. However, if you’ve identified specific problematic frequencies through room measurements, tuned bass traps targeting those frequencies can be used.
3. Mounting Bass Traps: Bass traps can be bulky, so ensure they are securely mounted. They can be hung like panels, or if they are freestanding, ensure they are stable and won’t easily tip over.
Conclusion
Creating an optimal environment for music production and recording in a home studio demands more than just high-quality equipment; it requires meticulous attention to the acoustics and soundproofing of the space itself.
Through decoupling and strategic placement of soundproofing materials, you lay the foundation for a studio where external noises are kept at bay.
But the journey doesn’t end there. Treating the interior ensures that the sound produced inside is as pristine and true to its source as possible.
By integrating techniques such as using acoustic panels, diffusers, and bass traps, you refine the studio’s sonic characteristics, ensuring clarity, depth, and authenticity in every recording.
As you embark on or continue your musical journey, remember that every detail, no matter how small, contributes to the masterpiece you aim to produce.
Your home studio, with its well-thought-out design and treatment, becomes a testament to your commitment to excellence in sound.