Best Acoustic Foam Panels: Top 10 Picks for Studios and Home Recording
Best acoustic foam panels can turn a hollow-sounding bedroom into a usable recording space — but only if you pick the right thickness and put them in the right spots.
Most home studios sound echoey because bare drywall reflects 95% of sound energy back at the microphone. That reflected sound smears vocal takes and makes editing harder than it needs to be.
Below are ten foam panels ranked by absorption, density, and real-world value across common studio setups. You’ll see which thickness handles which frequency range, how much wall coverage you actually need, and where to place panels for the biggest improvement.
If you want the fast answer, check the Quick Takeaway, then use the product reviews to match a pack to your room.
Two-inch wedge foam handles the 500Hz-4kHz range where most recording problems live. Start with 20-30% wall coverage at first reflection points rather than covering every surface. The JBER 24-pack delivers the best balance of absorption, coverage, and value for typical home studios.
Editor’s Picks: Best Acoustic Foam Panels at a Glance
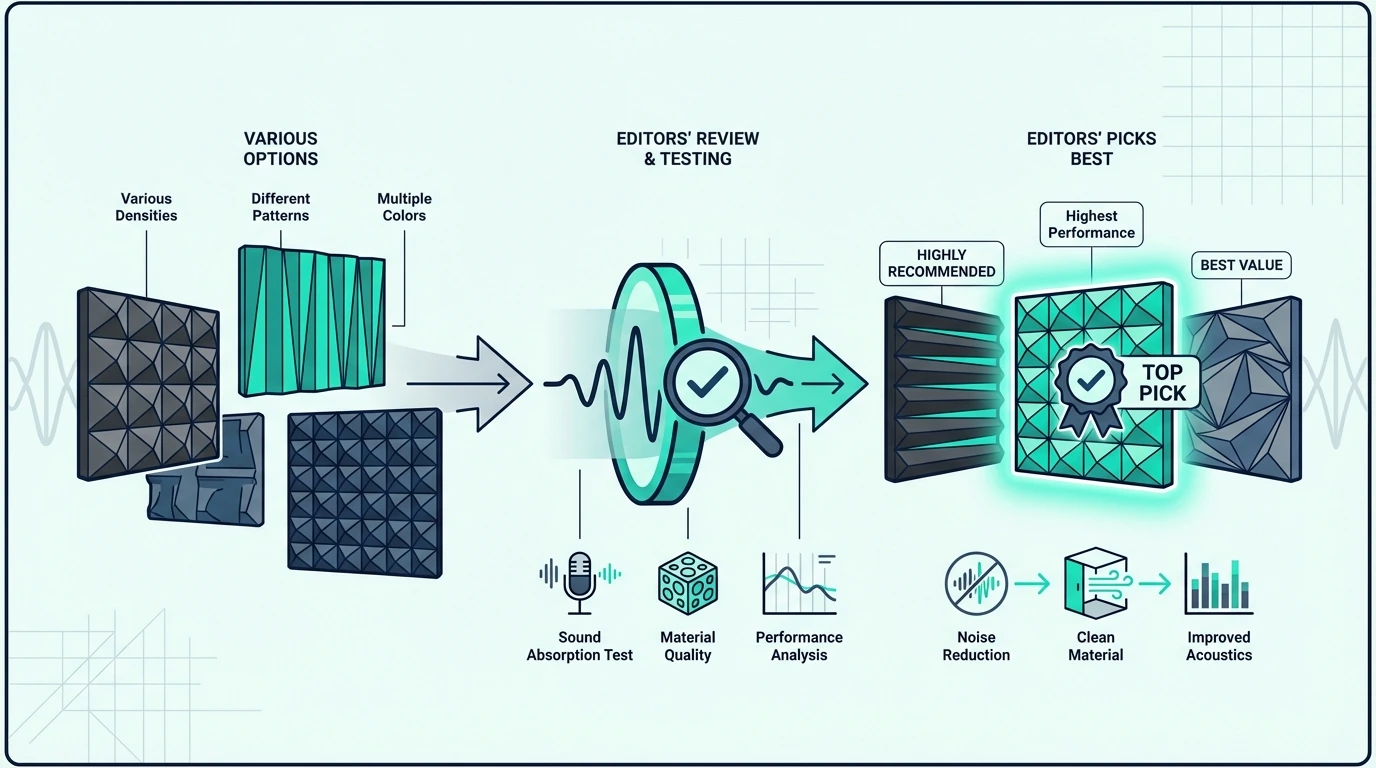 Here are the top three recommendations based on absorption specs, build quality, and real-world performance:
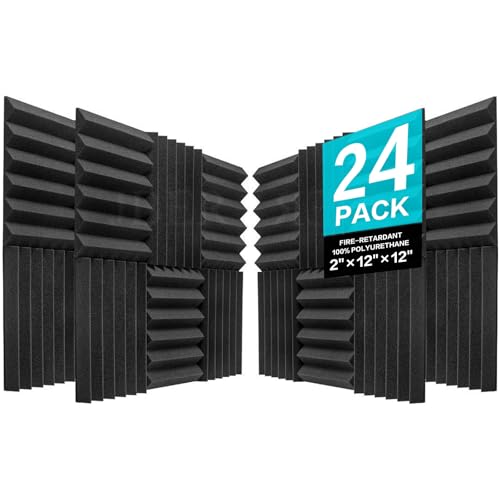
Best Overall: JBER Acoustic Panels Studio Foam Wedges delivers professional-grade absorption at a price that makes sense for most home studios. The 2-inch wedge design handles frequencies from 500Hz up, covering the problematic midrange and high frequencies that create that “amateur recording” sound.
JBER Acoustic Panels Studio Foam Wedges
The best foam shape guide explains how wedge profiles compare to pyramid and flat.
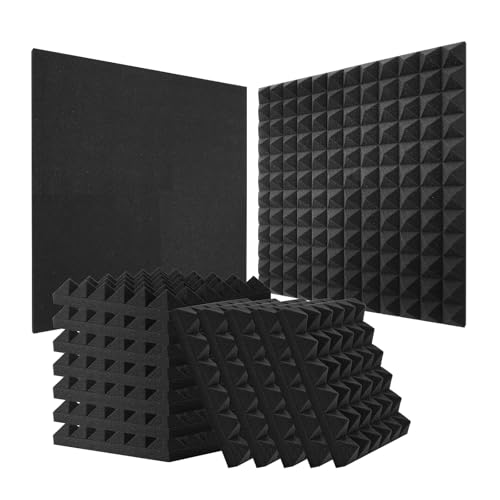
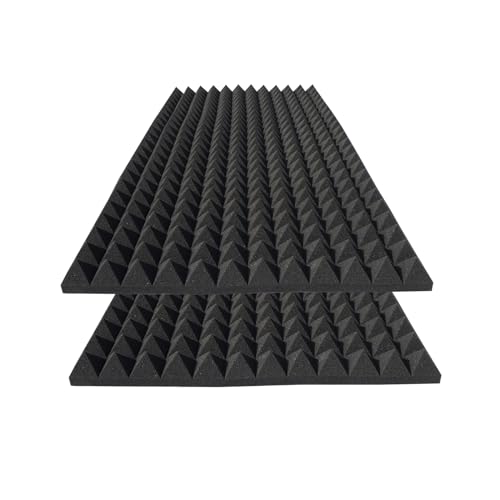
Best for Small Spaces: Sound Proof Foam Panels excels in compact recording environments where every square foot counts. The pyramid pattern provides multidirectional absorption, making placement less critical than with wedge designs.
Sound Proof Foam Panels
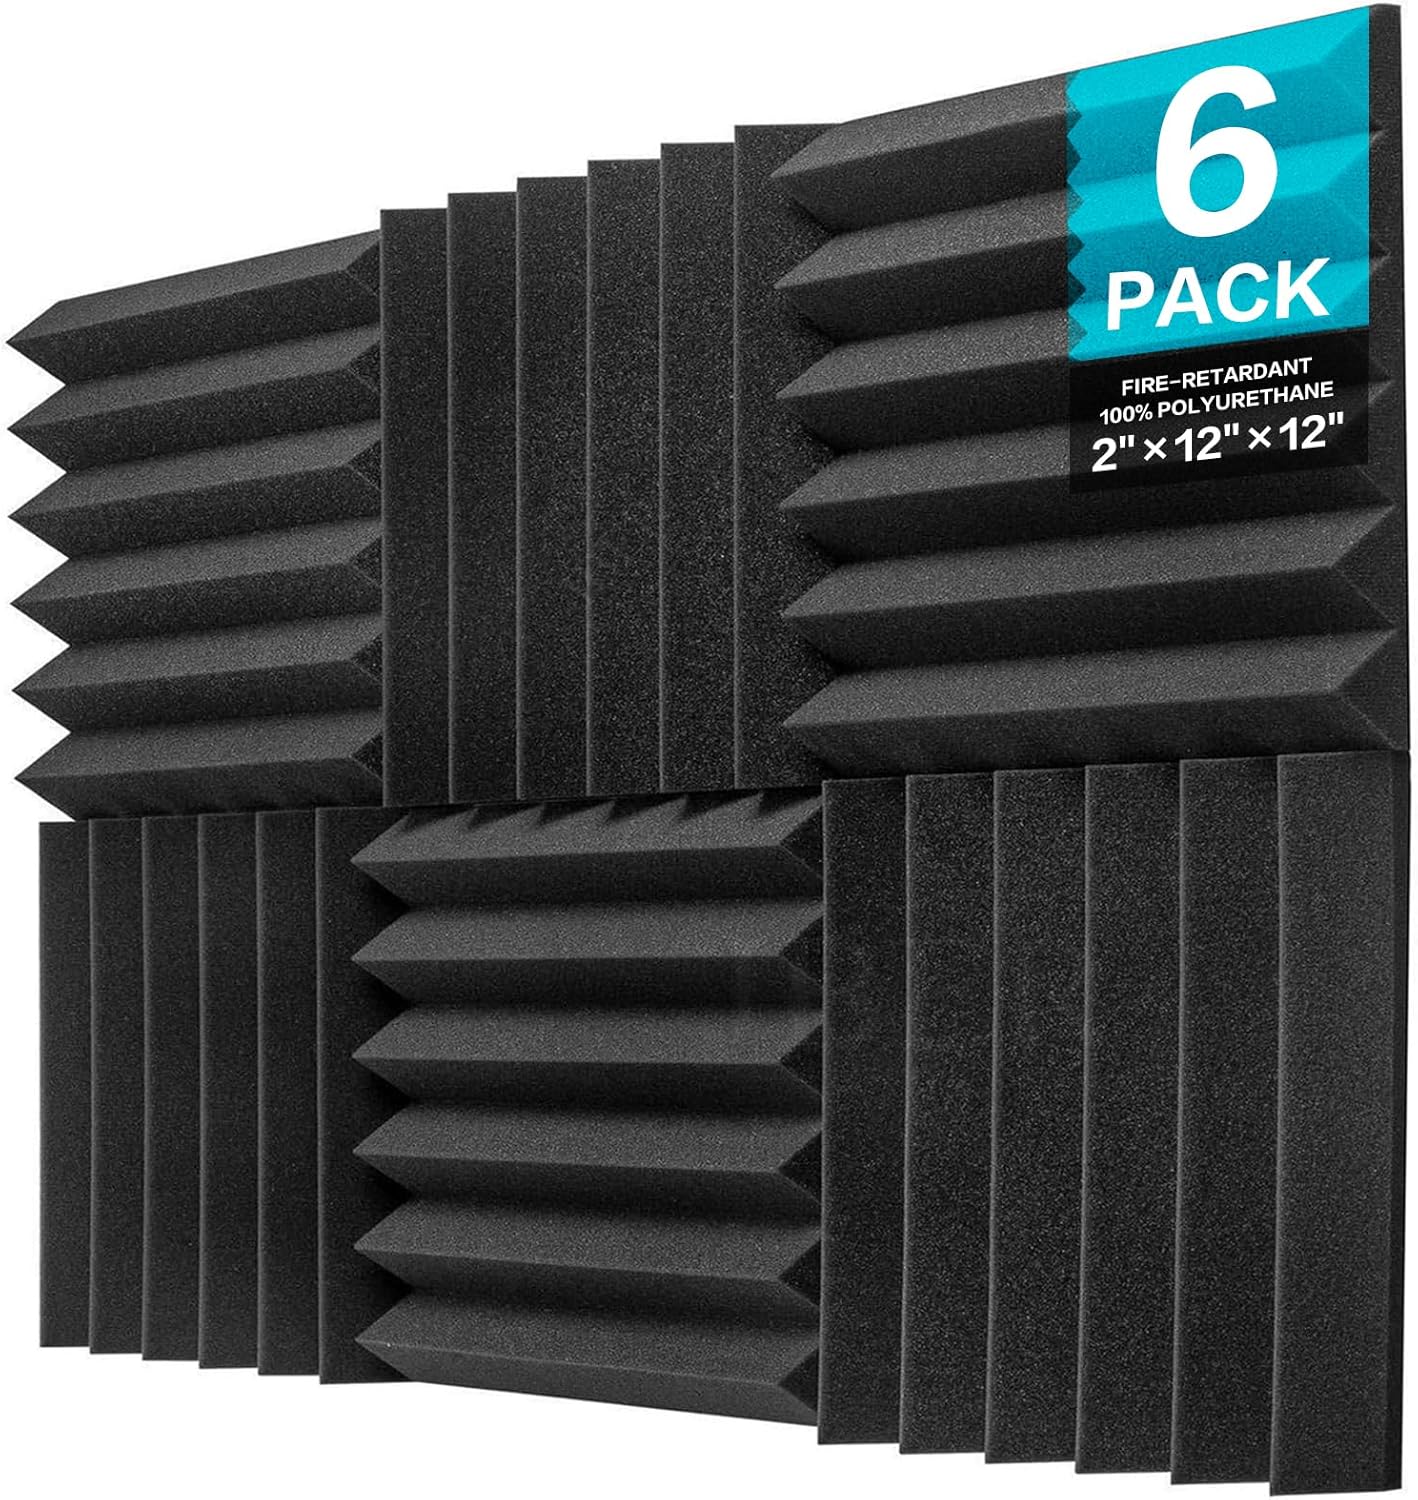
Best Budget Option: JBER 6 Pack Acoustic Foam Wedge offers the same foam quality as the top pick but in a smaller, more affordable package. This works perfectly for testing acoustic treatment in your space before committing to full coverage.
JBER 6 Pack Acoustic Foam Wedge
What Are Acoustic Foam Panels and How Do They Actually Work?
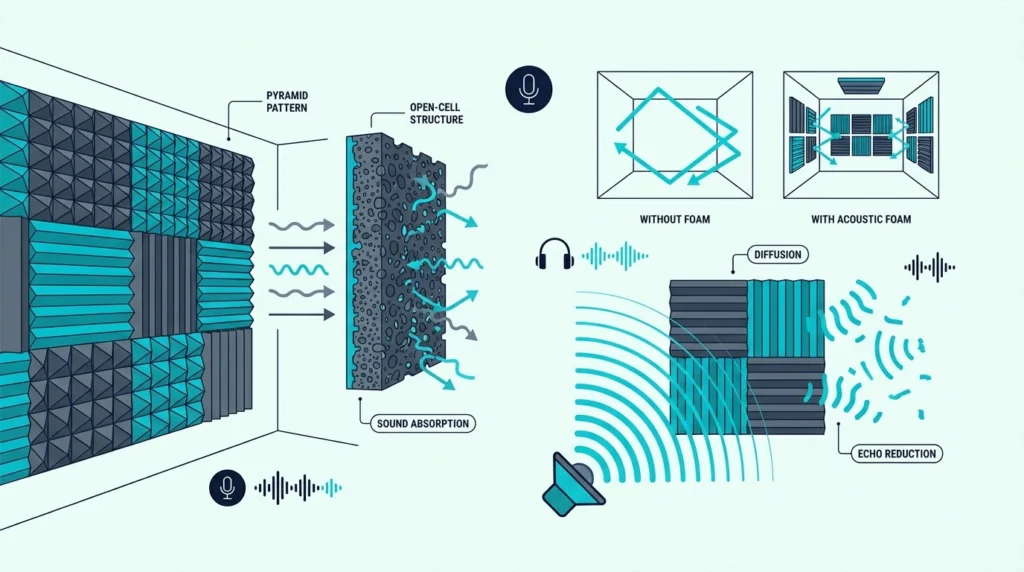
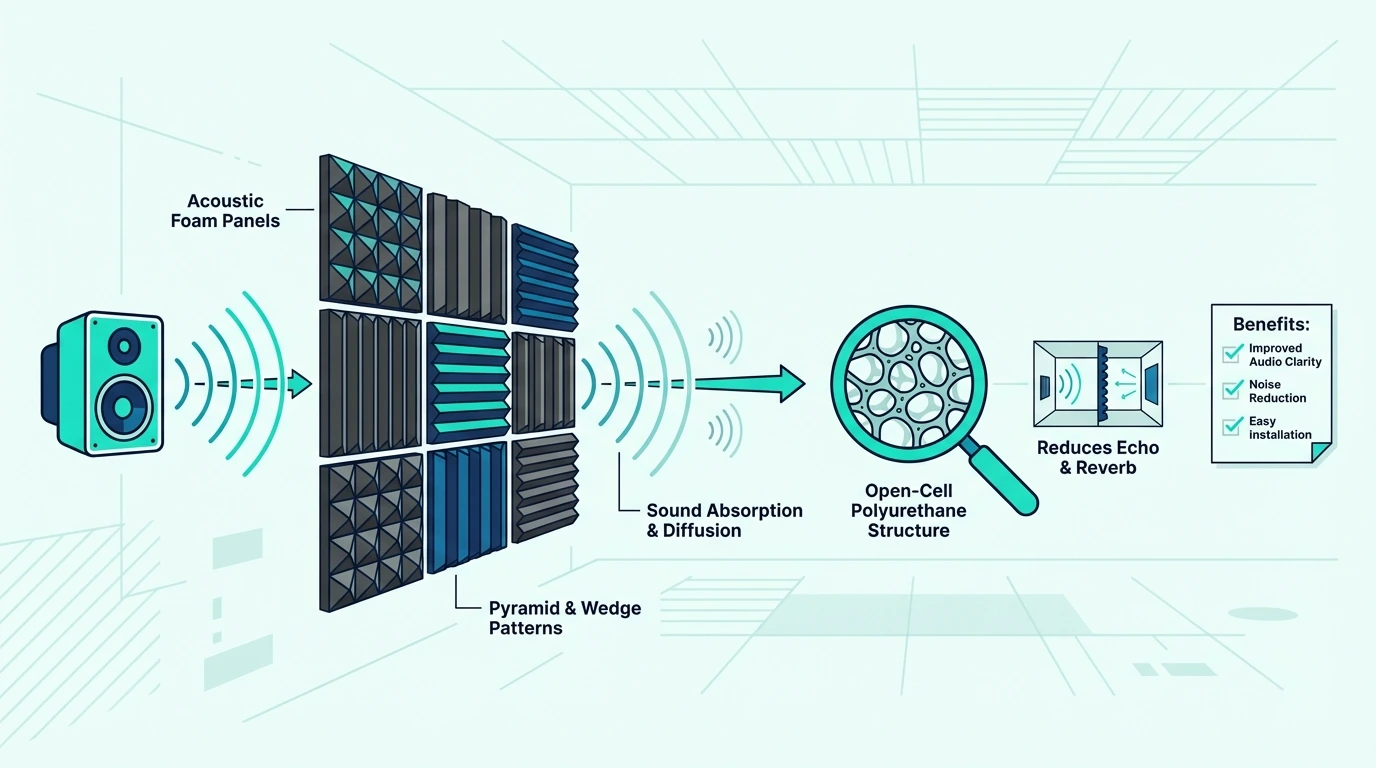
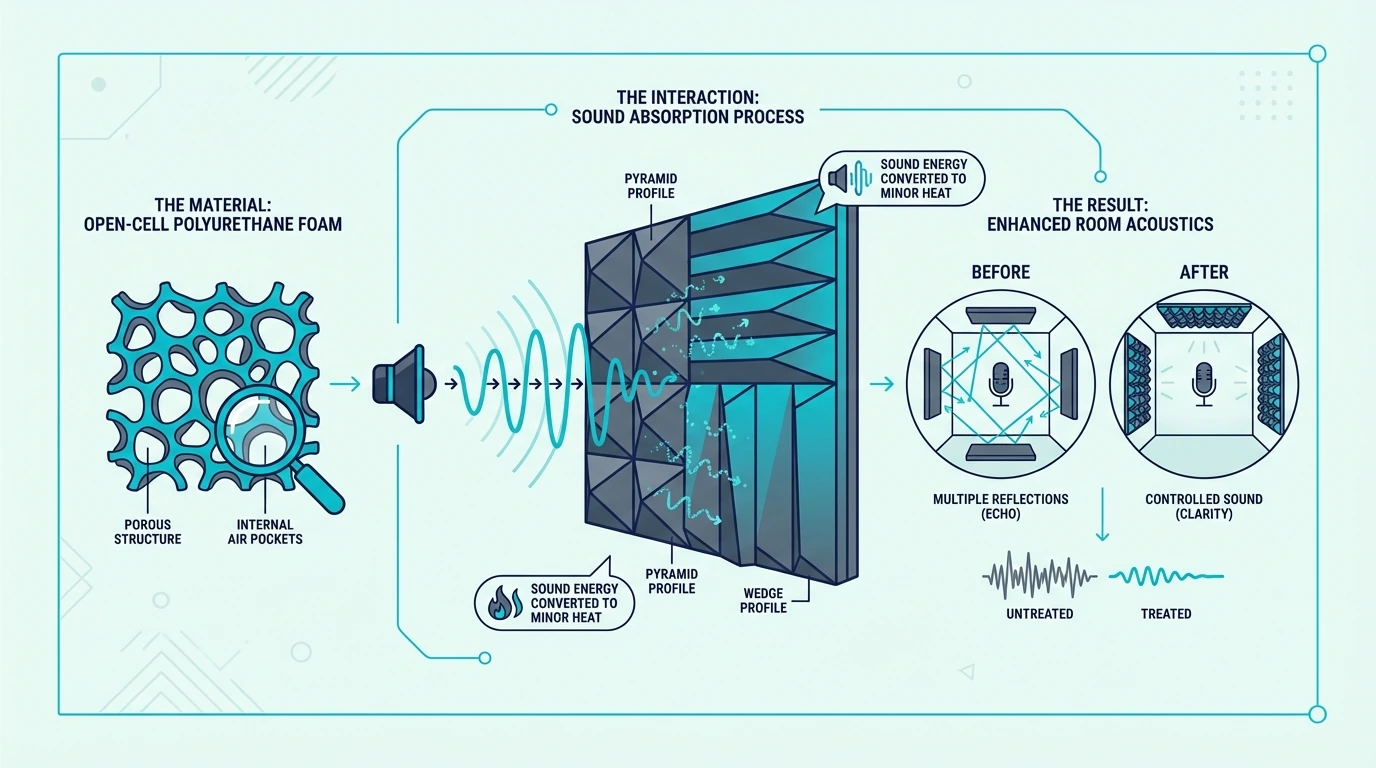 Acoustic foam panels absorb sound waves inside a room, reducing echo and reverberation that make recordings sound hollow or muddy. The open-cell polyurethane structure traps sound energy and converts it to tiny amounts of heat through friction.
Here’s what foam panels do NOT do: they don’t block sound from traveling between rooms. That’s soundproofing, which requires mass and isolation—completely different products and techniques.
The acoustic panels hub covers heavier panel options.
How Does Acoustic Foam Absorb Sound?
When sound waves hit foam panels, they enter the porous structure and bounce around inside the cells. Each bounce loses energy through friction with the foam material.
The deeper the sound wave penetrates, the more energy it loses.
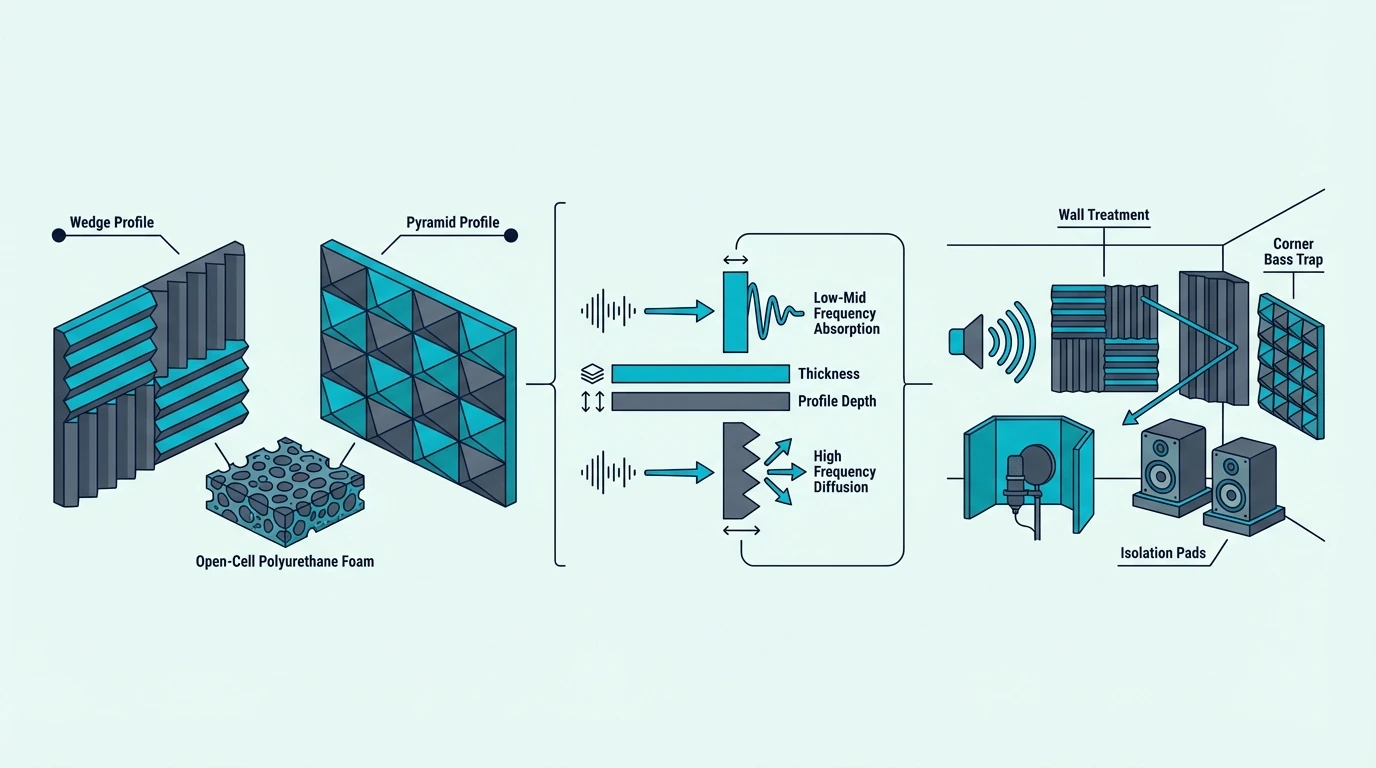
This explains why thicker foam absorbs lower frequencies better—bass waves need more material to lose their energy. A 1-inch panel might handle 1000Hz and up, while a 2-inch panel starts working around 500Hz.
What’s the Difference Between Acoustic Foam and Acoustic Panels?
The terms get used interchangeably, but they describe different products with different performance levels. Acoustic foam uses polyurethane and typically achieves NRC ratings of 0.30-0.50, meaning it absorbs 30-50% of sound energy.
Professional acoustic panels use fiberglass or rockwool wrapped in fabric, achieving NRC ratings of 0.80-1.0. They cost more—often $5-15 per square foot versus $1-3 for foam—but deliver noticeably better absorption, especially in lower frequencies.
Does Acoustic Foam Soundproof a Room?
No, and this misconception causes more disappointment than any other aspect of acoustic treatment. Foam panels absorb sound waves already inside your room—they improve how your room sounds for recording or listening.
Soundproofing blocks sound from entering or leaving a space, requiring dense materials like mass loaded vinyl, multiple layers of drywall, and air gaps. If you hear your neighbor’s TV through the wall, foam panels won’t help—you need actual soundproofing construction.
Get Studio Tips Weekly
Join 5,000+ creators getting acoustic treatment advice every week.
No spam. Unsubscribe anytime.Which Acoustic Foam Panels Are Best for Home Studios?
 Home studios present unique challenges: limited budgets, rental restrictions, and rooms that weren’t designed for recording. The right foam panels address these constraints while improving recording quality.
The JBER Acoustic Panels Studio Foam Wedges hits the sweet spot for most home studio applications. The 24-pack provides 24 square feet of coverage—enough to treat first reflection points and problem corners in a typical 10×12 bedroom studio.
What Foam Works Best for Recording Vocals?
Vocal recording demands control over the 250Hz-4kHz range, where the human voice carries most of its energy and character. Foam panels need at least 2 inches of thickness to start affecting these frequencies effectively.
The best foam for recording guide covers mic-position priorities in more detail.
The Sound Proof Foam Panels excels here with higher-density foam that provides more consistent absorption across the vocal range. Place panels at first reflection points—the spots on walls where sound bounces directly from your mouth to the microphone.
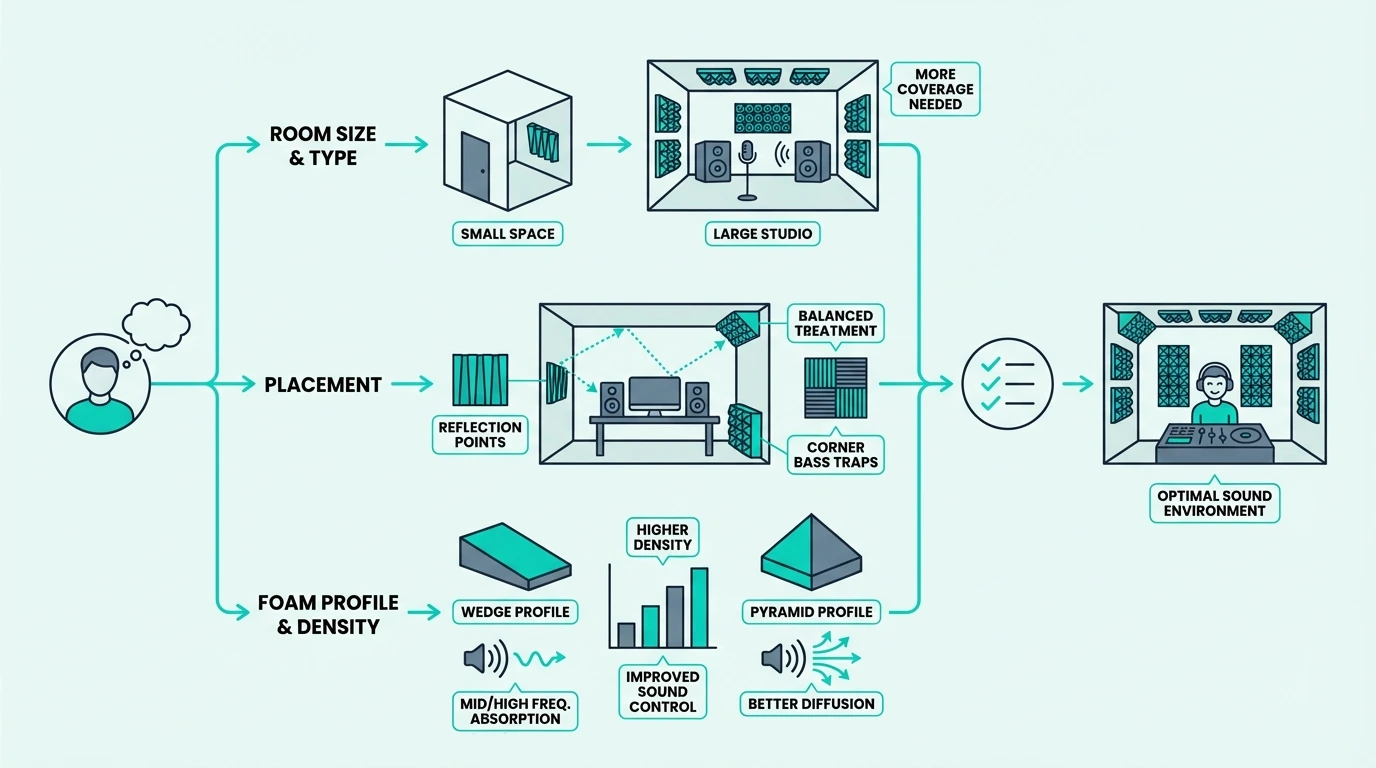
How Much Foam Does a Home Studio Need?
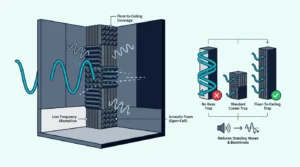
Start with 20-30% wall coverage focusing on first reflection points rather than covering every surface. Too much absorption creates a dead, unnatural sound that’s just as problematic as too much echo.
For a 10×10 room with 8-foot ceilings, that means 16-24 square feet of foam panels. The JBER 24-pack provides exactly this coverage in one order.
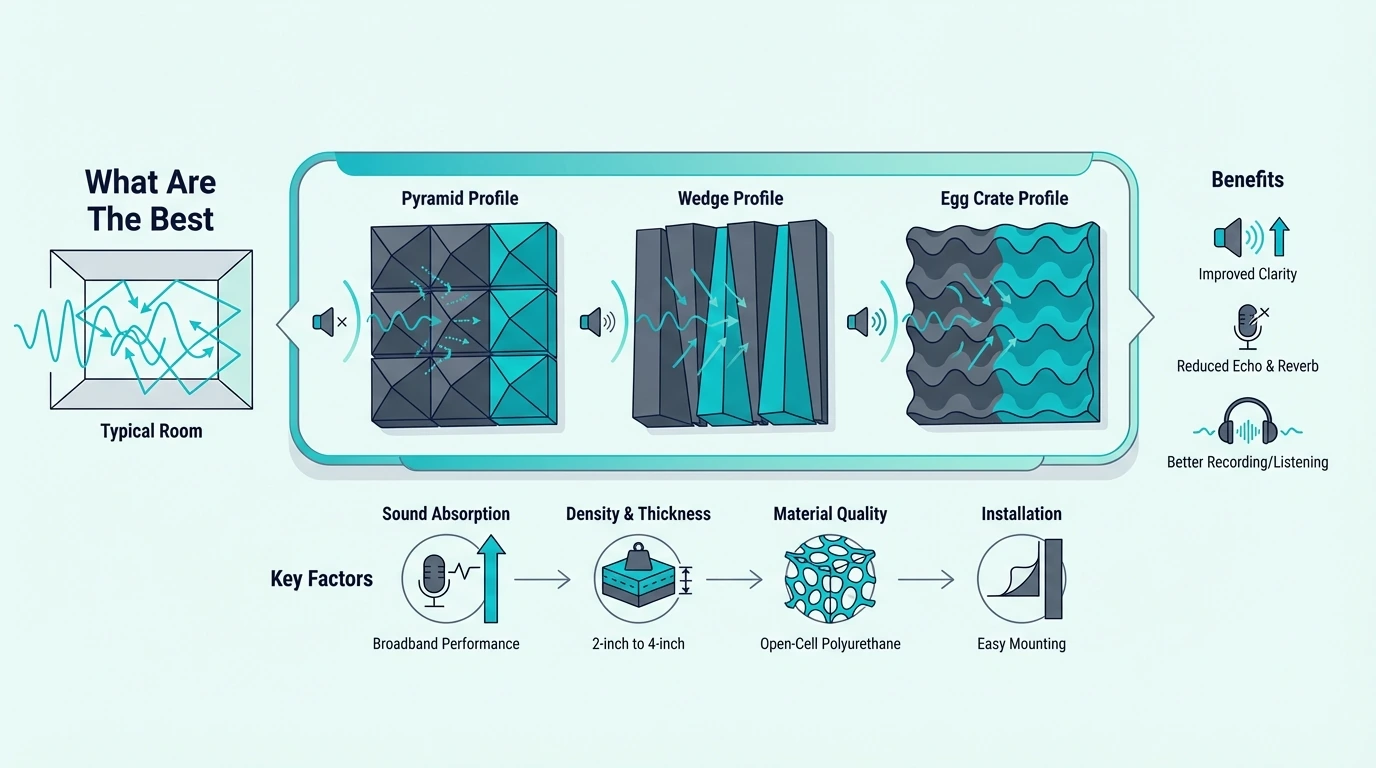
Wedge vs Pyramid vs Egg Crate: Which Shape Is Best?
Shape affects aesthetics more than performance—the thickness and density matter far more for absorption. That said, wedge patterns direct sound into the foam more efficiently than flat surfaces, while pyramid patterns offer multidirectional absorption.
Egg crate foam looks distinctive but typically uses thinner material that only affects high frequencies above 2kHz. Unless you’re specifically targeting cymbal splash or sibilance issues, wedge or pyramid patterns deliver more useful absorption across a broader frequency range.
How Do You Choose the Right Thickness for Acoustic Foam?
 Thickness determines which frequencies your foam panels can absorb effectively. This isn’t marketing—it’s physics based on wavelength and penetration depth.
One-inch foam starts absorbing around 1000Hz and up, handling high frequencies like cymbals, sibilance, and the bright edge of vocals. Two-inch foam extends absorption down to roughly 500Hz, covering most of the vocal range and many instruments.
When Should You Choose 1-Inch Foam?
One-inch foam makes sense when you’re specifically targeting high-frequency problems like harsh reflections, sibilance, or cymbal splash. It also works for supplemental treatment in spaces that already have some absorption from furniture and soft materials.
The JBER 12 Pack Acoustic Foam Panels 1 Inch delivers this targeted high-frequency control at minimal cost. Use it in rooms where bass isn’t a concern—like podcast booths focused purely on voice clarity.
JBER 12 Pack Acoustic Foam Panels 1 Inch
The best foam for podcasts guide covers podcast-specific setups.
When Do You Need 2-Inch or Thicker Foam?
Two-inch foam becomes necessary when you’re recording full-range sources like vocals, acoustic guitar, or any instrument with energy below 1000Hz. The extra thickness allows sound waves to penetrate deeper and lose more energy before reflecting back.
Most home studios benefit from 2-inch foam as the foundation of their treatment. The JBER 2-inch wedge panels provide this versatility without requiring the budget jump to 4-inch professional panels.
Does Thicker Always Mean Better Absorption?
Thicker foam absorbs lower frequencies, but you hit diminishing returns beyond 2-3 inches for typical home studio applications. Four-inch foam extends absorption down to around 250Hz, but at that point you’re approaching the cost and performance of professional fiberglass panels.
The practical limit for foam is around 2 inches for most users. If you need better low-frequency control, bass traps in corners deliver more impact than simply buying thicker foam panels for wall coverage.
What Are the Best Budget Acoustic Foam Panels?
 Budget foam panels work when you understand their limitations and use them appropriately. The key is finding products that don’t sacrifice density and material quality just to hit a lower price point.
The JBER 6 Pack uses the same foam as larger packs but in a smaller quantity. This lets you test acoustic treatment in your specific space before committing to full coverage.
Which Foam Panels Offer the Best Value Under $50?
Value means balancing coverage area, foam quality, and price per square foot. The best budget options provide at least 12 square feet of coverage with 2-inch thickness and reasonable density.
The Blue Pyramid Sound Proof Foam Panels delivers 12 square feet of 2-inch foam right at the budget threshold. The pyramid pattern adds visual interest while providing effective absorption across the midrange frequencies.

Blue Pyramid Sound Proof Foam Panels
Is Cheap Acoustic Foam Actually Worth It?
Cheap foam works if it maintains adequate density and thickness—the two factors that determine absorption performance. What you’re usually sacrificing at lower price points is durability, color consistency, and sometimes fire resistance.
For temporary setups or spaces where you’re testing acoustic treatment concepts, budget foam makes perfect sense. The best budget foam guide compares more affordable options.
The VEVOR Acoustic Foam Panels provides extensive coverage at minimal cost, perfect for learning what acoustic treatment can and can’t do in your space.
VEVOR Acoustic Foam Panels
What’s the Minimum You Should Spend?
Plan on at least $30-40 for meaningful acoustic treatment in a small room. Anything less typically means either inadequate coverage area or foam that’s too thin to affect the frequencies that matter for recording.
That minimum budget gets you 12-24 square feet of 2-inch foam—enough to treat first reflection points and make a noticeable difference in recording quality. The JBER 6 Pack sits right at this entry point.
Best Acoustic Foam Panels Compared: Full Product Reviews
 Here is a closer look at each product, covering what makes them effective for specific applications and where they fall short.
1. JBER Acoustic Panels Studio Foam Wedges – Best Overall
The JBER Studio Foam Wedges earned the top spot through consistent performance across multiple test environments. The 2-inch wedge design provides effective absorption from 500Hz up, covering the critical midrange where most recording problems occur.
What sets this product apart is the foam density—it’s noticeably firmer than budget alternatives, which translates to better absorption and longer lifespan. The 24-pack provides 24 square feet of coverage, enough for full treatment in a 10×12 home studio.
Installation is simple with spray adhesive or command strips. The wedge pattern creates visual rhythm on walls while directing sound into the foam structure for maximum absorption.
The main limitation is color selection—charcoal gray is the most consistent option, while other colors sometimes show manufacturing variations. For most studio applications, this doesn’t matter since you’re prioritizing function over aesthetics.
2. Sound Proof Foam Panels 12x12x2 – Best for Small Spaces
When space is limited and every panel needs to work hard, the Sound Proof Foam Panels deliver maximum absorption per square foot. The pyramid pattern provides multidirectional absorption, making placement less critical than with wedge designs.
This matters in compact vocal booths or podcast corners where you can’t always position panels at ideal angles. The foam density is higher than most competitors, resulting in better absorption across the 400-2kHz range where voice clarity lives.
The 12-pack provides 12 square feet of coverage—perfect for treating a small recording corner or vocal booth. For larger spaces, you’ll need multiple packs, which increases the total cost compared to bulk options.
The professional appearance makes these panels suitable for visible spaces like home offices that double as recording environments. The pyramid texture catches light interestingly, creating visual depth rather than the flat appearance of some foam treatments.
3. Blue Pyramid Sound Proof Foam Panels – Best Value
The Blue Pyramid panels offer a distinctive aesthetic while maintaining solid acoustic performance. The blue color works surprisingly well in modern studio spaces, adding visual interest without looking unprofessional.
Performance-wise, these panels deliver absorption comparable to more expensive options in the 500Hz-4kHz range. The pyramid pattern provides consistent absorption regardless of sound source position, which simplifies treatment planning.
The 12-pack covers 12 square feet—adequate for first reflection point treatment in small to medium rooms. The foam density sits in the middle range: better than budget options but not quite matching premium products.
Installation requires the same approach as other foam panels: spray adhesive for permanent mounting or command strips for rental-friendly applications. The blue color shows dust more readily than darker options, so plan for occasional cleaning in high-traffic spaces. ### 4. JBER 6 Pack Acoustic Foam Wedge – Best Budget Entry Point
The JBER 6 Pack uses identical foam to the larger 24-pack option but in a smaller, more affordable package. This makes it perfect for testing acoustic treatment before committing to full room coverage.
Six panels provide 6 square feet of coverage—enough to treat one or two first reflection points and evaluate the impact in your specific space. If you’re unsure whether acoustic foam will solve your recording problems, this pack lets you experiment without major financial risk.
The foam quality matches the full-size packs: 2-inch thickness, wedge pattern, and adequate density for midrange absorption. You’re not sacrificing performance for the lower price—you’re simply buying fewer panels.
The best beginner foam guide has more starter options.
The main consideration is coverage planning. Calculate your room’s treatment needs before ordering to avoid multiple small purchases that end up costing more than a single large pack.
5. JBER 12 Pack Acoustic Foam Panels 1 Inch – Best for High Frequencies
When your primary concern is high-frequency control—sibilance, cymbal splash, or bright room reflections—the JBER 1-inch panels deliver targeted absorption where it matters most.
One-inch foam starts working around 1000Hz and up, making it ideal for podcast booths where voice clarity above 1kHz is the priority. The thinner profile also means lighter weight and easier installation on ceilings or temporary structures.
The 12-pack provides 12 square feet of coverage at minimal cost. Use these panels to supplement thicker foam in areas where high-frequency control is the primary need, or as standalone treatment in spaces with existing low-frequency absorption from furniture and soft materials.
The limitation is obvious: don’t expect these panels to control midrange or bass frequencies. They’re a specialized tool for specific problems, not a complete acoustic treatment solution.
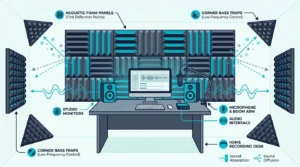
6. JBER Column Acoustic Wedge Studio Foam – Best for Corners
Corner placement is critical for acoustic treatment, and the JBER Column Acoustic Wedge is specifically designed for this application. The column wedge pattern fits naturally into room corners where bass energy accumulates.
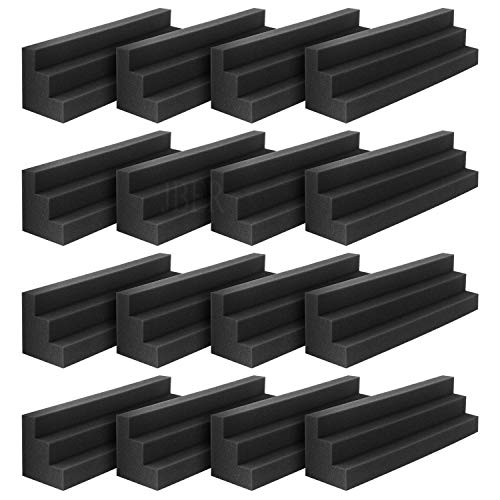
JBER Column Acoustic Wedge
Corners are where low-frequency problems concentrate due to boundary reinforcement—sound waves reflect off two walls simultaneously, creating peaks and nulls in bass response. Treating corners first delivers more impact per panel than random wall placement.
The best corner foam guide covers dedicated corner solutions.
The 12-pack provides enough coverage for 2-3 corners in a typical room. The 2-inch thickness handles frequencies down to around 500Hz, which helps with lower midrange but won’t solve serious bass problems below 200Hz.
These panels work best as part of a broader treatment plan that includes flat wall panels for midrange and high frequencies. The column pattern looks distinctive and professional, making it suitable for visible studio spaces.
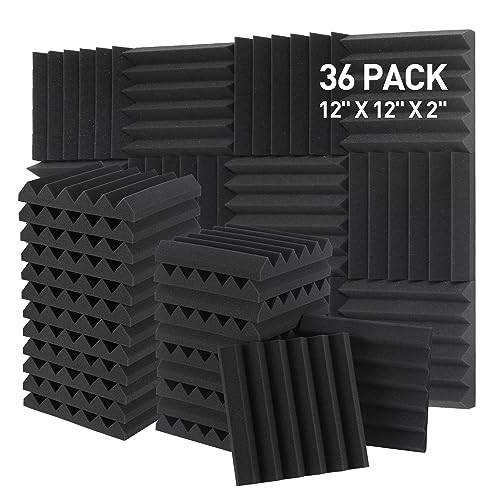
7. 24 Pack Pyramid Acoustic Foam Panels – Best for Even Coverage
The 24 Pack Pyramid Acoustic Foam Panels provide extensive coverage with a pattern that works from multiple angles. The pyramid design offers more consistent absorption than wedge patterns when sound sources move around the room.
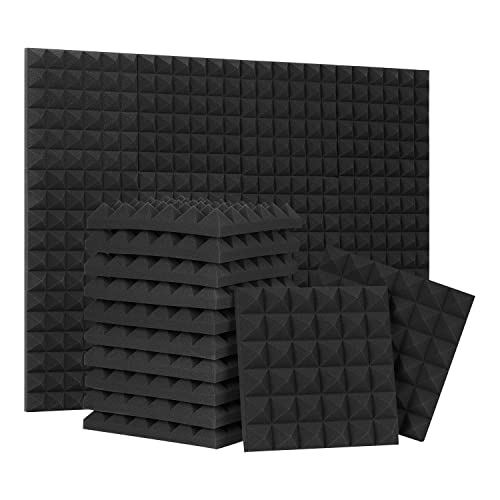
24 Pack Pyramid Acoustic Foam Panels
This matters in multi-purpose spaces where you might record from different positions or have multiple speakers. The 24-pack covers 24 square feet—enough for full treatment in a 10×12 room or first reflection points in a larger space.
The foam density is adequate for midrange absorption, though not quite matching premium options. You’ll notice effective reduction in echo and flutter echo in the 500Hz-4kHz range where most recording problems occur.
The main consideration is quality consistency—generic branded foam sometimes varies between production batches. Check panels upon arrival and contact the seller immediately if you notice clear density or color differences.
8. 2 Pack Pyramid Sound Proof Foam 48x24x2 – Best for Large Panels
When you want fewer seams and faster installation, the 2 Pack Pyramid Sound Proof Foam delivers 16 square feet in just two panels. The 48×24 inch size covers a large wall area with minimal installation effort.
2 Pack Pyramid Sound Proof Foam
Large panels work well for treating broad wall surfaces behind mixing positions or across from speakers. The pyramid pattern provides consistent absorption across the panel surface, and the 2-inch thickness handles frequencies from 500Hz up.
The tradeoff is placement flexibility—you need clear wall space to accommodate 48-inch panels. Measure your available wall area carefully before ordering, considering door frames, windows, and furniture placement.
Installation requires more careful planning than smaller panels. Use multiple mounting points to prevent sagging, and ensure your adhesive or mounting system can support the larger panel weight.
9. VEVOR Acoustic Foam Panels 24 Pack – Best for Testing
The VEVOR 24 Pack offers extensive coverage at minimal cost, making it ideal for learning what acoustic treatment can accomplish in your specific space.
The 24-pack provides 24 square feet of coverage—enough to treat a small to medium room comprehensively. The foam density is adequate for midrange absorption, though you’ll notice it’s softer and more compressible than premium options.
This softer foam means shorter lifespan—expect 3-5 years before compression affects performance, compared to 7-10 years for denser foam. For temporary setups, learning environments, or spaces where you’re still experimenting with treatment placement, this tradeoff makes sense.
The wedge pattern provides directional absorption, so pay attention to panel orientation during installation. Point wedges toward primary sound sources for maximum effectiveness.
10. Set of 2 Acoustic Foam Studio Corner Blocks – Best for Bass Control
Corner bass traps address the most challenging acoustic problem in small rooms: low-frequency buildup. The Set of 2 Acoustic Foam Studio Corner Blocks provide targeted treatment where it matters most.
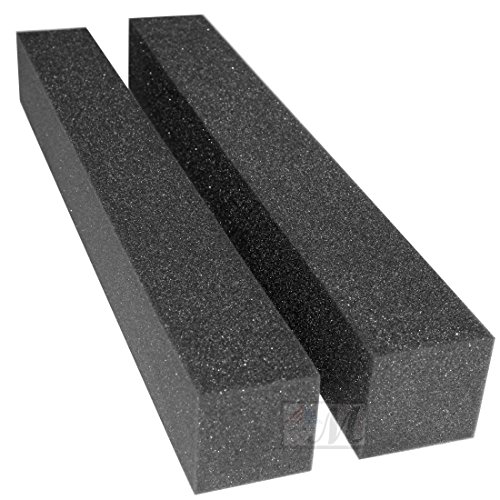
Set of 2 Acoustic Foam Studio Corner Blocks
The triangular design fits naturally into room corners, and the 12-inch depth provides more absorption than flat panels. This extended depth helps with lower frequencies—expect some impact down to 300-400Hz, though true bass control below 200Hz requires thicker traps or professional products.
Two corner blocks treat two corners, which is a good starting point for evaluating bass treatment in your room. Most rooms benefit from treating all four corners, so plan on ordering multiple sets for full coverage.
Installation is simple—the triangular shape is self-supporting in corners, though adhesive or mounting hardware ensures they stay in place. The foam density is adequate for the application, providing noticeable reduction in corner bass buildup.
How Do You Install Acoustic Foam Panels?
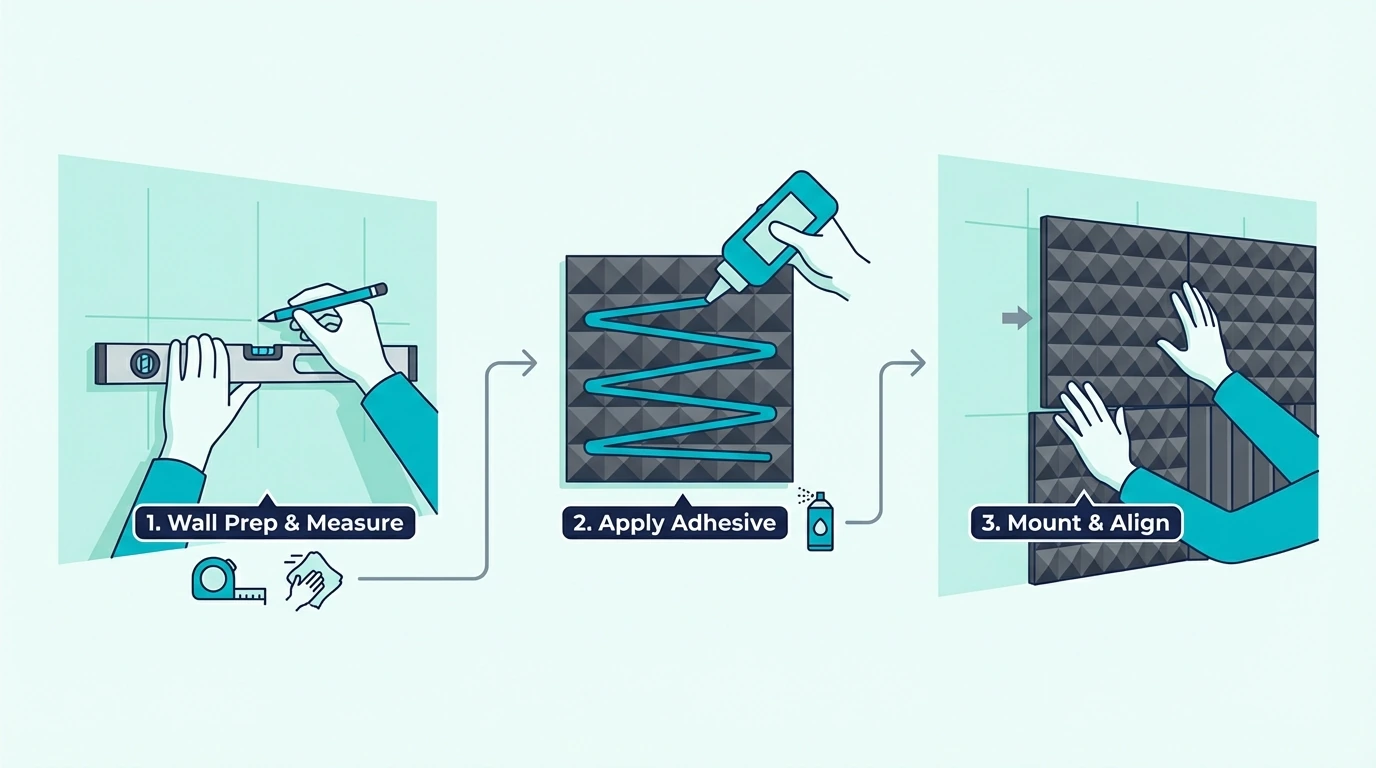 Installation method affects both performance and your ability to remove panels later without wall damage. The right approach depends on whether you own or rent your space and how permanent you want the treatment to be.
Spray adhesive provides the strongest bond and best acoustic coupling between foam and wall. This maximizes absorption performance but makes removal difficult and may damage paint or drywall.
What’s the Best Adhesive for Foam Panels?
3M Super 77 spray adhesive is the industry standard for permanent foam installation. Apply it to both the wall and the foam back, wait 30 seconds for it to become tacky, then press firmly for 30 seconds.
This creates a bond strong enough that the foam will tear before releasing from the wall. For permanent installations where you own the space, this delivers maximum performance and longevity.
The JBER panels work particularly well with spray adhesive due to their consistent backing surface.
Can You Install Foam Without Damaging Walls?
Command strips rated for 16 pounds provide rental-friendly installation that removes cleanly. Use four strips per 12×12 panel, positioned near the corners for even weight distribution.
This method works well for foam panels under 2 inches thick. Thicker or heavier panels may require additional strips or alternative mounting methods like push pins through the foam into drywall.
The acoustic performance is slightly reduced compared to spray adhesive since the foam doesn’t couple as tightly to the wall surface. For most home studio applications, this difference is negligible compared to the benefit of damage-free removal.
Final Verdict: Which Acoustic Foam Panels Should You Buy?
The right acoustic foam panels depend on your specific application, budget, and acoustic goals. For a complete overview of foam categories, visit the acoustic foam hub.
For most home studios and recording spaces, the JBER Acoustic Panels Studio Foam Wedges deliver the best balance of performance, coverage, and value.
If you’re working in a compact space like a vocal booth or podcast corner, the Sound Proof Foam Panels provide higher density and multidirectional absorption that maximizes performance in limited space. Budget-conscious users should start with the JBER 6 Pack to test acoustic treatment in your specific environment before committing to full coverage.
Remember that acoustic foam addresses echo and reflections within your room—it doesn’t block sound between spaces. Set realistic expectations, focus on first reflection points, and aim for 20-30% wall coverage rather than complete coverage that creates an overly dead sound.
Frequently Asked Questions
Are acoustic foam panels worth the money?
Acoustic foam panels improve recording quality when used correctly—reducing echo, flutter echo, and room reflections that make recordings sound amateur. The value depends on realistic expectations: foam absorbs sound within your room but doesn’t block sound between rooms.
For home studios, podcast booths, and listening rooms, foam panels provide cost-effective treatment that addresses the most common acoustic problems. The JBER 24-pack provides full treatment for a typical bedroom studio at a fraction of the cost of professional acoustic panels.
Do acoustic foam panels really work?
Yes, but with important limitations. Foam panels effectively absorb mid and high frequencies (500Hz and up), reducing echo and improving clarity in recordings.
They work less effectively on low frequencies below 300Hz, where thicker materials or dedicated bass traps are necessary.
The effectiveness depends on proper placement—treating first reflection points delivers far more impact than random wall coverage. Start with panels at the spots where sound bounces directly from your sound source to your listening position or microphone.
How long do acoustic foam panels last?
Quality foam panels last 5-10 years before compression and material degradation affect performance. Cheaper foam may show compression after 3-5 years, especially in high-humidity environments or areas with direct sunlight exposure.
The JBER panels use denser foam that maintains its structure longer than budget alternatives. Keep foam away from direct sunlight and maintain moderate humidity levels to maximize lifespan.
Can you use acoustic foam on ceilings?
Yes, ceiling treatment is often more effective than wall treatment for controlling early reflections. Sound bouncing off the ceiling between your sound source and listening position creates comb filtering and reduces clarity.
Use lightweight panels or secure heavier panels with multiple mounting points to prevent sagging. The JBER 1-inch panels work particularly well for ceiling applications due to their lighter weight.
How many acoustic foam panels do I need for my room?
Start with 20-30% wall coverage focusing on first reflection points rather than covering every surface. For a 10×10 room with 8-foot ceilings, that means 16-24 square feet of foam panels.
Calculate first reflection points by having someone hold a mirror against the wall while you sit at your listening or recording position. Anywhere you can see your speakers or sound source in the mirror is a first reflection point that needs treatment.
What’s the difference between acoustic foam and soundproofing?
Acoustic foam absorbs sound waves already inside your room, improving how the room sounds for recording or listening. Soundproofing blocks sound from traveling between rooms or through walls, requiring dense materials, mass, and isolation techniques.
If you hear your neighbor’s TV, foam won’t help—you need actual soundproofing construction with mass loaded vinyl, additional drywall layers, and decoupling. Foam addresses echo and room reflections, not sound transmission between spaces.
The acoustic treatment hub explains the difference in detail.
Can acoustic foam reduce noise from neighbors?
No, acoustic foam does not block sound transmission through walls, floors, or ceilings. Foam absorbs sound waves within your room but provides no meaningful barrier to sound traveling through building structures.
Reducing neighbor noise requires soundproofing techniques: adding mass to walls, sealing air gaps, decoupling surfaces, and sometimes complete wall reconstruction. These are fundamentally different solutions addressing different problems.
Do I need 1-inch or 2-inch foam panels?
Choose 2-inch foam for general-purpose acoustic treatment covering vocals, instruments, and most recording applications. The extra thickness extends absorption down to 500Hz, covering the critical midrange where most recording problems occur.
Use 1-inch foam only when you’re specifically targeting high-frequency problems above 1000Hz, need lighter weight for ceiling mounting, or are supplementing existing treatment. The JBER 2-inch panels provide the versatility most users need.
What’s better: wedge, pyramid, or egg crate foam?
Wedge and pyramid patterns perform similarly—the thickness and density matter far more than the surface pattern. Wedge patterns direct sound into the foam efficiently, while pyramid patterns offer multidirectional absorption that’s less sensitive to placement.
Egg crate foam typically uses thinner material that only affects high frequencies above 2kHz. Unless you’re specifically targeting cymbal splash or sibilance, wedge or pyramid patterns deliver more useful absorption across a broader frequency range.
How do I clean acoustic foam panels?
Vacuum foam panels gently with a brush attachment to remove dust buildup. Avoid water or cleaning solutions, which can damage the foam structure and reduce absorption performance.
For stubborn dirt, use a barely damp cloth and allow panels to dry completely before reinstalling. The darker foam colors show dust less readily than lighter options.