Can You Paint Acoustic Foam? No — Here’s What to Do Instead [2026]
Can you paint acoustic foam?
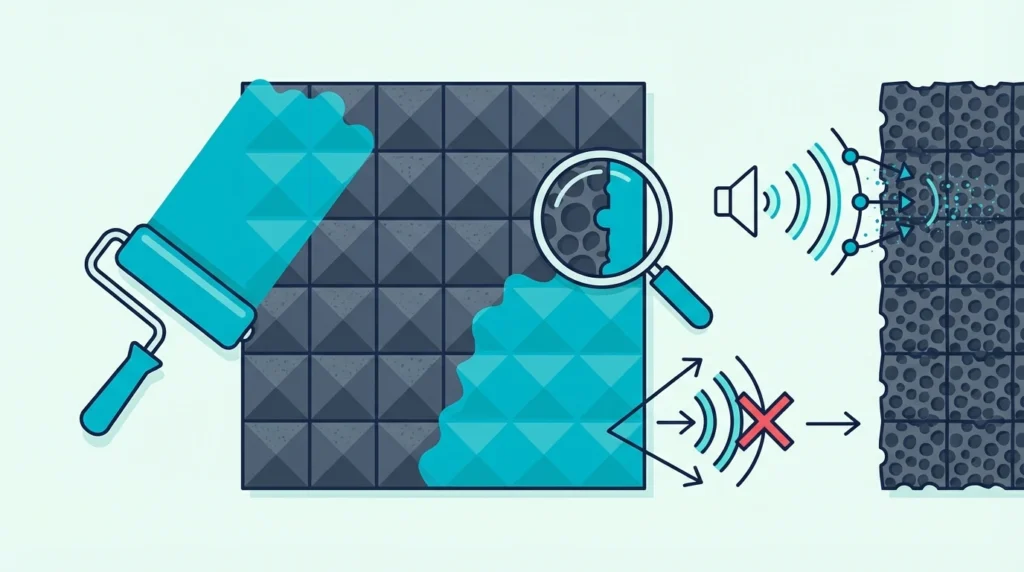
You can, but it usually turns into a double loss: it looks uneven and it stops working as treatment.
That’s because acoustic foam relies on open cells to let sound enter and die off inside the material.
Paint clogs those pores and turns the surface into something much closer to a reflective skin.
The good news is you don’t have to choose between “looks decent” and “sounds decent.”
Start with the quick takeaway, then I’ll show you what paint does, how to minimize damage if you insist, and better alternatives that keep performance intact.
If you want the fast version of the science, see how acoustic foam works.
Don’t paint acoustic foam. Paint seals the open-cell structure that absorbs sound, so your best move is to buy foam you like as-is or switch to fabric-wrapped panels for the look you want without sacrificing performance.
Why Can’t You Paint Acoustic Foam?
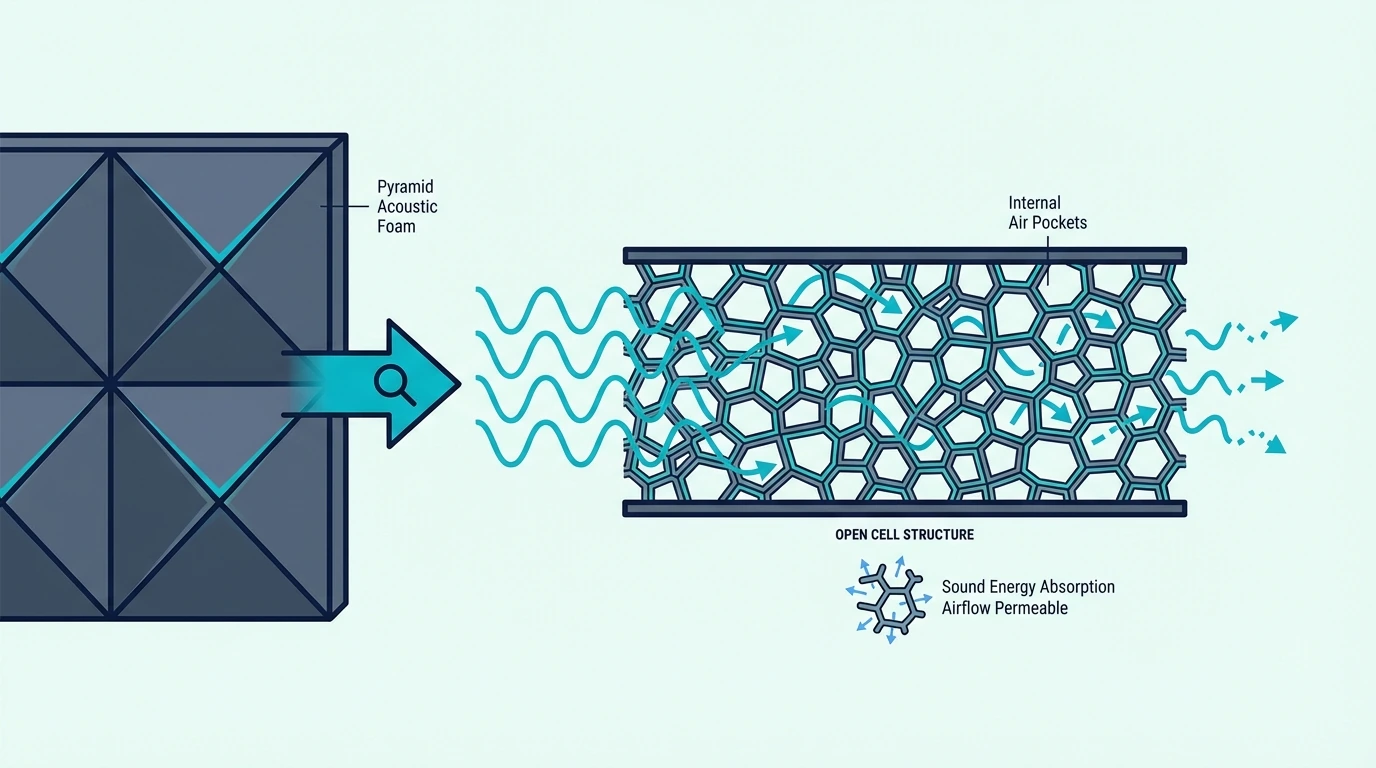
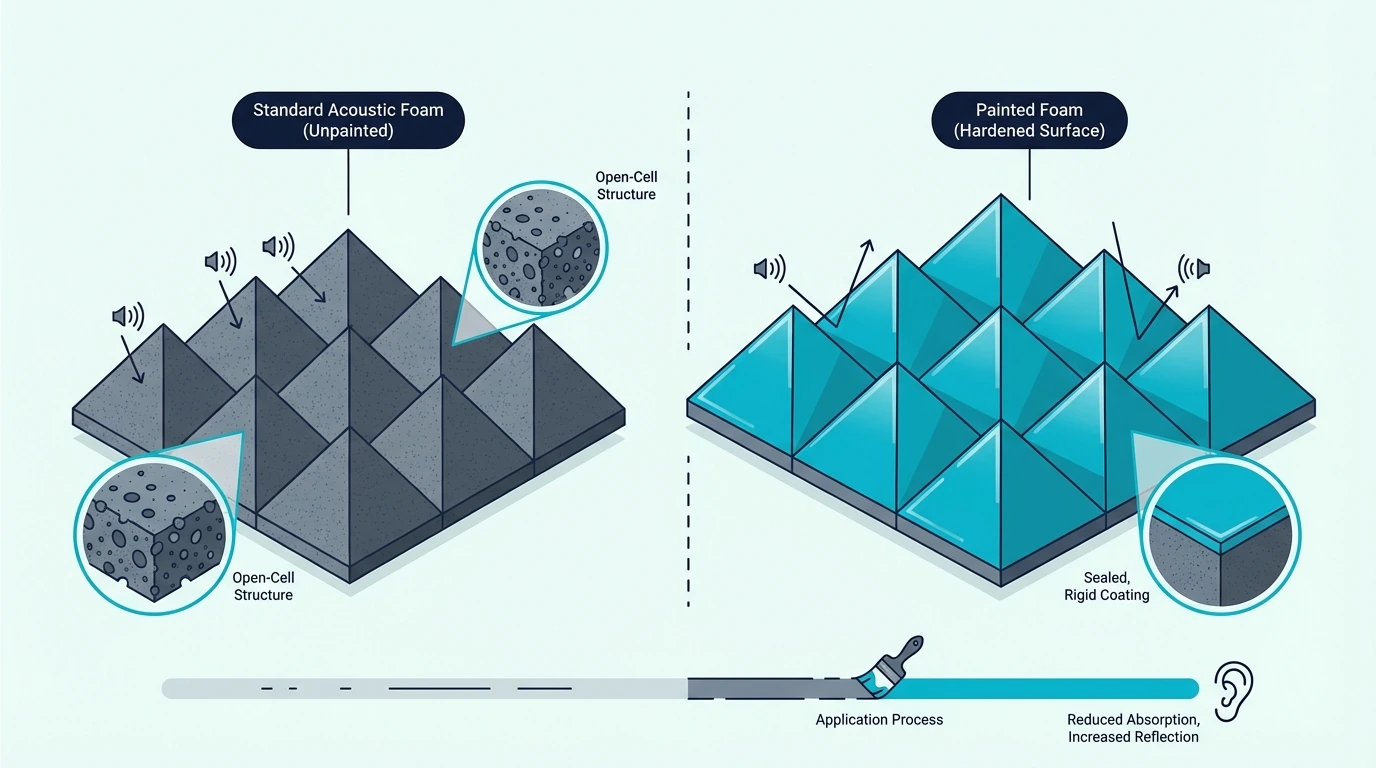
Acoustic foam isn’t just “soft stuff on a wall.” It’s engineered with open cells that trap and dissipate sound energy.
When sound hits unpainted foam, it can enter those cells and bounce around inside. That friction is where absorption happens.
If you’re still deciding whether foam is the right tool at all, read does acoustic foam work? for the real-world limits.
How Does Paint Ruin Foam’s Acoustic Properties?
To understand why paint is the enemy of foam, you have to look at how sound actually moves. Sound isn’t just a wave; it is the physical movement of air molecules back and forth.
In an open-cell absorber, these molecules must be able to travel into the pores where they lose energy through friction against the cell walls. When you apply a layer of paint, you increase the “airflow resistance” of the surface to near-infinite levels.
Instead of molecules entering the maze of the foam, they hit the solid wall of dried paint and bounce back. This converts your expensive acoustic treatment into a simple reflector, essentially turning your foam into a jagged piece of plastic.
Paint fills and seals the tiny openings that sound needs to enter. Even a “light” coat can create a skin that reflects more than it absorbs.
Think of it like putting plastic wrap over a sponge and expecting it to soak up water. The sponge still exists, but the function is blocked.
The more paint you add, the worse it gets. That’s why painted foam often ends up looking like treatment while behaving like decor.
The Risk of Melting: Polyurethane meets Solvents
Acoustic foam is almost always made of polyurethane, which is sensitive to certain harsh chemicals found in traditional paints. Many oil-based spray paints and industrial coatings contain solvents like acetone or toluene that can actually dissolve the foam on contact.
If you use the wrong product, you won’t just clog the pores; you could literally melt the wedges and pyramids into a sticky, misshapen mess. This is why water-based acrylics or latex-based “breathable” sprays are the only viable candidates for a cosmetic tint.
Why Are Brushes and Rollers Worse Than Spray?
Brushes and rollers push liquid paint down into the pores instead of dusting the surface. That makes it easier to “seal” the foam in one pass, even if you didn’t mean to.
They also create uneven thickness across ridges and valleys. Thick spots cure into a semi-hard crust, which is exactly what you’re trying to avoid.
What Happens to Acoustic Performance After Painting?
There’s no single universal number because the damage depends on paint type, coat thickness, and foam shape. However, the scientific consensus is clear: painting foam reduces absorption by creating what engineers call “The Skin Effect.”
Acoustic foam is an open-cell material, meaning it is essentially a labyrinth of interconnected air pockets. When sound waves hit unpainted foam, the air molecules vibrate within these pores, creating friction that converts sound energy into trace amounts of heat.
By applying paint, you create a non-porous “skin” over these openings. Instead of sound entering the material to be dissipated, it hits this dried paint layer and reflects immediately back into the room.
This turns a high-performance absorber into a surface that behaves more like painted drywall, defeating the entire purpose of the treatment.
This loss of performance isn’t limited to high-frequency sounds. While the “skin” primarily reflects shorter wavelengths, the reduction in effective surface area impacts the entire absorption curve.
You are essentially paying for high-performance acoustic material and then manually converting it into low-quality, reflective plastic.
Even a light dusting of paint behaves like a partial mirror in the 1 kHz to 4 kHz range where human speech and harsh reflections are most prominent. This is why painted foam rooms often sound brighter, harsher, and more “ringy” even if you have covered every square foot of the wall.
The Impact on Absorption Coefficients
To understand the loss, you have to look at the absorption coefficient across the frequency spectrum. A standard 2-inch unpainted wedge typically has an NRC (Noise Reduction Coefficient) of around 0.70 to 0.80.
After just two heavy coats of latex paint, that NRC can drop by as much as 40-50% in the mid-range. The foam still looks soft, but the surface tension of the dried paint creates a physical barrier that sound energy simply cannot penetrate.
If you are choosing a profile specifically to handle these reflections, the shape dictates how much “unpainted” area actually remains effective. Use pyramid vs wedge acoustic foam to understand which profile offers the most effective surface area for your specific room.
If you care about performance more than aesthetics, it is always better to choose high-density foam that is pre-dyed. Use our guide on how to choose acoustic foam to avoid the mistake of buying cheap foam and trying to “fix” it with a can of spray paint.
The Myth of “Acoustically Transparent” Paint
Some manufacturers claim to sell acoustically transparent paint, but in the world of open-cell foam, this is largely a marketing term. While some paints are thinner or have lower solids content, any liquid that dries into a hard film will naturally reduce the porosity of the foam.
If you are determined to try one of these products, look for stains or dyes rather than film-forming paints. Stains soak into the fibers without bridging the gaps, preserving more of the original absorption than a standard latex or acrylic coat.
Visual Cues: How to Tell When the Foam is Ruined
When painting, you must watch the surface texture closely rather than the color coverage. As soon as the “pores” of the foam begin to disappear and the surface looks like a solid sheet, you have crossed the line from absorber to reflector.
Another red flag is “bridging,” where paint spans the gap between two peaks or ridges in the foam. This creates a drum-head effect that vibrates and reflects sound, effectively killing the foam’s ability to handle mid-range energy.
How Can You Paint Acoustic Foam Safely?
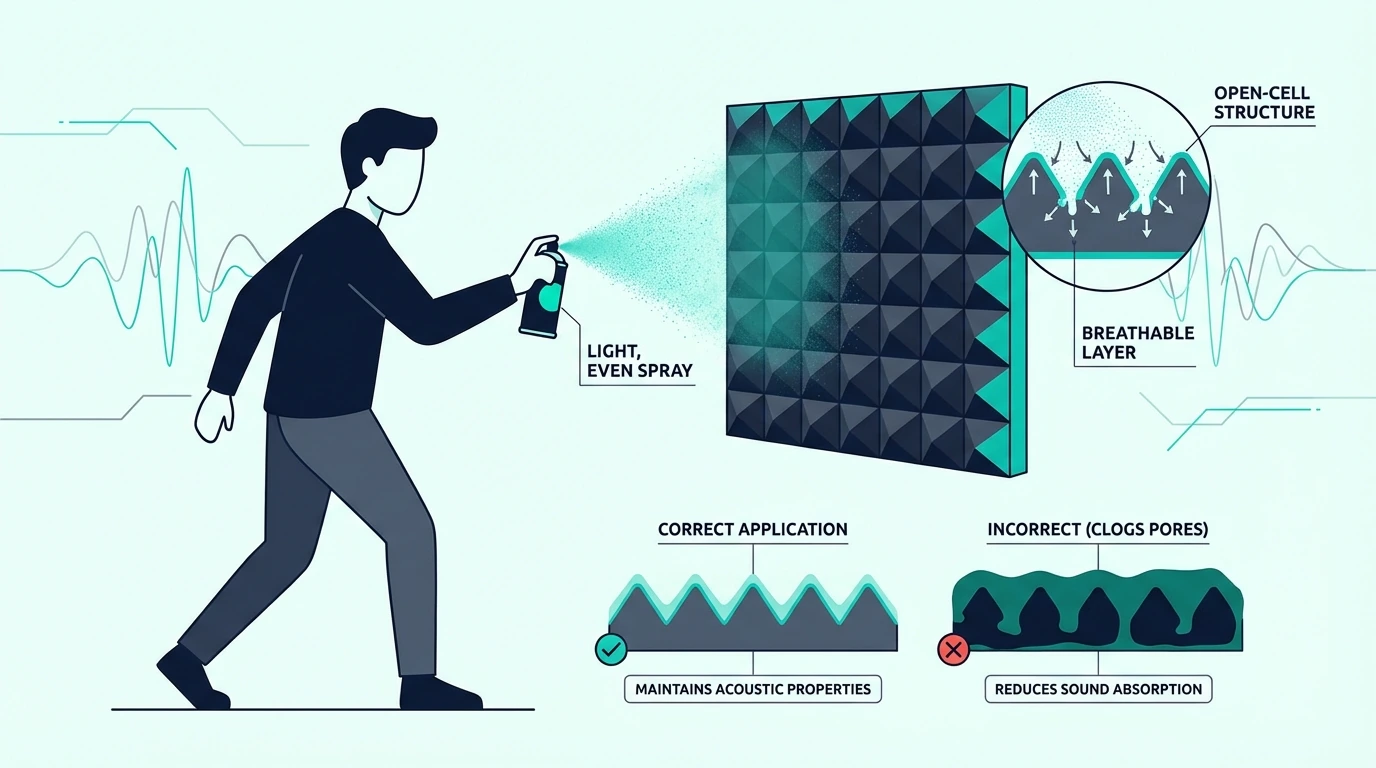
Sometimes aesthetics matter more than “best possible” performance. If you’re going to paint anyway, spray paint is the least-bad option.
Why Is Spray Paint the Only Option That’s Even Close?
Spray paint can be applied in thinner, more even passes than a brush or roller. That gives you a chance to add color without completely flooding the surface.
Water-based sprays are usually easier to control than heavy, oily coatings. The goal is tinting the surface, not soaking the foam.
How to Spray Paint Foam (If You Must)
Test on one scrap tile first. If it starts looking glossy, wet, or “sealed,” stop before you touch the panels that actually matter.
Use multiple very light passes instead of one heavy coat. Hold the can roughly a foot away and keep it moving so you are tinting the surface instead of soaking it.
Let each pass dry before you decide if you need more. If you are chasing perfectly solid, opaque color, you are already in the “too much paint” zone.
Think in tiers instead of perfection. A light dusting that just knocks down the original color does far less harm than trying to match a swatch on the can.
Avoid primer and clear coats because they are literally designed to seal porous surfaces. Avoid high-gloss finishes for the same reason — they behave more like a thin plastic film than a breathable tint.
As soon as the foam starts looking shiny or feeling even slightly stiff under your fingers, treat that as a red light. From that point on you are decorating a prop, not maintaining a working piece of acoustic treatment.
Get Studio Tips Weekly
Join 5,000+ creators getting acoustic treatment advice every week.
No spam. Unsubscribe anytime.What Are the Best Alternatives to Painting Acoustic Foam?
If you want a better-looking room without breaking the acoustics, you’ve got options. None of them involve clogging foam with paint.
Option 1: Replace the Foam (Don’t Paint It)
If the foam already on your wall is the wrong color, replacing it is usually cleaner than repainting it. You’ll keep the open-cell surface that makes foam work.
If you’re covering a bigger area on a budget, a bulk pack like 96-pack acoustic foam wedge tiles is a practical “start here” option.
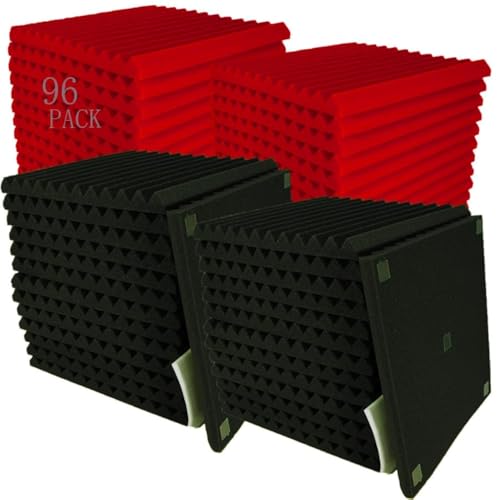
Allxinlog acoustic foam wedge panels (96-pack)
For buying guidance (not just the cheapest pack), see best acoustic foam panels.
If you’re doing a full re-install, don’t skip placement. Use where to place acoustic foam so you’re not covering the wrong wall just because it’s visible.
Option 2: Make It Look Like Decor (Without Losing Performance)
If you’re painting because you hate the “studio foam” look, consider artwork-style acoustic panels instead. They hide the treatment behind printed fabric, so the room feels finished.
The key is placement, not quantity. One or two panels in the right spot can clean up a room more than a full wall of random foam tiles.
For a smaller, decorative setup, art-style acoustic panels can be a good compromise.
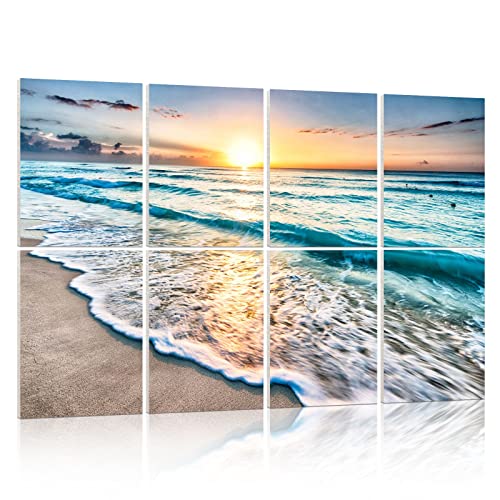
YPY Art Acoustic Panels (self-adhesive wall art)
If you want larger coverage with fewer pieces, large art acoustic panels are easier to make “look designed.”
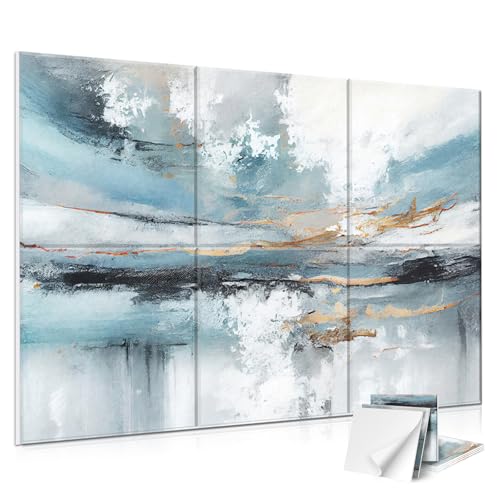
JBER art acoustic panels (large wall panels, 6-pack)
Option 3: Hide Foam Behind a Frame or Grille
You can also mount foam behind a decorative grille or a fabric frame. The foam stays unpainted and functional, while the front surface matches your room.
This is often the best compromise if you like what foam does but hate how it looks. From the front it reads as wall art or a simple panel, not as jagged studio tiles.
If you build a frame, don’t compress the foam. Compression flattens the surface and reduces the air movement you want for absorption.
Use breathable fabric that you can literally blow air through without much resistance.
This approach is highly effective for home theaters where the aesthetic requirements are strict but the acoustic goals are equally high. You get the look of a solid, professional wall while the hidden foam continues to work exactly as intended behind the scenes.
If air can’t pass, sound won’t either, and you end up with a pretty wall and a loud room.
If you go this route, placement matters more than perfection. Use where to place acoustic foam so the treatment is actually doing something.
Lighting and Placement: Aesthetics Without the Paint
If you want to paint your foam because the room looks “too dark” or “too boring,” try using light instead of chemicals. Strategic lighting can change the color of your foam panels instantly without clogging a single pore or reducing any absorption.
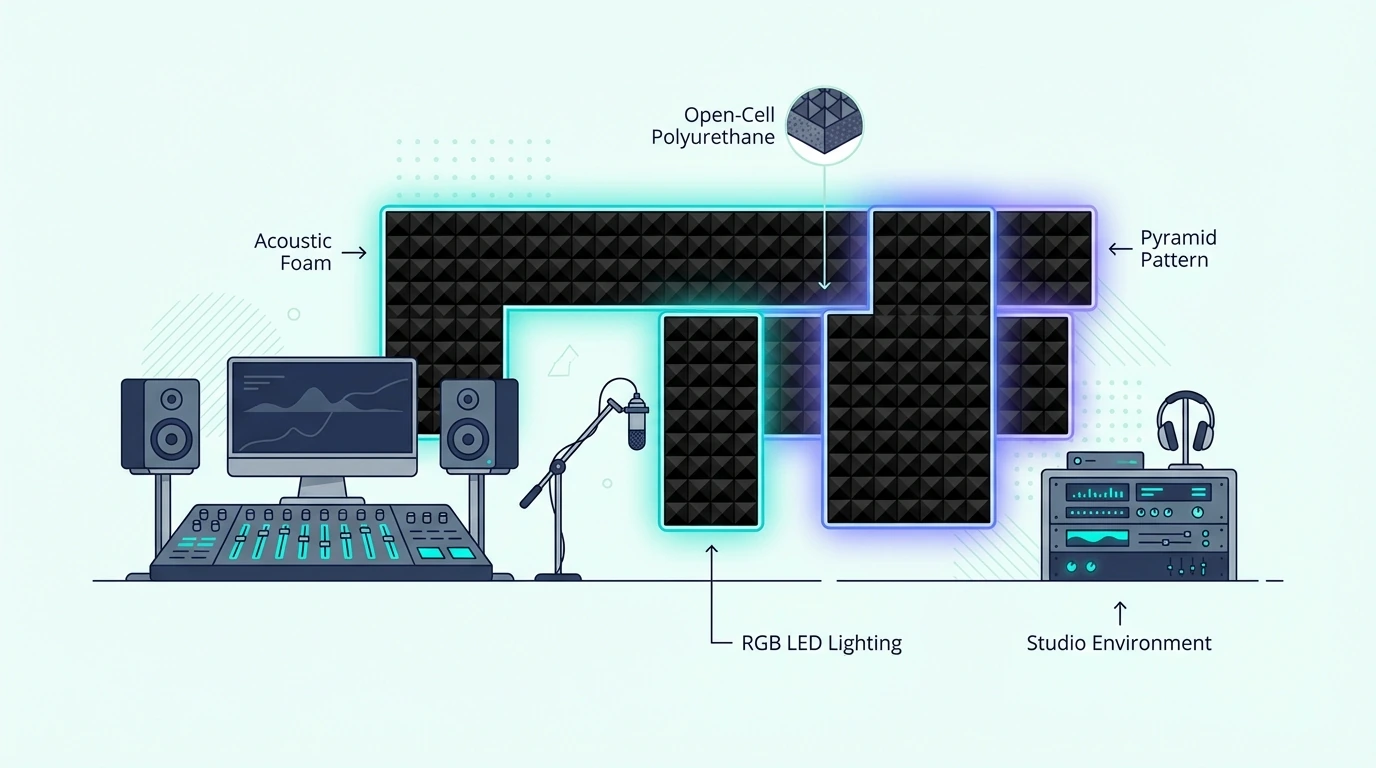
Using RGB LED Strips for Dynamic Color
LED strips are the ultimate hack for acoustic foam aesthetics because they leverage the natural shadows of wedges and pyramids. By grazing the panels with light from an angle, you highlight the textures and can change the room’s entire “vibe” with a remote.
This approach keeps your foam functional while giving you every color in the rainbow. Plus, if you ever change your studio’s color scheme, you just click a button instead of tearing down and replacing 48 panels.
Strategic Spacing and Checkerboard Patterns
You don’t have to cover every square inch of your wall with charcoal foam to get results. Using a “checkerboard” pattern with the existing wall color can break up the visual monotony and make the treatment look like a design choice.
Spacing panels 2-4 inches apart often looks cleaner than a solid block of foam. It also allows you to use fewer panels while still catching the primary reflections that ruin your recordings.
For more layout ideas that look intentional rather than accidental, check our guide on how to arrange acoustic foam. We also cover how to handle the edges so your room looks finished rather than like a construction site.
When Painting is Actually a Design Choice (Diffusion vs. Absorption)
In some rare cases, professional designers actually want to paint foam, but not for the reasons you might think. If a room is too “dead” (meaning it has zero reflections and sounds unnatural), painting some of the foam can help.
Creating a Hybrid Surface
By painting a few specific panels, you create a surface that absorbs low frequencies (which can still penetrate the skin) while reflecting high frequencies. This can help keep a room feeling “live” while still controlling the boomy mid-range energy that causes recording issues.
However, this is an advanced acoustic technique that requires measurement tools like Room EQ Wizard (REW). For the average home studio user, this usually happens by accident and ruins the room’s balance.
Painting for Video and Set Design
In the world of streaming, the visual “vibe” often dictates the gear choice. If you are painting foam to create a high-contrast background for a camera, you are making a tradeoff between video production and audio quality.
For most creators, the “voice” is more important than the background. If you paint every panel in your shot, you will likely need to boost your digital processing to handle the new echoes you’ve introduced.
If your room is purely a video set and you are using a separate “lavalier” or “shotgun” microphone very close to your mouth, the room’s acoustics might matter less than the visual branding. In this specific scenario, painting foam to match a brand color is a common practice in set design.
Just be aware that the moment you move the microphone away from the source, the “ringy” sound of the painted foam will become obvious. If you go this route, plan on using heavy digital noise reduction or “de-reverb” plugins in post-production to fix the audio damage.
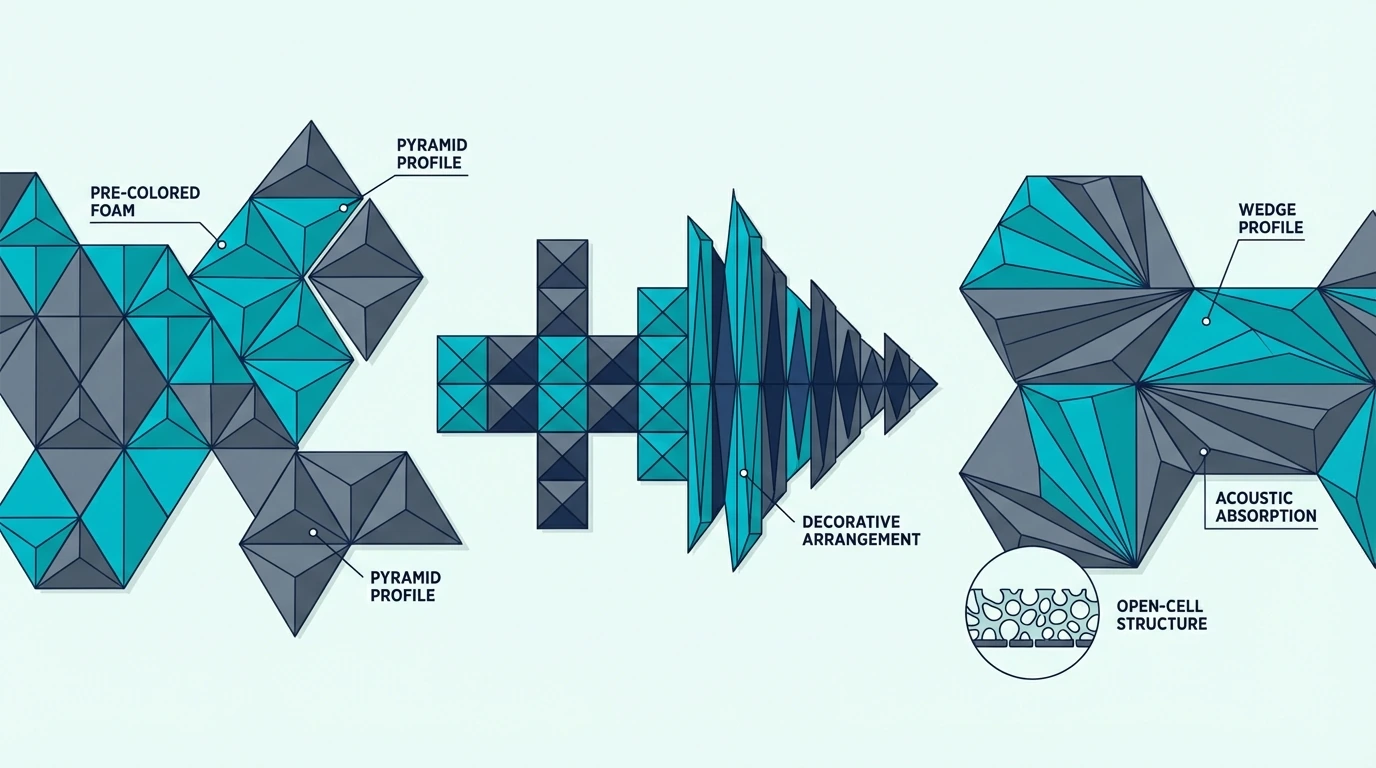
What Colors Does Acoustic Foam Come In?
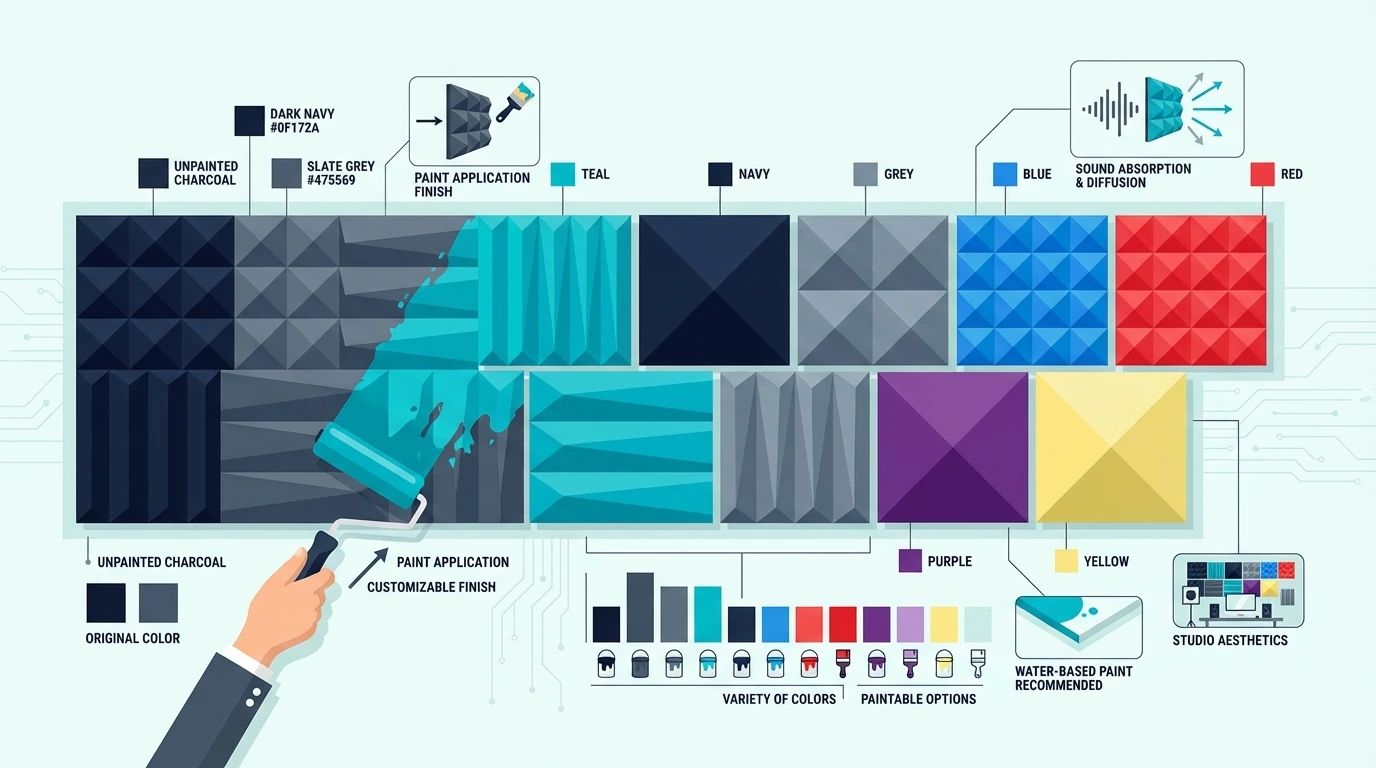
Most foam manufacturers stick to a practical palette. Black and charcoal are common, with some red, blue, purple, or green options depending on the brand.
Some listings offer multi-color packs so you can build a pattern instead of a foam “wall.” Just don’t assume color equals performance.
If you’re designing a wall pattern, symmetry helps. Repeating blocks (like a simple checker or stripe) tends to look intentional, while random colors often look accidental.
Do Different Colors Affect Sound Absorption?
Color doesn’t change absorption by itself. What matters is the foam type, thickness, density, and where you place it.
If you’re trying to get the most out of foam, the install matters at least as much as the purchase. Use how to put acoustic foam on a wall to avoid common mounting mistakes.
How Much Does Pre-Colored Acoustic Foam Cost?
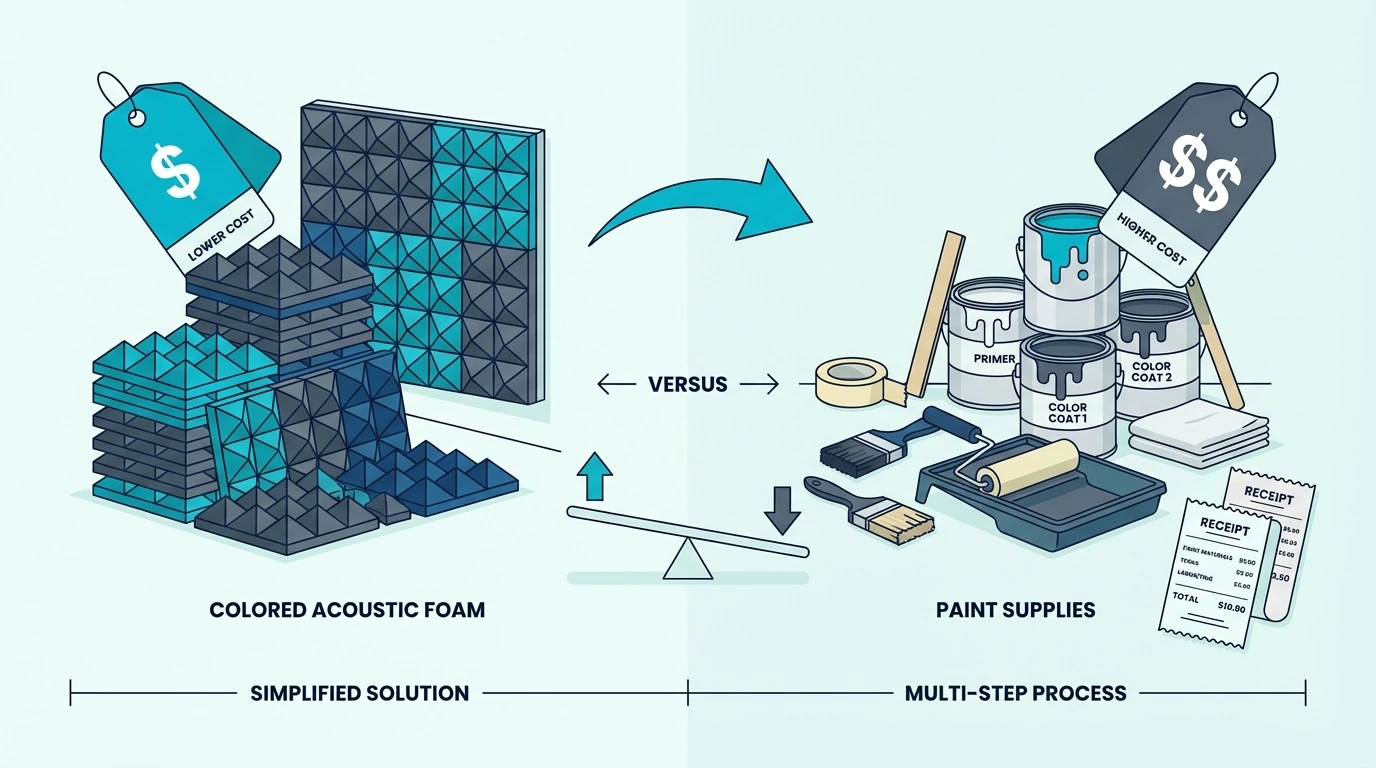
Pre-colored foam can cost a bit more than the same foam in black. Painting can look cheaper on paper, but it adds supplies, time, and usually a performance hit.
Painting also has a “hidden cost” most people forget. If you hate the result, you’re still buying new foam after spending time and money on paint.
If you’re weighing the tradeoff, here’s what sneaks up on you.
Prep and masking takes longer than you expect if you want clean edges. Drying time adds up too, because multiple light passes mean waiting between coats.
In a small room, smell and ventilation become the real bottleneck. Plus there’s the mess and cleanup from overspray and drips.
The worst case is that you end up with sealed foam that looks better but sounds worse. Then you still buy new foam after spending time and money on paint and cleanup.
If you’re mounting new foam anyway, choose the right adhesive and do it cleanly the first time. This guide to the best adhesive for acoustic foam will save you a lot of wall damage.
If you’re deciding between “foam for looks” and “panels for performance,” read acoustic foam vs panels before you commit. It’s the fastest way to avoid buying something pretty that never solves the sound problem you actually have.
Triage Checklist: Should You Actually Paint Your Foam?

Before you reach for the spray can, run through these priority checks to see if painting is actually your best move.
If your primary goal is recording, you should replace the foam with pre-colored panels or upgrade to fabric-wrapped fiberglass instead of painting. For those focused on visual set design, you can proceed with light misting coats, but keep your microphone as close to your mouth as possible to avoid picking up new reflections.
When budget is the main constraint, try using colored LED lighting or strategic spacing before risking the performance of the foam you already own. If the foam is old and discolored, painting will only accelerate the degradation, so disposal is the only safe option in that scenario.
How to Maintain and Clean Acoustic Foam Without Painting

If your primary motivation for painting is that your foam looks “dusty” or “faded,” there are several non-destructive ways to refresh the panels. Maintaining the open-cell structure is far easier than trying to repair it after a heavy coat of paint.
Deep Cleaning the Pores
Over time, dust and skin cells can clog the microscopic channels in the foam, which slightly reduces absorption performance. Instead of painting over the mess, use a high-powered vacuum with a soft brush attachment to lift debris without tearing the material.
For persistent smells or stains, a light misting of a 50/50 water and white vinegar solution can neutralize odors. Never soak the foam, as trapped moisture can lead to mold growth deep within the polyurethane core.
UV Fading and Foam Longevity
Polyurethane naturally yellows when exposed to direct sunlight over several years. If you are painting to hide this yellowing, consider rotating the panels or moving them to a wall that doesn’t receive direct UV rays.
In most professional studios, foam is replaced every 5-7 years because the chemical bonds in the plastic eventually break down and become brittle. If your foam is crumbling to the touch, painting will only create a sticky mess and won’t save the structural integrity of the panel.
The Bottom Line
You can paint acoustic foam, but you’ll usually reduce the very absorption you bought it for. If you want treatment that still works, keep the foam surface open.
If the real goal is aesthetics, replace foam or switch to decor-friendly panels instead of sealing foam with paint. You’ll get a room that looks finished and still sounds controlled.
For more on maintaining your setup, see how to clean acoustic foam properly. If you’re dealing with older panels, learn when to replace acoustic foam.
To avoid mounting issues, check the best adhesive for acoustic foam.
Frequently Asked Questions
Does painting acoustic foam affect fire safety?
Yes, it can. Most acoustic foam is treated with fire retardants, but adding a layer of traditional paint (which is often flammable when wet and can change the burning characteristics when dry) may compromise the original fire rating. If safety is a priority, avoid painting or use a specialized fire-rated paint.
Can I use fabric dye instead of paint?
Fabric dye is often better than paint because it doesn’t create a hard “skin.” However, polyurethane foam is notoriously difficult to dye evenly, and the process usually requires soaking the foam, which can lead to warping or mold issues if not dried perfectly.
Can You Spray Paint Acoustic Foam?
Yes, but it’s still a compromise. Use very light coats, and expect a noticeable drop in absorption compared to unpainted foam.
Can You Use Acrylic Paint on Acoustic Foam?
You can, but thick craft paint is one of the fastest ways to seal the surface. If you’re going to try anything, thin spray coats are still the safer direction.
Can You Dye Acoustic Foam?
Dye can soak into the foam and clog the pores in a similar way to paint. If you care about performance, it’s usually better to buy the color you want instead.
Can You Paint Only the Tips or Edges?
Painting only the high points can reduce damage compared to full coverage. But it’s still easy to overdo it, and you may end up with patchy color anyway.
Will Painted Foam Still Absorb Any Sound?
Some absorption remains, especially if the paint is extremely light. But once you seal the surface, performance can drop enough that the effort isn’t worth it.

