Acoustic Treatment For Mixing (How To Hear What Your Mix Actually Sounds Like)
Best acoustic treatment for mixing fixes the one variable that no plugin, monitor upgrade, or headphone can compensate for — but most bedroom producers ignore it entirely and wonder why their mixes fall apart on other systems.
Your room colors every decision you make behind the console. A bass bump at 80 Hz from a corner mode makes you pull the low end too far, a dip at 200 Hz from a wall cancellation makes you push the low-mids too hard, and early reflections from bare side walls smear the stereo image until panning feels like guesswork.
The fix is not expensive monitors or room correction software. Treating the room with panels at specific spots removes the acoustic distortion between your speakers and your ears so you finally hear what the mix actually contains.
Below, this guide covers the exact treatment sequence for a mixing room — where to sit, what to treat first, and how to balance absorption and diffusion so the room helps your mixing instead of sabotaging it.
To treat a mixing room, set your listening position at 38% from the front wall, install bass traps in all available corners, place 2-inch fiberglass panels at the first reflection points on both side walls and the ceiling, and add absorption or diffusion on the rear wall. That sequence addresses the problems in order of severity and gives you the flattest, most accurate monitoring environment for the least cost.
Why Your Room Is Your Most Important Mixing Tool
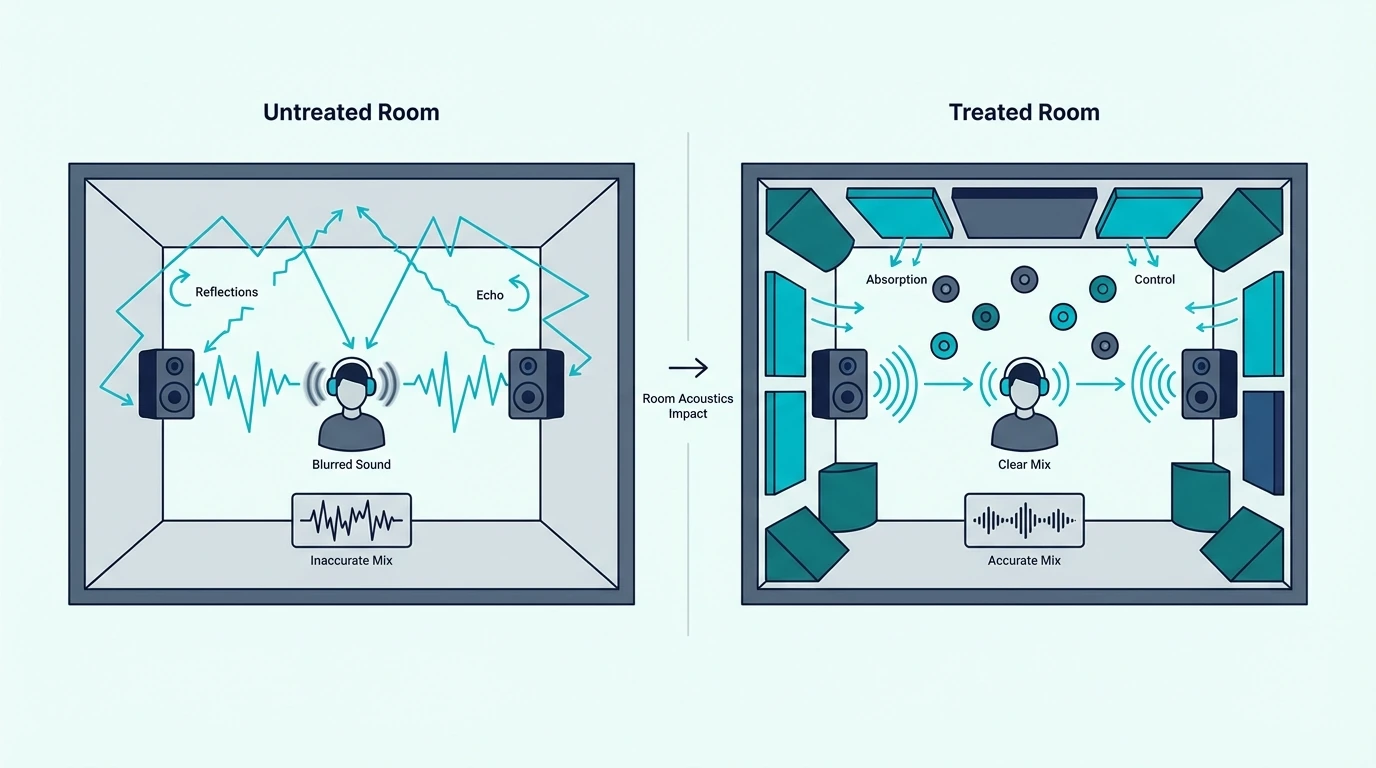
Every mixing decision you make is filtered through the room before it reaches your ears. If the room adds 6 dB of bass at 80 Hz, you instinctively mix the low end too quiet — and the mix sounds thin on every other system.
If the room creates a null at 120 Hz in your listening position, you push that frequency too hard and the mix booms everywhere else. Neither problem is audible while you are mixing — you only discover it when you play the track in the car.
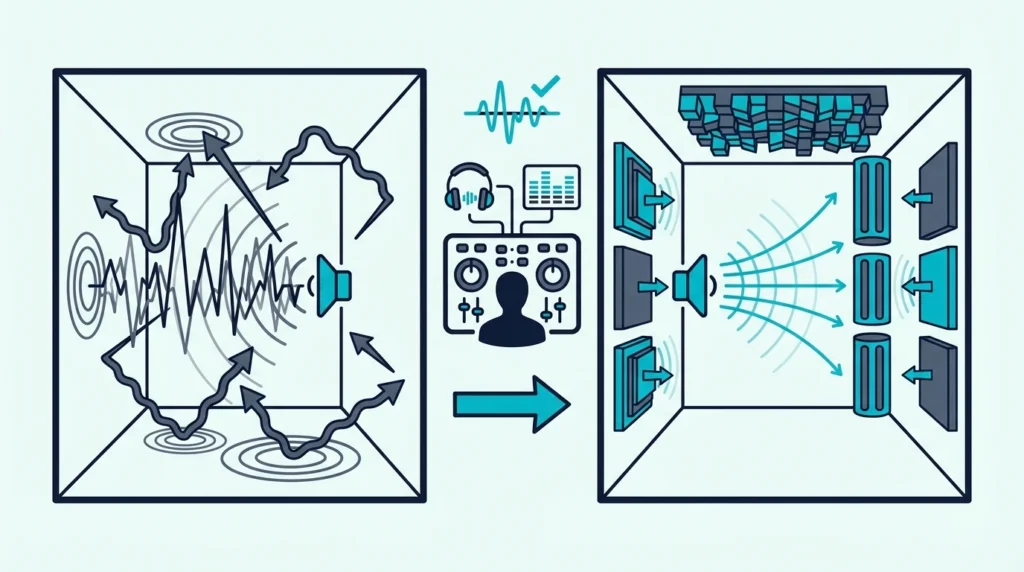
The room is not a neutral container for your monitors. It is an active participant in the signal chain, and without treatment, it adds its own EQ curve, its own reverb, and its own stereo distortion to everything you hear.
Professional mixing studios spend more on room construction and treatment than on any single piece of gear because they understand that accurate monitoring is the foundation of every mixing decision. A treated bedroom with mid-range monitors consistently produces better mixes than an untreated room with flagship speakers.
That is the real argument for treatment — not that the room will sound better, but that your mixes will translate better to every system your listeners use.
How To Acoustically Treat A Room For Mixing
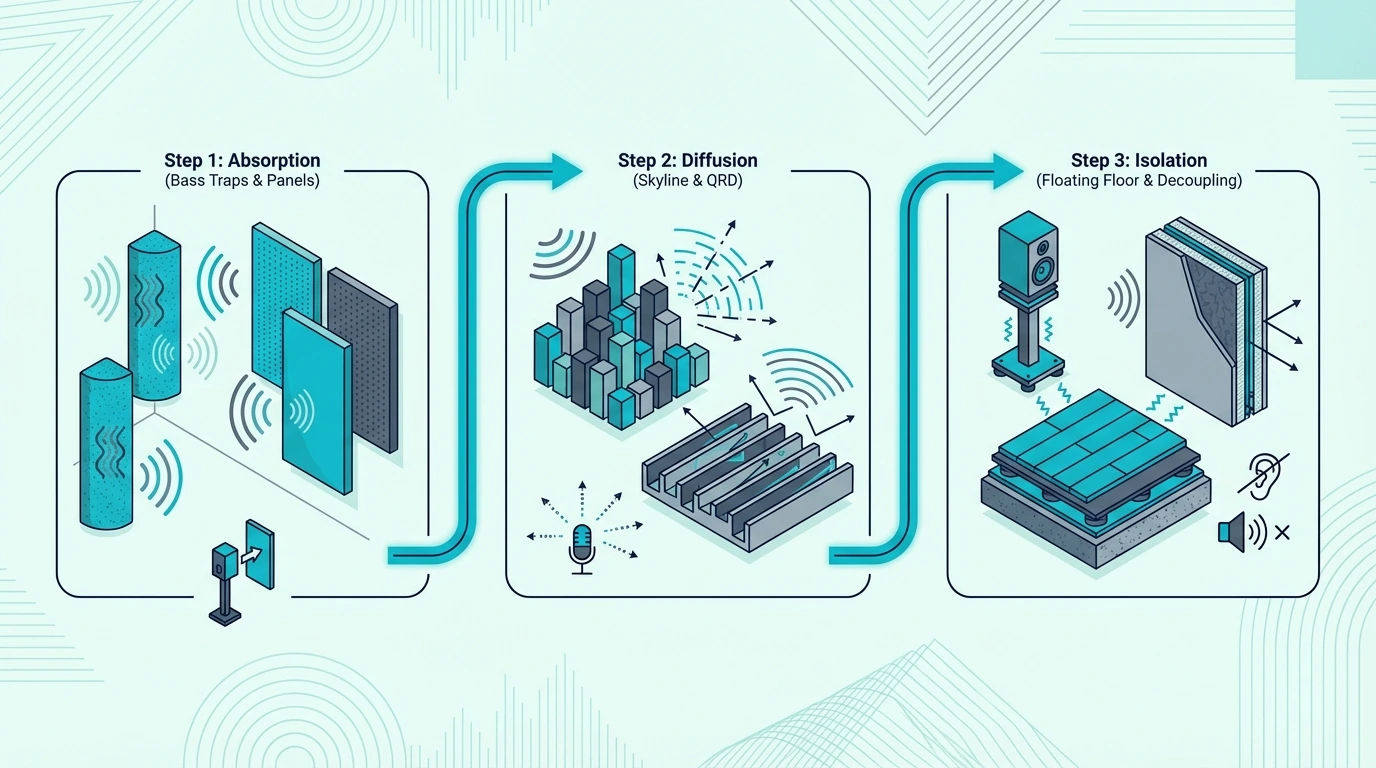
The treatment sequence for a mixing room follows a strict priority order because each step depends on the one before it. Skip a step or do them out of order, and the later treatments solve the wrong problems.
Step 1 — Set Up Your Listening Position
Before you hang a single panel, position your monitors and chair correctly. The treatment layout for every other step depends on where you sit.
Place your listening position at 38% of the room length from the front wall — the wall your monitors face. That spot minimizes the interaction between your seat and the strongest room modes in the lengthwise dimension, giving you the flattest bass response the room can offer before any treatment.
Set up an equilateral triangle between your two monitors and your head. The distance from each monitor to your ears should equal the distance between the two monitors.
Angle each monitor so it points directly at your near ear. Tweeters should be at ear height, not angled up from a desk surface.
Keep the monitors at least 8-12 inches from the front wall unless they are designed for boundary placement. The gap prevents the wall from reinforcing certain frequencies and creating a colored low-mid response that treatment alone cannot fix.
Step 2 — Tame Bass With Corner Traps
Bass traps in every available corner are the single highest-impact treatment in any mixing room. Low-frequency standing waves pile up where surfaces meet, and corners — where two or three surfaces converge — accumulate the most energy.
Install broadband absorbers made from fiberglass or mineral wool in all four vertical corners, floor to ceiling if possible. A minimum thickness of 4 inches is necessary to absorb meaningfully below 100 Hz.
Thinner traps help with the low-mids but miss the bass frequencies where room modes cause the worst problems. If you can only afford one thickness, go thicker — the low end is where untreated rooms cause the most damage to mix decisions.
An air gap between the trap and the wall extends the effective absorption depth without adding more material. A 4-inch trap mounted with a 2-inch air gap performs like a 6-inch trap for most practical purposes — a useful technique when budget or space is tight.
The front corners behind the monitors deserve the thickest treatment because the monitors drive the most energy into those junctions. Rear corners handle the reflected bass that the front traps miss.
Step 3 — Treat First Reflection Points
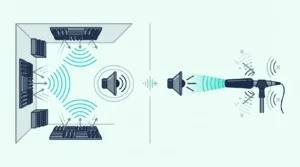
First reflections are the sound waves that bounce off the nearest wall surface and arrive at your ears within 5-15 milliseconds of the direct sound from the monitors. Those reflections interfere with the direct signal and smear the stereo image, muddy the transients, and create a comb-filtering effect that makes the frequency response at your seat wildly uneven.
Use the mirror trick to find each reflection point: sit in your mixing position and have someone slide a mirror along the side wall at tweeter height. Every spot where you can see a monitor driver in the mirror is a first reflection point that needs a panel.
Panels at the first reflection points on both side walls — typically two per side — restore the clarity and imaging that bare walls destroy. A 2-inch thick fiberglass panel absorbs the frequencies above 250 Hz where imaging and transient detail live.
For the side walls, panels like the Olanglab Fiberglass Panels fit between the monitor plane and the listening position without taking up floor space. The fiberglass core handles the critical mid and high frequency range where reflection damage is most audible during mixing.

Olanglab Fiberglass Panels
If your room allows larger panels, the UMIACOUSTICS Large Acoustic Panels cover an entire first reflection zone per panel — no gaps between smaller tiles means no untreated spots leaking reflections through.

UMIACOUSTICS Large Acoustic Panels
The ceiling above the mix position is the third first-reflection surface. A ceiling cloud — a single panel or pair of panels hung horizontally above your head — intercepts the overhead reflection that otherwise collapses the vertical dimension of the stereo image.
Panels with included mounting hardware like the UMIACOUSTICS 4-Pack with Brackets simplify ceiling mounting — the brackets handle the weight and alignment so you are not improvising with hooks and wire.

UMIACOUSTICS 4-Pack with Brackets
Step 4 — Rear Wall Treatment
The rear wall is the last surface to treat because its reflections arrive latest and cause the least acute damage. That does not mean it is unimportant — rear wall reflections add coloration to the low-mids and affect how the room decays after transients, which directly impacts your perception of reverb tails and spatial effects.
In small rooms (under 150 square feet), absorption on the rear wall is the safer choice because the wall is close enough to your seat that reflected energy arrives quickly enough to cause comb filtering.
In larger rooms where the rear wall sits 8 feet or more behind the listening position, diffusion scatters the reflected energy into many small reflections that arrive at different times and from different angles. That scattered energy keeps the room from feeling dead while preventing any single strong reflection from coloring the mix.
Get Studio Tips Weekly
Join 5,000+ creators getting acoustic treatment advice every week.
No spam. Unsubscribe anytime.Absorption vs Diffusion For Mixing Rooms
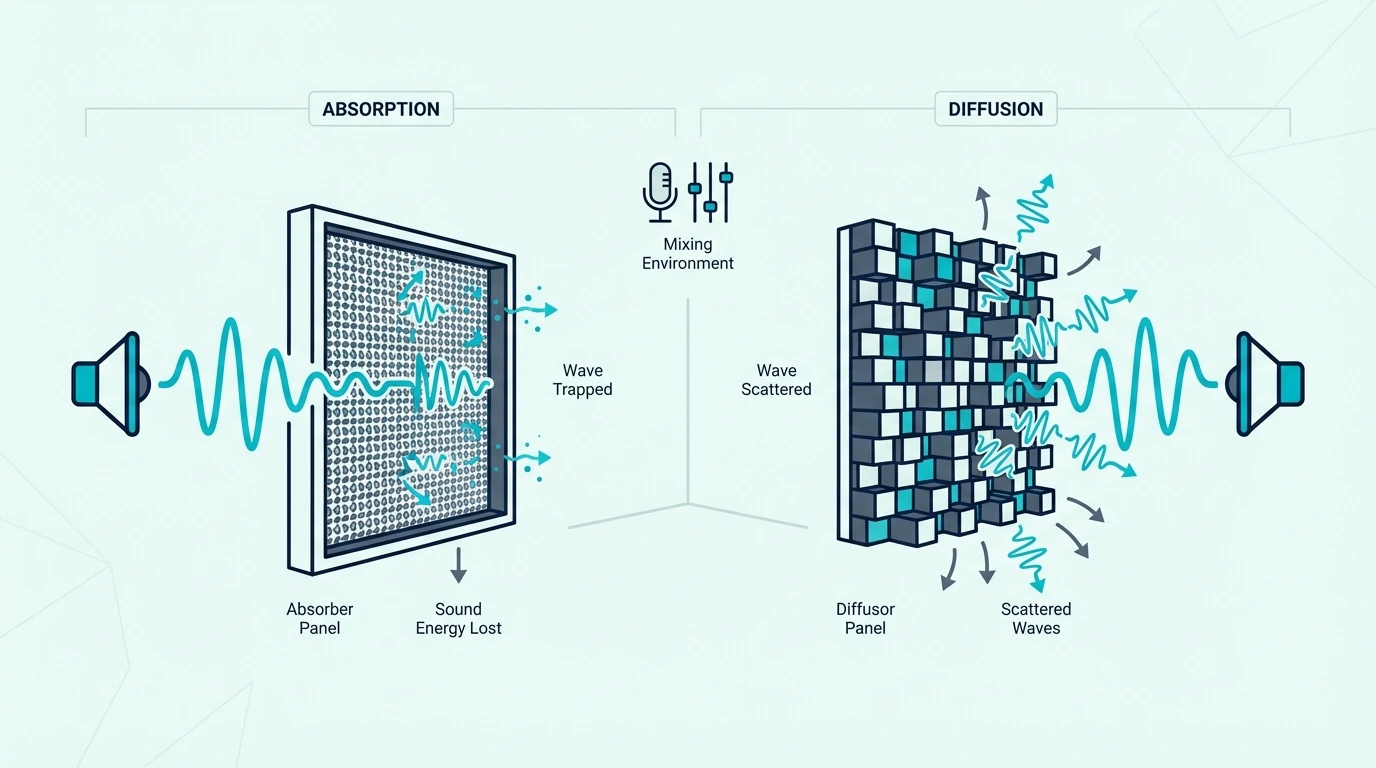
A common mistake in home mixing rooms is covering every surface with absorption until the room feels lifeless. That over-damped environment is just as problematic for mixing as an untreated room — you lose the natural sense of space, and mixes made in a dead room tend to have too much reverb and too much high-frequency energy because the mixer compensates for what the room lacks.
The goal is a balanced room, not a dead one. Absorption at the specific spots where reflections cause measurable problems — corners, first reflection points, and the ceiling above the mix position — combined with diffusion on surfaces where scattered energy keeps the room alive.
For most home mixing rooms, that means absorption on the front half of the room (corners, side walls between monitors and listener, ceiling above the seat) and diffusion or a mix of absorption and diffusion on the rear half.
If you want to estimate the total project cost, mixing rooms typically need 8-12 panels plus 4 corner bass traps. The best treatment kits bundle those components into a single purchase with matched coverage.
The Bottom Line
Treating a mixing room follows a non-negotiable sequence: listening position first, corner bass traps second, first reflection panels third, and rear wall treatment last. Every step builds on the previous one, and skipping any step undermines the ones that follow.
The investment pays for itself in mixes that translate — tracks that sound on your client’s car stereo the way they sounded on your monitors.
The full guide to acoustic treatment covers every surface type and placement strategy. For budget-friendly options that still deliver accurate monitoring, the roundup breaks down what works at every price point.
Frequently Asked Questions
What is the 38% rule room acoustics?
The 38% rule places your listening position at 38% of the room’s length from the front wall. That distance minimizes the interaction between your seat and the strongest axial room modes in the lengthwise dimension.
The rule is a starting point — not a universal solution — and the exact optimal position depends on your room’s dimensions and ceiling height.
Does acoustic treatment make a difference for mixing?
Treatment is the single biggest improvement you can make to mixing accuracy, more impactful than upgrading monitors or adding outboard gear. An untreated room adds its own EQ, reverb, and stereo distortion to everything you hear, and every mixing decision you make compensates for problems that only exist in your room.
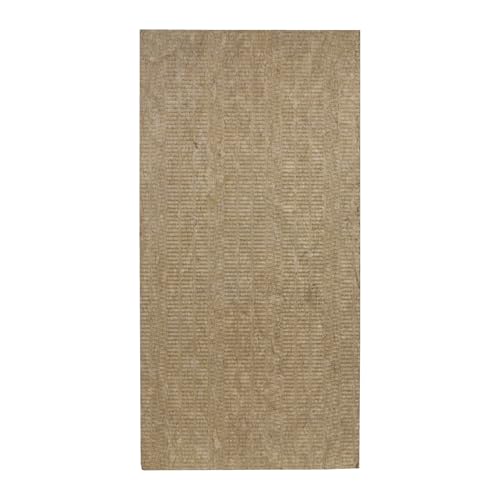
How much acoustic treatment do I need for a mixing room?
At minimum, a mixing room needs 4 corner bass traps, 2-4 side wall panels at first reflection points, 1-2 ceiling panels above the listening position, and 1-2 rear wall panels. That adds up to 8-12 treatment pieces total, covering roughly 30-40% of the room’s wall and ceiling area — enough to flatten the frequency response and tighten the stereo image without over-damping the space. For DIY builders, a 6-pack of Rockboard 60 mineral wool boards produces enough material for both corner traps and wall panels in a single purchase.