How To Record Music Without Acoustic Treatment (Practical Techniques That Work)
How to record music without acoustic treatment is a question every home studio builder faces at some point — you can get usable recordings in an untreated room, but only if you use specific microphone techniques and room choices that minimize how much the space damages your sound.
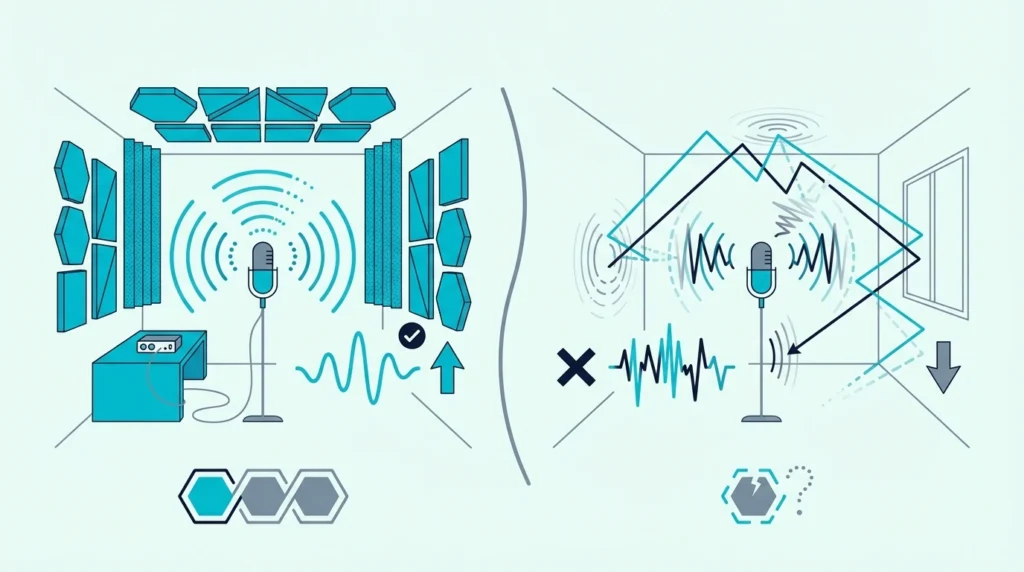
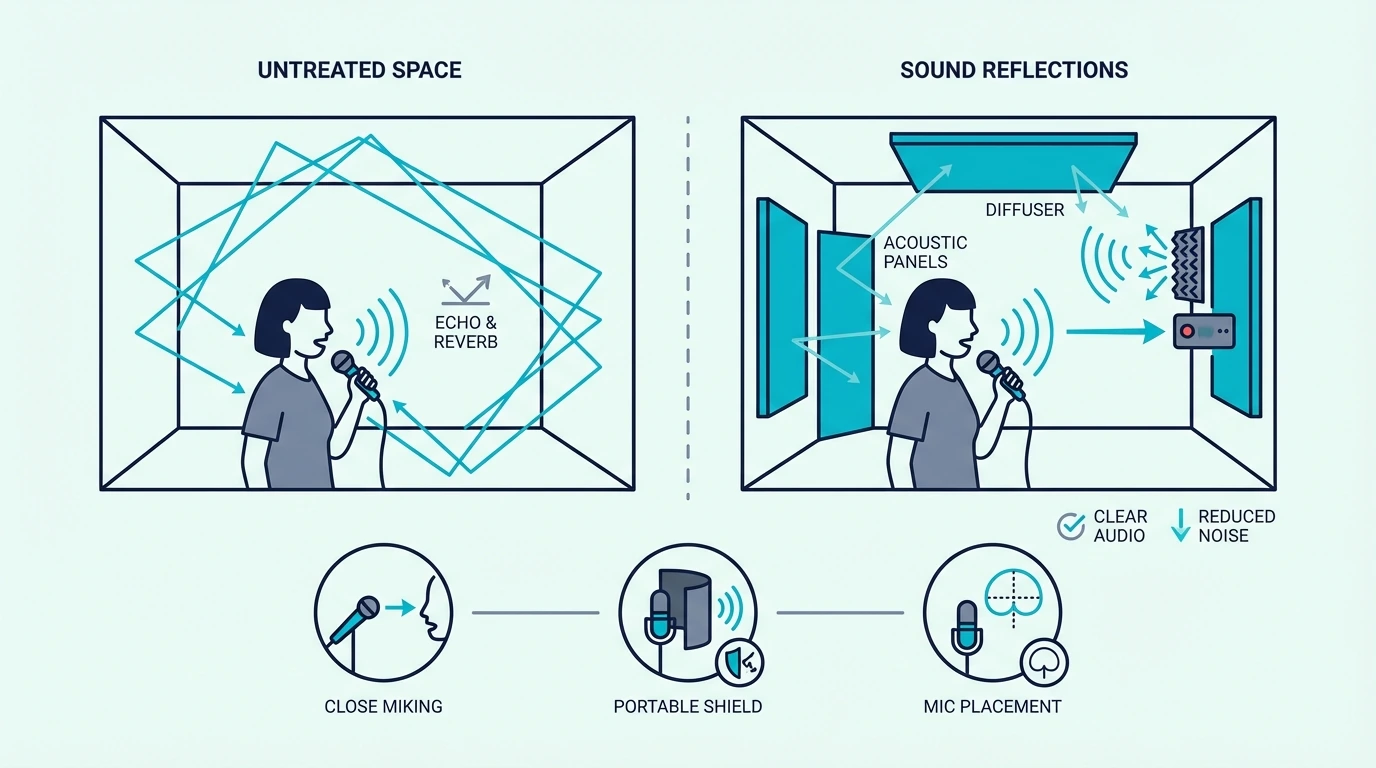
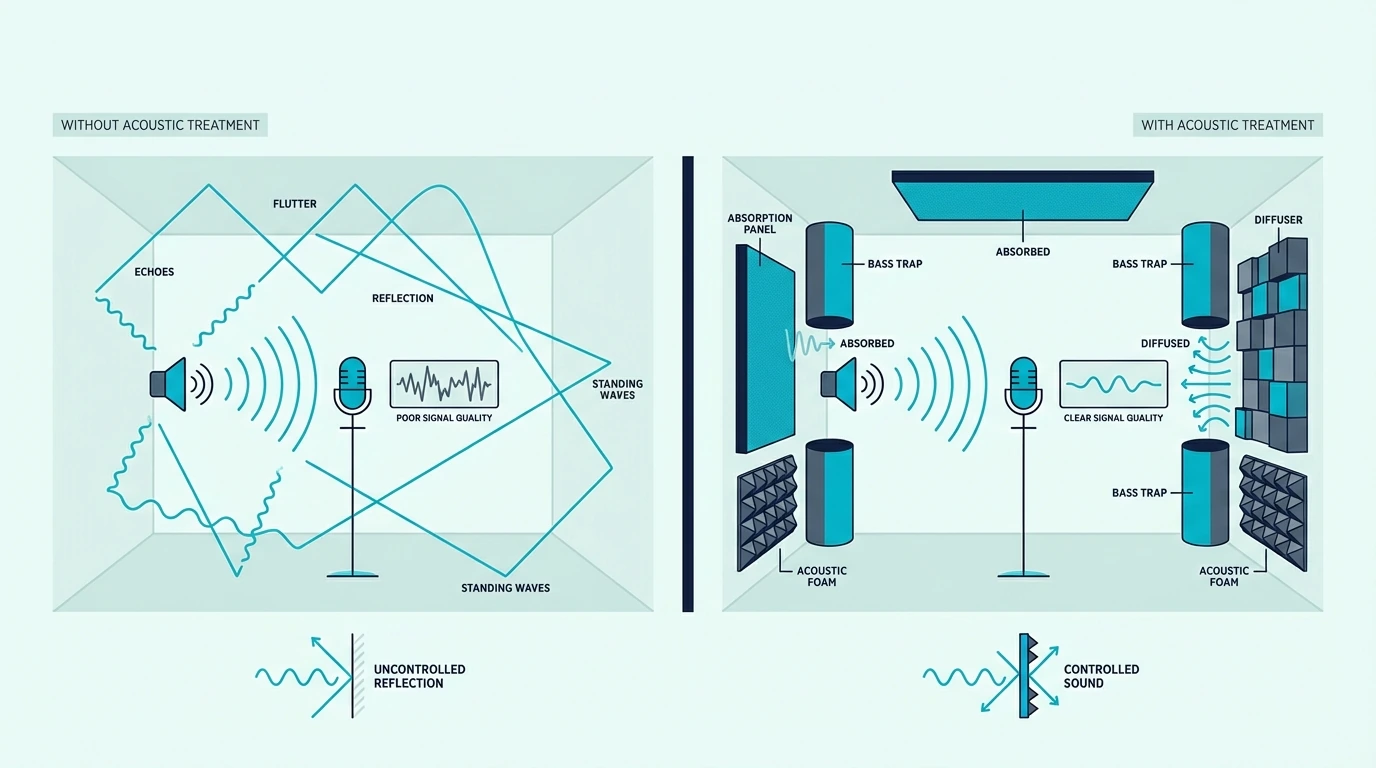
The problem with recording in an untreated room is that reflections from bare walls, ceiling, and floor reach the microphone milliseconds after the direct sound. Those reflections cause comb filtering, boxy coloration, and a roomy quality that no amount of post-production processing can fully remove.
The techniques below reduce the ratio of reflected sound to direct sound reaching the microphone. They are compromises — none of them replace proper treatment — but they produce recordings that are dramatically better than pointing a microphone at a singer in the middle of a bare room.
Start with microphone distance. Getting the source closer to the mic is the single most effective thing you can do in an untreated space.
Recording without treatment requires close microphone technique (4-8 inches from the source), a cardioid polar pattern to reject rear reflections, and a small furnished room or closet that naturally dampens sound. A portable isolation shield behind the microphone blocks the worst wall reflections. These techniques produce usable recordings but cannot match the clarity of a properly treated room.
Techniques For Recording In An Untreated Room
Every technique below targets the same goal: increasing the ratio of direct sound (from the source) to reflected sound (from the room) reaching the microphone.
Get Close To The Microphone
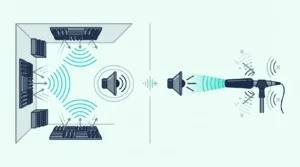
Microphone distance is the most powerful variable you control. At 4-6 inches from the source, the direct sound is so much louder than the room reflections that the microphone captures mostly the source with minimal room coloration.
At 12-18 inches, the room reflections become audible. At 3 feet or more, the room dominates the recording — you hear almost as much reflected sound as direct sound.
For vocals, position the singer 4-8 inches from a cardioid condenser or dynamic microphone. Use a pop filter to manage plosives at that close distance.
For acoustic guitar, place the microphone 6-10 inches from the 12th fret area. Closer placement emphasizes the strings and body resonance while reducing the room contribution.
The tradeoff with close-mic technique is proximity effect — bass buildup that occurs when a directional microphone is very close to the source. A high-pass filter at 80-100 Hz during recording or mixing corrects this without losing important low-frequency content.
Use A Closet Or Small Furnished Room
A walk-in closet full of hanging clothes is one of the best untreated recording spaces available. The clothes act as absorption, the small volume limits the distance reflections travel, and the irregular surfaces break up flutter echo.
A small bedroom with a bed, curtains, bookshelves, and soft furniture also works well. Every soft surface in the room absorbs some mid and high frequency energy, reducing the overall reverb time.
Avoid large empty rooms with hard surfaces — they produce the most audible room coloration. A garage, bathroom, or unfurnished living room with hardwood floors is the worst possible recording environment without treatment.
The small room treatment guide explains why smaller rooms with soft furnishings naturally outperform larger empty spaces for untreated recording.
Improvise With Blankets And Pillows
Heavy blankets hung behind and around the microphone position absorb some mid and high frequency reflections. They do not replace proper panels, but they measurably reduce the coloration from the nearest wall surfaces.
Hang a blanket on the wall directly behind the microphone — this is the wall whose reflections cause the most damage because they arrive at the microphone from behind, opposite the source. A second blanket behind the singer catches reflections that would otherwise bounce off the rear wall and back into the microphone.
Pillows and cushions piled on nearby hard surfaces (desks, dressers, shelves) further reduce reflections in the immediate recording area. The goal is not to treat the whole room — just to dampen the surfaces closest to the microphone.
The blankets as treatment guide covers what blankets can and cannot do acoustically, including the frequency range they affect and the best hanging methods.
Use A Microphone Isolation Shield
A microphone isolation shield mounts behind the microphone on a standard mic stand and blocks reflections from reaching the rear of the capsule. It is the single most targeted tool for recording in untreated rooms because it addresses the wall reflection that causes the most coloration.
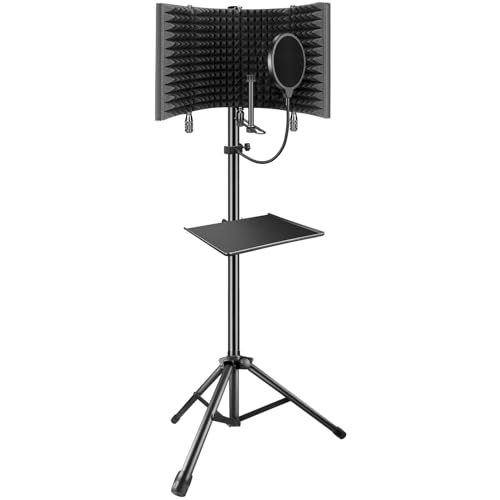
microphone isolation shield
Isolation shields work best for vocals and voiceover where the source is directly in front of the microphone. They are less effective for instruments that radiate sound in all directions because the shield only covers a narrow arc behind the mic.
For budget builds, the XTUGA isolation shield provides similar rear-reflection blocking at a lower price point. It folds flat for storage and sets up in seconds for mobile recording sessions.

XTUGA isolation shield
Choose The Right Microphone Pattern
Cardioid microphones reject sound from behind the capsule — exactly where the wall reflection arrives in a typical recording setup. This natural rejection pattern reduces room pickup by 15-25 dB from the rear compared to an omnidirectional microphone.
For untreated rooms, cardioid is almost always the right choice. It captures the source from the front while rejecting the worst wall reflections from behind.
Avoid omnidirectional patterns in untreated rooms. Omni microphones pick up equally from all directions, which means they capture every room reflection with the same sensitivity as the source.
Post-Production Fixes For Untreated Room Recordings
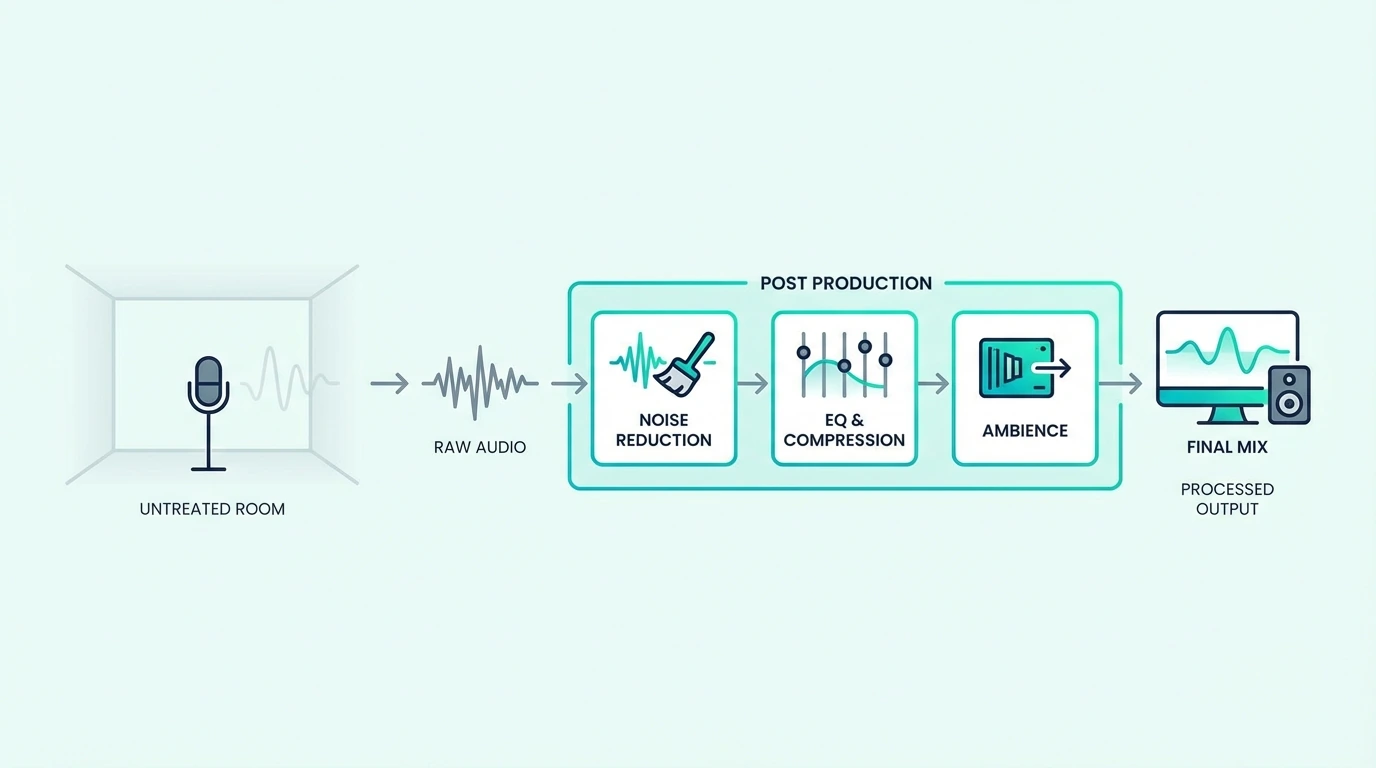
Software tools can reduce room coloration after recording, but they cannot fully remove it. Prevention through mic technique and room choice is always more effective than post-production correction.
De-Reverb Plugins
De-reverb plugins like iZotope RX analyze the reverb tail in a recording and attenuate it. They work well for mild room coloration — reducing a slightly roomy vocal to something closer to a dry studio sound.
They struggle with heavy room coloration. If the original recording has obvious echo or boxiness, de-reverb processing introduces artifacts that sound metallic or phasey.
The more room sound the plugin tries to remove, the worse the artifacts become.
EQ And Noise Gates
A noise gate cuts the signal when the source stops, eliminating the room reverb tail between phrases. This cleans up vocal recordings significantly by removing the audible room sound in the gaps between words.
EQ cuts in the 200-400 Hz range can reduce boxy room coloration. A narrow cut at the specific frequency where the room resonates removes some of the muddy quality without affecting the overall tone of the recording.
These tools help, but they cannot replace what proper microphone technique prevents in the first place. The vocal treatment guide covers the recording chain from room treatment through post-production.
Get Studio Tips Weekly
Join 5,000+ creators getting acoustic treatment advice every week.
No spam. Unsubscribe anytime.Why Acoustic Treatment Is Still Worth It
All the techniques above are compromises. They reduce room problems but do not eliminate them.
Even basic treatment — two DIY panels at first reflection points and two corner bass traps — eliminates the reflections that these workarounds only partially address. The total cost for four DIY panels is approximately 60-100 dollars in materials.
The difference between recording in an untreated room with good mic technique and recording in a treated room with the same technique is not subtle. Treatment removes the low-mid buildup and comb filtering that no microphone position or isolation shield can address.
For anyone recording regularly, treatment pays for itself in saved editing time within the first few sessions. The cost breakdown compares every treatment option from free techniques through professional installation.
The Bottom Line
Recording without treatment requires close microphone technique, a cardioid polar pattern, and the smallest, most furnished room available. An isolation shield behind the microphone blocks the worst wall reflections.
These techniques produce usable recordings but cannot match a treated room. Even a minimal treatment setup of two wall panels and two bass traps eliminates the problems that workarounds can only reduce.
The full guide to acoustic treatment covers treatment priorities from first purchase through complete room setup. For temporary or rental situations, the temporary treatment guide covers portable options that require no wall mounting.
Frequently Asked Questions
How do YouTubers get such good audio?
Most YouTubers with clean audio use close microphone technique (6-12 inches from the mouth), a cardioid dynamic microphone like the SM7B, and at least minimal room treatment behind the microphone. Many also use noise gates and light de-reverb processing in post-production.
The combination of close mic distance and a treated wall behind the microphone handles the majority of room problems. The rest is handled in post.
How to record music without background noise?
Record in the quietest room available — interior rooms with no exterior walls produce less traffic and environmental noise. Use a cardioid microphone pointed away from noise sources.
Apply a noise gate to cut the signal between phrases.
For persistent background noise (HVAC, computer fans), a noise reduction plugin like iZotope RX or Audacity’s noise reduction tool samples the noise floor and subtracts it from the recording. Close mic technique also helps because the source-to-noise ratio improves as the mic gets closer to the source.
Can you fix room reverb in post-production?
De-reverb plugins reduce mild room coloration but cannot fully remove it. Heavy room reverb leaves artifacts after processing that sound metallic or hollow.
Prevention is always more effective than correction. Proper mic technique in a furnished small room produces cleaner recordings than de-reverb processing applied to recordings made in a large untreated space. The mixing treatment guide explains how room acoustics affect both recording and monitoring accuracy.