How To Do Temporary Acoustic Treatment (No Wall Damage, Full Performance)
How to do temporary acoustic treatment is the first question renters, shared-space users, and mobile recordists need answered — you can get real acoustic improvement without drilling holes, leaving adhesive residue, or losing your security deposit, but only if you choose methods that actually absorb sound rather than just covering walls with decorative material.
The problem most temporary setups face is not a lack of options — it is choosing options that look like treatment but perform poorly. Thin foam tiles on command strips absorb almost nothing below 500 Hz.
A single blanket draped over a mic stand blocks one reflection while the rest of the room remains untreated.
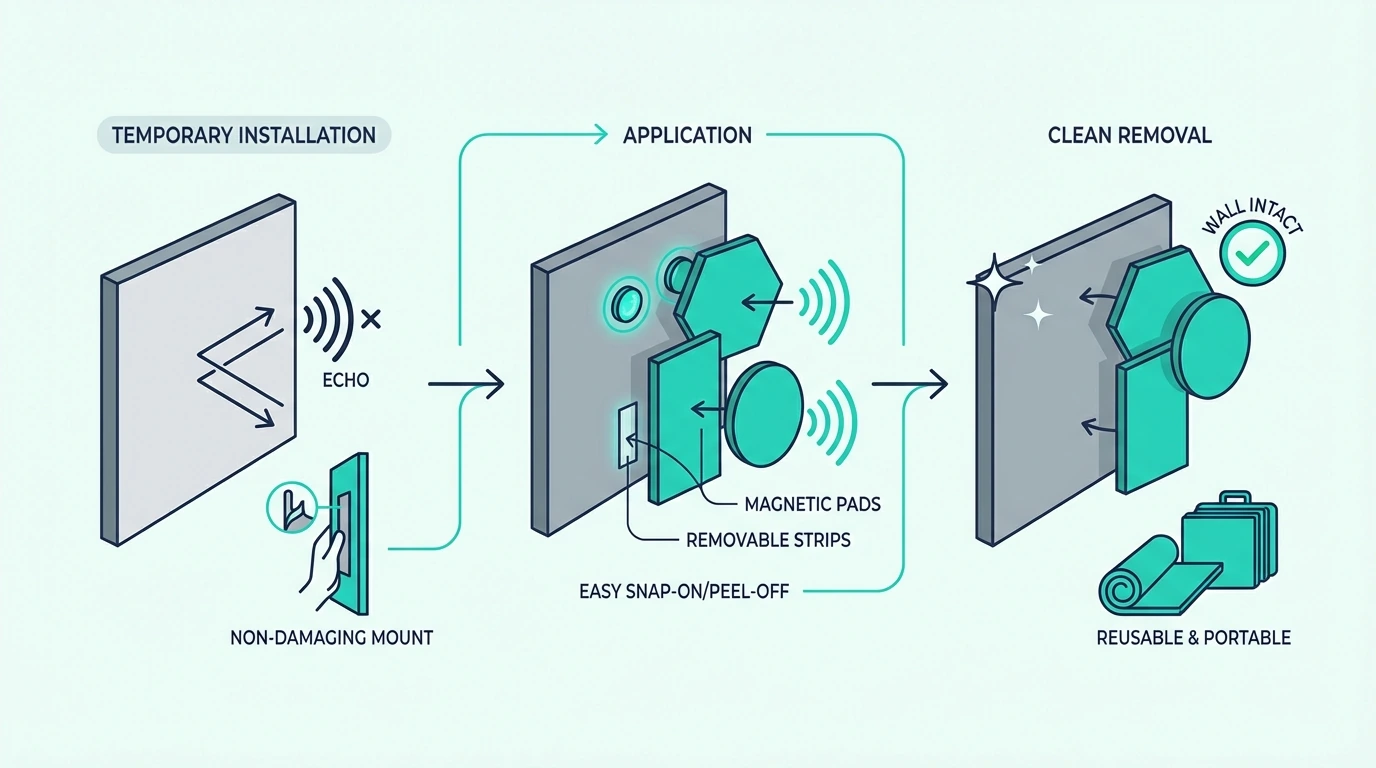
Effective temporary treatment uses the same materials as permanent treatment — fiberglass, mineral wool, or dense acoustic blankets — mounted with removable hardware that leaves walls undamaged when you move out.
Below you will find every temporary mounting method ranked by performance and wall impact, a budget breakdown from cheapest to most effective, and the specific products that work best for damage-free installation. Start with two panels at first reflection points hung on command strips or freestanding frames — that single step produces the biggest improvement.
Temporary acoustic treatment works best with real absorptive materials (fiberglass or mineral wool panels) mounted on removable hardware like heavy-duty command strips, industrial velcro, or freestanding floor frames. Avoid thin foam as your primary treatment. Two panels at first reflection points and two corner bass traps on freestanding frames deliver 80% of the improvement of a permanent installation with zero wall damage.
Solutions That Do Not Damage Walls
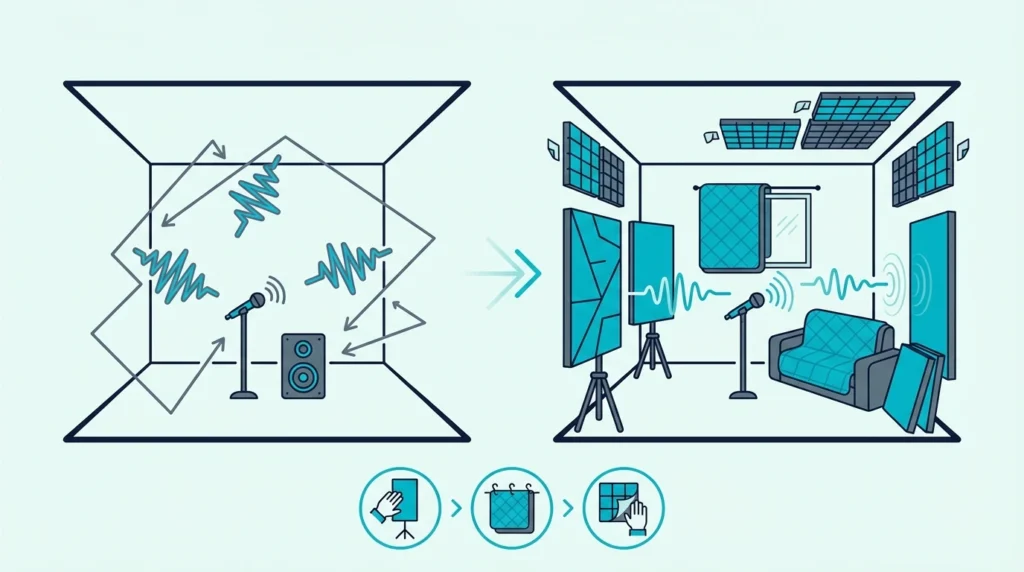
Temporary treatment falls into two categories: panels mounted with removable adhesive, and freestanding panels that never touch the wall at all. Both work.
The right choice depends on whether your landlord allows any wall contact or requires zero-contact solutions.
The acoustic performance of temporary treatment is identical to permanent treatment when you use the same materials. A fiberglass panel on command strips absorbs exactly the same amount of sound as a fiberglass panel screwed into the wall.
The only difference is the mounting method.
This means the treatment priorities are the same regardless of whether your setup is permanent or temporary. Treat the first reflection points first, then add corner bass traps, then treat the ceiling if possible.
The cost breakdown guide covers pricing for every option below, including both the panels and the mounting hardware.
Temporary Mounting Methods For Acoustic Panels
The mounting method determines how much weight the wall can support, how easy the panels are to reposition, and how much (if any) wall damage occurs when you remove them.
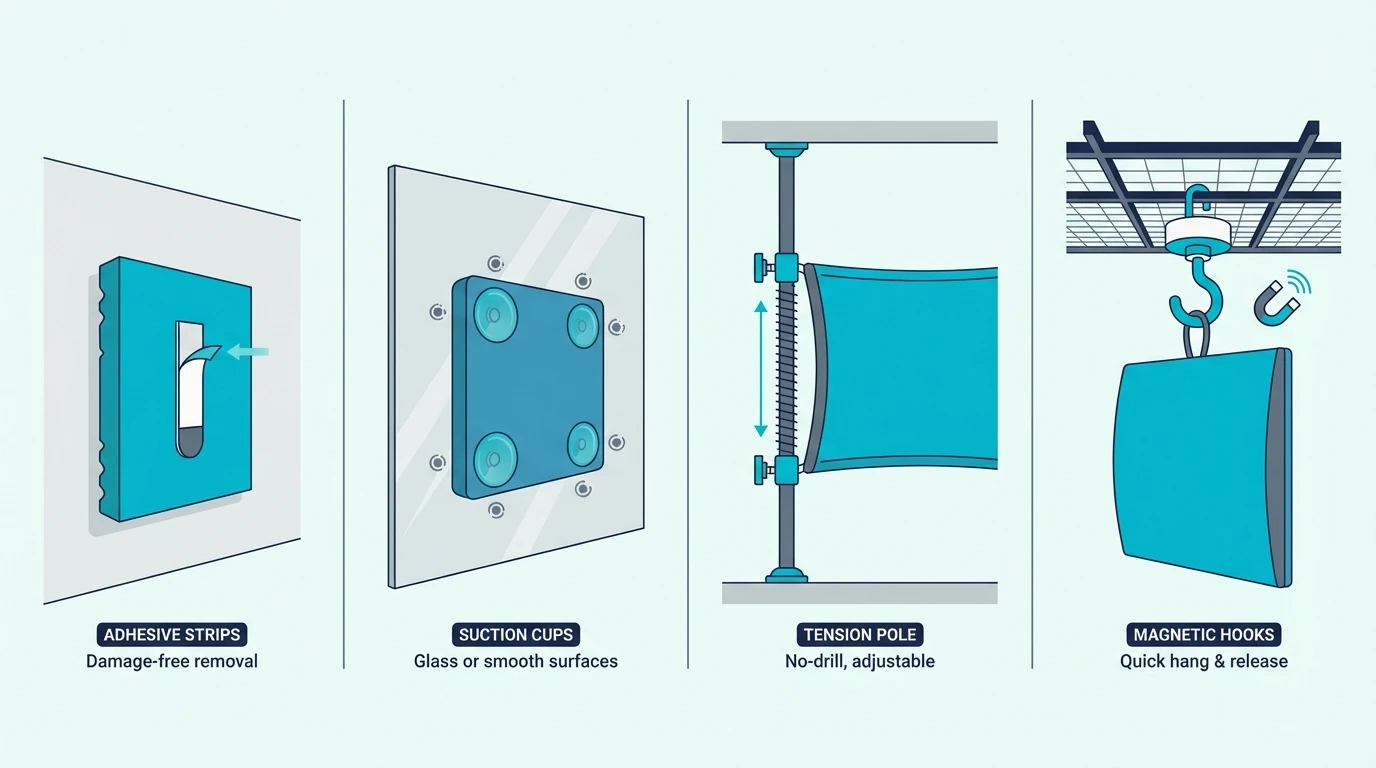
Command Strips And Adhesive Velcro
Heavy-duty Command strips rated for 12-16 lb hold most acoustic panels securely. A standard 24×24 inch fiberglass panel weighs 3-5 lb — well within the capacity of two Command strip pairs.
Apply the strips to the panel frame (not the fabric), press firmly for 30 seconds, and wait one hour before hanging. When you move out, pull the tab straight down to release the adhesive without damaging the wall surface.
Industrial-strength adhesive velcro works similarly but allows you to remove and rehang panels repeatedly without replacing the adhesive. Apply hook-side strips to the wall and loop-side to the panel back.
Both methods leave walls undamaged when removed properly. Avoid pulling Command strips away from the wall at an angle — always pull straight down along the wall surface to activate the stretch-release mechanism.
Freestanding Panel Frames
Freestanding frames hold panels upright with zero wall contact. They are the only truly damage-free option because nothing touches the wall surface at any point.
Build a simple T-shaped base from 2×4 lumber: a 24-inch horizontal foot piece with a vertical upright screwed into the center. Attach the acoustic panel to the upright with screws or velcro.
The wide base prevents tipping. You can also build an A-frame stand from two panels hinged at the top — this creates a self-supporting structure that stands on its own without any base at all.
Commercial mic stand adaptors also hold lightweight panels. Thread a panel onto a standard mic stand boom arm for a portable, repositionable treatment point that you can move between sessions.
The downside of freestanding frames is floor space. Each panel and its base occupies approximately 2 square feet of floor area, which adds up in small rooms where every inch matters.
Freestanding frames are ideal for corner bass traps because they naturally sit across the corner at a 45-degree angle with an air gap behind them — exactly the configuration that maximizes low-frequency absorption.
Tension Rods And Curtain Systems
Tension rods installed between two parallel walls hold acoustic blankets, heavy curtains, or lightweight panel arrays without any hardware touching the wall surface.
Use a heavy-duty tension rod rated for at least 20 lb in a window frame, doorway, or between two close walls. Hang acoustic blankets from the rod using curtain rings with clips.
The blankets hang flat against the wall behind them, creating an absorption surface.
This method works particularly well for window treatment — hang a dense acoustic curtain on a tension rod in the window frame to absorb reflections from the glass surface without permanent mounting.
For ceiling treatment, some renters use adhesive ceiling hooks (rated for smooth ceilings) with lightweight panels suspended on wire. This creates a temporary ceiling cloud that can be removed without damage to most ceiling finishes.
Leaning Panels Against Walls
The simplest temporary method is leaning panels against the wall at a slight angle. This requires no mounting hardware at all and creates a natural air gap between the panel and the wall that improves low-frequency absorption.
Lean panels at first reflection points on the side walls, propped against the wall at approximately 10-15 degrees from vertical. The bottom edge sits on the floor and friction holds the panel in place.
This method works for thicker, heavier panels that are stable enough not to slide. It does not work for lightweight foam tiles or thin panels that tip over easily.
For additional stability, place a rubber shelf liner strip under the bottom edge of the panel. The rubber grips the floor surface and prevents the panel from sliding outward over time.
Get Studio Tips Weekly
Join 5,000+ creators getting acoustic treatment advice every week.
No spam. Unsubscribe anytime.Temporary Treatment Options By Budget
From cheapest to most effective, here are the temporary treatment options ranked by acoustic performance per dollar.
Moving Blankets And Heavy Curtains (Under 50 Dollars)
Moving blankets are the cheapest temporary absorption material. A heavy-duty moving blanket hung from Command hooks or a tension rod provides NRC 0.2-0.4 — absorbing 20-40% of mid and high frequency energy that hits it.
The limitation is frequency range. Moving blankets absorb almost nothing below 500 Hz, which means the bass and low-mid problems that cause muddy, boxy recordings remain untouched.
Heavy blackout curtains perform similarly to moving blankets and look better in a living space. NICETOWN blackout curtain panels are a popular renter-friendly option — their triple-weave fabric absorbs mid and high frequency reflections while also blocking light, and they hang on a tension rod with zero wall contact.
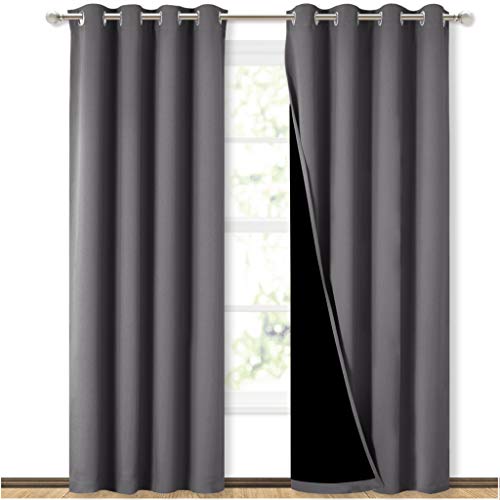
NICETOWN blackout curtain panels
For best results, double-layer blankets at the first reflection points rather than single-layer across more wall area. Two blankets stacked together absorb 30-50% more than a single blanket.
The blankets as treatment guide covers performance data, hanging methods, and when blankets make sense versus when you need to upgrade to panels.
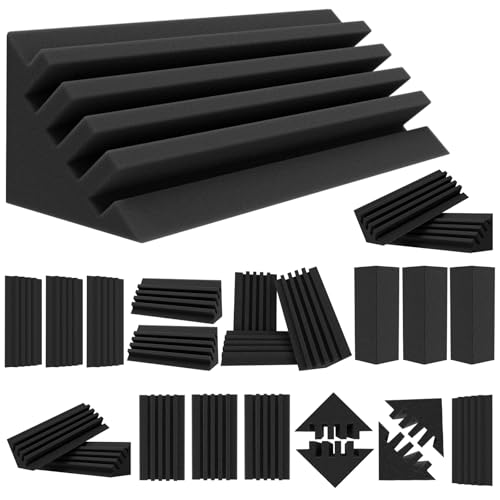
Acoustic Foam With Removable Adhesive (50-150 Dollars)
Acoustic foam tiles mounted with Command strips are the most common temporary treatment. They are lightweight, easy to install, and remove cleanly from most wall surfaces.
The acoustic limitation is the same as blankets — foam absorbs mid and high frequencies but does almost nothing below 500 Hz. A room treated entirely with 1-2 inch foam still has the same bass problems as an untreated room.
Foam works as a supplement to bass traps, not as a replacement. Use foam at first reflection points for mid-high absorption and pair it with thicker freestanding panels in the corners for bass control.
When mounting foam with Command strips, apply the strips to the foam first and let the adhesive bond for at least 10 minutes before pressing to the wall. This ensures the strip bonds fully to the foam surface before bearing the weight of the tile.
For small rooms where bass buildup is severe, foam alone is not sufficient regardless of how much you install.
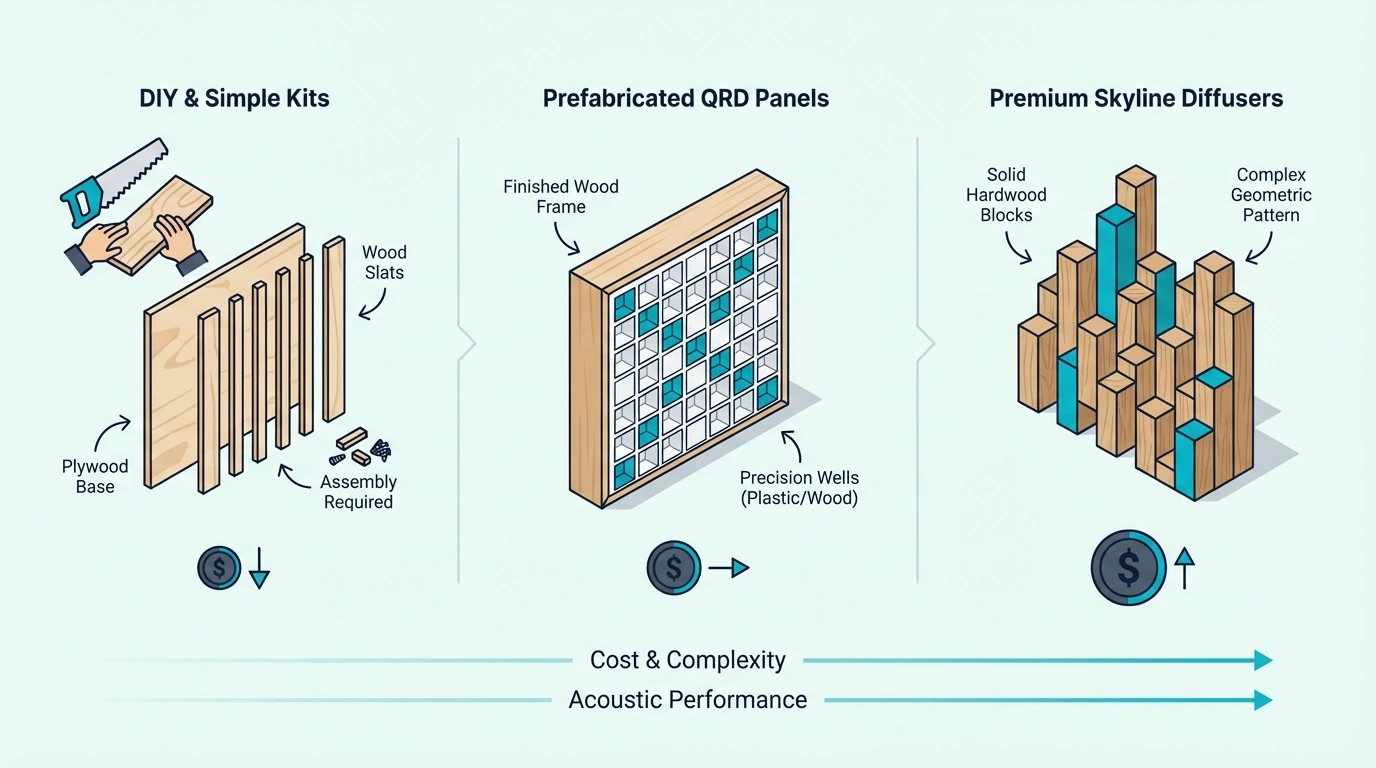
Fiberglass Panels With Removable Mounting (150-300 Dollars)
Fiberglass or mineral wool panels on Command strips or adhesive velcro deliver the same acoustic performance as a permanent installation. A 2-inch fiberglass panel achieves NRC 1.0 regardless of how it is mounted.
UMIACOUSTICS fiberglass panels include hanging brackets that mount on small Command hooks or nails. The 2-inch fiberglass core absorbs across the full mid and high frequency range including the low-mids where foam and blankets fall short.

UMIACOUSTICS fiberglass panels
A 4-pack covers two first reflection points — the highest-priority treatment positions in any room. Add a second 4-pack for rear wall treatment or use them as freestanding corner absorbers.
The fiberglass treatment guide covers panel thickness, density options, and NRC data for different configurations.
Freestanding DIY Panels (100-250 Dollars)
Building DIY panels with freestanding bases delivers the best acoustic performance of any temporary option. You control the insulation type, thickness, and density while the freestanding design requires zero wall contact.
Build standard 24×48 inch panels with 2-inch mineral wool or fiberglass insulation in a 1×4 lumber frame. Add a T-shaped base (a 24-inch foot piece with a vertical upright) to each panel.
The total materials cost per freestanding panel is approximately 25-35 dollars.
Freestanding panels can be repositioned instantly — slide them to different wall positions, angle them into corners for bass trapping, or move them to a different room entirely. No remounting, no adhesive, no wall contact.
For renters who move frequently, freestanding DIY panels are the only treatment investment that transfers fully to any new space. Wall-mounted panels need new adhesive and positioning in each new room, but freestanding panels simply move with you.
Portable Vocal Booths And Isolation Shields (40-100 Dollars)
For vocal recording specifically, a microphone isolation shield mounts directly on a mic stand with zero wall contact. It blocks the rear wall reflection that causes the most coloration in vocal recordings.
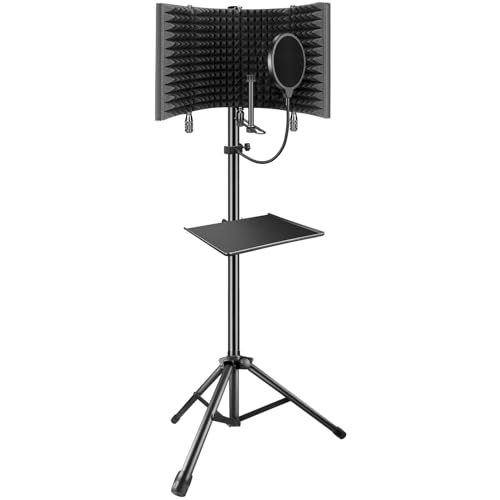
microphone isolation shield
Isolation shields do not treat the room — they treat the microphone position only. They are best used alongside room treatment, not as a replacement for it.
For maximum isolation in a completely untreated space, the TroyStudio enclosed vocal booth surrounds the microphone on all sides for maximum reflection blocking. It folds flat for storage and works on a desktop or mic stand.
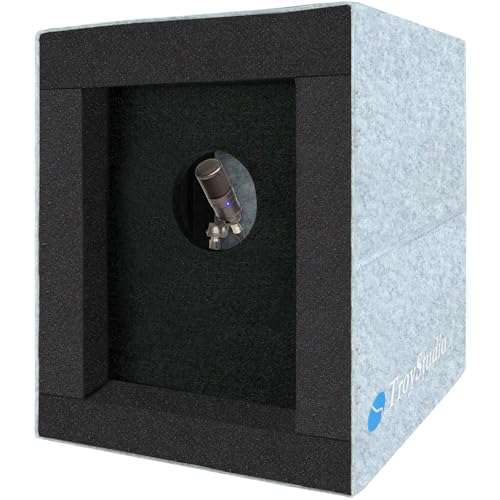
TroyStudio enclosed vocal booth
The recording without treatment guide covers additional mic techniques that complement portable isolation tools.
Placement Priorities For Temporary Setups
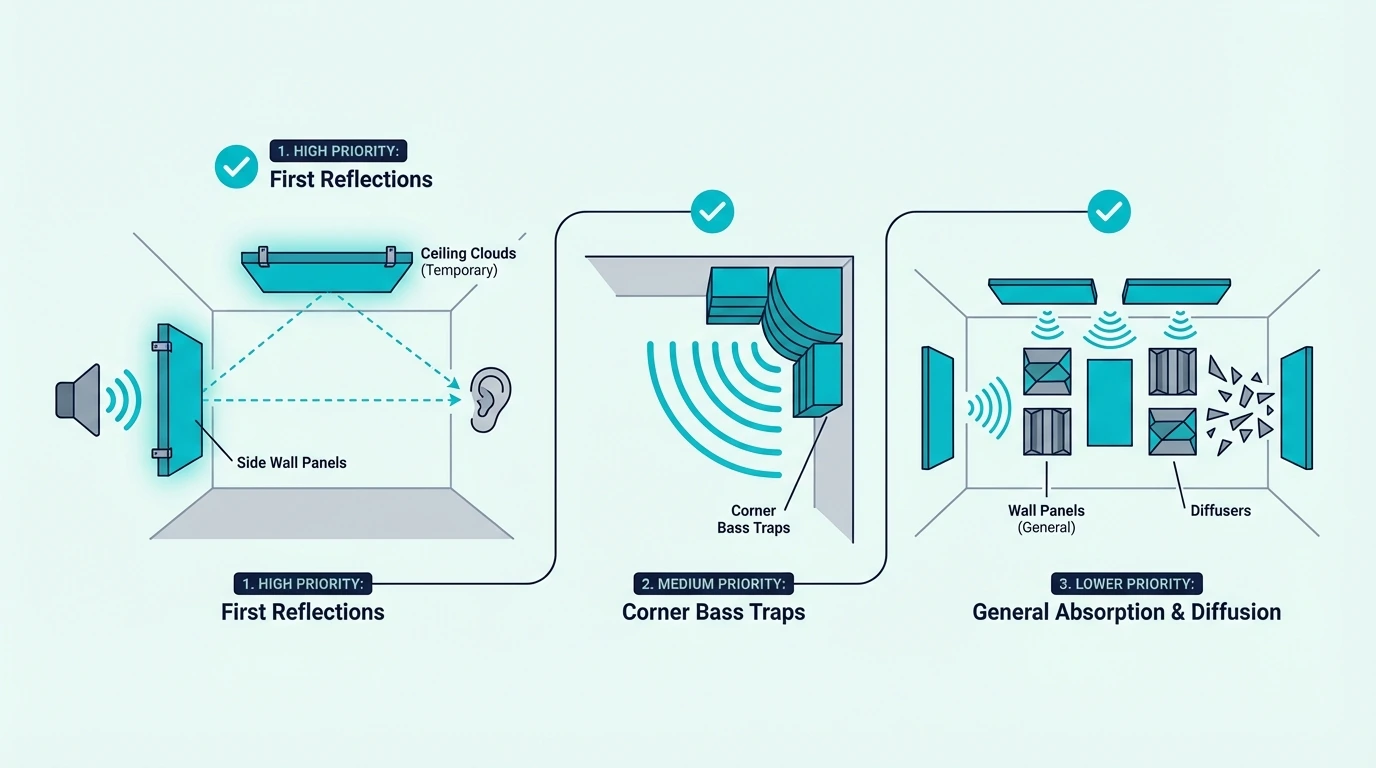
The placement priority is the same whether your treatment is temporary or permanent. Treat these positions in order:
First reflection points on side walls — the spots where sound from your speakers bounces to your listening position. Two panels here produce the single biggest improvement in any room.
Corner bass traps — freestanding panels leaned into corners at a 45-degree angle. Start with the two front corners behind your speakers.
Ceiling above the listening position — a suspended panel or ceiling cloud if your ceiling finish allows adhesive hooks.
Rear wall — absorption behind the listening position controls late reflections that add unwanted reverb.
Wall behind speakers — reduces the reflection from the front wall.
For mixing rooms, first reflection points and bass traps are non-negotiable even in temporary setups. For vocal recording, the wall behind the microphone and the wall behind the singer are the highest priorities.
The mirror trick identifies first reflection points accurately: sit at the mix position and have someone slide a small mirror along the side wall. Where you can see the speaker cone reflected in the mirror is the exact spot to place your panel.
For home theater setups, the same placement priorities apply but with additional emphasis on the rear wall where surround reflections cause the most interference.
Common Mistakes With Temporary Treatment
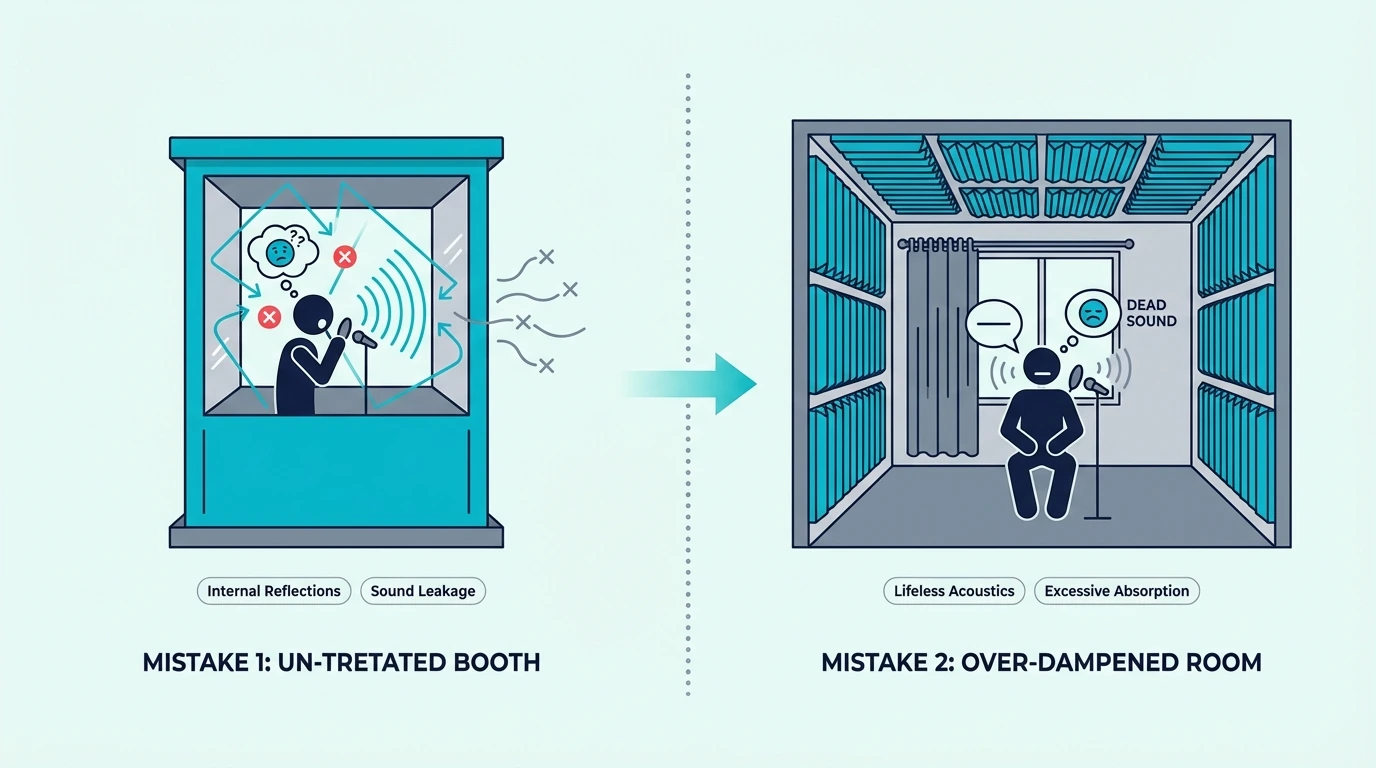
Temporary treatment fails most often because of material choice, not mounting method. These are the mistakes that waste money without improving the room.
Covering Every Wall With Thin Foam
Covering all four walls with 1-inch foam creates a room that sounds dead in the highs but still has the same bass and low-mid problems as an untreated room. The result is worse than selective treatment at key positions.
Two thick panels at first reflection points outperform twenty foam tiles spread across every wall. Target placement always beats broad coverage with inferior materials.
Ignoring Bass Traps
Bass problems are the most audible issue in small rooms, and no amount of wall-mounted foam or blankets addresses them. Freestanding bass traps in the corners are essential even in temporary setups.
A single 4-inch thick panel leaned into each front corner makes a dramatic difference in bass clarity. This is the treatment most temporary setups skip, and it is the treatment that matters most for mixing accuracy. TroyStudio foam bass traps friction-fit into corners with zero mounting hardware and cover all four vertical corners in a room for under 35 dollars.
Using Non-Acoustic Materials
Egg cartons, carpet scraps, and packing foam do not absorb sound in any meaningful way. The egg cartons guide explains why these materials fail acoustically despite looking like they should work.
Stick with materials designed for sound absorption: fiberglass, mineral wool, dense acoustic blankets, or at minimum, proper acoustic foam from a reputable manufacturer.
The Bottom Line
Temporary acoustic treatment delivers the same performance as permanent treatment when you use the same materials. The difference is the mounting method, not the acoustic result.
Start with fiberglass or mineral wool panels at first reflection points, mounted on Command strips, adhesive velcro, or freestanding frames. Add corner bass traps on freestanding bases.
This setup costs 150-300 dollars, leaves zero permanent wall damage, and provides 80% of the improvement of a full permanent installation.
The full guide to acoustic treatment covers the complete treatment workflow. For the lowest-budget approach, the budget treatment guide ranks every option by performance per dollar.
For pre-assembled solutions, the treatment kit guide covers packages that include panels and mounting hardware together.
Frequently Asked Questions
How to install acoustic panels without damaging walls?
Use heavy-duty Command strips rated for 12-16 lb per pair, or industrial adhesive velcro strips. Apply to the panel frame, press firmly, and wait one hour before hanging.
When removing, pull Command strips straight down along the wall to activate the stretch-release adhesive. Do not pull outward — that tears the adhesive and can damage paint.
How to mount acoustic foam temporarily?
Command strips work well for lightweight foam tiles. Apply two strips per tile — one near the top and one near the bottom.
For larger foam panels, use four strips (one in each corner). The total weight of a standard 12×12 inch foam tile is under 1 lb, which is well within the capacity of even the lightest Command strips.
What is the best temporary acoustic treatment for renters?
Freestanding DIY panels with T-shaped bases deliver the best performance with zero wall contact. Build 24×48 inch panels with 2-inch mineral wool insulation and a lumber frame with attached feet.
For lower budgets, fiberglass panels on Command strip brackets are the next best option. They require minimal wall contact and remove cleanly.
For vocal recording only, a microphone isolation shield mounted on a mic stand provides targeted treatment at the recording position with zero room modification.
What is the 38 percent rule in room acoustics?
The 38 percent rule is a starting point for speaker and listening position placement. It suggests placing your listening position at 38% of the room length from the front wall to minimize the impact of the strongest room modes.
This positioning reduces how much bass energy builds up at the listening position. It works in any room — temporary or permanent — and costs nothing to implement.
The home studio setup guide covers speaker placement and room positioning alongside treatment placement for the most effective combined approach.