Struggling to pump up the volume on your DJ controller to party levels? You need an amplifier to boost sound and drive professional speakers.
Learning how to connect your DJ controller to an amplifier is essential for building a legitimate DJ setup that can deliver booming sound.
This guide will walk through choosing equipment, making connections, configuring settings, wiring speakers, balancing levels, and resolving common audio issues when integrating controllers with amps.
Let’s dive in to see how to link up your controller and amplifier for superb sound at your next gig.
How Do I Connect My DJ Controller to an Amplifier?
You connect your DJ controller to an amplifier using either RCA or XLR cables to match the outputs from the controller to the inputs on the amp. Make sure to connect left and right channels properly for balanced stereo sound. We’ll explore specifics on cables, inputs and outputs, and audio configuration further below.
Choose Your Equipment
When setting up your DJ controller with an amplifier, the first step is to choose the right equipment to meet your needs. There are a few key considerations when selecting both a DJ controller and an amplifier for your setup.
For the DJ controller, you’ll want to pick one that has the necessary inputs and outputs to connect with your amplifier. Most controllers have RCA or balanced XLR outputs to feed audio signals to other devices. You’ll also want to consider the DJ software compatibility you need, such as Serato DJ or Traktor Pro. The size, layout, jog wheels, pads, knobs, faders and other features of the controller should suit your DJing preferences as well. Popular all-in-one controllers include the Pioneer DDJ-400, Numark Mixtrack Pro FX and Denon DJ Prime GO.
When choosing an amplifier, some key specs to look for include the inputs, power output, and impedance. Make sure the amp has stereo inputs that match the outputs on your controller, such as RCA, XLR or 1⁄4” TRS connections. The power output will determine how large your speakers can be, with most DJ setups needing around 1000 to 2000 watts for adequate headroom. Impedance should also be factored if connecting to passive speakers. Most amplifiers designed for PA systems or live music will have 4 to 8 ohm impedance outputs.
Connect Using RCA or XLR Cables
When connecting your DJ controller to your amplifier, you will need to utilize the appropriate cables to match up inputs and outputs between the devices. Two of the most common types of cables used are RCA cables or XLR cables.
RCA cables, also sometimes called phono cables or cinch cables, are those standard red and white cables found on most consumer stereo equipment. DJ controllers usually output audio signals through a pair of RCA connections, with one being for the left channel and the other being the right. Most amplifiers and powered speakers designed for DJ use will also have stereo RCA inputs for connection. RCA cables come in various lengths and quality levels, but decent ones usually only cost a few dollars. When purchasing, ensure you get enough cable length for your setup without going overboard. Excess cable coiled up can sometimes induce noise or hum.
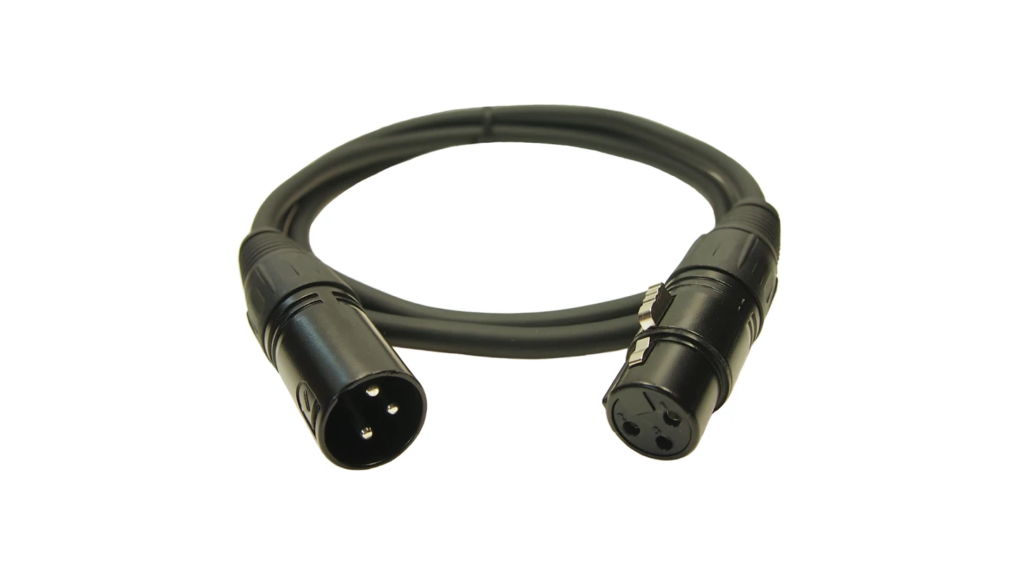
Professional audio equipment, like some premium amplifiers or active speakers, will often have balanced XLR inputs and outputs instead of RCA connections. This format utilizes a female XLR jack for receiving audio signals and a male XLR plug for sending them. XLR cables can transmit stereo signals through three pins or dual mono through two pins. These cables are able to provide better quality audio transmission over longer distances by balancing and isolating two signal wires along with a ground. You’ll find XLR cables commonly being used in recording studios, PA systems, and other high-end audio gear. They cost a bit more than RCA cables but deliver pristine audio quality with minimal interference when connecting DJ mixers and controllers to amplifiers.
When connecting RCA or XLR cables between your amplifier and controller, simply match inputs to outputs. For RCA, connect one channel’s red/white outputs from your DJ controller to the same channel’s red/white inputs on your amplifier, the left ports together and right ports together. For XLR, connect the male plug from your controller to the female jack inputs of the same channel on your amplifier. Make sure channels are matched on both ends for proper stereo imaging. Never split channels between inputs as this can cause phase issues in your mix.
Configure Audio Settings
Once your DJ controller is physically wired to your amplifier, some audio configuration is required to optimize signal flow between the devices. The output settings in your DJ controller’s software and connected hardware may need to be adjusted to perfectly match your cabling along with proper gain staging to avoid distortion.
Most DJ software and controllers will provide options for which audio outputs are active. For example, you may need to enable the RCA outputs instead of any headphone or digital connectivity that’s unnecessary for your setup with the amplifier. Enable the outputs that your physical cables are plugged into for everything to sync up. If using hardware with digital connectivity, try disconnecting unused outputs in your software interface to route signals properly.
For gain structure, you want to adjust relative volume levels at each stage to avoid peaking signals which can lead to clipping distortion. Set your DJ controller’s master outputs to around 50-75% maximum volume to keep adequate headroom in case an unexpectedly loud track plays. Then use your amplifier’s volume knob to make final tweaks for your speaker system or mixer levels, making sure not to max either out. It’s also handy to have your amplifier’s EQ settings tuned to your speakers and listening environment for balanced sound. Play around with boosted bass or treble adjustments here rather than relying solely on EQ tweaks in your DJ software.
One other consideration when connecting consumer DJ gear with pro audio equipment is the differences between balanced and unbalanced audio connections. For long cable runs in noisy environments, balanced XLR connections are best as they reduce interference by cancelling out outside signals before the amplifier stage. This can keep background hum and other noise from being amplified. With shorter RCA runs in home setups, unbalanced works fine. But DJ controllers don’t always have balanced outputs, so you’d use a direct box to convert. Adjust grounding and electrical outlets if buzzing persists.
Set Up Speakers or Mixer
After properly connecting your DJ controller to your amplifier, the next vital step is hooking up your actual speaker system, whether it’s a set of passive speakers, self-powered monitors, or a full PA system mixer. Your amplifier needs to have compatible outputs to plug in your gear, pushing the wattage necessary to drive your system.
If utilizing a set of passive speakers with a pole mount cabinet and wired inputs, connect your amplifier’s speaker outputs to one speaker input via speaker wire, banana plugs or binding posts. Then connect a second run of speaker wire from the first speaker’s throughput output to the input of the second, linking both sides together. Position speakers evenly spaced apart and angled in a triangle towards the center of the dancefloor. Make sure your amplifier’s impedance settings match the rating of your speakers. For example, if using 8 ohm speakers, choose that or 4 ohm on the amp so as not to overload them.
For convenient all-in-one active speakers or monitors that have the amplification and processing built-in, you simply need to connect the XLR or TRS outputs from your DJ amplifier directly to one side’s inputs. Then run another cable to daisy chain link the second powered cabinet. Place monitors atop speaker stands at head height when mixing to properly hear your audio. Power on monitors and set volume to match the output of your amplifier when testing.
To feed sound to a full PA setup with a powered mixer and multiple passive speakers, connect the amplifier signals to channel inputs on the mixer via XLR or RCA cables. The mixer then handles routing audio to wall-mounted tops or floor subs. Carefully configure the gain staging through every piece of equipment from controller to mixer to amps to tunes sound to the space and audience size accordingly.
Test and Adjust Levels
Once your physical gear is interconnected, properly cabled up with matching inputs and outputs, and speakers positioned as needed, it’s time to test out signal flow and dial in levels. Drop a track on your DJ controller and start mixing!
Listen critically to the audio quality coming from your speakers. Play various tracks across different genres to check if certain frequencies seem overly resonant or muted which could indicate issues with impedance matching or interference. Use the volume knobs and meters on both your controller interface and amplifier to avoid pushing signals so high that they clip and distort, especially for amplified bass.
Get familiar with making level adjustments in your controller software, on the controller itself, your amplifier, and speakers/mixer during a mix. For example, you may set incoming tracks low in the software so you can boost them for transitions on the hardware mixer, then attenuate everything with the amp output volume as needed. Get used to gain staging properly in this signal chain.
If fader adjustments still don’t give you adequate clean volume to fill your space, tweak amp EQ bands to slightly bump mids or highs rather than just maxing channels. And listen off-axis in the crowd area to hear what actually sounds best for dancers on a large system. Make tweaks to tune the frequency balance the way it sounds best experience.
Troubleshoot Common Issues
With all the cabling, software and diverse hardware that goes into a DJ controller setup, there are ample opportunities for technical problems to arise. Thankfully most issues that stop the music tend to be quick fixes.
One of the most obvious but frustrating problems is when everything seems connected properly, yet you still have little or no audio coming from your speakers. First check that both the controller, speakers, and amplifier are powered on. Make sure volume levels aren’t set to zero or cables plugged into the wrong input or output by mistake. Try swapping cables in case one went bad. If still nothing, sub in alternate speaker or amplifier gear to isolate where the connectivity issue lies using a process of elimination.
Distorted and muddy sound can also plague controller and amplifier integration. This often results from mismatched impedances or improper gain staging overwhelming a device and causing clipping. If distortion crops up at high volumes, back down amplifier or software gains in the chain before that point. Also adjust bass EQ if just low frequencies crackle. Setting up equipment with impedances outside rated specs can require getting line out converters or transformers.
Unwanted noise like buzzing or hum can also sneak into sound systems from problematic electrical wiring, ground loops with connected gear improperly isolated, or picking up interference from nearby appliances. Try disconnecting or moving potential offending devices away from your audio rig. Improve building wiring issues where possible, use power conditioners, and install noise filters on cables. Switching to balanced connections can also combat external noise in some cases.
Set up your DJ controller and amplifier properly by selecting compatible gear, making solid connections, dialing in optimum gain staging, matching specifications, and tweaking your configuration in the given environment. Follow this process closely so you can avoid technical troubles when playing out live. But even if issues inevitably emerge, methodically troubleshooting the signal chain from end to end should get the music pumping again.
Conclusion
In conclusion, connecting a DJ controller to an amplifier is vital for powering speakers properly and being heard. Follow best practices for selecting compatible equipment, making solid connections with quality cables, configuring software and hardware settings correctly, tuning the system to the environment, and troubleshooting issues. With the right gear properly integrated, DJs can pump out the tracks at full volume without distortion or noise. Implementing proper gain staging, impedance matching, and noise reduction techniques will keep the music playing all night.
