How Many Decibels Does Acoustic Foam Reduce? Understanding Real Performance
How many decibels does acoustic foam reduce? It can make a room feel calmer, but it won’t block your neighbor’s bass or stop sound from leaving your room.
If you’re chasing a single dB number, it’s usually because the problem feels confusing. Reflections inside a room and sound transmission through walls behave like two different worlds.
That’s because foam is light and porous, so it’s good at absorbing mid/high reflections and shortening reverb. It’s bad at soundproofing because it doesn’t add mass or seal air gaps.
In this guide, you’ll get a realistic “what changes / what doesn’t” answer and the metrics that actually matter. The picks below make it easier to match the right measurement tools to your room.
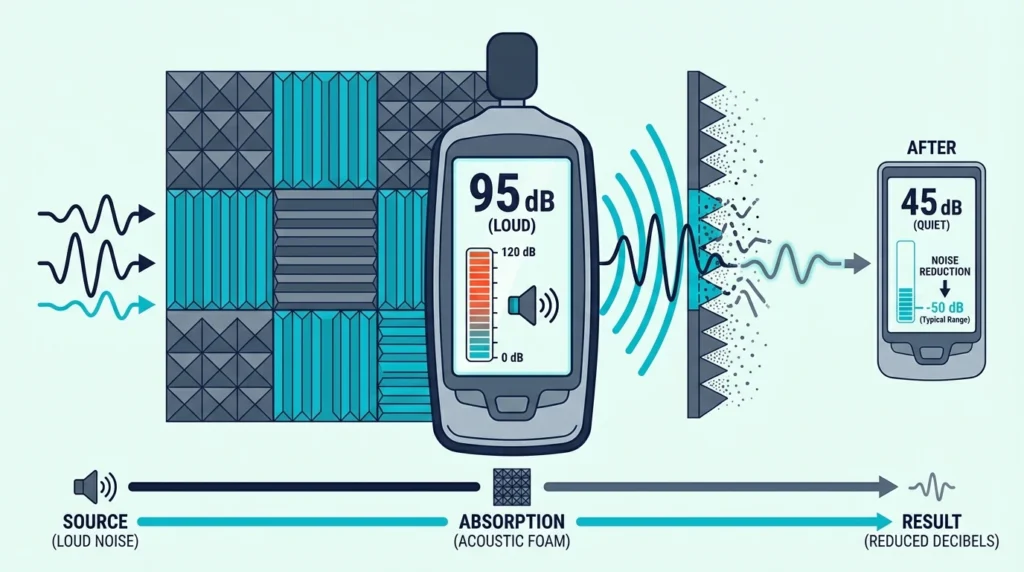
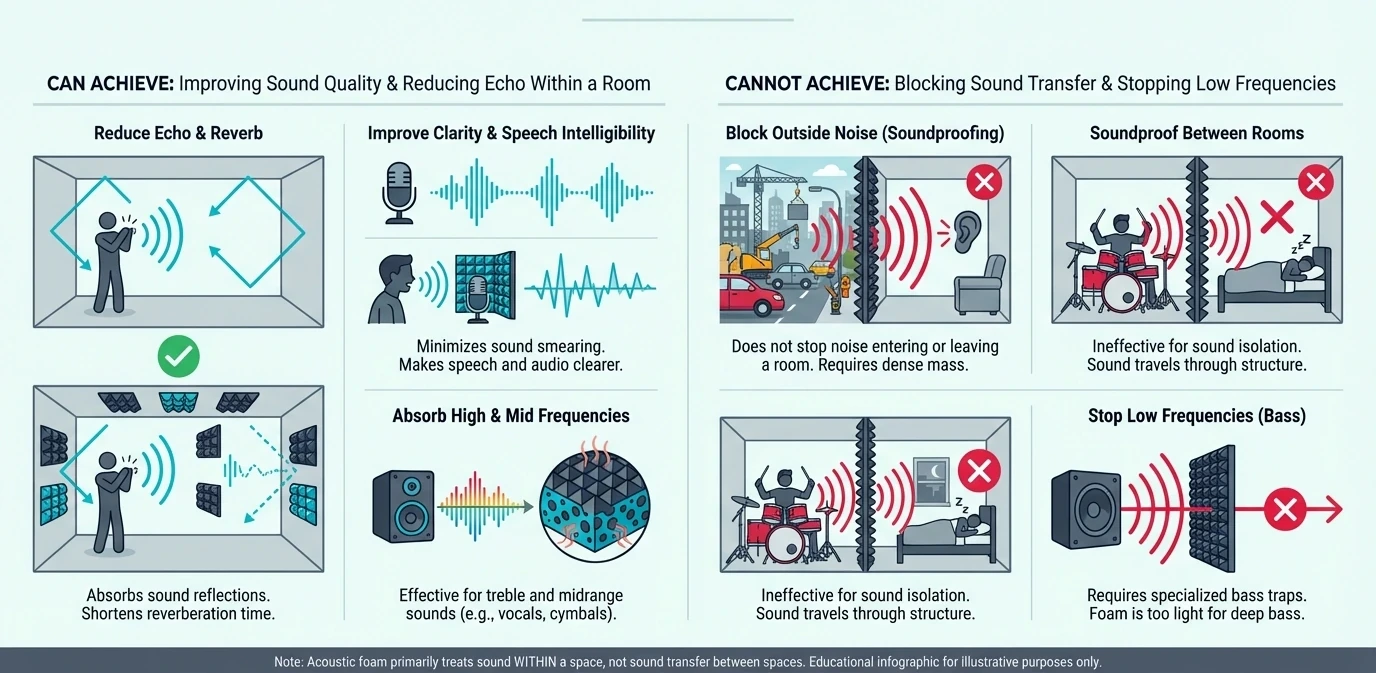
Acoustic foam reduces reflected sound (echo and reverb), not transmitted sound (noise through walls). If your goal is soundproofing, the honest answer is basically zero decibels.
Inside the room, you may measure a small drop in late reflections after treatment. The bigger win is a shorter reverb tail and clearer speech for your recordings.
What Does Acoustic Foam Actually Reduce?

The decibel question requires clarification about exactly what you are trying to measure. Foam interacts with sound energy in a specific way that differs from heavy construction materials, which explains why one room can feel “quieter” while another remains noisy.
How Does Sound Absorption Work?
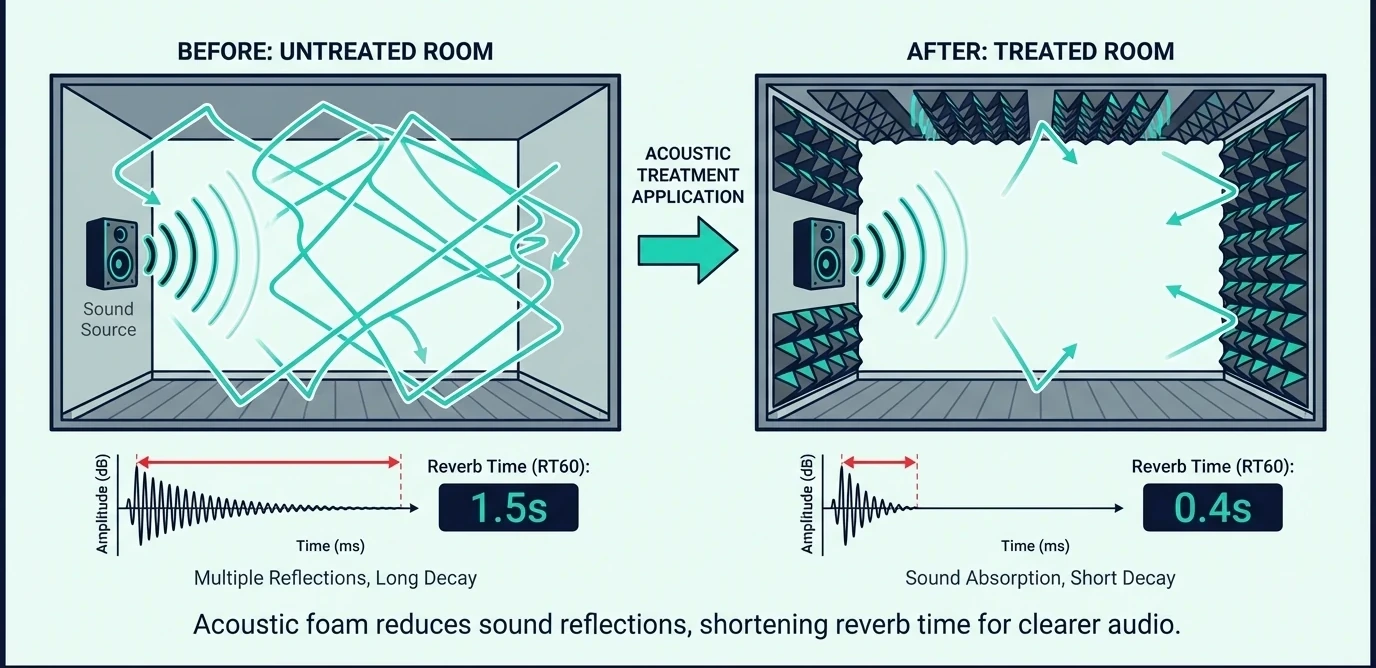
Acoustic foam absorbs sound waves that would otherwise reflect off hard surfaces like drywall or wood. When foam absorbs a reflection, that sound energy is converted into small amounts of heat.
This process reduces the reverb time (RT60), which is how long sound takes to decay by 60 dB. It also lowers the overall level of reflected sound and clears up room noise caused by buildup—but there is a hard limit to what this “soaking up” of energy can do.
Why Foam Fails at Sound Transmission
Sound transmission is the sound passing through walls, floors, and ceilings into other rooms. Foam provides essentially zero reduction in transmission because it lacks the necessary density.
Sound blocking requires mass to reflect energy and a lack of pores to prevent air leaks. If you want to know how much quieter your neighbor’s music will be, the answer is not at all.
For a deeper look at the absorption versus blocking distinction, check out our guide on sound deadening vs acoustic foam.
If you just want the straight expectation-setting version, does acoustic foam work? draws the line clearly.
Measured Absorption Performance
Understanding what foam actually achieves requires looking at lab-measured performance metrics. These numbers show how foam handles specific frequencies rather than just a broad decibel figure, and those specifics are what dictate how your room actually sounds.
Understanding Absorption Coefficients
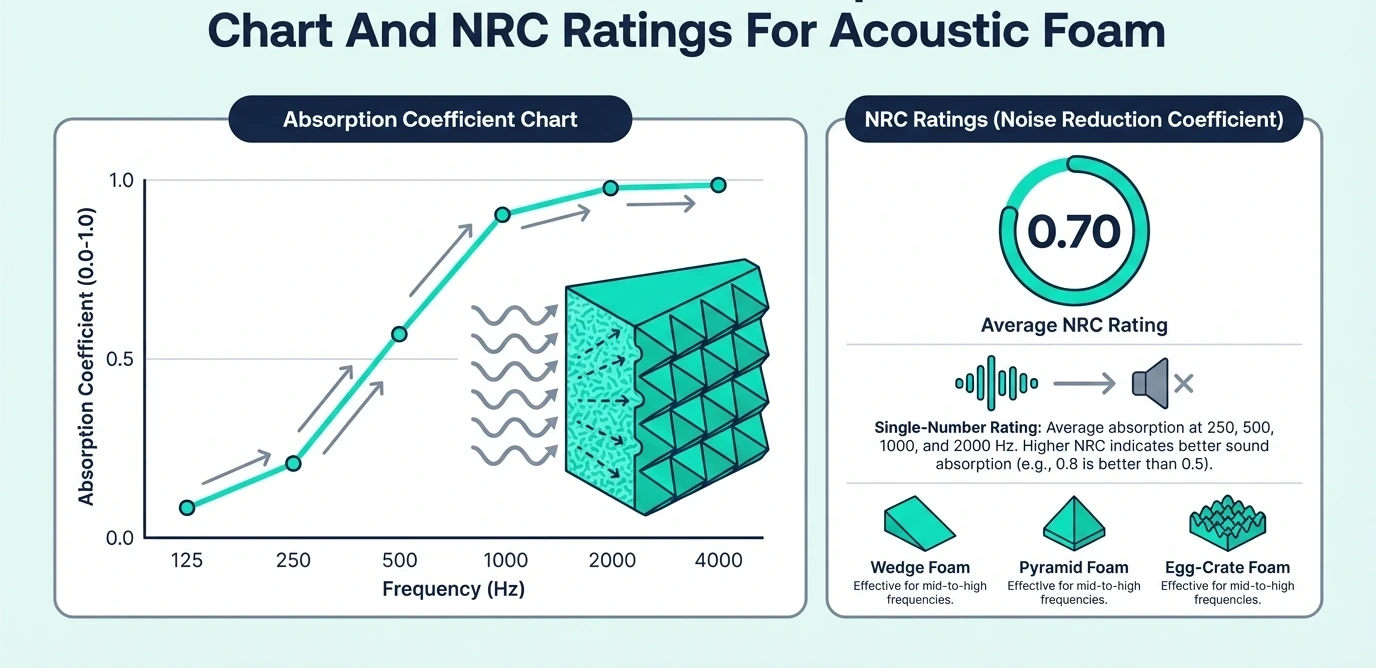
The absorption coefficient indicates what percentage of sound energy is absorbed at each frequency. A coefficient of 0.80 means 80% of the sound energy is absorbed while 20% reflects back.
Foam typically performs better at higher frequencies where the wavelengths are shorter. As you can see in the table below, performance drops off significantly in the lower bass regions.
| Frequency | 2” Foam | 4” Foam |
|---|---|---|
| 125 Hz | 0.10 | 0.25 |
| 250 Hz | 0.25 | 0.55 |
| 500 Hz | 0.55 | 0.85 |
| 1000 Hz | 0.80 | 0.95 |
| 2000 Hz | 0.90 | 0.95 |
| 4000 Hz | 0.85 | 0.90 |
What Is an NRC Rating?
The Noise Reduction Coefficient (NRC) is a scalar representation of the amount of sound energy absorbed by a surface. It is calculated by averaging the absorption coefficients at four key frequencies: 250 Hz, 500 Hz, 1000 Hz, and 2000 Hz.
Budget foam usually lands between 0.50 and 0.65, meaning it absorbs roughly 50-65% of the energy in the speech range. Premium, high-density foam can reach 1.0 or higher, effectively absorbing all incident sound energy in those bands.
Higher NRC ratings mean more effective control over mid-range “honk” and high-frequency “zing.” However, because NRC ignores everything below 250 Hz, it doesn’t tell you if the foam will fix a boomy bass problem.
To tackle those lower frequencies where NRC fails to give the full picture, you have to look at the physical profile of the panel itself. For a deeper dive into what frequencies foam handles best, see our guide on acoustic foam frequency absorption.
Why Thickness Changes the Decibel Math
The thickness of the foam directly dictates the lowest frequency it can effectively “grab” and convert to heat. A 2-inch panel is roughly the minimum required to handle the fundamental frequencies of the human voice.
If you switch to 4-inch foam, you aren’t just doubling the material; you are shifting the “absorption knee” lower. This allows the foam to reduce decibel buildup in the 250 Hz range, which is where most “muddiness” lives in a small room.
The Logarithmic Reality of Decibels
It is important to remember that decibels are logarithmic, which means a small number change equals a big energy change. A 3 dB reduction in reflected sound energy represents a 50% decrease in sound intensity.
While a 3 dB drop might look small on a handheld meter, the perceived change in clarity is dramatic. The “muddiness” clears up because you’ve effectively cut the competing noise floor of the room reflections in half.
Measuring Decibel Changes at Home
You might see small decibel changes inside a treated room, but it is usually in the late reflections. This is why a room feels less ringy even when the direct voice or speaker volume stays the same.
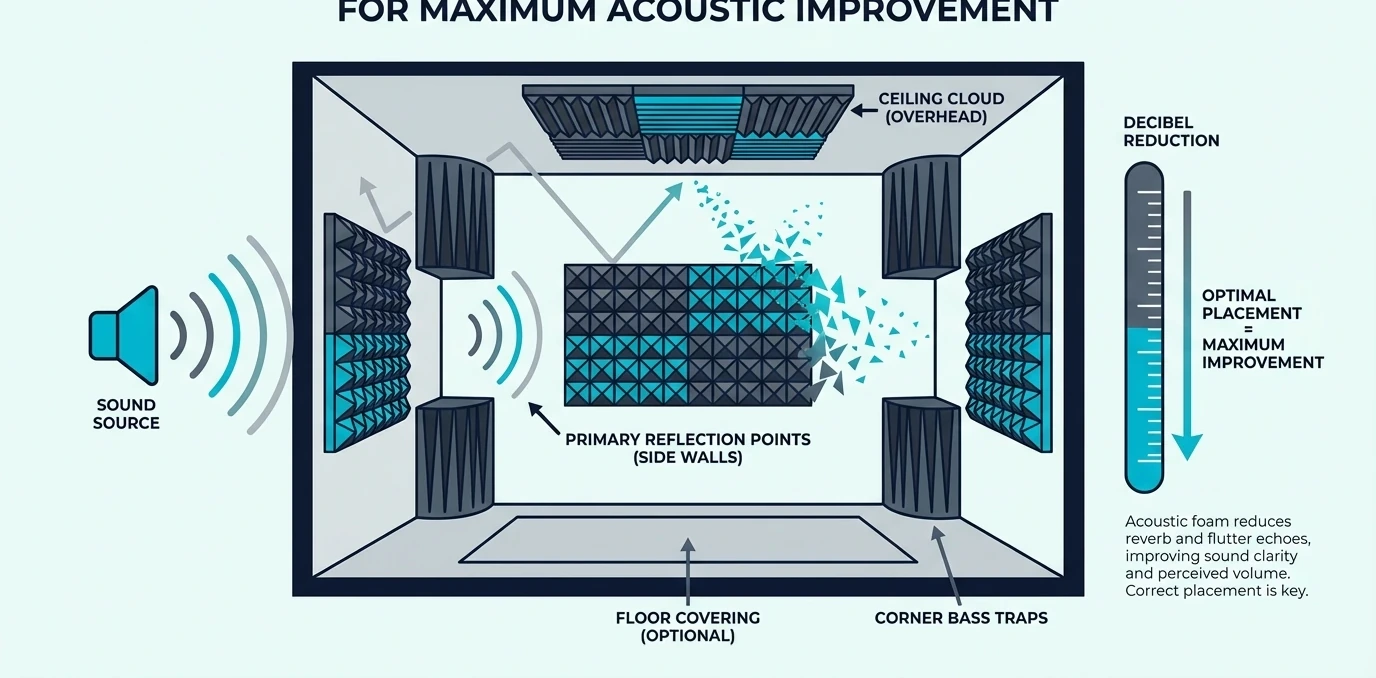
In a small bedroom, treating the primary reflection points can drop late-field room readings by 2 to 5 dB. The reflections stop stacking on top of the direct sound, creating a much cleaner environment.
If you’re treating a bedroom specifically, our guide on acoustic foam in a bedroom covers placement for that space.
If you want to measure this yourself, play pink noise and record from the same spot before and after treatment. Look for consistent trends in the 500 Hz to 4 kHz range where foam is most effective.
If you want to measure the improvement without the guesswork, a few key tools can help you establish a solid baseline.
If you just want a quick before-and-after check without a laptop, a simple Pyle Digital Handheld Sound Level Meter – Meter Automatic with A and C Frequency is perfect for tracking decibel snapshots as you add panels.
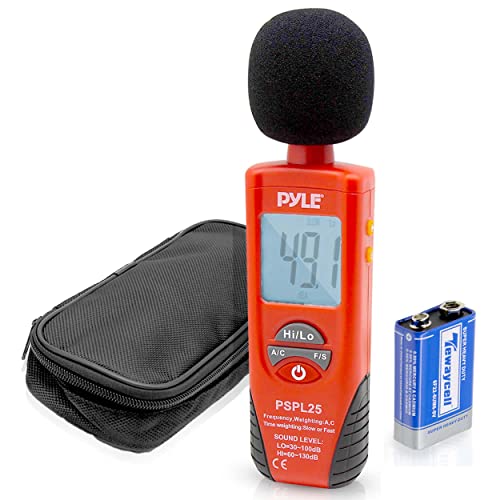
Pyle Digital Handheld Sound Level Meter – Meter Automatic with A and C Frequency
For those who need to see the RT60 decay and frequency response on a computer, a miniDSP UMIK-1 USB Measurement Calibrated Microphone is the industry standard for home studio calibration.
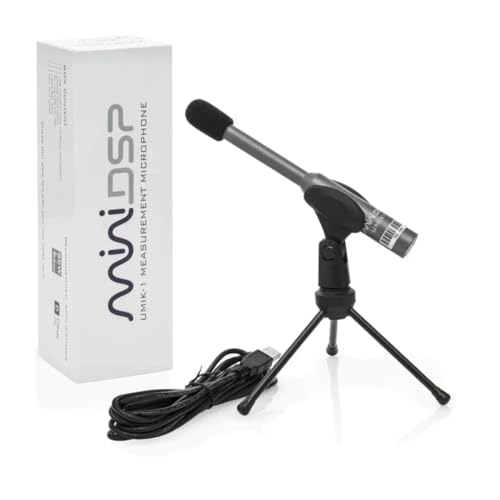
miniDSP UMIK-1 USB Measurement Calibrated Microphone
If you prefer a portable solution that works with your smartphone, a Dayton Audio iMM-6 Calibrated Measurement Microphone for iPhone, iPad Tablet and offers a calibrated way to get repeatable data using room-analysis apps.
Dayton Audio iMM-6 Calibrated Measurement Microphone for iPhone, iPad Tablet and
Get Studio Tips Weekly
Join 5,000+ creators getting acoustic treatment advice every week.
No spam. Unsubscribe anytime.Why Reverb Time Matters More Than Decibels
Reverb time is often a much more meaningful metric for room quality than raw decibel levels. It tells you how quickly sound stops bouncing around, which directly impacts clarity—and measuring that speed starts with a specific technical benchmark.
What Is RT60?
RT60 measures how long it takes for sound to decay by 60 dB after the source stops. Untreated rooms often have an RT60 of 1 to 2 seconds, while recording spaces target 0.3 to 0.6 seconds. Getting your room down to those professional targets is where acoustic foam becomes the primary tool for the job.
How Foam Impacts Reverb Decay
Proper foam treatment typically reduces RT60 by 30% to 50% with moderate coverage. If you move to comprehensive coverage of 40% or more, you can see a reduction of up to 70%.
A room with a 1.2-second RT60 might drop to 0.6 seconds with good treatment. This creates a dramatic improvement in perceived acoustics even if the SPL meter doesn’t move much.
Measuring Real Improvements at Home
If you want numbers instead of just vibes, measure your RT60 before and after treating the room. Keep your microphone position and speaker volume exactly the same to ensure a fair comparison.
Handheld meters show overall levels, but RT60 is much more sensitive to the presence of acoustic foam. For specific echo issues, how to stop echo with acoustic foam helps you place panels where they matter.
Analyzing Real-World Scenarios
Decibel reduction expectations change significantly depending on your specific goal. Let’s look at how foam performs in common household and studio environments.
The Home Recording Studio
In a recording environment, the goal is to maximize the “Direct-to-Reverberant” ratio for your microphone. Foam helps by catching the sound that passes your head and prevents it from bouncing back into the mic capsule.
You can expect a 40% to 60% reduction in reverb time (RT60) with strategic placement at reflection points. This makes your EQ and compression work better because you aren’t trying to process a “muddy” room sound.
For more details on this use case, see whether acoustic foam improves recording. The focus here is controlling the “ring” of the room rather than trying to block the neighbors.
Dealing With Noisy Neighbors
If you are trying to block sound from an adjacent apartment, foam effectiveness is zero. You will see a 0 dB reduction in transmitted sound through the walls.
Foam cannot solve this problem because it lacks mass and cannot seal air gaps. You need construction solutions like additional drywall layers or specialized soundproofing barriers.
Fixing Home Theater Echo
In a home theater, foam helps improve dialogue clarity by reducing harsh reflections. The effectiveness is moderate to high, leading to a much more immersive listening experience.
Dialogue becomes easier to understand because the room reflections no longer mask the speaker’s voice. This is a case where the room feels quieter because the noise floor of the reflections is lower.
Why the Decibel Question Is Often Misleading
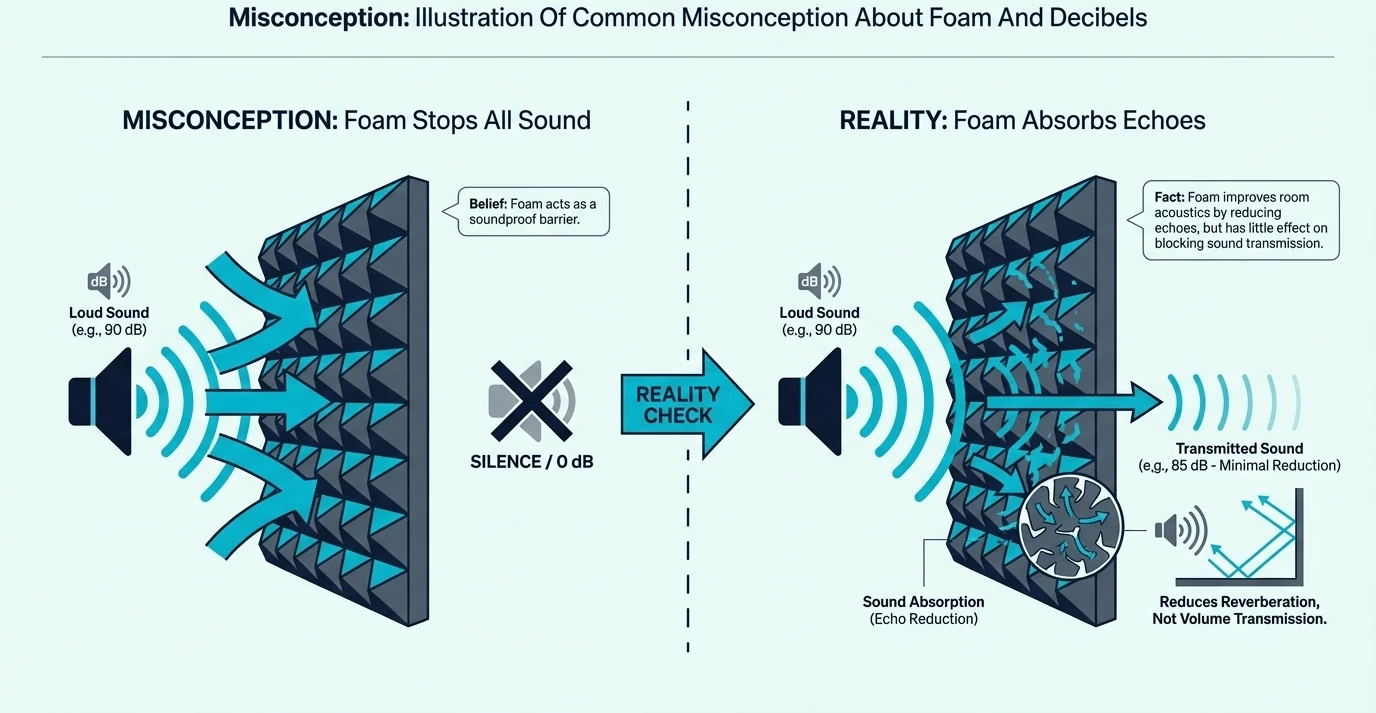
Asking how many decibels foam reduces often stems from a fundamental misunderstanding of acoustics. People often assume foam works like earplugs for a room, but the reality is more selective.
The Standard Misconception
Many users believe that adding foam will lower the overall volume of everything in the room. They expect a quieter room in the same way that closing a window reduces street noise.
The Reality of Acoustic Control
Foam selectively reduces reflected sound while leaving the direct sound from your speakers unchanged. It creates a controlled acoustic environment rather than a quieter space in the traditional sense.
Better Questions to Ask Instead
If you want to know if foam is the right choice, try asking these questions instead. Will foam reduce the echo in my room? Yes. Will foam improve my recording quality by cleaning up the room sound? Yes. Will foam stop sound from reaching my neighbors or block traffic noise? No, it won’t.
How to Maximize Your Room’s Performance
If you want the maximum impact from your foam treatment, strategic planning is essential. Coverage, placement, and thickness all play a role in how much sound you actually absorb.
Strategic Coverage Targets
More coverage generally leads to more absorption, but only up to a certain point. At 25% coverage, you get a noticeable improvement, while 40% offers a significant professional change.
Beyond 60%, you hit diminishing returns and risk making the room sound unnatural and “dead.” For choosing the right amount, see our guide on how to choose acoustic foam.
Placement vs. Random Coverage
Strategic placement always beats covering every square inch of a wall at random. Focus on first reflection points to get the maximum impact for the least amount of material.
Corners are another critical area where you should consider adding bass traps for low frequencies. For a full layout plan, see how to arrange acoustic foam.
Why Thickness and Quality Matter
Thicker foam is required to absorb lower frequencies that thinner panels simply miss. 2-inch foam is effective above 500 Hz, while 4-inch foam can reach down toward 250 Hz.
Higher density foam, ideally 1.5 pounds per cubic foot or more, also absorbs much more effectively. Cheap, low-density foam often underperforms significantly and fails to provide the control you need.
DIY Guide: How to Measure Your Room’s Improvement

If you want to move beyond “it sounds better” and see actual data, you can run a simple test with free tools. This process helps you identify if your foam is actually doing the job or if you need to adjust placement.
Step 1: Establish a Baseline
Before you stick any foam to the walls, set up your microphone in your primary recording position. Record a loud, sharp “clap” or use a “balloon pop” to generate a broad-spectrum impulse.
Open the recording in a free editor like Audacity and look at the “decay” of the waveform. Measure the time it takes for the tail of that clap to disappear into the noise floor.
Step 2: The First Reflection Test
Apply your first set of foam panels to the “first reflection points” on the side walls. Repeat the clap test and compare the visual length of the waveform tail to your baseline.
You should see a shorter, tighter decay pattern even if the initial peak of the clap is the same volume. This visual change is the “absorption” at work, showing you exactly how much room energy you’ve removed.
Step 3: Targeted Measurement with REW
If you want professional-grade data, download Room EQ Wizard (REW) and use a calibrated microphone. REW can generate a Waterfall Plot, which shows how specific frequencies decay over time in your room.
This allows you to see if you have “ringing” at specific frequencies that your foam isn’t catching. If you see a long tail at 200 Hz, you know you need thicker foam or bass traps in the corners.
Conclusion
Acoustic foam does not reduce sound by a simple decibel number in the way soundproofing materials do. It reduces reflected sound and reverb time while having almost no effect on sound transmission through walls.
For absorption, expect a 3 to 6 dB reduction in reflected sound levels and a significant drop in reverb. These improvements are essential for high-quality recording and accurate listening environments.
If you are trying to block noise from neighbors or prevent sound from escaping, foam is the wrong tool. That requires mass and sealing, which are completely different solutions from surface-level acoustic treatment.
Frequently Asked Questions
Will acoustic foam reduce noise by 10 dB?
Not in the sense of soundproofing through a wall. It can reduce the echo inside a room, but it won’t stop your neighbor’s music from coming through.
How much does acoustic foam reduce echo?
It reduces echo enough that a room sounds noticeably less ringy and more professional. The change is more obvious in the reverb decay time than on a single decibel meter reading.
Can acoustic foam make a room soundproof?
No, acoustic foam is too light and porous to block sound transmission. Soundproofing requires heavy mass and airtight seals that foam simply cannot provide.
How much foam do I need to notice a difference?
Most users notice a major change after treating the first reflection points and the wall behind their microphone. You do not need full coverage to hear a significant improvement in clarity.
Does thicker foam reduce more decibels?
Thicker foam reaches lower frequencies, which helps a room sound less boxy and more balanced. It still won’t block sound from entering or leaving the room through the walls.
How do I measure the acoustic improvement from foam?
Start with a simple before-and-after clap test or a short voice recording. For actual numbers, use a room-measurement app to track the RT60 reverb time from the same spot.

