
Ever wondered how your footsteps on the floor above might sound like a drumroll to the people downstairs?
If you’re the kind of person who cares about the comfort and peace of your neighbors or family living below you, then you’ve probably thought about soundproofing your floors.
Soundproofing isn’t just about you; it’s a community-minded action that contributes to a better living environment for everyone in your home or building.
This guide will walk you through the essentials of soundproofing your floors, from identifying types of noise to choosing the right materials and dodging common mistakes.
Ready to be the hero your building didn’t know it needed?
Let’s dive into how you can soundproof your floors and make communal living a little more harmonious for all.
Why Do People Choose to Soundproof Their Floors?

Soundproofing a floor is more than just a home improvement project; it’s often a solution to specific challenges in residential living.
Here are the reasons why you will want to soundproof your floors.
Are You Being Considerate of Others?
One of the most altruistic reasons people choose to soundproof their floors is out of consideration for others.
Whether it’s neighbors living in the apartment below or family members residing on a different level of the house, soundproofing floors can greatly contribute to a peaceful co-existence.
In an era where people are spending more time at home for work or leisure, the need for quiet and private spaces has become increasingly essential. By taking the step to soundproof your floors, you’re actively contributing to a more harmonious living environment.
It’s a gesture that doesn’t go unnoticed and can significantly improve relations with those around you.
Have You Received Noise Complaints?
In some instances, the decision to soundproof floors is reactive rather than proactive. If you’ve received noise complaints from neighbors or a housing association, then soundproofing becomes less of an option and more of a necessity.
Noise complaints can lead to strained relationships with neighbors and, in extreme cases, could result in legal action. Soundproofing your floors in response to complaints is a tangible step that shows you’re taking the issue seriously.
It can help mend fences with irritated neighbors and can potentially save you from legal troubles related to noise ordinances.
Is Your Family Living Below You?
In homes that are structured vertically, where family members occupy different levels, soundproofing floors is often done to maintain a sense of peace and privacy within the family unit.
For example, parents might need quiet for work or sleep, while children may engage in activities that are naturally noisy.
The noise doesn’t have to be extreme to become a source of tension; even everyday sounds like footsteps, talking, or the TV can become disruptive when heard from another level.
Soundproofing the floors in such homes can be an effective way to ensure that everyone can go about their daily activities without being a disturbance to others.
What Types of Noise Can Floors Transmit?

Understanding the different types of noise that can be transmitted through floors is essential for choosing the right soundproofing solutions. From the thumping of footsteps to the hum of a conversation, various noises can disrupt the peace and quiet of a home.
Impact Noise Or Structureborne Noise
Impact noise is among the most prevalent and disruptive types of noise people aim to reduce when soundproofing their floors. This type of noise is generated by the physical impact of objects with the floor.
Examples of impact noise sources are numerous: footsteps, pet activity, moving furniture, and even the dropping of objects on the floor. In settings where concentration is essential, such as home offices or study rooms, the intrusion of impact noise can significantly disrupt focus.
Similarly, in environments meant for rest, like bedrooms, impact noise can severely affect the quality of sleep. Therefore, understanding and treating impact noise effectively becomes critical for maintaining a peaceful living or working space.
Airborne Noise
Airborne noise is a different beast altogether. This type of noise includes sounds that travel through the air and get absorbed or blocked by other materials.
Conversations, music, TV, and even the noise from household appliances like vacuum cleaners or mixers fall under this category. One of the challenges with airborne noise is that it is often continuous and can vary in frequency, making it harder to eliminate completely.
Because these noises travel through the air, they can easily seep through floorboards, especially in older homes where the flooring may not be as secure.
Effective soundproofing against airborne noise usually involves using materials that can absorb these sound waves or block them from penetrating through the floor.
Flanking Noise
Flanking noise is perhaps the most tricky to handle, primarily because it’s not direct noise. Instead, it’s noise that finds alternative paths to travel, bypassing your primary soundproofing barriers.
For instance, you could have a well-soundproofed floor, but if the walls or even the ceiling are not soundproofed, noise could travel along those paths.
This is why it’s not uncommon for people to find that noise is still an issue even after they’ve invested in soundproofing their floors. Flanking noise requires a more comprehensive approach to soundproofing that goes beyond just treating the floors.
It often involves identifying all possible paths that sound can take and then taking measures to block or absorb the noise along those paths.
What Should You Do Before Soundproofing Your Floor?
Before diving into a floor soundproofing project, it’s essential to prepare adequately to ensure the effectiveness and longevity of your efforts.
From identifying the types of noise you’re dealing with to assessing the state of your existing floor and taking precise measurements, preparation is a critical aspect that sets the stage for a successful soundproofing project. Here is our your prepare before soundproofing your floor.
1. Identify the Source of the Noise
Identifying the source of the noise is arguably the most crucial first step in any soundproofing project. The reason for this is simple: different kinds of noise require different soundproofing solutions.
For instance, if you’re dealing primarily with impact noise, like footsteps or furniture being moved, your approach will likely involve materials designed to absorb or dissipate that kind of sound energy.
On the other hand, if you’re looking to minimize airborne noise, you’ll need materials that can either block or absorb sound waves effectively.
Accurate identification is often achieved by either carefully observing the kinds of sounds you hear or even using specialized measuring equipment. Sometimes, consultation with soundproofing experts may also be necessary for a more accurate diagnosis.
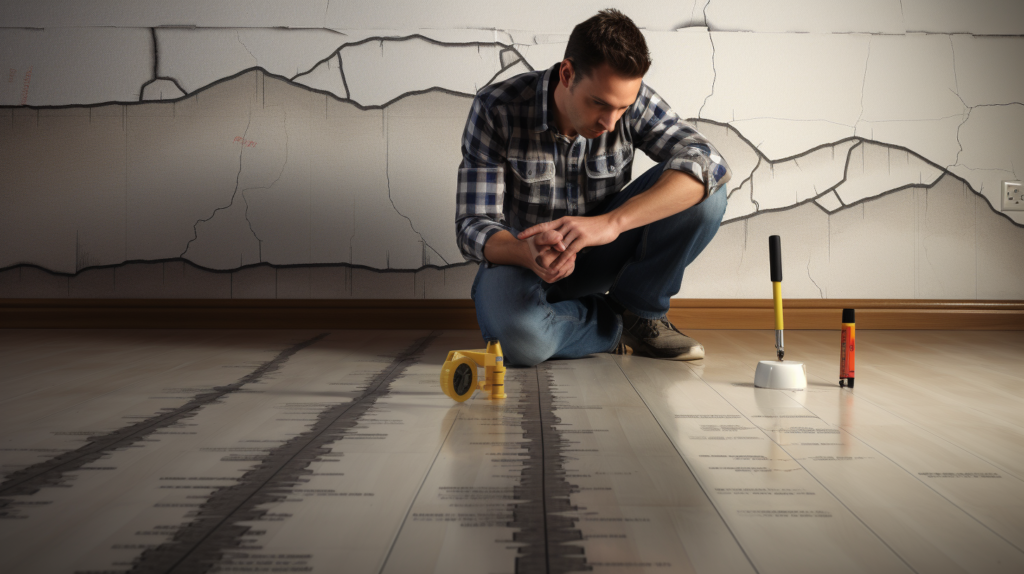
2. Assess the Condition of Your Floor?
Assessing the condition of your floor is another preparatory step that shouldn’t be skipped. Any existing issues like cracks, holes, or general wear and tear need to be addressed before you lay down any soundproofing materials.
Failure to do so can result in a less effective soundproofing outcome and may even require you to redo some or all of the work. Start by conducting a thorough visual inspection of the floor.
Look for any visible signs of damage or wear, such as cracked tiles, holes in wood planks, or uneven surfaces. You may also want to consider tapping along the surface to identify any hollow or loose sections that may need to be secured or replaced.
3. Take Accurate Measurements
Accurate measurements of your floor area are essential for multiple reasons. First, they help you estimate the amount of material you’ll need, which in turn helps you budget for your project.
Second, knowing the exact dimensions can also help you decide on the best layout for your soundproofing materials, maximizing their effectiveness. Measure the length and width of your floor to get the total square footage.
If your room isn’t a perfect square or rectangle, you’ll need to break it down into smaller geometric shapes and measure those individually. Don’t forget to account for alcoves, fireplaces, or any other features that might affect the amount of material you need.
Which Materials Are Best for Soundproofing Floors?
When it comes to choosing the right materials for soundproofing your floors, there are several options available that offer different benefits. In this section, we’ll focus on Rubber Acoustic Underlayments and Floating Floors, two popular choices that are both effective and versatile.
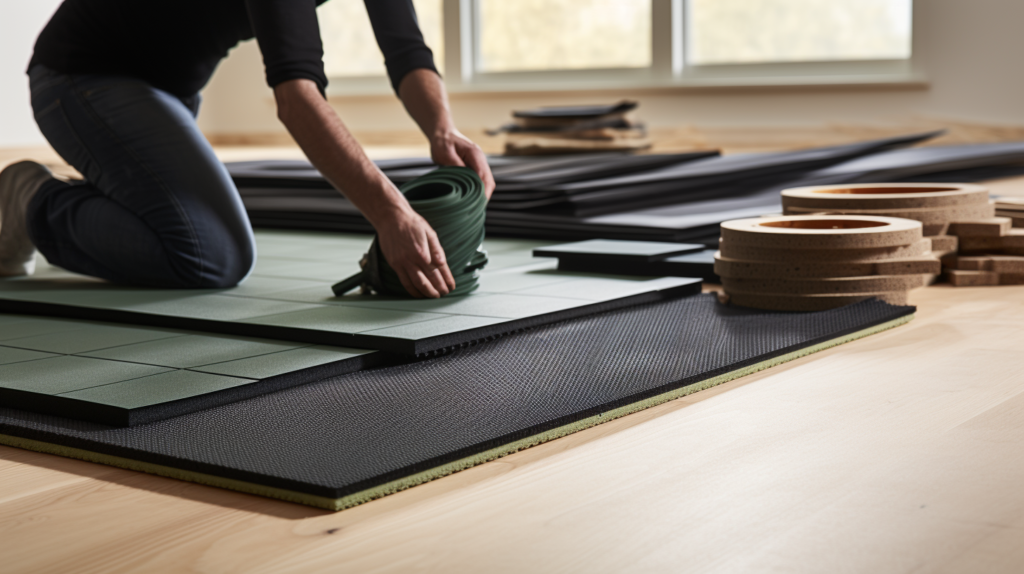
Rubber Acoustic Underlayments
Rubber acoustic underlayments are a go-to option for those primarily concerned with reducing impact noise. These underlayments are typically made from recycled rubber materials, making them an eco-friendly option.
The rubber material serves a dual function: it not only provides a cushion that absorbs the impact of footsteps or dropped objects but also has a dense structure that can help block airborne noise.
Installation is generally straightforward, usually requiring just a utility knife to cut the material to fit your space and an adhesive to secure it to the existing floor.
It’s a versatile solution, suitable for apartments, multi-level homes, and even commercial spaces like offices where noise reduction is key.
Floating Floors
Floating floors offer another effective way to soundproof your living or working space. Unlike traditional flooring, which is nailed or glued directly to the subfloor, a floating floor is laid over a layer of soundproofing material, allowing it to “float” above the existing floor.
This setup is excellent for minimizing the transfer of both airborne and impact noise. Floating floors can be made from various materials, including laminate, hardwood, and even tile, providing a range of aesthetic options to complement their soundproofing effectiveness.
However, installing a floating floor can be more complex than other methods, so you may want to consider hiring professionals, especially if you’re looking for maximum soundproofing efficacy.
How Can You Soundproof a Floor Yourself?
Taking on a DIY floor soundproofing project can be both cost-effective and rewarding. With the right materials and a little bit of know-how, you can significantly reduce noise levels in your home or office.
This section provides step-by-step guides for various DIY soundproofing methods, from installing rubber acoustic underlayments to setting up a floating floor system, empowering you to take control of your acoustic environment.
1. Install Rubber Acoustic Underlayment
For those who prefer to take a hands-on approach to home improvement, installing rubber acoustic underlayment can be a fulfilling weekend project.
Before you begin, you’ll need to ensure that your existing floor is clean and free from any debris, as dirt and particles can compromise the underlayment’s performance. Once the floor is clean, you can start rolling out the underlayment.
It’s generally a good idea to start from one corner of the room and work your way out, cutting the material as needed to fit around obstacles like columns or door frames.
Secure the underlayment using an adhesive or double-sided tape, taking care to eliminate any air bubbles that may form. Once the underlayment is in place, you can proceed with installing your chosen flooring material on top, following the manufacturer’s guidelines.
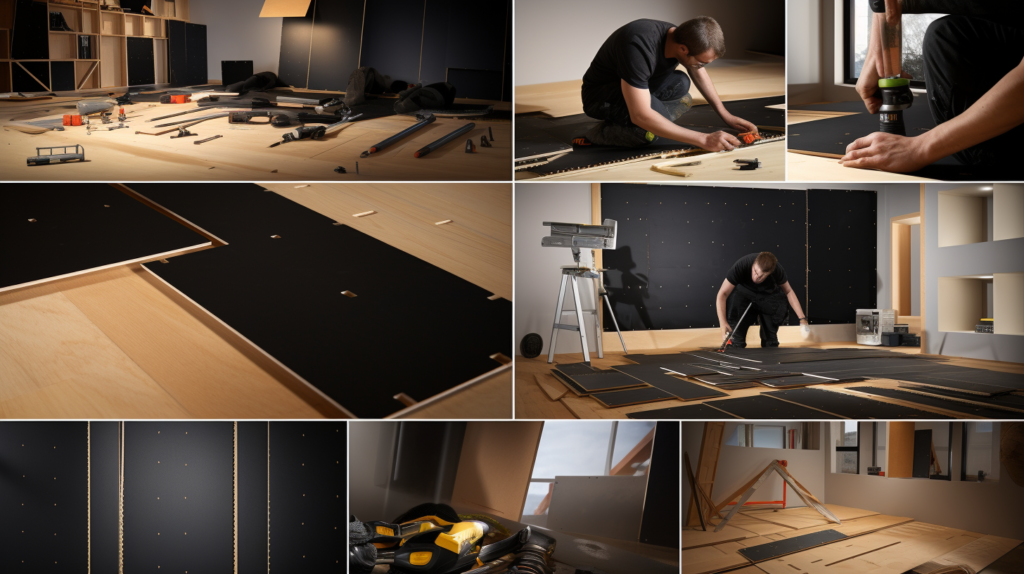
2. Add a Layer of Plywood, MDF, or Use a Floating Floor System On Top
For those looking to take their soundproofing efforts to the next level, adding a layer of plywood or Medium-Density Fiberboard (MDF) can offer an additional layer of sound protection.
Plywood and MDF have the advantage of being relatively easy to work with, requiring just basic tools like a saw, screws, and possibly some adhesive. Before you start, make sure to measure the area carefully to determine how much material you’ll need.
Once you have your materials, lay them out on top of your existing floor or soundproofing layer, taking care to fit the pieces closely together to avoid gaps where sound can escape.
Secure the plywood or MDF using screws, making sure to countersink them so that your final flooring layer lays flat.
Alternatively, you may opt for a floating floor system, which is a more advanced and effective but also more complicated solution. A floating floor is essentially a floor that is installed over a layer of soundproofing material, effectively “floating” above the existing floor.
This separation helps to minimize the transfer of sound through the structure of the building, providing superior soundproofing performance. Because this is a more complex installation, many people choose to hire professionals to ensure it’s done correctly.
How to Soundproof a Floor on a Budget?

Soundproofing a floor doesn’t always have to break the bank. There are cost-effective alternatives that can significantly reduce noise levels in your home or workspace.
This section offers practical, budget-friendly solutions, from repurposing household items to making strategic furniture placements, to help you achieve quieter living spaces without stretching your finances.
1. Use Carpets and Rugs
If budget is a concern, there are still several effective yet affordable ways to soundproof a floor. One of the simplest is to use carpets and rugs.
While they may not offer the same level of soundproofing as more specialized materials, they can still make a noticeable difference, particularly against impact noise.
Carpets and rugs work by adding a layer of soft material that absorbs the force of impacts, such as footsteps, thereby reducing the amount of noise that gets transmitted. Additionally, their fibrous nature can help to absorb some amount of airborne noise as well.
Beyond their soundproofing benefits, carpets and rugs also offer the added advantages of enhancing the aesthetic and comfort of your living space.
2. Repurpose Old Mattresses for Soundproofing
Another creative and budget-friendly option is to repurpose old mattresses as temporary soundproofing. While this is not a long-term or particularly attractive solution, it can be effective in a pinch.
For example, if you’re a musician, like a drummer and need to practice without disturbing others, laying down some old mattresses on the floor can significantly reduce the amount of noise that escapes the room.
This is particularly useful for absorbing impact noise, although it may have some effect on airborne noise as well.
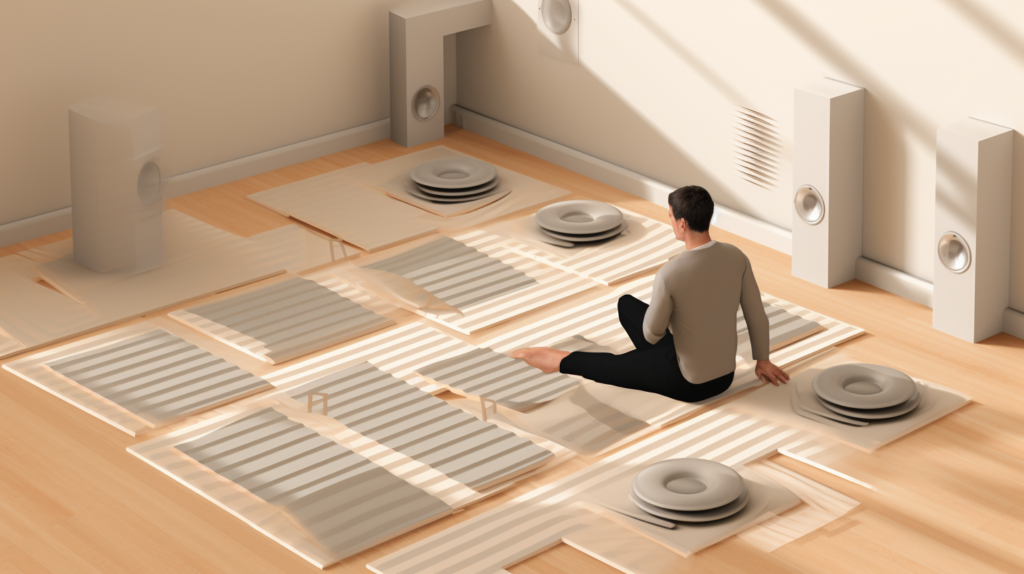
Use Furniture Strategically for Acoustic Treatment
While furniture isn’t typically designed for soundproofing, it can be used strategically to aid in reducing noise. Heavy pieces of furniture like bookshelves, sofas, and cabinets can actually serve as sound barriers when placed against walls or in areas where noise tends to travel.
While this method won’t completely soundproof your floor, it can certainly help in reducing the noise level. The reason behind this is fairly simple: the mass of the furniture can help to block or absorb sound waves, reducing their ability to travel freely.
Plus, bookshelves and cabinets can be filled with books, ornaments, or other items, adding to their sound-absorbing capabilities.
But just to be clear, they will not solve the soundproofing issue that would require specialized products like acoustic underlay and floating floor.
What Are the Common Mistakes to Avoid in Floor Soundproofing?
Embarking on a floor soundproofing project is a significant commitment that can yield remarkable benefits. However, the journey is often fraught with pitfalls that can compromise the effectiveness of your efforts.
Being aware of these common mistakes can save you both time and money, ensuring that your pursuit of a quieter environment is a successful one.
Skimping on Quality Materials
One common pitfall people fall into when embarking on a soundproofing project is opting for cheaper materials in an attempt to save money. While this may offer some short-term financial relief, it often compromises the effectiveness of your soundproofing efforts.
Lower-quality materials may not provide the same level of noise reduction as their higher-quality counterparts, meaning you may find yourself having to redo the project sooner than expected.
This can end up costing you more time and money in the long run. Therefore, it’s advisable to invest in quality materials from the outset, even if they come with a higher upfront cost.
Ignoring Flanking Paths
Another mistake that is often made is ignoring the potential for flanking paths. Sound has a way of finding the least resistant path, meaning it can easily bypass your newly soundproofed floor and travel through walls, ceilings, or even HVAC systems.
If you’re going to the effort and expense of soundproofing your floor, it makes sense to also consider other potential pathways for noise.
This may involve additional soundproofing measures like sealing gaps around doors and windows, soundproofing walls, or even adding acoustic panels to ceilings.
Conclusion
Soundproofing your floor is not just a home project but an investment in better living. Whether for peace within your family, compliance with noise regulations, or being a considerate neighbor, the benefits are manifold.
But success hinges on thoughtful planning and quality materials. Budget options exist, but remember, cutting corners could cost you more in the long run.
When done right, a soundproof floor can be a cornerstone in creating a more tranquil home environment for everyone involved.