
Picture this: You’re in your home office, on the brink of a breakthrough idea, and just as the thought crystallizes, a neighbor’s loud conversation or a nearby construction noise shatters your concentration. Such disturbances are all too common when your workspace is within the confines of your home.
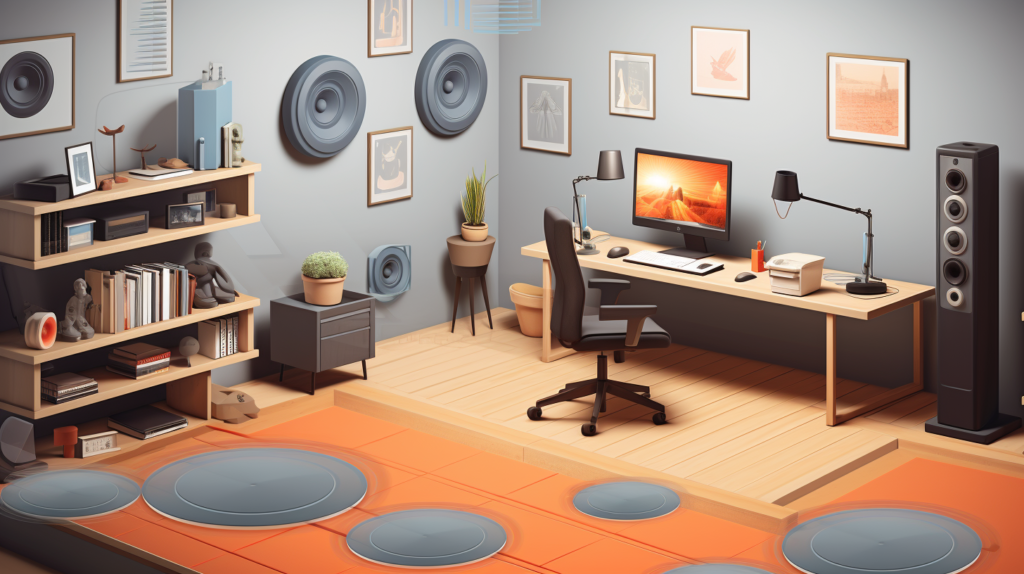
In our increasingly digital era, where home offices are becoming the epicenter of our professional lives, ensuring an acoustically serene environment is paramount.
If you’ve ever wondered how to elevate your workspace from a mere room to a haven of productivity, you’re in the right place. Let’s dive into the step-by-step guide to soundproofing your home office.
Step 1: Soundproof the Door
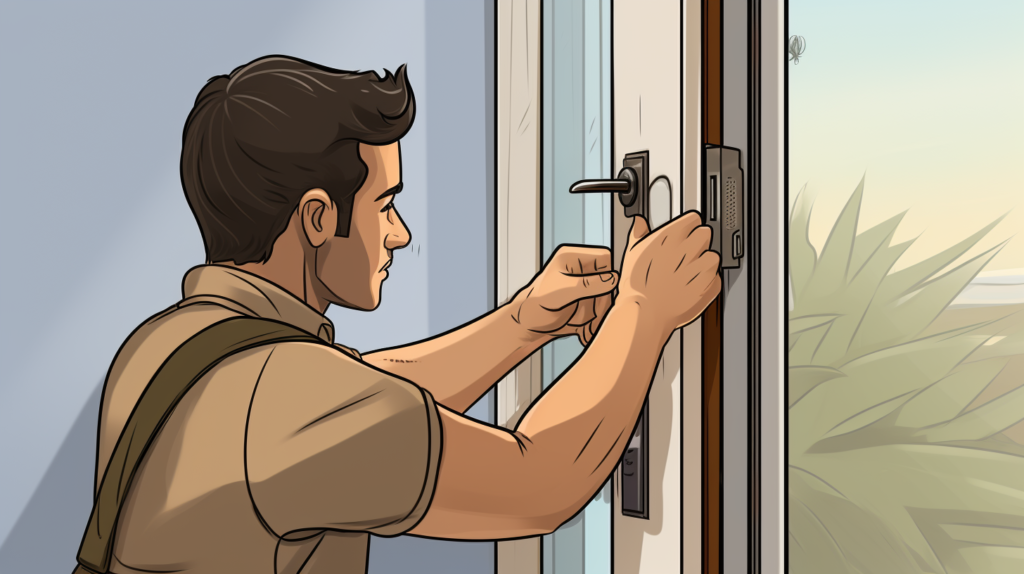
The door serves as both an entryway to your workspace and a gateway for sound. Its soundproofing is paramount for maintaining an acoustically serene environment.
Replace with a Solid-Core Door
Traditional homes often boast hollow-core doors. They’re light, cost-effective, but unfortunately, poor barriers to sound.
A solid-core door, constructed from dense wood or composite materials, acts as an acoustic shield.
When sound waves encounter this dense material, they’re largely reflected or absorbed, thereby reducing the noise that makes its way into your office.
Investing in such a door is akin to building a fortress wall against the external auditory world.
Install Weatherstripping
Even with a solid door, the gaps around its perimeter can be significant sound conduits.
Imagine trying to fill a bathtub with water, but the plug isn’t fully sealed; no matter how much water you pour, it keeps leaking.
Weatherstripping acts as this seal for sound.
Available in materials like adhesive foam, silicone, or even rubber, this seal ensures that sound doesn’t seep through the crevices, further enhancing the door’s soundproofing capabilities.
Add a Door Bottom
While the sides and top of the door are crucial, the bottom is often overlooked. However, the gap here, no matter how minuscule, can let in a considerable amount of noise, especially from foot traffic.
A Door Bottom or door sweep acts as a barrier, sealing this space. Additionally, it offers the added benefit of preventing drafts and small critters from entering, making it a multifunctional addition to your door.
Step 2: Soundproof the Walls

Your walls are like the canvas of your auditory environment. They determine how sound interacts within and outside your workspace.
Add Density with Soundproofing Materials
While some walls, especially those in modern homes, may be constructed with soundproofing in mind, many require additional reinforcement.
Adding density is the key. Soundproofing materials like mineral wool, fiberglass wool, or even specialized products like mass-loaded vinyl, when added to walls, increase their mass.
This added density means that they can absorb more sound energy, preventing it from passing through. It’s like adding layers of protective armor, each layer further dampening the noise.
Incorporate Resilient Channels
Sound has a pesky way of traveling. It can move through the air but can also vibrate through solid materials.
Walls, no matter how dense, can transmit these vibrations. Resilient channels break this chain.
By creating a decoupled space between the wall and the drywall, these channels disrupt the path of sound vibrations.
They act as a buffer, ensuring that the wall doesn’t directly transmit vibrations to the drywall and subsequently into your room.
If You Are Upgrading Concrete Walls:
At first glance, concrete might seem like an excellent barrier to sound. Its dense nature suggests it would be impenetrable.
However, concrete can efficiently transmit sound vibrations. To soundproof concrete walls, a layered approach is essential.
First, set up a framework of wall studs or joists. This not only provides a structure but also creates a decoupled space.
Within this space, add soundproofing materials, followed by Resilient Channels and Drywall.
This combination ensures that sound waves have multiple barriers to contend with, drastically reducing their energy by the time they reach your office’s interior.
Step 3: Soundproof The Windows

Windows are a double-edged sword. While they offer views and ventilation, they can be significant weak points in soundproofing.
Opt for Double or Triple Pane Windows:
Single-pane windows, common in older constructions, are acoustically transparent. Sound waves pass through them with little resistance.
Double or triple pane windows offer a robust solution. These windows have multiple layers of glass, separated by insulating gases or even vacuum spaces.
Each layer acts as a barrier, reflecting and absorbing sound energy.
Moreover, the gases or vacuum spaces between the panes further dampen sound vibrations, making these windows formidable opponents to external noise.
Hang Acoustic Curtains
If replacing windows isn’t immediately on the cards, Acoustic curtains can be a game-changer. These aren’t ordinary curtains.
Crafted from densely woven fabrics, they’re specifically designed to capture and reduce sound energy. When drawn, they create an additional sound barrier, complementing the window’s efforts.
Plus, they come in various designs and colors, ensuring that your soundproofing efforts don’t compromise on aesthetics.
Seal All Gaps:
Every junction or joint around a window frame is a potential gateway for sound.
Over time, even the most well-installed windows can develop tiny gaps due to wear and tear or structural settling.
Acoustic sealants or caulks can address these vulnerabilities. These sealants, when applied around the window perimeter, fill in these gaps, ensuring a tighter acoustic seal.
Step 4. Soundproof The Floor

Floors are often overlooked in soundproofing endeavors, but they play a pivotal role, especially if you have neighbors below or are sensitive to footfall noises.
Lay an Acoustic Underlay
Before making any aesthetic changes to the floor, it’s essential to address its base.
Acoustic underlays, made from materials like rubber, foam, or even mass-loaded vinyl, provide the first line of defense against noises emanating from below.
They act as shock absorbers, dampening the energy of sound waves before they can reach the surface.
Install a Floating Floor System
Traditional flooring systems bond directly to the subfloor. In contrast, floating floor systems rest atop the underlay without being anchored down.
This floating design provides a decoupled space, further reducing the transmission of sound vibrations.
Whether you opt for laminate, wood, or even tile, ensuring it’s a floating system can make a significant difference in floor acoustics.
Place a Dense Rug
While the underlayers of a floor handle the bulk of soundproofing, the surface too has a role to play. Dense rugs, with their thick and fibrous construction, naturally absorb sound.
They reduce the echo of footsteps, the clang of a dropped object, or even the hum of a chair being moved. Beyond their functional benefits, they also add warmth and comfort to the room, enhancing the overall ambiance.
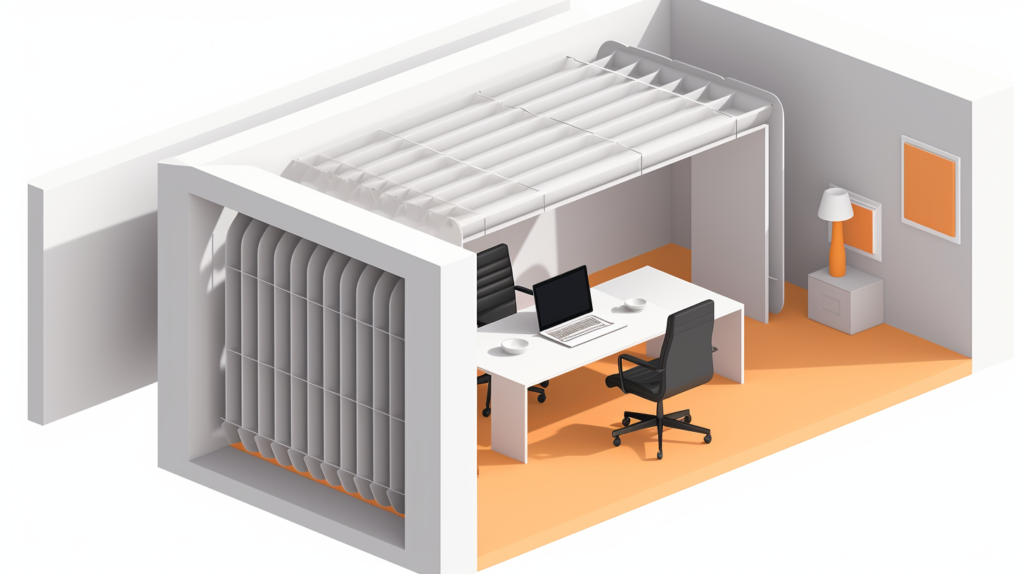
Step 5: Soundproof the Ceiling
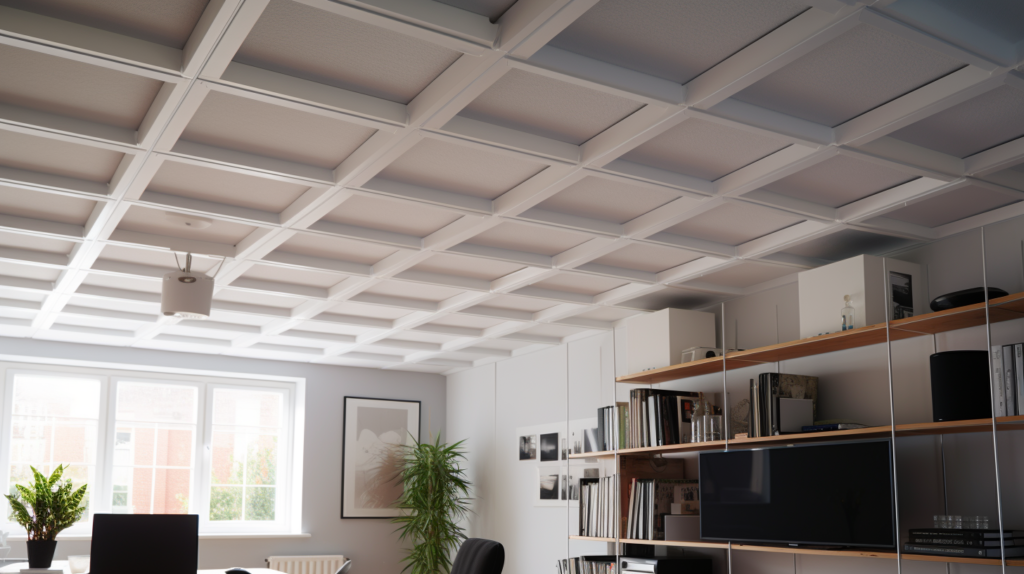
If you’ve ever been disturbed by the sound of footsteps or furniture moving in the room above, you’ll understand the importance of soundproofing the ceiling.
Create a Suspended Ceiling System
A suspended or drop ceiling offers a two-fold benefit. First, it creates a gap or cavity between the original ceiling and itself. This space can be filled with
Soundproofing Materials, turning it into an acoustic buffer zone. Secondly, the suspended ceiling itself, often made from acoustic tiles, provides an additional layer of sound dampening.
Add Resilient Channels and Drywall
Mirroring the technique used for walls, resilient channels can be added to the ceiling structure. By decoupling the ceiling from the joists above, these channels disrupt the path of sound vibrations.
‘Drywall, when added atop these channels, further enhances the ceiling’s soundproofing capabilities.
Step 6: Manage Ventilation
Air circulation is vital for a healthy living environment, but ventilation systems can sometimes introduce unwanted noise.
Install Duct Linings
Ducts, being long and hollow, can act as sound tunnels, channeling noise from distant parts of a building into your serene workspace.
Lining them with sound-absorbing materials like acoustic foam or fiberglass insulation can mitigate this. These linings dampen the sound energy traveling through the ducts, ensuring a quieter airflow.
Use Baffle Boxes
For standalone vents or those not connected to extensive duct systems, baffle boxes can be invaluable. These boxes, equipped with multiple chambers, force air to meander through a maze-like path.
This design not only purifies the air but also significantly reduces any accompanying noise.
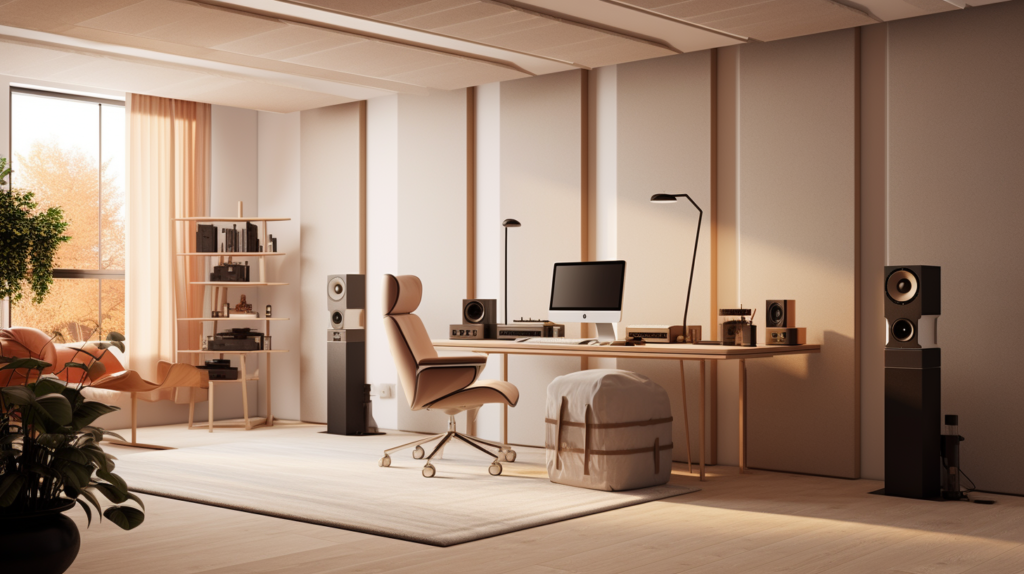
Step 7: Optimize Room Acoustics
A room’s internal acoustics dictate how sound behaves within it. Properly managing this ensures clarity and a pleasant auditory environment.
Set Up Acoustic Panels
Hard surfaces, like walls or even tables, can reflect sound, leading to echoes or a tinny sound quality. Acoustic panels, strategically placed, absorb these reflections.
Made from materials known for their sound-absorbing properties, these panels ensure that internal sounds, be it conversations, music, or even the hum of electronics, remain clear and undistorted.
Add Bass Traps
Bass frequencies, due to their long wavelengths, can be particularly challenging to manage.
They can resonate within a room, creating a sense of auditory murkiness. Bass traps are designed to target and absorb these low-frequency sounds.
Placed in room corners or other strategic locations, they ensure a balanced and clear sound profile.
Use Diffusers
While many soundproofing strategies focus on absorption, diffusion is equally vital.
Sound waves, when they encounter a diffuser, are scattered in multiple directions. This scattering ensures that there are no “hot spots” or areas where sound concentrates, leading to a balanced and natural-sounding environment.
Furnish Thoughtfully
Every item within a room interacts with sound. Soft furnishings, with their porous nature, naturally absorb sound.
Hard items, like bookshelves or desks, can reflect or even diffuse sound based on their positioning and structure. Being mindful of how you furnish your office can significantly enhance its acoustics.
Step 8: Handle Any Vibration
Vibrations, though often overlooked, can be a source of disturbance, especially in rooms with sensitive equipment or instruments.
Place Equipment on Isolation Pads:
Sensitive equipment, like microphones, amplifiers, or even precision instruments, can pick up external vibrations. Isolation pads, crafted to absorb vibrational energy, offer a solution.
By placing equipment atop these pads, you ensure a stable and vibration-free operation.
Consider Floating Platforms
For equipment demanding the highest level of stability, floating platforms are the answer.
These platforms, by isolating the equipment from the floor or table, ensure an environment free from even the minutest of external vibrations.
Conclusion
The quest for a serene, soundproofed home office is more than just a construction or design endeavor; it’s a commitment to enhancing the quality of your work environment.
With distractions at bay and the world’s cacophony silenced, you pave the way for undisturbed focus, creativity, and efficiency.
Each step, from addressing the door to managing vibrations, is a testament to the meticulous attention to detail that guarantees a tranquil workspace.
As remote work continues to redefine our professional landscape, ensuring your space is acoustically optimized is not just a luxury but a necessity. By following this comprehensive guide, you arm yourself with the knowledge and techniques to craft an auditory sanctuary, a haven where productivity thrives.