How To Soundproof Basement Ceiling (What Works In Finished And Unfinished Basements)
How to soundproof basement ceiling works, but only if you build for the noise you actually have.
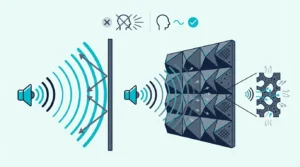
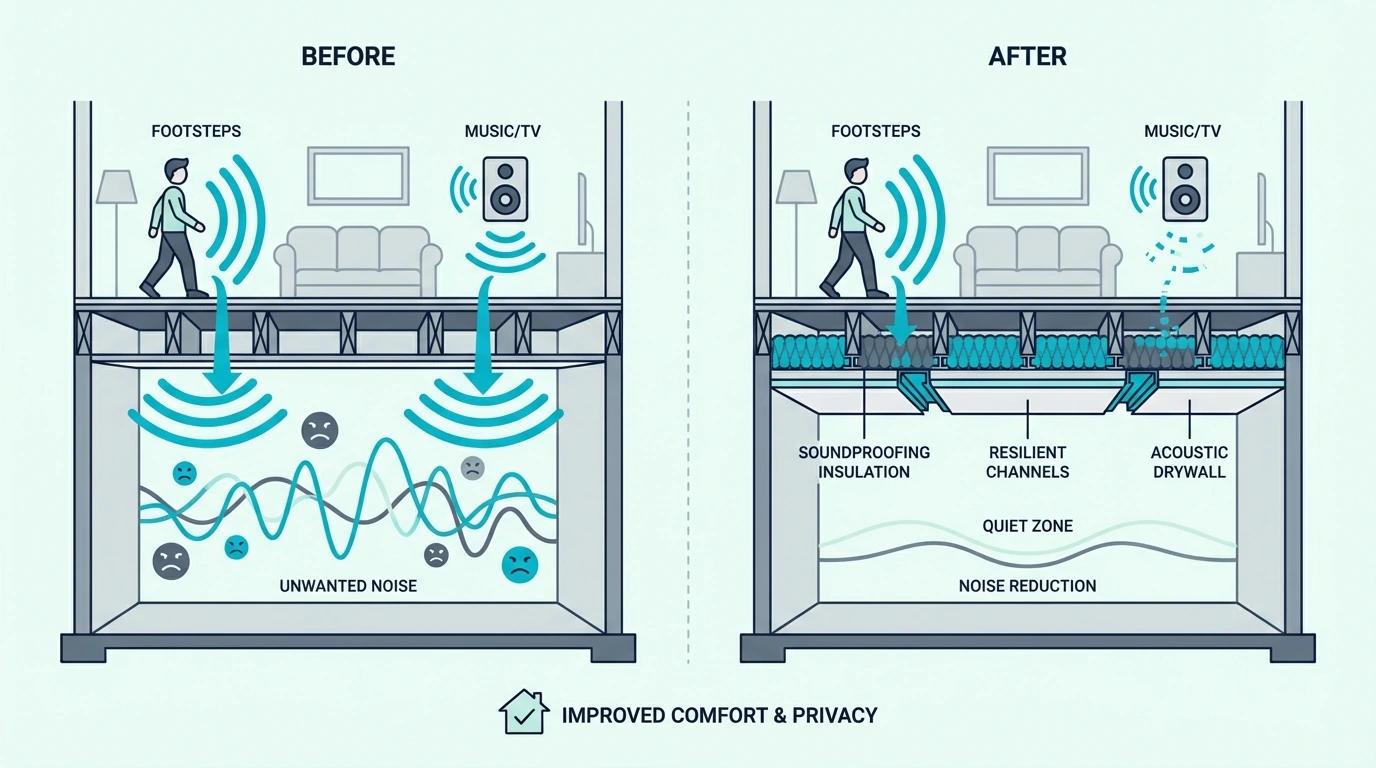
Footsteps from above are a structure problem, while voices and TV leaking downward are an assembly problem, and cheap surface treatments barely touch either.
The win is that basement ceilings give you more retrofit options than most rooms because the joist cavity and ceiling layer leave room for absorption, mass, damping, and sometimes decoupling.
Start by separating impact noise from airborne leakage, then match the build to that path. If the basement is part of a bigger room problem, our full how to soundproof a room guide helps you keep the ceiling in proportion with the rest of the shell.
The best basement ceiling soundproofing approach is usually a system, not a single material. If the ceiling is open, start with mineral wool in the joists, then add mass and damping with extra drywall or mass loaded vinyl; if the ceiling is already finished, a new drywall layer with damping is the most realistic upgrade, while blankets are only temporary stopgaps for renters or unfinished spaces.
Why The Basement Ceiling Matters
Before you buy materials, make sure the basement ceiling is actually the weak link.
Once the noise is clearly coming from above, the rest of the section sorts it by noise path, room stakes, and which side of the structure you can realistically treat.
Start With The Noise Path
Everything starts with separating impact noise from airborne leakage.
Upstairs footsteps, chair scrapes, and dropped objects travel as structure-borne vibration, while voices, TV, and music leak through gaps, thin drywall, recessed lights, and empty joist cavities.
Each path rewards a different kind of build.
If the main complaint is speech or media transfer, mass and sealing can move the needle fast; if the main complaint is stomping, the heavier win usually comes from decoupling below or source control above, just like we explain in how to soundproof a ceiling and on the source side in how to soundproof a floor.
Basements below kitchens, family rooms, and hallways usually get hit by both paths at once.
A ceiling can still feel disappointing after one improvement because fixing airborne leakage alone still leaves the floor structure free to radiate impact noise.
Let Room Use Set The Performance Bar
Once you know the noise path, room use tells you how high the performance bar really is.
A basement theater or bedroom needs stronger control of low-frequency spill and general loudness, while a basement office may only need speech privacy and less distraction during work hours.
Utility rooms muddy the picture because machines and structure-borne vibration can stack on top of upstairs activity.
If the basement is part of a broader home-noise problem, compare the ceiling project against adjacent weak points like walls, doors, and windows before assuming the ceiling deserves the whole budget.
Choose The Side That Can Actually Help
That mix of noise type and room stakes decides whether you attack the ceiling, the floor above, or both.
Work on the basement ceiling when you control that side, when the room below is the priority, or when opening the floor above is unrealistic. It is usually the simpler retrofit path because you can work from below without tearing up finished flooring upstairs.
Treat the floor above first when impact noise is the dominant complaint and you can reach that surface.
Thick rugs, dense underlayment, and better floor assemblies attack vibration at the source, which is usually more efficient than trying to catch all of it from below.
Choosing The Right Insulation
Once you have confirmed the ceiling is worth rebuilding, insulation is usually the first material people think about.
Insulation belongs inside a larger system, so the real question is which fill works overhead and how much it can actually do.
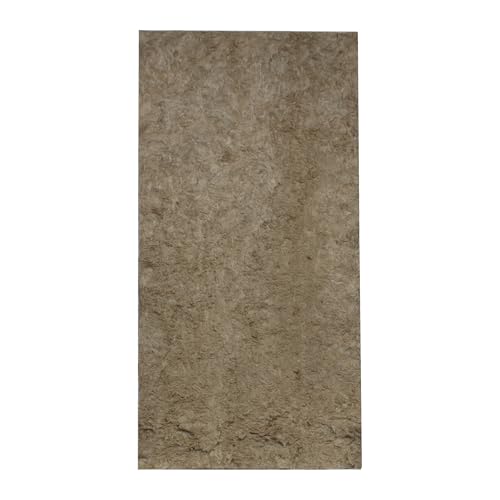
Mineral Wool Is Usually The Safer Default
Mineral wool is the better default for most basement ceilings because the extra density helps tame cavity resonance and the batts friction-fit more reliably overhead.
A standard joist-bay product like AFB Mineral Wool Insulation also holds shape more reliably overhead, which matters when you are working between floor joists rather than inside a closed wall.
AFB Mineral Wool Insulation
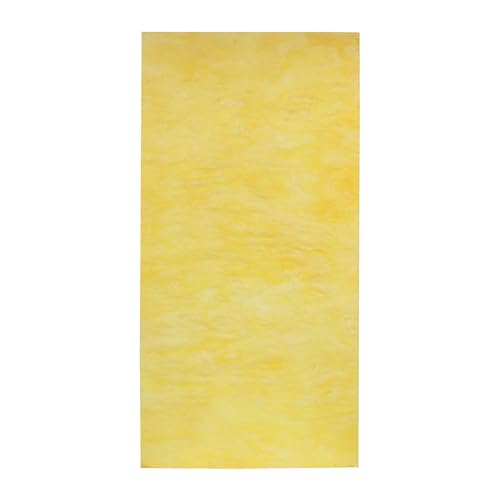
Fiberglass can still help, especially when budget is tight or you already have it on hand.
A rigid fiberglass board like Owens Corning 703 Fiberglass Boards is the main exception because the semi-rigid panels hold their shape between joists without sagging, which makes them a practical alternative to flexible batts in overhead applications.
Owens Corning 703 Fiberglass Boards
If you want a deeper breakdown of cavity materials before buying, our guide to the best insulation for soundproofing explains where mineral wool, fiberglass, and other fills actually make sense.
Cavity Fill Helps, But It Hits A Ceiling Fast
That material choice still has a limit: cavity fill cleans up the inside of the assembly, but it does not create the mass that actually blocks strong transmission.
In practical terms, insulation can make a basement sound less hollow and less leaky, yet it still will not fully solve upstairs footsteps or loud bass.
That limit is why people feel underwhelmed after stuffing an open joist cavity and calling it done.
The bigger jumps come when insulation is paired with mass, damping, better sealing, and, when needed, decoupling.
Open Joists Are The Real Opportunity
That limit is also why an open basement ceiling is such an advantage.
Once the cavity is exposed, you can seal around pipes, wiring penetrations, and duct chases, then friction-fit a denser product like Rockwool 8 lb Density Mineral Wool before deciding whether the next layer should stay exposed, get drywalled, or become fully decoupled.
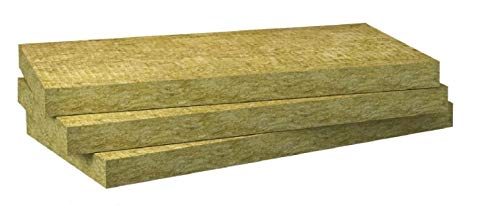
Rockwool 8 lb Density Mineral Wool
If you leave the joists exposed for an industrial look, expect the performance ceiling to stay lower.
Without a continuous finished layer, the framing and services keep giving noise easy escape routes.
Get Studio Tips Weekly
Join 5,000+ creators getting acoustic treatment advice every week.
No spam. Unsubscribe anytime.The Most Effective Soundproofing Methods
Once the cavity is doing its part, the real performance gains come from how you close the assembly.
At that point the project stops being about stuffing joists and starts being about mass, damping, and vibration control.
Mass And Damping Handle The Airborne Side
If voices, TV, and general household spill are the main complaint, adding mass below the joists is usually the first serious upgrade.
Extra drywall with Green Glue Noiseproofing Compound between layers is one of the best upgrades for a finished basement ceiling because it adds mass and damping without requiring you to open the floor above.
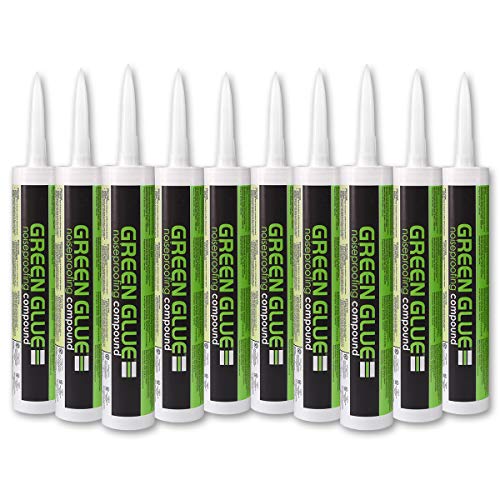
Green Glue Noiseproofing Compound
For voices, TV, general household activity, or moderate music leakage, it usually delivers the best balance of performance, cost, and construction complexity.
When you are already rebuilding the ceiling, a continuous layer of Soundsulate 1 lb Mass Loaded Vinyl can add even more mass inside the assembly.
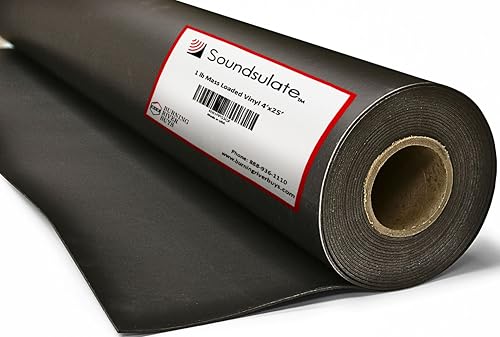
Soundsulate 1 lb Mass Loaded Vinyl
MLV works best as part of a sealed ceiling build, not as random patches, which is why our best soundproofing material guide treats it as a barrier product rather than a magic surface fix.
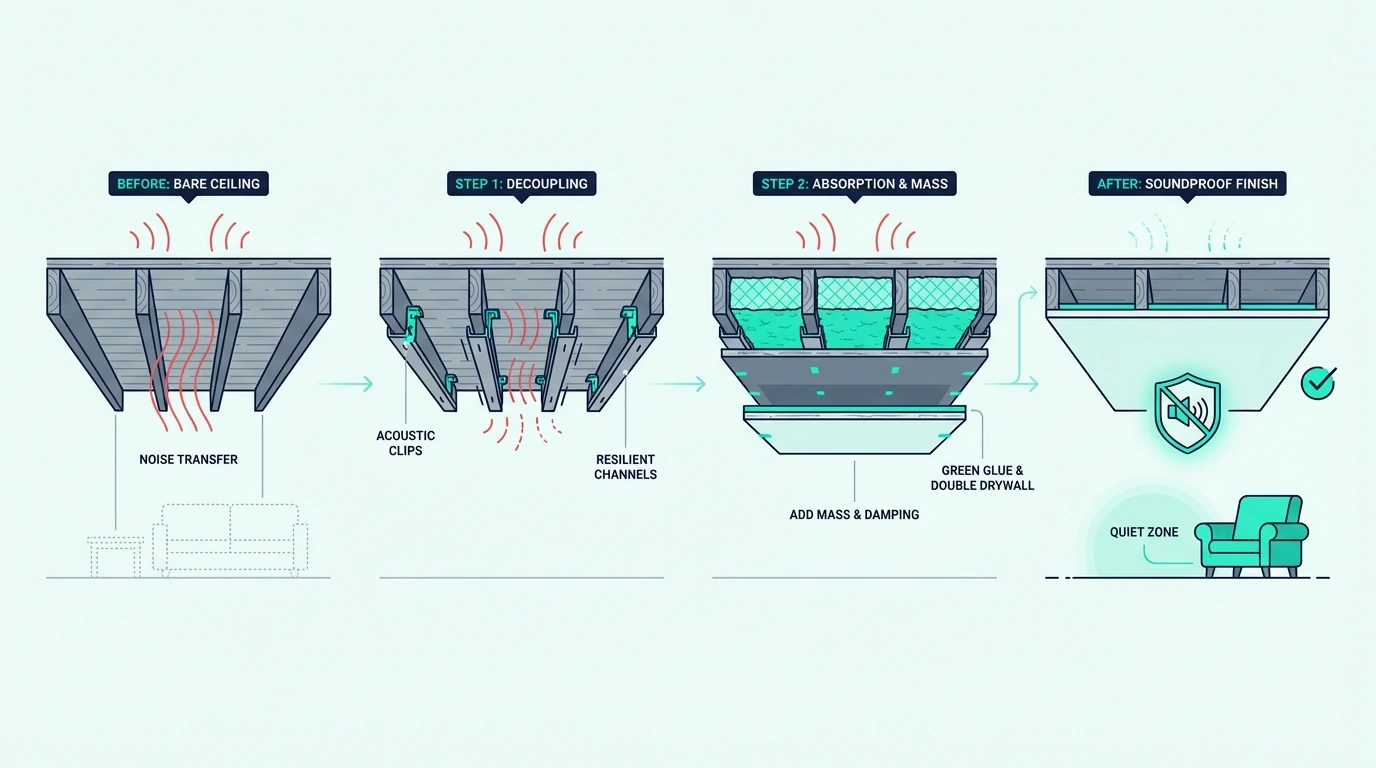
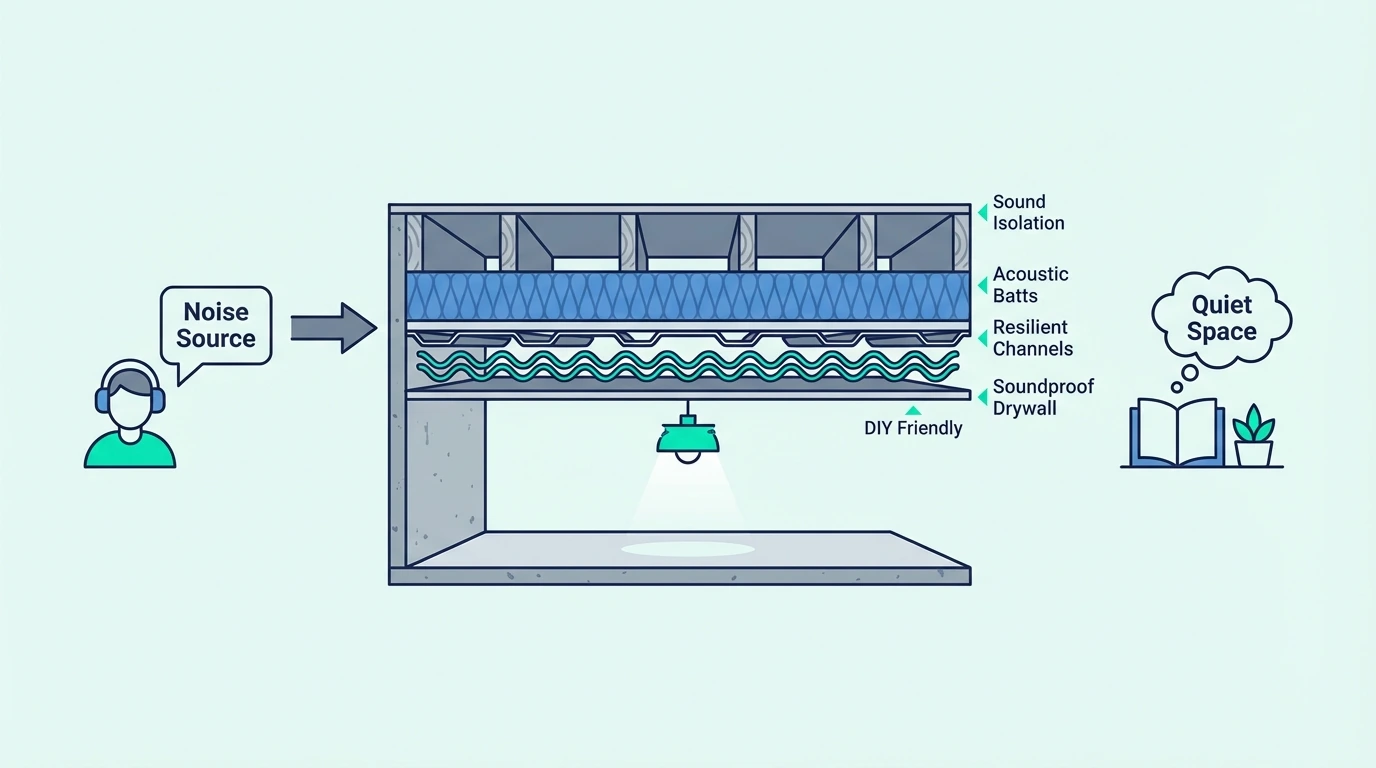
Decoupling Is What Changes Footsteps
That airborne-focused build still leaves one big hole: direct connection to the joists.
Mass and damping help, but they cannot fully stop upstairs footsteps if the ceiling drywall is screwed directly into the framing. The vibration travels straight through the fastener into the drywall and radiates as sound below.
Decoupling breaks that direct structural connection, and it is the single biggest factor in stopping impact noise from above.
The professional standard is RSIC-1 Resilient Sound Isolation Clips mounted directly to the joist bottoms. Hat channel snaps into the clips, and all drywall screws go into the hat channel — never into the joists. The rubber isolator in each clip absorbs vibration before it reaches the drywall, and this single step can add up to 15 STC points to the ceiling assembly.
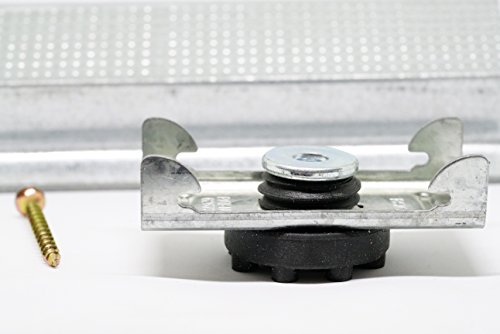
RSIC-1 Resilient Sound Isolation Clips
The budget-friendly alternative is a Trademark Soundproofing RC-1 Resilient Channel screwed perpendicular to the joists. Drywall then mounts to the channel instead of the joists. RC-1 channels cost less per square foot than isolation clips and work well when installed carefully, but they are more vulnerable to short-circuiting — a single screw that accidentally penetrates through the channel into a joist defeats the entire purpose of the decoupling.
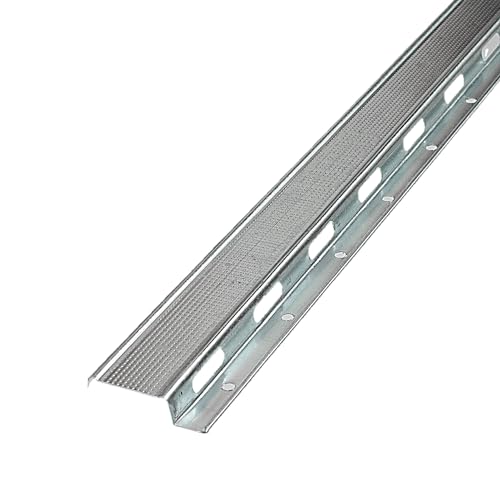
Trademark Soundproofing RC-1 Resilient Channel
For any basement that will serve as a bedroom, office, or home theater, decoupling is not optional. It is the difference between a ceiling that reduces some airborne noise and a ceiling that actually controls the footstep and impact noise that makes basements feel unfinished.
Drop Ceilings Are A Convenience Compromise
If a full decoupled drywall build feels too invasive, a drop ceiling lands in the middle.
It is better than an exposed ceiling for noise control, yet it is still not the same thing as a true soundproof ceiling. Standard suspended ceiling tiles help a little with absorption and convenience, yet they usually do not add enough mass to block strong sound transmission on their own.
That does not mean a drop ceiling has no place in a basement. It can be a practical compromise when you need access to plumbing or wiring, but if isolation is the main goal, a drywall-based assembly with insulation, damping, and decoupling will usually outperform it by a wide margin.
The Right Build Sequence
Knowing the ingredients is not enough because a good ceiling can still fail if the order is wrong.
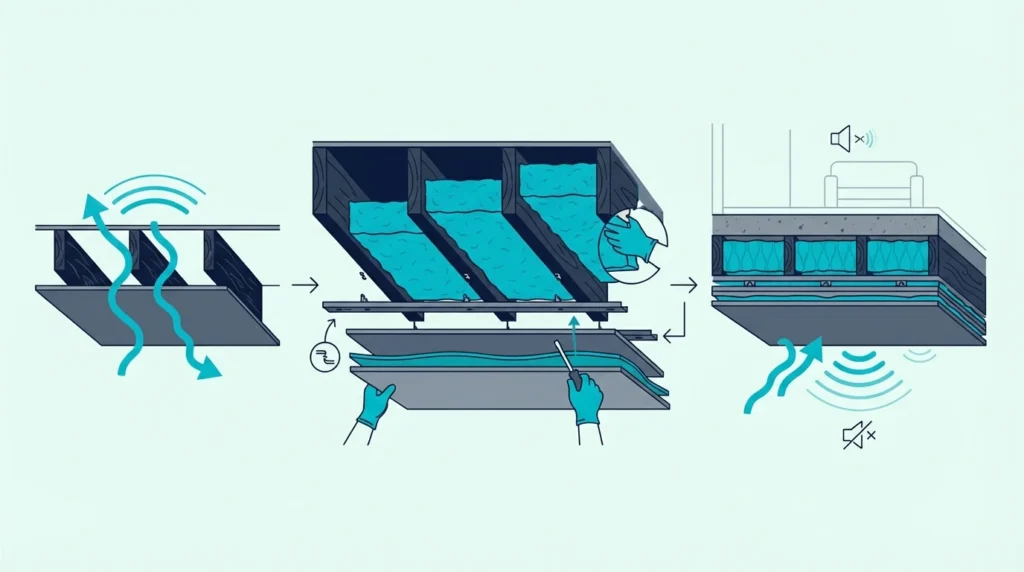
The build needs to close leakage first, control the cavity second, and only then add the layers that block and isolate.
Step 1: Seal Every Gap And Penetration
Before adding any material, seal every air path. Run acoustic caulk around the ceiling perimeter where it meets the walls, around every pipe and wire penetration, and around duct boots and recessed light housings. Sound travels through air gaps far more easily than through solid material, so even a small unsealed hole can undermine an otherwise strong assembly.
Step 2: Insulate The Joist Cavities
Once the leaks are closed, fill every joist bay.
This absorbs airborne sound energy inside the cavity and prevents resonance between the drywall layers. Use mineral wool like AFB or rigid fiberglass boards like Owens Corning 703 — both products are already linked in the insulation section above. Fill every bay completely.
Partial coverage leaves flanking paths that bypass the insulation.
Step 3: Install Decoupling (Resilient Channels Or Isolation Clips)
That insulated cavity still stays hard-linked until you break the framing path.
This is the step most DIY builders skip, and it is the step that matters most for impact noise. Mount RSIC-1 isolation clips or RC-1 resilient channels to the joist bottoms as described in the decoupling section above.
Every screw in the finished drywall must go into the channel or hat track — never directly into a joist.
Step 4: Hang Drywall With Damping Compound
Only after decoupling is in place does the drywall stack deliver its full value.
Screw 5/8-inch drywall to the resilient channels or hat channel. For maximum performance, apply Green Glue between two layers of drywall. The first layer adds mass, the Green Glue converts vibration into heat, and the second layer adds more mass on top.
This three-part stack is the same approach used in professional recording studios and home theaters.
Step 5: Seal The Perimeter Again
The final seal keeps the new ceiling from leaking around its own edges.
Run acoustic caulk around the entire edge of the finished ceiling where it meets the walls. Do not skip this — a quarter-inch gap around the perimeter can leak enough sound to offset the performance of everything behind it.
Why The Shortcuts Keep Failing
That five-step sequence is the real path, which is why foam tiles, decorative acoustic squares, stick-on panels, and sound blankets hung from joists are not real basement ceiling soundproofing. They may reduce echo inside the basement, but that is a room-acoustics change, not noise isolation from the floor above. Hanging a blanket from exposed joists does not add meaningful mass, does not decouple the structure, and does not seal the assembly.
If you are comparing absorptive products with real blocking materials, look at best soundproofing panels and soundproofing from outside noise side by side and you will see that mass, decoupling, and sealing are what actually reduce noise transmission through a ceiling.
If budget is the constraint, start with steps one and two (sealing and insulation) and save for the decoupled drywall build. A properly sealed and insulated ceiling with a single layer of drywall on resilient channels will outperform any number of blankets, foam tiles, or decorative panels stacked together.
Cost Breakdown
That five-step path also explains why basement ceiling budgets swing so widely.
You are not paying for one product; you are paying for how complete the assembly needs to be.
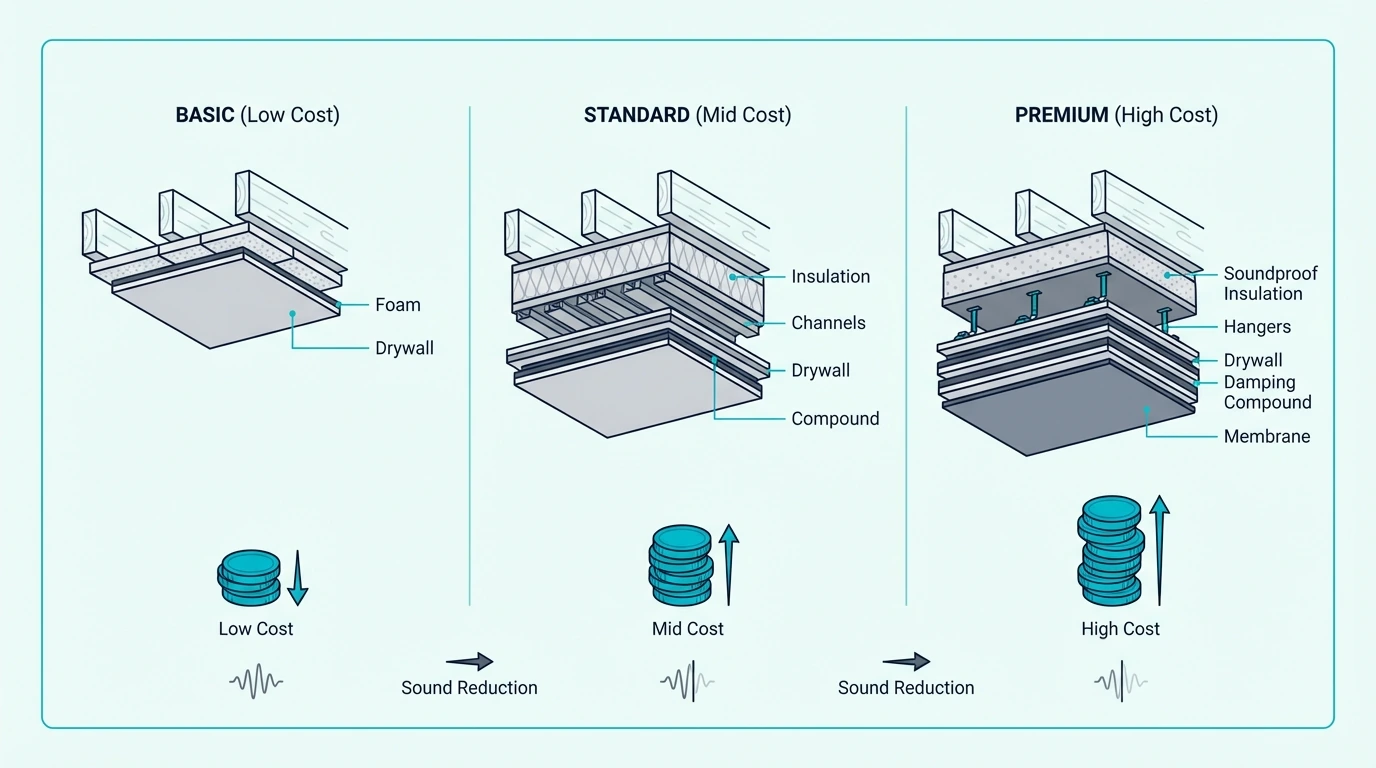
The Entry-Level Budget
The cheapest serious tier usually means sealing penetrations, adding insulation between open joists, and possibly installing a simple drywall layer below.
Material-only costs often land around two to five dollars per square foot, depending on the insulation type, drywall thickness, and whether you use damping compound.
Labor can double that range if you hire out the work, especially once taping, mudding, painting, and fixture adjustments are included. Even so, this tier makes sense for many homeowners because it produces a real improvement without a full structural ceiling rebuild.
Costs climb fastest when you have to work around can lights, soffits, low headroom, or irregular joist spacing. In basements, the ceiling is often the most detail-heavy part of the room, so labor planning matters almost as much as material selection.
The High-Performance Budget
Once clips or channels, multiple drywall layers, damping compound, and detail work enter the build, the budget changes fast.
A high-performance basement ceiling goes further with mineral wool, clips or channels, one or two drywall layers, damping compound, careful perimeter sealing, and detail work around lights, ducts, and bulkheads. That kind of assembly often lands in the eight to fifteen dollars per square foot range for materials and labor together, and it can go higher if the basement has complicated mechanical runs.
The cost sounds steep until you compare it with the value of turning a noisy basement into usable square footage. If the project is part of a larger renovation, it is also worth comparing the ceiling upgrade with the overall apartment-style retrofit logic or even a broader room plan from other perimeter noise-control upgrades so you do not overspend on one surface while neglecting another.
When Paying For Labor Makes Sense
That upper tier is not just more material — it is more ways to get the assembly wrong.
Bring in a contractor when the basement will become living space, when impact noise is severe, when you need fire or code compliance integrated into the build, or when there are many recessed lights, ducts, and obstructions. A contractor who understands sound-control assemblies can prevent expensive mistakes like short-circuiting resilient channels, leaving perimeter leaks, or adding mass without addressing the vibration path.
You should also get help when the basement noise problem overlaps with HVAC noise, plumbing transfer, or a full home-theater design. At that point, you are no longer buying a simple materials package; you are designing a system.
The Bottom Line
The basement ceiling that works is the one built around the noise path, not the material list.
Airborne noise responds well to mass, damping, and sealing, while footsteps only change in a major way when you reduce the direct structural link.
That is the decision to make before you spend: are you sealing a leaky assembly or rebuilding an impact path?
If the ceiling is open, insulation plus a properly built new lid gives you the best runway; if it is already finished, an extra drywall layer with damping is usually the next practical move before a full isolated rebuild.
Keep the ceiling in context with the rest of the room.
Our guides on soundproofing a ceiling, soundproofing a floor, blocking outside noise, and the full room soundproofing hub help you avoid fixing one surface while noise keeps leaking through another.
Frequently Asked Questions
What is the cheapest way to soundproof a basement ceiling?
The cheapest real improvement is sealing air gaps and, if the joists are open, adding insulation between them. Hanging a heavy blanket can help temporarily in unfinished basements, but cheap foam products are mostly an acoustic-treatment fix rather than true soundproofing.
How to reduce noise from upstairs to basement?
First identify whether the noise is mostly footsteps or airborne sound like voices and TV. For footsteps, source control on the floor above and decoupling below work best; for airborne noise, add mass, damping, insulation, and perimeter sealing to the basement ceiling assembly.
What is the cheapest soundproofing option?
Sealing leakage paths is usually the best low-cost option because even a strong assembly loses performance if air can slip around it. Cheap products only help when they match the actual problem, which is why acoustic foam is rarely the cheapest effective answer for a basement ceiling.
Can you put a vapor barrier on a basement ceiling?
A vapor barrier is a moisture-control decision, not a soundproofing decision. In many basement ceilings it is unnecessary or even problematic if it traps moisture in the wrong place, so follow local code and the whole basement moisture strategy rather than adding one just because you are addressing sound.