How To Soundproof A Studio (What Works And What To Skip)
How to soundproof a studio is a question that every home producer, podcaster, and musician eventually asks, but only after realizing that acoustic foam on the walls did not stop the neighbor’s lawnmower from ruining a take or keep the drum session from shaking the whole house.
That is why studio soundproofing projects fail so often. Buyers confuse acoustic treatment with sound isolation, spend money on products that improve the room’s internal sound quality without reducing how much noise travels in or out, and then blame the products instead of the approach.
The better way to think about studio soundproofing is to separate studio-first isolation goals from broader music-room containment. Isolation keeps outside noise out and studio noise in, treatment makes the room usable for recording, mixing, or monitoring, and the right build depends on whether the space is for takes, streaming, production, or loud rehearsal.
Below, you will learn what to prioritize first, which materials actually isolate a studio, which common approaches are overrated, and when professional help makes more sense than a DIY build.
How to soundproof a studio depends on separating isolation from treatment. Isolation uses mass, decoupling, damping, and sealing to keep noise in or out. Treatment uses absorbers, bass traps, and diffusers to improve the sound inside the room. Most studio builds need both, but isolation comes first because treatment cannot fix a room that leaks noise through the walls.
A Studio Build Only Works When You Define The Isolation Problem First
Once isolation and treatment are separated, the next job is defining the studio in practical terms.
A vocal booth, mix room, and rehearsal-heavy studio do not ask the shell to do the same job.
The Studio Type Sets The Isolation Standard
The type of studio changes the isolation requirement dramatically. A vocal booth for podcasting, voiceover, or singing usually needs moderate isolation from outside noise but does not generate much noise itself.
A production or mix room needs quiet surroundings and predictable monitoring more than it needs rehearsal-grade containment. That makes outside intrusion, HVAC, and weak openings more important than brute-force band-room construction.
A rehearsal-heavy studio for drums or amplified music is the outer edge of the studio category because it behaves more like a loud music room than a quiet production room. If that is the real use case, compare this page with soundproofing a room for music or soundproofing a room for drums before you assume a generic studio build guide is the right fit.
Home studios in apartments and shared buildings face the hardest constraints because the noise travels through shared walls, floors, and ceilings that you may not be able to modify heavily. That overlap with soundproofing an apartment is worth checking if your studio is in a multi-unit building.
The Main Noise Direction Tells You Where To Spend
Outside noise intrusion — traffic, neighbors, HVAC, footsteps — is the problem when you need a quiet room for recording or mixing. Studio sound leakage — drums, amplified guitars, monitor speakers at mixing volume — is the problem when your studio noise is disturbing others.
Most studios deal with both directions, but the dominant direction determines where the heaviest work needs to go. A podcast or mix room in a noisy neighborhood prioritizes keeping noise out, while a rehearsal-heavy studio in a residential area prioritizes keeping sound in.
Studios Need A Lower Noise Floor Than Normal Rooms
Studios are harder because the performance standard is higher. A bedroom only needs to be quiet enough for sleep.
A studio often needs to be quiet enough for a sensitive microphone or clean monitoring, which is a much lower noise-floor target.
Studios also deal with a wider frequency range. Low-frequency bass from monitors, drums, and amplifiers is the hardest sound to contain because it requires significantly more mass and isolation than mid-range speech or TV noise, which is why studio builds often need more deliberate wall, door, floor, ceiling, and ventilation choices than a general music room.
Most Studio Budgets Should Attack The Shell Before Anything Else
With the use case clear, the build order becomes much easier to trust.
In most studios, weak openings and shared structure expose themselves long before exotic construction details do.
Doors, Windows, And Shared Walls Usually Fail First
Yes, almost always. The door is usually the first weak link because most studios start in ordinary rooms with hollow-core doors and visible gaps.
The window is usually next because glass is thin relative to the wall and outside noise shows up fast on microphones. Walls matter most once the openings are improved or when the studio shares structure with a neighbor.
Treating the door first delivers the highest return per dollar in most studio builds. A solid-core door with a proper sweep, perimeter sealing, and a threshold seal can improve isolation more than any single wall upgrade.
If the studio has visible light under the slab, a first-step product like HomeProtect Door Draft Stopper is usually worth trying before you assume the wall assembly is the main bottleneck.
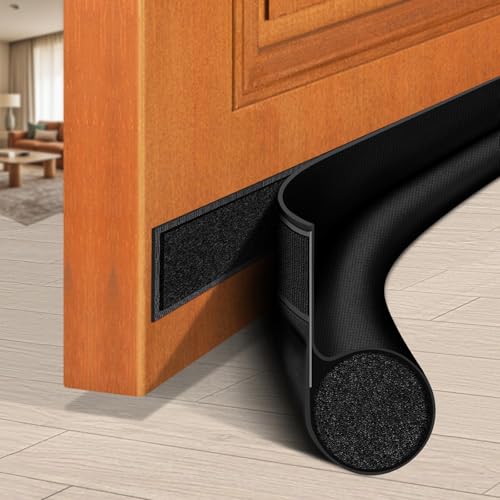
HomeProtect Door Draft Stopper
Soundproofing a door and best door sweep for soundproofing cover the specific options.
For windows, adding mass or an air gap with an insert is the standard studio approach because microphones punish glass leakage quickly. Soundproofing windows and best soundproof window inserts cover the window-specific path.
Floors And Ceilings Become Critical When Vibration Enters The Structure
Floors and ceilings matter most when the studio is above or below another occupied space or when stands, monitors, and instruments are feeding vibration into the structure. That is where studio advice stops being generic room advice and starts becoming assembly work.
A floating floor — a decoupled platform that sits on resilient pads rather than directly on the subfloor — is the standard studio approach for severe floor-to-floor transfer. It is also one of the more expensive and disruptive upgrades, which is why it is usually reserved for serious builds rather than casual home studios.
For lighter-use rooms where you want to test whether top-side vibration is part of the problem before building a full platform, TroyStudio Thick Sound Absorbing Interlocking Floor Mats is a more realistic diagnostic step.
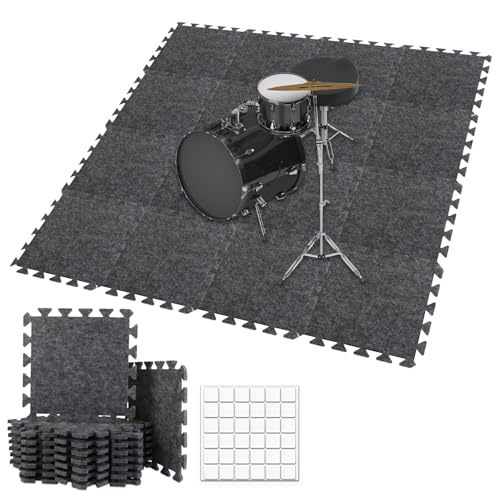
TroyStudio Thick Sound Absorbing Interlocking Floor Mats
Soundproofing a floor and soundproofing between floors cover the assembly options.
If the room’s main problem is daily loud practice, bass containment, or drum rehearsal rather than recording isolation or monitoring, compare this page with soundproofing a room for music and soundproofing a room for drums. Those pages are better at sorting the complaint path before you escalate into full studio-build language.
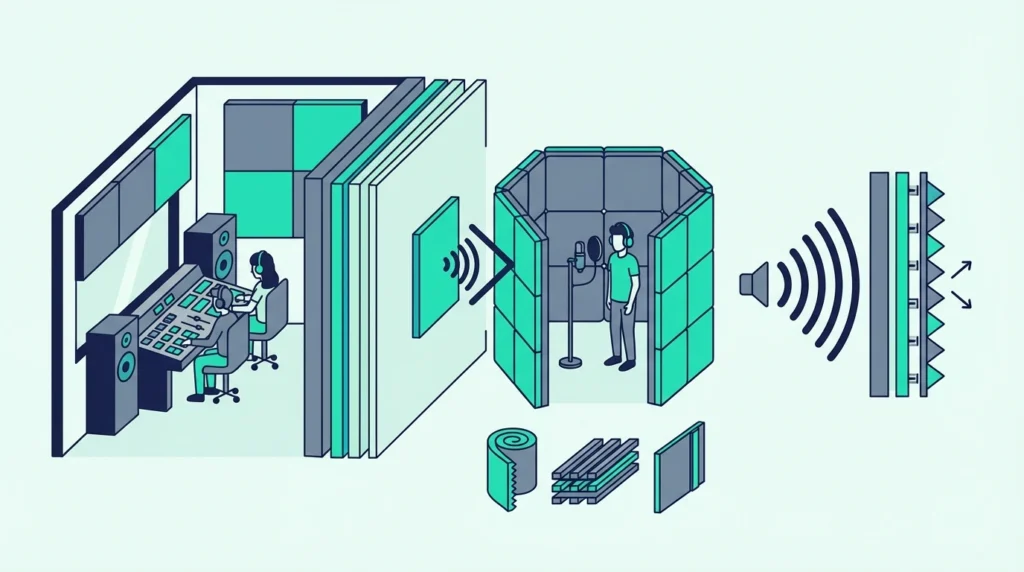
Room-Within-A-Room Is Reserved For Severe Isolation Targets
A room-within-a-room makes sense when the isolation requirement is severe — typically for professional recording studios, drum rooms, and any space where loud sound needs to be fully contained without affecting the surrounding building.
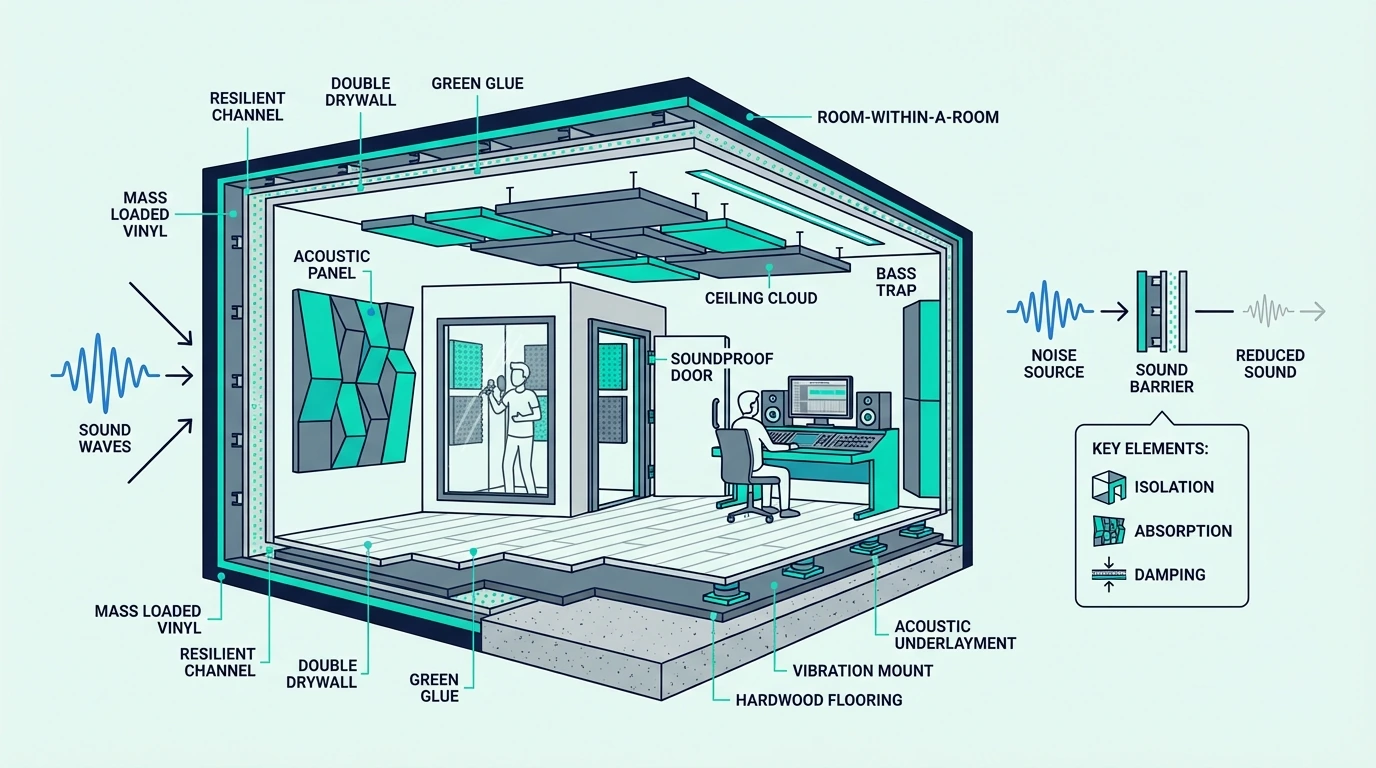
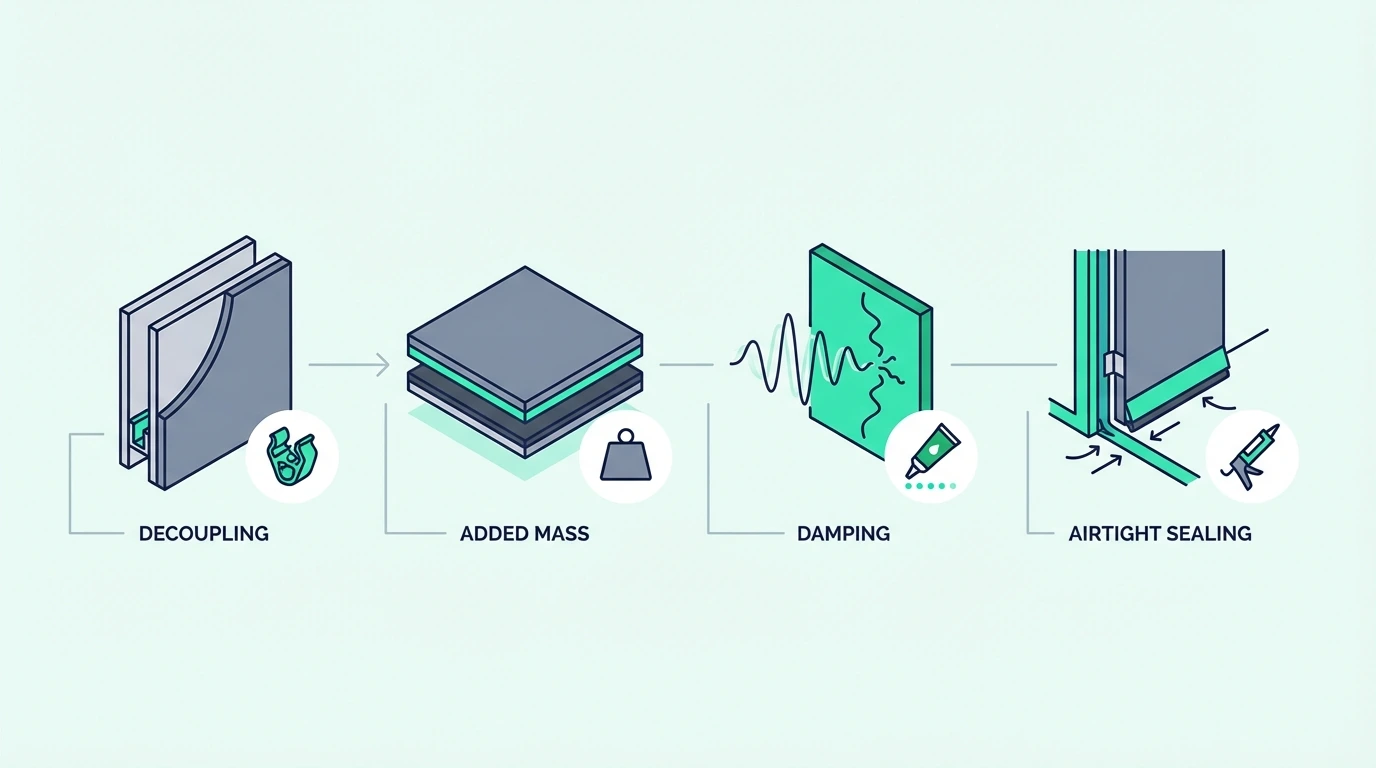
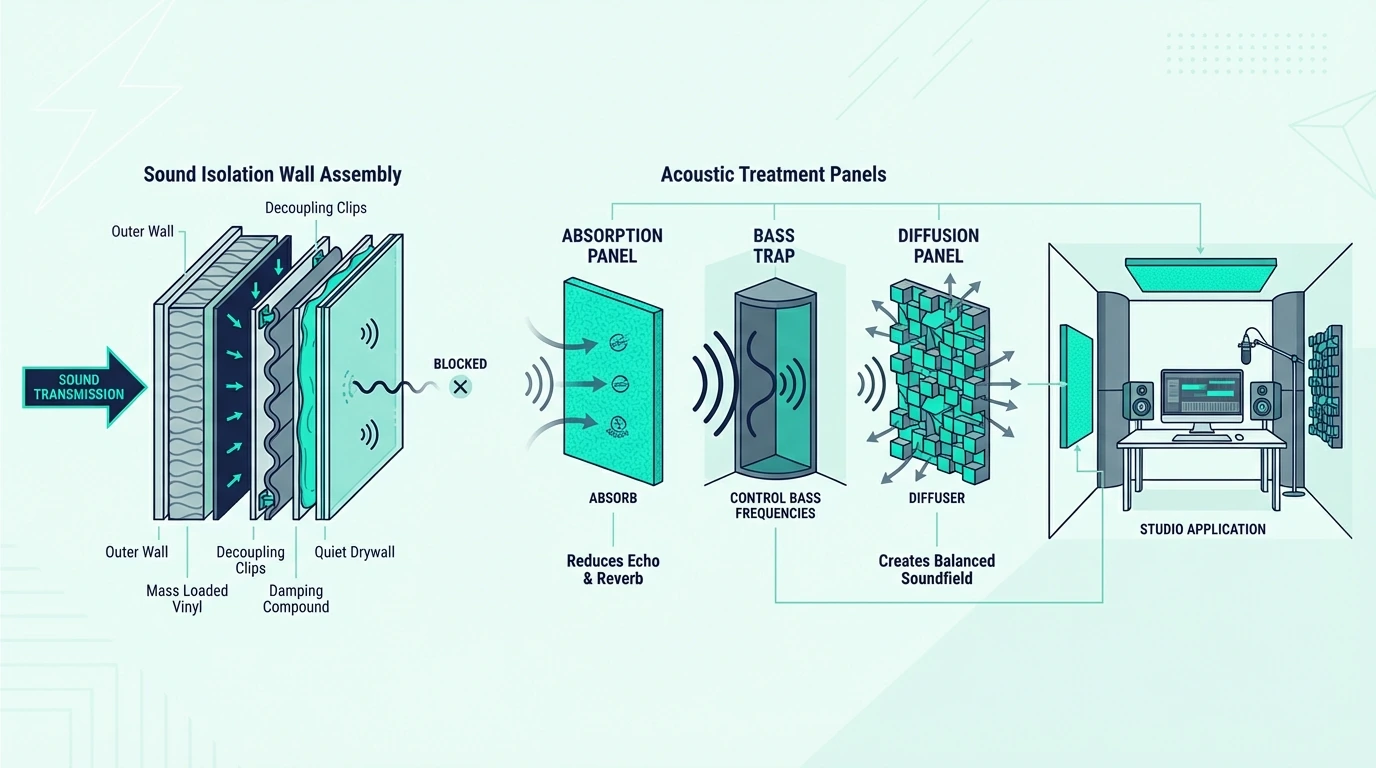
The concept is exactly what it sounds like: a second set of walls, floor, and ceiling built inside the existing room with an air gap between the two shells. The air gap and the decoupled construction prevent vibration from transferring between the shells, and the added mass of the second shell blocks airborne sound.
This is the gold standard for studio isolation, but it is also the most expensive and space-consuming approach. Most home studios do not need a full room-within-a-room build.
A well-executed single-shell upgrade with mass, decoupling, damping, and sealing can achieve enough isolation for home recording, podcasting, streaming, and moderate-volume production.
Get Studio Tips Weekly
Join 5,000+ creators getting acoustic treatment advice every week.
No spam. Unsubscribe anytime.Studio Soundproofing Uses Layered Assemblies, Not One Miracle Material
Once the shell priorities are clear, material choices stop looking mysterious.
What matters is the job each layer performs inside the assembly.
Mass Materials Carry The Heaviest Part Of The Load
Mass loaded vinyl (MLV) and multiple layers of drywall are the two most common mass-adding materials in studio builds. MLV like Trademark Soundproofing Mass Loaded Vinyl is installed between drywall layers or directly on the studs before the finish layer.
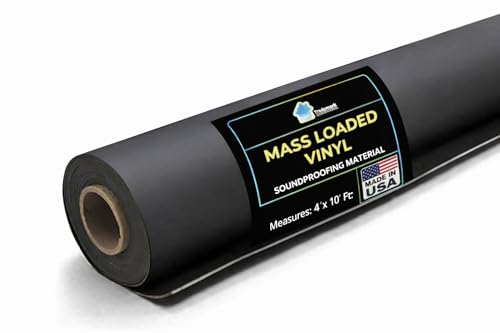
Trademark Soundproofing Mass Loaded Vinyl
Double drywall with a damping compound between the layers adds both mass and vibration damping.
Dense insulation in the wall and ceiling cavities — mineral wool or fiberglass batts — adds absorption inside the assembly, which reduces the resonance that would otherwise amplify certain frequencies through the structure. A stud-bay product like AFB Acoustical Fire Batts fits the studio case when the walls or ceiling are already open, because it improves cavity absorption without pretending to replace the heavier layers.
AFB Acoustical Fire Batts
Damping And Decoupling Keep Vibration From Bridging The Shell
Viscoelastic damping compounds (like Green Glue) applied between drywall layers convert vibration energy into heat, which reduces the amount of sound that transmits through the panel. A product like Green Glue Noiseproofing Compound makes sense once the studio build is moving past surface fixes and into real layered construction.
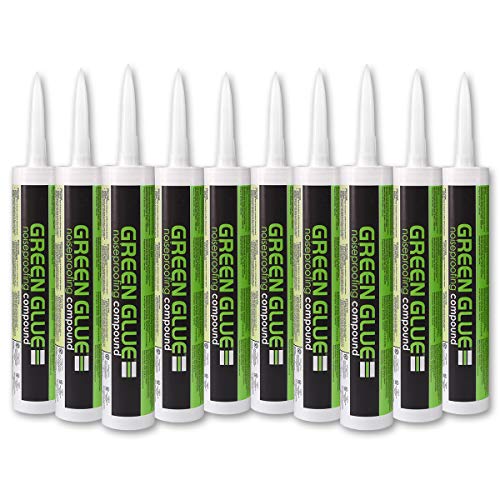
Green Glue Noiseproofing Compound
Resilient channels and sound isolation clips decouple the drywall from the studs so vibration cannot travel directly from the structure into the finish surface.
Acoustic sealant around every joint, penetration, and edge of the assembly is the final critical material. Sealant closes the air paths that would otherwise let sound bypass the mass and decoupling you just installed.
A studio with excellent mass and decoupling but unsealed joints will still leak noticeably.
Foam And Decorative Fixes Are Easy To Overrate
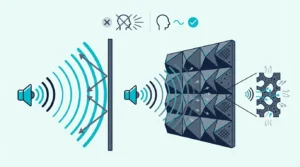
Acoustic foam is the most overrated studio material because it is marketed as “soundproofing” when it is actually acoustic treatment. Foam absorbs reflections inside the room, which improves recording clarity and reduces echo, but it adds almost no mass to the wall and does not block sound from entering or leaving.
Acoustic panels are excellent for treatment after the isolation is built, but they should never be confused with soundproofing materials. If you are choosing between treatment panels and MLV for a studio that leaks noise, the MLV addresses the isolation problem while the panels do not.
Thin decorative panels, tapestries, and egg cartons are the other common overrated options. They change the look of the room but contribute almost nothing to either isolation or meaningful acoustic treatment.
Most Failed Studio Builds Confuse Treatment With Isolation
The most expensive mistakes usually happen after people buy treatment products for an isolation problem.
The room sounds more controlled inside, but the barrier itself stays weak.
Panels Improve The Room But They Do Not Strengthen The Barrier
Because panels are porous and lightweight. They absorb sound energy inside the room by reducing reflections, but they do not add mass to the wall structure and cannot block sound from passing through.
Covering every wall with foam panels will make the room sound dead and dry inside, but the neighbor’s TV will be just as audible and your drum session will still shake the building.
This distinction between treatment and isolation is the most important concept in studio soundproofing. Does soundproof foam work and acoustic treatment vs soundproofing both cover this boundary in detail.
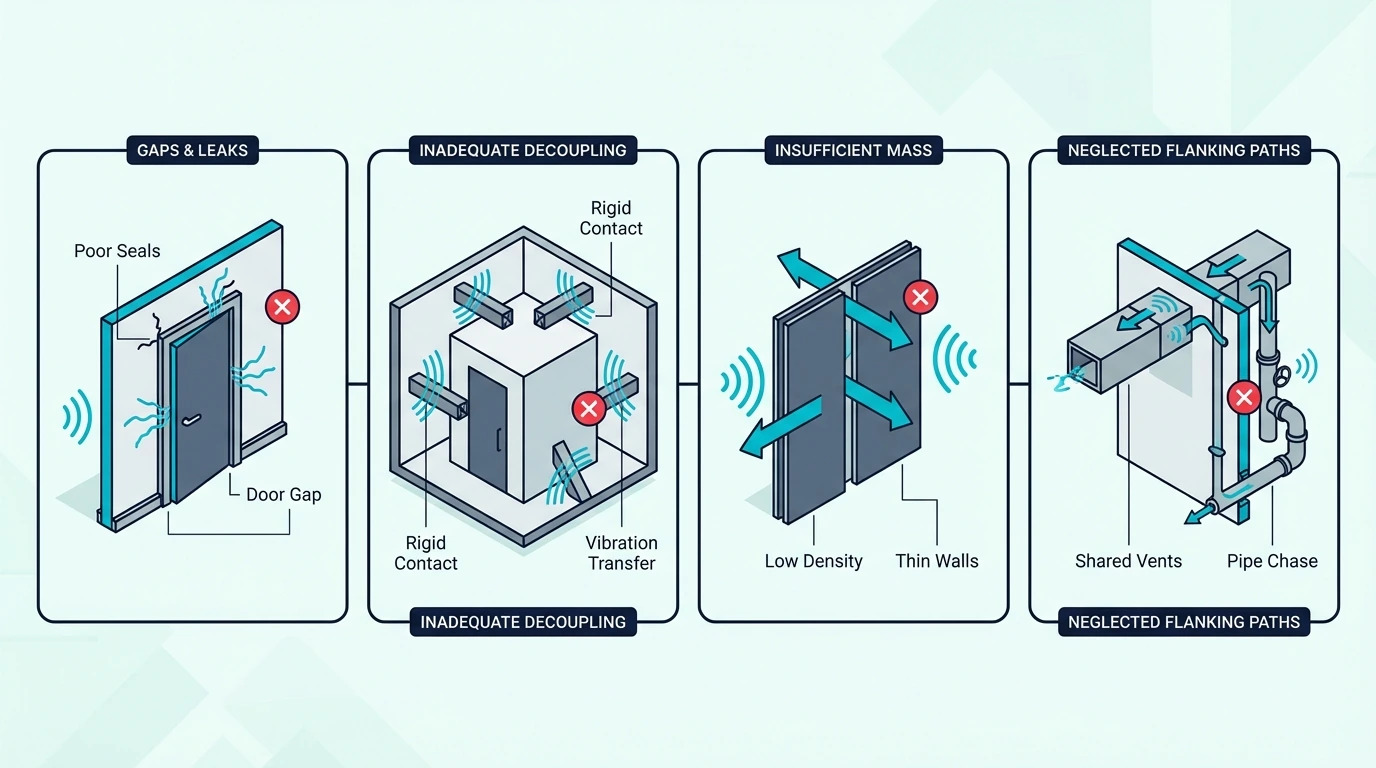
Small Gaps Can Undo Heavy Construction
Because sound follows the path of least resistance. A studio with excellent wall isolation but a hollow-core door with a visible bottom gap will perform as if the walls were barely treated because most of the sound enters and exits through the door.
The same applies to unsealed electrical outlets, light switches, HVAC penetrations, and any opening that creates an air path through the barrier. A bead of acoustic caulk around outlet boxes, perimeter joints, and service penetrations is one of the cheapest and most impactful steps in any studio build because it closes the leaks that would otherwise bypass the rest of the assembly.
Acoustical Caulk (29 oz)
Professional Design Pays Off When The Noise Floor Must Be Truly Low
Call a professional when the studio needs to handle loud sound sources, meet a recording-grade noise floor, or add ventilation without giving back the isolation. A studio acoustician can model the room, specify the assembly, and verify the result with measurements.
Professional help is also worth considering when the studio is in a rented space, a multi-story building, or a situation where noise complaints could become a legal issue. Getting the build right the first time is cheaper than retrofitting a failed DIY attempt, especially once fresh-air and HVAC paths have to stay usable without turning into leak paths.
For broader context, compare this page with soundproofing a wall, soundproofing a ceiling, best insulation for soundproofing, best soundproofing material, and the broader soundproofing hub so the studio build stays grounded in the same assembly principles that apply to every other room.
The Bottom Line
How to soundproof a studio comes down to separating isolation from treatment and matching the shell to a studio-first use case. Mass, decoupling, damping, and sealing are the four pillars of studio isolation, and they need to work together across every surface — walls, ceiling, floor, door, and window — to deliver real results.
For most home studios, the best first step is upgrading the door, sealing every air gap, and adding mass to the weakest wall or ceiling section. Those three upgrades address the biggest leak paths at the lowest cost, and they give you a clear baseline for deciding whether heavier construction like resilient channels, double drywall, or a floating floor is worth the additional investment.
If your real goal is mostly loud music practice, bass playback, or drum rehearsal rather than recording or monitoring, compare this page with soundproofing a room for music and soundproofing a room for drums. Those pages own the broader music-room lane, while this one is strongest when the room has to behave like a real studio.
Frequently Asked Questions
How do I reduce noise in my studio?
Reduce noise in your studio by identifying the weakest barrier — usually the door or window — and treating it with mass, sealing, and a better closure. Then add mass and insulation to the walls and ceiling as budget allows, focusing on the surfaces closest to the noise source.
Does rockwool soundproof?
Rockwool helps with soundproofing when used inside wall or ceiling cavities because it adds density and absorption to the assembly. It is not a standalone soundproofing solution, but it improves the performance of a wall system when combined with proper mass, decoupling, and sealing.
What materials block high frequency sound?
Dense, heavy materials like mass loaded vinyl, multiple layers of drywall, and sealed assemblies are the most effective at blocking high-frequency sound. High frequencies are easier to block than low frequencies because the sound waves are shorter and lose energy more quickly when they hit a massive barrier.