How To Soundproof A Wall From Noisy Neighbours (What Actually Works)

How to soundproof a wall from noisy neighbours can work, but only if you match the fix to the actual shared-wall problem. The right solution for TV voices through a light stud wall is not the right solution for bass through a masonry party wall, and neither one works well if the real leak is actually the ceiling edge, the floor, or a nearby door.
That is why so many neighbor-noise projects disappoint. People hang foam, add one decorative panel, or buy “soundproof” products without understanding how sound waves, sound transfer, and sound vibrations are moving through the existing wall assembly in the first place.
When the diagnosis is wrong, even a well-installed product can feel like a waste of money.
The good news is that shared-wall soundproofing can make a meaningful difference when you match the method to the wall type, the noise type, and the likely flanking paths. Sometimes a wall-only upgrade really is the answer.
Other times the smartest move is a lighter retrofit, a renter-safe compromise, or a broader room strategy that includes the wall plus nearby flanking paths.
Start by figuring out whether you have a brick or stud shared wall and whether the wall is truly the main weak point. Then you can decide if you need a lighter retrofit, a stronger drywall-and-damping build, or a more complete system that deals with the surrounding room as well.
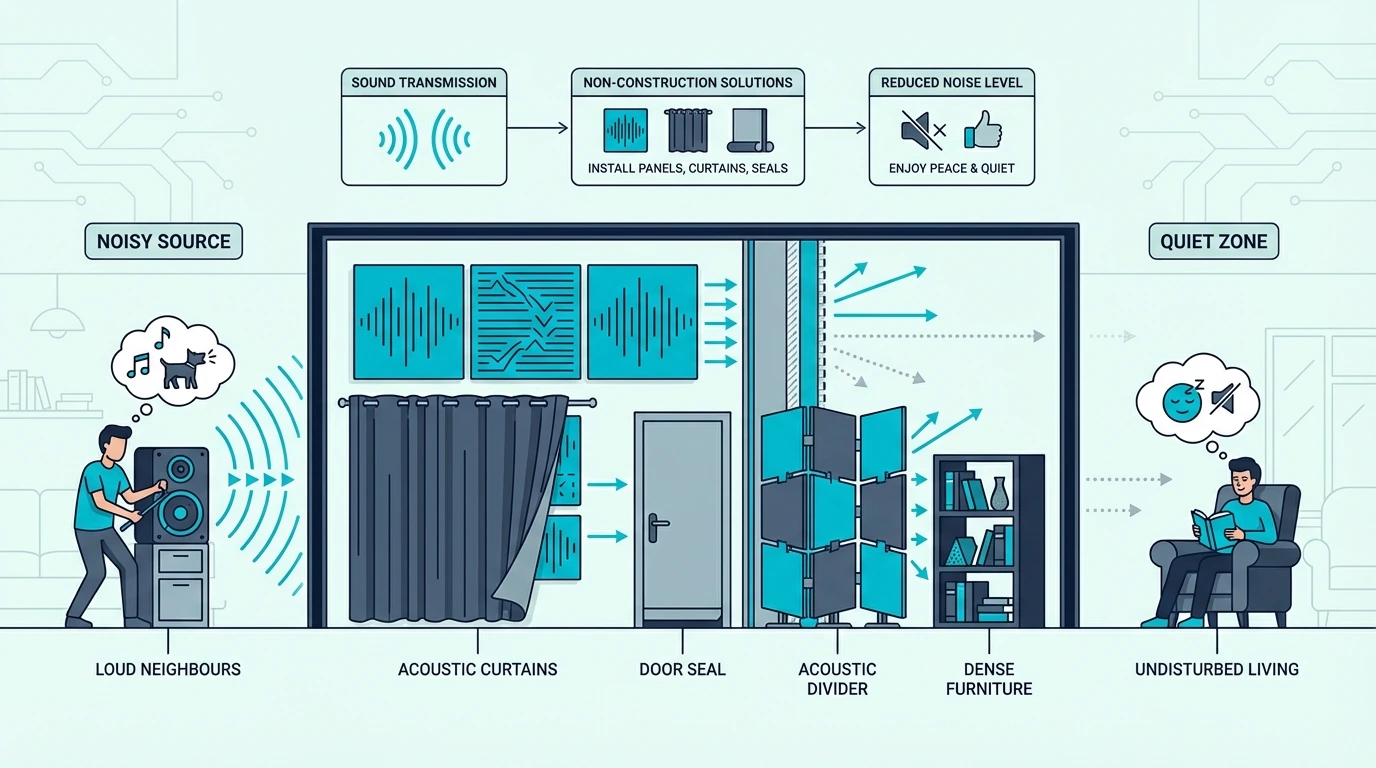
The best way to soundproof a wall from noisy neighbours is usually to add mass, improve sealing, and in stronger builds combine damping or decoupling with insulation inside the assembly. Solid brick party walls and light stud walls need different strategies, and wall-only fixes often disappoint if the noise is also flanking through floors, ceilings, doors, or window details. For already-built rooms, renter-safe or non-destructive fixes can dampen noise a little, but the biggest improvements usually come from rebuilt shared-wall systems.
If you want the fastest answer first, use this matrix before the full diagnosis. It shows which shared-wall approach usually fits the noise type, wall type, and amount of construction you can tolerate.
| Situation | Best starting move | What to expect |
|---|---|---|
| Voices or TV through a light stud wall | Add sealing plus a new 5/8-inch drywall layer with damping | Usually the best value upgrade for clear airborne noise |
| Bass or repeated music through a light wall | Plan for a more separated front assembly, not just another thin surface layer | Stronger improvement, but more thickness and labor |
| Noise through a brick or masonry party wall | Focus on sealing and a stronger inner build-up in front of the wall | Better than soft surface products, but still build-dependent |
| Renting or avoiding major construction | Seal nearby gaps, add dense furniture, and use temporary heavy barriers | Modest improvement only |
| Wall is not clearly the loudest surface | Diagnose flanking at the door, ceiling line, floor edge, and outlets first | Wall-only work may disappoint if the leak is elsewhere |
Shared-Wall Soundproofing Only Works After A Proper Diagnosis

The first step is not choosing a product.
The first step is working out what kind of neighbour noise you are actually dealing with and how it is getting through the wall.
A shared wall that leaks speech, television sound, and general voices behaves differently from a wall that seems to carry bass, low rumbles, or heavy thuds. That difference matters because the level of mass, damping, and separation required is not the same across all noise types.
Airborne Voices And Low-Frequency Bass Do Not Ask The Same Thing From The Wall
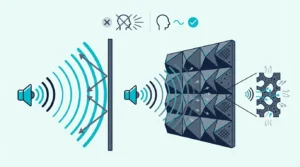
Voices, TV dialogue, midrange music, and general living noise are usually airborne noise problems. These are often the easiest shared-wall issues to improve because adding mass, damping, sealing, and in the right cases insulation can reduce sound transmission across the wall more effectively.
Bass is harder because lower frequencies carry more energy, travel farther through the structure, and make the wall assembly vibrate more aggressively.
That is why readers dealing with subwoofers, gaming setups, home theater noise, or repetitive music often feel like the wall is “impossible” to treat. The problem is not that soundproofing solutions never work.
The problem is that low-frequency sound transfer asks more from the wall system than speech-level noise does. In practice, that usually means more thickness, more mass, and more tolerance for construction than people first expect.
It also helps to separate airborne noise from impact-style noise. If what you are hearing feels more like vibration, repeated knocks, or transferred structure-borne energy, the fix may involve more than the shared wall alone.
That is where readers should compare this page with how to soundproof a ceiling, how to soundproof a floor, and the broader how to soundproof a room guide before blaming the wall only.
The Shared Wall Is Not Always The Only Leak Path
A shared wall is often the obvious suspect, but not always the true main weak point. Sound can flank around the wall through a door frame, an adjacent window, a floor perimeter gap, ceiling junctions, outlet boxes, vents, or a stud connection that ties the sound into nearby surfaces.
That is why simple diagnosis matters so much. Stand near the wall, but also listen at the door, the ceiling line, the corners, and any openings close to the shared surface.
If the wall is the loudest surface, treat it first. If the edge details are nearly as loud, you may need a combined approach rather than a wall-only build.
It also helps to test at different times of day. A party wall that seems mainly like a voice problem in the afternoon may reveal stronger bass transfer at night, and that changes the kind of build that makes sense.
This is also why modest flanking fixes are sometimes worth trying before a larger wall project. A product like soundproofing weather stripping is not a wall system, but it can reveal whether adjacent gaps are making the shared wall problem feel worse than it really is.
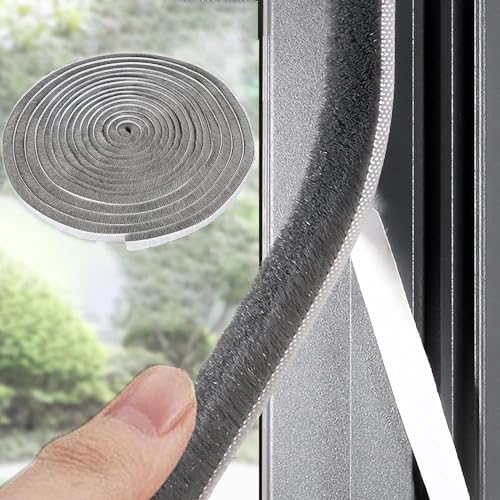
33 Ft Gray Self-Adhesive Soundproofing Weather Stripping
Realistic Targets Protect You From Wasting Money
This is where expectation-setting protects readers from spending badly. Small retrofits can dampen noise a little.
Heavier surface additions and better assemblies can reduce sound more clearly. A rebuilt shared wall with mass, damping, cavity treatment, and careful sealing can make a big difference.
What most people cannot buy is perfect silence from a single finished-wall add-on. If the goal is “I want to hear less TV and fewer voices,” there are many effective solutions.
If the goal is “I never want to hear my neighbor again,” the wall may need much more thickness, more cost, and more structural work than the average DIY reader expects. That is especially true where the existing wall is light, poorly sealed, or tied tightly into the rest of the structure.
That honest framing matters because it shapes the whole article. You are not choosing between “works” and “does not work.”
You are choosing between modest improvement, meaningful reduction, and a high-performance build.
Brick Walls And Stud Walls Fail In Different Ways
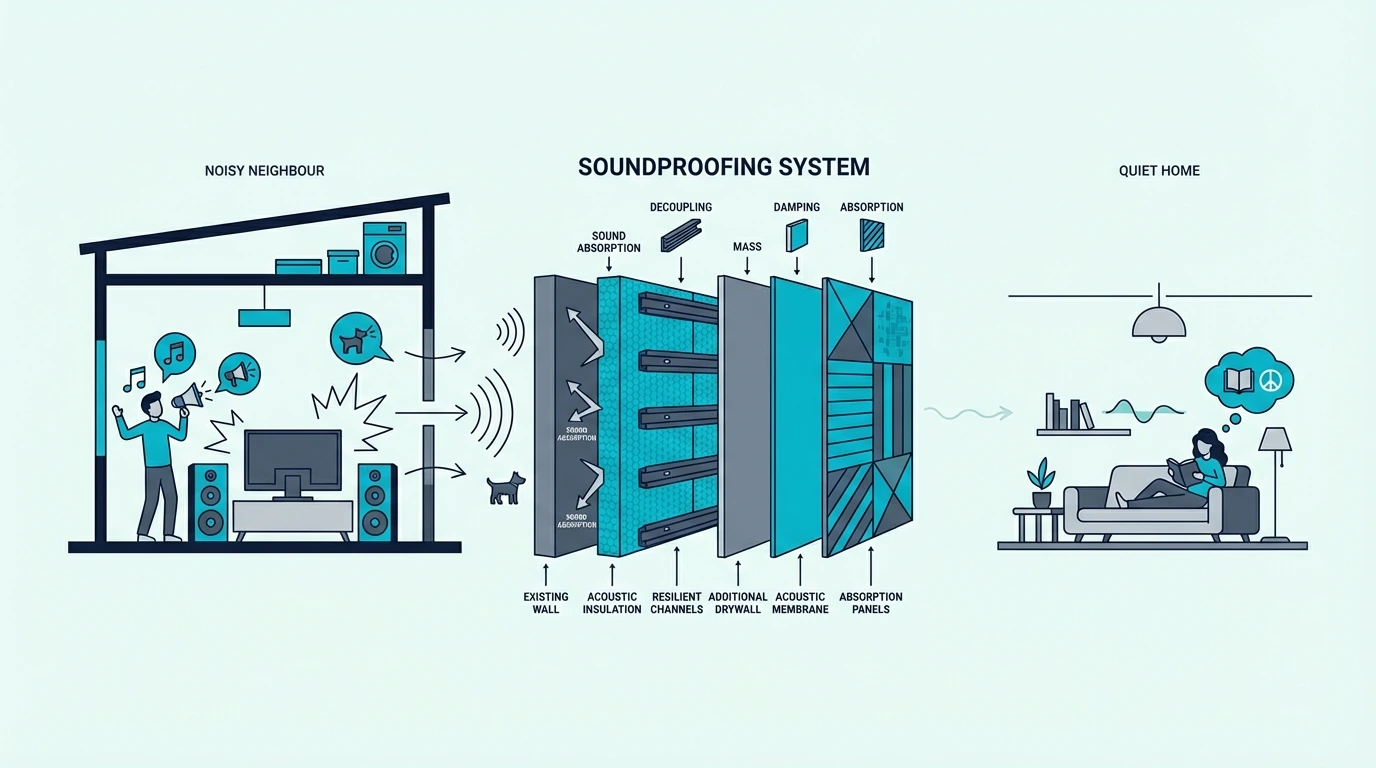
The wall type matters because a solid brick party wall and a light stud wall fail in different ways.
A heavy existing wall already has more mass, so the strategy often centers on sealing, damping, and adding a new independent layer where needed. A lighter stud wall is more vulnerable to sound transfer through the cavity and the shared framing, so the plan changes much faster.
That is why two neighbors with the same complaint can need very different effective solutions. One may benefit from a front build-up on top of an already heavy wall, while the other needs a fuller lightweight-wall assembly upgrade.
Masonry Walls Usually Need A Better Inner Build-Up, Not Soft Surface Products
A brick or masonry party wall already gives you one useful thing: mass. That means you may not need to chase the exact same build logic you would use on a thin stud wall.
Instead, the question becomes whether the current wall needs more airtightness, a better isolated layer in front of it, or a new build-up that reduces direct contact and dampens sound waves more effectively. In many masonry cases, the wall itself is not “too light.” The weakness is more often at the finish layer, the edge details, or the lack of a more separated inner skin.
For a masonry wall, simple thin treatments are usually weak value. If a wall is already heavy, the problem is often not that it needs a soft decorative covering.
The problem is that it needs a stronger front assembly or a better sealed finish that helps dampen sound and reduce sound transmission across the full surface. Readers often get better results by thinking in terms of “new inner layer” rather than “wall decoration.”
This is where high-mass materials can make sense when the job justifies them. A product like Trademark soundproofing mass loaded vinyl is not a first-step fix for every reader, but it is the kind of material that matches a serious masonry shared-wall upgrade better than a cheap foam layer ever will.
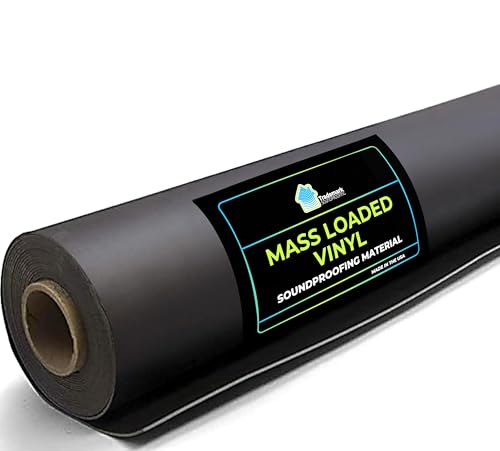
Trademark Soundproofing Mass Loaded Vinyl
Stud Walls Improve Most When The Whole Assembly Gets Better
A stud wall is different because the cavity, the studs, the board layers, and the connections all affect sound transfer.
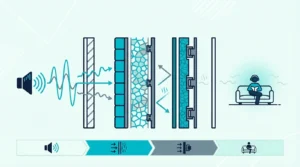
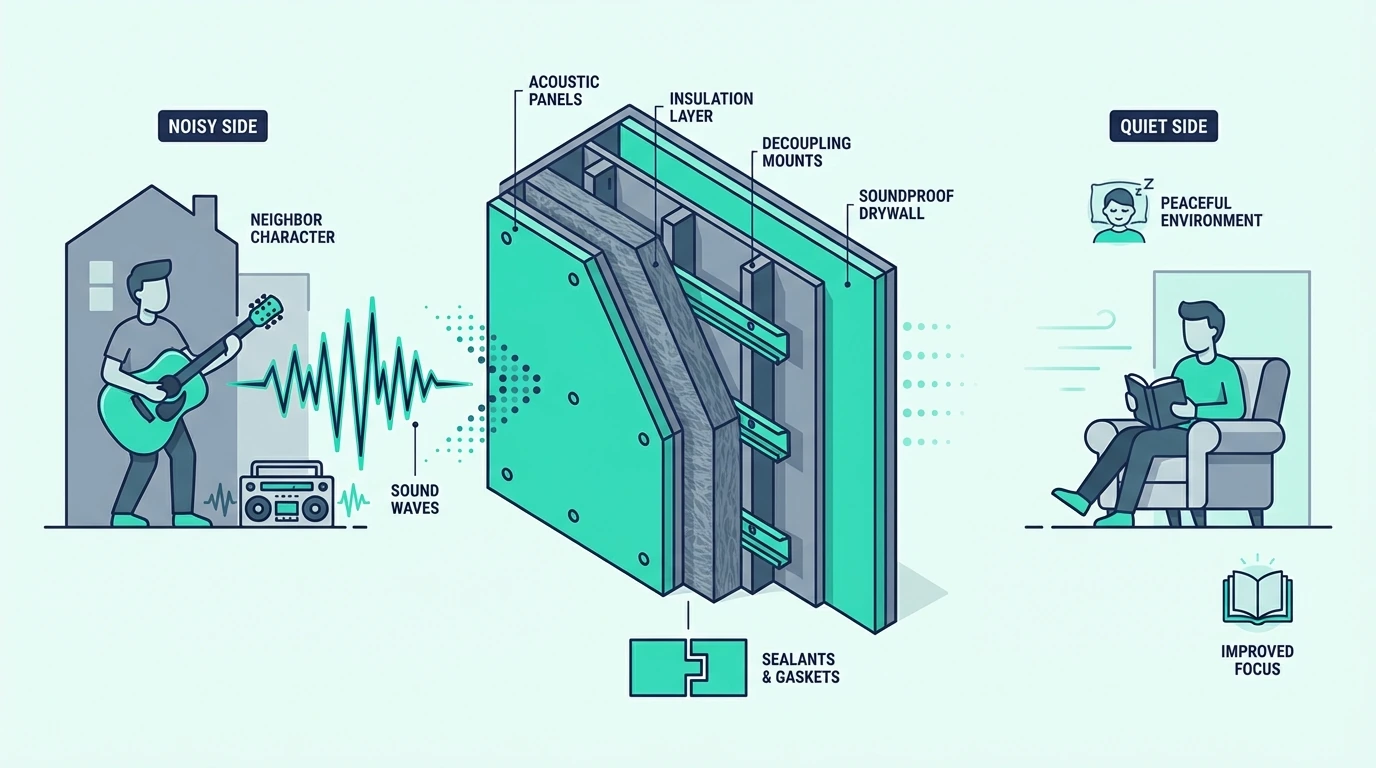
A light existing wall often benefits from a fuller system approach: additional drywall or other mass layers, damping between layers, cavity insulation where appropriate, and in higher-performance builds some degree of decoupling so the new surface is less directly tied to the old vibrating wall.
Stud walls are also where weak workmanship shows up fast. Gaps, poorly sealed perimeters, shallow cavities, and direct rigid connections all make it easier for neighbour noise to move through the assembly.
This is why stud walls can sometimes deliver better improvement than readers expect when upgraded properly. The existing wall has less mass to begin with, but it also has more room for system-level gains if you add mass, change the cavity behavior, and reduce direct vibration transfer.
That said, cavity treatment alone is not enough. Wall insulation helps, but it is rarely the whole answer.
The best stud-wall improvements come from combining wall insulation with added mass, damping, and full sealing rather than expecting one component to solve everything. If you want the material-level comparison behind that logic, connect this article with best insulation for soundproofing, best soundproofing material, and best soundproofing panels.
Uncertainty About Wall Type Should Change The First Step, Not Stop The Project
Start simple. A tap test, the wall thickness, the age and style of the building, and what sits on the other side can give useful clues.
A hollow or lighter response often points toward a stud wall. A dense, hard, and more solid feel often points toward masonry or brick.
You can also use context. Apartments, newer partitions, and some interior dividing walls are more likely to be stud constructions.
Older terraces, semi-detached homes, and many true party-wall situations are more likely to involve brick or masonry. Townhouses can go either way, which is why a quick field check still matters.
If you still are not sure, plan around uncertainty instead of pretending certainty. Focus on the strategies that help diagnose first: listen for flanking, check adjacent openings, and avoid buying thin “quick fixes” that would be weak value on either wall type.
That cautious approach prevents a lot of wasted cost. It also keeps you from locking yourself into a wall treatment that makes less sense once the wall type is finally confirmed.
Get Studio Tips Weekly
Join 5,000+ creators getting acoustic treatment advice every week.
No spam. Unsubscribe anytime.The Best Shared-Wall Upgrade Depends On How Much Construction You Can Tolerate
The best shared-wall solution is usually the one that matches both the noise level and the amount of construction you can tolerate.
This is the core decision section because it separates meaningful upgrades from partial compromises.
It is also where readers need to decide whether they want a proper assembly upgrade or simply the best available improvement for an existing wall.
If you want the fastest build-level answer, most readers fall into one of the four tracks below. The goal is to match the wall system to the actual neighbour-noise problem instead of stacking random products on the surface.
| Goal | Build level | Typical assembly | Best fit |
|---|---|---|---|
| Stop light leakage around a mostly decent wall | Light retrofit | Seal edge gaps, outlets, nearby door or window details, and add dense room-side layers | Mild voices where flanking is obvious |
| Improve a finished light wall without a full rebuild | Mid-tier wall build | New 5/8-inch drywall layer with Green Glue Noiseproofing Compound, plus sealing | Voices, TV, and moderate music through a stud wall |
| Get stronger performance from a light stud wall | Serious stud-wall build | Cavity insulation, a more separated front assembly, new drywall, and full perimeter sealing | Repetitive, stronger, or bass-heavier transfer |
| Upgrade a heavy brick or masonry party wall | Serious masonry build | Sealed existing wall plus a new inner build-up rather than soft wall coverings | Masonry walls that still leak neighbour noise |
Added Drywall And Damping Often Give The Best Mid-Tier Return
Extra drywall helps because it adds mass. Damping helps because it reduces how strongly the wall layers resonate and transmit sound vibrations.
Together, they are often the most practical upgrade path for a finished shared wall when you can accept added thickness and moderate construction. For many homeowners, this is the sweet spot between weak surface add-ons and full decoupled rebuilds.
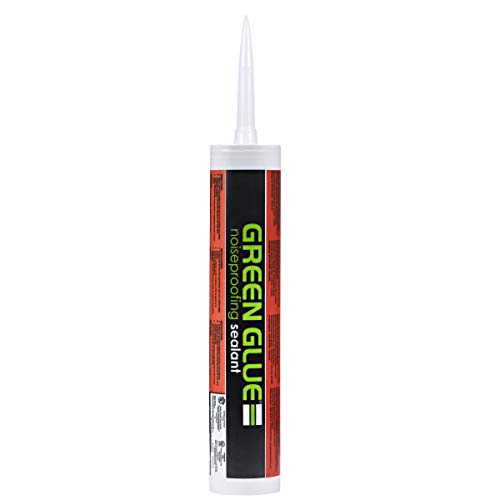
For a typical finished stud wall leaking voices or TV noise, the practical mid-tier build is perimeter sealing plus one new 5/8-inch drywall layer with Green Glue Noiseproofing Compound between rigid layers. If the existing wall is especially light or the transfer is stronger than normal speech, add Trademark soundproofing mass loaded vinyl before the new drywall rather than expecting a soft wall covering to do the same job.
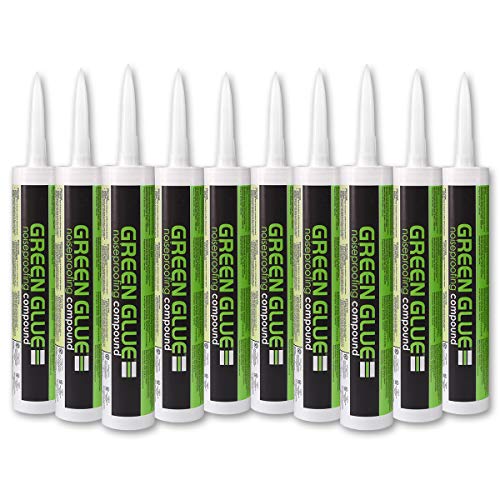
Green Glue Noiseproofing Compound
This is often the point where readers start seeing the difference between a cosmetic upgrade and an actually effective solution. It is also why the main wall article, how to soundproof a wall, should sit alongside this page when you want the broader wall logic beyond the neighbour-specific case.
Decoupling Earns Its Thickness When Vibration And Bass Dominate
Decoupling is worth it when the shared-wall problem is serious enough that simply adding mass to the existing wall may not get you where you want to go. If the noise is repetitive, strong, or bass-heavy, or if the existing wall is light enough that vibration transfer is a major part of the problem, resilient systems or more separated front assemblies become much more attractive.
The tradeoff is thickness, cost, and labor. Decoupling is not usually the answer for readers looking for the easiest weekend project.
Think of this as the serious-build track: a more separated front assembly in front of the shared wall, then new board layers and full sealing. On a light stud wall with repetitive music or bass, this is often where the upgrade starts becoming meaningfully stronger rather than just heavier.
On masonry, the equivalent move is usually an isolated inner skin in front of the party wall rather than trying to glue soft materials straight to the brick. That is why decoupling belongs in the serious-fix bucket even though it is not necessary for every neighbor-noise problem.
Insulation Matters Most When It Supports A Complete Wall System
Insulation matters most when it is part of a full shared-wall assembly rather than a standalone idea. In a stud wall, cavity insulation can help absorb sound and reduce some internal resonance, and a product like AFB Mineral Wool Insulation works best when paired with better board layers, damping, and careful sealing of the whole system.
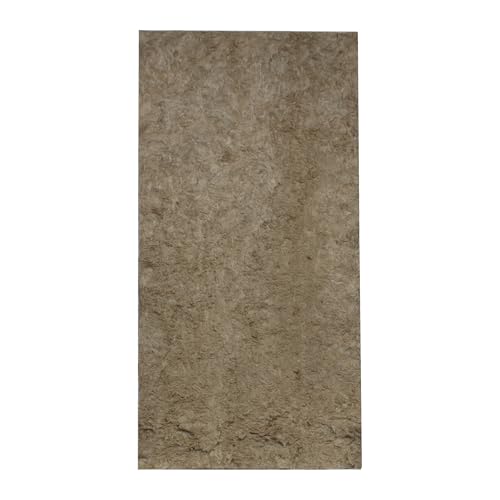
AFB Mineral Wool Insulation
The practical opened-wall sequence is cavity insulation first, then better board layers or a more separated front assembly, then careful sealing at outlets and perimeters. That is the point where insulation starts helping the full wall system instead of acting like an isolated idea.
This is where many DIY readers lose the thread. They hear that wall insulation helps and assume the cavity fill is the project.
In reality, cavity treatment is one part of a broader system that needs to control sound transfer across the whole wall. If the cavity is improved but the wall still leaks through outlets, edges, or weak board layers, the result will still feel incomplete.
Finished Rooms Can Still Improve Without A Full Rebuild
Yes, but the limits matter. A finished shared wall can sometimes be improved without major construction, but non-destructive solutions usually dampen noise a little rather than deliver the big jump people associate with true soundproofing.
That does not make them pointless. It just means they belong in the “modest help” bucket rather than the “major reduction” bucket.
Non-Destructive Fixes Belong In The Modest-Improvement Bucket
Furniture placement, heavy shelving, dense storage, layered soft surfaces, temporary barriers, and careful sealing around nearby leaks can all help a little.
These are not fake improvements. They are just smaller improvements.
That distinction matters because small gains can still be useful. If the shared wall mainly carries occasional voices or moderate TV noise, even a modest reduction can improve sleep, focus, or daily comfort.
This is especially true in bedrooms, nurseries, and home offices where reducing the sharpest noise peaks matters more than chasing complete isolation.
A renter-safe temporary barrier like the VEVOR sound dampening blanket fits this category. It is not a replacement for a rebuilt party wall, but it can help as a temporary barrier, a test layer, or a finished-room compromise.
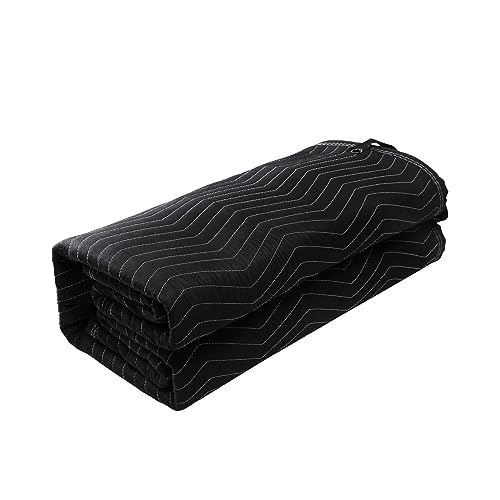
VEVOR Sound Dampening Blanket
Renters Usually Do Better With Layered Reversible Fixes
Renters should think in reversible layers: large furniture on the shared wall, rugs if the room has hard floors, denser curtains near nearby openings, removable shelves or storage, and temporary heavy barriers where allowed.
The best renter strategy is usually to combine several modest fixes instead of expecting one product to solve a structural problem. That layered approach can also help identify which part of the room is really causing the most trouble before money goes into bigger work.
That is why apartment readers should keep one eye on the broader room context. If the “shared wall” problem is really part wall, part door gap, and part outside noise, the more relevant companion pages may be how to soundproof an apartment, how to soundproof a door, and how to soundproof windows.
Thin Foam And Miracle Products Usually Belong In The Wrong Category
Thin acoustic foam, lightweight stickers, decorative felt tiles with little density, and products marketed like miracle solutions are mostly hype when the real goal is to reduce sound transmission through a shared wall.
They may change room sound or slightly dampen reflections, but they do not give the kind of adding-mass, damping, or sealing benefits a serious neighbor-noise problem usually needs.
That is why readers should be careful with language like “soundproof existing wall” or “soundproof a neighbouring wall” when the suggested product has almost no mass.
If the product cannot meaningfully reduce sound transmission, it is not the main answer to a noisy neighbour problem. Cheap products can still have a place, but only when their limitations are understood from the start.
Flanking Paths Explain Why A Good Wall Build Can Still Disappoint
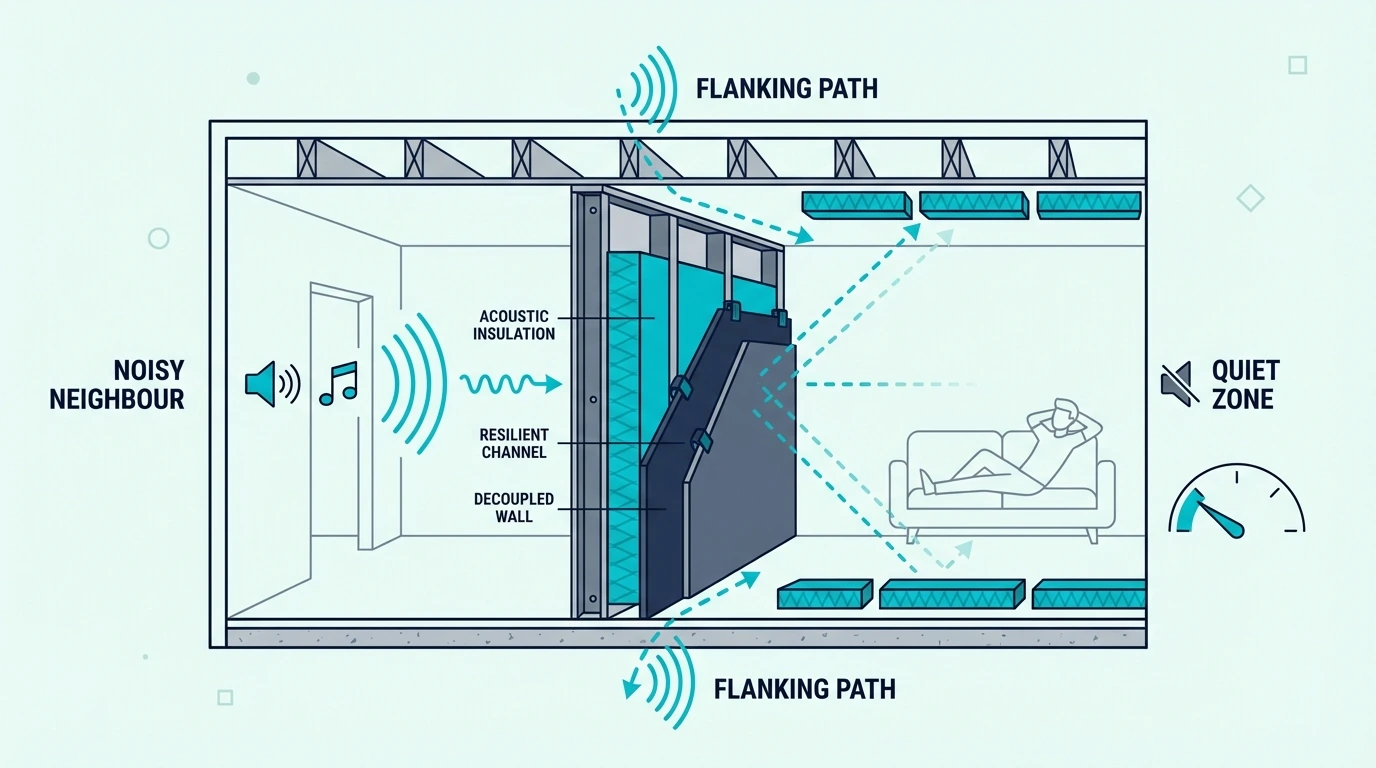
This is the section most people need and most articles underplay. A shared wall can be treated correctly and still underperform because sound is not always loyal to the wall you decided to fix.
That does not mean the wall upgrade failed. It may simply mean the room was behaving like a system and the wall was only part of that system.
Floors, Ceilings, And Side Junctions Can Bypass The Upgraded Wall
Yes. Sound can travel through floors, ceilings, adjacent walls, framing connections, sockets, trims, and gaps where the wall meets other surfaces.
This is called flanking, and it is one of the main reasons wall-only projects can feel disappointing. It is also why the wall may sound quieter in the middle than at the room edges.
That is why system thinking matters more than product shopping. If the noisy neighbors share a floor line, a ceiling line, or a connected wall junction, treating only the most visible wall surface may not control the full path of sound transfer.
If the loudest spots are outlets, trim transitions, or perimeter cracks rather than the wall field itself, a sealant like Acoustical Caulk (29 oz) is often the cheapest way to stop a good wall plan from being bypassed by small leaks.
Acoustical Caulk (29 oz)
This is especially common in apartments and terraces where the party wall is tightly tied into the surrounding structure. In those buildings, a good wall build can still leave some residual transfer because the noise is partly bypassing the upgraded surface.
This is also where readers benefit from connecting articles instead of isolating them. If wall treatment seems logical but the result is still weak, compare your situation with how to soundproof a ceiling, how to block outside noise, and how to soundproof a room cheaply to identify what the wall build may have missed.
Sometimes The Better Investment Is Above Or Below The Wall
The ceiling or floor may be the better place to work when the wall treatment makes only a small improvement, when impact-style vibration seems to dominate, or when the room layout suggests sound is entering from above, below, or around the shared partition rather than through it directly.
That is why good shared-wall diagnosis includes the surrounding assembly. If the wall is one leg of a larger soundproofing problem, the better investment may be a ceiling treatment, a floor strategy, or a mixed plan rather than a thicker wall alone.
Readers often resist this conclusion because it feels like the wall project “should” have solved everything. In reality, the room is only telling you where the next weak path lives.
Professional Help Makes Sense Before You Sacrifice Too Much Depth Or Budget
Call a professional when the wall use case is important enough that guesswork would be expensive, when the room needs a higher-performance build, or when you suspect a more technical party-wall assembly involving fire, structure, code, or complex flanking paths.
A professional can help confirm the wall type, the weak points, and the improvement level the current room can realistically support. That becomes especially valuable once you are considering thicker assemblies, room-depth loss, or a more permanent system with multiple components.
This is especially true if you are about to lose meaningful room depth or spend heavily on a rebuilt assembly. A stronger design is much easier to live with when the thickness, cost, and expected result have been planned honestly from the start.
The Bottom Line
How to soundproof a wall from noisy neighbours is really about choosing the right level of intervention for the right wall. If the shared wall is light and clearly the weak point, a fuller system with added mass, damping, insulation, sealing, and sometimes decoupling is often the most effective path.
If the wall is already heavy, you may need a better front assembly, better edge sealing, or a stronger understanding of where sound is flanking around the party wall.
The goal is not to buy the most dramatic product. The goal is to build the right response to the actual shared-wall problem.
That diagnosis usually saves more money than another random surface product ever will.
For lighter problems and finished rooms, small retrofits can still dampen noise and improve comfort, but they should be judged as modest improvements rather than miracle cures.
The smartest next step is to pair this page with the articles that match the actual weak point in your room: the soundproofing hub, how to soundproof a wall, how to soundproof an apartment, how to block outside noise, and how much it costs to soundproof a room.
Frequently Asked Questions
How can I stop hearing my neighbor through walls?
Start by confirming the shared wall is the main path, then improve sealing and decide whether the problem calls for a modest retrofit or a rebuilt wall assembly. If the noise is strong or bass-heavy, small surface fixes usually will not be enough on their own.
How can I soundproof my walls cheaply?
Cheap wall soundproofing usually means modest improvements like furniture placement, temporary heavy barriers, and fixing flanking leaks near the shared wall. Those can help a little, but stronger neighbor-noise problems usually need more mass or a better wall system.
How can I soundproof a shared wall?
The most effective shared-wall approach is usually to add mass, use damping where appropriate, seal everything carefully, and in stronger builds consider insulation and some degree of decoupling. The exact plan depends on whether the wall is masonry or stud construction.
What can I put on my walls so I don’t hear my neighbors?
On a finished wall, dense furniture, heavy temporary barriers, and carefully chosen retrofit layers can help more than thin foam or decorative panels. If you need a major improvement, the best answer is usually not something you simply stick to the wall surface.