Isolation Shield vs Acoustic Foam: Which One You Actually Need (and When)

Isolation shield vs acoustic foam sounds like the same fix for a bad room. Yes, but they tackle reflections in two different ways.
If your vocals sound boxy or roomy, early reflections are usually bouncing off nearby hard surfaces and back into the microphone. Pick the wrong tool and you’ll still hear that “live room” smear, even after you spend the money.
Choose the right starting point and you’ll get cleaner takes and a more controlled space without overbuying. First decide whether your biggest problem is the wall behind the mic or the room as a whole.
Recording vocals in different rooms? Start with an isolation shield. Whole room sounds echoey? Start with acoustic foam at first reflection points. Mixing or monitoring in the same room? Acoustic foam helps more than a shield. For the cleanest vocal capture, combine both.
What’s the Real Difference Between Isolation Shields and Acoustic Foam?

Now that you’ve got the quick takeaway, here’s what each tool actually treats. The core difference is what each product is designed to treat.
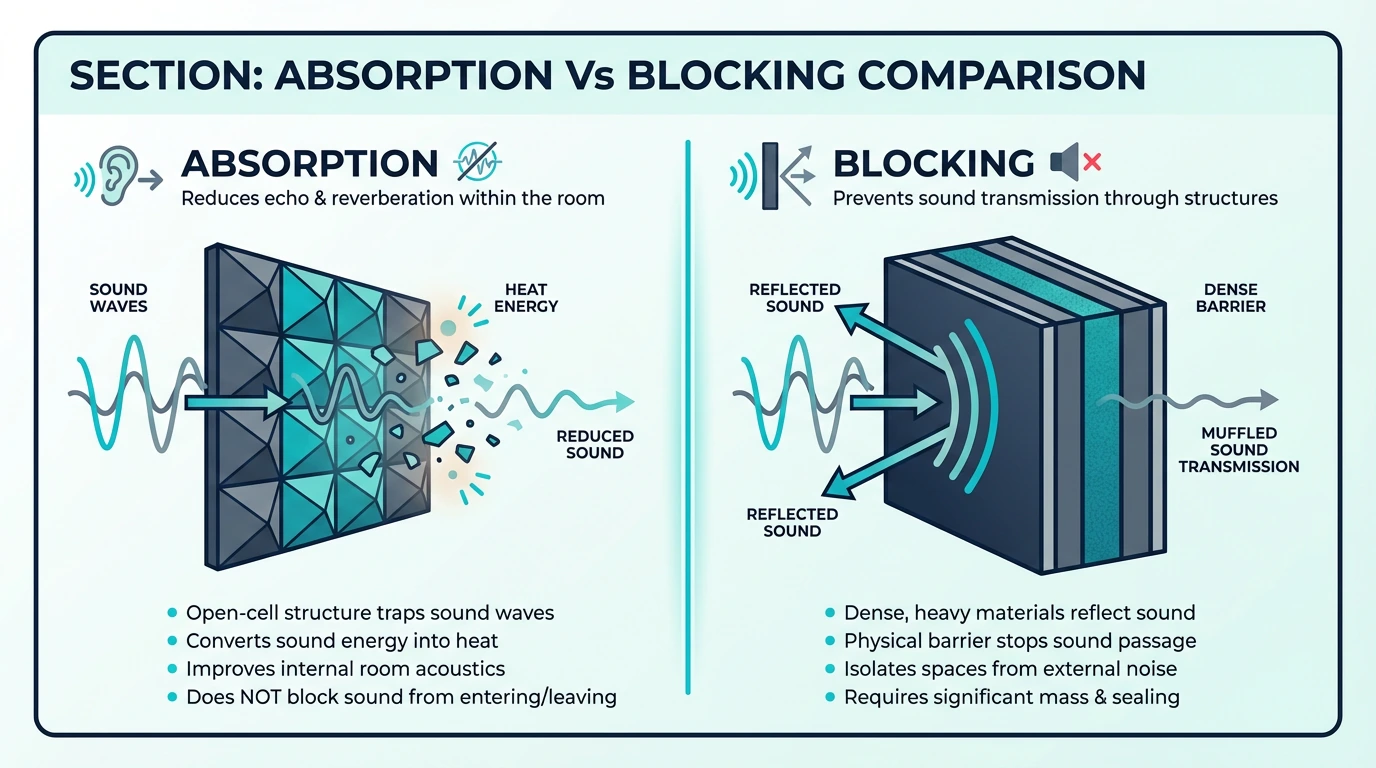
Isolation shields focus on your microphone’s immediate environment, especially reflections coming from behind and to the sides. Acoustic foam treats the room itself, reducing reverb, echo, and flutter from the surfaces you cover.
Think of an isolation shield like wearing headphones in a noisy café. The café is still noisy, but you’ve created a bubble around your ears.
Acoustic foam is closer to treating the café so the whole room benefits.
How Do Isolation Shields Actually Work?
Isolation shields — also called reflection filters or portable vocal booths — mount behind your microphone on a standard mic stand. They create a semi-circular barrier of acoustic foam that absorbs sound waves before they can bounce off the wall behind you and back into the mic.
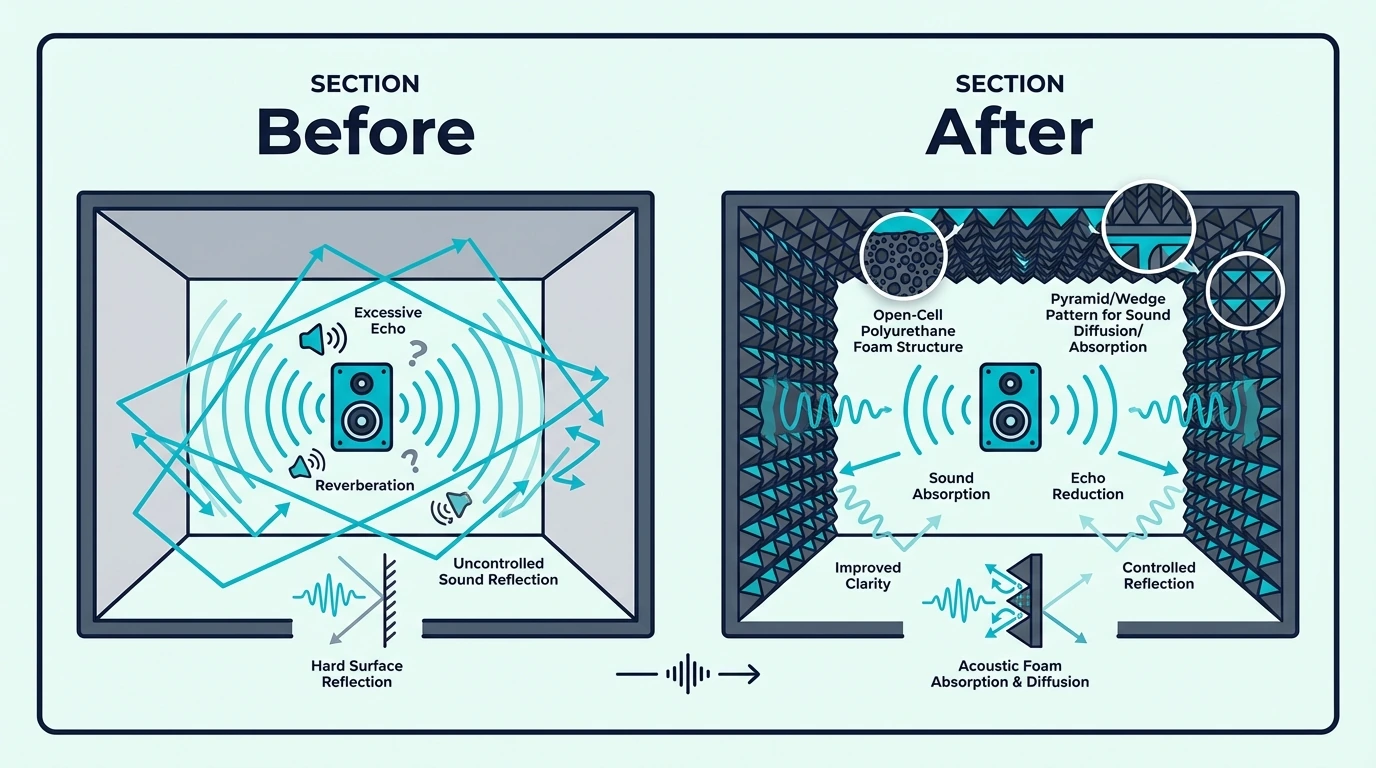
The physics here are simple. When you speak or sing into a microphone, your voice travels in all directions.
Without treatment, waves hit the wall behind you, bounce back, and reach the mic a few milliseconds after the direct sound. That short delay is what creates the “roomy” quality that makes vocals sound less controlled.
An isolation shield intercepts those reflections at the source — right behind the microphone where they’d otherwise bounce back. High-quality shields use multi-layer construction: dense foam for absorption, metal or plastic shell for rigidity, and sometimes air gaps for additional isolation.
The key limitation is coverage. Isolation shields mainly treat reflections from one direction, especially the wall directly behind the microphone.
Ceiling, floor, and side-wall reflections can still reach the mic, which is why shields help but rarely make a space sound fully treated.
How Does Acoustic Foam Room Treatment Work?
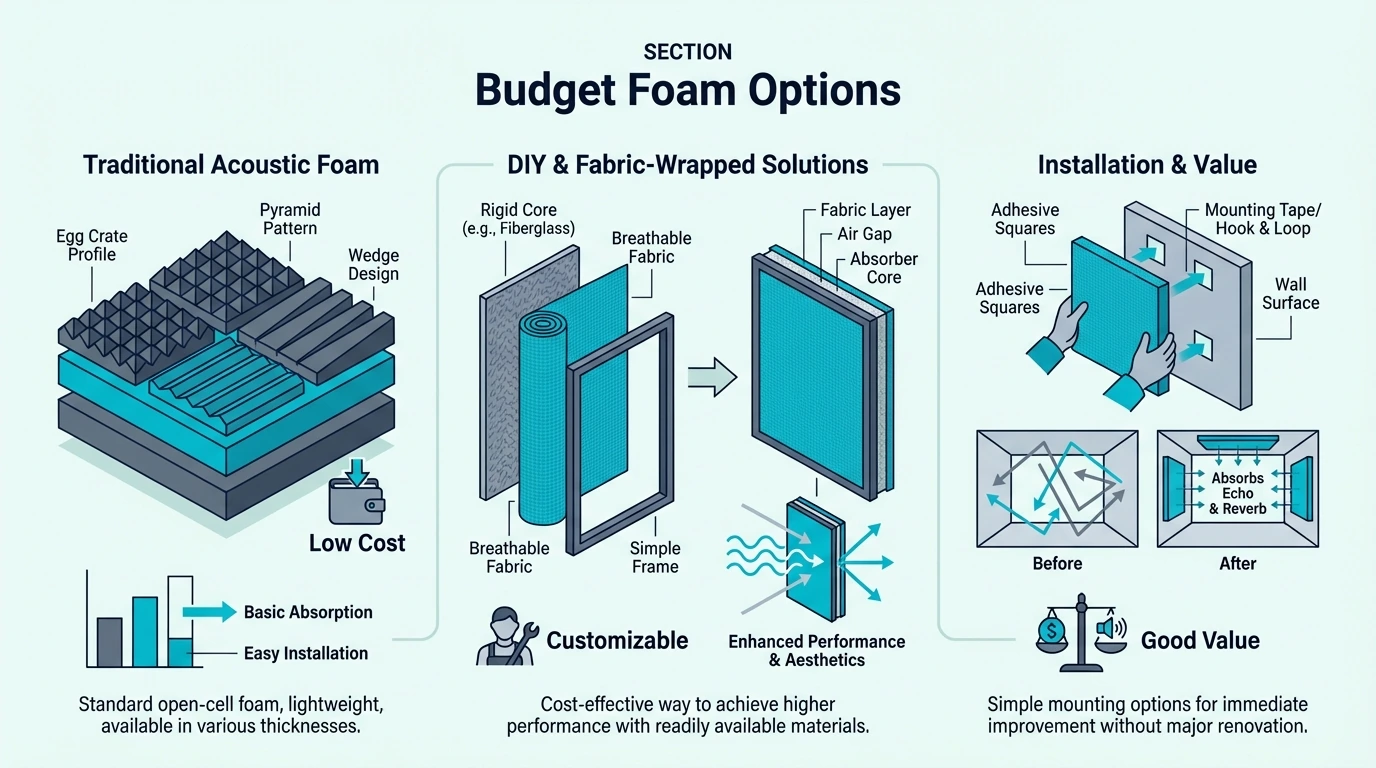
Acoustic foam panels mount on your walls and absorb sound waves across the room. Instead of treating one direction, foam reduces reverb and echo from every surface you cover.
Most panels are open-cell polyurethane, and they work by converting sound energy into a tiny amount of heat. Sound waves enter the foam’s porous structure, bounce around inside, and lose energy with each bounce.
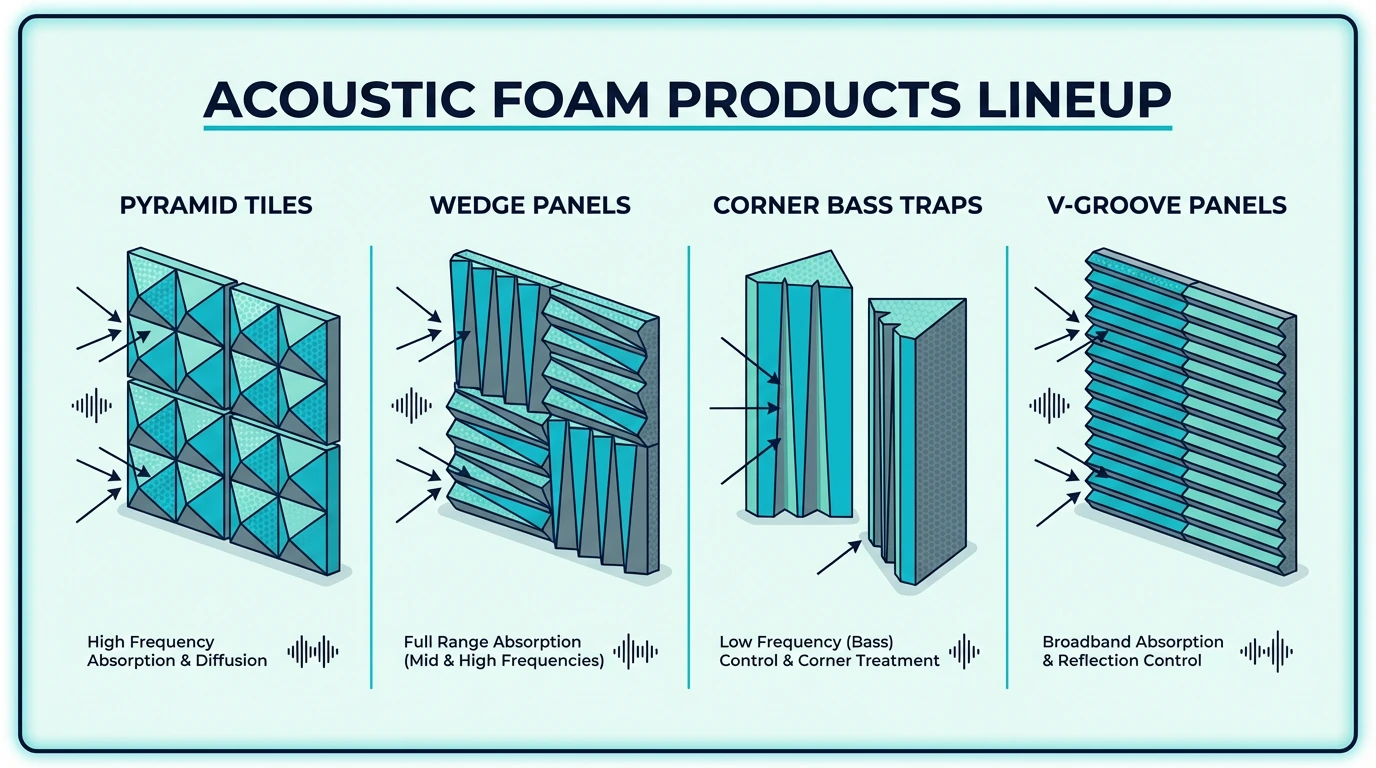
Foam panels are most effective at mid and high frequencies. The pyramid and wedge shapes aren’t just aesthetic, because the patterns increase surface area and create varying depths that absorb different wavelengths.
If you’re choosing shapes, see the foam shape guide. If you’re deciding between packs, compare 1-inch vs 2-inch acoustic foam.
This frequency limitation matters most for music production. Bass needs thicker treatment (typically 4 inches or more) or dedicated bass traps in room corners.
Standard foam handles voice and many mid/high instruments well, but it won’t control deep low-end rumble from subwoofers or kick drums. For bass frequency treatment, see bass traps vs acoustic foam.
For choosing the right foam for your needs, see how to choose acoustic foam.
Why Do They Solve Different Problems?
Here’s the simplest way to think about it. Isolation shields manage what your mic hears right away, while acoustic foam changes how your room behaves.
A shield works instantly, requires no wall installation, and travels with your mic. If you record in different locations, it gives you a consistent improvement anywhere you can set up a mic stand.
Acoustic foam is permanent treatment. Once installed, it improves recording, mixing, video calls, and even casual listening in that room.
Neither option replaces the other. A shield won’t fix strong flutter echo across the room, and foam won’t stop the wall directly behind your mic from bouncing sound back into the capsule.
For understanding how foam treats room acoustics, see how to arrange acoustic foam.
When Should You Choose an Isolation Shield?
Now that the difference is clear, here are the situations where a shield is the smarter first move. Isolation shields make the most sense when portability, budget, or rental restrictions drive your decision.
Here are the situations where a shield outperforms room treatment.
You Record in Multiple Locations
If your recording setup isn’t permanent, an isolation shield follows you wherever you go. Podcasters who record at home and in offices, voice actors who work from hotel rooms while traveling, musicians who jam at different friends’ houses — all benefit from portable treatment that sets up in 30 seconds.
That matters because the “wall behind the mic” problem changes every time you move. The shield stays in the same spot relative to the capsule, so you get a more consistent vocal tone from room to room.
If you want a foldable, budget-friendly option, TroyStudio Portable Vocal Booth is a common starter choice. It won’t replace room treatment, but it can make a big difference when you can’t control the space.
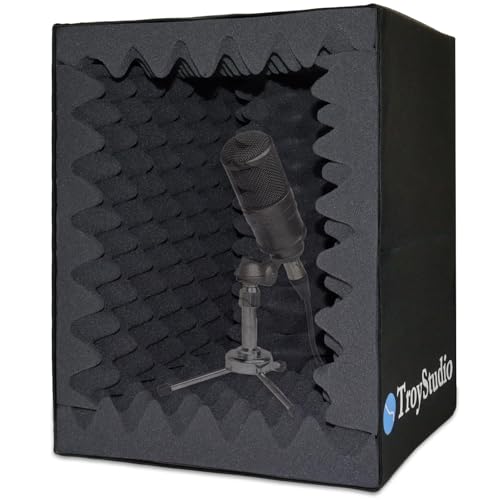
TroyStudio Portable Vocal Booth
Room treatment stays where you install it. The acoustic foam you mount in your bedroom doesn’t help when you’re recording from another location.
A shield packs into a bag and provides consistent results in any room. For best results, place the shield a few inches behind the mic and keep the top edge roughly level with the capsule.
If the shield is too far back, the reflection still reaches the mic before it hits the foam.
You’re on a Tight Budget
Quality isolation shields run between affordable and mid-range pricing — much less than treating even a small room with acoustic foam. For someone just starting out with podcasting or voice recording, a shield offers immediate improvement without a major financial commitment.
If you do decide to invest in foam later, best acoustic foam for recording covers the top options.
Foam can be budget-friendly too, but it’s easier to underbuy. If you only stick a handful of tiles on one wall, you usually won’t hear much change.
Room treatment costs add up quickly. Covering 20-30% of a small room’s wall space requires multiple packs of foam panels.
If you’re not sure recording is a long-term pursuit, the shield lets you test the waters without spending heavily. This ties back to the scope difference from earlier.
A shield treats one high-impact area, while foam needs coverage to feel like it “worked.”
You’re in a Rental and Can’t Modify Walls
Many landlords prohibit mounting anything that damages walls. Command strips and removable adhesive options work for lightweight items, but acoustic foam panels are heavy enough that improper mounting leads to them falling — potentially damaging floors or equipment.
Even if the adhesive is “removable,” paint texture and dust are what make foam fail. If the wall is even slightly chalky, the panel can peel off overnight.
Isolation shields require zero wall modification. They clamp onto your existing mic stand and add no permanent changes to your rental.
When you move, everything comes with you. If you still want to try foam in a rental, test one tile first and leave it up for 24 hours.
That quick test will tell you more than a pack of reviews.
You Only Need Vocal Recording Improvement
If your sole concern is how your voice sounds in recordings, a shield addresses that directly. You’re using it for one job: cutting down the reflections that bounce into the mic.
If you’re not using the room for mixing or monitoring, full-room treatment matters less.
This applies especially to voice-over artists, audiobook narrators, and podcasters who record in one spot and edit elsewhere. Your monitoring happens through headphones anyway — you don’t need the room to sound good for playback, just for capture.
Get Studio Tips Weekly
Join 5,000+ creators getting acoustic treatment advice every week.
No spam. Unsubscribe anytime.When Should You Choose Acoustic Foam?
If a shield is about what the mic hears, foam is about how the whole room behaves. Acoustic foam makes sense when you need a room-wide improvement, you’re in a permanent space, or your work goes beyond vocals.
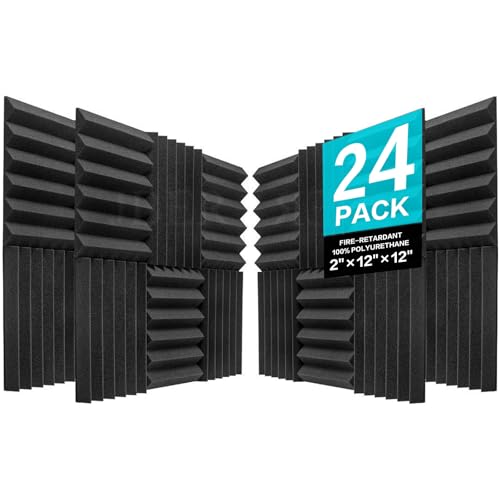
For a small starter layout, JBER 12 Pack Acoustic Foam is an easy way to test first reflection points before you commit to a full install.
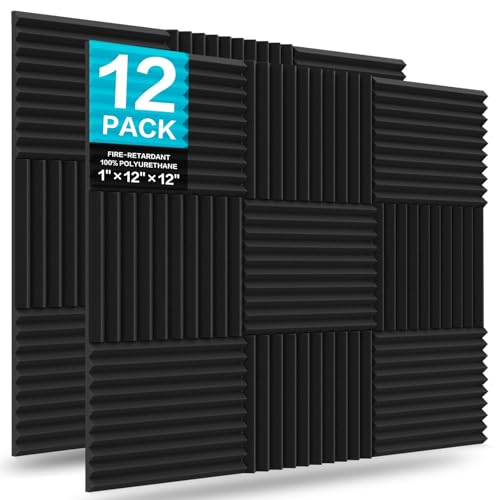
JBER 12 Pack Acoustic Foam
You Have a Dedicated, Permanent Space
If you have a dedicated room for audio work, foam treatment provides lasting value. The panels go up once and benefit every session for years.
Unlike portable solutions, permanent treatment doesn’t require setup time before each recording. The nice part is you can get results without covering every wall.
Six to ten panels placed at first reflection points usually beats thirty tiles scattered wherever there’s open drywall. That permanence also means you can dial in placement precisely.
You can treat first reflection points and problem areas, then leave the layout optimized. The installation guide covers the process step by step.
You Need to Improve Your Mixing Environment
Isolation shields do nothing for how you hear playback. When you’re mixing or producing, the room’s acoustic behavior directly affects your decisions.
Untreated reflections can cause comb filtering and listening fatigue. Try this: play a steady vocal or pink noise and move your head a few inches left and right.
If the tone changes, you’re hearing reflections and phase interactions, not just your speakers. Acoustic foam panels address many of these issues.
Strategic placement at first reflection points can improve stereo imaging and clarity. If you want more absorption at first reflection points, JBER 24 Pack Wedge Foam is a common step up from thin 1-inch sheets.
JBER 24 Pack Wedge Foam
You Record Multiple Sound Sources
Vocals are just one microphone pointed in one direction. Drums, acoustic guitars, and multi-instrument sessions involve microphones capturing sound from various positions around the room.
An isolation shield behind one mic does nothing for room sound bleeding into other mics. You’ll notice this fast if you track acoustic guitar close-mic’d around 10-12 inches.
The mic still hears the room from the sides and ceiling, especially if there’s a desk or bare wall nearby. Full-room foam treatment improves the entire acoustic environment.
When you record drums, every overhead mic benefits from reduced room reflection. When you track acoustic guitar, the room ambience caught by the mic can sound smoother instead of harsh.
This is the same “scope” point from the difference section showing up in real life. Multiple mics means multiple reflection paths, and foam helps more than one path at a time.
You Use the Room for Video as Well
Streamers, YouTubers, and content creators often care about both audio and visual quality. Acoustic foam doubles as visual backdrop — the distinctive pyramid or wedge patterns signal “content creator” and look professional on camera.
You don’t need a full wall of foam for the camera shot. A small cluster behind your head and one or two panels at side reflections can clean up audio and make the frame look intentional.
Isolation shields work for audio but look awkward on video. They can block part of the frame and cast shadows.
Foam panels on the wall behind you can treat reflections and provide a cleaner background. For styling ideas that look good on camera, see how to decorate with acoustic foam.
Can You Use Both Together?
Once you understand where each tool helps, combining them starts to make a lot of sense. Absolutely, and many professional home studios do exactly this.
Combined treatment addresses both the immediate microphone environment and the broader room acoustics. Here’s how to layer the two without overcomplicating your setup.
The Best-of-Both-Worlds Approach
Start with basic room treatment at first reflection points. Panels on side walls and behind your monitors can improve your mixing environment and reduce overall room reverb.
Then add an isolation shield behind your vocal mic to catch remaining direct reflections that panels can’t reach. This is where that “wall behind the mic” preview from the intro pays off.
That reflection is usually the first one to slap back into the capsule, so cleaning it up makes vocals sound drier right away. The shield handles what room treatment doesn’t.
You’re using it for direct bounces from the wall immediately behind your recording position. In a treated room, the shield can provide the last bit of vocal cleanup.
When Combined Treatment Makes Sense
Professional voice work benefits most from combined treatment. Room treatment creates a controlled acoustic environment, and the shield helps keep the microphone focused on direct sound.
If you’re recording spoken word, the room shows up most on sibilance and breaths. That’s where the last bit of reflection control can be the difference between “fine” and “finished.”
Home studios handling music production plus vocal recording also benefit. Foam treatment improves mixing accuracy.
If you want faster setup, 48 Pack Self-Adhesive Foam can make installation easier. The shield helps keep vocal takes consistent when mic positions change between projects.
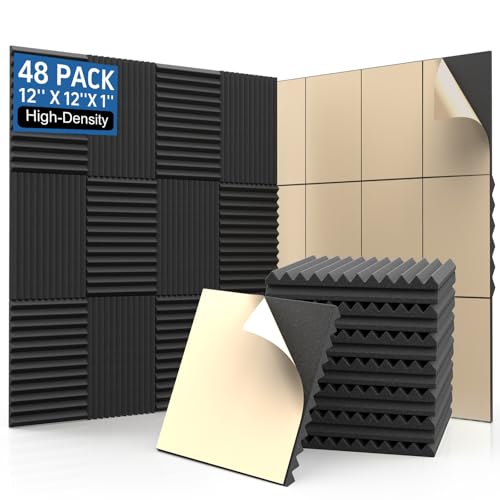
48 Pack Self-Adhesive Foam
Budget Prioritization Strategy
If you can’t afford both immediately, prioritize based on your primary use case. Voice recording only?
Start with the shield. Mixing and monitoring?
Start with room treatment, because the shield won’t help your playback accuracy. Add the shield later when budget allows.
For more details on thickness selection, see the 1-inch vs 2-inch acoustic foam guide.
Quick Comparison: Isolation Shield vs Acoustic Foam
Here’s everything covered above in a side-by-side comparison:
| Factor | Isolation Shield | Acoustic Foam |
|---|---|---|
| What It Treats | Direct reflections to mic | Room reverb and echo |
| Coverage | Behind microphone only | Entire room (where installed) |
| Installation | Clamps to mic stand | Mounts on walls |
| Portability | Fully portable | Permanent installation |
| Setup Time | 30 seconds | Several hours |
| Rental-Friendly | Yes | Usually no |
| Helps Mixing | No | Yes |
| Price Range | Budget to mid-range | Budget to mid-range (per pack) |
| Best For | Vocal recording, portability | Room treatment, mixing |
The numbers tell the story: isolation shields solve one problem extremely well, while acoustic foam solves multiple problems adequately. Your choice depends on which problems you actually have.
The Bottom Line
Isolation shield vs acoustic foam isn’t a competition — it’s a choice based on your specific situation, budget, and goals.
Choose an isolation shield if you’re mobile, renting, budget-conscious, or focused purely on vocal recording quality. The portable, no-installation approach provides immediate improvement without commitment.
Choose acoustic foam if you have a permanent space, need to improve your mixing environment, record multiple sources, or want full-room treatment. The investment pays off across every session for years.
Choose both if you’re serious about audio quality and have the budget. Combined treatment addresses the full spectrum of acoustic issues, from direct reflections to room reverb.
For product recommendations, check the foam buying guide. For everything from installation to maintenance, visit the acoustic foam hub.
Frequently Asked Questions
Do Isolation Shields Actually Work?
Yes, but with limitations. Quality isolation shields can reduce direct reflections from behind the microphone by roughly 10-15 dB.
They won’t eliminate room sound entirely because they only treat one direction. The difference is most obvious in untreated rooms with hard walls close behind the recording position.
You can test this in two minutes. Record a 10-second voice clip with the mic 12-18 inches from a bare wall, then repeat with a shield placed a few inches behind the mic.
Listen for the “tail” after your words. If the room sounds less splashy and the voice feels more forward, the shield is doing its job.
Just don’t expect it to fix the rest of the room. If the ceiling is low, the floor is reflective, or you’re next to a desk, those reflection paths still reach the mic.
Is an Isolation Shield Better Than Room Treatment?
Neither is objectively better, because they serve different purposes. For portable vocal recording in varying locations, shields tend to outperform.
For permanent studios where mixing accuracy matters, room treatment tends to outperform. The real question is which problem you’re trying to solve.
If the recording sounds “roomy” even at close mic distance, a shield can be the fastest way to cut the wall-behind-the-mic reflection. If your room sounds bad everywhere, foam has the bigger payoff because it reduces reverb across multiple surfaces.
One quick rule that helps:
If you can move the mic setup easily, a shield makes sense. If the room is your long-term workspace, treat the room.
How Much Acoustic Foam Do I Need for a Small Room?
A 10×10 bedroom typically needs 20-30% wall coverage for noticeable improvement. That’s roughly 25-35 square feet of foam panels.
Focus on first reflection points and the wall behind your monitors. For a complete comparison with other materials, see the acoustic foam vs rockwool guide.
The coverage target matters less than the placement. Six to ten panels placed at reflection points usually beats a random patchwork of twenty tiles.
Try the clap test as you go. Clap once in the middle of the room and listen for a “zing” or fast flutter, then add panels and repeat.
When the flutter shortens and the room stops ringing, you’re moving in the right direction.
Can I Use an Isolation Shield Instead of Treating My Room?
For vocal recording only, yes. A shield provides real improvement without room treatment.
For mixing, monitoring, or recording multiple instruments, no. The shield doesn’t help how you hear playback or how other microphones capture room sound.
Even for vocals, results depend on the room. If you have a hard wall 1-2 feet behind the mic, the shield usually helps a lot.
If you’re surrounded by reflective surfaces, you’ll still hear the room in the take. That’s the point where a few foam panels at first reflection points can do more than buying a bigger shield.
Which Is Cheaper: Isolation Shield or Acoustic Foam?
Isolation shields usually cost less upfront. Budget options can start around the price of a single foam pack, while better shields can cost about the same as treating a small room.
If you have a permanent space, foam often provides more overall improvement per dollar. If you need portability, the shield tends to be the better value.
Another way to compare cost is by how much setup you want to do. A shield is one purchase and you’re recording the same day.
Foam is a project. It takes time to plan placement, mount panels, and figure out how much coverage your room actually needs.

