Best Acoustic Treatment For Ceiling (The Surface Most People Ignore)
Best acoustic treatment for ceiling starts with one fact most home studio owners overlook — the ceiling creates some of the strongest early reflections in any room, but most people skip it entirely and wonder why their mixes still sound muddy.
That muddy low-mid buildup sitting on top of every vocal take and every guitar track isn’t a mic problem or a plugin problem — it’s an untreated ceiling bouncing energy straight back into your monitoring position before your ears can separate the direct sound from the reflection.
Treat that overhead surface with the right panel in the right position, and you get tighter stereo imaging, cleaner reverb tails, and a mix position you can actually trust across different playback systems.
Below, this guide breaks down why ceiling reflections hit harder than most wall reflections, what types of ceiling treatment exist, and how to install each one without ripping out drywall or hiring a contractor.
The first step is understanding what makes overhead reflections so damaging — and why one well-placed ceiling panel outperforms a half-dozen random wall panels.
To treat your ceiling acoustically, hang a fiberglass or mineral wool panel (called a ceiling cloud) directly above your listening position with a 2-4 inch air gap. That single panel controls the strongest overhead early reflection in most rooms and improves stereo imaging more than any other single treatment placement.
Why Does The Ceiling Matter For Acoustic Treatment?
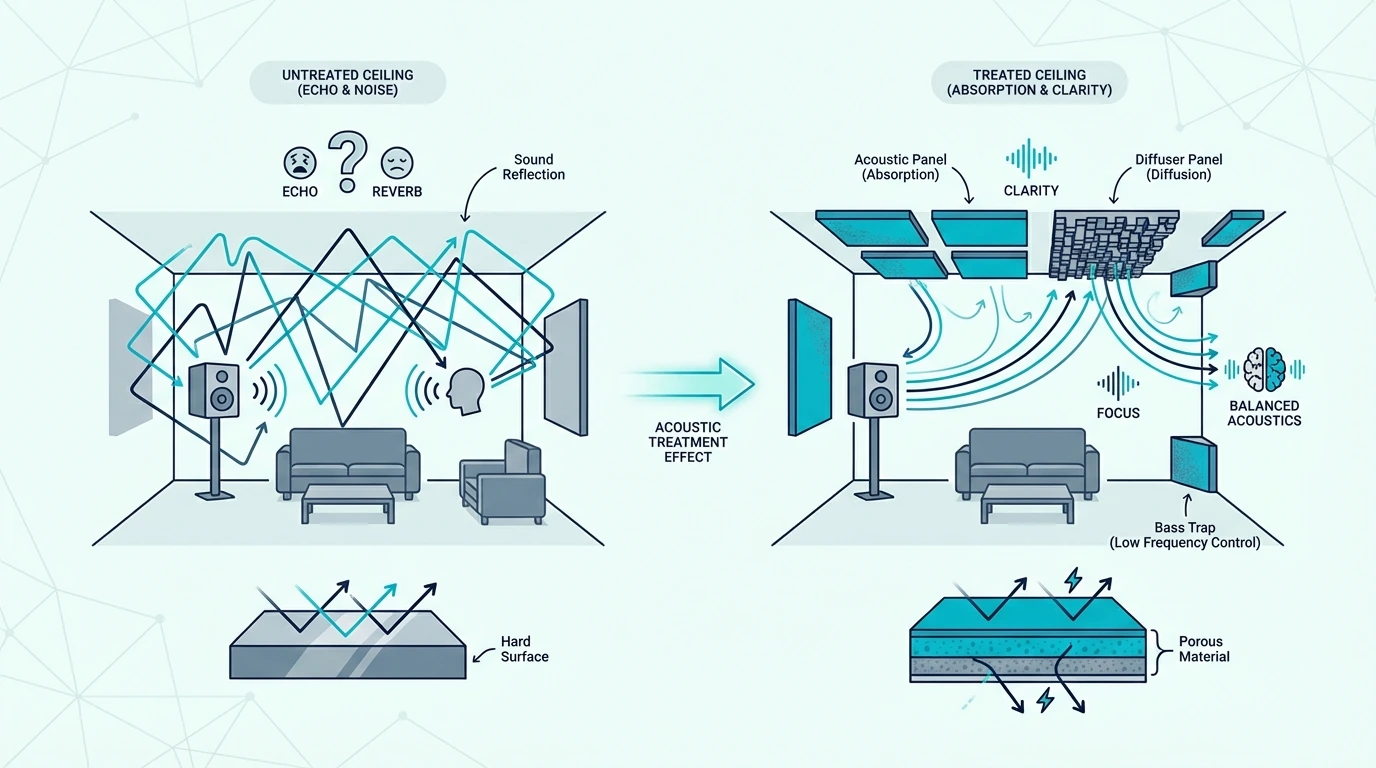
That flat surface sitting quietly above your mix position creates a shorter reflection path than most walls — and that shorter path is exactly why ceiling treatment deserves priority over almost everything else in a small room.
The Reflection Point You Cannot Dodge
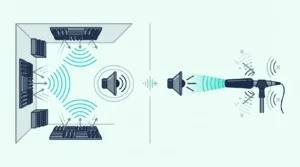
Sound from your monitors hits the ceiling and bounces straight back to your ears. The distance is shorter than the path to most side walls, which means the reflected sound arrives sooner and blends with the direct signal before your brain can separate the two.
A reflection arriving within the first 15-20 milliseconds of the direct sound doesn’t register as a separate echo — it colors the original tone. You hear it as thickness, smearing, or a vague sense that the low-mids are always piling up.
In a typical home studio with 8-foot ceilings, the ceiling reflection reaches you roughly 3-5 milliseconds after the direct sound. That’s fast enough to shift perceived frequency balance and smear the stereo image between your left and right monitors.
Clap your hands once while standing at your mix position and listen for a bright, metallic ring from above. If you hear it, that’s the ceiling reflection dominating your monitoring environment.
Ceiling Versus Walls — Where Your Treatment Budget Pays Off First
Side walls and rear walls matter, but the ceiling reflection often ranks as the second strongest reflection point in a room — right after the wall directly behind your monitors.
Most people tackle wall panels first because walls feel obvious and accessible. The ceiling gets skipped because it feels harder to reach, harder to mount, and less visible to anyone walking into the room.
That instinct is backwards in rooms where the ceiling height is shorter than the wall-to-wall distance. In a 10 x 12 foot room with 8-foot ceilings, the ceiling is the closest large reflective surface above the mix triangle — closer than either side wall.
Treating it first, even before side walls, gives you a cleaner home studio monitoring position with less effort. One well-placed ceiling cloud does the work that would take two or three wall panels to approximate from the sides.
What Types Of Ceiling Acoustic Treatment Exist?
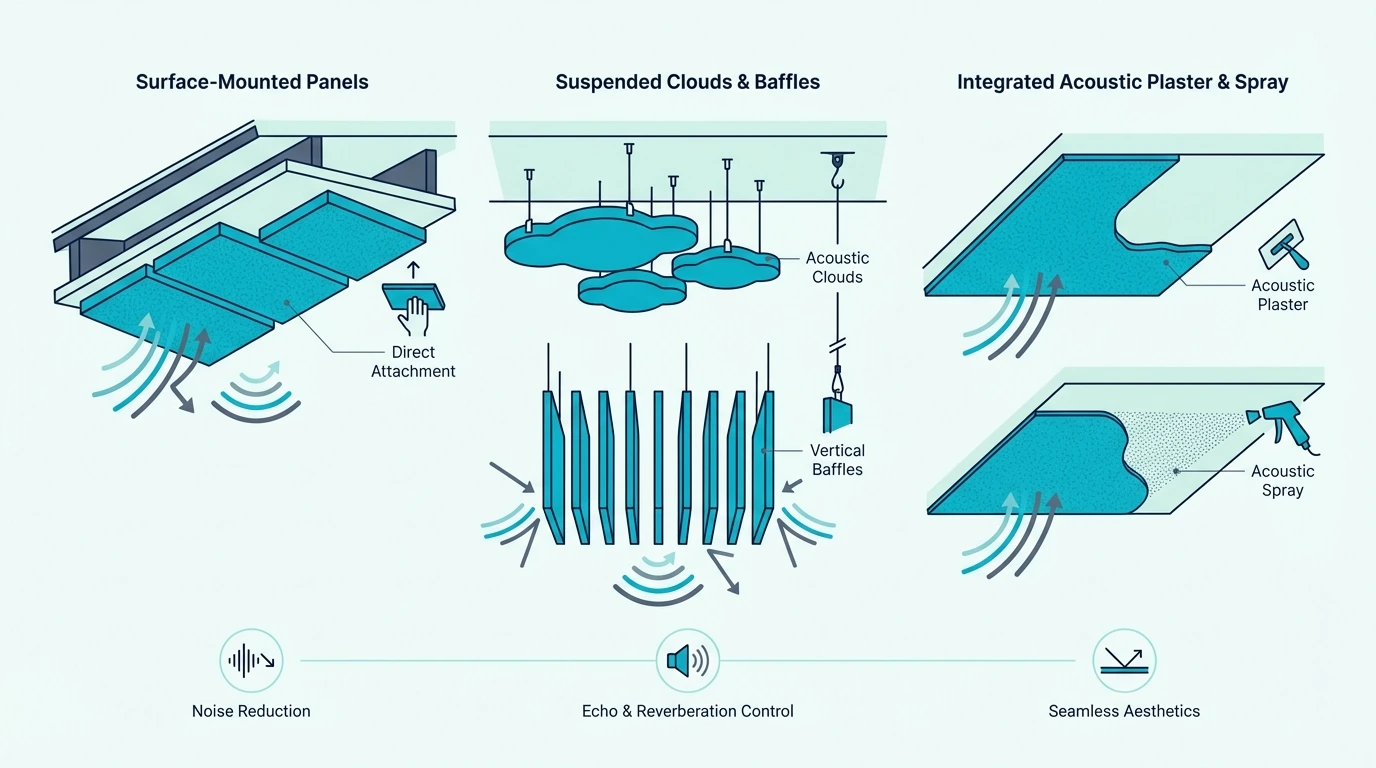
Now that you see why overhead reflections cause so much damage, the next question is what to actually hang up there. Three main options cover virtually every scenario, and each suits a different ceiling height, budget, and mounting situation.
Ceiling Clouds
A ceiling cloud is a fabric-wrapped fiberglass or mineral wool panel suspended below the ceiling with an air gap between the panel and the surface. That air gap is what separates a cloud from a flat panel glued overhead — and it makes a measurable difference in low-frequency performance.
With a 2-4 inch air gap, a 2-inch thick fiberglass cloud absorbs effectively down to roughly 250 Hz. Without the gap, that same panel barely touches anything below 500 Hz, which means all of those muddy low-mid reflections pass right through.
Clouds work best in studios, home theaters, and any room where you sit in a fixed listening position below the panel. The sweet spot is directly above the mix position, centered between the left and right monitors.
A ready-made option like the UMIACOUSTICS 4-Pack Fiberglass Acoustic Panels with Hanging Brackets ships with the mounting hardware already included, which saves a separate trip for eye hooks and wire.

UMIACOUSTICS 4-Pack Fiberglass Acoustic Panels with Hanging Brackets
Direct-Mount Ceiling Panels
When suspension hardware isn’t an option — popcorn ceilings, concrete overhead, or a landlord who bans holes — direct-mount panels fill the gap with a simpler install.
These panels attach flush to the ceiling using construction adhesive or impaling clips. No air gap, no cables, and a lower profile that barely changes the visible ceiling height.
The tradeoff is predictable: without an air gap, absorption drops off sharply below 500 Hz. You still get solid mid and high frequency control, which helps noticeably with speech clarity, flutter echo, and vocal recording.
Direct mounting suits office ceilings, podcast rooms, and spaces where overhead treatment needs to be subtle. Lightweight panels like the Olanglab Fiberglass Acoustic Panels 4-Pack are thin and light enough for adhesive mounting without worrying about gravity pulling them off overnight.

Olanglab Fiberglass Acoustic Panels 4-Pack
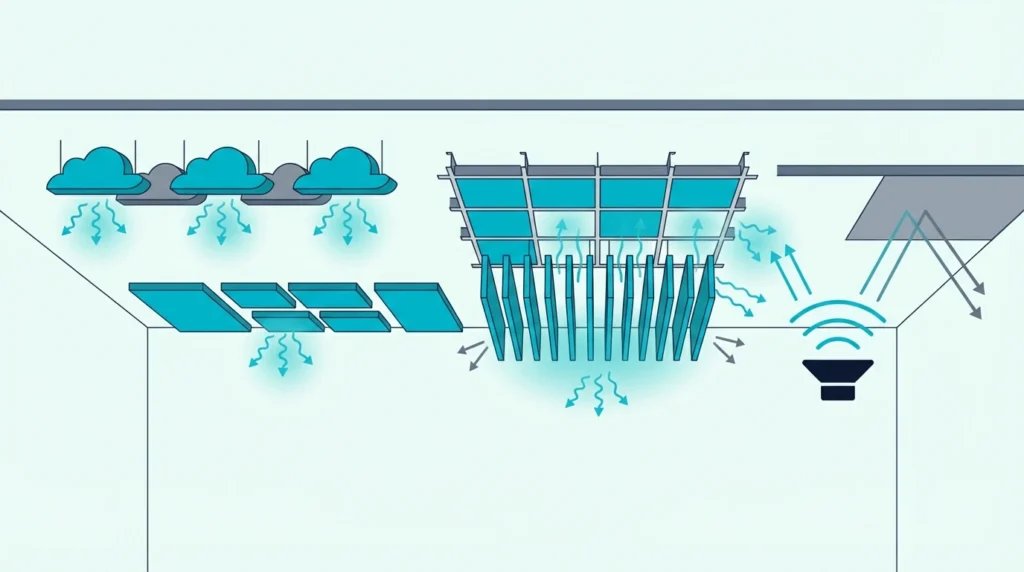
Acoustic Ceiling Tiles And Baffles
Drop-ceiling tiles sit inside a suspended grid framework — the kind you see in commercial offices and conference rooms. They replace standard ceiling tiles with higher-NRC rated versions that absorb more energy across the grid.
Baffles take a different approach entirely. They hang vertically from the ceiling in large open spaces where the ceiling area alone cannot hold enough flat treatment to control the reverberation time.
Neither option targets a single reflection point the way a cloud does. Tiles spread absorption across the entire ceiling grid, and baffles scatter and absorb sound arriving from all directions rather than focusing on one listening position.
For home studios and home theaters, ceiling clouds outperform both options by a wide margin. Tiles and baffles make practical sense only in commercial or large-venue contexts where the ceiling is 12 feet or higher and no single listening position dominates.
Get Studio Tips Weekly
Join 5,000+ creators getting acoustic treatment advice every week.
No spam. Unsubscribe anytime.How To Install Ceiling Acoustic Treatment
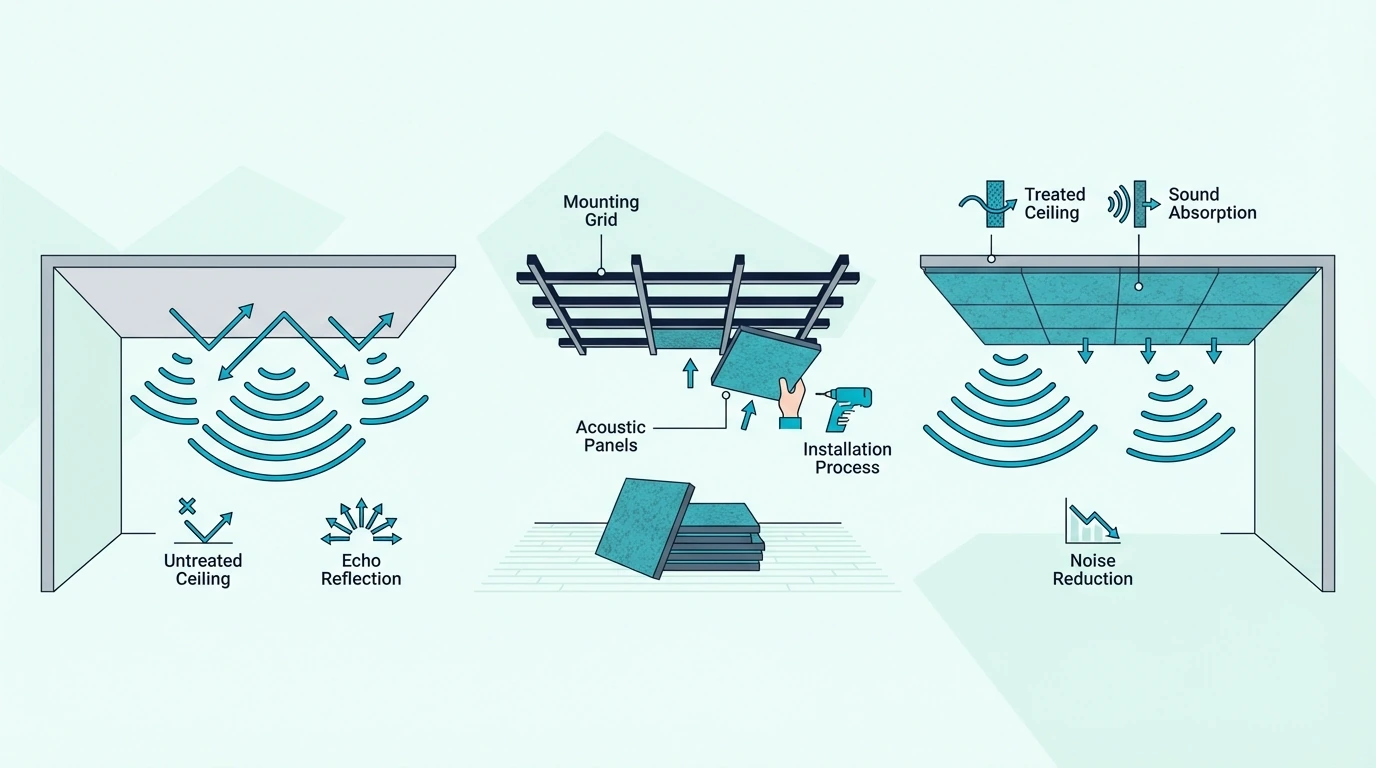
Knowing what type of ceiling treatment works best only matters if you can actually get it mounted safely overhead. Two installation methods cover almost every ceiling situation, and the one you pick depends on whether an air gap is possible in your space.
Suspended Installation With Air Gap
The most effective ceiling treatment method uses eye hooks screwed into ceiling joists, with aircraft cable or picture wire holding the panel 2-4 inches below the surface.
Start by locating your ceiling joists with a stud finder. Eye hooks need to thread into solid wood — drywall anchors alone will not support a fiberglass panel overhead long-term, especially with any vibration from footsteps on the floor above.
Space four eye hooks in a rectangle matching the panel corners, then run wire from each hook to the panel frame. Adjust the wire length until the panel hangs level with a consistent gap behind it.
A standard 24 x 48 inch fiberglass panel weighs roughly 4-8 pounds. That’s well within the capacity of standard eye hooks in joists.
Heavier hybrid panels like the Jocavi WoodWaves Absorption-Diffusion Panels need structural screws or toggle bolts rather than basic hooks. Always check the hook or anchor rating against the panel weight before you mount anything.

Jocavi WoodWaves Absorption-Diffusion Panels
If you want a complete acoustic treatment kit that bundles ceiling panels with wall panels and mounting hardware, that can simplify the shopping step — especially for a first room setup.
Direct Mount Installation
For ceilings where suspension is not feasible — concrete, rental restrictions, or no accessible joists — impaling clips or construction adhesive handle the job with fewer holes and less hardware.
Impaling clips are metal plates with sharp pins that push into the back of the panel. You screw the flat plate to the ceiling, then press the panel onto the pins until it holds flush against the surface.
Construction adhesive (like Loctite PL Premium) bonds the panel directly overhead. This approach is permanent — pulling the panel off later damages both the panel face and the ceiling finish underneath.
Between the two, impaling clips suit most situations better. They leave only small screw holes, hold the panel securely, and let you remove or reposition later without destroying anything.
That flexibility matters if you ever build your own panels and need to swap them out. The total cost for ceiling treatment stays lower when your mounting method doesn’t force you to replace panels every time you adjust the layout.
The Bottom Line
The ceiling is the most cost-effective surface to treat in a small room because one panel above the listening position controls the strongest overhead reflection — and that single reflection shapes stereo imaging more than most people expect.
Start with one ceiling cloud hung 2-4 inches below the surface, centered between your monitors. Everything else — side walls, rear walls, bass traps — performs better once that overhead reflection is under control.
If you’re still mapping out your full room treatment plan, the complete guide to acoustic treatment covers every surface and every placement priority. And if budget is tight, the best budget acoustic treatment roundup shows what delivers real results without spending more than you need to.
Frequently Asked Questions
How do you acoustically treat a ceiling?
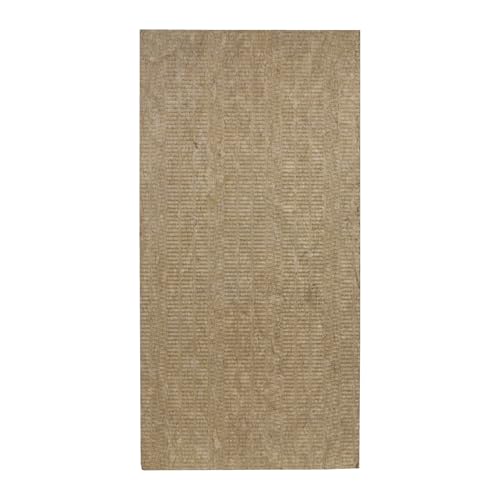
Hang a fiberglass or mineral wool panel above your listening position using eye hooks screwed into ceiling joists, with wire holding the panel 2-4 inches below the surface. That air gap lets the panel absorb lower frequencies that a flush-mounted panel would miss entirely. For DIY ceiling clouds, Rockboard 60 mineral wool boards hold their shape when suspended overhead and absorb deeper into the low-mids than lighter insulation options.
Do acoustic ceiling baffles work?
Baffles are effective in large spaces with high ceilings — gymnasiums, warehouses, open-plan offices — where wall treatment alone cannot control the reverb time. For home theaters and home studios with standard 8-10 foot ceilings, a ceiling cloud directly above the seating position outperforms baffles because it targets the specific reflection that matters most.
Are acoustic ceiling tiles worth it?
For offices and conference rooms with drop-ceiling grids, acoustic tiles reduce overall reverberation and improve speech clarity across the room. For studios, they spread absorption too thinly — a focused ceiling cloud above the mix position gives you deeper absorption right where the strongest reflection hits.