What Kind Of Acoustic Treatment Reduces Boxy Vocals (And How To Fix Your Room)
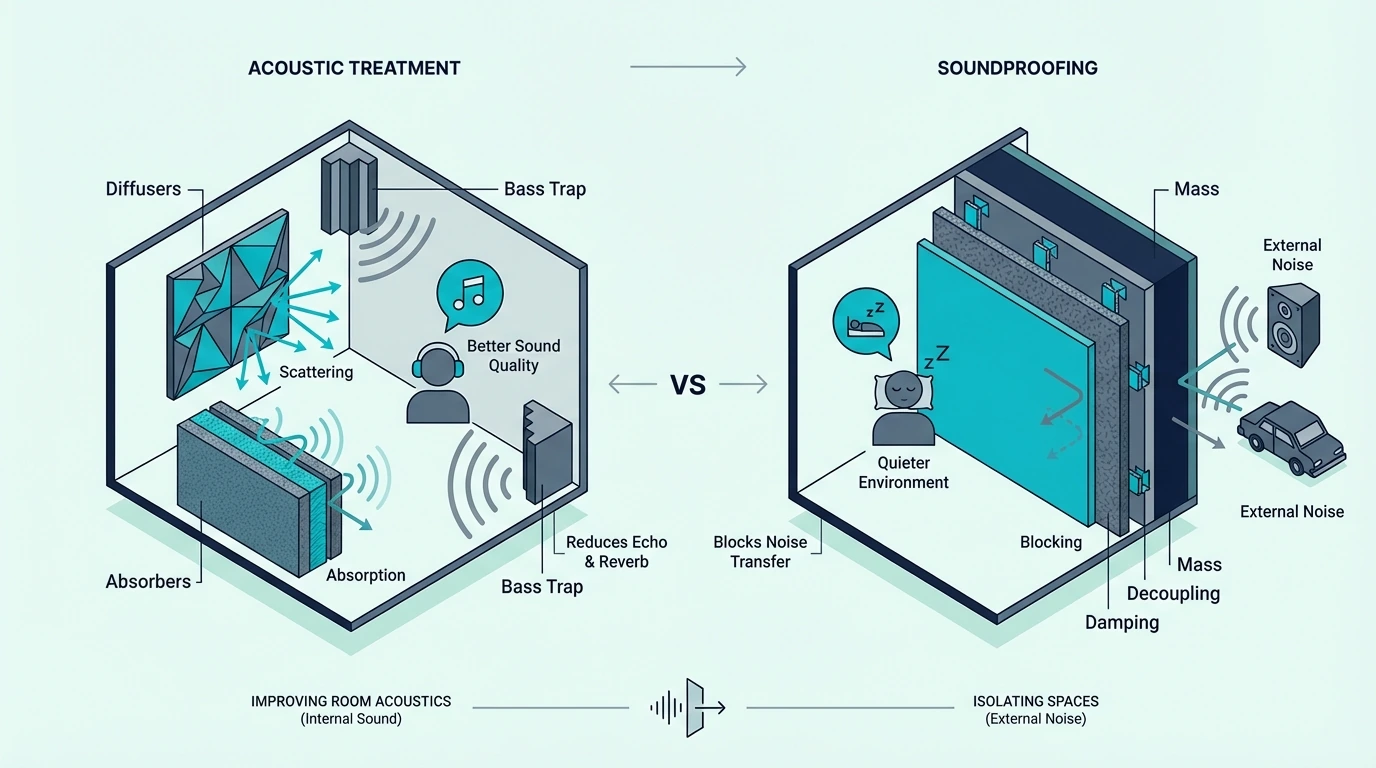
What kind of acoustic treatment reduces boxy vocal recordings comes down to one thing — absorbing the 200-500 Hz energy that bounces off nearby walls and arrives at your microphone slightly after the direct sound, but the fix only works if you treat the right surfaces in the right order.
That boxy, hollow quality on vocals is not a microphone problem or an EQ problem. It is a room problem.
Sound leaves the singer’s mouth, hits the nearest walls, and reflects back to the mic a few milliseconds later. Those delayed reflections create phase cancellation in the low-mid range that your ears hear as boxiness.
The treatment that fixes it is thick absorption — 2 inches minimum of fiberglass or mineral wool — placed on the wall behind the singer, behind the microphone, and in the room corners. Treat those three surfaces first and the boxy coloration drops dramatically before you touch a single EQ knob.
Below you will find exactly what causes boxiness, which surfaces to treat first, and why EQ alone cannot fix the problem. Start with the wall directly behind the singer — that single panel delivers the biggest improvement.
Boxy vocals come from 200-500 Hz buildup caused by early reflections off nearby walls and room modes in small spaces. The fix is thick absorption panels (2 in minimum) behind the singer, behind the microphone, and bass traps in the corners. This treatment addresses the root cause — EQ can reduce the symptom but cannot eliminate the comb filtering that creates the boxy quality.
What Causes Boxy Vocals?

Boxiness is a specific acoustic problem with a specific cause. Understanding the physics helps you target the treatment precisely instead of guessing which walls to cover.
Early Reflections And Comb Filtering
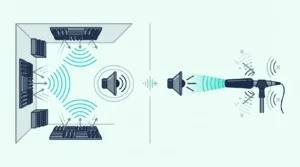
When a singer performs, sound radiates outward from their mouth in all directions. The direct sound travels straight to the microphone.
At the same time, sound also travels to the nearest walls, bounces off, and arrives at the mic a few milliseconds later.
That timing difference creates comb filtering — a pattern of peaks and cancellations in the frequency response. In a typical home studio where the singer stands 2-4 feet from the nearest wall, the comb filtering lands squarely in the 200-500 Hz range.
Your ears interpret that pattern as boxiness — a hollow, tubular quality that makes vocals sound like they were recorded inside a cardboard box. The closer the singer stands to a reflective surface, the stronger the effect.
Room Modes In Small Rooms
Room modes are standing waves that form between parallel surfaces. Every room has them, but smaller rooms have modes that fall directly in the vocal frequency range.
A room dimension of roughly 5-11 feet produces axial modes between 100-500 Hz. That overlaps almost perfectly with the fundamental frequency and first harmonics of most singing and speaking voices.
When a vocalist stands at a point where a room mode peaks, the frequencies at that mode are amplified. If the mode falls in the 200-400 Hz range, the result is a pronounced boxy quality that no amount of mic technique can overcome.
Moving the singer even 1-2 feet can change which modes they excite. But the only permanent fix is absorption — specifically, corner bass traps that reduce the strength of the modes themselves.
How To Treat A Room For Clearer Vocals
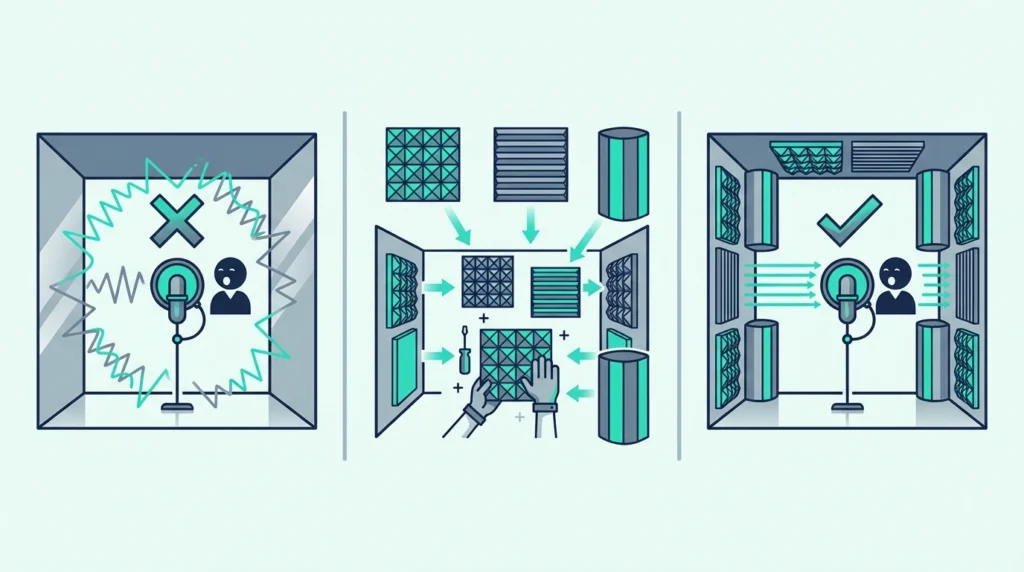
The treatment priority for vocal recording is different from the priority for mixing. For vocals, you are treating the surfaces closest to the singer and microphone first because those create the strongest early reflections.
Behind The Singer
The wall directly behind the singer is the single most important surface to treat for vocal boxiness. Sound from the singer’s mouth radiates backward, hits that wall, and bounces directly back through the singer and into the front of the microphone.
A cardioid microphone rejects sound from directly behind, but it does not reject sound arriving from the sides or at oblique angles. The reflected sound from the wall behind the singer arrives at angles the mic cannot fully reject.
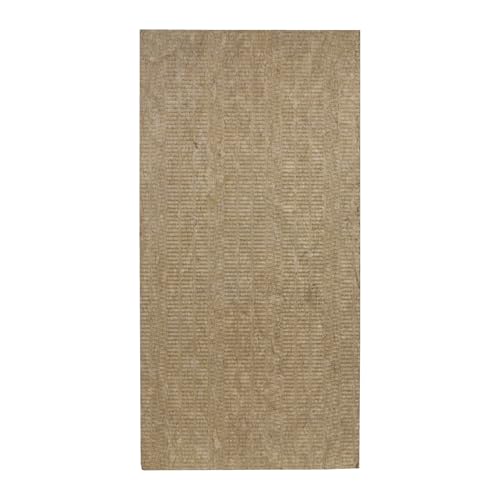
Place a thick absorption panel — at least 2 inches of rigid fiberglass or mineral wool — centered on the wall directly behind where the singer stands. The panel should be at least 2 x 4 feet to cover the primary reflection zone at head height.
The UMIACOUSTICS 4-Pack Fiberglass Panels provide enough coverage for the behind-singer position with panels to spare for other treatment points. The 2-inch fiberglass core absorbs effectively in the 200-500 Hz range where boxiness lives.
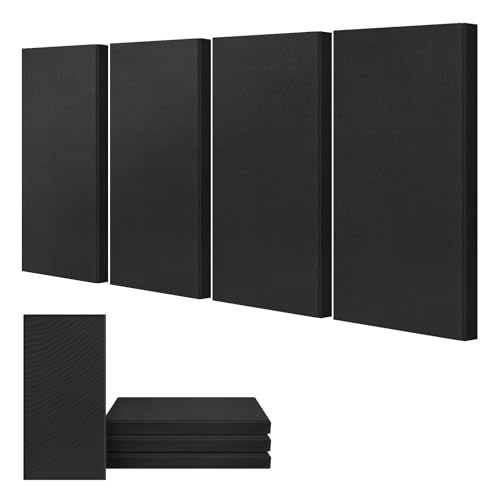
UMIACOUSTICS 4-Pack Fiberglass Panels
Behind The Microphone
The wall behind the microphone is the second priority. Sound that passes by the microphone continues to the wall behind it, reflects, and travels back into the front of the mic.
This creates another set of delayed reflections that contribute to the boxy character.
If you cannot mount a panel on that wall, a microphone isolation shield serves a similar purpose. It mounts on the mic stand behind the capsule and absorbs reflections that would otherwise bounce off the wall and back into the mic.
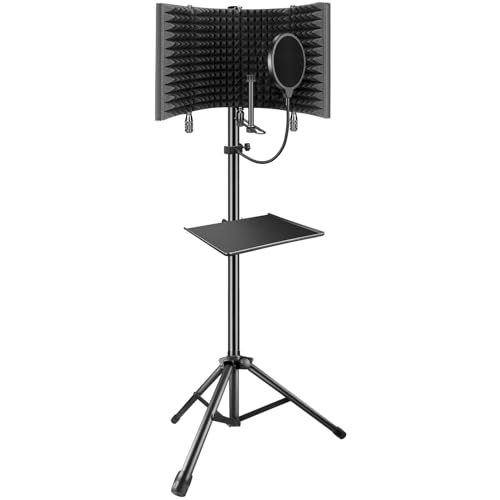
microphone isolation shield
A reflection filter does not replace proper room treatment — it only addresses reflections from one direction. But in rooms where permanent wall treatment is not possible, it provides measurable improvement on vocal clarity.
Corner Bass Traps
Corner bass traps address the room modes that cause low-frequency boxiness. Modes concentrate energy in the corners where walls meet, so treating the corners reduces the strength of those modes across the entire room.
For vocal recording, prioritize the two corners closest to the singer. Even two thick bass traps in the nearest corners reduce the 200-400 Hz buildup that contributes most to the boxy quality.
The traps need to be thick — 4 inches minimum of rigid fiberglass or mineral wool. Thinner foam traps help with mid-bass (300-500 Hz) but do not reach the deeper modes below 200 Hz that also cause problems.
Ceiling Cloud
A ceiling cloud above the recording position catches vertical reflections between the floor and ceiling. In rooms with low ceilings (8 feet or less), these vertical reflections arrive quickly and contribute to the overall boxy coloration.
The ceiling cloud is the fourth priority — after behind-singer, behind-mic, and corner treatment. If budget is limited, the first three treatments deliver the majority of the improvement.
What About Portable Vocal Booths?
For singers who cannot permanently treat their space — renters, shared rooms, or musicians who record in different locations — a portable vocal booth offers a budget-friendly starting point.
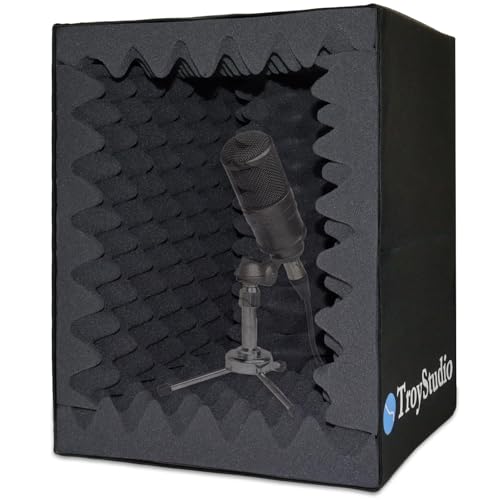
portable vocal booth
These foldable shields reduce reflections arriving at the mic from behind and to the sides. They do not address room modes or reflections from surfaces the shield does not cover, so they are a partial solution — but a meaningful one for spaces where wall-mounted panels are not an option.
For a deeper comparison of portable booths versus full room treatment, the booth vs treatment guide covers the tradeoffs in detail.
Get Studio Tips Weekly
Join 5,000+ creators getting acoustic treatment advice every week.
No spam. Unsubscribe anytime.Why EQ Cannot Replace Treatment
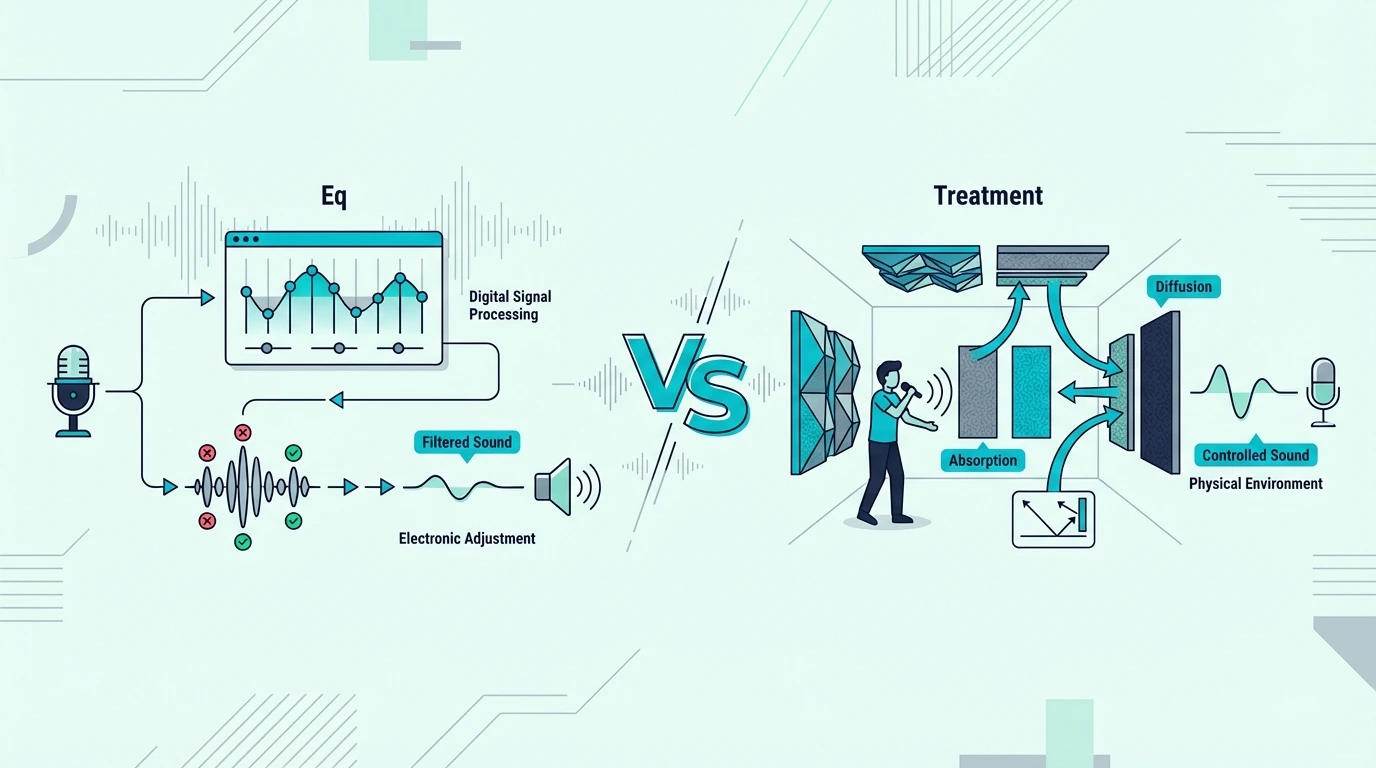
Many engineers try to fix boxy vocals with EQ — typically a 2-4 dB cut in the 200-500 Hz range. This reduces the perceived boxiness, but it does not fix the underlying problem.
The boxy quality comes from comb filtering — a complex pattern of peaks and nulls created by the timing difference between the direct sound and the reflected sound. EQ applies a broad reduction across the frequency range.
When you cut 300 Hz with EQ, you cut both the direct sound and the reflected sound equally. The comb filtering pattern remains intact.
The vocal sounds thinner but still boxy.
Acoustic treatment removes the reflected energy before it reaches the microphone. The direct sound arrives clean, without the delayed copies that create the interference pattern.
The result is a vocal that sounds full and present without the boxy coloration — and without losing low-mid body to EQ cuts.
The practical approach is to treat the room first, then use EQ for fine-tuning. A well-treated room needs far less corrective EQ, and the EQ you do apply works more predictably because it is shaping a clean signal rather than trying to mask a room problem.
The Bottom Line
Boxy vocals are caused by early reflections and room modes in the 200-500 Hz range. The treatment that fixes them is thick absorption on the wall behind the singer, the wall behind the microphone, and bass traps in the nearest corners.
Treat those three surfaces first — they deliver the majority of the improvement. A ceiling cloud and broader wall coverage add incremental benefit after the primary treatment is in place.
The full guide to acoustic treatment covers placement priorities for every surface. The cost breakdown compares DIY and commercial panel pricing.
For rooms where permanent treatment is not possible, the temporary treatment guide covers portable and removable options that still deliver meaningful results.
Frequently Asked Questions
How to make vocals sound less boxy?
Place a thick absorption panel (2 inches of fiberglass or mineral wool) on the wall directly behind the singer. Add a second panel or reflection filter behind the microphone.
These two treatments address the early reflections that cause the 200-500 Hz buildup your ears hear as boxiness. Corner bass traps in the two nearest corners further reduce the room modes that contribute to the problem. For DIY builders, Rockboard 60 mineral wool boards produce enough material for behind-singer panels and corner traps from a single 6-pack.
Will acoustic treatment give my vocal more clarity?
Yes — reducing early reflections and room modes directly improves vocal clarity. The microphone captures more direct sound and less reflected energy, which means the raw recording has better definition before any processing.
Treatment does not add clarity artificially. It removes the room interference that was masking the clarity already present in the performance.
How to EQ out boxiness?
Apply a gentle cut (2-4 dB) with a wide bell shape centered around 250-400 Hz. Sweep the frequency slowly while listening to find the specific range where the boxiness is most pronounced.
EQ reduces the symptom but does not eliminate the comb filtering that causes it. Acoustic treatment is the more effective fix because it removes the reflected energy before it reaches the microphone rather than trying to subtract it afterward.
Is acoustic treatment enough for recording vocals?
Acoustic treatment addresses the room’s contribution to the vocal sound. It does not replace good microphone technique, proper gain staging, or a quality microphone.
A well-treated room with a budget microphone produces cleaner vocals than an untreated room with an expensive microphone. The room is the biggest variable in vocal recording quality — treat it first, then invest in gear upgrades.